 |
OFK 60 - Moreno Vs Baxaaja PBP Commentary |
Undercard bout
|
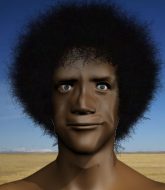
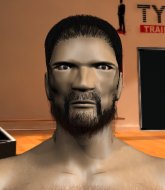
Coming up we have a featherweight MMA rules bout between Alexander Andersson (ranked 6721 p4p, 24310 weight class) and Lee Johnson (ranked 484 p4p, 527 weight class). Both fighters will be looking to make this an exciting fight for the fans, I'm sure!
 |
|
 |
| 175 cm
20
145
4 - 2 - 0 |
|
179 cm
20
155
5 - 8 - 0 |
BJJ Blue Belt
Basic striking
Hates pizza |
|
Good takedowns
Brawler
Knockout power |
|
| |
|
Ladies and gentlemen. This fight is 3 rounds, in the featherweight division.
Introducing the fighter to my left, fighting out of the red corner.
With a record of 4 - 2 - 0, fighting out of Montreal, Alexander Andersson!
And introducing the fighter to my right, fighting out of the blue corner.
With a record of 5 - 8 - 0, fighting out of Las Vegas, Lee Johnson!
The judges for this bout are Paulsen Ambrosius, Radbod Blank and Aafke Stam.

The bell rings for round one and we are underway!
Andersson lets the fists fly and connects with a left straight followed by a right hook.

Andersson feints and then dives in with a takedown. That was a long way out but the feint bought him enough time to close the distance and complete the takedown. Now we'll play guard for a bit and see who can get the better of that position.
Andersson won't allow Johnson to get back to his feet.
Andersson postures up in Johnson's guard and throws a big left but Johnson blocks it.
Andersson seems content to control from guard here. He's going to have to remain active though if he doesn't want to get stood back up.
Andersson throwing strikes from guard but Johnson blocks nicely.
Andersson tries to free his leg and advance position but Johnson is retaining full guard.
Andersson stops Johnson from standing up.
Johnson keeping moving, preventing Andersson from controlling successfully.
We've had a slow start to the round here - hopefully the action picks up.
Johnson wants to get back to his feet but Andersson passes into half guard.
Andersson prevents Johnson from standing back up.
The ref warns both fighters not to hold the cage as they work up against the meshing.

That's one minute gone in the round.
Andersson controlling the pace.
Johnson is looking to escape.
Andersson throwing shots but Johnson is blocking nicely.
Johnson looks like he's trying to stand up.

The referee decides to stand the fighters back up.
Andersson will have to do better than that with his takedown attempts.
Johnson with a poor takedown
and Andersson counters with a nice jab to the body that keeps Johnson thinking.
Andersson closes this distance looking for a takedown but Johnson circles away.
Andersson avoids a lazy jab quite easily.
Johnson throws a lazy uppercut
and Andersson counters with a nice uppercut.
Andersson definitely looks more muscular than last time we saw him fight.
Johnson misses with a takedown attempt. He shot from a bit too far out.
Johnson tries to drive through with a takedown attempt but Andersson defends well and Johnson ends up having to push Andersson into the cage where they will battle it out in the clinch.
Alexander Andersson has stuffed three takedown attempts in the round now. That's going to take a lot out of Lee Johnson.

That's two minutes gone in the round.
Johnson looks frustrated there after his takedown attempt is stuffed easily.
Andersson changes levels looking for a counter takedown but doesn't commit.
Andersson pushes forward with a 1-2 combination that forces Johnson back to the cage. Andersson follows up with a solid lead hook to the liver.
Johnson rushes in with a sloppy looking punch
and Andersson counters with a lovely shot to the body.
Andersson cracks Johnson with a good jab.
Lee Johnson seems to be the more aggressive standup fighter in this bout.
We've seen a great period of action over the last minute or so - credit to both fighters for going all out!
Nice defenses there by Andersson.
Andersson connects with a jab.
 Johnson is rocked! Johnson is rocked!
Andersson looks for a left high kick but can't connect. Andersson backs up to catch a breather... no he lunges forward with a huge flying knee that smacks Johnson's temple! It sends Johnson violently to the canvas! The crowd goes nuts as Andersson celebrates and the doctors try to help Johnson!
Ladies and gentlemen, after 2:41 of round 1, we have a winner by way of KO (Flying Knee). Alexander Andersson!
|
|
|
|
|
|
|
|
|
|
|
|
|
|
|
|
|
|
|
|
|
|
|
| S |
C
A |
G |
S |
C
B |
G |
|
S |
C |
G |
|
energy
A | B |
|
hype
A | B |
|
pop
A | B |
|
mgr
A | B |
|
FIGHT
RATING
41% |
|
|
|
|
|
|
|
Undercard bout
|
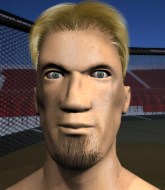
Coming up we have a featherweight MMA rules bout between Rocco Damato (ranked 3721 p4p, 3835 weight class) and Maruim Silva (ranked 336 p4p, 341 weight class). Damato's entrance music is Thunderstruck. A fine choice. Both fighters really staring each other down here, as Maruim Silva enters the cage!
 |
|
 |
| 170 cm
19
150
3 - 3 - 0 |
|
170 cm
19
140
5 - 1 - 0 |
BJJ Purple Belt
Basic striking
Granite chin |
|
BJJ Purple Belt
Counter fighter
Granite chin |
|
| |
|
Ladies and gentlemen. This fight is 3 rounds, in the featherweight division.
Introducing the fighter to my left, fighting out of the red corner.
With a record of 3 - 3 - 0, fighting out of Helsinki, Rocco Damato!
And introducing the fighter to my right, fighting out of the blue corner.
With a record of 5 - 1 - 0, fighting out of Rio de Janeiro, Maruim Silva!
The judges for this bout are Patrick Alders, Paulsen Ambrosius and Radbod Blank.
The bell rings for round one and we are underway!
Damato swings away with a leg kick that misses.

Silva has taken the fight to the clinch.
Damato has dropped down and is looking to force the takedown but it's defended by Silva after a bit of a struggle.
Silva gets underhooks to prevent Damato's takedown attempt.
Damato wants to stall.
Silva lands with a short head shot on the inside.
Damato drops down for a takedown but doesn't get it.
Silva looks more muscular than last time we saw him. He must have been on the weights.
That's three failed takedown attempts in the round for Rocco Damato. That's going to take a lot out of him.
Silva lands a body shot.
Silva tries to land a shot to the body but it's blocked.
We've had a slow start to the round here - hopefully the action picks up.
Silva misses with a punch to the body.
Silva gets underhooks to prevent Damato's takedown attempt.
Silva tries to throw a body punch but Damato avoids it by throwing Silva back against the cage.
Silva presses Damato against the cage and delivers a mid-strength body shot.
Silva misses with a punch on the inside.
Silva misses with a short punch on the inside.
That's one minute gone in the round.
Silva lands a left hand that snaps the head of Damato backwards.
Damato is looking to score with knees to the body. Maybe he'll change it up and go body then head. Silva is defending well for now.
Damato lands a takedown into guard.
Damato looking to sit in guard and control but Silva gets the butterfly guard and sweeps. He's now in the guard on the top.


Damato kicks Silva off and gets to his feet.

Silva shoots in and scores a nice double leg takedown into half guard.
This is a great period of action - very entertaining stuff!
Silva stalling.
Silva has freed up his trapped foot and advances to mount.
Silva works his way to his opponent's back.
That's two minutes gone in the round.
Silva biding his time, looking for the opening.
Damato covering up well under a barage of strikes.
Damato is being controlled on the ground here - he must escape this position otherwise surely the end is near.
Damato is trying to break free.
Good control from Silva.

Silva has the rear naked choke here! This is very bad for Damato! Can he survive? No! He's out! Silva gets to his feet and celebrates with his cornermen. He looks absolutely delighted. In the post fight interviews he takes time to thank his parents and everyone who has believed in him from the start. How sweet.
Ladies and gentlemen, after 3:55 of round 1, we have a winner by way of Submission (RNC). Maruim Silva!
A victorious Maruim Silva thanked his army of followers in his post fight interview, telling people to make sure they follow him on Twitter.
|
|
|
|
|
|
|
|
|
|
|
|
|
|
|
|
|
|
|
|
|
|
|
| S |
C
A |
G |
S |
C
B |
G |
|
S |
C |
G |
|
energy
A | B |
|
hype
A | B |
|
pop
A | B |
|
mgr
A | B |
|
FIGHT
RATING
46% |
|
|
|
|
|
|
|
Undercard bout
|
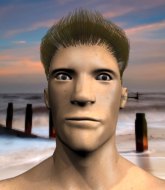
Coming up we have a welterweight MMA rules bout between Alex Jones (ranked 3071 p4p, 0 weight class) and James O Hara (ranked 386 p4p, 0 weight class). I don't know about you partner, but I'm pumped for this one!
 |
|
 |
| 183 cm
26
174
3 - 2 - 0 |
|
186 cm
26
161
2 - 7 - 0 |
Decent wrestler
Counter fighter
KO power |
|
BJJ Blue Belt
Good kicks
Granite chin |
|
| |
|
Ladies and gentlemen. This fight is 3 rounds, in the welterweight division.
Introducing the fighter to my left, fighting out of the red corner.
With a record of 3 - 2 - 0, fighting out of Las Vegas, Alex Jones!
And introducing the fighter to my right, fighting out of the blue corner.
With a record of 2 - 7 - 0, fighting out of Amsterdam, James O Hara!
The judges for this bout are Wagner Zegers, Saam Ante and Albert Achterberg.
The bell rings for round one and we are underway!
Jones shoots in looking for a single leg takedown. O Hara is trying to defend but Jones finishes it well and ends up in half guard. Let's see if he can advance position further.
O Hara is trying to stand.
O Hara is looking for a sweep. Jones is wise to his cunning plan and keeps the top position.

Jones seems to be looking for submissions.
O Hara is looking to regain full guard. Not this time though.
Jones scores with a couple of good hammerfists.
O Hara blocking the ground and pound attempt from Jones.
O Hara is a painfully thin specimen of a man. You do wonder whether a good body kick would snap him clean in two.
O Hara has hold of Jones's hands but Jones slips his arm to the side and lands an elbow.
Jones missing with the ground and pound from half guard.
We've had a slow start to the round here - hopefully the action picks up.
Jones throwing punches and elbows but they're not doing any damage.
O Hara actively working from the bottom here.
Jones is scoring with some nice ground and pound from the dominant position.
Jones works his foot free and advances to mount.
That's one minute gone in the round.
Jones lands with some vicious ground and pound - can O Hara hang on?
Jones is in the full mount, landing strikes.
O Hara is rocked!
Jones postures up and connects with a big shot that has rocked O Hara badly. He's trying desperately to grab hold of Jones around the waist but Jones pushes him off and unloads with more strikes, forcing the referee to jump in and save him! Jones is the winner by TKO! Jones jumps onto the cage and shouts into the camera. "We did it momma!"
Ladies and gentlemen, after 1:34 of round 1, we have a winner by way of TKO (Strikes). Alex Jones!
|
|
|
|
|
|
|
|
|
|
|
|
|
|
|
|
|
|
|
|
|
|
|
| S |
C
A |
G |
S |
C
B |
G |
|
S |
C |
G |
|
energy
A | B |
|
hype
A | B |
|
pop
A | B |
|
mgr
A | B |
|
FIGHT
RATING
65% |
|
|
|
|
|
|
|
Undercard bout
|
Coming up we have a featherweight MMA rules bout between Sho Pereyra (ranked 2532 p4p, 5985 weight class) and Perdue Willshire (ranked 269 p4p, 450 weight class). Perdue Willshire has the better chin. Will he look to stand and bang today?
 |
|
 |
| 176 cm
21
155
4 - 6 - 0 |
|
172 cm
32
142
8 - 27 - 1 |
BJJ Purple Belt
Basic striking
Cardio machine |
|
BJJ Blue Belt
Counter fighter
Knockout power |
|
| |
|
Ladies and gentlemen. This fight is 3 rounds, in the featherweight division.
Introducing the fighter to my left, fighting out of the red corner.
With a record of 4 - 6 - 0, fighting out of Tokyo, Sho Pereyra!
And introducing the fighter to my right, fighting out of the blue corner.
With a record of 8 - 27 - 1, fighting out of Las Vegas, Perdue Willshire!
The judges for this bout are Radbod Blank, Paulsen Ambrosius and Paul Aken.
The bell rings for round one and we are underway!
Nice uppercut lands for Pereyra. That snapped Willshire's head back.
Pereyra digs a good body shot into Willshire's ribs.
Willshire tries to clinch up but Pereyra circles away and keeps his distance.
Pereyra swung with a counter right hand that didn't connect.
Willshire wants to clinch.
Pereyra scores with a takedown into Willshire's guard.
Willshire is trying to stand up but he's not managed so far.
We've had a slow start to the round here - hopefully the action picks up.
Willshire controls Pereyra momentarily but Pereyra frees himself.
Willshire is in a good position here but he's just trying to control... And he's not even managing to do that successfully.
Willshire has control of Pereyra's left arm, preventing Pereyra from doing any damage.
That's one minute gone in the round.
Pereyra content to stall in guard here.
Willshire looking to sweep here. No luck so far.
Willshire is looking to stand up but Pereyra isn't so interested in that idea.
Pereyra trying to control the position from guard on top but Willshire is wriggling around, looking for whatever he can.
Pereyra missing there with some ground and pound from the guard.
Pereyra looks to be in better condition than last time we saw him fight. Obviously he's been working hard on his cardio.
Willshire keeping moving, preventing Pereyra from controlling successfully.
The referee has stepped in and called for a break in the action. We'll restart on the feet.
Pereyra shoots in from a long way out. He's driving through with the takedown attempt and he eventually gets it, landing in Willshire's guard.
Pereyra trying to pass the guard but can't manage it just yet.
Willshire is working an open guard here, looking to improve his position. No doubt that will leave him open to counters but at least he's being more offensive.
That's two minutes gone in the round.
Pereyra trying to pass the guard but can't manage it just yet.
Pereyra controlling from the top position.
The ref warns both fighters not to hold the cage as they work up against the meshing.
Willshire is looking to get back to his feet but can't, whilst Pereyra is controlling him.
Pereyra pushing down on Willshire's thigh, trying to pass to half guard. He's managed it... Nice work.
Pereyra is just sitting in half guard, waiting for something to happen.
Willshire pushes Pereyra off looking to stand but Pereyra dives back in and keeps control.

That's three minutes gone in the round.
Willshire on the receiving end of some nice ground and pound.
Pereyra is thwarting Willshire's attempts to control the position.

Pereyra decides to stand up.
Willshire swings for the body but Pereyra moves out of range.

Pereyra clinches up with Willshire and pushes him back against the cage.
Willshire looking to stall.
A short left from Pereyra.

Pereyra breaks the clinch and we return to the middle of the mat.
Pereyra walks into a jab.
Willshire shoots in and gets a takedown into half guard. Willshire showed some decent athleticism there.

Pereyra kicks off Willshire and gets to his feet.

That's four minutes gone in the round.
This has been an exciting period of action!
Willshire misses with a takedown attempt. He shot from a bit too far out.
Pereyra closes the distance and clinches up, looking for a takedown. He shifts his weight and gets a nice trip into half guard.
The referee walks around the fighters to get a better view of the action. Pereyra lands a nice short elbow.
Pereyra performing his best blanket impression for a moment.
Willshire really doesn't want to stay on the ground with Pereyra. If he can't get it back to his feet, it's only a matter of time before he'll be tapping out.
Pereyra wants to take a breather but Willshire is having none of it.
Willshire is trying to stand back up but Pereyra is controlling him
Pereyra is keen to just control but Willshire is a slippery customer.
And that is the end of the round. The fighters go back to their corners.
Sho Pereyra dominated that round.
That's the end of the interval. I'm sure that seemed a lot quicker than a minute for our two fighters! Back to the action.

Pereyra pushes Willshire up against the cage in a clinch.
Willshire tries to pull guard but Pereyra won't allow it.
Pereyra gets the body lock takedown. After a quick scramble, Willshire regains guard.
Pereyra tries to free his leg and advance position but Willshire is retaining full guard.
Pereyra trying to control but Willshire is working from the bottom.
Willshire has control of Pereyra's left arm, preventing Pereyra from doing any damage.
Pereyra seems content to control from guard here. He's going to have to remain active though if he doesn't want to get stood back up.
Willshire is working actively off his back, looking to secure an arm or perhaps work for a triangle.
We've had a slow start to the round here - hopefully the action picks up.
Willshire keeping moving, preventing Pereyra from controlling successfully.
Pereyra decides he's had enough of playing guard and decides to stand. Come on Willshire, up you get!
That's one minute gone in the round.
Willshire throws a jab, cross combination which is slipped
and Pereyra holds on and brings the fighters into a clinch.
Willshire tries to pull guard but Pereyra holds him up against the cage and eventually Willshire drops back down to his feet.
Pereyra lands an uppercut.
Pereyra lands with a short head shot on the inside.
Willshire blocks a body shot from Pereyra.
Pereyra trying to land knees to the body.
Willshire is working hard here but doesn't seem to be able to control effectively, up against the cage.
Pereyra misses with some punches.
Pereyra is trying to wear down his opponent with knees to the body.
Kneeeeees! The crowd are calling for knees to the body. Pereyra obliges.
Willshire is trying to break free.
Pereyra misses with a shot to the kidneys.
An uppercut on the inside fails to land for Pereyra.
Pereyra tries a shoulder strike but it doesn't do any damage.
That's two minutes gone in the round.
A nice glancing elbow lands by Willshire.
Pereyra has moved round to his opponent's back and is looking for a suplex! Oh snap! He's tossed Willshire clear over his head and slammed him to the mat!
The crowd are loving this. Great action here.
Willshire trying to control the hands but Pereyra won't let him.
What can Willshire do to escape this position? He's going to have to figure it out pretty quick if he wants to stay in the fight!
Pereyra looking for the rear naked choke. And he's got it! Willshire taps!
Ladies and gentlemen, after 2:49 of round 2, we have a winner by way of Submission (RNC). Sho Pereyra!
Sho Pereyra took to the mic in his post fight interview and said 'I couldn't do this without my team. Thanks Big Chief Nutrition. Thank you God. Thank you fans. See you all next time.'.
|
|
|
|
|
|
|
|
|
|
|
|
|
|
|
|
|
|
|
|
|
|
|
| S |
C
A |
G |
S |
C
B |
G |
|
S |
C |
G |
|
energy
A | B |
|
hype
A | B |
|
pop
A | B |
|
mgr
A | B |
|
FIGHT
RATING
44% |
|
|
|
|
|
|
|
Undercard bout
|
Coming up we have a featherweight MMA rules bout between Emory Terranova (ranked 1301 p4p, 2961 weight class) and Shigatsu Miyamoto (ranked 152 p4p, 295 weight class). Miyamoto has chosen 82.99 FM as his entrance music, which hasn't gone down very well with the crowd. These two fighters really are very evenly matched on the feet - it will be fascinating to see who can assert themselves in that aspect of the fight.
 |
|
 |
| 165 cm
24
141
4 - 5 - 0 |
|
166 cm
25
141
4 - 3 - 0 |
BJJ Blue Belt
Basic striking
Very quick |
|
BJJ Purple Belt
Basic striking
Solid chin |
|
| |
|
Ladies and gentlemen. This fight is 3 rounds, in the featherweight division.
Introducing the fighter to my left, fighting out of the red corner.
With a record of 4 - 5 - 0, fighting out of Tokyo, Emory Terranova!
And introducing the fighter to my right, fighting out of the blue corner.
With a record of 4 - 3 - 0, fighting out of Tokyo, Shigatsu Miyamoto!
The judges for this bout are Wagner Zegers, Radbod Blank and Saam Ante.
The bell rings for round one and we are underway!
Miyamoto throws a series of punches but Terranova avoids them all with ease.
Terranova doesn't manage to clinch there - Miyamoto circles away.
Terranova rushes Miyamoto and presses him up against the cage.
Miyamoto is trying to force a seperation but Terranova has the dominant position.
Miyamoto is fighting off a takedown attempt but Terranova is just too persistent for him and manages to trip Miyamoto to the mat. Miyamoto regains guard as soon as the fighters hit the mat.
Terranova scoring with some ground and pound.
Miyamoto working a defensive guard here.
Miyamoto is working the butterfly guard. He manages to land a nice scissor sweep and is now in half guard on the top. Nice move.
Miyamoto trying to control from half guard but Terranova is working away.
Terranova wants to get back to full guard.
Terranova tries to kick Miyamoto off but Miyamoto keeps his base steady and stays in half guard.
Miyamoto uses his free foot to push down on Terranova's thigh. Eventually he works his other foot free and he's advanced to mount - this is trouble for Terranova.
Miyamoto controlling from the full mount.
That's one minute gone in the round.
Miyamoto throws some wild stikes that Terranova manages to avoid easily.
Miyamoto looks more muscular than last time we saw him. He must have been on the weights.
Miyamoto trying to control but he's not successful this time.
Miyamoto thowing shots but they're missing.
Miyamoto trying to control but he's not successful this time.
Miyamoto fails to advance to Terranova's back.
Miyamoto tries to control but Terranova wriggling away.
That's two minutes gone in the round.
Terranova can't escape the position.
Terranova is squirming around, avoiding Miyamoto's attempts to control the action.
Miyamoto controlling his opponent.
Terranova on his back here. We all know that wrestlers don't like being on their back so let's see if Terranova tries to get out of the position.
The referee warns Terranova that he has to improve his position here as he takes two more clean shots to the head.
Terranova slips a leg in and gets back to half guard.
Terranova wants to get back to full guard.
Miyamoto thows a wild elbow that connects with the canvas.
That's three minutes gone in the round.
Terranova is not content to let Miyamoto control the position.
Miyamoto is trying for a guillotine from the top but the pressure isn't in the right place so Terranova is just riding it out for now. Miyamoto eventually gives up the hold.
Terranova wants to control but Miyamoto is keeping busy and won't allow it.
Terranova looks to be in better condition than last time we saw him fight. Obviously he's been working hard on his cardio.
The fighters are battling for position here. Terranova manages to regain full guard. Nice work.
Miyamoto trying to control but Terranova is working from the bottom.
Miyamoto loading up with the ground and pound but he's missing more than he's landing in this flurry.
That's four minutes gone in the round.
My god... these two guys really need to pick up the pace or everyone will leave to go get a beer.
Miyamoto is looking to pass into half guard but Terranova pushes him away with his feet and jumps on top - now Terranova is in guard.

Terranova has a momentary lapse of concentration, allowing Miyamoto to throw up a leg and lock on what appears to be a pretty tight triangle! Terranova is fighting it off but it's all too little too late - Miyamoto pulls down on the head and he's put Terranova to sleep! This one is all over!
Ladies and gentlemen, after 4:26 of round 1, we have a winner by way of Submission (Triangle). Shigatsu Miyamoto!
A very excited looking Shigatsu Miyamoto made sure he remembered to thank all the fans both in the arena and on the internet. He said all the coolest people spend all day on MMA websites, which got a big reaction.
The defeated Emory Terranova had this to say: 'It is what it is, but I have a loving family and support network in the gym and at home. I'll crack open a beer, restart my Chief Nutrition, and spend time spoiling my family while I'm recovering. I'll be seeing y'all.'.
|
|
|
|
|
|
|
|
|
|
|
|
|
|
|
|
|
|
|
|
|
|
|
| S |
C
A |
G |
S |
C
B |
G |
|
S |
C |
G |
|
energy
A | B |
|
hype
A | B |
|
pop
A | B |
|
mgr
A | B |
|
FIGHT
RATING
32% |
|
|
|
|
|
|
|
Undercard bout
|
Coming up we have a welterweight MMA rules bout between Jon Horn (ranked 1365 p4p, 2034 weight class) and Travis Copeland (ranked 188 p4p, 283 weight class). Jon Horn could well score a knockout today. He has the power to get to Travis Copeland's chin.
 |
|
 |
| 201 cm
39
177
20 - 28 - 0 |
|
175 cm
27
165
14 - 13 - 0 |
Good wrestling
World class boxer
Cardio machine |
|
Good wrestler
World class MT
Good gas tank |
|
| |
|
Ladies and gentlemen. This fight is 3 rounds, in the welterweight division.
Introducing the fighter to my left, fighting out of the red corner.
With a record of 20 - 28 - 0, fighting out of Amsterdam, Jon Horn!
And introducing the fighter to my right, fighting out of the blue corner.
With a record of 14 - 13 - 0, fighting out of Los Angeles, Travis Copeland!
The judges for this bout are Saam Ante, Wagner Zegers and Patrick Alders.
The bell rings for round one and we are underway!
Horn lands a leg kick that knocks Copeland off balance momentarily.
Copeland is on the wrong end of a nice combination from Horn.
Horn avoids the clinch attempt nicely.
Wow, both these guys are really going for it!
The fighters circling - Copeland throws out the jab but it was never going to land.
Copeland swinging wildly here.
Horn lands a head kick!
Copeland on the wrong end of a nice low kick. He's acting like it's no big deal but he doesn't want to take many more of those.
Copeland bobs and weaves well there to avoid the strikes.
A combination from Copeland does no damage.
Copeland has taken the fight to the clinch.
Horn is trying to break the clinch but Copeland has him pressed against the cage.
Horn avoiding damage as Copeland throws knees to the body.
Horn dodges an elbow strike from Copeland.
This is a great period of action - very entertaining stuff!
Copeland throws a nice elbow but it doesn't land.
Copeland looks to throw an elbow but misses.
Horn tries to break the clinch but Copeland is controlling the position.
Horn blocks a knee to the body. He'll have a nicely bruised forearm in the morning.
Copeland leaning his opponent against the cage.
Copeland prevents Horn from breaking the clinch.
That's one minute gone in the round.
Copeland with an attempt at a knee that misses.
Horn breaks from the clinch.
Horn throws a jab to the body, straight down the pipe. Boom. That sent Copeland stumbling backwards but he manages to regain his composure quickly.
Copeland slips under a jab.
Horn moves forwards but Copeland connects with a nice, crisp jab.
Jon Horn seems to be the more aggressive standup fighter in this bout.
Copeland is looking to take this fight into the clinch.
Horn misses with an attempted mid kick.
Copeland instigates a clinch.
Horn breaks from the clinch.
Copeland moves in looking to clinch but Horn pushes him off.
Horn swats away the attempt to clinch by Copeland.
Copeland tries to close the distance and clinch up against the cage but Horn paws at him with a jab and circles away.
Horn throws a quick counter head kick but Copeland was just out of range.
Horn scores with a nice head shot.
We've been told by Horn's head coaches at Kaptajnernes Træningscenter that he's been working on his takedown defense in preparation for this fight.
Horn misses with a right hand
and Copeland counters with a straight right hand.
Copeland just misses with a punch to the body.
That's two minutes gone in the round.
No joy there for Copeland, who threw a few shots but didn't land.
Copeland is the aggressor but that punch slipped nicely by Horn.
The crowd are loving this. Great action here.
Horn tries to land a leg kick but Copeland saw it coming and moves away.
Horn uses good footwork to get in and out, landing a nice hook.
A combination from Copeland does no damage.
Horn lands with a thumping leg kick.
Copeland wants to clinch up but Horn keeps it at a distance.
Horn wants to land a leg kick but Copeland is out of range.
Copeland has taken the fight to the clinch.
Copeland gets an overhook and lands an elbow to the side of the head.
 It looks like Jon Horn has been cut. It looks like Jon Horn has been cut.
Copeland throws an elbow but it's blocked.
Copeland creates a bit of distance and throws an elbow that only just misses.
Horn looks like he'd prefer to be striking at range right now.
Copeland keeps control of Horn as he tries to wriggle out of the double underhooks.
Horn breaks the clinch.
Horn takes a hook to the side of the head. I wonder if that's got his ears ringing.
Horn misses with a head kick.
Horn really does look like a pencil wearing a pair of gloves. Let's hope he has a gameplan to suit that ridiculous body shape.
Copeland misses with an uppercut.
Horn throws a hard body shot but it just misses.
Horn on the wrong end of a vicious looking body shot.
That's three minutes gone in the round.
Horn tries to keep at a distance but Copeland has taken the fight into the clinch.
Horn can't break the clinch.
Copeland crunches a lovely knee into Horn's ribcage.
Copeland putting his Muay Thai to good use. He has Horn in a tight clinch and is doing some damage with knees to the body.
Horn is trying to break the clinch but Copeland has him pressed against the cage.
Copeland throws a vicious knee straight up the middle but Horn blocks it with crossed arms.
Horn is trying to break free.
Horn working hard to break the clinch.
Horn managing to block the knees to the body from Copeland.
Horn is trying to work out of this bad position, with his back against the cage.
Copeland content to slow the pace in the clinch.
Copeland throws a vicious knee straight up the middle but Horn blocks it with crossed arms.
Horn looks like he'd prefer to be striking at range right now.
With the two fighters working up against the cage, Copeland just misses with a elbow thrown towards Horn's brow.
Horn is trying to break the clinch but Copeland is controlling him.
Horn wants to strike at distance but he can't break free of the clinch.
Horn's corner calls for him to break the clinch, which he does.
A solid leg kick lands there for Horn.
That's four minutes gone in the round.
Copeland throws out a loose jab but Horn uses good head movement to avoid it.
Copeland throws a nice looking combination but Horn bobs and weaves to avoid any damage.
Copeland moves into the clinch.
Horn takes an elbow to the temple.
Copeland tries to throw a body punch but Horn avoids it by throwing Copeland back against the cage.
Copeland creates a bit of space for himself and sneaks an elbow through Horn's defenses.
This has been an exciting period of action!
With the two fighters working up against the cage, Copeland just misses with a elbow thrown towards Horn's brow.
Horn tries to break free but Copeland pushes him back against the cage.
A frustrated look appears on Horn's face as he tries to break the clinch.
Copeland keeps the fight in the clinch, despite Horn's efforts to push away.
Copeland pushes off and fires off an elbow that misses, before clinching up again, against the cage.
A nice glancing elbow lands by Copeland.
Jon Horn's cut is getting worse.
Horn pushes off and circles away, back to the middle of the mat.
Horn takes a punch to the jaw and another one to the bread basket.
Horn throws a hard body shot but it just misses.
Horn changes levels and scores with a jab to the body.
Copeland tries to clinch but Horn is having none of it.
Copeland wants to clinch.
And that is the end of the round. The fighters go back to their corners.
Travis Copeland dominated that round.
The cut man is working on Jon Horn's cut.
The referee calls time. The cornermen exit stage left and we're back to business.
Horn walks forward and throws out a flicking leg kick. Copeland checks it nicely though, as he moves to the side.
Copeland is looking for the big counter here.
Horn just misses with a punch to the body.
Horn throws a low kick, looking for Copeland's leg but Copeland calmly moves out of range.
Horn throws a right and a left that both miss.
Copeland moves in looking to clinch but Horn pushes him off.
Horn misses with a straight right.
Copeland closes the distance and clinches.
Horn is trying to break the clinch but Copeland is controlling him.
Horn wants to strike at distance but he can't break free of the clinch.
Horn wants to strike at distance but he can't break free of the clinch.
Horn can't break the clinch.
A frustrated look appears on Horn's face as he tries to break the clinch.
Copeland gets an overhook and lands an elbow to the side of the head.
We've had a slow start to the round here - hopefully the action picks up.
A hook to the body from Copeland.
Copeland misses with a knee strike.
Copeland lands an elbow that stopped Horn in his tracks for a moment.
Jon Horn's cut is bleeding quite badly. He's got to try and protect it.
Copeland lands a nice elbow from the clinch.
Horn takes an elbow to the temple.
Jeez, Jon Horn's cut is really nasty now. The referee must be thinking about getting that checked.
The referee calls the doctor in to look at Jon Horn's cut. Oh no, the doctor has called an end to the bout!
Ladies and gentlemen, after 1:59 of round 2, we have a winner by way of TKO (Cut). Travis Copeland!
A relieved looking Travis Copeland thanked the fans for their support and gave the usual line about them being amazing. They seemed to believe that he actually meant it.
|
|
|
|
|
|
|
|
|
|
|
|
|
|
|
|
|
|
|
|
|
|
|
| S |
C
A |
G |
S |
C
B |
G |
|
S |
C |
G |
|
energy
A | B |
|
hype
A | B |
|
pop
A | B |
|
mgr
A | B |
|
FIGHT
RATING
43% |
|
|
|
|
|
|
|
Undercard bout
|
Coming up we have a welterweight MMA rules bout between Danny Raggazza (ranked 1526 p4p, 1806 weight class) and Van Darkholme (ranked 215 p4p, 258 weight class). Over to our ring announcer for the fighter introductions!
 |
|
 |
| 175 cm
23
165
5 - 5 - 1 |
|
183 cm
24
177
4 - 5 - 0 |
Abu Dhabi Champ
Excellent boxer
Cardio machine |
|
Good wrestler
World class MT
Good gas tank |
|
| |
|
Ladies and gentlemen. This fight is 3 rounds, in the welterweight division.
Introducing the fighter to my left, fighting out of the red corner.
With a record of 5 - 5 - 1, fighting out of Tokyo, Danny Raggazza!
And introducing the fighter to my right, fighting out of the blue corner.
With a record of 4 - 5 - 0, fighting out of New York, Van Darkholme!
The judges for this bout are Radbod Blank, Patrick Alders and Saam Ante.
The bell rings for round one and we are underway!
Raggazza throws a hook but Darkholme avoids it easily.
Darkholme tries to clinch up against the cage, rushing in to close the distance. Raggazza manages to break the clinch and circles back to the middle of the mat.
Darkholme tries to land with a swinging hook to the body but Raggazza was well out of range. Poor timing from Darkholme.
Raggazza jabbing away but nothing is landing.
Darkholme fakes high and swings low for a body shot but Raggazza manages to avoid it.
Raggazza blocks a low kick nicely.
Raggazza just misses with a punch to the body.
Raggazza looks to throw the jab but Darkholme is out of range.
Raggazza shakes his hands off, looking to compose himself, but takes a jab to the jaw whilst he does it.
Raggazza definitely looks more muscular than last time we saw him fight.
Raggazza is pinned up against the cage taking some big shots here. The referee is looking closely deciding whether he should stop the fight.
Darkholme digs a good hook to Raggazza's body.
Darkholme connects with a leg kick. He turned his hip over nicely there.
Darkholme lands a really nice looking cross but Raggazza seems unphased.
Raggazza staying out of range there.
Darkholme avoids the body shot from Raggazza.
Darkholme closes the distance and clinches.
The crowd cheering loudly, showing their appreciation for the quality fight we're seeing here.
Darkholme lands a left hand.
Darkholme stops a takedown attempt from Raggazza.
That's one minute gone in the round.
Raggazza misses with some punches.
Raggazza swings away with an uppercut that misses.
Raggazza gets through Darkholme's defenses to land a nice punch to the side of the head.
Raggazza is working for a takedown up against the cage. He can't get it on this occasion though.
Darkholme working on landing some head shots here - that one got through nicely.
Darkholme doesn't land with the attempted body shot.
Raggazza blocks an uppercut.
Darkholme lands an uppercut.
Darkholme stays in close to his opponent and throws a right hand to the body.
Darkholme lands a nice looking hook to the body, against the cage.
Darkholme's coach down at GachiClub was telling us pre-fight that they have been working on Darkholme's balance. Obviously they view that as a key factor in the outcome of this fight.
Darkholme blocks a punch to the side of the head.
Darkholme lands a shoulder strike that jolts his opponent's head backwards.
Darkholme works on Raggazza's body with a couple of short punches.
Darkholme lands a left hand that snaps the head of Raggazza backwards.
Darkholme scores with a nice hook to the head.
This is a great period of action - very entertaining stuff!
Raggazza blocking some punches.
Nice body punch from Raggazza.
A quick uppercut on the inside from Darkholme.
Raggazza swings wildly with an uppercut but Darkholme uses good head movement to avoid it.
Darkholme misses with a body punch.
Darkholme lands with a light punch inside.
 Raggazza is rocked! Raggazza is rocked!
That's two minutes gone in the round.
Raggazza throws a head punch that misses.
Still in the clinch, Darkholme scores with a nice short uppercut.
Oh Raggazza is still all over the place! His legs are completely gone! Will he be able to recover?!!
Raggazza tries a shoulder strike but it doesn't do any damage.
Darkholme stays in close to his opponent and throws a right hand to the body.
Raggazza seems to have got his legs back now.
A head punch on the inside from Darkholme fails to land.
Raggazza throws a punch but it's blocked by Darkholme.
Darkholme pushes Raggazza back against the cage and unloads with a body punch.
A short right from Darkholme.
Darkholme lands with a good tight uppercut to the head.
Raggazza struggles to land a body shot inside as Darkholme controls his hands.
Darkholme misses with a body punch.
Darkholme throws a punch but it's blocked by Raggazza.
Raggazza tries a shoulder strike but it doesn't do any damage.
Darkholme scores with a shot to the side of Raggazza's head.
Darkholme blocks a punch to the side of the head.
Darkholme works for underhooks and lands a body shot in the process.
Darkholme blocks a body shot from Raggazza.
Darkholme has Raggazza pressed against the cage.
Nice body punch from Raggazza.
Raggazza lands a shot to the body.
Darkholme lands a short shot on the inside that snaps the head of Raggazza backwards.
That's three minutes gone in the round.
A short left from Darkholme.
Darkholme misses with a punch on the inside.
Darkholme doesn't land with the attempted body shot.
Darkholme throws a head punch that misses.
Raggazza throws a punch but it's blocked by Darkholme.
Raggazza misses with a short punch on the inside.
Darkholme lands with a short head shot on the inside.
Darkholme misses with a short punch on the inside.
Raggazza goes for a body shot but it's blocked.
Raggazza struggles to land a body shot inside as Darkholme controls his hands.
Raggazza tries a knee to the head but he's missed.
Raggazza blocks a punch to the side of the head.
Raggazza swings wildly with an uppercut but Darkholme uses good head movement to avoid it.
Darkholme scores with a shoulder strike.
A nice left hand lands by Darkholme.
A right hook to the body lands for Darkholme.
Darkholme misses with a hook to the ribs.
Raggazza blocks a couple of punches on the inside.
Both fighters working to control the clinch.
That's four minutes gone in the round.
Darkholme works for underhooks and lands a body shot in the process.
Darkholme lands a right hand that snaps the head of Raggazza backwards.
The crowd are loving this. Great action here.
Darkholme working aggressively here.
Raggazza misses the knee to the body. Nice hip positioning from Darkholme.
Raggazza tries to work over Darkholme's body with a swooping hook but it only glances the target.
Darkholme pushes Raggazza back against the cage and lands a hook to the side of the head.
Darkholme blocks an uppercut.
A quick uppercut on the inside from Darkholme.
Darkholme goes for a body shot but it's blocked.
Raggazza tries to land knees in the clinch but Darkholme avoids the damage to the body.
Raggazza softening up his opponent with strikes, against the cage.
Darkholme is stalling here. The referee will be looking to step in if he doesn't pick up the pace.
A nice right hand lands inside from Darkholme.
Darkholme pushes Raggazza back against the cage and lands a hook to the side of the head.
Still in the clinch, Darkholme scores with a nice short uppercut.
The crowd applaud the fighters' efforts here as the round comes to an end.
Darkholme lands a right hand that snaps the head of Raggazza backwards.
Darkholme lands a body punch - he's looking to wear down Raggazza.
Raggazza wants the takedown. Darkholme is fighting it off but Raggazza persists and manages to bring the fight to the ground, ending up in Darkholme's guard against the cage.
The fighters are pressed up against the cage, both looking to find a bit of space to work.
Raggazza scoring with some ground and pound.
Darkholme throwing some rather feeble looking strikes off his back.
And that is the end of the round. The fighters go back to their corners.
Van Darkholme dominated that round.
The referee calls time. The cornermen exit stage left and we're back to business.
Darkholme takes a shot right to the bread basket.
Darkholme has been the more effective fighter overall so far.
Darkholme uses decent footwork to sidestep a right hand from Raggazza.
Raggazza jabs Darkholme to the body, keeping him at a distance.
Raggazza misses with an uppercut. Darkholme saw that one coming.
Raggazza backing away here, and Darkholme unleashes a leg kick that just misses.
Darkholme lands a nice shot to the body.
Danny Raggazza seems to be the more aggressive standup fighter in this bout.
Raggazza throws a series of punches but Darkholme avoids them all with ease.
Darkholme checks a leg kick nicely.
Raggazza shoots in for a takedown but Darkholme shows good takedown defense there and keeps this one on the feet.
Darkholme has taken the fight to the clinch.
Darkholme goes for a body shot but it's blocked.
Darkholme works on Raggazza's body with a couple of short punches.
A right handed body shot lands from Darkholme.
We've had a slow start to the round here - hopefully the action picks up.
Raggazza misses with a knee to the head.
Darkholme tries to land a shot to the body but it's blocked.
Darkholme lands a left hand.
Darkholme doesn't land with the attempted body shot.
Both fighters are absolutely exhausted here.
Darkholme misses with a hook to the ribs.
A short right hand to the side of the head by Darkholme.
The crowd cheering loudly, showing their appreciation for the quality fight we're seeing here.
Darkholme lands a right hand that snaps the head of Raggazza backwards.
That's one minute gone in the round.
Darkholme takes a shot to the head.
Raggazza misses with a body punch.
A short right hand to the side of the head by Darkholme.
Darkholme doesn't land with the attempted body shot.
A real battle for position is taking place between these two warriors.
Raggazza can't find room to land a body shot as Darkholme controls the action.
Darkholme presses Raggazza against the cage and delivers a mid-strength body shot.
Raggazza blocks a punch to the side of the head.
Darkholme tries to land a shot to the body but it's blocked.
Darkholme lands a body shot.
Darkholme can't find room to land a body shot as Raggazza controls the action.
Darkholme softening up his opponent with strikes, against the cage.
Raggazza tries to throw a body punch but Darkholme avoids it by throwing Raggazza back against the cage.
Raggazza tries to throw a body punch but Darkholme avoids it by throwing Raggazza back against the cage.
Darkholme controlling the action here for a moment.
Darkholme misses with some punches.
Darkholme avoids the elbow strike from Raggazza, against the cage.
Darkholme misses with the head strike.
Darkholme tries a body shot but Raggazza blocks it.
That's two minutes gone in the round.
Darkholme lands a short shot on the inside that snaps the head of Raggazza backwards.
Raggazza tries a body shot but Darkholme blocks it.
A short uppercut from Darkholme.
Darkholme scores with a nice hook to the head.
This is a great period of action - very entertaining stuff!
Darkholme lands with a short punch from the clinch.
A short body shot lands from Darkholme as the two fighters clinch.
Darkholme misses with a short punch on the inside.
Raggazza struggles to land a body shot inside as Darkholme controls his hands.
Darkholme swings wildly with an uppercut but Raggazza uses good head movement to avoid it.
Nice body punch from Darkholme - that landed with a thud.
A short right from Darkholme on the inside.
Van Darkholme seems to be working more effectively in the clinch in the fight so far.
Darkholme swings wildly with an uppercut but Raggazza uses good head movement to avoid it.
A nice right hand lands inside from Darkholme.
Darkholme lands with a light punch inside.
Raggazza struggles to land a body shot inside as Darkholme controls his hands.
A short body shot lands from Darkholme as the two fighters clinch.
Darkholme tries to land a shot to the body but it's blocked.
Darkholme working on landing some head shots here - that one got through nicely.
That's three minutes gone in the round.
Raggazza tries a body shot but Darkholme blocks it.
Raggazza doesn't land with the attempted body shot.
Darkholme lands a hook that snaps the head of Raggazza backwards.
Raggazza misses with a hook from the clinch.
Raggazza blocking some punches.
Raggazza misses with the head strike.
A nice left hand lands by Darkholme.
Darkholme throws a big uppercut that drops Raggazza! More strikes from Darkholme and the referee jumps in to stop the fight! Raggazza lies dazed against the cage as Darkholme celebrates with his cornermen!
Ladies and gentlemen, after 3:29 of round 2, we have a winner by way of TKO (Strikes). Van Darkholme!
|
|
|
|
|
|
|
|
|
|
|
|
|
|
|
|
|
|
|
|
|
|
|
| S |
C
A |
G |
S |
C
B |
G |
|
S |
C |
G |
|
energy
A | B |
|
hype
A | B |
|
pop
A | B |
|
mgr
A | B |
|
FIGHT
RATING
75% |
|
|
|
|
|
|
|
Undercard bout
|
Coming up we have a featherweight MMA rules bout between Yajson Rram (ranked 1253 p4p, 2078 weight class) and Irish Power (ranked 146 p4p, 230 weight class). Rram comes into the arena with Overhaul blaring out of the sound system. The key to victory for Yajson Rram has got to be keeping the fight on the feet.
 |
|
 |
| 164 cm
26
146
16 - 8 - 0 |
|
172 cm
32
151
14 - 10 - 0 |
BJJ Brown Belt
World class boxer
Cardio machine |
|
Good wrestler
Good kicks
Heavy handed |
|
| |
|
Ladies and gentlemen. This fight is 3 rounds, in the featherweight division.
Introducing the fighter to my left, fighting out of the red corner.
With a record of 16 - 8 - 0, fighting out of New York, Yajson Rram!
And introducing the fighter to my right, fighting out of the blue corner.
With a record of 14 - 10 - 0, fighting out of Tokyo, Irish Power!
The judges for this bout are Aafke Stam, Albert Achterberg and Paulsen Ambrosius.
The bell rings for round one and we are underway!
Power takes a jab right on the kisser.
Power uses good footwork to get in and out and land a nice right hand before Rram has time to react.
Rram ducks down and throws a hook to the body.
Rram feints a straight left to the body, then turns around with a flashy move and hits Powers jaw with a dramatic spinning back fist!
Rram rushes forward with a series of wild hooks but Power moves out of range and avoids them all easily.
Power's jab looks to have found its range, popping Rram under the eye.
Power slips a jab and a cross from Rram.
Power throws a hard body shot but it just misses.
Rram swings wildly with a hook that is half blocked by Power.
Rram goes to the watering hole and comes back with a big thumbs up from the judges as he scores a three punch combo.
This has been an exciting period of action!
Rram walks straight into a jab right on the nose. That one stung - he's blinking and trying to clear his head.
Power misses with a hook.
Power misses with a leg kick.
Power motions for Rram to come forward. Power throws a leg kick but it misses it's target.
Power looks more muscular than last time we saw him. He must have been on the weights.
Rram uses some good footwork to avoid the body shot by Power.
Rram throws a series of punches but Power avoids them all with ease.
Rram fakes a couple of low kicks, before throwing one on the third attempt. It connects and Power has to reset his feet before getting ready to engage.
Rram takes a punch right to his stomach. That took the wind out of him momentarily.
Rram scores with a jab to the head.
That's one minute gone in the round.
Power takes a jab on the nose. He smiles like he loves it and keeps coming.
Power lands with an uppercut that bounces Rram off the cage and back into range.
Power takes an uppercut right on the jaw but it doesn't phase him.
Rram tries to bum rush Power with a series of wild strikes but Power uses good footwork to avoid the assault.
Rram keeping his hands up high there, blocking the jab from Power.
It looks like Rram has been trying to sharpen up his punching technique, as it looks crisper than last time we saw him.
Power takes a big uppercut there. He seems a bit wobbly but no, he's OK.
Rram lands a head shot.
Power steps to his left, right into the path of a big body kick from Rram. That one must have hurt.
Power cracks Rram with a good jab.
Rram swings wildly with a couple of big hooks
and Power counters with a nice uppercut.
The crowd are loving this. Great action here.
Rram misses with a low kick as Power jumps back.
Power getting the better of the striking in that exchange.
Rram is rocked!
Power misses with an uppercut
and Rram counters with a nice low kick that buckles Power's knee momentarily.
Power throws a body punch but Rram moves out of range.
Rram jabs at Power's body.
Rram misses with a hook
and Power counters with a nice uppercut.
Oh Rram is still all over the place! His legs are completely gone! Will he be able to recover?!!
Power fakes with a right hand and throws a good leg kick, right into the thigh. That had to hurt Rram.
That's two minutes gone in the round.
Power fakes the leg kick and throws a superman punch. It's knocked Rram out cold! Brutal finish!
Ladies and gentlemen, after 2:06 of round 1, we have a winner by way of KO (Superman Punch). Irish Power!
Irish Power got down on his knees post fight and begged the management for a title shot. 'Please, I want that title shot so bad! Give it to me!'
|
|
|
|
|
|
|
|
|
|
|
|
|
|
|
|
|
|
|
|
|
|
|
| S |
C
A |
G |
S |
C
B |
G |
|
S |
C |
G |
|
energy
A | B |
|
hype
A | B |
|
pop
A | B |
|
mgr
A | B |
|
FIGHT
RATING
81% |
|
|
|
|
|
|
|
Co-main event
|
Coming up we have a welterweight MMA rules bout between Zak Foley (ranked 860 p4p, 2082 weight class) and Chief Walker (ranked 119 p4p, 290 weight class). The key to victory for Zak Foley has got to be keeping the fight on the feet.
 |
|
 |
| 185 cm
26
180
6 - 0 - 0 |
|
184 cm
22
185
7 - 3 - 0 |
BJJ Blue Belt
Excellent MT
Granite chin |
|
BJJ Purple Belt
Good kicks
Good gas tank |
|
| |
|
Ladies and gentlemen. This fight is 3 rounds, in the welterweight division.
Introducing the fighter to my left, fighting out of the red corner.
With a record of 6 - 0 - 0, fighting out of Las Vegas, Zak Foley!
And introducing the fighter to my right, fighting out of the blue corner.
With a record of 7 - 3 - 0, fighting out of Las Vegas, Chief Walker!
The judges for this bout are Wagner Zegers, Radbod Blank and Paul Aken.
The bell rings for round one and we are underway!
Foley tries to check a leg kick but that clearly hurt him.
A punch combination from Walker misses.
Foley scores with a nice looking left hook and follows it up with an uppercut!
Walker throws a lazy right hand but Foley sees it coming a mile off and sidesteps it easily.
Foley swung with a counter punch to the body but it didn't connect.
Foley connects with a leg kick. He turned his hip over nicely there.
That kick from Foley tenderised Walker's leg. Walker is trying to keep his angry face on.
Foley has been talking about how he's improved his wrestling in the run up to the fight so let's see if that's enough to sway the balance.
Walker shoots for a double leg takedown but Foley sprawls well. He's pushed Walker's face into the mat and manages to get back to his feet relatively easily.
Foley fakes with a right hand and throws a good leg kick, right into the thigh. That had to hurt Walker.
A cross from Foley lands.
Foley fakes the leg kick and cracks Walker in the body.
Fantastic stuff here - a very entertaining period of action, which has drawn cheers from the crowd.
Foley blocks a low kick nicely.
Foley cracks Walker with a good jab.
Walker is rocked!
Walker throws a monster uppercut resembling something out of street fighter but it doesn't land.
Walker is still on wobbly legs! Can Foley finish him?
Foley lands a big head kick that sends Walker to the canvas! Foley follows up with strikes from the mount that forces the ref to step in and stop the fight!
Ladies and gentlemen, after 0:40 of round 1, we have a winner by way of TKO (Strikes). Zak Foley!
Our winner, Zak Foley, made sure he spent some time buttering up the crowd during his post fight interview, which will no doubt bring him a few more fans.
|
|
|
|
|
|
|
|
|
|
|
|
|
|
|
|
|
|
|
|
|
|
|
| S |
C
A |
G |
S |
C
B |
G |
|
S |
C |
G |
|
energy
A | B |
|
hype
A | B |
|
pop
A | B |
|
mgr
A | B |
|
FIGHT
RATING
100% |
|
|
|
|
|
|
|
Main event
|
Coming up we have a welterweight MMA rules bout between Troy Moreno (ranked 874 p4p, 1976 weight class) and Phol Boxaaja (ranked 123 p4p, 278 weight class). Both fighters look fresh as a daisy as they make their way towards the cage.
 |
|
 |
| 184 cm
24
179
7 - 1 - 0 |
|
180 cm
29
173
22 - 11 - 0 |
Good wrestling
World class MT
Cardio machine |
|
Good wrestler
World class boxer
Good gas tank |
|
| |
|
Ladies and gentlemen. This fight is 3 rounds, in the welterweight division.
Introducing the fighter to my left, fighting out of the red corner.
With a record of 7 - 1 - 0, fighting out of Los Angeles, Troy Moreno!
And introducing the fighter to my right, fighting out of the blue corner.
With a record of 22 - 11 - 0, fighting out of St Petersburg, Phol Boxaaja!
The judges for this bout are Radbod Blank, Daniel Blasius and Paul Aken.
The bell rings for round one and we are underway!
Moreno scores with a nice right hand.
Boxaaja thuds a left hand into Moreno's body.
Boxaaja dips down and scores with a jab to the body.
Boxaaja's corner calls for a 1, 2 combination and Boxaaja duly obliges.
Moreno moves into the clinch.
Moreno fails to land with a short punch on the inside.
Moreno throws an elbow but it misses.
Moreno with an attempt at a knee that misses.

Boxaaja escapes the clinch and we're back to striking.
Troy Moreno seems to be the more aggressive standup fighter in this bout.
A jab from Moreno misses.
Boxaaja lands the left hand.
It looks like Troy Moreno has been cut.
This has been an exciting period of action!
Boxaaja showing good head movement there, avoiding the strikes from Moreno.
A little jabbing left from Boxaaja on the counter but it doesn't find it's target.
That's one minute gone in the round.
Good standup being displayed there by Moreno as he connects with a hook.
Moreno has been working on his boxing with his coaches at Zoowie's Funhouse in the buildup to the fight.
Boxaaja steps to the side to avoid the strikes from Moreno.
Boxaaja defending well as Moreno loads up on a big left hand.
Boxaaja lets it all go there with a big combo counter but none of the punches connected.
Moreno lunges in with swinging rights and lefts but Boxaaja circles away quickly and effectively.
Moreno throws an overhand right that lands on Boxaaja's shoulder, as Boxaaja tries to avoid the shot.
Boxaaja looked like he wanted to counter with a punch but didn't throw it.
Moreno throws a nice inside leg kick.
Moreno walks into a stiff left hand from Boxaaja.
Boxaaja takes a shot to the nose. Hopefully that hasn't broken it.
Boxaaja is rocked!
A chopping leg kick lands by Moreno.
Boxaaja is still on wobbly legs! Can Moreno finish him?
That's two minutes gone in the round.
Boxaaja drops his hands momentarily. Moreno doesn't need a second invitation, landing a shot to the temple. Boxaaja staggers and falls to the mat and the ref dives in to save him from any more punishment. Boxaaja doesn't seem happy with the stoppage but he was done.
Ladies and gentlemen, after 2:06 of round 1, we have a winner by way of KO (Punch). Troy Moreno!
During a confident post fight interview, Troy Moreno thanked all his fans. He seemed very genuine when describing how motivated his fans keep him.
|
|
|
|
|
|
|
|
|
|
|
|
|
|
|
|
|
|
|
|
|
|
|
| S |
C
A |
G |
S |
C
B |
G |
|
S |
C |
G |
|
energy
A | B |
|
hype
A | B |
|
pop
A | B |
|
mgr
A | B |
|
FIGHT
RATING
53% |
|
|
|
|
|
|
|
|
|
|
