 |
Kikku 6 PBP Commentary |
Undercard bout
|
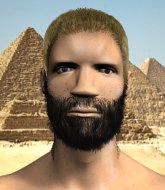
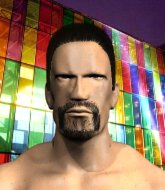
Coming up we have a middleweight kickboxing rules bout between Seth Mansour (ranked 5867 p4p, 24266 weight class) and Michael Yakamito (ranked 687 p4p, 814 weight class). Both these guys have really solid chins. Will we see a standup war or will they both decide that a knockout is unlikely and try to win the fight elsewhere?
 |
|
 |
| 201 cm
19
185
2 - 0 - 0 |
|
191 cm
28
198
4 - 3 - 0 |
Excellent boxer
Granite chin
|
|
Dangerous knees
Good gas tank
|
|
| |
|
Ladies and gentlemen. This fight is 3 rounds, in the middleweight division.
Introducing the fighter to my left, fighting out of the red corner.
With a record of 2 - 0 - 0, fighting out of Las Vegas, Seth Mansour!
And introducing the fighter to my right, fighting out of the blue corner.
With a record of 4 - 3 - 0, fighting out of Rio de Janeiro, Michael Yakamito!
The judges for this bout are Hirohito Nitta, Sosuke Kotani and Taro Takaoka.

The bell rings for round one and we are underway!
Mansour stooping low to avoid any incoming strikes and then lunges in with an uppercut come cross that lands flush.
Mansour throws a hard body shot but it just misses.
Yakamito lands a right hook to the body.
Yakamito's coach down at BLOODBATH Training Grounds was telling us pre-fight that they have been working on Yakamito's balance. Obviously they view that as a key factor in the outcome of this fight.
Yakamito scores with the left hand. Mansour knows he should have avoided that one.
Mansour moves out of range as Yakamito strikes.
Yakamito misses with a left hand
enabling Mansour to counter with a crisp jab.
Yakamito looks to throw the jab but Mansour is out of range.
Mansour swung with a counter right hand that didn't connect.
Mansour swings and misses with a hook to the body.
We've had a slow start to the round here - hopefully the action picks up.
Mansour scores with a crisp jab that stopped Yakamito in his tracks.
We've been told by Mansour's head coaches at five angels that he's been working on his takedown defense in preparation for this fight.
Yakamito throws a jab when Mansour was well out of range.
Yakamito moves out of range of the strikes.

That's one minute gone in the round.
Mansour misses with a hook.
Yakamito jabbing away but nothing is landing.
A looping hook to the body misses from Mansour. Yakamito does a little dance to reset his feet.
Yakamito jabs Mansour right on the nose. Mansour blinks but takes it well.
Yakamito closes the distance and takes a jab right on the nose as he does so.
Mansour staying out of range there.
A big left from Mansour misses.
It seemed like Yakamito was going to counter with the hook but didn't fully commit to it.
Yakamito misses with a hook.
Mansour takes a swing at Yakamito's ribcage but misses.
Yakamito on the wrong end of a nice hook.

That's two minutes gone in the round.
Mansour throws a hook but Yakamito blocks it.
Yakamito let fly with a counter punch to the body but it didn't land.
Yakamito throws out a token jab with nothing on it.
Yakamito misses with a hook. Mansour ducked under it nicely.
Yakamito misses the body punch
and Mansour counters nicely by changing levels and landing a hook to the body.
Yakamito is really struggling to land any decent head shots against his taller opponent.
Yakamito misses with a hook to the body
and Mansour connects with a straight left hand counter down the middle.
This has been an exciting period of action!
Yakamito takes a hook to the side of the head. I wonder if that's got his ears ringing.
Yakamito misses the shot to the body.
Mansour fakes high and swings low for a body shot but Yakamito manages to avoid it.
Mansour walks into a jab.
 It looks like Seth Mansour has been cut. It looks like Seth Mansour has been cut.
Mansour on the wrong end of a decent looking cross there.

That's three minutes gone in the round.
Mansour changes levels and scores with a jab to the body.
Mansour connects with a jab.
Yakamito looks to throw the jab but Mansour is out of range.
Mansour throws a hook but Yakamito blocks it.
Mansour misses with a body shot.
Jab by Mansour.
Yakamito swings and misses with a shot to the body
and Mansour counters with a left to the body.
Mansour throws the left hand but Yakamito avoids the punch easily.
Yakamito uses good footwork to avoid the strikes from Mansour.
Mansour is using his height advantage well here, landing a good percentage of his punches.

That's four minutes gone in the round.
Mansour throws a jab when Yakamito was well out of range.
Yakamito is looking for the big counter here.
Yakamito uses some good footwork to avoid the body shot by Mansour.
Mansour moves away from the strike by Yakamito.
Mansour really does look like a pencil wearing a pair of gloves. Let's hope he has a gameplan to suit that ridiculous body shape.
Yakamito scores with the left hand. Mansour knows he should have avoided that one.
Mansour misses with a straight left.
Yakamito looks like he wants to counter punch here.
Mansour throws a body shot but no joy.
We've seen a great period of action over the last minute or so - credit to both fighters for going all out!
Yakamito misses with a lunging right hand
and Mansour connects with a straight left hand counter down the middle.
Yakamito doesn't react quick enough there as he takes a shot to the body.
Yakamito defending well as Mansour loads up on a big left hand.
Yakamito fakes low and throws an overhand right that catches Mansour on the side of the head.
And that is the end of the round. The fighters go back to their corners.
Seth Mansour dominated that round.
The cut man is working on Seth Mansour's cut.
That's time! Back to the action!

Yakamito swings away with a body shot that misses
and Mansour counters with a crisp hook to the side of the head.
Some wild striking there from Mansour.
A little jabbing left from Yakamito on the counter but it doesn't find it's target.
Mansour misses the shot to the body.
Yakamito appears to be waiting to throw a counter punch to the body.
Mansour ducks under an overhand right and circles away with a smile on his face.
Yakamito throws a body shot but no joy.
Mansour was looking to counter that last move with a shot to the body but he didn't commit.
Yakamito throws a jab when Mansour was well out of range.
A quick step to the side and Mansour tries to counter with a shot to the body but it doesn't connect.
We've had a slow start to the round here - hopefully the action picks up.
Yakamito misses with a body shot
enabling Mansour to counter with a crisp jab.
Mansour lands a jab to the head.
Mansour throws a right and a left that both miss.
That's one minute gone in the round.
Mansour throws a big shot that misses.
Mansour is really dominating this fight. Is there anything that Yakamito can do to turn this around?
Yakamito misses with a left hand
and Mansour connects with a straight left hand counter down the middle.
Yakamito misses with an uppercut. Mansour saw that one coming.
Mansour uses some good footwork to avoid the body shot by Yakamito.
Seth Mansour is winning the standup battle so far.
Yakamito throws out a token jab with nothing on it.
Yakamito tries to land with a swinging hook to the body but Mansour was well out of range. Poor timing from Yakamito.
A counter left hand to the body from Mansour misses its target.
Mansour scores with a punch to the head.
Mansour ducks under a wild hook from Yakamito.
Yakamito loads up on a big right hand but Mansour slips the punch.
That's two minutes gone in the round.
Mansour avoids the body shot from Yakamito.
An attempted straight right counter from Mansour misses the target.
Mansour scores with a body shot.
Yakamito misses with a hook to the body

and Mansour moves into the clinch.
Yakamito lands a right hand.
Mansour is leaning against Yakamito and scores with a nice uppercut to the body.
Yakamito takes a shot to the head.
This is a great period of action - very entertaining stuff!
Mansour is working Yakamito over against the ropes.
Yakamito misses with a shot to the kidneys.
Yakamito missing with knees to the body.

Mansour pushes off and circles away, back to the middle of the mat.
Mansour digs a good body shot into Yakamito's ribs.
Mansour throws a body punch but Yakamito moves out of range.
Yakamito ducks low and lands a nice hook to the body of his opponent.

Mansour clips Yakamito with a right and a left that makes him do the chicken dance for a couple of seconds. He touched his left hand down on the canvas so the referee steps between the fighters to give Yakamito a standing 8 count before we can continue the bout.
 It looks like Michael Yakamito has been cut. It looks like Michael Yakamito has been cut.
That's three minutes gone in the round.
A shot to the body from Mansour misses
and Yakamito counters with a nice uppercut.
Mansour throws a body shot but no joy.
Yakamito throws out a counter right but Mansour avoids it with no problem.
Mansour scores with a body shot.
Mansour throws a poor cross that misses
and Yakamito cracks him with a counter punch right on the button.
Mansour stumbles momentarily as he takes a strong leg kick from Yakamito.
A right-left combo lands from Mansour.
Mansour throws a jab when Yakamito was well out of range.
Mansour lands a nice shot to the body.
Yakamito defending well as Mansour loads up on a big left hand.
That's four minutes gone in the round.
Mansour throws a series of punches but Yakamito moves out of range.
Mansour cracks a nice hook into Yakamito's ribs.
We've seen a great period of action over the last minute or so - credit to both fighters for going all out!
Yakamito tries to clinch but Mansour is having none of it.
No joy there for Mansour, who threw a few shots but didn't land.
Yakamito throws a right hand that misses
and Mansour counters with a crisp hook to the side of the head.
Mansour throws an overhand right that lands on Yakamito's shoulder, as Yakamito tries to avoid the shot.
Yakamito works his jab well there, keeping his opponent at a distance.
Mansour lands with a straight right. Yakamito didn't see that one coming.
Mansour lands the left hand.
And that is the end of the round. The fighters go back to their corners.
Seth Mansour will take that round after scoring the only knockdown of the round.
Both fighters have cut men working on them during the interval.
The fighters' corners scream their final instructions, as the referee calls time. Here we go, back to the action! Ladies and gentlemen, this is the final round!

Mansour lands with a cross to side of his opponent's head.
Yakamito is looking to clinch.
Yakamito throws a nice hook to the body that draws an oooh from the crowd.
Yakamito looks to throw the jab but Mansour is out of range.
Mansour lands a jab to the head.
A looping hook to the body misses from Mansour. Yakamito does a little dance to reset his feet.
A countering left hand to the body from Yakamito misses.
Nice straight punches there by Yakamito. You know Roy Jones Jr respects the hands of Yakamito.
We've had a slow start to the round here - hopefully the action picks up.
Mansour swings away but doesn't land with a series of punches.
Yakamito now looks to counter with a shot at the body.
Yakamito throws an ugly left hook that misses
enabling Mansour to counter with a crisp jab.
Yakamito takes a jab right on the nose. That must have hurt but he shrugs his shoulders and looks to return the favor.
That's one minute gone in the round.
Mansour takes a big uppercut there. He seems a bit wobbly but no, he's OK.
Yakamito walks into a straight right hand from Mansour.
 Yakamito is rocked! Yakamito is rocked!
Yakamito bobs and weaves well there to avoid the strikes.
Mansour comes forward and lands a shot to the body, then darts back out of range.
Yakamito lunges at Mansour with a hook that half lands and is half blocked by Mansour's hand.
Yakamito misses with a hook
and Mansour counters with a left to the body.
Mansour scores with a hook.
Yakamito jabs. That one connects to the head of his opponent.
Yakamito tests Mansour's chin there with a solid looking shot.
Michael Yakamito has stepped it up - he knows he needs a finish here!
Seth Mansour is fighting for a decision here - he's started to take the cautious approach.
That's two minutes gone in the round.
Yakamito lands a head shot.
The crowd are loving this. Great action here.
Mansour paws at his opponent with the jab and then lunges in with a straight, right on the button.
Mansour tries to land with a swinging hook to the body but Yakamito was well out of range. Poor timing from Mansour.
Yakamito changes levels and scores with a jab to the body.
Mansour blocks a jab.
Yakamito bobs and weaves well there to avoid the strikes.
Yakamito swings away with a counter right hand but no contact made.
Mansour connects with a body shot.
A jab from Yakamito misses.
Mansour swung with a counter right hand that didn't connect.
That's three minutes gone in the round.
Mansour fakes and then throws a beautiful body shot. Yakamito looks a bit winded and takes a step backwards to take a breath.
Mansour fakes and then throws a beautiful body shot. Yakamito looks a bit winded and takes a step backwards to take a breath.
Mansour connects with a slap. Keep your fist closed son.
Mansour avoids a lazy jab quite easily.
Yakamito takes a body punch that cleary hurt but he's trying not to show any weakness.
Yakamito uses good footwork to avoid the strikes from Mansour.
Yakamito throws out a counter right but Mansour avoids it with no problem.
Yakamito ducks down and throws a hook to the body but Mansour moves away.
Mansour tests Yakamito's chin there with a solid looking shot.
That's four minutes gone in the round.
Yakamito misses with a lunging right hand
and Mansour counters with a one-two to the body.
Yakamito throws a combination but it was largely blocked by Mansour.
It looked like Mansour was trying to counter with a body shot coming off that last attack from Yakamito.
Mansour fakes a head shot and lands one to the body.
We've seen a great period of action over the last minute or so - credit to both fighters for going all out!
Yakamito misses with a telegraphed body shot
and Mansour cracks him with a counter punch right on the button.
Mansour looks to throw the jab but Yakamito is out of range.
Mansour with a body punch. A glancing blow.
Mansour's corner calls for a 1-2. Mansour obliges with the 1 part as he scores the single shot and moves back out of range.
Yakamito misses with an uppercut
and Mansour counters with a stiff right hand.
Mansour cracks Yakamito with a right hand to the side of the head.
And that's the end of the fight!
Seth Mansour showed his dominance in that final round.
Well Mansour has outscored his opponent in every aspect of the fight today. Only a scarily incompetent judge or two will keep him from a well deserved win... Over to the ring announcer for the scorecards.
Ladies and gentlemen, after 3 rounds of action, we go to the scorecards for a decision.
Judge Hirohito Nitta scores the fight 30:26
Judge Sosuke Kotani scores the fight 30:26
Judge Taro Takaoka scores the fight 30:26
In favor of your winner, by unanimous decision... Seth Mansour!
During a confident post fight interview, Seth Mansour thanked all his fans. He seemed very genuine when describing how motivated his fans keep him.
|
|
|
|
|
|
|
|
|
|
|
|
|
|
|
|
|
|
|
|
|
|
|
| S |
C
A |
G |
S |
C
B |
G |
|
S |
C |
G |
|
energy
A | B |
|
hype
A | B |
|
pop
A | B |
|
mgr
A | B |
|
FIGHT
RATING
60% |
|
|
|
|
|
|
|
Undercard bout
|
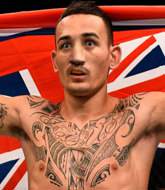
Coming up we have a super heavyweight kickboxing rules bout between Ay Blyad (ranked 498 p4p, 5990 weight class) and Molokai Built (ranked 11 p4p, 117 weight class). Blyad comes to the ring accompanied by luv. There are an array of beautiful celebrities at ringside tonight! I wonder if any of them paid for their tickets.
 |
|
 |
| 177 cm
28
158
10 - 2 - 0 |
|
169 cm
35
140
19 - 15 - 1 |
World class boxer
Granite chin
|
|
World class boxer
Granite chin
|
|
| |
|
Ladies and gentlemen. This fight is 3 rounds, in the super heavyweight division.
Introducing the fighter to my left, fighting out of the red corner.
With a record of 10 - 2 - 0, fighting out of Los Angeles, Ay Blyad!
And introducing the fighter to my right, fighting out of the blue corner.
With a record of 19 - 15 - 1, fighting out of Montreal, Molokai Built!
The judges for this bout are Kenichi Hosakawa, Yukihiro Yamamoto and Yukihiro Shimada.
The bell rings for round one and we are underway!
Blyad throws a hook but Built blocks it.
Despite the aggression on Built's face he doesn't fully commit to the counter.
Blyad throws a feint and then finishes with a kick to the body.
Blyad sizes up Built with a pawing jab and scores with a straight right down the middle.
Blyad looks to throw the jab but Built is out of range.
Built throws a counter combo.
Blyad rushes in with a sloppy looking punch
and Built counters with a series of strikes. Blyad will be more careful next time no doubt.
Blyad looks to have improved his striking defense since last time we saw him fight.
Built bobs and weaves well there to avoid the strikes.
Built lets it all go there with a big combo counter but none of the punches connected.
Blyad throws a hook but Built blocks it.
As Blyad backs off Built throws a huge counter combo but Blyad manages to avoid it all.
Blyad scores with a jab.
Nice defenses there by Built.
Built ducks under a wild hook from Blyad.
Built is looking for the big counter here.
Built closes the distance and takes a jab right on the nose as he does so.
Blyad throws a hook to the side of Built's head but Built sees it coming and ducks under it beautifully.
Blyad throws a poor cross that misses
and Built counters with a one-two to the body.
That's one minute gone in the round.
A big left from Blyad misses.
Blyad misses the body punch
and Built counters with a three punch combination, finished off with a leg kick. Nice work.
Nice uppercut there from Blyad.
A clash of legs there as Built blocks the low kick.
Built moves away from the strike by Blyad.
Blyad cracks Built with a right hand to the side of the head.
Blyad ducks down and throws a hook to the body but Built moves away.
Built is looking for the big counter here.
Built moves out of range of the body kick.
Blyad throws a lazy uppercut
and Built counters with a left and a right that stings Blyad.
Blyad misses with an attempted mid kick.
Blyad throws a leg kick but he was too far away and it doesn't land.
Built is looking for the big counter here.
Built moves out of range as Blyad throws a body kick.
That's two minutes gone in the round.
Blyad lands a nice looking body shot.
The fans in attendance giving it up for the two fighters, who have really let it all hang out in the last minute or so!
Blyad swings for the body but Built moves out of range.
As Blyad backs off Built throws a huge counter combo but Blyad manages to avoid it all.
Blyad throws a hard body shot but it just misses.
Built is loading up here, looking for a big counter of his own.
A jab from Blyad does it's job there.
Blyad misses with a wild body shot.
Built unleashes a big counter combination but Blyad bobs and weaves and avoids any damage.
Built moves out of range of the leg kick from Blyad.
Built is looking for the big counter here.
Blyad dances in quickly and lands a nice inside leg kick on Built. That did some damage!
Built staying out of range there.
As Blyad backs off Built throws a huge counter combo but Blyad manages to avoid it all.
Blyad throws a leg kick but Built moved away.
Built lets it all go there with a big combo counter but none of the punches connected.
Blyad is looking to score with low kicks.
Blyad scores with a jab. Built acknowledges it with a nod of the head.
Blyad throws a front kick aimed at Built's knee but Built avoids it well.
That's three minutes gone in the round.
A punch lands to the side of Built 's head but he takes it in his stride.
A left lands for Blyad.
Blyad misses the shot to the body.
As Blyad backs off Built throws a huge counter combo but Blyad manages to avoid it all.
Blyad cracks Built with a good jab.
Blyad jabbing away but nothing is landing.
Built unleashes a big counter combination but Blyad bobs and weaves and avoids any damage.
A looping hook to the body misses from Blyad. Built does a little dance to reset his feet.
As Blyad backs off Built throws a huge counter combo but Blyad manages to avoid it all.
Blyad throws the kick towards the body but Built avoids it.
Blyad thows a leg kick but Built checks it
and Built counters with a two punch combo.
Blyad getting the better of the striking in that exchange.
Nice cross by Blyad.
Good work by Built as he checks the leg kick.
Blyad misses with an uppercut.
That's four minutes gone in the round.
Blyad punishes Built's body with a nice straight punch.
The crowd cheering loudly, showing their appreciation for the quality fight we're seeing here.
Blyad scores with a jab to the body.
Blyad looks to land a left hand but Built moved out of range nicely.
Blyad stuns Built with a nice body shot, before stepping back out of range.
The sound of bone on bone echoes around the arena as Built checks a leg kick.
Built is loading up here, looking for a big counter of his own.
Blyad misses with a body kick.
Blyad scores with a nice head shot.
Blyad pivots, looking for a leg kick but Built is out of range and Blyad settles back down.
Built lets it all go there with a big combo counter but none of the punches connected.
Blyad looks to land a left hand but Built moved out of range nicely.
Despite the aggression on Built's face he doesn't fully commit to the counter.
Blyad misses with a body shot. Nice footwork from Built.
Blyad just misses with a punch to the body.
Built has his hands up protecting his head but a hook from Blyad finds it's way round the side to connect with Built's head.
And that is the end of the round. The fighters go back to their corners.
Ay Blyad dominated that round.
Well, the break between rounds is over. Let's get back to the scrappin!
Blyad stooping low to avoid any incoming strikes and then lunges in with an uppercut come cross that lands flush.
Blyad fakes and then throws a beautiful body shot. Built looks a bit winded and takes a step backwards to take a breath.
Built keeping a good distance there, avoiding the body shot.
Built lets it all go there with a big combo counter but none of the punches connected.
Blyad misses with a low kick.
Blyad throws out a leg kick but Built moves out of range and Blyad only half commits.
Built unleashes a big counter combination but Blyad bobs and weaves and avoids any damage.
Blyad swings and misses with a hook to the body.
Despite the aggression on Built's face he doesn't fully commit to the counter.
Ay Blyad seems to be the more aggressive standup fighter in this bout.
Blyad throws a body kick but he wasn't in range.
Despite the aggression on Built's face he doesn't fully commit to the counter.
Blyad throws a low kick but Built moves out of range easily.
Blyad ducks down and throws a hook to the body but Built moves away.
Built is loading up here, looking for a big counter of his own.
We've had a slow start to the round here - hopefully the action picks up.
Blyad throws a low kick but Built avoids it.
Built with poor footwork there. He got himself in a bit of a tangle, enabling Blyad to score with a decent uppercut.
Blyad ducks down and throws a hook to the body but Built moves away.
Blyad tries to score with a leg kick but it misses it's target.
That's one minute gone in the round.
Blyad ducks down and throws a hook to the body.
Molokai Built is looking to throw some combinations by the looks of things.
A good leg kick by Blyad.
Built takes a shot right to the liver - Bas would have been proud of that punch.
A looping hook to the body misses from Blyad. Built does a little dance to reset his feet.
Built takes a solid shot to the body. That one hurt him but he's trying not to show it.
Blyad looks to land a right hand but Built moved out of range.
Blyad fakes a head shot and lands one to the body.
Built slips under a jab.
Built unleashes a big counter combination but Blyad bobs and weaves and avoids any damage.
Blyad looking to throw a kick but he's pulled out of it.
Built throws a counter combo.
Blyad fakes with a right hand and throws a good leg kick, right into the thigh. That had to hurt Built.
Blyad ducks down and throws a hook to the body but Built moves away.
That's two minutes gone in the round.
Blyad looks to land a right hand but Built moved out of range.
Blyad swings and misses with a hook to the body.
A solid leg kick lands there for Blyad.
Blyad rushes in with a sloppy looking punch
and Built counters with a left and a right that stings Blyad.
The crowd are loving this. Great action here.
Built keeping his hands up high there, blocking the jab from Blyad.
Blyad throws the kick towards the body but Built avoids it.
Built is loading up here, looking for a big counter of his own.
A jab lands there for Blyad.
Built moves away from the strike by Blyad.
Blyad looks to throw the jab but Built is out of range.
Built is looking for the big counter here.
Blyad misses with a looping left.
Built lets it all go there with a big combo counter but none of the punches connected.
Blyad throws a lazy uppercut
and Built counters with a three punch combo that has Blyad backing up. Blyad nods at Built to acknowledge the strikes.
Built blocks a jab.
That's three minutes gone in the round.
Blyad misses with a wild body shot.
Despite the aggression on Built's face he doesn't fully commit to the counter.
Blyad misses with a wild body shot.
Built throws a counter combo.
Built uses some good footwork to avoid the body shot by Blyad.
As Blyad backs off Built throws a huge counter combo but Blyad manages to avoid it all.
Blyad waving his hands out in front of him, looking to distract Built.
Built unleashes a big counter combination but Blyad bobs and weaves and avoids any damage.
Built moves out of range of the strikes.
Built takes a shot to the nose. Hopefully that hasn't broken it.
Built checks a low kick from Blyad.
Built is looking for the big counter here.
Good work by Built as he checks the leg kick.
Blyad looking to throw a kick but he's pulled out of it.
Blyad takes a swing at Built's ribcage but misses.
Built unleashes a big counter combination but Blyad bobs and weaves and avoids any damage.
Blyad scores with a jab to the jaw.
Blyad throws an ugly left hook that misses
and Built counters with a left and a right that stings Blyad.
That's four minutes gone in the round.
Blyad digs a good body shot into Built's ribs.
Built avoids a lazy jab quite easily.
Built is loading up here, looking for a big counter of his own.
Blyad throws a leg kick but Built sees it coming and checks it nicely.
As Blyad backs off Built throws a huge counter combo but Blyad manages to avoid it all.
Blyad throws out a loose jab but Built uses good head movement to avoid it.
Built lets it all go there with a big combo counter but none of the punches connected.
Blyad walks forward and throws out a flicking leg kick. Built checks it nicely though, as he moves to the side.
Blyad is looking to chop away at Built's legs.
Despite the aggression on Built's face he doesn't fully commit to the counter.
Blyad tries to land a leg kick but Built saw it coming and moves away.
Blyad misses with a telegraphed body shot
and Built counters with a three punch combo that has Blyad backing up. Blyad nods at Built to acknowledge the strikes.
The crowd are loving this. Great action here.
Nice body kick there by Blyad.
Blyad throws a leg kick that is checked
and Built counters with a series of strikes. Blyad will be more careful next time no doubt.
Blyad throws a predictable looking body shot
and Built counters with a two punch combo.
Blyad throws a shot from downtown. Built moves away and avoids it.
And that is the end of the round. The fighters go back to their corners.
Ay Blyad dominated that second round.
That's the end of the interval. I'm sure that seemed a lot quicker than a minute for our two fighters! Back to the action. This is the final round!
Blyad motions for Built to come forward. Blyad throws a leg kick but it misses it's target.
Built unleashes a big counter combination but Blyad bobs and weaves and avoids any damage.
Built moves out of range as Blyad strikes.
Despite the aggression on Built's face he doesn't fully commit to the counter.
Blyad jabbing away but nothing is landing.
Built blocks a jab.
Blyad throws a hook to the body but it doesn't connect.
Built is loading up here, looking for a big counter of his own.
A looping hook to the body misses from Blyad. Built does a little dance to reset his feet.
Blyad throws a lazy right hand but Built sees it coming a mile off and sidesteps it easily.
Despite the aggression on Built's face he doesn't fully commit to the counter.
Built steps to the side to avoid the strikes from Blyad.
We've had a slow start to the round here - hopefully the action picks up.
Blyad throws a quick inside leg kick.
Blyad throws a front kick aimed at Built's knee but Built avoids it well.
A nice inside leg kick there by Blyad. That's going to slow Built down.
Built gets cracked there but stands up to it.
Blyad is really dominating this fight. Is there anything that Built can do to turn this around?
That's one minute gone in the round.
A slow jab from Blyad misses its intended target.
As Blyad backs off Built throws a huge counter combo but Blyad manages to avoid it all.
Built on the wrong end of a nice hook.
Built moves out of range of the strikes.
Built unleashes a big counter combination but Blyad bobs and weaves and avoids any damage.
Blyad throws out a leg kick but Built moves out of range and Blyad only half commits.
Despite the aggression on Built's face he doesn't fully commit to the counter.
Blyad throws a body kick that misses
and Built counters with a two punch combo.
Built takes a shot right to the bread basket.
Blyad lands a lovely overhand right.
Blyad thows a leg kick but Built checks it
and Built counters with a series of strikes. Blyad will be more careful next time no doubt.
Blyad swings for the body but Built moves out of range.
Built is looking for the big counter here.
Blyad throws an off balance right hand
and Built counters with a three punch combo that has Blyad backing up. Blyad nods at Built to acknowledge the strikes.
The crowd are loving this. Great action here.
Blyad scoring well with a low kick there.
Built is working the combinations to good effect here.
Oooooooooooh, not good. A low kick from Blyad lands where it shouldn't have, right in the... well, you know what he did? He kicked him in the penis. He's injured, injured bad. The referee sends both fighters to their corners and Built has 5 minutes to recover. He's OK now though... a thumbs up from Built and we're back underway with a touch of gloves.
As Blyad backs off Built throws a huge counter combo but Blyad manages to avoid it all.
Built has a pretty nasty looking mouse under his right eye.
That's two minutes gone in the round.
Blyad throws a decent looking leg kick but it doesn't land clean.
Built lets it all go there with a big combo counter but none of the punches connected.
Blyad changes levels and scores with a jab to the body.
Blyad throws a monster uppercut resembling something out of street fighter but it doesn't land.
Blyad throws a low kick but his opponent is out of range.
Blyad looks to land a body kick but Built moved away.
Blyad lands a nice hook to Built's body. Built takes it in his stride and looks to land his own strikes.
Blyad throws a body shot but no joy.
Despite the aggression on Built's face he doesn't fully commit to the counter.
Blyad throws a body shot but no joy.
Built unleashes a big counter combination but Blyad bobs and weaves and avoids any damage.
Built walks into a stiff left hand from Blyad.
Blyad thows a left - swing and a miss!
As Blyad backs off Built throws a huge counter combo but Blyad manages to avoid it all.
Blyad takes a swing at Built's ribcage but misses.
As Blyad backs off Built throws a huge counter combo but Blyad manages to avoid it all.
That's three minutes gone in the round.
A telegraphed right hand from Blyad misses the target.
Despite the aggression on Built's face he doesn't fully commit to the counter.
Built checks a leg kick.
As Blyad backs off Built throws a huge counter combo but Blyad manages to avoid it all.
Blyad is looking to score with low kicks.
Built is loading up here, looking for a big counter of his own.
Blyad looks to land a right hand but Built moved out of range.
Blyad misses with a body kick.
Built lets it all go there with a big combo counter but none of the punches connected.
Built uses good head movement to avoid the hook from Blyad.
Good standup being displayed there by Blyad as he connects with a hook.
A bone on bone clash there as Built blocks the leg kick.
Built lets it all go there with a big combo counter but none of the punches connected.
Ay Blyad is winning the standup battle so far.
Blyad misses with a body shot. Nice footwork from Built.
Blyad throws a solid leg kick but Built takes the impact on his shin and smiles at Blyad.
Built is looking for the big counter here.
Blyad connects with a nice looking jab.
Blyad lands the left hand.
That's four minutes gone in the round.
Blyad lands an overhand right.
Built keeping his hands up high there, blocking the jab from Blyad.
The fighters circling - Blyad throws out the jab but it was never going to land.
Built throws a counter combo.
Built avoids a kick to the body.
Built unleashes a big counter combination but Blyad bobs and weaves and avoids any damage.
Built uses some good footwork to avoid the body shot by Blyad.
A looping hook to the body misses from Blyad. Built does a little dance to reset his feet.
Blyad throws a push kick but Built slaps the foot to one side.
Built uses some good footwork to avoid the body shot by Blyad.
Blyad misses with a body shot. Nice footwork from Built.
Built is looking for the big counter here.
Blyad connects nicely with a jab. Noted by the judges no doubt.
Molokai Built has stepped it up - he knows he needs a finish here!
Fantastic stuff here - a very entertaining period of action, which has drawn cheers from the crowd.
Blyad connects with a solid leg kick.
And that's the end of the fight!
Ay Blyad showed his dominance in that final round.
Well Blyad has outscored his opponent in every aspect of the fight today. Only a scarily incompetent judge or two will keep him from a well deserved win... Over to the ring announcer for the scorecards.
Ladies and gentlemen, after 3 rounds of action, we go to the scorecards for a decision.
Judge Kenichi Hosakawa scores the fight 30:27
Judge Yukihiro Yamamoto scores the fight 30:27
Judge Yukihiro Shimada scores the fight 30:27
In favor of your winner, by unanimous decision... Ay Blyad!
|
|
|
|
|
|
|
|
|
|
|
|
|
|
|
|
|
|
|
|
|
|
|
| S |
C
A |
G |
S |
C
B |
G |
|
S |
C |
G |
|
energy
A | B |
|
hype
A | B |
|
pop
A | B |
|
mgr
A | B |
|
FIGHT
RATING
59% |
|
|
|
|
|
|
|
Undercard bout
|
Coming up we have a heavyweight kickboxing rules bout between Dick Tator (ranked 6125 p4p, 7106 weight class) and Paper Boi (ranked 599 p4p, 655 weight class). Dick Tator has the better chin. Will he look to stand and bang today?
 |
|
 |
| 192 cm
19
230
2 - 1 - 0 |
|
209 cm
19
240
0 - 3 - 0 |
Solid boxing
Granite chin
|
|
Excellent MT
Determined
|
|
| |
|
Ladies and gentlemen. This fight is 3 rounds, in the heavyweight division.
Introducing the fighter to my left, fighting out of the red corner.
With a record of 2 - 1 - 0, fighting out of New York, Dick Tator!
And introducing the fighter to my right, fighting out of the blue corner.
With a record of 0 - 3 - 0, fighting out of Tokyo, Paper Boi!
The judges for this bout are Taro Takaoka, Yuuki Gou and Hirohito Nitta.
The bell rings for round one and we are underway!
Tator throws a poor cross that misses
and Boi cracks him with a counter punch right on the button.
Tator misses with a straight right.
Boi tries to close the distance and clinch but Tator swats him to one side with an open hand palm strike and circles away.
Tator circles away from the clinch attempt.
Tator closes the distance and clinches.
Both fighters working to control the clinch.
Boi misses with a punch to the body.
Tator works on Boi's body with a couple of short punches.
Tator lands a body punch in the clinch.
Tator creates a bit of space for himself and sneaks an elbow through Boi's defenses.
It looks like Paper Boi has been cut.
Boi swings away with an uppercut that misses.
Tator lands a nice uppercut.
Boi fails to land with a short punch on the inside.
I was talking to Tator's coach per-fight and he was telling me that they'd been working on the clinch in the runup to this fight.
An uppercut on the inside fails to land for Boi.
Tator is stalling here.
Boi misses with a hook from the clinch.
Tator lands with a short punch from the clinch.
Tator throws a hook to the body. More of an arm punch but it's all scoring with the judges.
Boi looks winded!
This is a great period of action - very entertaining stuff!
Tator lands on the inside with an uppercut.
Tator lands a right hand that snaps the head of Boi backwards.
Boi is rocked!
Boi's head jolts backwards as he takes an uppercut right on the button!
Boi is still on wobbly legs! Can Tator finish him?
That's one minute gone in the round.
Tator is pushing Boi up against the ropes, for a bit of lean and pray action. Action being used the in the loosest possible sense of the word.
Tator gets an overhook and lands an elbow to the side of the head.
Boi fails to land with a short punch on the inside.
Boi tries to land a shot to the body but it's blocked.
Tator lands a right hand that snaps the head of Boi backwards.
Tator prevents Boi from breaking the clinch.
With the fighters clinched against the ropes, Tator creates a bit of distance for himself and scores with a nice uppercut.
Tator is stalling here.
Tator lands a right hand that snaps the head of Boi backwards.
Boi misses with some punches.
A right hook to the body lands for Tator.
Boi seems to have recovered his senses.
A short right hand to the side of the head by Tator.
Tator stalling here - the referee won't stand for too much of that.
Some stalling of biblical proportions here from Tator.
Boi misses with a hook from the clinch.
Tator stalling.
Tator gets an overhook and lands an elbow to the side of the head.
Tator lands a nice looking hook to the body, against the ropes.
We've seen a great period of action over the last minute or so - credit to both fighters for going all out!
An uppercut to the body lands inside from Tator.
Tator leaning against his opponent.
Tator avoiding damage.
The crowd are getting pretty annoyed with Tator for his constant stalling in the clinch and are voicing their displeasure.
That's two minutes gone in the round.
A short right from Tator.
Tator scores with a shot to the side of Boi's head.
Tator lands on the inside with an uppercut.
Tator lands a shoulder strike that jolts his opponent's head backwards.
Tator has control of Boi and unloads with a rapid fire barage of elbows, sending Boi crashing to the mat! Boi looks in big trouble - I don't think he's going to beat the count! He hasn't! The referee has reached 10 and this fight is all over! Tator looks delighted, as well he should.
Ladies and gentlemen, after 2:25 of round 1, we have a winner by way of TKO (Elbows). Dick Tator!
|
|
|
|
|
|
|
|
|
|
|
|
|
|
|
|
|
|
|
|
|
|
|
| S |
C
A |
G |
S |
C
B |
G |
|
S |
C |
G |
|
energy
A | B |
|
hype
A | B |
|
pop
A | B |
|
mgr
A | B |
|
FIGHT
RATING
64% |
|
|
|
|
|
|
|
Undercard bout
|
Coming up we have a heavyweight kickboxing rules bout between Vinny Valentini (ranked 7105 p4p, 6187 weight class) and Panagiotis Christoforou (ranked 654 p4p, 602 weight class). These two fighters really are very evenly matched on the feet - it will be fascinating to see who can assert themselves in that aspect of the fight.
 |
|
 |
| 190 cm
19
240
0 - 4 - 0 |
|
203 cm
19
275
2 - 2 - 0 |
Solid boxing
KO power
|
|
Excellent boxer
Granite chin
|
|
| |
|
Ladies and gentlemen. This fight is 3 rounds, in the heavyweight division.
Introducing the fighter to my left, fighting out of the red corner.
With a record of 0 - 4 - 0, fighting out of Tokyo, Vinny Valentini!
And introducing the fighter to my right, fighting out of the blue corner.
With a record of 2 - 2 - 0, fighting out of London, Panagiotis Christoforou!
The judges for this bout are Ren Mimura, Sosuke Kotani and Tatsuya Matsuyama.
The bell rings for round one and we are underway!

Valentini walks into a big right hand from Christoforou and goes down! The referee sends Christoforou to a neutral corner as Valentini gets back to his feet. He looks OK so we're back under way.
It looks like Vinny Valentini has been cut.
Christoforou looks to land a right hand but Valentini moved out of range.
Valentini seem to be loading up, looking for a big counter.
Christoforou weaves into range and cracks Valentini right on the temple with a beautiful overhand right! Valentini goes down! He's out cold! Wow, what a beautiful knockout! Christoforou is strutting round the canvas like a movie star as the camera bulbs flash frantically.
Ladies and gentlemen, after 0:11 of round 1, we have a winner by way of KO (Punch). Panagiotis Christoforou!
|
|
|
|
|
|
|
|
|
|
|
|
|
|
|
|
|
|
|
|
|
|
|
| S |
C
A |
G |
S |
C
B |
G |
|
S |
C |
G |
|
energy
A | B |
|
hype
A | B |
|
pop
A | B |
|
mgr
A | B |
|
FIGHT
RATING
100% |
|
|
|
|
|
|
|
Co-main event
|
Coming up we have a super heavyweight kickboxing rules bout between Dmitri Zaitsev (ranked 4382 p4p, 20856 weight class) and KarateO Masuta (ranked 159 p4p, 138 weight class). Masuta comes into a darkened arena with his song building. We Can Dance kicks in, the lights come on and the crowd goes wild! What a showman! Over to our ring announcer for the fighter introductions!
 |
|
 |
| 192 cm
41
278
29 - 25 - 0 |
|
188 cm
30
203
11 - 16 - 0 |
Excellent boxer
Very strong
|
|
Excellent MT
Good gas tank
|
|
| |
|
Ladies and gentlemen. This fight is 5 rounds, in the super heavyweight division.
Introducing the fighter to my left, fighting out of the red corner.
With a record of 29 - 25 - 0, fighting out of Montreal, Dmitri Zaitsev!
And introducing the fighter to my right, fighting out of the blue corner.
With a record of 11 - 16 - 0, fighting out of Montreal, KarateO Masuta !
The judges for this bout are Shirou Masuda, Shigeki Sano and Kenichi Hosakawa.
The bell rings for round one and we are underway!
Zaitsev will need to tighten up his combinations if he doesn't want to gas himself out, swinging at thin air.
Zaitsev throws a hook to the side of Masuta 's head but Masuta sees it coming and ducks under it beautifully.
Masuta throws out a counter right but Zaitsev avoids it with no problem.
Zaitsev misses the shot to the body.
Masuta is clearly trying to counter these attacks from Zaitsev with a body shot.
Zaitsev throws a jab, cross combination which is slipped
letting Masuta counter with a right hand.
Zaitsev with a nice cross.
Zaitsev lands a nice hook to Masuta 's body. Masuta takes it in his stride and looks to land his own strikes.
A head kick by Zaitsev misses
and Masuta counters with a good right hand that lands right on the jaw.
We've had a slow start to the round here - hopefully the action picks up.
Zaitsev is looking to score with low kicks.
Masuta flicks out a counter leg kick but Zaitsev steps away.
Zaitsev throws a right hand that misses
and Masuta makes him pay by landing a nice hook to the body before moving out of range.
Zaitsev thows a left - swing and a miss!
Zaitsev misses with a half-hearted attempt at a head kick.
Masuta appears to be waiting to throw a counter punch to the body.
That's one minute gone in the round.
Zaitsev fakes high and swings low for a body shot but Masuta manages to avoid it.
And an attempted straight right on the counter from Masuta ! But no joy.
Zaitsev takes a swing at Masuta 's ribcage but misses.
Masuta now looks to counter with a shot at the body.
Zaitsev thows a leg kick but Masuta checks it
and Masuta cracks him with a counter punch right on the button.
Masuta slips a jab from Zaitsev.
A nice side step and Masuta releases a counter shot to the body, but it doesn't find it's home.
Masuta slips a straight right by Zaitsev.
Masuta ducks into a a hook from Zaitsev and goes down! He looks in a bit of a mess; will he beat the count?! 4,5,6,7,8 - he's up and looking to carry on! The referee looks into his eyes and sees that he's OK to continue!
Masuta walks straight into a perfectly timed right hook, crumpling him to the floor! Masuta is in all kinds of trouble here - can he beat the count? 3,4,5,6,7,8,9....10 - he's out and it's by a long way too - he didn't ever look like beating that count!
Ladies and gentlemen, after 1:45 of round 1, we have a winner by way of TKO (Punch). Dmitri Zaitsev!
An out of breath Dmitri Zaitsev thanked his loyal fans in his post fight interview, giving them credit for his success over the course of his career.
KarateO Masuta was interviewed post fight and said 'Arigoto'.
|
|
|
|
|
|
|
|
|
|
|
|
|
|
|
|
|
|
|
|
|
|
|
| S |
C
A |
G |
S |
C
B |
G |
|
S |
C |
G |
|
energy
A | B |
|
hype
A | B |
|
pop
A | B |
|
mgr
A | B |
|
FIGHT
RATING
58% |
|
|
|
|
|
|
|
Main event
|
Coming up we have a heavyweight kickboxing rules bout between Darth Mauler (ranked 6345 p4p, 6653 weight class) and Clubber Sang (ranked 617 p4p, 630 weight class). Chooooooooon! I think Mauler might be my favorite fighter, now he's come out to Say something bout the Prequels bitch!. These two fighters really are very evenly matched on the feet - it will be fascinating to see who can assert themselves in that aspect of the fight.
 |
|
 |
| 207 cm
19
273
4 - 0 - 0 |
|
195 cm
19
245
2 - 2 - 0 |
Basic striking
Very quick
|
|
Decent boxing
Solid chin
|
|
| |
|
Ladies and gentlemen. This fight is 5 rounds, for the heavyweight championship of the world!
Introducing the champion to my left, fighting out of the red corner.
With a record of 4 - 0 - 0, fighting out of Las Vegas, Darth Mauler!
And introducing the challenger to my right, fighting out of the blue corner.
With a record of 2 - 2 - 0, fighting out of Amsterdam, Clubber Sang!
The judges for this bout are Yukihiro Yamamoto, Yukihiro Shimada and Ren Mimura.
The bell rings for round one and we are underway!
Mauler with a hook.
Sang connects with a leg kick.
Mauler lands an overhand left. A wild punch that just about connected.
Mauler throws a body shot but no joy.
Mauler throws a hook to the body but it doesn't connect.
Sloppy strikes from Sang. Those never looked like landing.
Sang misses with a half-hearted attempt at a head kick.
A jab from Mauler finds it's way through Sang's defenses.
Jab from Mauler.
Sang tries a switch kick but it misses it's target.
Sang has his head snapped back a nice jab. A little nod from Sang there as he acknowledges the shot.
Sang misses with an uppercut.
Sang fakes a couple of low kicks, before throwing one on the third attempt. It connects and Mauler has to reset his feet before getting ready to engage.
Clubber Sang seems to be the more aggressive standup fighter in this bout.
Fantastic stuff here - a very entertaining period of action, which has drawn cheers from the crowd.
Mauler digs a good hook to Sang's body.
Mauler has managed to clinch.
Mauler digs a right hand into Sang's ribs. Those have got to be taking their toll on Sang's gas tank.
Sang looks winded!
Sang avoiding damage as Mauler throws knees to the body.
A short right from Mauler on the inside.
A left hand lands to the body for Mauler.
That's one minute gone in the round.
Mauler is working Sang over against the ropes.
Mauler lands punches inside but they're not really causing much damage.
Mauler pushes Sang back against the ropes and unloads with a body punch.
Mauler tries to throw a body punch but Sang avoids it by throwing Mauler back against the ropes.
Sang misses the knee to the body. Nice hip positioning from Mauler.
Mauler blocks a knee to the body. He'll have a nicely bruised forearm in the morning.
Sang missing with knees to the body.
Mauler leaning against his opponent.
Mauler tries to land a knee to the body but he is off balance and Sang avoids it.
Mauler tries a body shot but Sang blocks it.
Mauler tries a knee to the head but he's missed.
That's two minutes gone in the round.
Mauler lands a body shot.
Mauler scores with a hook to the body.
Mauler lands with a left to the head.
Mauler scores with a hook to the body.
An uppercut to the body lands inside from Mauler.
Sang takes a shot to the head.
It looks like Clubber Sang has been cut.
Mauler lands a body shot.
This has been an exciting period of action!
Mauler tries to land a knee to the body but he is off balance and Sang avoids it.
A left hand lands to the body for Mauler.
Mauler makes some space for himself and lands an uppercut.
Mauler misses with a punch to the body.
Mauler tried to land a shot to the body but connects with Sang's elbow.
That's three minutes gone in the round.
Mauler lands on the inside with an uppercut.
Mauler leaning against his opponent.
Mauler tries to throw a body punch but Sang avoids it by throwing Mauler back against the ropes.
A right hook to the body lands for Mauler.
Mauler taking a breather.
The two fighters are working to gain dominance in the clinch.
Both guys are working to get underhooks.
Sang tries a knee to the head but Mauler blocks it.
Mauler cracks Sang with a nice body shot.
Mauler makes some space for himself and lands an uppercut.
That's four minutes gone in the round.
Mauler blocks a knee to the body. He'll have a nicely bruised forearm in the morning.
Mauler digs a right hand underneath Sang's ribcage. Sang let out a lung full of air as it connected.
Mauler stays in close to his opponent and throws a right hand to the body.
Mauler lands a body punch.
Mauler lands a body shot in the clinch.
Mauler lands with a quick shot inside that doesn't really do much damage.
Mauler trying to land knees to the body.
Mauler goes for a body shot but it's blocked.
Mauler lands a body shot in the clinch.
Mauler lands an uppercut.
The fans in attendance giving it up for the two fighters, who have really let it all hang out in the last minute or so!
Sang managing to block the knees to the body from Mauler.
And that is the end of the round. The fighters go back to their corners.
Darth Mauler dominated that round.
The cut man is working on Clubber Sang's cut.
The fighters get back to their feet, the hooter sounds and we're back to the action!
Sang throws a leg kick but he was too far away and it doesn't land.
Sang throws a leg kick but Mauler checks it.
Sang swings away but doesn't land with a series of punches.
Mauler is really dominating this fight. Is there anything that Sang can do to turn this around?
Mauler forces Sang back against the ropes and clinches.
A right hook to the body lands for Mauler.
Mauler throws a hook to the body. More of an arm punch but it's all scoring with the judges.
A body shot lands from Mauler.
Mauler tries to throw a body punch but Sang avoids it by throwing Mauler back against the ropes.
Mauler cracks Sang with a nice body shot.
Mauler presses Sang against the ropes and delivers a mid-strength body shot.
We've had a slow start to the round here - hopefully the action picks up.
Mauler stalling here - the referee won't stand for too much of that.
Sang is breathing heavily.
Mauler scores with a shoulder strike.
That's one minute gone in the round.
Mauler scores with a shot to the side of Sang's head.
Mauler lands a body punch - he's looking to wear down Sang.
Darth Mauler has scored more points in the clinch so far.
The fighters are starting to perspire pretty heavily.
Mauler with the Thai clinch. He's looking to land a big knee but he's not managed it this time.
Sang is working hard here but doesn't seem to be able to control effectively, up against the ropes.
Mauler tried to land a shot to the body but connects with Sang's elbow.
Mauler digs a right hand into Sang's ribs. Those have got to be taking their toll on Sang's gas tank.
Mauler lands a right hand.
Mauler misses the knee to the body. Nice hip positioning from Sang.
Mauler lands a body shot in the clinch.
Mauler tries a knee to the head but Sang blocks it.
Mauler content to slow the pace in the clinch.
That's two minutes gone in the round.
Mauler avoiding damage as Sang throws knees to the body.
Mauler doesn't land with the attempted body shot.
A body shot lands from Mauler.
Sang blocks a knee to the body. He'll have a nicely bruised forearm in the morning.
Mauler misses with a knee strike.
Mauler blocks a body shot from Sang.
Sang blocks a body shot from Mauler.
A right hand to the body from Mauler.
Mauler misses with a shot to the kidneys.
Mauler putting his Muay Thai to good use. He has Sang in a tight clinch and is doing some damage with knees to the body.
The crowd cheering loudly, showing their appreciation for the quality fight we're seeing here.
Mauler will no doubt start fighting again in a minute but for now he's just having a little rest, leaning Sang up against the ropes.
That's three minutes gone in the round.
Sang blocks a knee to the body. He'll have a nicely bruised forearm in the morning.
Mauler digs a right hand underneath Sang's ribcage. Sang let out a lung full of air as it connected.
Mauler has Sang pressed against the ropes.
Mauler stays in close to his opponent and throws a right hand to the body.
Mauler controlling the action here for a moment.
Mauler lands a body punch.
That's four minutes gone in the round.
Mauler lands a body punch.
Mauler lands a body punch - he's looking to wear down Sang.
An uppercut to the body lands inside from Mauler.
Sang managing to block the knees to the body from Mauler.
A hook to the body from Mauler.
Good body shot from Mauler.
Mauler lands a body punch.
Mauler stalling here - the referee won't stand for too much of that.
The crowd thankful this round is nearly over.
A right hand to the body from Mauler.
Nice body punch from Mauler.
And that is the end of the round. The fighters go back to their corners.
Darth Mauler dominated that second round.
The cut man is working on Clubber Sang's cut.
The corners get their ten second warning. Both fighters stand from their stools and stare each other down, ready to get back to the action.
Sang takes one to the side of the head.
Sang takes a shot to the eye socket. That's gotta hurt.
Mauler scores with a sloppy right hand. Sang should have avoided that one.
Sang throws a solid leg kick but Mauler takes the impact on his shin and smiles at Sang.
Mauler is looking to counter with a shot to the body.
Sang has tried to improve his agility in the runup to this fight.
Mauler lands with a good body shot.
Clubber Sang is looking to throw some combinations by the looks of things.
Sang takes a big uppercut there. He seems a bit wobbly but no, he's OK.
Sang shapes like he's going to throw a leg kick but settles back down.
Mauler fakes high and swings low for a body shot but Sang manages to avoid it.
A jab lands there for Mauler.
Mauler has taken the fight to the clinch.
Mauler throws a blind hook that connects with the side of Sangs head.
Mauler lands with a light punch inside.
Wooooo! Give it up for these two warriors! They are putting on a show!
Mauler looking to throw knees to the head but Sang is blocking nicely.
Mauler lands a left hand.
Sang blocks a knee to the body. He'll have a nicely bruised forearm in the morning.
Sang takes a big intake of breath there - he's definitely tired.
That's one minute gone in the round.
Mauler misses with a body punch.
Mauler lands a nice looking hook to the body, against the ropes.
Mauler is pushing Sang up against the ropes, for a bit of lean and pray action. Action being used the in the loosest possible sense of the word.
Mauler lands a left hand that snaps the head of Sang backwards.
Sang struggles to land a body shot inside as Mauler controls his hands.
Mauler struggles to land a body shot inside as Sang controls his hands.
Mauler struggles to land a body shot inside as Sang controls his hands.
Sang blocks a body shot from Mauler.
Mauler misses with a punch to the body.
That's two minutes gone in the round.
Mauler misses with a body punch.
Mauler lands a right hand.
Mauler avoiding damage as Sang throws knees to the body.
Mauler lands a hook to the side of the head.
Mauler misses with a hook to the ribs.
Mauler tried to land a shot to the body but connects with Sang's elbow.
Sang tries to land knees in the clinch but Mauler avoids the damage to the body.
Mauler is using his height advantage well here, landing a good percentage of his punches.
Mauler tries to land a knee to the head but Sang blocks with his arms.
Mauler can't find room to land a body shot as Sang controls the action.
Mauler on the defensive, avoiding the knees to the body.
Sang throws a punch but it's blocked by Mauler.
That's three minutes gone in the round.
Mauler avoiding damage as Sang throws knees to the body.
Mauler makes some space for himself and lands an uppercut.
Sang prevents a body shot from Mauler.
Mauler lands a nice looking hook to the body, against the ropes.
Mauler struggles to land a body shot inside as Sang controls his hands.
Mauler working some nice short punches in the clinch.
Mauler scores with a hook to the body.
Mauler tries to land a knee to the head but Sang blocks with his arms.
Sang with an attempt at a knee that misses.
Mauler stalling the fight.
Sang is trying to slow down the pace of the fight but Mauler is keeping busy.
That's four minutes gone in the round.
Mauler lands with a quick shot inside that doesn't really do much damage.
Mauler makes some space for himself and lands an uppercut.
Mauler misses the knee to the body. Nice hip positioning from Sang.
Mauler stays in close to his opponent and throws a right hand to the body.
Mauler tries to land a shot to the body but it's blocked.
Sang on the defensive, avoiding the knees to the body.
Mauler cracks Sang with a nice body shot.
Mauler working some nice short punches in the clinch.
Fantastic stuff here - a very entertaining period of action, which has drawn cheers from the crowd.
Mauler presses Sang against the ropes and delivers a mid-strength body shot.
Mauler avoiding damage.
And that is the end of the round. The fighters go back to their corners.
Darth Mauler clearly takes that round.
The cut man is working on Clubber Sang's cut.
The referee calls time. The cornermen exit stage left and we're back to business.

Sang lunges in with swinging rights and lefts but Mauler circles away quickly and effectively.
Mauler rushes Sang and pushes him back against the ropes in a clinch.
Sang on the defensive, avoiding the knees to the body.
A short right from Mauler.
Sang swings wildly with an uppercut but Mauler uses good head movement to avoid it.
Mauler lands a shoulder strike.
Mauler softening up his opponent with strikes, against the ropes.
We've had a slow start to the round here - hopefully the action picks up.
A short right from Mauler.
Mauler misses with a shot to the kidneys.
Sang misses with some punches.
Mauler is leaning against Sang and scores with a nice uppercut to the body.
Sang is absolutely dripping with sweat - he looks exhausted.
That's one minute gone in the round.
Mauler missing with knees to the body.
Mauler lands a body shot.
Sang blocks a body shot from Mauler.
Sang can't find room to land a body shot as Mauler controls the action.
Mauler lands a body punch.
Mauler digs a right hand into Sang's ribs. Those have got to be taking their toll on Sang's gas tank.
Mauler lands a shot to the body.
Mauler lands with a short punch from the clinch.
A shot in the inside from Mauler.
Sang is rocked!
A bit of stalling here from Mauler.
Sang's head jolts backwards as he takes an uppercut right on the button!
Sang is still on wobbly legs! Can Mauler finish him?
That's two minutes gone in the round.
Mauler working on landing some head shots here - that one got through nicely.
Mauler creates a bit of distance and cracks Sang with a big uppercut! Sang goes down! The referee pushes Mauler away into a neutral corner and starts the count. 4,5,6,7. Will Sang make it up in time? He's still flopping around all over the place! The referee has called off the fight! Mauler takes it!
Ladies and gentlemen, after 2:21 of round 4, we have a winner by way of TKO (Punch). Darth Mauler!
Darth Mauler retains his heavyweight title!
Darth Mauler seemed lost for words in his post fight interview but he remembered to thank his fans and directed everyone to his website.
|
|
|
|
|
|
|
|
|
|
|
|
|
|
|
|
|
|
|
|
|
|
|
| S |
C
A |
G |
S |
C
B |
G |
|
S |
C |
G |
|
energy
A | B |
|
hype
A | B |
|
pop
A | B |
|
mgr
A | B |
|
FIGHT
RATING
52% |
|
|
|
|
|
|
|
|
|
|
