 |
GC 383 Bleak vs Harling PBP Commentary |
Undercard bout
|
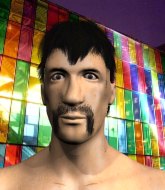
Coming up we have a light heavyweight MMA rules bout between Kyrylo Lagounov (ranked 23686 p4p, 1658 weight class) and Joyful Beatdown (ranked 716 p4p, 226 weight class). The key to victory for Kyrylo Lagounov has got to be keeping the fight on the feet.
 |
|
 |
| 184 cm
22
205
3 - 5 - 0 |
|
195 cm
20
212
5 - 0 - 0 |
BJJ Blue Belt
Excellent boxer
Granite chin |
|
BJJ Blue Belt
Good kicks
Good gas tank |
|
| |
|
Ladies and gentlemen. This fight is 3 rounds, in the light heavyweight division.
Introducing the fighter to my left, fighting out of the red corner.
With a record of 3 - 5 - 0, fighting out of Hilo, Kyrylo Lagounov!
And introducing the fighter to my right, fighting out of the blue corner.
With a record of 5 - 0 - 0, fighting out of Las Vegas, Joyful Beatdown!
The judges for this bout are Tiny Johnson, Gwen Towbar and Chris Downing.

The bell rings for round one and we are underway!
Lagounov misses with a double jab
enabling Beatdown to counter with a crisp jab.
Beatdown throws a head kick that misses.
Beatdown slips a jab and a cross from Lagounov.
Lagounov uses good footwork to avoid the strikes from Beatdown.
Lagounov moves to clinch but Beatdown breaks away
and Beatdown counters with a nice uppercut.
Beatdown drops his hands momentarily and Lagounov takes advantage with a crisp shot to the head.
A decent looking body kick lands there for Beatdown.
Beatdown throws a head kick that Lagounov semi-blocks.
Beatdown is moving around nicely and scores here with a single head shot.
This has been an exciting period of action!
Beatdown lands a brutal head kick. Lagounov looks out on his feet and Beatdown throws more strikes until the ref is forced to stop the fight!
Ladies and gentlemen, after 0:53 of round 1, we have a winner by way of TKO (Kick and Punches). Joyful Beatdown!
After the fight, Joyful Beatdown was humble in paying tribute to his opponent but made it clear he wants to go on to bigger and better things. It seemed to go down well with the crowd who cheered him loudly.
Kyrylo Lagounov was interviewed post fight and said '...I will get stronger, but still thanks you managers, fans, Big Chief nutrition, teammates, coaches and everyone who makes this operation work.'.
|
|
|
|
|
|
|
|
|
|
|
|
|
|
|
|
|
|
|
|
|
|
|
| S |
C
A |
G |
S |
C
B |
G |
|
S |
C |
G |
|
energy
A | B |
|
hype
A | B |
|
pop
A | B |
|
mgr
A | B |
|
FIGHT
RATING
80% |
|
|
|
|
|
|
|
Undercard bout
|
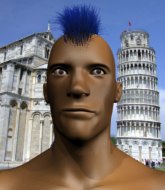
Coming up we have a lightweight MMA rules bout between Wedge Antilles (ranked 4044 p4p, 5332 weight class) and Walter Wiener (ranked 450 p4p, 539 weight class). Wedge Antilles could well score a knockout today. He has the power to get to Walter Wiener's chin.
 |
|
 |
| 180 cm
20
165
2 - 3 - 0 |
|
225 cm
23
164
7 - 8 - 0 |
BJJ Purple Belt
Solid Muay Thai
Granite chin |
|
Dangerous GnP
Excellent MT
Powerful |
|
| |
|
Ladies and gentlemen. This fight is 3 rounds, in the lightweight division.
Introducing the fighter to my left, fighting out of the red corner.
With a record of 2 - 3 - 0, fighting out of Amsterdam, Wedge Antilles!
And introducing the fighter to my right, fighting out of the blue corner.
With a record of 7 - 8 - 0, fighting out of Las Vegas, Walter Wiener!
The judges for this bout are Robert Twigg, Gwen Towbar and Chris Downing.
The bell rings for round one and we are underway!
Wiener moves away from the strike by Antilles.
Antilles misses with a straight right.
Wiener only half commits to the counter leg kick.
Antilles tries to clinch up.
Wiener on the wrong end of an overhand right that came out of nowhere.
Antilles tries to land with a swinging hook to the body but Wiener was well out of range. Poor timing from Antilles.
Wiener now looks to counter with a shot at the body.
Wiener tries a head kick but it misses.
Wiener swings and misses with a hook to the body.

Antilles rushes Wiener and presses him up against the cage.
Antilles lands punches inside but they're not really causing much damage.
A short right from Antilles.
We've had a slow start to the round here - hopefully the action picks up.
Antilles lands a body shot in the clinch.

Wiener escapes the clinch and we're back to striking.
Wiener looks for the body kick but Antilles saw that one coming.
Wiener misses with a head kick.
Antilles throws a combination but it was largely blocked by Wiener.

That's one minute gone in the round.
Antilles moves into the clinch successfully.
An uppercut on the inside fails to land for Antilles.
Antilles struggles to land a body shot inside as Wiener controls his hands.
Wiener blocking some punches.
Wiener is trying to push Antilles away but Antilles has him pressed against the cage, so he's going nowhere.
Wiener misses with a knee strike.
Antilles keeps control of Wiener as he tries to wriggle out of the double underhooks.
Wiener tries to land a knee to the body but he is off balance and Antilles avoids it.
Antilles lands with a quick shot inside that doesn't really do much damage.
Wiener wants to break free but Antilles has control.
Antilles cracks Wiener with a nice body shot.
Antilles has a couple of punches blocked by Wiener.
Antilles misses with some punches.
Wiener blocks a punch to the side of the head.
Wiener blocks an uppercut.
Antilles throws a punch but it's blocked by Wiener.

That's two minutes gone in the round.
A head punch blocked on the inside by Wiener.
Antilles digs a right hand underneath Wiener's ribcage. Wiener let out a lung full of air as it connected.
Antilles misses with the head strike.
Nice body punch from Antilles - that landed with a thud.
Wiener blocks an uppercut.
Antilles throws a punch but it's blocked by Wiener.
Wiener breaks the clinch and we're back to striking at distance.
Antilles misses the jab.
Wiener raises up his leg as if looking to counter with a high kick.
Antilles has taken the fight to the clinch.
We've seen a great period of action over the last minute or so - credit to both fighters for going all out!
Antilles tries a shoulder strike but it doesn't do any damage.
Wiener slows down the pace here.
Antilles misses with a punch on the inside.
Wiener tries to land knees in the clinch but Antilles avoids the damage to the body.

That's three minutes gone in the round.
Wiener dictating the pace here, as the fighters clinch against the cage.
Wiener is looking to score with knees to the body. Maybe he'll change it up and go body then head. Antilles is defending well for now.
Wiener stalling.
Antilles lands with a quick shot inside that doesn't really do much damage.
Antilles gets through Wiener's defenses to land a nice punch to the side of the head.
Wiener blocks a punch to the side of the head.
A nice right hand lands inside from Antilles.
 Wiener is rocked! Wiener is rocked!
Antilles misses with the head strike.
Wiener is still on wobbly legs! Can Antilles finish him?
Antilles lands a right hand that snaps the head of Wiener backwards.
Wiener is trying to force a seperation but Antilles has the dominant position.
Wiener misses with a knee strike.
Antilles lands a body shot.
Antilles misses with some punches.
Antilles throws a big uppercut that drops Wiener! More strikes from Antilles and the referee jumps in to stop the fight! Wiener lies dazed against the cage as Antilles celebrates with his cornermen!
Ladies and gentlemen, after 3:48 of round 1, we have a winner by way of TKO (Strikes). Wedge Antilles!
Wedge Antilles spent the whole post fight interview bigging himself up. It didn't go down that well with the fans after a while as they thought it was a bit arrogant.
|
|
|
|
|
|
|
|
|
|
|
|
|
|
|
|
|
|
|
|
|
|
|
| S |
C
A |
G |
S |
C
B |
G |
|
S |
C |
G |
|
energy
A | B |
|
hype
A | B |
|
pop
A | B |
|
mgr
A | B |
|
FIGHT
RATING
44% |
|
|
|
|
|
|
|
Undercard bout
|
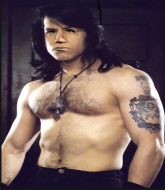
Coming up we have a featherweight MMA rules bout between Patrick Slinger (ranked 3707 p4p, 2839 weight class) and Peter Tiernan (ranked 337 p4p, 272 weight class). Slinger comes to the cage accompanied by Hail Mary. Peter Tiernan is the more experienced fighter, so let's see if that makes a difference tonight.
 |
|
 |
| 170 cm
20
145
3 - 2 - 0 |
|
162 cm
29
150
8 - 5 - 0 |
Good wrestling
Counter fighter
Very strong |
|
Good wrestler
Excellent boxer
Granite chin |
|
| |
|
Ladies and gentlemen. This fight is 3 rounds, in the featherweight division.
Introducing the fighter to my left, fighting out of the red corner.
With a record of 3 - 2 - 0, fighting out of Los Angeles, Patrick Slinger!
And introducing the fighter to my right, fighting out of the blue corner.
With a record of 8 - 5 - 0, fighting out of St Petersburg, Peter Tiernan!
The judges for this bout are Gwen Towbar, Robert Twigg and Frank Dennis.
The bell rings for round one and we are underway!
Slinger tries a switch kick but it misses it's target.
Tiernan throws the kick towards the body but Slinger avoids it.
Slinger takes a step back and watches a body kick go sailing past his mid section.

Slinger shoots in for a takedown and gets it.

Slinger is looking for a kimura. It's pretty deep but Tiernan still has the half guard so he's probably OK. Oh, Tiernan has exploded into a beautiful escape there and after a quick scramble, he's ended up in side control on top! Nice work!
Tiernan wants to control but Slinger is keeping him busy.
Slinger can't do much from the bottom here.
We've had a slow start to the round here - hopefully the action picks up.
Slinger is looking for a sweep.

Tiernan tries for a kimura. Not really close to a finish though.
Tiernan trying to control the position but Slinger is working away.
That's one minute gone in the round.
Slinger tries to control the position but he's not in luck - Tiernan easily slips into full mount!
Tiernan trying to control but he's not successful this time.
Slinger is working to get back to half guard.
Tiernan working for a guillotine from mount but Slinger is in no mood to give up.
Tiernan jumps to side control looking for an arm triangle but Slinger manages to avoid the submission attempt.
Tiernan wants to stand but Slinger is controlling his arm.
Slinger struggling a bit here.
That's two minutes gone in the round.
Slinger looks to move to half guard but instead Tiernan has passed into mount! Damn!
Slinger wants to hold on but Tiernan pushes him away.
Tiernan takes a little breather and maintains the position. The referee will be looking for him to stay active from such a dominant position though.
Slinger tries to get back to half guard but can't.
Tiernan controlling the pace for now.
Tiernan trying to control but he's not successful this time.
Tiernan prevents Slinger from getting the reversal.
Slinger is writhing around trying to get back to his feet.
Slinger is wriggling around trying to escape.
Tiernan controlling from the full mount.
That's three minutes gone in the round.
Tiernan moves to take his opponent's back.
Tiernan looking for the RNC.
Slinger breaks Tiernan's hooks off and manages to turn into his guard.
Tiernan keeping moving, preventing Slinger from controlling successfully.
Tiernan wants to stand and escape but Slinger is having none of it.
A real slowdown in the pace of the fight for a moment, as Tiernan holds on and takes a little breather.
Tiernan keeping moving, preventing Slinger from controlling successfully.
Slinger drops back for a leg but he's not going to get it - he lets go and Tiernan dives on top into guard.

Slinger is throwing his legs up, looking for submissions. Tiernan is aware though and is defending well.
Slinger is throwing his legs up, looking for submissions. Tiernan is aware though and is defending well.
The ref warns both fighters not to hold the cage as they work up against the meshing.
Tiernan sneaks a leg through and gets to half guard. That was like a knife through butter how easily he passed Slinger's guard.

That's four minutes gone in the round.
Slinger keeping his head moving to avoid the ground and pound.
Tiernan is keen to just control but Slinger is a slippery customer.
Slinger moves into full guard.
Slinger avoiding any damage from the ground and pound.
The fighters are pressed up against the cage, both looking to find a bit of space to work.
Slinger being controlled here, momentarily.
Tiernan wants to stand but Slinger has a closed guard, so he can't escape.
Slinger is throwing his legs up, looking for submissions. Tiernan is aware though and is defending well.
Slinger throwing his legs up looking for a triangle.
Slinger has an active guard here but Tiernan has managed to pass into half guard.
Tiernan seems to have lost interest with the ground game and is thinking about standing back up.
And that is the end of the round. The fighters go back to their corners.
Peter Tiernan dominated that round.
The fighters' corners scream their final instructions, as the referee calls time. Here we go, back to the action!

Sloppy strikes from Tiernan. Those never looked like landing.
Slinger half commits to a counter takedown before pushing away, out of range.
Slinger drives through with a really nice takedown into side control.
Slinger goes for an armbar! This could be all over! Wait, no, Tiernan rolls with the submission and now he's on top in Slinger's guard! Nice work there by Tiernan!
Tiernan works a leg free and moves into half guard.
Tiernan prevents Slinger from improving his position.
Tiernan wants to control but Slinger is keeping him busy.
Slinger looking for subs from the bottom but Tiernan mounts him!
Tiernan lands a shot to the body, followed up by a shot to the exposed head of his trapped opponent.
The crowd are loving this. Great action here.
Slinger is looking to get to half guard.
Tiernan lands a shot to the body, followed up by a shot to the exposed head of his trapped opponent.
Tiernan takes a little breather and maintains the position. The referee will be looking for him to stay active from such a dominant position though.
Tiernan is thinking about an arm triangle here, looking to tighten it up before moving to side control. Slinger can see it coming though and defends well with a couple of strikes to the head and some good arm positioning.
That's one minute gone in the round.
Slinger is working to get back to half guard.
Slinger tries to hold on but Tiernan pushes him away.
Slinger is going to have to think about doing something other than just controlling because Tiernan is managing to avoid having the position dictated to him.
Tiernan controlling his opponent.
Tiernan punching from mount but Slinger doing a good job of avoiding damage.
Slinger tries to lock up and control but Tiernan gives him a forearm to the face and pushes him away.
Tiernan takes a little breather and maintains the position. The referee will be looking for him to stay active from such a dominant position though.
Slinger manages to regain half guard. Good work.
Tiernan wants to lay and pray for a moment but Slinger keeps working.
Slinger has improved his flexibility recently so we will have to see if he can use that to his advantage.
That's two minutes gone in the round.
Slinger actively working from the bottom here.
Slinger tries to get to full guard but Tiernan has control of the leg.
Slinger makes his way to full guard. A much better position for Slinger.
Tiernan trying to control the position from guard on top but Slinger is wriggling around, looking for whatever he can.
Slinger throwing his legs up looking for a triangle.
Slinger is throwing his legs up, looking for submissions. Tiernan is aware though and is defending well.
Slinger has an omoplata and is looking to use it perhaps as a submission or perhaps to transition. Tiernan is in a bit of discomfort here, but he's managed to free himself and has dived into side control! That didn't work out too well for Slinger.
Tiernan has been the more effective fighter overall so far.
Tiernan lands a nice forearm strike.
That's three minutes gone in the round.
Slinger is trying to get back to half guard.
Tiernan lands a decent elbow from side control.
Tiernan tries to advance to mount but Slinger denies him.
Slinger looks to move to half guard but instead Tiernan has passed into mount! Damn!
Tiernan avoids the attempt from Slinger to control.
Tiernan throwing sloppy strikes, which aren't doing any damage.
Slinger has given up his back.
Slinger trying to control the hands but Tiernan won't let him.
Tiernan is looking to control Slinger but Slinger is wriggling around and keeping busy.
That's four minutes gone in the round.
Slinger is trying to break free.
Tiernan wants to control but Slinger is keeping busy.
Tiernan controlling from the back.
Slinger tries to escape but Tiernan has the hooks in and won't let him break free.
Tiernan trying desperately to keep hold of the dominant position.
Slinger trying to control the position but Tiernan manages to sink in the hooks.
Slinger is in bad spot here.
Tiernan trying to secure his dominant position for a moment - making sure Slinger doesn't escape.
Well, with Tiernan on his back, surely it's only a matter of time before Slinger is tapping out... Can he escape the position?
Tiernan struggling to land strikes to the head as Slinger covers up.
And that is the end of the round. The fighters go back to their corners.
Peter Tiernan showed his class in that round. I'd imagine he'll take it on all the scorecards.
Well, the break between rounds is over. Let's get back to the scrappin! This is the final round!

Slinger shoots in for a takedown! He's got it and he's managed to land in side control! That's better than Slinger was expecting from the takedown attempt, I'm sure!
Slinger looking for an arm triangle but it's way too loose to do anything.
Tiernan gets back to half guard.
Slinger seems to be working for a kimura but Tiernan defends the submission attempt.
Slinger prevents Tiernan from improving his position.
We've had a slow start to the round here - hopefully the action picks up.
Slinger is trying a forearm choke
I don't think that's going to do much at this level of the game.
Tiernan has no desire to be mounted, so is trying to control. Slinger is working away from the top position though.
That's one minute gone in the round.
Slinger is thinking about going for an arm triangle but he can't free his leg.
Tiernan gets back to full guard.
Slinger trying to control the position from guard on top but Tiernan is wriggling around, looking for whatever he can.
Slinger tries to free his leg and advance position but Tiernan is retaining full guard.
Slinger looking to sit in guard and control but Tiernan gets the butterfly guard and sweeps. He's now in the guard on the top.
Tiernan postures up to throw the ground and pound strikes but they don't connect.
Slinger is trying to control the position from the bottom.
Slinger avoiding any damage from the ground and pound.
Patrick Slinger has stepped it up - he knows he needs a finish here!
That's two minutes gone in the round.
Tiernan slips nicely into half guard.
Slinger has hold of Tiernan's hands but Tiernan slips his arm to the side and lands an elbow.
Tiernan tries to pass the half guard into mount. Slinger knows what he's doing though and prevents the attempt.
Tiernan trying to control the pace.
It looks like Tiernan is going to stand back up.
Peter Tiernan has got the better of the ground game so far.
Slinger looking for submissions off his back.
Slinger looking for submissions off his back.
Slinger tries to roll over but Tiernan keeps him under control.
That's three minutes gone in the round.
Tiernan seems to have lost interest with the ground game and is thinking about standing back up.
Slinger wants to control but Tiernan passes into side.
Slinger is looking to reverse the position.
Tiernan moving around in side mount but really he's just happy to control for now.
Tiernan tries to cartwheel into mount but he doesn't manage it.
Slinger gets back to half guard.
Slinger looking to work for a kimura from the bottom.
Tiernan is trying for a guillotine from the top but the pressure isn't in the right place so Slinger is just riding it out for now. Tiernan eventually gives up the hold.
That's four minutes gone in the round.
Tiernan thows a wild elbow that connects with the canvas.
Tiernan seems to be looking for submissions.
Slinger tries to strike from the bottom but it doesn't land.
Slinger actively working from the bottom here.
Tiernan is working for a kimura but Slinger is defending it quite comfortably.
Boooooooooooooooooooo!!! God, this has been a terrible round. Come on you two, sort yourselves out!
Slinger is looking to improve his position.
And that's the end of the fight!
Peter Tiernan comfortably won the final round on my scorecard.
Well Tiernan has outworked and out performed his opponent in all aspects of the game today. He was simply too good and the decision should be no more than a formality. Over to the ring announcer for the scorecards.
Ladies and gentlemen, after 3 rounds of action, we go to the scorecards for a decision.
Judge Gwen Towbar scores the fight 27:30
Judge Robert Twigg scores the fight 27:30
Judge Frank Dennis scores the fight 27:30
In favor of your winner, by unanimous decision... Peter Tiernan!
Patrick Slinger was interviewed post fight and said 'Congratulations to my opponent. He got the better of me, and deserves all the credit in the world for his hard work. I hope we meet again.'.
|
|
|
|
|
|
|
|
|
|
|
|
|
|
|
|
|
|
|
|
|
|
|
| S |
C
A |
G |
S |
C
B |
G |
|
S |
C |
G |
|
energy
A | B |
|
hype
A | B |
|
pop
A | B |
|
mgr
A | B |
|
FIGHT
RATING
35% |
|
|
|
|
|
|
|
Undercard bout
|
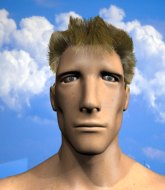
Coming up we have a middleweight MMA rules bout between Thor White (ranked 1392 p4p, 3566 weight class) and Voltsz Diesel (ranked 198 p4p, 466 weight class). Diesel has chosen Outerspass - Frosty as his entrance music. These two fighters really are very evenly matched on the feet - it will be fascinating to see who can assert themselves in that aspect of the fight.
 |
|
 |
| 189 cm
21
195
6 - 1 - 0 |
|
189 cm
21
195
2 - 1 - 0 |
Good wrestling
Solid boxing
Cardio machine |
|
Good wrestler
Good elbows
Good gas tank |
|
| |
|
Ladies and gentlemen. This fight is 3 rounds, in the middleweight division.
Introducing the fighter to my left, fighting out of the red corner.
With a record of 6 - 1 - 0, fighting out of Las Vegas, Thor White!
And introducing the fighter to my right, fighting out of the blue corner.
With a record of 2 - 1 - 0, fighting out of Amsterdam, Voltsz Diesel!
The judges for this bout are Robert Twigg, Alan Glass and Stewart Dunkirk.
The bell rings for round one and we are underway!
Diesel keeping a good distance there, avoiding the body shot.

Diesel forces White back against the cage and clinches.
White blocks a couple of punches on the inside.
White avoids a wild elbow strike from Diesel.
Diesel misses with an elbow over the top.
A short right from Diesel on the inside.
Diesel lands a shoulder strike.
A nice glancing elbow lands by Diesel.
Diesel misses with some punches.
Nice elbow from Diesel.
Diesel misses with some punches.
White takes an elbow to the forehead.
 It looks like Thor White has been cut. It looks like Thor White has been cut.
White avoids the elbow strike from Diesel, against the cage.
White jumps guard.
The ref warns both fighters not to hold the cage as they work up against the meshing.
This is a great period of action - very entertaining stuff!
White working a defensive guard here.
That's one minute gone in the round.
White working from the bottom, still in full guard. He's managed to get a loose triangle. Diesel doesn't seem to be doing much to defend here, obviously he feels comfortable in the position. Diesel manages to throw the legs off his shoulder and he's back into guard - no problem.
We've been hearing good reports from White's training camp. Apparently he has been rolling around with some good quality BJJ practitioners and has been sharpening his skills. Let's see if that has an impact on the fight today.
White is working actively off his back, looking to secure an arm or perhaps work for a triangle.
White has a loose triangle. He'll be looking to tighten that up but Diesel can see exactly what he's planning and manages to posture up and free himself.
White looking for a guillotine here but Diesel defends easily.
White keeping full guard, as Diesel tries to pass.
That's two minutes gone in the round.
White looking for submissions off his back, moving his hips, looking for an opening.
White working for a triangle but Diesel defends it easily.
Diesel slows down the pace of the fight, as he sits in guard.
White is trying to keep Diesel in close.
That's three minutes gone in the round.
White throws his legs up looking for a submission but Diesel uses it to pass to side control.
White is sneaking out the side here. He's bucked Diesel off and has taken his back!
White has the rear naked choke here! This is very bad for Diesel! Can he survive? No! He's out! White gets to his feet and celebrates with his cornermen. He looks absolutely delighted. In the post fight interviews he takes time to thank his parents and everyone who has believed in him from the start. How sweet.
Ladies and gentlemen, after 3:48 of round 1, we have a winner by way of Submission (RNC). Thor White!
An out of breath Thor White thanked his loyal fans in his post fight interview, giving them credit for his success over the course of his career.
|
|
|
|
|
|
|
|
|
|
|
|
|
|
|
|
|
|
|
|
|
|
|
| S |
C
A |
G |
S |
C
B |
G |
|
S |
C |
G |
|
energy
A | B |
|
hype
A | B |
|
pop
A | B |
|
mgr
A | B |
|
FIGHT
RATING
35% |
|
|
|
|
|
|
|
Undercard bout
|
Coming up we have a middleweight MMA rules bout between Hill Billy Hank (ranked 4050 p4p, 1607 weight class) and Frank Karuso (ranked 516 p4p, 231 weight class). Hill Billy Hank could well score a knockout today. He has the power to get to Frank Karuso's chin.
 |
|
 |
| 188 cm
21
200
1 - 1 - 0 |
|
190 cm
20
195
5 - 1 - 0 |
Decent wrestler
Basic striking
Very quick |
|
BJJ White Belt
Excellent MT
Good gas tank |
|
| |
|
Ladies and gentlemen. This fight is 3 rounds, in the middleweight division.
Introducing the fighter to my left, fighting out of the red corner.
With a record of 1 - 1 - 0, fighting out of Montreal, Hill Billy Hank!
And introducing the fighter to my right, fighting out of the blue corner.
With a record of 5 - 1 - 0, fighting out of Las Vegas, Frank Karuso!
The judges for this bout are George Francis, Robert Twigg and Alan Glass.
The bell rings for round one and we are underway!
Karuso throws an uppercut from half a mile away. Hank sees it coming and avoids it easily.
Hank fails with a takedown attempt.
Karuso lands a really nice looking cross but Hank seems unphased.
Hank is looking to take this fight into the clinch.
Karuso paws at his opponent with the jab and then lunges in with a straight, right on the button.
Karuso circles away from the clinch attempt.
Karuso wants to counter the offense by Hank and move into the clinch position.
Karuso waving his hands out in front of him, looking to distract Hank.
Karuso gets taken down but at least he's managed to land in guard.
Hank is standing up over Karuso. Karuso looks to escape but Hank dives into side control.
The ref warns both fighters not to hold the cage as they work up against the meshing.
Karuso is trying to work for a sweep but Hank has mounted him!
That's one minute gone in the round.
Karuso takes a big shot to the head but keeps on trying to improve his position.
Hank wants to control the pace but Karuso is squirming around nicely.
Karuso really trying hard to get back to half guard here.
Hank working the ground and pound effectively.
The fighters are pressed up against the cage, both looking to find a bit of space to work.
Hank controlling his opponent.
That's two minutes gone in the round.
Karuso wants to hold on but Hank pushes him away.
Karuso holding onto his opponent's waist for dear life, as Hank tries to land some strikes to get him to release his grip.
Hank controlling the position easily from mount.
Hank working the ground and pound effectively.
That's three minutes gone in the round.
Hank scores with a couple of good head shots there.
Hank controlling from the full mount.
Hank avoids the attempt from Karuso to control.
You get the feeling that Karuso really doesn't like being in this position too much.
Hank looking to control but Karuso is working nicely, looking to advance position himself.
Karuso tries to hold on but Hank pushes him away.
That's four minutes gone in the round.
Hank landing strikes, looking to finish!
Karuso can't escape the position.
Hank looks to be in better condition than last time we saw him fight. Obviously he's been working hard on his cardio.
Karuso is still trying to improve position.
Hank trying to control but Karuso is having none of it.
Karuso wants to control but Hank is having none of it.
The crowd thankful this round is nearly over.
Hank raining down shots from the mount!
And that is the end of the round. The fighters go back to their corners.
Hill Billy Hank dominated that round.
That's the end of the interval. I'm sure that seemed a lot quicker than a minute for our two fighters! Back to the action.
Karuso scores with a shot to the body.
Karuso misses with a wild body shot.
Hank fakes high and shoots in for a takedown but Karuso avoids it really well and circles away.
Karuso just misses with a punch to the body.
Hank is really dominating this fight. Is there anything that Karuso can do to turn this around?
Hank walks into a left hand.
Hank dives in and scores a takedown into Karuso's guard.
Karuso is looking to stand back up but Hank counters by passing into half guard. Oops... bit sloppy there by Karuso.
Hank seems to be looking for submissions.
We've had a slow start to the round here - hopefully the action picks up.
Hank looking to pass the half guard. Not this time.
That's one minute gone in the round.
Karuso wants to improve his position but Hank is controlling well.
Karuso keeping control of the position.
Karuso wants to control but Hank is keeping busy.
Karuso really doesn't want to stay on the ground with Hank. If he can't get it back to his feet, it's only a matter of time before he'll be tapping out.
Hank seems to be working for a kimura but Karuso defends the submission attempt.
That's two minutes gone in the round.
A lull in the action here being met with boos from the crowd.
Karuso wants to get back to his feet.
Karuso avoiding damage under a succession of punches from Hank.
Karuso is trying to maintain the position but Hank is very close to passing his half guard.

The referee decides to stand the fighters back up.
Karuso slips in close and lands a nice hook before moving back out of range.
Karuso connects with a lovely jab that went straight through the gap between Hank's hands.
Hank ducks under a wild hook from Karuso.
Hank seemed to be looking to counter by closing the distance.
Hank moves out of range as Karuso strikes.
Karuso swings and misses with a hook to the body.
Frank Karuso is looking to keep the fight on the feet at all costs.
That's three minutes gone in the round.
Hank tries to score a power double leg takedown but Karuso sees that one coming and sprawls well. That will dishearten Hank somewhat.
Hank is trying hard to land a takedown here. Karuso sprawls well and keeps this one on the feet.
Karuso wants to counter with a clinch but Hank pushes him away.
That's three failed takedown attempts in the round for Hill Billy Hank. That's going to take a lot out of him.
Hank blocks a jab.
Hank tries to counter by moving into the clinch but Karuso manages to circle out of the way.
Karuso throws a monster uppercut resembling something out of street fighter but it doesn't land.
Hank looking for a takedown here - he's got it.
Hank trying to control but Karuso is working from the bottom.
Hank throws a big right hand that misses.
Hank trying to control but Karuso is working from the bottom.
Karuso wants to control here, rather than go for any submissions from the bottom. At least for now.
That's four minutes gone in the round.
Hank stopping the sweep attempt from Karuso.
Hank passes Karuso's left leg - he's now in half guard.
Hank is working for a submission of some sort.
We get told so often about how wrestlers don't like to be on their backs. Let's see if Karuso can do anything to dispel that myth.
Boooooooooooooooooooo!!! God, this has been a terrible round. Come on you two, sort yourselves out!
Hank throwing shots but they're hitting the canvas more than the man.
And that is the end of the round. The fighters go back to their corners.
Frank Karuso showed his class in that round. I'd imagine he'll take it on all the scorecards.
The minute break is over - no more time for sponges and pep talks - back to the action! This is the final round!
Karuso keeps the fight standing with a nice sprawl.
Karuso lands a pitter patter jab to the forehead of his opponent.
Karuso gets tackled into the cage by Hank. Hank maintains the clinch.
Karuso prevents a takedown attempt there.
Karuso misses with a shot to the kidneys.
Karuso stops a takedown attempt from Hank.
That's three failed takedown attempts in the round for Hill Billy Hank. That's going to take a lot out of him.
Hank tries for a takedown but Karuso manages to get underhooks.
Karuso lands a right uppercut that snaps the head of Hank backwards.
Karuso working aggressively here.
We've had a slow start to the round here - hopefully the action picks up.
Hank wants a takedown.
Karuso lands a left hand that snaps the head of Hank backwards.
Karuso slows down the pace here.
Karuso lands a hook that snaps the head of Hank backwards.
That's one minute gone in the round.
Karuso is trying to drag Hank to the mat but Hank just about manages to keep his footing. He used the cage to his advantage there.
Hank prevents a body shot from Karuso.
Karuso gets double underhooks to prevent a takedown attempt from Hank.
Hank goes for a takedown in the clinch but Karuso prevents it.
A short right from Karuso.
Karuso lands a hook that snaps the head of Hank backwards.
Karuso tries to work over Hank's body with a swooping hook but it only glances the target.
Hank misses with an elbow over the top.
Karuso has been looking to improve his clinch game in recent weeks. Hank seems to have the measure of him in the clinch so far, so let's see if Karuso can turn it around.
Karuso lands a shot to the body.
Karuso lands with a short punch from the clinch.
Hank has a body lock and is looking for a takedown. Karuso is bouncing around trying to prevent the takedown and somehow he has indeed managed to stay on his feet.
Karuso throws a blind hook that connects with the side of Hanks head.
That's two minutes gone in the round.
Hank tries to land a knee to the head but misses.
Hank has Karuso pressed up against the cage and is working for takedown. Karuso manages to improve position though and keeps the fight standing.
Karuso goes for a body shot but it's blocked.
A right hand to the body from Karuso.
Hank drops down looking for an ankle pick but Karuso pulls his leg out and moves away.
Both fighters are breathing heavily.
Hank fails with a takedown attempt.
Karuso jabs at Hank's body.
A jab from Karuso finds it's way through Hank's defenses.
Fantastic stuff here - a very entertaining period of action, which has drawn cheers from the crowd.
Karuso stuffs the takedown attempt from Hank. Hank gets slowly back to his feet.
Hank looks frustrated there after his takedown attempt is stuffed easily.
Karuso tries to counter with a clinch but Hank shakes him off and moves away.
Karuso uses good footwork to get in and out, landing a nice hook.
That's three minutes gone in the round.

Karuso cracks Hank with a big right hand that sends him crashing to the floor. Karuso has the opportunity to follow him to the ground but instead he's beckoning Hank to stand back up!
 Hank is rocked! Hank is rocked!
Hank shoots in for a takedown. "Ole!" shouts Karuso as he jumps to the side.
Oh Hank is still all over the place! His legs are completely gone! Will he be able to recover?!!
Hank walks right into a perfectly timed right hook and goes down hard! He's out cold! The ref cradles Hank limp body while Karuso jumps on to the cage and waves to the roaring crowd. Wow that was just a brutal knockout!
Ladies and gentlemen, after 3:18 of round 3, we have a winner by way of KO (Punch). Frank Karuso!
The defeated Hill Billy Hank had this to say: 'Beats going hungry '.
|
|
|
|
|
|
|
|
|
|
|
|
|
|
|
|
|
|
|
|
|
|
|
| S |
C
A |
G |
S |
C
B |
G |
|
S |
C |
G |
|
energy
A | B |
|
hype
A | B |
|
pop
A | B |
|
mgr
A | B |
|
FIGHT
RATING
49% |
|
|
|
|
|
|
|
Undercard bout
|
Coming up we have a welterweight MMA rules bout between Johnny Somebody (ranked 3341 p4p, 3027 weight class) and Martin Alexander (ranked 431 p4p, 396 weight class). Somebody comes to the cage accompanied by America, Fuck Yeah!. Alexander comes into a darkened arena with his song building. Kurt Kobain kicks in, the lights come on and the crowd goes wild! What a showman! These two fighters really are very evenly matched on the feet - it will be fascinating to see who can assert themselves in that aspect of the fight.
 |
|
 |
| 191 cm
22
186
4 - 4 - 0 |
|
186 cm
30
185
13 - 7 - 0 |
BJJ Purple Belt
Excellent boxer
Cardio machine |
|
Good wrestler
Excellent MT
Good gas tank |
|
| |
|
Ladies and gentlemen. This fight is 3 rounds, in the welterweight division.
Introducing the fighter to my left, fighting out of the red corner.
With a record of 4 - 4 - 0, fighting out of Las Vegas, Johnny Somebody!
And introducing the fighter to my right, fighting out of the blue corner.
With a record of 13 - 7 - 0, fighting out of Las Vegas, Martin Alexander!
The judges for this bout are Wesley Smith, Alan Glass and Frank Dennis.
The bell rings for round one and we are underway!
Somebody throws a body kick but he wasn't in range.
And an attempted straight right on the counter from Alexander! But no joy.
We've been hearing reports that Somebody has been drilling takedowns in recent sessions so let's see if that has an impact on the result of this fight.
Somebody looks for the body kick but Alexander saw that one coming.
Somebody lands a leg kick. The shin dug right into the meat of the thigh.
Somebody avoids a lazy jab quite easily.
Somebody misses with an uppercut. Alexander saw that one coming.
Alexander takes a nasty kick to the mid section... That should keep him thinking. Does he try and block and risk a head kick landing?
Johnny Somebody seems to be the more aggressive standup fighter in this bout.
Alexander thows a left - swing and a miss!
Somebody tried to counter with a leg kick but Alexander avoided it.
Somebody fakes a jab and scores with a low kick.
Alexander throws a looping overhand right but Somebody ducks down to avoid it.
Somebody looked to counter that last move with a leg kick but didn't pull the trigger.
Alexander connects with a jab.
Somebody looks to score with a jab to the body but Alexander is just out of range.
We've had a slow start to the round here - hopefully the action picks up.
Alexander uses some good footwork to avoid the body shot by Somebody.
Some bone on bone action there as Alexander checks a low kick. Luckily it wasn't a particularly hard one.
Somebody throws a body punch but Alexander moves out of range.
Somebody slips under a jab.
That's one minute gone in the round.
Alexander tries to land with a swinging hook to the body but Somebody was well out of range. Poor timing from Alexander.
Somebody defending well as Alexander loads up on a big left hand.
Somebody connects with a crisp jab.
Alexander avoids a kick to the body.
Alexander displays some good footwork, moving neatly out of range as Somebody throws out the jab.
Somebody bobs and weaves and then throws a good body kick.
Somebody throws a low kick but Alexander avoids it.
Somebody jabs Alexander to the body, keeping him at a distance.
Somebody throws a body shot but no joy.
Somebody fakes a head punch and goes low to the body. Nicely done.
Somebody scores with a sloppy right hand. Alexander should have avoided that one.
A low kick from Somebody misses
and Alexander counters with a nice body shot.
Alexander lands a nice hook to Somebody's body. Somebody takes it in his stride and looks to land his own strikes.
This has been an exciting period of action!
Somebody throws a nice inside leg kick.
That's two minutes gone in the round.
Somebody misses with a wild body shot.
Somebody connects with a looping right hand.
Somebody swings away with a body shot that misses
and Alexander cracks him with a counter punch right on the button.
Somebody misses with a straight left.
Somebody tries to land with a swinging hook to the body but Alexander was well out of range. Poor timing from Somebody.
Alexander let fly with a counter punch to the body but it didn't land.
Alexander fakes a head punch and goes low to the body. Nicely done.
Somebody throws a leg kick
and Alexander counters with a lovely shot to the body.
Somebody walks straight into a jab right on the nose. That one stung - he's blinking and trying to clear his head.
Alexander swings and misses with a hook to the body.
Alexander lands a right hook to the body.
A left and a right from Alexander both land. Nice combination.
Somebody is rocked!
Alexander drops a shoulder and throws an uppercut that cracks Somebody right on the button. Somebody goes down! Alexander follows him to the mat and finishes the job with more strikes! Alexander gets the win via TKO!
Ladies and gentlemen, after 2:54 of round 1, we have a winner by way of TKO (Strikes). Martin Alexander!
A very excited looking Martin Alexander made sure he remembered to thank all the fans both in the arena and on the internet. He said all the coolest people spend all day on MMA websites, which got a big reaction.
|
|
|
|
|
|
|
|
|
|
|
|
|
|
|
|
|
|
|
|
|
|
|
| S |
C
A |
G |
S |
C
B |
G |
|
S |
C |
G |
|
energy
A | B |
|
hype
A | B |
|
pop
A | B |
|
mgr
A | B |
|
FIGHT
RATING
57% |
|
|
|
|
|
|
|
Co-main event
|
Coming up we have a lightweight MMA rules bout between Jack McScramble (ranked 1638 p4p, 2582 weight class) and Pate Murhapuro (ranked 207 p4p, 298 weight class). Both fighter's entrance songs getting the crowd jumping here.
 |
|
 |
| 156 cm
21
156
4 - 1 - 0 |
|
178 cm
20
170
4 - 3 - 0 |
Good wrestling
Solid boxing
Very quick |
|
Good wrestler
Decent boxing
Good gas tank |
|
| |
|
Ladies and gentlemen. This fight is 3 rounds, in the lightweight division.
Introducing the fighter to my left, fighting out of the red corner.
With a record of 4 - 1 - 0, fighting out of Helsinki, Jack McScramble!
And introducing the fighter to my right, fighting out of the blue corner.
With a record of 4 - 3 - 0, fighting out of London, Pate Murhapuro!
The judges for this bout are Chris Downing, Frank Dennis and Cecil Peabody.
The bell rings for round one and we are underway!
A big right from Murhapuro misses.
Some wild striking there from Murhapuro.
Murhapuro clinches.
Murhapuro misses with the head strike.
Murhapuro misses with a punch on the inside.
Murhapuro swings wildly with an uppercut but McScramble uses good head movement to avoid it.
McScramble has dropped down and is working for a takedown. Murhapuro is trying to keep an underhook but McScramble manages to get the takedown into half guard.
McScramble is looking for a kimura but he's never going to get it from there.
McScramble is trying to work for a kimura but Murhapuro is defending well.
Murhapuro is refusing to be controlled, as McScramble sits in half guard.
That's one minute gone in the round.
McScramble drops an elbow to the side of Murhapuro's head.
McScramble lands a big shot. The thud that echoes around the arena is like music to the fans' ears.
McScramble is trying to control. Murhapuro wants to improve his position but can't escape this time.
McScramble uses his free foot to push down on Murhapuro's thigh. Eventually he works his other foot free and he's advanced to mount - this is trouble for Murhapuro.
McScramble trying to control but Murhapuro is having none of it.
McScramble moves into side control, trying to work for a kimura. That looks painful! Will he finish!!?? No, Murhapuro has worked his arm free - good work by Murhapuro!
That's two minutes gone in the round.
McScramble throws a strike aimed at the side of Murhapuro's head but Murhapuro avoids it well.
We get told so often about how wrestlers don't like to be on their backs. Let's see if Murhapuro can do anything to dispel that myth.
McScramble tries to advance to mount but Murhapuro denies him.
McScramble thinks about going for a far side armbar but bails out and retains the dominant position instead.
McScramble really is built like a bowling ball. I wonder if he'd roll if you pushed him down a hill...
McScramble misses with a strike but at least he's keeping busy, looking to cause some damage - that will still help him when it comes to the judges scorecards.
Murhapuro struggling a bit here.
McScramble lands a knee to the body and follows it up with some ground and pound to the head. That will wear Murhapuro down.
That's three minutes gone in the round.
McScramble looks up at the clock and then as Murhapuro takes his cue and looks up at the clock too, McScramble smacks him right in the chops with a big elbow! How rude!
Murhapuro tries to work a leg under to get back to half guard but McScramble wriggles his own leg back out and remains in side control.
McScramble is looking to take a break and control but Murhapuro is keeping him honest, looking to work from the bottom.
McScramble is working Murhapuro over with some ground and pound from side control.
McScramble is trying to ground and pound but Murhapuro uses the momentary lack of control by McScramble to regain half guard.
The fighters are starting to get a bit slippery now, which will make submissions a bit more difficult.
McScramble is looking for a kimura. It's going to be difficult to finish that from half guard though and Murhapuro defends it well.
McScramble passes to full mount!
That's four minutes gone in the round.
McScramble lands with some strikes.
McScramble is landing with some decent strikes but Murhapuro is trying to advance his position so the referee is letting the fight continue.
McScramble connects with a couple of good shots from mount.
McScramble throws some wild stikes that Murhapuro manages to avoid easily.
McScramble scores with a couple of good head shots there.
The crowd are loving this. Great action here.
The crowd thankful this round is nearly over.
McScramble looking to finish with strikes here!
McScramble controlling the pace for now.
And that is the end of the round. The fighters go back to their corners.
Jack McScramble dominated that round.
That's the end of the round. The referee orders the cornermen out of the cage so we can get back down to business.
A shot to the liver by McScramble. Beautiful body shot.
McScramble dips down and scores with a jab to the body.
Murhapuro throws an uppercut from half a mile away. McScramble sees it coming and avoids it easily.
McScramble slips a jab from Murhapuro.
Murhapuro misses with a hook.
McScramble drops down looking for a counter takedown but Murhapuro sprawls and moves away.
McScramble misses with a left hand
and McScramble takes a counter punch right on the button for his troubles.
Murhapuro misses with a looping right.
Murhapuro throws a hard body shot but it just misses.
McScramble feinted with a counter takedown.
Murhapuro is looking to clinch but McScramble is avoiding it.
Murhapuro dodges the punch combination from McScramble.
We've had a slow start to the round here - hopefully the action picks up.
Murhapuro thows a left - swing and a miss!
Murhapuro throws a body shot but no joy.
Murhapuro scores with a nice head shot.
Murhapuro takes a shot right to the bread basket.
That's one minute gone in the round.
Murhapuro has closed the distance and engaged McScramble in a clinch.
McScramble is trying to drag Murhapuro to the mat but Murhapuro just about manages to keep his footing. He used the cage to his advantage there.
Murhapuro misses with a hook from the clinch.
McScramble prevents a body shot from Murhapuro.
Murhapuro swings away with an uppercut that misses.
Murhapuro lands a shoulder strike that jolts his opponent's head backwards.
A right hand to the body from Murhapuro.
McScramble is trying to slow down the pace in the clinch, to catch his breath.
The referee calls for McScramble to work.
McScramble lands a nice uppercut.
Murhapuro struggles to land a body shot inside as McScramble controls his hands.
McScramble wants to stall.
Murhapuro prevents McScramble from breaking the clinch.
A head punch blocked on the inside by McScramble.
That's two minutes gone in the round.
Murhapuro keeps control of McScramble as he tries to wriggle out of the double underhooks.
McScramble blocking some punches.
McScramble manages to pull guard.
Murhapuro wants to control from the top but McScramble keeps moving.
McScramble escapes his hips to the side and looks to be working for an armbar. Murhapuro gives him a little smile and shakes his head. No chance.
McScramble being controlled here, momentarily.
McScramble trying to control the position.
Murhapuro really doesn't want to stay on the ground with McScramble. If he can't get it back to his feet, it's only a matter of time before he'll be tapping out.
That's three minutes gone in the round.
Murhapuro stopping the sweep attempt from McScramble.
Murhapuro looking to pass the guard.
McScramble is trying to keep Murhapuro in close.
The ref warns both fighters not to hold the cage as they work up against the meshing.
McScramble looking for submissions from the bottom but instead Murhapuro passes into half guard.
McScramble tries to roll over but Murhapuro keeps him under control.
McScramble wants to control but Murhapuro is keeping busy and won't allow it.
That's four minutes gone in the round.
My god... these two guys really need to pick up the pace or everyone will leave to go get a beer.
McScramble tries to get to full guard but Murhapuro has control of the leg.
McScramble looking to work for a kimura from the bottom.
The fighters are battling for position here. McScramble manages to regain full guard. Nice work.
Murhapuro controlling from the guard. I say controlling but really, he's stalling.
The crowd thankful this round is nearly over.
McScramble working away from the bottom but not quite defensive enough there because Murhapuro has passed into half guard!
And that is the end of the round. The fighters go back to their corners.
Pate Murhapuro showed his class in that round. I'd imagine he'll take it on all the scorecards.
The fighters get back to their feet, the hooter sounds and we're back to the action! So, we enter the final round. Let's see if either fighter can bring us a finish, or whether we're going to the judges scorecards.
McScramble throws a shot from downtown. Murhapuro moves away and avoids it.
McScramble looks to throw the jab but Murhapuro is out of range.
McScramble shoots in for a takedown. He's persisting with it as Murhapuro sprawls well. Murhapuro wins this battle and keeps the fight standing. McScramble gets slowly back to his feet.
Murhapuro gets a clinch.
Murhapuro lands a left hand.
A short right hand to the side of the head by Murhapuro.
A head punch on the inside from Murhapuro fails to land.
We've had a slow start to the round here - hopefully the action picks up.
McScramble fails to land with a short punch on the inside.
A head punch on the inside from Murhapuro fails to land.
Murhapuro has a couple of punches blocked by McScramble.
Murhapuro throws a punch but it's blocked by McScramble.
An uppercut on the inside fails to land for McScramble.
A head punch blocked on the inside by McScramble.
That's one minute gone in the round.
Murhapuro lands a right hand.
Murhapuro has a couple of punches blocked by McScramble.
McScramble misses with a punch on the inside.
Murhapuro working aggressively here.
McScramble tries to stall but Murhapuro uses the opportunity to gain a better position.
Murhapuro blocks a couple of punches on the inside.
Murhapuro goes for a body shot but it's blocked.
Murhapuro blocks an uppercut.
Murhapuro tries a shoulder strike but it doesn't do any damage.
McScramble misses with a hook to the ribs.
Murhapuro stalling the fight.
With the fighters clinched against the cage, Murhapuro creates a bit of distance for himself and scores with a nice uppercut.
Murhapuro can't find room to land a body shot as McScramble controls the action.
McScramble blocks an uppercut.
Murhapuro fails to land with a short punch on the inside.
McScramble wants a takedown.
McScramble lands a hook that snaps the head of Murhapuro backwards.
McScramble throws a punch but it's blocked by Murhapuro.
McScramble blocks an uppercut.
That's two minutes gone in the round.
Murhapuro lands with a light punch inside.
Murhapuro misses with some punches.
Murhapuro tries to land a shot to the body but it's blocked.
Murhapuro works for underhooks and lands a body shot in the process.
Murhapuro makes some space for himself and lands an uppercut.
This has been an exciting period of action!
Murhapuro has a couple of punches blocked by McScramble.
Murhapuro misses with some punches.
McScramble is trying to pull guard but Murhapuro turns him against the cage and we stay in the clinch.
That's three failed takedown attempts in the round for Jack McScramble. That's going to take a lot out of him.
McScramble is trying to break the clinch but Murhapuro is controlling him.
Murhapuro lands a hook that snaps the head of McScramble backwards.
McScramble is trying to pull guard but Murhapuro has him pressed against the cage.
Murhapuro content to slow the pace in the clinch.
Murhapuro tries a shoulder strike but it doesn't do any damage.
Murhapuro throws a punch but it's blocked by McScramble.
McScramble wants to push off and get back to the center of the mat but Murhapuro has him pressed against the cage.
Good anti-grappling being displayed by Murhapuro as McScramble tries to tie him up.
McScramble tries to take the fight to the ground by pulling guard but can't manage it.
Pate Murhapuro seems to be working more effectively in the clinch in the fight so far.
That's three minutes gone in the round.
Murhapuro managing to block the knees to the body from McScramble.
I was talking to McScramble's coach per-fight and he was telling me that they'd been working on the clinch in the runup to this fight.
McScramble lands with a right to the head.
Murhapuro fails to land with a short punch on the inside.
Murhapuro swings wildly with an uppercut but McScramble uses good head movement to avoid it.
McScramble is working on a leg, looking for a takedown but Murhapuro is defending well.
McScramble blocks a couple of punches on the inside.
Murhapuro throws a hook to the body. More of an arm punch but it's all scoring with the judges.
Both fighters are breathing heavily.
Murhapuro softening up his opponent with strikes, against the cage.
Murhapuro working aggressively here.

McScramble pushes off and circles away, back to the middle of the mat.
Murhapuro swings and misses with a hook to the body.
Murhapuro cracks McScramble with a good jab.
Pate Murhapuro is looking to keep the fight on the feet at all costs.
McScramble tries to land with a swinging hook to the body but Murhapuro was well out of range. Poor timing from McScramble.
Murhapuro ducks down and throws a hook to the body but McScramble moves away.
McScramble misses with an uppercut.
That's four minutes gone in the round.
Murhapuro will need to tighten up his combinations if he doesn't want to gas himself out, swinging at thin air.
Murhapuro scores with a nice strike.
Murhapuro tries to sprawl but McScramble drives through with a takedown into half guard.
We've seen a great period of action over the last minute or so - credit to both fighters for going all out!
McScramble wants to take a breather but Murhapuro is having none of it.
McScramble is going to have to think about doing something other than just controlling because Murhapuro is managing to avoid having the position dictated to him.
The fighters are pressed up against the cage, both looking to find a bit of space to work.
McScramble thows a wild elbow that connects with the canvas.
McScramble tries to pass the half guard into mount. Murhapuro knows what he's doing though and prevents the attempt.
Murhapuro is doing well to avoid being mounted. He's controlling the position at the moment.
Murhapuro is staying active underneath McScramble, who seems content to just control the action from this position.
And that's the end of the fight!
Pate Murhapuro comfortably won the final round on my scorecard.
I think Murhapuro has won this one but let's see whether the judges agree with me. Over to the ring announcer for the scorecards.
Ladies and gentlemen, after 3 rounds of action, we go to the scorecards for a decision.
Judge Chris Downing scores the fight 28:29
Judge Frank Dennis scores the fight 28:29
Judge Cecil Peabody scores the fight 28:29
In favor of your winner, by unanimous decision... Pate Murhapuro!
|
|
|
|
|
|
|
|
|
|
|
|
|
|
|
|
|
|
|
|
|
|
|
| S |
C
A |
G |
S |
C
B |
G |
|
S |
C |
G |
|
energy
A | B |
|
hype
A | B |
|
pop
A | B |
|
mgr
A | B |
|
FIGHT
RATING
40% |
|
|
|
|
|
|
|
Main event
|
Coming up we have a lightweight MMA rules bout between Darsin Bleak (ranked 297 p4p, 1341 weight class) and Harald Harling (ranked 35 p4p, 168 weight class). Harling is bobbing his head along to his entrance song: The HU - Wolf totem. Over to our ring announcer for the fighter introductions!
 |
|
 |
| 180 cm
21
160
8 - 0 - 0 |
|
170 cm
21
150
5 - 1 - 0 |
Great wrestler
Solid boxing
Insanely flexible |
|
BJJ Purple Belt
Excellent boxer
Good gas tank |
|
| |
|
Ladies and gentlemen. This fight is 5 rounds, for the lightweight championship of the world!
Introducing the champion to my left, fighting out of the red corner.
With a record of 8 - 0 - 0, fighting out of New York, Darsin Bleak!
And introducing the challenger to my right, fighting out of the blue corner.
With a record of 5 - 1 - 0, fighting out of Las Vegas, Harald Harling!
The judges for this bout are Alan Glass, Daniel Franklin and Wesley Smith.
The bell rings for round one and we are underway!
Bleak is trying hard to land a takedown here. Harling sprawls well and keeps this one on the feet.
Harling lands an overhand left. A wild punch that just about connected.
Harling slaps away a takedown attempt from Bleak, before circling back to the center of the mat.
A big right from Bleak misses.
Harling jabs. That one connects to the head of his opponent.
It looks like Darsin Bleak has been cut.
Bleak shoots in for a takedown. He's persisting with it as Harling sprawls well. Harling wins this battle and keeps the fight standing. Bleak gets slowly back to his feet.
That's three failed takedown attempts in the round for Darsin Bleak. That's going to take a lot out of him.
Bleak fails with a takedown attempt from distance.
We've had a slow start to the round here - hopefully the action picks up.
Bleak tries to land with a swinging hook to the body but Harling was well out of range. Poor timing from Bleak.
Bleak fails with a takedown attempt.
That's one minute gone in the round.
Harling throws a hard body shot but it just misses.
Bleak appears to be looking for a counter takedown.
Bleak fails with a takedown attempt from distance.
Bleak moves out of range as Harling strikes.
Bleak changes levels and drives through with a really nice takedown into side control. Harling looks really pissed at himself for not defending that better.
Bleak tries to score with some ground and pound. Harling controls his posture well this time though and the shots don't do any damage.
Bleak cracks Harling with an elbow. That is naaassty.
Bleak wants to work for a kimura but he's foiled early by Harling, who protects the arm well.
Bleak throws a knee to the body but it doesn't do much damage.
Bleak in side control, throwing shots but Harling defends.
Bleak is looking for a kimura. He might have it! No, Harling has escaped the position, nice work there.
Bleak working the ground and pound but Harling is defending the strikes.
That's two minutes gone in the round.
Bleak fails to land a wild elbow strike.
Bleak throwing shots but missing, from side control.
Bleak looking for an arm triangle but it's way too loose to do anything.
Wooooo! Give it up for these two warriors! They are putting on a show!
Harling wants to get back to his feet.
An elbow from Bleak crashes against the mat.
Bleak sitting in side control, looking to soften his opponent up with elbows and hammerfists but Harling is avoiding damage well and looking to escape the position.
Bleak throws a strike aimed at the side of Harling's head but Harling avoids it well.
Harling is trying to escape the position but Bleak is controlling the position.
Harling takes a couple of big shots there - the referee warns him that he has to defend himself better.
Bleak has been looking to land a fair amount of strikes on the ground. He might be looking to soften his opponent up in order to work for a submission.
Bleak misses with the ground and pound.
That's three minutes gone in the round.
Check out the look on Bleak's face as he threw that strike - that's one determined fighter!
Bleak postures up a little and throws a couple of hammerfists but they don't connect properly.
Harling dodges the ground and pound from Bleak.
Bleak in side control, trying to ground and pound but not landing this time.
Harling is trying to stand back up. He's worked his way up against the cage but Bleak has just dragged him back down to the mat.
Bleak goes for an armbar! This could be all over! Wait, no, Harling rolls with the submission and now he's on top in Bleak's guard! Nice work there by Harling!
Harling throws a strike but Bleak rolls with it and manages to sweep. Now he's in guard on top.

Bleak throwing elbows and punches but not connecting, as Harling works some decent striking defense from the bottom.
The ref warns both fighters not to hold the cage as they work up against the meshing.
Bleak prevents Harling from getting back to his feet.
Bleak tries to free his leg and advance position but Harling is retaining full guard.
Harling can't keep his opponent in guard - Bleak advances to half guard, no doubt looking to mount.
Bleak working the head and body with strikes.
That's four minutes gone in the round.
Harling wants to get back to his feet.
Bleak wants to pass to mount but Harling is defending the position.
Harling tries to kick Bleak off but Bleak keeps his base steady and stays in half guard.
Bleak thows a huge punch but Harling dodges it nicely.
Harling is trying to stand up here but Bleak is controlling him well.
Bleak missing with some ground and pound from the half guard.
Bleak is looking to pass the guard... He's managed it - he's now in full mount!
And that is the end of the round. The fighters go back to their corners.
Darsin Bleak dominated that round.
The cut man is working on Darsin Bleak's cut.
The fighters get back to their feet, the hooter sounds and we're back to the action!
Harling walks into a straight right hand from Bleak.
Bleak dives in for a single leg takedown but Harling sprawls and the fighters end up clinched against the cage.
Harling throws out a counter right but Bleak avoids it with no problem.
Bleak is looking for a takedown up against the cage. Harling gets underhooks though and prevents the takedown attempt.
Bleak prevents a body shot from Harling.
Bleak misses with a punch to the body.
Bleak working aggressively here.
Harling throws a blind hook that connects with the side of Bleaks head.
Bleak breaks the clinch and we return to the middle of the mat.
Harling throws a combination that misses
and Bleak counters with a nice shoot takedown that brings the fighters to the ground.
Bleak in full guard, throwing the ground and pound. No damage this time.
Bleak throws a big right hand that misses.
We've had a slow start to the round here - hopefully the action picks up.
Bleak lands a couple of decent looking shots.
Bleak throws an elbow that misses. Harling uses the momentum to reverse the position. He's now in Bleak's guard. Nice move by Harling!
This has been an exciting period of action!
Harling stands over his opponent and dives in with a flying punch! Bleak throws up his legs and catches Harling in a triangle! Oh this looks tight! Harling tries to escape but he's forced to tap! Wow, fantastic work there by Bleak! That came out of nowhere!
Ladies and gentlemen, after 1:59 of round 2, we have a winner by way of Submission (Triangle Choke). Darsin Bleak!
Darsin Bleak retains his lightweight title!
Our winner, Darsin Bleak, made sure he spent some time buttering up the crowd during his post fight interview, which will no doubt bring him a few more fans.
Harald Harling spoke after the fight, saying 'You win lose, you some some.'.
|
|
|
|
|
|
|
|
|
|
|
|
|
|
|
|
|
|
|
|
|
|
|
| S |
C
A |
G |
S |
C
B |
G |
|
S |
C |
G |
|
energy
A | B |
|
hype
A | B |
|
pop
A | B |
|
mgr
A | B |
|
FIGHT
RATING
37% |
|
|
|
|
|
|
|
|
|
|

