 |
Highland 18 PBP Commentary |
Undercard bout
|
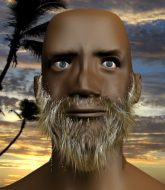
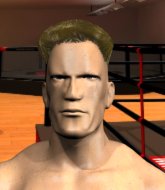
Coming up we have a bantamweight MMA rules bout between Mister Meowgi (ranked 6702 p4p, 25137 weight class) and Taji Mufca (ranked 274 p4p, 305 weight class). Mister Meowgi has the edge in experience - let's see if he can make that count tonight.
 |
|
 |
| 168 cm
20
138
0 - 2 - 0 |
|
189 cm
18
130
0 - 2 - 0 |
BJJ Blue Belt
Brawler
KO power |
|
BJJ Blue Belt
Brawler
Solid chin |
|
| |
|
Ladies and gentlemen. This fight is 3 rounds, in the bantamweight division.
Introducing the fighter to my left, fighting out of the red corner.
With a record of 0 - 2 - 0, fighting out of The Island, Mister Meowgi!
And introducing the fighter to my right, fighting out of the blue corner.
With a record of 0 - 2 - 0, fighting out of The Island, Taji Mufca !
The judges for this bout are Peter Branson, Bart Greer and Dirk Anderson.

The bell rings for round one and we are underway!
Mufca throws a jab to the body, straight down the pipe. Boom. That sent Meowgi stumbling backwards but he manages to regain his composure quickly.
Mufca looks frustrated there after his takedown attempt is stuffed easily.
Meowgi slips a straight right by Mufca .
The fighters circling - Mufca throws out the jab but it was never going to land.
Mufca connects with the punch.
Mufca misses with a takedown attempt. He shot from a bit too far out.
Meowgi appears to be looking for a big counter.
Mufca fails with a takedown attempt.
Mister Meowgi has stuffed three takedown attempts in the round now. That's going to take a lot out of Taji Mufca .
Mufca throws a combination but comes up with nothing but fresh air.

Meowgi decides to change it up a bit and drives through with a nice takedown into half guard.

Mufca makes some distance and scrambles quickly back to his feet. Nice work!
This is a great period of action - very entertaining stuff!
Mufca misses with a few strikes there.
Mufca misses with a low kick.
Meowgi shoots in looking for a single leg takedown. Mufca is trying to defend but Meowgi finishes it well and ends up in half guard. Let's see if he can advance position further.
Mufca looks winded!
Meowgi trying to mount his opponent but Mufca defends it.

That's one minute gone in the round.
Well, if Meowgi is going to just lie there, perhaps we should talk about what we're having for dinner tonight
I'm having a ham and pineapple pizza
Yum. Can't wait.
Meowgi's ground tactics aren't going to win him many fans. Let's hope he's got fireworks for us if he gets back to his feet because he's not doing much on the ground.
Meowgi working over Mufca with some ground and pound. Mufca looks like he wants out of this position, which is understandable.
Meowgi stops Mufca from getting back to his feet.
Meowgi looks to score some points with some ground and pound.

That's two minutes gone in the round.
There's not a lot going on here and the crowd are letting the fighters know they're not willing to tolerate a lack of action.
Mufca tries to roll over but Meowgi keeps him under control.
Meowgi looks to score some points with some ground and pound.
The ref warns both fighters not to hold the cage as they work up against the meshing.
Meowgi thows a wild elbow that connects with the canvas.
Mufca is a painfully thin specimen of a man. You do wonder whether a good body kick would snap him clean in two.
Meowgi sitting in half guard, looking to land shots. Mufca defending well though.
Meowgi is trying to control the action in half guard but Mufca is working away on the bottom, looking perhaps to get back to full guard.
Mufca avoiding damage under a succession of punches from Meowgi.

Meowgi is looking for a kimura. It's going to be difficult to finish that from half guard though and Mufca defends it well.
Meowgi is figuring out what he wants to do next.

That's three minutes gone in the round.
The fighters are battling for position here. Mufca manages to regain full guard. Nice work.
Meowgi slows down the pace of the fight, as he sits in guard.
Meowgi trying to control the position from guard on top but Mufca is wriggling around, looking for whatever he can.

The referee decides to stand the fighters back up.
A big left from Mufca misses.
No luck for Mufca with that takedown attempt.
As Mufca tries to get set, Meowgi tries to push him back and clinch up but Mufca manages to avoid the attempt.
Mufca defends well against a solid takedown attempt from Meowgi.
Mufca wants to clinch.
It looked like Meowgi was looking amped, ready to throw a big counter but didn't commit.

That's four minutes gone in the round.
Neither fighter has done anything of merit for a good minute or two here and the crowd are not happy about it.
Meowgi scores with a punch to the gut of his opponent.
Mufca misses with a few strikes there.
Meowgi uses good head movement to avoid the hook from Mufca .
A counter left hand to the body from Meowgi misses its target.
Meowgi is looking to clinch.
Horrible takedown attempt by Mufca or perhaps it was just good defense by Meowgi, which made it look bad.

Meowgi rushes Mufca and presses him up against the cage.
Mufca gets double underhooks to prevent a takedown attempt from Meowgi.
Meowgi tries to jump guard but he falls flat on his backside. Mufca smiles and moves away.
Meowgi throws a looping left and ducks down for a takedown. He's got his arms around Mufca 's waist but Mufca gets an underhook and avoids the takedown by throwing Meowgi off to one side.
And that is the end of the round. The fighters go back to their corners.
A close round but Taji Mufca will probably get the nod.
OK. That's time! The bell goes and we're back to the action.

Meowgi keeps the fight standing with a nice sprawl.
Meowgi attempts a counter takedown but Mufca avoids it well and moves away.
Mufca shoots in for a takedown but Meowgi shows good takedown defense there and keeps this one on the feet.
Meowgi doesn't manage to clinch there - Mufca circles away.
And an attempted straight right on the counter from Mufca ! But no joy.
Meowgi shoots in for a takedown but Mufca shows good takedown defense.
Meowgi checks a low kick. Bone on bone - not my idea of a good time.
Meowgi tries to clinch there but Mufca circles away.
Mufca lunges at Meowgi with a hook that half lands and is half blocked by Meowgi's hand.
Meowgi fails with the takedown.
A swing and a miss from Mufca .
Mufca misses with a hook.
We've had a slow start to the round here - hopefully the action picks up.
Mufca gets tackled into the cage by Meowgi. Meowgi maintains the clinch.
A real battle for position is taking place between these two warriors.
Meowgi keeps the fight in the clinch, despite Mufca 's efforts to push away.
Mufca tries to break the clinch but Meowgi is controlling the position.
That's one minute gone in the round.
Mufca working hard to break the clinch.
Mufca gets underhooks to prevent Meowgi's takedown attempt.
That's three failed takedown attempts in the round for Mister Meowgi. That's going to take a lot out of him.
Meowgi stalling in the clinch but Mufca improves position.
Mufca throws a blind hook that connects with the side of Meowgis head.

Mufca breaks the clinch.
Mufca moves out of range of the body kick.
Mufca lunges in with swinging rights and lefts but Meowgi circles away quickly and effectively.
Mufca takes a step towards his opponent and connects with a left hand, before circling away.
Mufca is breathing heavily.
Meowgi moves into the clinch.
Meowgi is trying to slow down the pace of the fight but Mufca is keeping busy.
Mufca breaks the clinch and we return to the middle of the mat.
Mufca throws a big shot that misses.

Mufca clinches.
Meowgi is looking to take this one to the mat.
That's two minutes gone in the round.
Meowgi tries to land a knee to the body but he is off balance and Mufca avoids it.
Meowgi keeps control of Mufca as he tries to wriggle out of the double underhooks.
Mufca has been the more effective fighter overall so far.
Meowgi is working on a single leg takedown against the cage. Mufca can't fight it off and eventually Meowgi manages to take the fight to the floor. Mufca looks annoyed but at least he's managed to land in guard.
This is a great period of action - very entertaining stuff!

Meowgi gets to his feet and steps away from his opponent.
Mufca closes the distance and clinches up with Meowgi, looking for a takedown. Mufca pushes Meowgi against the cage but Meowgi circles to the side and manages to break the clinch.
Mufca misses with a jab, cross combination.
Mufca swings widly with a right hand
and Meowgi counters with a left and a right that stings Mufca .
Mufca stuffs the takedown.
Meowgi defending well as Mufca loads up on a big left hand.
Taji Mufca seems to be the more aggressive standup fighter in this bout.
Nice body punch from Mufca .
Meowgi throws a series of strikes that have Mufca backpedaling.
Mufca tries to clinch but is not successful on this occasion.
That's three minutes gone in the round.
Mufca clinches.
Mufca is pressed up against the cage. Meowgi has hold of a leg and is looking to drag Mufca down to the mat. Mufca avoids the attempt though and has circled away. We're back to striking at a distance.
Meowgi shoots in with a lovely double leg takedown. Mufca manages to land in full guard to minimise the damage.
Mufca pushes Meowgi off and gets back to his feet.
Meowgi takes a shot to the nose. Hopefully that hasn't broken it.
Mister Meowgi is looking to throw some combinations by the looks of things.
Mufca misses with a two punch combination.
Mufca stuns Meowgi with a nice body shot, before stepping back out of range.
The crowd are loving this. Great action here.
Meowgi scores with a push kick.
Meowgi getting the better of the striking in that exchange.
Meowgi shoots in and drives through. Mufca sprawls well.
That's four minutes gone in the round.
A lazy left from Mufca finds it's target.
Mufca lands a jab, followed by a cross and another cross, as Meowgi backs up against the cage.
Meowgi seems to be moving with more speed, compared to his last bout. He must have been working on that in the gym.
Meowgi fakes high and shoots in for a takedown but Mufca avoids it really well and circles away.
Mufca lands with a right hand.
Meowgi needs to keep his hands up - Mufca had a free shot at his head there.
Meowgi closes the distance and clinches.
Mufca wants to break free but Meowgi has control.
Meowgi tries to pull guard but Mufca won't allow it.
Meowgi wants to push off and get back to the center of the mat but Mufca has him pressed against the cage.
Mufca tries to break free but Meowgi pushes him back against the cage.
And that is the end of the round. The fighters go back to their corners.
Taji Mufca showed his class in that round. I'd imagine he'll take it on all the scorecards.
That's the end of the interval. I'm sure that seemed a lot quicker than a minute for our two fighters! Back to the action. This is the final round!

Mufca lands with an overhand left.
Mufca tries to shoot in for a takedown. He's got hold of a leg but Meowgi swivels and escapes.
Mufca tries to bum rush Meowgi with a series of wild strikes but Meowgi uses good footwork to avoid the assault.
Mufca stuffs the takedown attempt from Meowgi. Meowgi gets slowly back to his feet.
Mufca throws a nice looking combination but Meowgi bobs and weaves to avoid any damage.
No luck for Meowgi with that takedown attempt.
Mufca closes the distance and presses his opponent up against the cage.
A short right from Mufca on the inside.
We've had a slow start to the round here - hopefully the action picks up.
Mufca tries to pull guard but can't drag his opponent to the mat. Meowgi just stands there and leans against the cage.
Meowgi drops to a knee looking for a takedown but Mufca gets the underhooks and prevents it.
That's three failed takedown attempts in the round for Mister Meowgi. That's going to take a lot out of him.
Mufca breaks the clinch and we return to the middle of the mat.
Both fighters are breathing heavily.
That's one minute gone in the round.
Mufca moves into range and clinches up with Meowgi.
Mufca wants to break free. God knows he wants to breaaaak freeee.
Mufca wants to get back to striking at distance but Meowgi won't allow it.
Meowgi goes for a takedown in the clinch but Mufca prevents it.

Meowgi breaks from the clinch.
No luck with that takedown attempt from Meowgi.
Meowgi takes a shot to the eye socket. That's gotta hurt.
Meowgi tries a head kick but it misses.
Mufca connects with a looping right hand.
 Meowgi is rocked! Meowgi is rocked!
Mufca connects with a picture perfect right hand that knocks Meowgi out cold! This one is over in a flash!
Ladies and gentlemen, after 1:56 of round 3, we have a winner by way of KO (Punch). Taji Mufca !
|
|
|
|
|
|
|
|
|
|
|
|
|
|
|
|
|
|
|
|
|
|
|
| S |
C
A |
G |
S |
C
B |
G |
|
S |
C |
G |
|
energy
A | B |
|
hype
A | B |
|
pop
A | B |
|
mgr
A | B |
|
FIGHT
RATING
59% |
|
|
|
|
|
|
|
Undercard bout
|
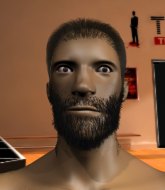
Coming up we have a middleweight MMA rules bout between Josh Peters (ranked 6953 p4p, 5999 weight class) and Roundabout Tom (ranked 757 p4p, 687 weight class). Roundabout Tom has the better chin. Will he look to stand and bang today?
 |
|
 |
| 176 cm
18
195
0 - 1 - 0 |
|
175 cm
18
190
1 - 1 - 0 |
BJJ White Belt
Brawler
Cuts easily |
|
Good takedowns
Counter fighter
Solid chin |
|
| |
|
Ladies and gentlemen. This fight is 3 rounds, in the middleweight division.
Introducing the fighter to my left, fighting out of the red corner.
With a record of 0 - 1 - 0, fighting out of The Island, Josh Peters!
And introducing the fighter to my right, fighting out of the blue corner.
With a record of 1 - 1 - 0, fighting out of The Island, Roundabout Tom!
The judges for this bout are Bart Greer, David Hoff and Dirk Anderson.
The bell rings for round one and we are underway!
Tom misses with a two punch combination.
Peters goes to the watering hole and comes back with a big thumbs up from the judges as he scores a three punch combo.
Peters throws a loose over hand right and dives in with a double leg takedown. Tom tries to sprawl but it's too late and the fighters hit the mat. Peters is in Tom's guard.
Peters throws an elbow that misses. Tom uses the momentum to reverse the position. He's now in Peters's guard. Nice move by Tom!

Peters working the defensive guard well to avoid strikes from Tom.
Peters keeping moving, preventing Tom from controlling successfully.
The ref warns both fighters not to hold the cage as they work up against the meshing.
Tom distracts Peters with his right hand and drops a big elbow with his other arm.
Peters keeping moving, preventing Tom from controlling successfully.
Peters working a defensive guard here.
Tom is pushing down on Peters's leg trying to pass to half guard. Peters is fighting to maintain full guard but Tom has managed to sneak the leg through.
Tom works his way into side control.
That's one minute gone in the round.
Tom wants to control but Peters is keeping him busy.
Tom is chipping away with strikes.
Peters is trying to get back to half guard.
Tom in side control, just content to control the action for now.
The fighters are pressed up against the cage, both looking to find a bit of space to work.
Tom lands a few punches from side control.
Tom working away diligently from side control. Landing strikes effectively there - that will score him some points on the judges scorecards.
Tom working the ground and pound from side control.
Tom working the ground and pound.
Tom taking a breather here.
Tom looks up at the clock and then as Peters takes his cue and looks up at the clock too, Tom smacks him right in the chops with a big elbow! How rude!
Peters is rocked!
Peters knows he needs to get back to his feet asap. He's simply no match for Tom on the ground.
That's two minutes gone in the round.
Tom scores with a couple of short elbows.
Oh Peters is still in real trouble! Will he be able to recover?!!
Tom looks more muscular than last time we saw him. He must have been on the weights.
Check out the look on Tom's face as he threw that strike - that's one determined fighter!
A big shot lands for Tom! That's hurt Peters! Will he recover? Tom fires away with more strikes and the referee has to step in to stop the fight!
Ladies and gentlemen, after 2:34 of round 1, we have a winner by way of TKO (Strikes). Roundabout Tom!
|
|
|
|
|
|
|
|
|
|
|
|
|
|
|
|
|
|
|
|
|
|
|
| S |
C
A |
G |
S |
C
B |
G |
|
S |
C |
G |
|
energy
A | B |
|
hype
A | B |
|
pop
A | B |
|
mgr
A | B |
|
FIGHT
RATING
46% |
|
|
|
|
|
|
|
Undercard bout
|
Coming up we have a heavyweight MMA rules bout between Ray Dalio (ranked 3947 p4p, 4263 weight class) and Keith Logan (ranked 439 p4p, 466 weight class). Keith Logan will no doubt be trying to keep this one on the feet, where he has a distinct advantage.
 |
|
 |
| 193 cm
25
265
1 - 0 - 0 |
|
197 cm
25
278
1 - 0 - 0 |
Good wrestling
Counter fighter
Good chin |
|
BJJ White Belt
Excellent MT
Granite chin |
|
| |
|
Ladies and gentlemen. This fight is 3 rounds, in the heavyweight division.
Introducing the fighter to my left, fighting out of the red corner.
With a record of 1 - 0 - 0, fighting out of The Island, Ray Dalio!
And introducing the fighter to my right, fighting out of the blue corner.
With a record of 1 - 0 - 0, fighting out of The Island, Keith Logan!
The judges for this bout are Daniel Franklin, Bart Greer and Sandra Marshall.
The bell rings for round one and we are underway!
Logan rushes Dalio and pushes him back against the cage in a clinch.
Dalio tries to jump guard but he falls flat on his backside. Logan smiles and moves away.
Logan scores with a straight right hand, right through his opponent's guard.
Logan keeps his opponent at a distance with a nice jab.
Logan throws a body punch but Dalio moves out of range.
Logan misses with a combination
and Dalio counters with a shoot takedown. Logan fights it but they end up in guard.
Dalio drops back for a leg! It's a sloppy attempt though and Dalio jumps back into guard quickly, to retain the dominant position.
Logan really doesn't want to stay on the ground with Dalio. If he can't get it back to his feet, it's only a matter of time before he'll be tapping out.
Dalio drops back looking for a submission - "I'm sorry sir, but I'm gunna break your leg" says Dalio as he cranks on the unfortunate limb! Logan screams and taps out before any major damage is done! Don't mess with Dalio! Nice submission victory there!
Ladies and gentlemen, after 0:50 of round 1, we have a winner by way of Submission (Kneebar). Ray Dalio!
|
|
|
|
|
|
|
|
|
|
|
|
|
|
|
|
|
|
|
|
|
|
|
| S |
C
A |
G |
S |
C
B |
G |
|
S |
C |
G |
|
energy
A | B |
|
hype
A | B |
|
pop
A | B |
|
mgr
A | B |
|
FIGHT
RATING
100% |
|
|
|
|
|
|
|
Undercard bout
|
Coming up we have a heavyweight MMA rules bout between Ricky Thompson (ranked 3253 p4p, 5815 weight class) and Dylan Sydal (ranked 365 p4p, 571 weight class). Dylan Sydal will no doubt be looking to use his reach advantage to good effect.
 |
|
 |
| 190 cm
25
280
3 - 3 - 0 |
|
201 cm
21
270
3 - 1 - 0 |
Good wrestling
Brawler
KO power |
|
Decent wrestler
Brawler
Granite chin |
|
| |
|
Ladies and gentlemen. This fight is 3 rounds, in the heavyweight division.
Introducing the fighter to my left, fighting out of the red corner.
With a record of 3 - 3 - 0, fighting out of The Island, Ricky Thompson!
And introducing the fighter to my right, fighting out of the blue corner.
With a record of 3 - 1 - 0, fighting out of The Island, Dylan Sydal!
The judges for this bout are Michael Johnstone, Dirk Anderson and Winston Alpacca.
The bell rings for round one and we are underway!
Sydal looks frustrated there after his takedown attempt is stuffed easily.
Sydal looks frustrated there after his takedown attempt is stuffed easily.
Thompson looking to score a takedown here. Sydal is defending well but Thompson drives through and ends up in Sydal's guard.
Thompson is sitting in guard, working some ground and pound.
We get told so often about how wrestlers don't like to be on their backs. Let's see if Sydal can do anything to dispel that myth.
Sydal preventing the ground and pound from doing any damage.
Thompson working from the guard for now, landing some ground and pound.
Sydal not looking particularly offensive just at the moment.
The fighters are pressed up against the cage, both looking to find a bit of space to work.
Sydal keeping full guard, as Thompson tries to pass.
Sydal looking to sweep here. No luck so far.
We've had a slow start to the round here - hopefully the action picks up.
Thompson scoring with some ground and pound.
Thompson lands a couple of decent looking shots.
Thompson stops Sydal from standing up.
Thompson is stalling in the full guard.
That's one minute gone in the round.
Thompson looking to pass the guard.
Thompson looking to control the position here, rather than advance.
Thompson has been looking to land a fair amount of strikes on the ground. He might be looking to soften his opponent up in order to work for a submission.

Sydal is working actively off his back, looking to secure an arm or perhaps work for a triangle.
Thompson scoring with punches to the head and body.
That's two minutes gone in the round.
Neither fighter has done anything of merit for a good minute or two here and the crowd are not happy about it.
Sydal keeping moving, preventing Thompson from controlling successfully.
Sydal working a defensive guard here.
Thompson is just sitting in guard, looking to avoid any submissions.
Thompson lands a couple of elbows.
Thompson seems content to control from guard here. He's going to have to remain active though if he doesn't want to get stood back up.
Thompson postures up and scores with a shot to the body and a follow up elbow to the head.
Thompson stands up over Sydal, holding his feet. He dives back in and lands a decent shot to the head.
Thompson is working Sydal over from the guard. He should look to pass the guard and do a little more damage with these strikes.
Thompson working in close now, lands a nice elbow to the side of Sydal's head.
Thompson has improved his flexibility recently so we will have to see if he can use that to his advantage.
That's three minutes gone in the round.
Thompson with a couple of shots to the head there. Not particularly brutal.
Thompson stands up over Sydal, holding his feet. He dives back in and lands a decent shot to the head.
Sydal is trying to control the position but Thompson postures up.
Thompson cracks Sydal with a solid left hand.
Thompson showing good wrestling skills to control the position.
Thompson distracts Sydal with his right hand and drops a big elbow with his other arm.
Thompson is working the ground and pound from guard. He might want to try advancing position though to get more of an impact.
Thompson scoring with some ground and pound.
Sydal looks winded!
Thompson postures up and scores with a shot to the body and a follow up elbow to the head.
Thompson working from the guard for now, landing some ground and pound.
 Sydal is rocked! Sydal is rocked!
Sydal is trying to control the position from the bottom.
Thompson pushes down on Sydal's leg and manages to get into half guard.
That's four minutes gone in the round.
Sydal is trying to defend against the ground and pound but Thompson scores with a couple of nice shots.
Sydal is still in real trouble! Can Thompson finish him?
Thompson sitting and controlling from the half guard.
Sydal seems to have recovered his senses.
Thompson lands with a punch from half guard.
The crowd thankful this round is nearly over.
Thompson winds up and cracks Sydal with a swinging punch to the side of the head.
And that is the end of the round. The fighters go back to their corners.
Ricky Thompson dominated that round.
That's time! Back to the action!
Thompson is trying hard to land a takedown here. Sydal sprawls well and keeps this one on the feet.
Thompson is trying hard to land a takedown here. Sydal sprawls well and keeps this one on the feet.
Sydal looks frustrated there after his takedown attempt is stuffed easily.
Sydal tries to clinch but Thompson is having none of it.
Thompson drops down and drives through with a powerful takedown into guard.
Thompson is taking a break and basically stalling. The referee will not allow him to do that for long.
Sydal has momentary wrist control but Thompson slips an elbow through the middle.
Thompson stands up over Sydal, holding his feet. He dives back in and lands a decent shot to the head.
Sydal working from the bottom, still in full guard. He's managed to get a loose triangle. Thompson doesn't seem to be doing much to defend here, obviously he feels comfortable in the position. Thompson manages to throw the legs off his shoulder and he's back into guard - no problem.
We've had a slow start to the round here - hopefully the action picks up.
Thompson distracts Sydal with his right hand and drops a big elbow with his other arm.
Thompson is working Sydal over from the guard. He should look to pass the guard and do a little more damage with these strikes.
Thompson might be looking to lock onto one of his opponent's long limbs for a submission, whilst we're on the ground.
That's one minute gone in the round.
Thompson works over Sydal with some ground and pound from guard.
Thompson is just sitting in guard, looking to avoid any submissions.
Thompson is in close to Sydal's body, working some short punches and elbows.
Ricky Thompson overall seems to be getting the better of the ground position in the fight so far.
Sydal is breathing heavily.
Thompson distracts Sydal with his right hand and drops a big elbow with his other arm.
Thompson not doing a lot at the moment. He'll have to show some more aggression or the fight will get stood up.
Thompson scoring with some ground and pound.
Thompson won't allow Sydal to sweep him here.
Thompson is frustrating his opponent with some stalling tactics from top position.
Sydal keeping full guard, as Thompson tries to pass.
Thompson advances to half guard.
That's two minutes gone in the round.
Sydal is trying to defend against the ground and pound but Thompson scores with a couple of nice shots.
Thompson is keeping good posture, landing some ground and pound.
Ground and pound from Thompson.
Thompson lands strikes from half guard.
Sydal is rocked!
Thompson lands a massive shot from half guard that has rocked Sydal! More strikes land and this one is all over! Thompson jumps to his feet and is applauded loudly by the crowd!
Ladies and gentlemen, after 2:43 of round 2, we have a winner by way of TKO (Strikes). Ricky Thompson!
|
|
|
|
|
|
|
|
|
|
|
|
|
|
|
|
|
|
|
|
|
|
|
| S |
C
A |
G |
S |
C
B |
G |
|
S |
C |
G |
|
energy
A | B |
|
hype
A | B |
|
pop
A | B |
|
mgr
A | B |
|
FIGHT
RATING
38% |
|
|
|
|
|
|
|
Undercard bout
|
Coming up we have a light heavyweight MMA rules bout between Aisland Bounser (ranked 4082 p4p, 3343 weight class) and Rustam Tsubekov (ranked 497 p4p, 430 weight class). Over to our ring announcer for the fighter introductions!
 |
|
 |
| 188 cm
25
205
1 - 1 - 0 |
|
183 cm
25
210
2 - 1 - 1 |
Good wrestling
Counter fighter
Granite chin |
|
Good wrestler
Counter fighter
Solid chin |
|
| |
|
Ladies and gentlemen. This fight is 3 rounds, in the light heavyweight division.
Introducing the fighter to my left, fighting out of the red corner.
With a record of 1 - 1 - 0, fighting out of The Island, Aisland Bounser!
And introducing the fighter to my right, fighting out of the blue corner.
With a record of 2 - 1 - 1, fighting out of The Island, Rustam Tsubekov!
The judges for this bout are Santiago Holmes, Bart Greer and Winston Alpacca.
The bell rings for round one and we are underway!
Bounser clinches.
Bounser misses with a hook from the clinch.
Bounser lands on the inside with an uppercut.
Bounser definitely looks more muscular than last time we saw him fight.
Bounser misses with some punches.
Bounser swings wildly with an uppercut but Tsubekov uses good head movement to avoid it.
Tsubekov prevents a body shot from Bounser.
Bounser misses with a shot to the kidneys.
Tsubekov looking for a takedown.
A battle for position here, against the cage.
Bounser swings wildly with an uppercut but Tsubekov uses good head movement to avoid it.
Tsubekov is trying to pull guard but being pressed up against the cage enables Bounser to keep the fight standing.
An uppercut on the inside fails to land for Bounser.
A head punch blocked on the inside by Tsubekov.
Tsubekov fails to pull guard.
Aisland Bounser has stuffed three takedown attempts in the round now. That's going to take a lot out of Rustam Tsubekov.
We've had a slow start to the round here - hopefully the action picks up.
Tsubekov wants a takedown but no success here.
Tsubekov misses with a body punch.
A real battle for position is taking place between these two warriors.
Bounser is defending well against a takedown attempt.
Bounser tries to land a shot to the body but it's blocked.
Bounser tries to land a shot to the body but it's blocked.
A head punch blocked on the inside by Tsubekov.
That's one minute gone in the round.
Bounser scores with a nice hook to the head.
An uppercut on the inside fails to land for Bounser.
Bounser doesn't land with the attempted body shot.
Bounser throws a punch but it's blocked by Tsubekov.
Tsubekov drops down looking for an ankle pick but Bounser pulls his leg out and moves away.
Tsubekov slips a jab from Bounser.
Bounser bobs and weaves into range and then changes levels and scores with a nice takedown into side control.
Tsubekov taking punishment in the form of punches.
Bounser working the head with strikes.
Tsubekov is positioning himself to get back to half guard.
That's two minutes gone in the round.
Fantastic stuff here - a very entertaining period of action, which has drawn cheers from the crowd.
Bounser landing strikes.
Bounser working the head with strikes.
Bounser taking a breather here.
Tsubekov takes an elbow right on the bridge of the nose and winces in pain.
Bounser working away.
Tsubekov gets back to half guard.
The two fighters exchange a few words. I couldn't hear what they were saying but maybe it's more fun if you make it up yourself. Bounser connects with a nice short shot to Tsubekov's temple.
Bounser is scoring with some nice ground and pound from the dominant position.
Bounser thows a wild elbow that connects with the canvas.
That's three minutes gone in the round.
The fighters are starting to get a bit slippery now, which will make submissions a bit more difficult.
The fighters are battling for position here. Tsubekov manages to regain full guard. Nice work.
Tsubekov seems keen to control rather than go for a submission, at least for now.
Tsubekov is looking for a guillotine. You can't force these things though and Bounser defends well.
Bounser distracts Tsubekov with his right hand and drops a big elbow with his other arm.
Tsubekov working the defensive guard well to avoid strikes from Bounser.
Bounser with a flurry of punches that miss.
The ref warns both fighters not to hold the cage as they work up against the meshing.
Tsubekov is trying to control the position but Bounser postures up.
Bounser is in close to Tsubekov's body, working some short punches and elbows.
Bounser is sitting in guard, working some ground and pound.
We get told so often about how wrestlers don't like to be on their backs. Let's see if Tsubekov can do anything to dispel that myth.
Bounser postures up and scores with a shot to the body and a follow up elbow to the head.
That's four minutes gone in the round.
Bounser cracks Tsubekov with a solid left hand.
Tsubekov controlling the position.
Tsubekov trying to keep a closed guard but Bounser is proving a slippery customer.
Bounser stopping the sweep attempt from Tsubekov.
Bounser trying to control the position from guard on top but Tsubekov is wriggling around, looking for whatever he can.
Bounser wants to pass the guard but Tsubekov is keeping the position.
Bounser keeps in close for a moment and lands a decent shot to the side of Tsubekov's head.
Tsubekov is doing well to control the posture of his opponent and prevent any damage.
The fighters are pressed up against the cage, both looking to find a bit of space to work.
Bounser lands a couple of elbows.
Bounser content to strike from guard, landing some decent shots.
And that is the end of the round. The fighters go back to their corners.
Aisland Bounser dominated that round.
The corners get their ten second warning. Both fighters stand from their stools and stare each other down, ready to get back to the action.
Nice takedown defense from Bounser. No joy for Tsubekov on that attempt.
Tsubekov gets caught napping as Bounser dives in and scores a takedown. Tsubekov manages to retain guard.
Bounser missing there with some ground and pound from the guard.
Tsubekov keeping moving, preventing Bounser from controlling successfully.
Bounser controls from within his opponent's guard.
Tsubekov bucks up whilst keeping hold of a body lock, managing to reverse the position. Now he's in top in Bounser's guard.
We've had a slow start to the round here - hopefully the action picks up.
Bounser keeping moving, preventing Tsubekov from controlling successfully.
Tsubekov controls the pace of the fight for a moment.
That's one minute gone in the round.
Bounser keeping moving, preventing Tsubekov from controlling successfully.
Tsubekov content to stall in guard here.
Bounser is trying to keep Tsubekov in close.
Bounser is really dominating this fight. Is there anything that Tsubekov can do to turn this around?
Tsubekov trying to control but Bounser is working from the bottom.
Bounser controls Tsubekov momentarily but Tsubekov frees himself.
Bounser is really struggling to control Tsubekov but he's trying to hold on to the position.
That's two minutes gone in the round.
The crowd are showing their displeasure at the lack of action as loud boos ring out around the arena.
Tsubekov looking to control the position here, rather than advance.
The referee is asking the fighters to pick up the pace.
Tsubekov trying to control the position from guard on top but Bounser is wriggling around, looking for whatever he can.
The referee has motioned to the fighters to stand back up.
Bounser moves into range and lands a nice leg kick.
Tsubekov closes the distance and clinches up with Bounser, looking for a takedown. Tsubekov pushes Bounser against the cage but Bounser circles to the side and manages to break the clinch.
Bounser throws a hard body shot but it just misses.
Tsubekov steps in looking to clinch after the strikes miss from Bounser.
Aisland Bounser seems to be the more aggressive standup fighter in this bout.
That's three minutes gone in the round.
Bounser misses with a straight left.
Tsubekov steps in looking to clinch after the strikes miss from Bounser.
Bounser leaves Tsubekov with his face pressed against the mat as he sprawls beautifully, defending against a solid takedown attempt.
Aisland Bounser has stuffed three takedown attempts in the round now. That's going to take a lot out of Rustam Tsubekov.
Bounser throws a jab but it's blocked by Tsubekov.
Tsubekov tries to close the distance and clinch but Bounser swats him to one side with an open hand palm strike and circles away.
Bounser appeared to be looking to counter that last move with a leg kick.
Tsubekov has a takedown stuffed.
Tsubekov closes this distance looking for a takedown but Bounser circles away.
That's four minutes gone in the round.
Bounser swings for the body but Tsubekov moves out of range.
Bounser sets himself, and Tsubekov steps forward looking for the clinch! Bounser avoids it this time.
A head kick by Bounser misses

and Tsubekov counters with a shoot takedown. Bounser fights it but they end up in guard.
Bounser wants to hit a sweep here but Tsubekov passes into full mount! Oh no, disaster for Bounser there!
Bounser is working to get back to half guard.
Boooooooooooooooooooo!!! God, this has been a terrible round. Come on you two, sort yourselves out!
Tsubekov is working for a guillotine from mount but Bounser frees his head quite easily.
And that is the end of the round. The fighters go back to their corners.
That was a close second round but I would say that Aisland Bounser will probably get the nod.
OK. That's time! The bell goes and we're back to the action. Let's hear some noise people - this is the final round!
Bounser throws a hook but Tsubekov avoids it easily.
Tsubekov steps in looking to clinch after the strikes miss from Bounser.
Bounser shoots in for a takedown but Tsubekov shows good takedown defense.
Bounser throws a head kick that misses and slips in the process. He scrambles back to his feet and the fighters circle.
Tsubekov tries to counter by closing the distance.
A low kick from Bounser misses
and Tsubekov counters with a takedown into side control.
Tsubekov controls the position.
We've had a slow start to the round here - hopefully the action picks up.
Tsubekov has knee on belly momentarily but Bounser bucks him off and regains half guard.
Bounser wants to control but Tsubekov is keeping busy.
That's one minute gone in the round.
Tsubekov perhaps working for something from half guard, or maybe not. It looks like he's just sitting there.
Aisland Bounser overall seems to be getting the better of the ground position in the fight so far.
Bounser tries to roll over but Tsubekov keeps him under control.
Tsubekov passes to full mount!
That's two minutes gone in the round.
There's not a lot going on here and the crowd are letting the fighters know they're not willing to tolerate a lack of action.
Tsubekov sitting in mount, just looking to control for the moment.
Bounser can't escape the position.
Tsubekov looking to control and managing it successfully.
Tsubekov prevents Bounser from getting the reversal.
Tsubekov wants to control but Bounser has made it back to half guard. Nice work.
Tsubekov seems to be working for a kimura but Bounser defends the submission attempt.
Aisland Bounser is fighting for a decision here - he's started to take the cautious approach.
That's three minutes gone in the round.
Bounser is staying active underneath Tsubekov, who seems content to just control the action from this position.
Bounser has no desire to be mounted, so is trying to control. Tsubekov is working away from the top position though.
Tsubekov perhaps working for something from half guard, or maybe not. It looks like he's just sitting there.
Tsubekov's corner are shouting for him to control the position and he seems happy to oblige.
Tsubekov is continuing to stall.
The referee has stepped in and called for a break in the action. We'll restart on the feet.
That's four minutes gone in the round.
The crowd are getting on the fighters' backs, as the pace has dropped off in the last minute or so.
Bounser rushes Tsubekov and presses him up against the cage.
Tsubekov tries to pull guard but Bounser holds him up against the cage and eventually Tsubekov drops back down to his feet.
An uppercut on the inside fails to land for Bounser.
Tsubekov tries for a takedown. No joy.
Tsubekov has a body lock and is looking for a takedown. Bounser is bouncing around trying to prevent the takedown and somehow he has indeed managed to stay on his feet.
Aisland Bounser has stuffed three takedown attempts in the round now. That's going to take a lot out of Rustam Tsubekov.
Tsubekov has dropped down and is looking to force the takedown but it's defended by Bounser after a bit of a struggle.
Boooooooooooooooooooo!!! God, this has been a terrible round. Come on you two, sort yourselves out!
Bounser throws a head punch that misses.
Bounser tries a shoulder strike but it doesn't do any damage.
A quick uppercut on the inside from Bounser.
Rustam Tsubekov has stepped it up - he knows he needs a finish here!
Tsubekov blocks an uppercut.
And that's the end of the fight!
That was a close round. You could make an argument for either fighter but I would give it to Aisland Bounser.
Well Bounser has outscored his opponent in every aspect of the fight today. Only a scarily incompetent judge or two will keep him from a well deserved win... Over to the ring announcer for the scorecards.
Ladies and gentlemen, after 3 rounds of action, we go to the scorecards for a decision.
Judge Santiago Holmes scores the fight 30:27
Judge Bart Greer scores the fight 30:27
Judge Winston Alpacca scores the fight 30:27
In favor of your winner, by unanimous decision... Aisland Bounser!
|
|
|
|
|
|
|
|
|
|
|
|
|
|
|
|
|
|
|
|
|
|
|
| S |
C
A |
G |
S |
C
B |
G |
|
S |
C |
G |
|
energy
A | B |
|
hype
A | B |
|
pop
A | B |
|
mgr
A | B |
|
FIGHT
RATING
33% |
|
|
|
|
|
|
|
Undercard bout
|
Coming up we have a bantamweight MMA rules bout between Harry Henderson (ranked 3091 p4p, 3739 weight class) and Amangkurat Mauliwarmadewa (ranked 145 p4p, 171 weight class). Mauliwarmadewa has chosen Follow Through as his entrance music. Fingers crossed for an exciting fight - I'm sure both fighters are looking for a nice under the table bonus!
 |
|
 |
| 159 cm
25
135
1 - 1 - 0 |
|
151 cm
25
130
1 - 1 - 0 |
Good wrestling
Basic striking
Very quick |
|
BJJ White Belt
Excellent boxer
Good gas tank |
|
| |
|
Ladies and gentlemen. This fight is 3 rounds, in the bantamweight division.
Introducing the fighter to my left, fighting out of the red corner.
With a record of 1 - 1 - 0, fighting out of The Island, Harry Henderson!
And introducing the fighter to my right, fighting out of the blue corner.
With a record of 1 - 1 - 0, fighting out of The Island, Amangkurat Mauliwarmadewa!
The judges for this bout are Sandra Marshall, Dirk Anderson and Daniel Franklin.
The bell rings for round one and we are underway!
Henderson bobs and weaves into range and then changes levels and scores with a nice takedown into side control.
Henderson working the ground and pound.
Henderson is looking for a kimura. He might have it! No, Mauliwarmadewa has escaped the position, nice work there.
Mauliwarmadewa wants to get back to his feet but Henderson drags him back down.
The fighters are pressed up against the cage, both looking to find a bit of space to work.
Henderson wants to work for a kimura but he's foiled early by Mauliwarmadewa, who protects the arm well.
Henderson has an Americana. Mauliwarmadewa didn't react quickly enough there and he's in big trouble now! He tries to squirm out but is forced to tap! Henderson is delighted and gyrates in front of the ring girls. They seem to like the attention - it'll be interesting to see if Henderson hooks up with any of them at the after show party.
Ladies and gentlemen, after 0:47 of round 1, we have a winner by way of Submission (Americana). Harry Henderson!
Harry Henderson seemed lost for words in his post fight interview but he remembered to thank his fans and directed everyone to his website.
|
|
|
|
|
|
|
|
|
|
|
|
|
|
|
|
|
|
|
|
|
|
|
| S |
C
A |
G |
S |
C
B |
G |
|
S |
C |
G |
|
energy
A | B |
|
hype
A | B |
|
pop
A | B |
|
mgr
A | B |
|
FIGHT
RATING
100% |
|
|
|
|
|
|
|
Undercard bout
|
Coming up we have a light heavyweight MMA rules bout between Sterling Turner (ranked 2841 p4p, 3474 weight class) and Archie Laird (ranked 363 p4p, 441 weight class). The key to victory for Sterling Turner has got to be keeping the fight on the feet.
 |
|
 |
| 183 cm
25
200
2 - 2 - 0 |
|
180 cm
25
211
1 - 0 - 0 |
BJJ Blue Belt
Counter fighter
Granite chin |
|
Good wrestler
Basic striking
Granite chin |
|
| |
|
Ladies and gentlemen. This fight is 3 rounds, in the light heavyweight division.
Introducing the fighter to my left, fighting out of the red corner.
With a record of 2 - 2 - 0, fighting out of The Island, Sterling Turner!
And introducing the fighter to my right, fighting out of the blue corner.
With a record of 1 - 0 - 0, fighting out of The Island, Archie Laird!
The judges for this bout are Bart Greer, Santiago Holmes and Dirk Anderson.
The bell rings for round one and we are underway!
Laird gets off balance looking for a body kick
and Turner counters with a single leg into guard. Laird didn't expect that.
Turner postures up to throw the ground and pound strikes but they don't connect.
Laird trying to control the position here.
Turner throws a big elbow that misses.
Laird wants to control here, rather than go for any submissions from the bottom. At least for now.
Laird looking for a guillotine here but Turner defends easily.
We've had a slow start to the round here - hopefully the action picks up.
Turner throws an elbow that misses. Laird uses the momentum to reverse the position. He's now in Turner's guard. Nice move by Laird!
The ref warns both fighters not to hold the cage as they work up against the meshing.
Laird landing with the ground and pound.
That's one minute gone in the round.
Laird is frustrating his opponent with some stalling tactics from top position.
Turner looking to control.
Laird is sitting in guard, working some ground and pound.
Turner wants to sweep but no luck.
Laird showing good wrestling skills to control the position.
Laird cracks Turner with a solid left hand.
Laird is frustrating his opponent with some stalling tactics from top position.
That's two minutes gone in the round.
The crowd are hurling abuse towards the fighters... You can hardly blame them though because there isn't a lot going on in the fight.
Laird landing some decent shots from guard.
Laird keeps in close for a moment and lands a decent shot to the side of Turner's head.
Laird wants to control from the top but Turner keeps moving.
Laird makes a bit of distance and scores with some ground and pound, still in guard.
Laird chips away with some ground and pound.
Laird postures up and lands a big shot to Turner's brow.
Laird postures up and scores with a shot to the body and a follow up elbow to the head.
Laird postures up and scores with a shot to the body and a follow up elbow to the head.
The fighters are pressed up against the cage, both looking to find a bit of space to work.
Laird won't allow Turner to sweep him here.
Turner on his back here. We all know that wrestlers don't like being on their back so let's see if Turner tries to get out of the position.
Laird working from the guard for now, landing some ground and pound.
That's three minutes gone in the round.
Laird looking to control the position here, rather than advance.
Laird landing some decent shots from guard.
Turner is working from a closed guard but he's struggling to control his opponent.
Laird connects with a couple of short punches.
Turner is looking to stand back up but Laird counters by passing into half guard. Oops... bit sloppy there by Turner.
Laird is controlling the pace.
Laird stops Turner from getting back to his feet.
That's four minutes gone in the round.
There's not a lot going on here and the crowd are letting the fighters know they're not willing to tolerate a lack of action.
Laird slows the pace down in half guard.
Laird lands with an elbow from half guard - that looked like it hurt.
Laird not doing much here.
Boooooooooooooooooooo!!! God, this has been a terrible round. Come on you two, sort yourselves out!
Laird lands strikes from half guard.
And that is the end of the round. The fighters go back to their corners.
Archie Laird dominated that round.
That's the end of the interval. I'm sure that seemed a lot quicker than a minute for our two fighters! Back to the action.
Laird moves into the clinch successfully.
Laird goes for a takedown in the clinch but Turner prevents it.
Laird gets control of Turner's arms and successfully pulls guard. Laird will no doubt be looking for submissions off his back.
We've been informed that Laird has been working hard on his conditioning in the buildup to the fight.
Turner in full guard, throwing the ground and pound. No damage this time.
Turner makes a bit of distance and scores with some ground and pound, still in guard.
Laird tries to land a sweep but no joy.
Laird throws a couple of shots from the bottom but they don't land.
Laird has been the more effective fighter overall so far.
We've had a slow start to the round here - hopefully the action picks up.
Laird is working the butterfly guard. He manages to land a nice scissor sweep and is now in half guard on the top. Nice move.
Ground and pound from Laird.
Nice strikes from Laird there.
Laird stops Turner from getting back to his feet.
That's one minute gone in the round.
Turner on the receiving end of some nice ground and pound.
Turner is looking to escape.
Laird looks towards his corner to check for any instructions. The corner give him nothing to work with, so he cracks Turner with a short hammerfist. I guess that's as good as any advice he could get in this position.
Laird lands with a punch from half guard.
Turner looks to be in better condition than last time we saw him fight. Obviously he's been working hard on his cardio.
Laird slows the pace down in half guard.
Turner trying to control but Laird postures up.
Laird seems very keen to just sit and control from half guard but Turner does not like that idea so much and is remaining active off his back.
Laird content to control rather than advance.
Turner trying to control from the bottom.
That's two minutes gone in the round.
Turner is looking for a sweep. Laird is wise to his cunning plan and keeps the top position.
Laird seems to be taking a bit of a break to think of his next move. He lands a short punch in the meantime.
Laird slips a nice elbow through Turner's hands, connecting with Turner's forehead.
Laird seems to be taking a bit of a break to think of his next move. He lands a short punch in the meantime.
Laird sitting and controlling from the half guard.
Archie Laird has got the better of the ground game so far.
Laird is looking for a kimura. It's going to be difficult to finish that from half guard though and Turner defends it well.
Laird moves into full mount! Turner won't be happy about that!
The referee warns Turner that he has to improve his position here as he takes two more clean shots to the head.
That's three minutes gone in the round.
Laird punishing his opponent with strikes.
Laird looking to ground and pound his opponent to a finish here.
Turner is rocked!
Both fighters are absolutely exhausted here.
Turner is really trying hard to get back to his feet.
Oh Turner is still in real trouble! Will he be able to recover?!!
Laird cracks Turner with a big head shot that has him covering up instantly! He's rolled onto his side and the referee has seen enough - this one is aaaaaaaaaaall over!
Ladies and gentlemen, after 3:32 of round 2, we have a winner by way of TKO (Strikes). Archie Laird!
During a confident post fight interview, Archie Laird thanked all his fans. He seemed very genuine when describing how motivated his fans keep him.
The defeated Sterling Turner had this to say: 'win next time'.
|
|
|
|
|
|
|
|
|
|
|
|
|
|
|
|
|
|
|
|
|
|
|
| S |
C
A |
G |
S |
C
B |
G |
|
S |
C |
G |
|
energy
A | B |
|
hype
A | B |
|
pop
A | B |
|
mgr
A | B |
|
FIGHT
RATING
34% |
|
|
|
|
|
|
|
Undercard bout
|
Coming up we have a featherweight MMA rules bout between BH Turner (ranked 2695 p4p, 3455 weight class) and Calvin Shields (ranked 259 p4p, 312 weight class). These two fighters really are very evenly matched on the feet - it will be fascinating to see who can assert themselves in that aspect of the fight.
 |
|
 |
| 175 cm
25
150
2 - 0 - 0 |
|
172 cm
25
150
1 - 0 - 0 |
BJJ Blue Belt
Brawler
Cuts easily |
|
Good wrestler
Basic striking
Solid chin |
|
| |
|
Ladies and gentlemen. This fight is 3 rounds, in the featherweight division.
Introducing the fighter to my left, fighting out of the red corner.
With a record of 2 - 0 - 0, fighting out of The Island, BH Turner!
And introducing the fighter to my right, fighting out of the blue corner.
With a record of 1 - 0 - 0, fighting out of The Island, Calvin Shields!
The judges for this bout are Sandra Marshall, Bart Greer and Peter Branson.
The bell rings for round one and we are underway!
Shields dives in and grabs Turner's left leg, looking for a takedown. Turner pushes down on Shields's head and hops out.
Shields looks frustrated there after his takedown attempt is stuffed easily.
Shields looks frustrated there after his takedown attempt is stuffed easily.
BH Turner has stuffed three takedown attempts in the round now. That's going to take a lot out of Calvin Shields.
Turner slaps away a takedown attempt from Shields, before circling back to the center of the mat.
Turner appears to be looking for a big counter.
Turner stuffs the takedown.
Turner lands with a nice low kick. That'll leave a bruise.
Shields has a takedown stuffed.
Shields shoots in and gets a takedown into Turner's guard.
We could do with one of the fighters taking the initiative a bit more on the ground - they're both waiting to capitalize on a mistake.
Turner controls Shields momentarily but Shields frees himself.
We've had a slow start to the round here - hopefully the action picks up.
Shields works over Turner with some ground and pound from guard.
Shields loading up with the ground and pound but he's missing more than he's landing in this flurry.
Shields controlling from the guard. I say controlling but really, he's stalling.
That's one minute gone in the round.
Shields got a little sloppy there for a moment and Turner has worked his way into a loose triangle - can he finish it?! No, Shields has managed to get both his arms back between Turner's legs - danger averted.
Shields with a couple of shots to the head there. Not particularly brutal.
Shields scoring with some ground and pound.
Turner is working from a closed guard but he's struggling to control his opponent.
Shields with a couple of shots to the head there. Not particularly brutal.
Shields works over Turner with some ground and pound from guard.
Shields controlling from the guard. I say controlling but really, he's stalling.
Shields is sitting in guard, working some ground and pound.
That's two minutes gone in the round.
The crowd are getting on the fighters' backs, as the pace has dropped off in the last minute or so.
Shields stays in close to Turner's body and controls the position.
Shields chips away with some ground and pound.
Shields with a nice head shot there.
Shields lands a nice shot whilst sitting in his opponent's guard.
Shields is just sitting in guard, looking to avoid any submissions.
Turner looks to be in better condition than last time we saw him fight. Obviously he's been working hard on his cardio.
Turner looking for submissions off his back, moving his hips, looking for an opening.
Shields scores with a decent looking elbow strike.
Shields works over Turner with some ground and pound from guard.
That's three minutes gone in the round.
Hammerfist, elbow! yells Shields's corner. There ya go! There ya go!
Turner is rocked!
Shields is in close to Turner's body, working some short punches and elbows.
Oh Turner is still in real trouble! Will he be able to recover?!!
Shields postures up from his opponent's guard, before exploding into some vicious ground and pound! Turner covers up, he's hurt! Shields keeps throwing the strikes, glancing at the referee... Will he stop it?? One more big shot from Shields and the ref steps in to end the fight! Shields can't hide his delight as he celebrates with his corner.
Ladies and gentlemen, after 3:26 of round 1, we have a winner by way of TKO (Strikes). Calvin Shields!
In defeat, BH Turner stepped up to the mic, saying 'shit happens'.
|
|
|
|
|
|
|
|
|
|
|
|
|
|
|
|
|
|
|
|
|
|
|
| S |
C
A |
G |
S |
C
B |
G |
|
S |
C |
G |
|
energy
A | B |
|
hype
A | B |
|
pop
A | B |
|
mgr
A | B |
|
FIGHT
RATING
31% |
|
|
|
|
|
|
|
Co-main event
|
Coming up we have a lightweight MMA rules bout between Ed Green (ranked 3558 p4p, 3055 weight class) and Marques Moura (ranked 392 p4p, 341 weight class). Moura is bobbing his head along to his entrance song: Sepultura - Tainted Love. Marques Moura has the better chin. Will he look to stand and bang today?
 |
|
 |
| 175 cm
25
162
2 - 1 - 0 |
|
188 cm
25
165
1 - 0 - 0 |
Good takedowns
Brawler
Big heart |
|
BJJ Blue Belt
Basic striking
Solid chin |
|
| |
|
Ladies and gentlemen. This fight is 3 rounds, in the lightweight division.
Introducing the fighter to my left, fighting out of the red corner.
With a record of 2 - 1 - 0, fighting out of The Island, Ed Green!
And introducing the fighter to my right, fighting out of the blue corner.
With a record of 1 - 0 - 0, fighting out of The Island, Marques Moura!
The judges for this bout are Daniel Franklin, Bart Greer and Peter Branson.
The bell rings for round one and we are underway!
Horrible takedown attempt by Green or perhaps it was just good defense by Moura, which made it look bad.
Moura feints a counter leg kick.
Green definitely looks more muscular than last time we saw him fight.
Green changes levels and drives through with a really nice takedown into side control. Moura looks really pissed at himself for not defending that better.
Moura is looking to reverse the position.
Moura trying to remain calm as Green controls from the top position.
Moura prevents Green from moving into mount.
Moura tries to bench press Green off him but Green keeps the position.
Green tries for a kimura. Not really close to a finish though.
Moura is trying to get back to half guard.
We've had a slow start to the round here - hopefully the action picks up.
You can see the frustration on Moura's face as Green controls the position.
Moura gets one leg under and gets the fight to half guard.
Moura is a painfully thin specimen of a man. You do wonder whether a good body kick would snap him clean in two.
Green wants to pass the guard but Moura is defending well.
That's one minute gone in the round.
Green is keen to just control but Moura is a slippery customer.
Moura tries to get to full guard but Green has control of the leg.
Moura is looking to control Green's leg but it's slowly edging free. Can Moura avoid being mounted?
Green passes to side control.
Moura tries to get back to half guard but can't.
Green tries to move into full mount but can't pass Moura's legs.
Green is looking to finish here, going for an Americana. Moura knows the correct defense though, so he's OK.
Moura is trying to work for a sweep but Green has mounted him!
That's two minutes gone in the round.
Green trying to control but he's not successful this time.
Green fails to advance to Moura's back.
Moura throwing hammer fists to the chest of Green. What's that going to do exactly?
Moura is controlling an arm, preventing Green from taking his back. Although keeping him in mount is no better to be honest.
Moura is writhing around trying to get back to his feet.
Green seems to be looking to move to his opponent's back but Moura is holding on tight.
Green tries to control but Moura wriggling away.
Moura wants to hold on but Green pushes him away.
Green controlling from the full mount.
That's three minutes gone in the round.
Moura gets back to half guard.
Moura is pressing down on Green's left leg trying to get back to full guard. He's managed it.
Green sitting in guard here, content to control.
Moura is working an open guard here, looking to improve his position. No doubt that will leave him open to counters but at least he's being more offensive.
Green slips nicely into half guard.
Well, if Green is going to just lie there, perhaps we should talk about what we're having for dinner tonight
I'm having a ham and pineapple pizza
Yum. Can't wait.
Green tries to pass to full mount but Moura defends it.
Moura is trying to maintain the position but Green is very close to passing his half guard.
That's four minutes gone in the round.
Green passes to side control.
Moura struggling a bit here.
The ref warns both fighters not to hold the cage as they work up against the meshing.
Green trying to control the action but Moura is working from the bottom.
Green is looking for a kimura. He might have it! No, Moura has escaped the position, nice work there.
Boooooooooooooooooooo!!! God, this has been a terrible round. Come on you two, sort yourselves out!
Green working hard here to secure a kimura but he's not really in the right position for it.
And that is the end of the round. The fighters go back to their corners.
Ed Green dominated that round.
That's the end of the round. The referee orders the cornermen out of the cage so we can get back down to business.
Moura clinches with his opponent.
Moura trying to land knees to the body.
Moura lands a knee to the body.
Moura's coach down at was telling us pre-fight that they have been working on Moura's balance. Obviously they view that as a key factor in the outcome of this fight.
Green tries to jump guard but he falls flat on his backside. Moura smiles and moves away.
Green shoots in for a takedown. He's persisting with it as Moura sprawls well. Moura wins this battle and keeps the fight standing. Green gets slowly back to his feet.
Moura darts in and clinches Green up against the cage.
Moura slowing the pace effectively.
We've had a slow start to the round here - hopefully the action picks up.
Green is trying to pull guard but Moura has him pressed against the cage.
That's three failed takedown attempts in the round for Ed Green. That's going to take a lot out of him.
The referee calls for Moura to work.
Moura has Green pressed against the cage.
Moura stalling in the clinch but Green improves position.
That's one minute gone in the round.
Moura with the Thai clinch. He's looking to land a big knee but he's not managed it this time.
Moura lands a nice trip takedown into half guard.
Green is not content to let Moura control the position.
Green gets full guard.
Green might be looking to lock onto one of his opponent's long limbs for a submission, whilst we're on the ground.
Moura stands and throws Green's legs to the side, diving into side control.
Moura working away.
Green manages to get one leg in to regain half guard.
Moura is keen to just control but Green is a slippery customer.
Moura tries to pass to full mount but Green defends it.
Green moves his hips nicely and gets into full guard.
Moura slips nicely into half guard.
That's two minutes gone in the round.
Green is looking to regain full guard. Not this time though.
Moura with the ground and pound but Green uses the opportunity to regain guard.
Green looking for a guillotine here but Moura defends easily.
Green controlling Moura's posture.
The fans in attendance giving it up for the two fighters, who have really let it all hang out in the last minute or so!
Green is working actively off his back, looking to secure an arm or perhaps work for a triangle.
Moura throws a big right hand that misses.
Both fighters have adopted an aggressive gameplan on the ground!
That's three minutes gone in the round.
Green keeping moving, preventing Moura from controlling successfully.
Moura must be cautious of submissions here, given that his opponent has the superior Jiu Jitsu.
Green is working an open guard here, looking to improve his position. No doubt that will leave him open to counters but at least he's being more offensive.
Moura missing there with some ground and pound from the guard.
Green looking to sweep here. No luck so far.
Moura really doesn't want to stay on the ground with Green. If he can't get it back to his feet, it's only a matter of time before he'll be tapping out.
Moura avoids a guillotine attempt easily.
Moura lands a couple of elbows.
Moura stopping the sweep attempt from Green.
Green trying to control the position.
Green looking for a guillotine here but Moura defends easily.
That's four minutes gone in the round.
Green wants to hit a sweep here but Moura passes into full mount! Oh no, disaster for Green there!
Moura looking to control but Green is working nicely, looking to advance position himself.
Moura in mount throwing good strikes here, bouncing his opponent's head off the canvas.
Green is looking to get to half guard.
Green taking shots to the head.
The crowd thankful this round is nearly over.
Moura lands a couple of good shots and Green has given up his back, trying to escape the position!
Green is rocked!
This is a great period of action - very entertaining stuff!
Moura working for a RNC but it's not happening just yet.
Oh Green is still in real trouble! Will he be able to recover?!!
Green wants to escape the position.
And that is the end of the round. The fighters go back to their corners.
Marques Moura showed his class in that round. I'd imagine he'll take it on all the scorecards.
The referee calls time. The cornermen exit stage left and we're back to business. This is the final round!
Moura moves into the clinch.
Green seems to have got his legs back now.
Moura gets a trip takedown into half guard.
Green is looking for a sweep. Moura is wise to his cunning plan and keeps the top position.
Green wants to control but Moura is keeping busy and won't allow it.
Green is in a bad position, trying to hold on for dear life but he is really struggling to maintain any sort of control.
Moura throwing shots but Green is blocking nicely.
Green moves his hips nicely and gets into full guard.
Moura being controlled here momentarily.
We've had a slow start to the round here - hopefully the action picks up.
Green looking for submissions off his back, moving his hips, looking for an opening.
Ed Green overall seems to be getting the better of the ground position in the fight so far.
Green keeping moving, preventing Moura from controlling successfully.
That's one minute gone in the round.
Green wants to sweep but no luck.
Moura loading up with the ground and pound but he's missing more than he's landing in this flurry.
Moura throwing strikes from guard but Green blocks nicely.
Moura throwing elbows and punches but not connecting, as Green works some decent striking defense from the bottom.
Moura cracks Green with a solid left hand.
Green is trying to control the position but Moura postures up.
Moura is frustrating his opponent with some stalling tactics from top position.
Moura trying to control but Green is working from the bottom.
Moura lands a nice shot whilst sitting in his opponent's guard.
That's two minutes gone in the round.
Well. There's a bit of a lull in the action here and the crowd are starting to get restless.
Green has his hands on Moura's head, controlling the position.
Green looking to hit a scissor sweep but Moura is one step ahead there.
Green is working for submissions here. He's thrown up his legs looking for a triangle but Moura frees his head nicely. Oh but Green has switched to an armbar! Moura is tapping furiously! Lovely submission there!
Ladies and gentlemen, after 2:42 of round 3, we have a winner by way of Submission (Triangle Armbar). Ed Green!
Marques Moura spoke after the fight, saying 'Seja dono da sua boca, para não ser escravo de suas palavras.'.
|
|
|
|
|
|
|
|
|
|
|
|
|
|
|
|
|
|
|
|
|
|
|
| S |
C
A |
G |
S |
C
B |
G |
|
S |
C |
G |
|
energy
A | B |
|
hype
A | B |
|
pop
A | B |
|
mgr
A | B |
|
FIGHT
RATING
42% |
|
|
|
|
|
|
|
Main event
|
Coming up we have a heavyweight MMA rules bout between Dick Hickock (ranked 2456 p4p, 2055 weight class) and Koto Show (ranked 282 p4p, 236 weight class). I don't know about you partner, but I'm pumped for this one!
 |
|
 |
| 200 cm
25
270
3 - 0 - 0 |
|
182 cm
25
270
2 - 0 - 0 |
BJJ Blue Belt
Excellent boxer
Big right hand |
|
BJJ Blue Belt
Counter fighter
Granite chin |
|
| |
|
Ladies and gentlemen. This fight is 3 rounds, in the heavyweight division.
Introducing the fighter to my left, fighting out of the red corner.
With a record of 3 - 0 - 0, fighting out of The Island, Dick Hickock!
And introducing the fighter to my right, fighting out of the blue corner.
With a record of 2 - 0 - 0, fighting out of The Island, Koto Show!
The judges for this bout are Santiago Holmes, Peter Branson and Bart Greer.
The bell rings for round one and we are underway!
Show closes the distance and pushes Hickock back into the cage.
A bit of stalling here from Show.
Nice body punch from Show.
The referee is keeping an eye on Show - much more stalling and he will separate the fighters.
Show just leaning against Hickock, taking a breather.
Show stays in close to his opponent and throws a right hand to the body.
Hickock is trying to pull guard but Show has him pressed against the cage.
Show lands a short shot on the inside that snaps the head of Hickock backwards.
Some stalling of biblical proportions here from Show.
Show scores with a shoulder strike.
Hickock's head jolts backwards as he takes an uppercut right on the button!
Hickock is trying to pull guard but Show has him pressed against the cage.
Show working some nice short punches in the clinch.
Hickock's head jolts backwards as he takes an uppercut right on the button!
A shot in the inside from Show.
Wooooo! Give it up for these two warriors! They are putting on a show!
A short left from Show.
Show scores with a nice hook to the head.
Hickock is rocked!
Show creates some distance for himself and unleashes a massive uppercut that sends Hickock's eyes rolling into the back of his head! Hickock drops to his knees and Show pours it on with more strikes until the referee steps in to end the bout!
Ladies and gentlemen, after 0:56 of round 1, we have a winner by way of TKO (Strikes). Koto Show!
|
|
|
|
|
|
|
|
|
|
|
|
|
|
|
|
|
|
|
|
|
|
|
| S |
C
A |
G |
S |
C
B |
G |
|
S |
C |
G |
|
energy
A | B |
|
hype
A | B |
|
pop
A | B |
|
mgr
A | B |
|
FIGHT
RATING
82% |
|
|
|
|
|
|
|
|
|
|

