|
TWGC 33 (170lbs, D3): Tokyo Qualifier - Round 2 PBP Commentary |
Co-main event
|
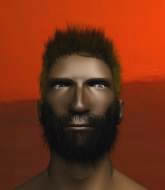
This TWGC bout is 1 fifteen minute round in the welterweight division. Introducing today's competitors. In the red corner, competing out of Los Angeles, with a TWGC record of 1 wins and 0 losses; Sticky Booger! And in the blue corner, fighting out of Tokyo, with a TWGC record of 1 wins and 0 losses; Ryker Lee!
The judges for this bout are Sosuke Kotani, Tatsuya Matsuyama and Taro Takaoka.
The fighters bow as they face eachother in the middle of the mat and we are under way.
Lee fails with the takedown.
Booger drops down looking for a counter takedown but Lee sprawls and moves away.
Booger tries to score a power double leg takedown but Lee sees that one coming and sprawls well. That will dishearten Booger somewhat.
Lee is looking to clinch but Booger is avoiding it.
Booger circles away from the clinch attempt.
Booger drops down looking for a counter takedown but Lee sprawls and moves away.
Lee with a lazy takedown attempt #TD#
and Booger counters with a nice double leg into half guard. Score +2 for takedown into guard / half guard: Booger (2) vs (0) Lee#SUB#
Booger is trying for a guillotine from the top but the pressure isn't in the right place so Lee is just riding it out for now. Booger eventually gives up the hold. #SUB#
Booger is trying to work for a kimura. This could be trouble! No, Lee has managed to free his arm - good work.
We've had a slow start to the round here - hopefully the action picks up.
Lee is refusing to be controlled, as Booger sits in half guard. #T1#
Lee is looking to improve his position.
#SUB#
Booger is working for an americana but Lee has been sneaky and has managed to get back to half guard, whilst Booger was thinking about the submission.#SUB2#
Booger got a little sloppy there for a moment and Lee has worked his way into a loose triangle - can he finish it?! No, Booger has managed to get both his arms back between Lee's legs - danger averted.#SUB2#
Lee escapes his hips to the side and looks to be working for an armbar. Booger gives him a little smile and shakes his head. No chance.
Booger passes into half guard. #SUB#
Booger is thinking about going for an arm triangle but he can't free his leg.
#T2#
Booger looking to pass the half guard. Not this time.
Lee is refusing to be controlled, as Booger sits in half guard.
The ref warns both fighters not to hold the cage as they work up against the meshing.
Lee controlling the leg, holding on to half guard.
Booger is keen to just control but Lee is a slippery customer.
Booger works his way into full mount! Score +3 for passing guard: Booger (5) vs (0) Lee
Booger is trying to take his opponent's back.
#T3#
Lee tries to reverse the position but Booger maintains control.#SUB#
Booger is in full mount, looking to secure a guillotine but Lee is surviving well by controlling Booger's body position as best he can.
Lee is writhing around trying to get back to his feet.
Lee is in all sorts of trouble here.
Lee is squirming around, avoiding Booger's attempts to control the action.
Lee keeping his composure momentarily, calmly looking to get back to half guard.
The fighters are pressed up against the cage, both looking to find a bit of space to work.
Booger looking to control but Lee is working nicely, looking to advance position himself. #T4#
Lee is trying desperately to improve position.
Booger can't quite control the action as he would like just now, as Lee is looking to escape.
Lee is wriggling around trying to escape.
Booger content just to control the position here.
Lee is writhing around trying to get back to his feet. #SUB#
Lee has left one of his arms exposed and Booger doesn't need a second invitation. He's isolated it and locked on a tight armbar. Lee screams and taps out, obviously in a lot of pain. Hopefully there isn't permanent damage to that arm.
Ladies and gentlemen, after 4:57 of round 1, we have a winner by way of Submission (Armbar). Sticky Booger!
After winning the bout, Sticky Booger thanked all his fans and promised he'd do even better in his next fight. The crowd seemed to love his humility. |
|
|
|
Main event
|
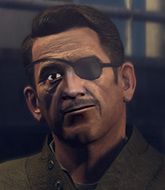
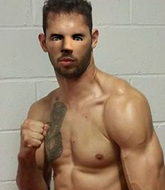
This TWGC bout is 1 fifteen minute round in the welterweight division. Introducing today's competitors. In the red corner, competing out of New York, with a TWGC record of 1 wins and 2 losses; Atanase Teodor! And in the blue corner, fighting out of Amsterdam, with a TWGC record of 1 wins and 1 losses; James Kent!
The judges for this bout are Shirou Masuda, Sosuke Kotani and Ren Mimura.
Let's get this grappling contest under way! Who will be victorious?
Kent shoots in looking for a takedown but Teodor manages to keep the fight standing, pushing Kent's face into the canvas for good measure before circling away.#TD2#
Kent shoots in with a lovely double leg takedown. Teodor manages to land in full guard to minimise the damage. Score +2 for takedown into guard / half guard: Teodor (0) vs (2) Kent
Kent seems content to control from guard here. He's going to have to remain active though if he doesn't want to get stood back up.
Kent trying to control but Teodor is working from the bottom.
Teodor pulls Kent in close to prevent any damage.
Teodor keeping full guard, as Kent tries to pass.
We've had a slow start to the round here - hopefully the action picks up.
Kent being controlled here momentarily.
Kent not doing a lot at the moment. He'll have to show some more aggression or the fight will get stood up. #T1#
Teodor is controlling Kent's posture.
Teodor keeping moving, preventing Kent from controlling successfully.
Teodor is avoiding any damage by keeping wrist control.
Teodor is working the butterfly guard. He manages to land a nice scissor sweep and is now in half guard on the top. Nice move. Score +2 for sweep to guard / half guard: Teodor (2) vs (2) Kent
Teodor is just sitting in half guard, waiting for something to happen.
Kent tries to roll over but Teodor keeps him under control.#T2#
Teodor looks over to his corner - he wants some instructions but his corner are not responding.
The ref warns both fighters not to hold the cage as they work up against the meshing.#SUB2#
Teodor moves into side control, avoiding a weak kimura attempt from Kent. Score +3 for passing guard: Teodor (5) vs (2) Kent
Teodor controls the position.
The fighters are pressed up against the cage, both looking to find a bit of space to work.#T3#
Kent sneaks a leg under to get back to half guard.#T4#
Teodor is just sitting in half guard, waiting for something to happen.
Teodor tries to pass the half guard into mount. Kent knows what he's doing though and prevents the attempt.
Teodor is controlling the pace.
#T5#
Kent won't allow Teodor to pass to mount.
Teodor looks over to his corner - he wants some instructions but his corner are not responding.
Kent wants to control but Teodor is keeping busy.
Kent is looking to improve his position.
Kent has found himself in a tricky position here. He's been working his transitions in training so let's see if he can work his way out of it.
Teodor is controlling the pace.
#T6#
Kent wants to improve his position but Teodor is controlling well.
Kent trying to control here.
#T7#
Teodor not doing much here.
Kent trying to get back to full guard but Teodor takes advantage of the position and moves to full mount! Score +3 for passing guard: Teodor (8) vs (2) Kent#T8#
Teodor sitting in mount, just looking to control for the moment. #T9#
Teodor's ground tactics aren't going to win him many fans. Let's hope he's got fireworks for us if he gets back to his feet because he's not doing much on the ground.
Teodor has controlled the position for a good 20 seconds, which will no doubt be starting to frustrate his opponent.#T10##T11#
Kent is desperately trying to get back to half guard.
#T12#
Teodor controlling his opponent.
Teodor with some aggressive grappling here, looking for the finish.
Teodor tucks in and makes sure he doesn't lose the dominant position.
Kent is wriggling around trying to escape.
Teodor controlling from the full mount. #T13#
This is a sustained period of stalling by Teodor.
Kent is desperately trying to improve his position but Teodor has a good base and remains in mount.
Teodor looking to control and managing it successfully.
Further stalling from Teodor.#T14#
Kent wants to control but Teodor is having none of it.
Teodor controlling the pace for now.
Boooooooooooooooooooo!!! God, this has been a terrible round. Come on you two, sort yourselves out!
And that's the end of the fight!
Teodor takes the fight on points by 8 to 2.
Our winner, Atanase Teodor, made sure he spent some time buttering up the crowd during his post fight interview, which will no doubt bring him a few more fans. |
|
|
|
|
|
|