 |
Sucker Punch Pro Series 75 PBP Commentary |
Undercard bout
|
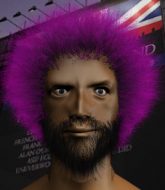
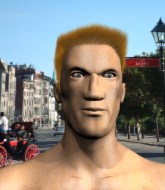
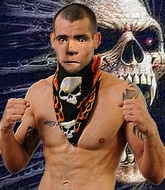
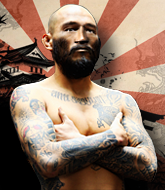
Coming up we have a welterweight MMA rules bout between Nils Norling (ranked 1833 p4p, 22904 weight class) and Pete Dunham (ranked 259 p4p, 619 weight class). Chooooooooon! I think Norling might be my favorite fighter, now he's come out to Scarlet - Age of seduction. Dunham has chosen Im Forever Blowing Bubbles as his entrance music. Pete Dunham has the better chin. Will he look to stand and bang today?
 |
|
 |
| 185 cm
23
175
6 - 3 - 0 |
|
178 cm
25
170
2 - 3 - 0 |
Good wrestling
World class boxer
Cardio machine |
|
BJJ White Belt
World class MT
Good gas tank |
|
| |
|
Ladies and gentlemen. This fight is 3 rounds, in the welterweight division.
Introducing the fighter to my left, fighting out of the red corner.
With a record of 6 - 3 - 0, fighting out of Las Vegas, Nils Norling!
And introducing the fighter to my right, fighting out of the blue corner.
With a record of 2 - 3 - 0, fighting out of New York, Pete Dunham!
The judges for this bout are Ron Honeybunn, Donatello Bradman and John Mangel.

The bell rings for round one and we are underway!
A head kick misses from Dunham.
Dunham throws a lazy body kick
and Norling cracks him with a counter punch right on the button.
 It looks like Pete Dunham has been cut. It looks like Pete Dunham has been cut.
Dunham lands a nice shot to the body.
A head kick by Dunham misses
and Norling counters with a lovely straight right hand!
Dunham uses good footwork to avoid the strikes from Norling.
Dunham goes to the watering hole and comes back with a big thumbs up from the judges as he scores a three punch combo.
 It looks like Nils Norling has been cut. It looks like Nils Norling has been cut.
A slow jab from Dunham misses its intended target.
Donk. Dunham catches Norling right on the button with a cross.
Sloppy strikes from Norling. Those never looked like landing.
The fans in attendance giving it up for the two fighters, who have really let it all hang out in the last minute or so!
Norling on the receiving end of a decent leg kick there by Dunham. Dunham obviously looking to wear him down.
A head kick misses from Dunham.
Norling takes a jab right on the nose. That must have hurt but he shrugs his shoulders and looks to return the favor.

Norling fakes with an overhand right and moves in to clinch with Dunham, pushing him back against the cage.

That's one minute gone in the round.
Dunham blocking some punches.

Dunham breaks the clinch and we're back to striking at distance.
Norling blocks a leg kick.
A looping hook to the body misses from Dunham. Norling does a little dance to reset his feet.
Dunham misses with a body shot
and Norling counters with a crisp hook to the side of the head.
A big left from Dunham misses.
Norling was looking to counter that move with a punch but didn't quite pull the trigger.
Dunham scores with a reasonable looking shot to the body. Norling doesn't seem bothered though.
Dunham throws a body punch but Norling moves out of range.
Norling went nuts there looking for a big combo counter but none of the flurry connected.
Dunham slips under a jab.
Dunham feints a straight left to the body, then turns around with a flashy move and hits Norlings jaw with a dramatic spinning back fist!
Dunham throws a leg kick which misses Norling's front leg but catches the back leg as Norling tries to avoid it.
Dunham works his jab well there, keeping his opponent at a distance.
Norling lands a slapping body shot.
A slapping body kick lands there for Dunham.

That's two minutes gone in the round.
This is a great period of action - very entertaining stuff!
Dunham throws a sloppy body shot
and Norling counters with a crisp hook to the side of the head.
Dunham misses with a series of wild punches.
Dunham is looking to chop away at Norling's legs.
Dunham has tried to improve his agility in the runup to this fight.
Dunham comes forward and lands a shot to the body, then darts back out of range.
Dunham throws a looping overhand right but Norling ducks down to avoid it.
A low kick from Dunham misses
letting Norling counter with a right hand.
Dunham feints and then cracks Norling's leading leg with a nice low kick. He's obviously looking to slow Norling down.
Norling is using his height advantage well here, landing a good percentage of his punches.
Dunham throws a head kick but Norling moves out of range.
Dunham scores with a sloppy right hand. Norling should have avoided that one.
Dunham moves away from the strike by Norling.
A good leg kick by Dunham.

That's three minutes gone in the round.
Norling closes the distance and pushes Dunham back into the cage.
Dunham breaks the clinch and we return to the middle of the mat.
Pete Dunham seems to be the more aggressive standup fighter in this bout.
Dunham throws a body kick but he wasn't in range.
Norling is looking to counter with a shot to the body.
Dunham throws a sloppy body shot
and Norling connects with a straight left hand counter down the middle.
A head kick by Dunham misses
enabling Norling to counter with a crisp jab.
That has opened up Pete Dunham's cut even more.
Norling checks a leg kick nicely.
Norling seemed to be looking to counter by closing the distance.
Dunham lands a jab to the head.
Dunham swings widly with a right hand

and Dunham is countered with a crisp right hand from Norling that sends him to the canvas! Norling follows him to the mat into side control.
 Dunham is rocked! Dunham is rocked!
We've seen a great period of action over the last minute or so - credit to both fighters for going all out!
Norling throws a knee to the body but it doesn't do much damage.
Dunham is still in real trouble! Can Norling finish him?
A big shot lands for Norling! That's hurt Dunham! Will he recover? Norling fires away with more strikes and the referee has to step in to stop the fight!
Ladies and gentlemen, after 4:55 of round 1, we have a winner by way of TKO (Strikes). Nils Norling!
Nils Norling decided to go for the less than humble approach in his post fight interview, telling everyone how he is going to conquer the world. The crowd seemed to like it when really that sort of approach could have gone either way.
|
|
|
|
|
|
|
|
|
|
|
|
|
|
|
|
|
|
|
|
|
|
|
| S |
C
A |
G |
S |
C
B |
G |
|
S |
C |
G |
|
energy
A | B |
|
hype
A | B |
|
pop
A | B |
|
mgr
A | B |
|
FIGHT
RATING
70% |
|
|
|
|
|
|
|
Undercard bout
|
Coming up we have a light heavyweight MMA rules bout between Victor Veidt (ranked 1772 p4p, 3408 weight class) and Morioka Shigemasa (ranked 245 p4p, 427 weight class). Shigemasa has chosen Seek and Destroy as his entrance music. Both fighters look fresh as a daisy as they make their way towards the cage.
 |
|
 |
| 198 cm
22
212
5 - 1 - 0 |
|
192 cm
23
203
4 - 5 - 0 |
Good wrestling
Excellent boxer
Cardio machine |
|
Good wrestler
Lethal high kicks
Good gas tank |
|
| |
|
Ladies and gentlemen. This fight is 3 rounds, in the light heavyweight division.
Introducing the fighter to my left, fighting out of the red corner.
With a record of 5 - 1 - 0, fighting out of Hilo, Victor Veidt!
And introducing the fighter to my right, fighting out of the blue corner.
With a record of 4 - 5 - 0, fighting out of Hilo, Morioka Shigemasa!
The judges for this bout are Ben Hemmingworth, Winston Howard and Summer Carpenter.
The bell rings for round one and we are underway!

Shigemasa instigates a clinch.
Veidt working aggressively here.
Shigemasa wants a takedown but no success here.
Shigemasa controlling the action here for a moment.
A head punch on the inside from Veidt fails to land.
Nice body punch from Veidt.
Veidt misses with a hook from the clinch.
Shigemasa misses with a hook from the clinch.
A head punch on the inside from Veidt fails to land.
Veidt lands an uppercut.
Veidt can't find room to land a body shot as Shigemasa controls the action.
Veidt has been talking about how he's improved his wrestling in the run up to the fight so let's see if that's enough to sway the balance.
Shigemasa displaying some good clinch control by pressing Veidt up against the cage.
Shigemasa can't get the takedown.
We've had a slow start to the round here - hopefully the action picks up.
Veidt blocks a couple of punches on the inside.
Veidt swings wildly with an uppercut but Shigemasa uses good head movement to avoid it.
Shigemasa dictating the pace here, as the fighters clinch against the cage.
Veidt has a couple of punches blocked by Shigemasa.
Shigemasa is looking to take this one to the mat.
Victor Veidt has stuffed three takedown attempts in the round now. That's going to take a lot out of Morioka Shigemasa.
That's one minute gone in the round.
An uppercut on the inside fails to land for Veidt.
Shigemasa breaks the clinch.
Veidt just misses with a punch to the body.
Veidt misses with a hook. Shigemasa ducked under it nicely.
Shigemasa keeps his opponent at a distance with a nice jab.
Veidt slips in close and lands a nice hook before moving back out of range.
Veidt fakes and then throws a beautiful body shot. Shigemasa looks a bit winded and takes a step backwards to take a breath.
Shigemasa walks into a straight right hand from Veidt.
Veidt walks forward and throws a big overhand right! Shigemasa drops to the floor like a sack of potatoes! Veidt swarms on him with more punches until the referee wrestles him away from Shigemasa's unconscious body! Wow, that was brutal!
Ladies and gentlemen, after 1:29 of round 1, we have a winner by way of TKO (Strikes). Victor Veidt!
|
|
|
|
|
|
|
|
|
|
|
|
|
|
|
|
|
|
|
|
|
|
|
| S |
C
A |
G |
S |
C
B |
G |
|
S |
C |
G |
|
energy
A | B |
|
hype
A | B |
|
pop
A | B |
|
mgr
A | B |
|
FIGHT
RATING
60% |
|
|
|
|
|
|
|
Undercard bout
|
Coming up we have a middleweight MMA rules bout between Longsun Zhao (ranked 1138 p4p, 4098 weight class) and Jim Beam (ranked 175 p4p, 532 weight class). Longsun Zhao had a look across the cage there at his opponent. He definitely means business
 |
|
 |
| 185 cm
24
187
8 - 7 - 0 |
|
176 cm
23
185
5 - 10 - 0 |
BJJ Purple Belt
Lethal high kicks
Cardio machine |
|
Good wrestler
Excellent MT
Good gas tank |
|
| |
|
Ladies and gentlemen. This fight is 3 rounds, in the middleweight division.
Introducing the fighter to my left, fighting out of the red corner.
With a record of 8 - 7 - 0, fighting out of New York, Longsun Zhao!
And introducing the fighter to my right, fighting out of the blue corner.
With a record of 5 - 10 - 0, fighting out of Montreal, Jim Beam!
The judges for this bout are Darius Henderson, Damien Edna and Francis DeMontford.
The bell rings for round one and we are underway!

Beam gets a double leg takedown into Zhao's guard.
Beam pressing down on his opponent's thigh, looking to pass guard. Zhao is keeping the position for now.
The ref warns both fighters not to hold the cage as they work up against the meshing.
Beam working from the guard for now, landing some ground and pound.
Beam wants to pass the guard but Zhao is keeping the position.
Zhao is looking to stand up but Beam isn't so interested in that idea.
Beam has the superior BJJ but he's also working some ground strikes into his gameplan.
Beam is sitting in guard, working some ground and pound.
Zhao preventing the ground and pound from doing any damage.
The fighters are pressed up against the cage, both looking to find a bit of space to work.
Beam looking to pass the guard.
We've had a slow start to the round here - hopefully the action picks up.
Beam passes into half guard.
Zhao is in a tricky position. We've heard reports from his gym mates at Iron Wolf Private Gym that he's been drilling escapes, so let's see if he can get back to his feet.
Zhao knows he needs to get back to his feet asap. He's simply no match for Beam on the ground.
Zhao is trying to stand back up but Beam is controlling him
That's one minute gone in the round.
Zhao is refusing to be controlled, as Beam sits in half guard.
Beam lands a big shot. The thud that echoes around the arena is like music to the fans' ears.
Zhao tries to kick Beam off but Beam keeps his base steady and stays in half guard.
Beam working the head and body with strikes.
Zhao has hold of Beam's hands but Beam slips his arm to the side and lands an elbow.
Zhao is trying to stand back up but Beam is controlling him
Zhao is staying active underneath Beam, who seems content to just control the action from this position.

Beam is trying to work for a kimura. This could be trouble! No, Zhao has managed to free his arm - good work.
Beam works his foot free and advances to mount.
Beam lands a big elbow.
That's two minutes gone in the round.
Beam breaks from Zhao's wrist control and lands an elbow.
Beam is dominating on the ground here - he's now on his opponent's back, looking to sink in the hooks. Zhao is in real trouble.
Beam is working really hard to secure the rear naked choke. Zhao defends successfully for a significant amount of time. Both fighters are looking very determined.
Wooooo! Give it up for these two warriors! They are putting on a show!
Zhao is trying to stand back up.
Beam lands with a nice looking elbow that stuns Zhao.

Zhao is trying to get back to his feet. He's worked up on to his knees and now he's on his feet with his head on the canvas, trying to shake Beam off. It looks like it's working - Beam slides off, much to his dismay, and we're back to standing! Zhao displaying calm under pressure there.
Longsun Zhao is looking to keep the fight on the feet at all costs.
Beam uses decent footwork to sidestep a right hand from Zhao.
Zhao waving his hands out in front of him, looking to distract Beam.
That's three minutes gone in the round.
Beam scores with a three punch combo!
Jim Beam seems to be the more aggressive standup fighter in this bout.
Zhao pulls out of a head kick attempt.
Beam blocks a head kick by Zhao.
Beam drives through and clinches with Zhao against the cage.
Zhao wants to push off and get back to the center of the mat but Beam has him pressed against the cage.
Zhao is trying to work out of this bad position, with his back against the cage.
Beam breaks from the clinch.
Beam throws a body shot but no joy.
Zhao throws the left hand but Beam avoids the punch easily.
Zhao throws a sloppy head kick and Beam moves out of range easily.
Nice shot lands for Beam.
Zhao lands with a shot to the body.
Beam clinches up with Zhao and pushes him back against the cage.
Beam is trying to trip Zhao. He has hold of a leg but Zhao is hopping around, keeping his balance for the moment. Beam persists though and gets the takedown into guard.
Fantastic stuff here - a very entertaining period of action, which has drawn cheers from the crowd.
Beam wants to pass the guard but Zhao is keeping the position.
Zhao wants to get back to his feet but Beam passes into half guard.

That's four minutes gone in the round.
Zhao looks like he's trying to stand up.
Beam thows a huge punch but Zhao dodges it nicely.
Beam is keeping good posture, landing some ground and pound.
Zhao is looking to escape.
Zhao has hold of Beam's hands but Beam slips his arm to the side and lands an elbow.
Beam lands a big shot. The thud that echoes around the arena is like music to the fans' ears.
 Zhao is rocked! Zhao is rocked!
Beam working Zhao over with strikes.
Oh Zhao is still in real trouble! Will he be able to recover?!!
Beam is thinking about going for an arm triangle but he can't free his leg.
Beam scoring with strikes to the body and head.
Beam lands a big elbow from half guard. That looks like it's hurt Zhao quite badly. Zhao pulls Beam in close trying to recover. Beam postures up and lands two really hard shots that put Zhao on queer street! The ref takes a look and decides to call an end to the fight! Possibly an early stoppage but Zhao doesn't seem to be complaining too much.
Ladies and gentlemen, after 4:55 of round 1, we have a winner by way of TKO (Strikes). Jim Beam!
A less than humble Jim Beam misjudged his post fight interview somewhat and came across a little too arrogant whilst trying to hype up his own abilities.
|
|
|
|
|
|
|
|
|
|
|
|
|
|
|
|
|
|
|
|
|
|
|
| S |
C
A |
G |
S |
C
B |
G |
|
S |
C |
G |
|
energy
A | B |
|
hype
A | B |
|
pop
A | B |
|
mgr
A | B |
|
FIGHT
RATING
51% |
|
|
|
|
|
|
|
Undercard bout
|
Coming up we have a light heavyweight MMA rules bout between Wille Thai (ranked 2447 p4p, 4136 weight class) and Abraham Barnes (ranked 312 p4p, 515 weight class). Abraham Barnes told me before the fight that he's been watching a lot of DVDs so let's see if that helps him in this one! I can't wait to find out!
 |
|
 |
| 195 cm
24
212
9 - 5 - 0 |
|
185 cm
23
210
4 - 7 - 0 |
Good wrestling
Solid boxing
Granite chin |
|
Good wrestler
Excellent MT
Good gas tank |
|
| |
|
Ladies and gentlemen. This fight is 3 rounds, in the light heavyweight division.
Introducing the fighter to my left, fighting out of the red corner.
With a record of 9 - 5 - 0, fighting out of London, Wille Thai!
And introducing the fighter to my right, fighting out of the blue corner.
With a record of 4 - 7 - 0, fighting out of Las Vegas, Abraham Barnes!
The judges for this bout are John Mangel, Donatello Bradman and Darius Henderson.
The bell rings for round one and we are underway!
Barnes throws a body punch but Thai moves out of range.
Thai tries to counter by moving into the clinch but Barnes manages to circle out of the way.
Barnes looks to land a left hand but Thai moved out of range nicely.
Thai attempts a counter takedown but Barnes avoids it well and moves away.
Thai with a lazy takedown attempt
and Thai takes a counter punch right on the button for his troubles.
Barnes throws a lazy uppercut

and Thai counters with a single leg into guard. Barnes didn't expect that.
Barnes looking to sweep using the butterfly guard but Thai puts pay to that idea as he passes nicely into half guard.
Barnes tries to roll over but Thai keeps him under control.
Thai has been talking about how he's improved his wrestling in the run up to the fight so let's see if that's enough to sway the balance.
The fighters are pressed up against the cage, both looking to find a bit of space to work.
Barnes looking for submissions off his back.

Thai is looking for a kimura here.
We've had a slow start to the round here - hopefully the action picks up.
Barnes looking for submissions off his back.
That's one minute gone in the round.
Barnes wants to get back to full guard.
Barnes is in trouble now - Thai has advanced to mount!
Thai jumps to side control looking for an arm triangle but Barnes manages to avoid the submission attempt.
Barnes tries to bench press Thai off him but Thai keeps the position.
Thai is looking to finish here, going for an Americana. Barnes knows the correct defense though, so he's OK.
Barnes manages to work his way to half guard, despite Thai's best efforts.
Thai is pressing down on Barnes's thigh, looking to free his foot. Barnes is holding on for now.
Thai is trying a forearm choke
I don't think that's going to do much at this level of the game.
That's two minutes gone in the round.
Barnes manages to get to full guard.
Barnes keeping full guard, as Thai tries to pass.
Barnes tries to land a sweep but no joy.
Barnes pulls Thai in close to his closed guard and prevents Thai from doing any damage or advancing position.
Thai stands up and looks to throw the legs aside to pass to side control. Barnes swivels though and keeps the full guard.
Barnes has an omoplata and is looking to use it perhaps as a submission or perhaps to transition. Thai is in a bit of discomfort here, but he's managed to free himself and has dived into side control! That didn't work out too well for Barnes.
Thai tries for a kimura but Barnes is defending well.
That's three minutes gone in the round.
Barnes gives up the full mount - oops, sloppy defensive grappling there!
Barnes regains half guard.
Barnes actively working from the bottom here.
Thai is looking for an arm triangle, whilst trying to pass to side control. Barnes doesn't seem that keen to cooperate though. No luck this time Thai.
Thai is looking for a kimura here.
The ref warns both fighters not to hold the cage as they work up against the meshing.
Thai is pressing down on Barnes's thigh, looking to free his foot. Barnes is holding on for now.
That's four minutes gone in the round.
Barnes is trying to get back to full guard.
Thai is looking for an arm triangle, whilst trying to pass to side control. Barnes doesn't seem that keen to cooperate though. No luck this time Thai.
Thai is looking for a kimura but Barnes is holding onto that half guard position, so it's hard for Thai to get the leverage.
Thai is working for a submission of some sort.
Barnes is looking to regain full guard. Not this time though.
Boooooooooooooooooooo!!! God, this has been a terrible round. Come on you two, sort yourselves out!
Barnes tries to kick Thai off in order to stand up. Thai Avoids the leg push though and dives into side control.
And that is the end of the round. The fighters go back to their corners.
Wille Thai dominated that round.
The fighters' corners scream their final instructions, as the referee calls time. Here we go, back to the action!

Barnes throws the left hand but Thai avoids the punch easily.
Thai gets his takedown attempt stuffed easily
and Barnes counters with a good right hand that lands right on the jaw.
Thai fails with a takedown attempt.
We've had a slow start to the round here - hopefully the action picks up.
Barnes misses with a combination
and Thai counters with a driving takedown into guard. Nice work there by Thai.
Thai works a leg free and moves into half guard.
Thai looking for a kimura but he'll have to free his other leg if he wants to finish that. Perhaps he's just using it as a distraction technique.
That's one minute gone in the round.
Thai is looking for a kimura but he's never going to get it from there.
Barnes looking for submissions off his back.
Thai is working for submissions here but there's nothing on.
Thai is looking for a kimura. It's going to be difficult to finish that from half guard though and Barnes defends it well.
Barnes moves into full guard.
That's two minutes gone in the round.
The crowd are showing their displeasure at the lack of action as loud boos ring out around the arena.
Barnes trying to keep a closed guard but Thai is proving a slippery customer.
Thai trying to pass the guard but can't manage it just yet.
Thai forces his way into half guard.
Thai is looking for a kimura. It's going to be difficult to finish that from half guard though and Barnes defends it well.
Barnes gets back to full guard.
There's a bit of a scramble here and now Barnes is on top in guard.

Barnes keeps in close for a moment and lands a decent shot to the side of Thai's head.
Thai is really dominating this fight. Is there anything that Barnes can do to turn this around?
Thai had isolated an arm as going for a kimura. Barnes defends it easily.
Barnes lands a couple of decent looking shots.
That's three minutes gone in the round.
Barnes trying to control the position from guard on top but Thai is wriggling around, looking for whatever he can.
Barnes lands a nice shot whilst sitting in his opponent's guard.
Barnes trying to control the position from guard on top but Thai is wriggling around, looking for whatever he can.
Barnes with a couple of shots to the head there. Not particularly brutal.
Barnes got a little sloppy there for a moment and Thai has worked his way into a loose triangle - can he finish it?! No, Barnes has managed to get both his arms back between Thai's legs - danger averted.
Thai throws his legs up looking for a submission but Barnes uses it to pass to side control.
Barnes looking for an arm triangle but it's way too loose to do anything.
Barnes trying to control the position but Thai is working away.
Thai is looking to reverse the position.
Barnes trying to control the position but Thai is working away.
Wille Thai overall seems to be getting the better of the ground position in the fight so far.

Barnes decides to stand back up.
That's four minutes gone in the round.
Thai walks into a stiff left hand from Barnes.
Thai tries to shoot in for a takedown. He's got hold of a leg but Barnes swivels and escapes.
That's three failed takedown attempts in the round for Wille Thai. That's going to take a lot out of him.
A jab from Barnes does it's job there.
Abraham Barnes is looking to keep the fight on the feet at all costs.
Thai fakes high and shoots in for a takedown but Barnes avoids it really well and circles away.
The crowd thankful this round is nearly over.
Thai with a lazy takedown attempt
and Barnes connects with a straight left hand counter down the middle.
Barnes displaying good standup as he scores with a three punch combination.
And that is the end of the round. The fighters go back to their corners.
Abraham Barnes showed his class in that round. I'd imagine he'll take it on all the scorecards.
That's time! Back to the action! So, we enter the final round. Let's see if either fighter can bring us a finish, or whether we're going to the judges scorecards.

Barnes stuffs the takedown attempt from Thai. Thai gets slowly back to his feet.
Barnes fails to land with a series of punches.
Thai dives in and grabs Barnes's left leg, looking for a takedown. Barnes pushes down on Thai's head and hops out.
Barnes scores with a shot to the body.
Abraham Barnes seems to be the more aggressive standup fighter in this bout.
Thai takes a hook to the side of the head. I wonder if that's got his ears ringing.
We've had a slow start to the round here - hopefully the action picks up.
A leg kick checked by Thai.
Thai feinted with a counter takedown.
Thai fails with a takedown attempt.
That's three failed takedown attempts in the round for Wille Thai. That's going to take a lot out of him.
That's one minute gone in the round.
Barnes fakes a couple of low kicks, before throwing one on the third attempt. It connects and Thai has to reset his feet before getting ready to engage.
Barnes fakes a head shot and lands one to the body.
Barnes with a body punch. A glancing blow.
Barnes tries to bum rush Thai with a series of wild strikes but Thai uses good footwork to avoid the assault.
Barnes throws the left hand but Thai avoids the punch easily.
Barnes throws a body punch but Thai moves out of range.
Thai changes levels looking for a counter takedown but doesn't commit.
Barnes lands a nice looking body shot.
That's two minutes gone in the round.
Thai tries for a takedown but Barnes sees it coming a mile off and avoids it easily.
A little jabbing left from Barnes on the counter but it doesn't find it's target.
Barnes throws a left and a right that both miss
and Thai counters with a takedown into side control! That could mean trouble for Barnes!
Fantastic stuff here - a very entertaining period of action, which has drawn cheers from the crowd.
Barnes regains half guard.
Thai wants to work for an arm triangle but Barnes is really keeping half guard well and defending the submission attempt.
Thai seems to be working for a kimura but Barnes defends the submission attempt.
Barnes wants to get back to full guard.
Thai wants to work for an arm triangle but Barnes is really keeping half guard well and defending the submission attempt.
Barnes looks like he's trying to stand up.
Thai is trying to work for a kimura but Barnes is defending well.
That's three minutes gone in the round.
Barnes is looking to regain full guard. Not this time though.
Barnes trying to control from the bottom.
Thai is trying to work for a kimura. This could be trouble! No, Barnes has managed to free his arm - good work.
Thai is looking for submissions but instead, Barnes has regained full guard.
Barnes manages to sweep nicely, so he's now on top. Thai manages to get himself to full guard.
Barnes advances to half guard.
Barnes is trying to control the action in half guard but Thai is working away on the bottom, looking perhaps to get back to full guard.
That's four minutes gone in the round.
Thai is looking for a sweep. Barnes is wise to his cunning plan and keeps the top position.
Thai is looking to sinch up a guillotine here but Barnes pulls his head out easily.
Barnes scores with a couple of good hammerfists.
Barnes passes the half guard and he's now in mount! Big trouble for Thai!
Thai tries to get back to half guard but can't.
Thai in a bad spot here, taking shots to the head.
The crowd growing excited in anticipation of a finish here! Right on cue, Barnes cracks his opponent with a massive right hand that draws loud cheers!
Thai tries to reverse the position but Barnes maintains control.
Barnes looking to control but Thai is working nicely, looking to advance position himself.
Barnes is still in mount, landing shots to his trapped opponent. Thai can't stay in a position like this for much longer.
We've seen a great period of action over the last minute or so - credit to both fighters for going all out!
Barnes lands a heavy elbow.
Barnes connects with a couple of good shots from mount.
Thai is looking to improve his position but Barnes isn't that keen on the idea.
And that's the end of the fight!
Abraham Barnes comfortably won the final round on my scorecard.
I think Barnes has won this one but let's see whether the judges agree with me. Over to the ring announcer for the scorecards.
Ladies and gentlemen, after 3 rounds of action, we go to the scorecards for a decision.
Judge John Mangel scores the fight 28:29
Judge Donatello Bradman scores the fight 28:29
Judge Darius Henderson scores the fight 28:29
In favor of your winner, by unanimous decision... Abraham Barnes!
Abraham Barnes was full of energy after the big win and talked about how he thinks he can do big things in this sport. The crowd were appreciative of his determination to succeed.
|
|
|
|
|
|
|
|
|
|
|
|
|
|
|
|
|
|
|
|
|
|
|
| S |
C
A |
G |
S |
C
B |
G |
|
S |
C |
G |
|
energy
A | B |
|
hype
A | B |
|
pop
A | B |
|
mgr
A | B |
|
FIGHT
RATING
37% |
|
|
|
|
|
|
|
Co-main event
|
Coming up we have a middleweight MMA rules bout between Wilfred Ainsworth (ranked 1210 p4p, 2899 weight class) and Derek Patterson (ranked 188 p4p, 405 weight class). Ainsworth comes to the cage accompanied by Fred Neil - Everybody's Talkin'. The crowd seem to be enjoying Patterson's choice of entrance music: I'm So High. Nashville Pussy. Wilfred Ainsworth has the edge in experience - let's see if he can make that count tonight.
 |
|
 |
| 179 cm
22
185
8 - 3 - 1 |
|
179 cm
23
188
2 - 1 - 0 |
Good wrestling
Lethal high kicks
Insanely flexible |
|
Excellent grappler
Excellent MT
Granite chin |
|
| |
|
Ladies and gentlemen. This fight is 3 rounds, in the middleweight division.
Introducing the fighter to my left, fighting out of the red corner.
With a record of 8 - 3 - 1, fighting out of Las Vegas, Wilfred Ainsworth!
And introducing the fighter to my right, fighting out of the blue corner.
With a record of 2 - 1 - 0, fighting out of Sydney, Derek Patterson!
The judges for this bout are Ron Honeybunn, Hugh Johnson and Skip Squint.
The bell rings for round one and we are underway!
Ainsworth tests Patterson's chin there with a solid looking shot.
Patterson misses with a takedown attempt. He shot from a bit too far out.
Ainsworth lands a slapping body shot.
Patterson connects with a slap. Keep your fist closed son.
Ainsworth keeps Patterson at a distance using the push kick.
The fighters circling - Patterson throws out the jab but it was never going to land.
Ainsworth connects with the punch.
Patterson misses with a leg kick.
Patterson connects with a good right hand that stumbles Ainsworth. Ainsworth circles away out of range and recomposes himself.
Ainsworth misses with a low kick.
A jab from Patterson misses.
We've been told by Ainsworth's head coaches at Team Grunt that he's been working on his takedown defense in preparation for this fight.
Patterson is pinned up against the cage taking some big shots here. The referee is looking closely deciding whether he should stop the fight.
Ainsworth scores with a leg kick.
The fans in attendance giving it up for the two fighters, who have really let it all hang out in the last minute or so!
Patterson lands a jab.
Patterson misses with a wild body shot.
Ainsworth misses with a body shot.
We've been informed that Patterson has been sparring a lot of Muay Thai in the buildup to this fight so let's see if that has an impact on the result.
Ainsworth misses with a looping left.
A big right from Patterson misses.
That's one minute gone in the round.
A looping hook to the body misses from Ainsworth. Patterson does a little dance to reset his feet.
Ainsworth misses with a body shot. Nice footwork from Patterson.
Ainsworth lands a straight punch to the body, keeping Patterson at a distance.
Ainsworth keeping his hands up high there, blocking the jab from Patterson.
Wilfred Ainsworth seems to be the more aggressive standup fighter in this bout.
Ainsworth paws at his opponent with the jab and then lunges in with a straight, right on the button.
Nice jab there from Ainsworth.
Ainsworth throws out a loose jab but Patterson uses good head movement to avoid it.
An inside leg kick from Ainsworth misses.
Ainsworth throws a body kick that sends a sickening thudding noise reverberating around the arena.
Ainsworth uses good footwork to avoid the strikes from Patterson.
Good shot there by Patterson.
Ainsworth slips a straight right by Patterson.
Ainsworth swings and misses with a hook to the body.
Patterson misses with a hook.
Ainsworth ducks under a wild hook from Patterson.
Ainsworth takes a jab on the nose. He smiles like he loves it and keeps coming.
The crowd cheering loudly, showing their appreciation for the quality fight we're seeing here.
Patterson throws a low kick but Ainsworth avoids it.
Patterson shoots in looking for a takedown but Ainsworth manages to keep the fight standing, pushing Patterson's face into the canvas for good measure before circling away.
Ainsworth was looking to counter that last move with a shot to the body but he didn't commit.
Patterson looks shocked there as he takes a right hand to the temple.
That's two minutes gone in the round.
Ainsworth lands with an uppercut that bounces Patterson off the cage and back into range.
Ainsworth throws a jab when Patterson was well out of range.
Ainsworth throws a right hand that misses
and Patterson cracks him with a counter punch right on the button.
Ainsworth misses with a low kick.
Ainsworth backing away here, and Patterson unleashes a leg kick that just misses.
Ainsworth finds nothing but air with that leg kick attempt.
Patterson thows a left - swing and a miss!
Ainsworth appeared to be looking to counter that last move with a leg kick.
Ainsworth lands a nice leg kick that just misses Patterson's sensitive parts.
Ainsworth lunges in with an uppercut that skims his opponent's chin.
Ainsworth swings and misses with a hook to the body.
Ainsworth is really peppering his opponent's head with punches.
Ainsworth throws a right hand that misses
and Patterson counters with a stiff right hand.
Patterson tests Ainsworth's chin there with a solid looking shot.
Ainsworth lands a leg kick and bounces back out of range.
Ainsworth misses with a low kick.
Ainsworth ducks down and throws a hook to the body but Patterson moves away.
Ainsworth keeping a good distance there, avoiding the body shot.
Patterson looks to land a right hand but Ainsworth moved out of range.
That's three minutes gone in the round.
A nice inside leg kick there by Ainsworth. That's going to slow Patterson down.
Ainsworth has his front leg slapped to the side - a nice low kick landing there from Patterson.
Ainsworth throws an overhand right that lands on Patterson's shoulder, as Patterson tries to avoid the shot.
Patterson fails in his attempt to clinch.
Patterson dips to his left and cracks Ainsworth with an uppercut!
Patterson cracks Ainsworth with a nice right hand that draws applause from the crowd.
Ainsworth misses with a low kick.
Ainsworth throws a decent looking leg kick but it doesn't land clean.
Patterson throws an uppercut from half a mile away. Ainsworth sees it coming and avoids it easily.
Patterson avoids a lazy jab quite easily.
Ainsworth just misses with a punch to the body.
Patterson keeping his hands up high there, blocking the jab from Ainsworth.
A looping hook to the body misses from Ainsworth. Patterson does a little dance to reset his feet.
Ainsworth slips a jab from Patterson.
Patterson jabbing away but nothing is landing.
A clash of legs there as Ainsworth blocks the low kick.
Ainsworth scores with a nice right hand.
Good work by Patterson as he checks the leg kick.
Patterson appeared to try and counter that last move with a leg kick.
That's four minutes gone in the round.
Ainsworth swings for the body but Patterson moves out of range.
Ainsworth throws a body punch but Patterson moves out of range.
This is a great period of action - very entertaining stuff!
Ainsworth cracks a nice hook into Patterson's ribs.
Ainsworth throws a low kick but his opponent is out of range.
Patterson swings away with a counter right hand but no contact made.
Ainsworth throws a good cross that connects.
Both fighters circling a little - Patterson finishes the exchange with a kick to the body.
Patterson throws an uppercut from half a mile away. Ainsworth sees it coming and avoids it easily.
Patterson walks straight into an uppercut. Luckily it didn't land flush.
Ainsworth tries to score with an inside leg kick but telegraphs it and Patterson is able to avoid easily.
Ainsworth lands a powerful looking uppercut that connected with his opponent's jaw.
Patterson tries to check a leg kick but that clearly hurt him.
A chopping leg kick lands by Ainsworth.
Patterson lands a vicious shot with the stealth of a sniper and the strength of a viper. Are vipers that strong? I can think of lots of things that are stronger than a viper - not many rhyme with sniper though.
The crowd applaud the fighters' efforts here as the round comes to an end.
Ainsworth throws a nice inside leg kick.
Ainsworth misses with a body shot.
Patterson avoids a punch combination nicely.
A shot to the liver by Patterson. Beautiful body shot.
And that is the end of the round. The fighters go back to their corners.
Wilfred Ainsworth dominated that round.
The minute break is over - no more time for sponges and pep talks - back to the action!
Ainsworth takes a swing at Patterson's ribcage but misses.
Patterson looks like he wants to counter punch here.
Patterson waving his hands out in front of him, looking to distract Ainsworth.
Patterson misses with a straight right.
Patterson throws a jab when Ainsworth was well out of range.
Ainsworth appears to be looking for a counter punch to the body.
Patterson with poor footwork there. He got himself in a bit of a tangle, enabling Ainsworth to score with a decent uppercut.
Patterson tries to clinch but Ainsworth is having none of it.
Ainsworth lands with a shot to the body.
Ainsworth moves into range and throws a lovely three punch combination.
Ainsworth buckles his opponent's knee momentarily with a nice leg kick.
Ainsworth getting the better of the striking in that exchange.
A looping hook to the body misses from Patterson. Ainsworth does a little dance to reset his feet.
Patterson lands a beauty of a right hand that gets the crowd cheering.
Patterson throws a right hand that misses
and Ainsworth cracks him with a counter punch right on the button.
Fantastic stuff here - a very entertaining period of action, which has drawn cheers from the crowd.
Patterson takes a shot right to the liver - Bas would have been proud of that punch.
Nice defenses there by Patterson.
Patterson will need to tighten up his combinations if he doesn't want to gas himself out, swinging at thin air.
That's one minute gone in the round.
Ainsworth throws a leg kick
and Patterson counters with a leg kick that reverborates around the arena.
Wilfred Ainsworth is looking to keep the fight on the feet at all costs.
Patterson takes a shot to the body in his stride.
Ainsworth takes a swing at Patterson's ribcage but misses.
Ainsworth just misses with a punch to the body.
Ainsworth connects nicely with a jab. Noted by the judges no doubt.
Patterson misses with a body shot.
Ainsworth half committed to a counter leg kick.
Ainsworth throws a hook to the body but it doesn't connect.
Patterson's leg has a nasty welt from taking a succession of leg kicks. That must be slowing him down.
Ainsworth scores with a body shot.
Patterson takes one to the chin there.
Patterson takes a shot right to the bread basket.
The fighters circling - Patterson throws out the jab but it was never going to land.
Ainsworth ducks under a wild hook from Patterson.
Ainsworth misses the shot to the body.
Ainsworth is looking to slow Patterson down with leg kicks.
Patterson fails with the takedown.
Ainsworth with a nice cross.
That's two minutes gone in the round.
Wooooo! Give it up for these two warriors! They are putting on a show!
Donk. Ainsworth catches Patterson right on the button with a cross.
Ainsworth is really dominating this fight. Is there anything that Patterson can do to turn this around?
Ainsworth lands a pitter patter jab to the forehead of his opponent.
A big right from Ainsworth misses.
Wilfred Ainsworth is winning the standup battle so far.
Ainsworth scores with a jab. Patterson acknowledges it with a nod of the head.
Ainsworth moves out of range of the body kick.
Ainsworth half committed to a counter leg kick.
Patterson looking to throw a kick but he's pulled out of it.
Ainsworth throws a sloppy body shot
and Patterson counters with a lovely straight right hand!
Good exchange - Patterson coming out on top.
Ainsworth takes a jab right on the kisser.
The fighters circling - Ainsworth throws out the jab but it was never going to land.
Ainsworth checks a low kick. Bone on bone - not my idea of a good time.
A telegraphed right hand from Patterson misses the target.
Ainsworth swinging wildly here.
The fighters are going at a pretty good pace and they're both starting to sweat now.
Ainsworth misses with a body shot.
A punch combination from Patterson misses.
Patterson gets off balance looking for a body kick
enabling Ainsworth to counter with a crisp jab.
Patterson has a pretty nasty looking mouse under his right eye.
That's three minutes gone in the round.
Patterson throws a wild combination but nothing lands.
Ainsworth takes one on the button.
Ainsworth blocks a head kick by Patterson.
Ainsworth looks to score with a jab to the body but Patterson is just out of range.
Ainsworth checks a low kick from Patterson.
Patterson slips under a jab.
A nice leg kick lands there from Ainsworth.
Ainsworth misses with a body shot. Nice footwork from Patterson.
Ainsworth takes one on the chin but seems OK.
Ainsworth moves out of range as Patterson strikes.
Ainsworth tries to land a leg kick but Patterson saw it coming and moves away.
Patterson throws out a token jab with nothing on it.
Ainsworth connects with a nice looking jab.
Ainsworth uses good footwork to avoid the strikes from Patterson.
Patterson throws a hook to the body but it doesn't connect.
Ainsworth has his head snapped back a nice jab. A little nod from Ainsworth there as he acknowledges the shot.
Ainsworth uses some good footwork to avoid the body shot by Patterson.
That's four minutes gone in the round.
Ainsworth connects with a body shot.
The crowd are loving this. Great action here.
Ainsworth lands a leg kick. The shin dug right into the meat of the thigh.
Ainsworth misses with a kick to the body.
Ainsworth connects with an inside leg kick.
Ainsworth scores with a nice strike.
Both these guys seem content to just stand up and trade with each other but Patterson might want to think about changing up his gameplan a bit because over the course of the fight, Ainsworth has got the better of the exchanges.
Patterson with a hook.
Patterson uses good footwork to avoid the strikes from Ainsworth.
Ainsworth wings a very wild body shot but it does the job and lands to the midsection.
Ainsworth throws a shot from downtown. Patterson moves away and avoids it.
Ainsworth with a body punch. A glancing blow.
Patterson misses with a looping left.
Patterson misses with a leg kick.
The crowd applaud the fighters' efforts here as the round comes to an end.
Patterson takes a shot to the body in his stride.
Ainsworth throws a nice hook to the body that draws an oooh from the crowd.
Patterson uses good footwork to get in and out, landing a nice hook.
A jab from Patterson finds it's way through Ainsworth's defenses.
And that is the end of the round. The fighters go back to their corners.
Wilfred Ainsworth dominated that second round.
That's time! Ainsworth's corner gives him a slap on the ass as he gets ready to fight. And we move into the final round!
Ainsworth motions for Patterson to come forward. Ainsworth throws a leg kick but it misses it's target.
Ainsworth lands with a thumping leg kick.
Ainsworth is looking to chop away at Patterson's legs.
Patterson throws an overhand right that lands on Ainsworth's shoulder, as Ainsworth tries to avoid the shot.
Patterson misses with a hook. Ainsworth ducked under it nicely.
Ainsworth was looking to counter that move with a punch but didn't quite pull the trigger.
Patterson misses with a looping right.
Ainsworth lands an overhand right.
Ainsworth checks a leg kick.
Ainsworth scores with a hook to the body. Patterson takes a step back and tries to catch his breath.
Ainsworth keeping at a good range here, avoiding a leg kick.
Ainsworth just misses with a punch to the body.
Patterson looks like he wants to counter punch here.
Ainsworth lands a jab to Patterson's midsection.
We've had a slow start to the round here - hopefully the action picks up.
Ainsworth throws a monster uppercut resembling something out of street fighter but it doesn't land.
And Patterson tries to counter it with a takedown but Ainsworth pushes his down on his head and steps out.
That's a knee to de groin and it's over and out! Patterson crumples to the ground after an illegal strike from Ainsworth - the referee stops the clock and Patterson gets 5 minutes to recover from that one. "I'm sorry" says Ainsworth. Patterson manages to get back to his feet and the fight resumes.
Donk. Ainsworth catches Patterson right on the button with a cross.
Patterson connects with a single shot there.
Ainsworth throws out a token jab with nothing on it.
That's one minute gone in the round.
Ainsworth scores with a reasonable looking shot to the body. Patterson doesn't seem bothered though.
Patterson lands with a cross.
Ainsworth finds nothing but air with that leg kick attempt.
Ainsworth misses with a kick to the body.
Patterson takes a step towards his opponent and connects with a left hand, before circling away.
Ainsworth throws a hook but Patterson avoids it easily.
An inside leg kick lands from Ainsworth.
A jab from Ainsworth misses.
Ainsworth ducks down and throws a hook to the body but Patterson moves away.
Patterson pivots, looking for a leg kick but Ainsworth is out of range and Patterson settles back down.
Patterson takes a hook to the side of the head. I wonder if that's got his ears ringing.
Ainsworth swings and misses with a hook to the body.
Ainsworth connects with a body shot that sends Patterson's belly button to the back.
Ainsworth misses with a low kick.
Patterson throws a hard body shot but it just misses.
Patterson avoids the body shot from Ainsworth.
Patterson goes for a double leg but Ainsworth avoids the attempt and the two fighters end up clinched against the cage as Ainsworth continues to drive forward.
Derek Patterson has stepped it up - he knows he needs a finish here!
That's two minutes gone in the round.
Ainsworth throws a hard body shot but it just misses.
Patterson misses with a looping right.
The crowd cheering loudly, showing their appreciation for the quality fight we're seeing here.
Patterson stumbles momentarily as he takes a strong leg kick from Ainsworth.
Ainsworth lands a really nice looking cross but Patterson seems unphased.
Ainsworth misses with a body shot. Nice footwork from Patterson.
Ainsworth darts in and out, connecting with a jab.
Ainsworth scores with a hook to the body. Patterson takes a step back and tries to catch his breath.
Ainsworth shakes his hands off, looking to compose himself, but takes a jab to the jaw whilst he does it.
Patterson jabbing away but nothing is landing.
Ainsworth keeping his hands up high there, blocking the jab from Patterson.
Ainsworth throwing a counter right hand but Patterson manages to avoid it.
Patterson slips under a jab.
Patterson misses with a body punch
and Ainsworth counters with a nice jab to the body that keeps Patterson thinking.
Ainsworth fakes high and swings low for a body shot but Patterson manages to avoid it.
Ainsworth missing with a left hand there. Patterson was out of range so wasted energy throwing that one.
Patterson walks forward, straight into a front kick from Ainsworth.
Ainsworth misses with a low kick.
That's three minutes gone in the round.
Patterson thumps Ainsworth with a low kick.
Patterson misses with a double jab.
Ainsworth looks to score with a jab to the body but Patterson is just out of range.
Ainsworth gets cracked with a nice right hand there by Patterson.
Ainsworth misses with a wild body shot.
Patterson looks to throw the jab but Ainsworth is out of range.
A little feinted left hand from Ainsworth on the counter but he doesn't commit to it.
Patterson blocks a low kick nicely.
And an attempted straight right on the counter from Patterson! But no joy.
Patterson checks a low kick from Ainsworth.
It seemed like Patterson was going to counter with the hook but didn't fully commit to it.
Ainsworth tries to land a front kick but Patterson steps back. That was a bit too telegraphed.
Ainsworth defending well as Patterson loads up on a big left hand.
Patterson throws a hook but Ainsworth blocks it.
Ainsworth tries to land with a swinging hook to the body but Patterson was well out of range. Poor timing from Ainsworth.
Patterson tries a counter takedown but it's more of a dummy move, and he uses it to push himself away.
Ainsworth avoids a low kick by using good footwork.
Ainsworth getting the better of the striking in that exchange.
Patterson lands a nice shot that snaps Ainsworth's head back.
Ainsworth displays some good footwork, moving neatly out of range as Patterson throws out the jab.
That's four minutes gone in the round.
Patterson misses the jab.
Ainsworth throws a solid leg kick but Patterson takes the impact on his shin and smiles at Ainsworth.
Ainsworth moves out of range as Patterson strikes.
Ainsworth throws out a token jab with nothing on it.
Ainsworth scores with a punch to the head.
Fantastic stuff here - a very entertaining period of action, which has drawn cheers from the crowd.
Patterson tries a low kick but Ainsworth avoids it.
Ainsworth is looking to chop away at Patterson's legs.
Patterson scores with a jab to the jaw of his opponent.
Nice uppercut there from Ainsworth.
Patterson misses with a takedown attempt. He shot from a bit too far out.
Patterson drops his hands and takes a jab to the jaw for his troubles.
Ainsworth with a hook.
Patterson shoots in with a takedown attempt and he has Ainsworth pinned against the cage. Ainsworth gets the underhooks and manages to circle away.
And that's the end of the fight!
Wilfred Ainsworth showed his dominance in that final round.
Well Ainsworth has outscored his opponent in every aspect of the fight today. Only a scarily incompetent judge or two will keep him from a well deserved win... Over to the ring announcer for the scorecards.
Ladies and gentlemen, after 3 rounds of action, we go to the scorecards for a decision.
Judge Ron Honeybunn scores the fight 30:27
Judge Hugh Johnson scores the fight 30:27
Judge Skip Squint scores the fight 30:27
In favor of your winner, by unanimous decision... Wilfred Ainsworth!
A relieved looking Wilfred Ainsworth thanked the fans for their support and gave the usual line about them being amazing. They seemed to believe that he actually meant it.
|
|
|
|
|
|
|
|
|
|
|
|
|
|
|
|
|
|
|
|
|
|
|
| S |
C
A |
G |
S |
C
B |
G |
|
S |
C |
G |
|
energy
A | B |
|
hype
A | B |
|
pop
A | B |
|
mgr
A | B |
|
FIGHT
RATING
79% |
|
|
|
|
|
|
|
Main event
|
Coming up we have a featherweight MMA rules bout between Michael Aalto (ranked 166 p4p, 530 weight class) and Magnificent Chulalongkorn (ranked 16 p4p, 56 weight class). Chulalongkorn is bobbing his head along to his entrance song: Yellow Claw & The Opposites - Thunder. Both fighters look fresh as a daisy as they make their way towards the cage.
 |
|
 |
| 177 cm
24
149
11 - 1 - 0 |
|
163 cm
25
144
11 - 4 - 0 |
Abu Dhabi Champ
Excellent boxer
Insanely flexible |
|
Excellent grappler
World class boxer
Good gas tank |
|
| |
|
Ladies and gentlemen. This fight is 5 rounds, for the featherweight championship of the world!
Introducing the champion to my left, fighting out of the red corner.
With a record of 11 - 1 - 0, fighting out of Helsinki, Michael Aalto!
And introducing the challenger to my right, fighting out of the blue corner.
With a record of 11 - 4 - 0, fighting out of London, Magnificent Chulalongkorn!
The judges for this bout are Francis DeMontford, John Mangel and Damien Edna.
The bell rings for round one and we are underway!
Chulalongkorn gets in close and instigates a clinch.
Chulalongkorn tries to throw a body punch but Aalto avoids it by throwing Chulalongkorn back against the cage.
Chulalongkorn throws a punch but it's blocked by Aalto.
Aalto throws a head punch that misses.
Aalto drops down for a takedown but doesn't get it.
Aalto is trying to stall.
A short uppercut from Chulalongkorn.
Chulalongkorn tries to work over Aalto's body with a swooping hook but it only glances the target.
Chulalongkorn fails to land with a short punch on the inside.
Aalto has been talking about how he's improved his wrestling in the run up to the fight so let's see if that's enough to sway the balance.
Aalto has picked Chulalongkorn up - he's going for a ride! Aalto dumps his opponent to the mat with a thud and settles into half guard.
Aalto is looking to take a break and control but Chulalongkorn is keeping him honest, looking to work from the bottom.
Chulalongkorn looking for submissions off his back.
Aalto is looking for the mount but instead finds himself back in full guard.
Aalto looking to pass the guard.
That's one minute gone in the round.
Chulalongkorn working a defensive guard here.
Chulalongkorn is working actively off his back, looking to secure an arm or perhaps work for a triangle.
The fighters are pressed up against the cage, both looking to find a bit of space to work.
Aalto trying to move into half guard but instead Chulalongkorn has managed to sweep!
Aalto wants to sweep but no luck.
Chulalongkorn trying to control the position from guard on top but Aalto is wriggling around, looking for whatever he can.
Chulalongkorn is holding a leg here, probably looking for an ankle lock - he drops back and goes for it! Aalto is in trouble! Is it all over??? No! Aalto has escaped and now he's on top!

Aalto wants to pass the guard but Chulalongkorn is keeping the position.
Chulalongkorn has a loose triangle. He'll be looking to tighten that up but Aalto can see exactly what he's planning and manages to posture up and free himself.
Aalto will need to keep those long limbs tucked in whilst he's on the ground, to prevent any submissions.
That's two minutes gone in the round.
Chulalongkorn working from the bottom, still in full guard. He's managed to get a loose triangle. Aalto doesn't seem to be doing much to defend here, obviously he feels comfortable in the position. Aalto manages to throw the legs off his shoulder and he's back into guard - no problem.
Chulalongkorn keeping moving, preventing Aalto from controlling successfully.
Chulalongkorn is looking for a guillotine. You can't force these things though and Aalto defends well.
Aalto wants to pass the guard but Chulalongkorn is keeping the position.
Our spies down at at The Grind inform us that Chulalongkorn has really been working on his submissions in the buildup to this fight. Will it pay off?
Aalto is working hard here to advance position.
Aalto has gone for a leg lock! Chulalongkorn slips out almost immediately though and dives into Aalto's guard.
That's three minutes gone in the round.
Aalto wants to sweep but no luck.
Aalto being controlled here, momentarily.
Aalto tries to land a sweep but no joy.
Aalto keeping moving, preventing Chulalongkorn from controlling successfully.
Chulalongkorn won't allow Aalto to sweep him here.
Aalto keeping moving, preventing Chulalongkorn from controlling successfully.
Aalto wants to sweep here but Chulalongkorn controlling him for the moment.
Chulalongkorn got a little sloppy there for a moment and Aalto has worked his way into a loose triangle - can he finish it?! No, Chulalongkorn has managed to get both his arms back between Aalto's legs - danger averted.
That's four minutes gone in the round.
Well. There's a bit of a lull in the action here and the crowd are starting to get restless.
Aalto tries to land a sweep but no joy.
Chulalongkorn is stalling in the full guard.
Chulalongkorn passes easily into side control. Nice work.
Aalto tries to bench press Chulalongkorn off him but Chulalongkorn keeps the position.
Chulalongkorn is trying to get an arm triangle but Aalto is defending well.
The crowd thankful this round is nearly over.
Chulalongkorn in side control, working for a kimura. He's got hold of an arm and he's torquing it... Aalto is tapping! That's the end of the fight!
Ladies and gentlemen, after 4:59 of round 1, we have a winner by way of Submission (Kimura). Magnificent Chulalongkorn!
Magnificent Chulalongkorn is the new featherweight champion!
Magnificent Chulalongkorn decided to go for the less than humble approach in his post fight interview, telling everyone how he is going to conquer the world. The crowd seemed to like it when really that sort of approach could have gone either way.
|
|
|
|
|
|
|
|
|
|
|
|
|
|
|
|
|
|
|
|
|
|
|
| S |
C
A |
G |
S |
C
B |
G |
|
S |
C |
G |
|
energy
A | B |
|
hype
A | B |
|
pop
A | B |
|
mgr
A | B |
|
FIGHT
RATING
26% |
|
|
|
|
|
|
|
|
|
|
