|
TWGC 34 (265+lbs, D2): Finals - Round 1 PBP Commentary |
Undercard bout
|
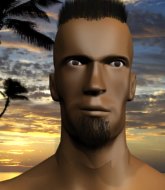
This TWGC bout is 1 fifteen minute round in the super heavyweight division. Introducing today's competitors. In the red corner, competing out of London, with a TWGC record of 2 wins and 1 losses; Jack Potter! And in the blue corner, fighting out of Las Vegas, with a TWGC record of 4 wins and 2 losses; Roger Daly!
The judges for this bout are Albert Achterberg, Aafke Stam and Paulsen Ambrosius.
The fighters bow as they face eachother in the middle of the mat and we are under way.#CL2#
Daly darts in and clinches Potter up against the cage.
Daly drops to a knee looking for a takedown but Potter gets the underhooks and prevents it.
Daly is working on a leg, looking for a takedown but Potter is defending well.
Daly tries for a takedown but Potter manages to get underhooks.
Jack Potter has stuffed three takedown attempts in the round now. That's going to take a lot out of Roger Daly.
Potter is trying to work for a single leg takedown but Daly pulls him back up using the underhooks.
Potter wants to take the fight to the mat but Daly manages to get underhooks and keep the fight in the clinch.
Daly is working for takedown but Potter is calmly controlling the position for now.
Potter has Daly pressed up against the cage and is working for takedown. Daly manages to improve position though and keeps the fight standing.
Daly drops down for a takedown but doesn't get it.
Potter tries for a takedown. No joy.
We've had a slow start to the round here - hopefully the action picks up.
Daly is trying to work for a single leg takedown but Potter pulls him back up using the underhooks. #TD2#
Daly lands a nice trip takedown into half guard.
Score +2 for takedown into guard / half guard: Potter (0) vs (2) Daly
Potter is looking to improve his position.
Daly controlling the pace.
We've been hearing good reports from Potter's training camp. Apparently he has been rolling around with some good quality BJJ practitioners and has been sharpening his skills. Let's see if that has an impact on the fight today.#T1#
Daly is looking to stall here but Potter recovers full guard.
Potter keeping full guard, as Daly tries to pass.
Daly slows down the pace of the fight, as he sits in guard.
Potter managing to control the position. #T2#
Daly won't allow Potter to sweep him here.
Daly wants to control from the top but Potter keeps moving.
Daly trying to pass the guard but can't manage it just yet.
Potter seems keen to control Daly's posture.
Potter being controlled here, momentarily. #T3#
Daly tries to free his leg and advance position but Potter is retaining full guard.
Potter keeping moving, preventing Daly from controlling successfully.
Daly pressing down on his opponent's thigh, looking to pass guard. Potter is keeping the position for now.
Daly is taking a break and basically stalling. The referee will not allow him to do that for long. #T4#
Potter is working an open guard here, looking to improve his position. No doubt that will leave him open to counters but at least he's being more offensive.
Potter keeping full guard, as Daly tries to pass.
Daly looking to sit in guard and control but Potter gets the butterfly guard and sweeps. He's now in the guard on the top. Score +2 for sweep to guard / half guard: Potter (2) vs (2) Daly
Daly looking to sweep here. No luck so far.
Daly managing to control the position.
Potter pushing down on Daly's thigh, trying to pass to half guard. He's managed it... Nice work. #T5#
Daly makes his way to full guard. A much better position for Daly.
Daly wants to sweep here but Potter controlling him for the moment.
Potter controls the pace of the fight for a moment.
Daly working a defensive guard but Potter passes into half guard.
Daly wants to control but Potter is keeping busy.
#T6#
Daly wants to get back to full guard.
Potter works his way into side control. Score +3 for passing guard: Potter (5) vs (2) Daly
Daly holding on.
Daly manages to get back to half guard.
Daly trying to control here.
Potter seems content to maintain position for now, rather than mounting any offense. #T7#
Potter is looking to advance position but Daly won't allow it.
Daly wants to get back to full guard.
Daly is looking to get full guard. It looks like he might be successful but at the last minute Potter jumps into side control! Score +3 for passing guard: Potter (8) vs (2) Daly#T8#
Potter trying to control the position but Daly is working away.
Daly struggling a bit here.
Daly is looking for a sweep.
Daly manages to land a sweep and he's now on top! Lovely Jiu Jitsu! Score +2 for sweep to guard / half guard: Potter (8) vs (4) Daly
Potter is staying active underneath Daly, who seems content to just control the action from this position.
Potter is concentrating on defense, preventing Daly from advancing position.
Potter is not content to let Daly control the position.#T9#
Daly is stalling here. Potter is in no mood to hang around though. He's locked up a kimura from the bottom! Daly seems to be keeping calm but he's forced to roll out of the hold and Potter has ended up in side control on the top. Nice work. Score +4 for clean sweep to past guard: Potter (12) vs (4) Daly
Daly is trying to get back to half guard. He's pushing on Potter's leg. He's managed it. Nice work.
The fighters are battling for position here. Daly manages to regain full guard. Nice work.
Potter seems content to control from guard here. He's going to have to remain active though if he doesn't want to get stood back up.
Daly wants to sweep here but Potter controlling him for the moment.
The fighters are pressed up against the cage, both looking to find a bit of space to work.#T10#
Potter passes into half guard.
Potter controlling the action here.
Potter prevents Daly from improving his position.#T11#
Daly gets back to full guard.
Daly not looking particularly offensive just at the moment.
Potter is stalling in the full guard. #SUB2#
Daly looking for submissions off his back, moving his hips, looking for an opening.
Potter looking to pass the guard. #T12#
Potter passes Daly's right leg, so he's now in half guard.
Daly wants to get back to full guard.
Daly tries to regain full guard. Instead though, Potter has advanced to mount. Uh oh. Score +3 for passing guard: Potter (15) vs (4) Daly
Potter avoids the attempt from Daly to control.
Potter is looking to work his way around to Daly's back. He needs to be careful though, as he's in danger of losing this dominant position.
Daly is trying to reverse the position but instead Potter has taken his back - oops! Score +3 for taking back: Potter (18) vs (4) Daly#T13#
Potter not allowing Daly to control his hands.
Daly wants to escape the position.
Daly looking very determined here, making life difficult for Potter.
Daly looks to control his opponent's hands but he's not mananging it at the moment.
Potter trying to secure his dominant position for a moment - making sure Daly doesn't escape. #T14#
Daly trying to control the position but Potter manages to sink in the hooks.
Daly is very frustrated here, being controlled quite effectively by Potter.
Potter is hanging on to Daly's back as he tries to escape.
A lull in the action here.
Daly tries to escape the position - he's now mounted. Is that better or worse? Hard to tell!
Boooooooooooooooooooo!!! God, this has been a terrible round. Come on you two, sort yourselves out!
Potter controlling the pace for now.
Daly is desperately trying to get back to half guard.
And that's the end of the fight!
Potter takes the fight on points by 18 to 4.
Jack Potter was full of energy after the big win and talked about how he thinks he can do big things in this sport. The crowd were appreciative of his determination to succeed. |
|
|
|
Undercard bout
|
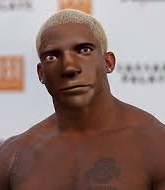
This TWGC bout is 1 fifteen minute round in the super heavyweight division. Introducing today's competitors. In the red corner, competing out of Los Angeles, with a TWGC record of 1 wins and 0 losses; Robert Munson! And in the blue corner, fighting out of Las Vegas, with a TWGC record of 6 wins and 15 losses; Rui Rodrigo Germano!
The judges for this bout are Wagner Zegers, Patrick Alders and Paulsen Ambrosius.
Let's get this grappling contest under way! Who will be victorious?
Munson is looking to clinch. #TD2#
Munson gets caught on his heels momentarily as he allows Germano to score an easy takedown into full guard. Score +2 for takedown into guard / half guard: Munson (0) vs (2) Germano
Germano trying to pass the guard but can't manage it just yet.
Germano trying to control the position from guard on top but Munson is wriggling around, looking for whatever he can.
Munson tries to land a sweep but no joy.
Munson can't do much from the bottom at the moment, as Germano controls the pace.
Germano wants to pass the guard but Munson is keeping the position.
We've had a slow start to the round here - hopefully the action picks up.
Germano won't allow Munson to sweep him here.
Germano looking to sit in guard and control but Munson gets the butterfly guard and sweeps. He's now in the guard on the top. Score +2 for sweep to guard / half guard: Munson (2) vs (2) Germano
Germano lands a beautiful sweep and he's now moved into his opponent's guard. Score +2 for sweep to guard / half guard: Munson (2) vs (4) Germano
The ref warns both fighters not to hold the cage as they work up against the meshing.#T1#
Germano controlling from the guard. I say controlling but really, he's stalling.
Germano trying to control the position from guard on top but Munson is wriggling around, looking for whatever he can.
Germano tries to free his leg and advance position but Munson is retaining full guard.
Munson is trying to keep Germano in close.
Germano is intent on slowing down the pace of the fight, simply looking to control.
Germano wants to pass the guard but Munson is keeping the position.
The fighters are pressed up against the cage, both looking to find a bit of space to work.
Munson keeping moving, preventing Germano from controlling successfully.
Germano stopping the sweep attempt from Munson.#T2##SUB#
Munson working from the bottom, still in full guard. He's managed to get a loose triangle. Germano doesn't seem to be doing much to defend here, obviously he feels comfortable in the position. Germano manages to throw the legs off his shoulder and he's back into guard - no problem.
Germano trying to pass the guard but can't manage it just yet.
Germano postures up.
#SUB#
Germano got a little sloppy there for a moment and Munson has worked his way into a loose triangle - can he finish it?! No, Germano has managed to get both his arms back between Munson's legs - danger averted.
Germano pushes down on Munson's leg and manages to get into half guard.
Germano controlling the action here.#SUB2#
Germano is looking for a kimura. It's going to be difficult to finish that from half guard though and Munson defends it well. #T3#
Germano is just sitting in half guard, waiting for something to happen.
Munson is trying to maintain the position but Germano is very close to passing his half guard.
Munson is in trouble now - Germano has advanced to mount! Score +3 for passing guard: Munson (2) vs (7) Germano
Germano controlling from the full mount.
Munson is wriggling around trying to escape.
Germano seems to be looking to move to his opponent's back but Munson is holding on tight.
Germano forces the positional change into back control. Score +3 for taking back: Munson (2) vs (10) Germano
Germano keeps control of the position easily here as Munson tries to buck him off.
#T4##SUB2#
Munson is displaying good submission defense - not really looking in danger of submitting to the rear naked choke at the moment. That could change in an instant of course if Germano gets his way!
#SUB2#
Germano is looking to finish the fight by rear naked choke. Munson knows exactly what he's got planned though, so he's defending well. Maybe a few strikes would soften Munson for a finish. #SUB2#
Munson fending off the submission attempt from Germano.
Munson just trying to survive but Germano is wriggling into a better position, looking to finish. #T5#
Munson rolls and manages to get back to half guard. Nicely done.
Munson is refusing to be controlled, as Germano sits in half guard.
Germano prevents Munson from improving his position.
Munson won't allow Germano to pass to mount.
Munson is looking to regain full guard. Not this time though.
Germano trying to control from half guard but Munson is working away.
Munson wants to improve his position but Germano is controlling well.
#T6#
Germano has freed up his trapped foot and advances to mount. Score +3 for passing guard: Munson (2) vs (13) Germano
Munson is desperately trying to get back to half guard.
Germano tucks in and makes sure he doesn't lose the dominant position.
Munson is in a tricky position but he's been working on his transitions down at Rad's Flying Circus, so we'll see if he gets out of it.
Munson is working to get back to half guard.
Germano tries to control but Munson wriggling away. #T7##SUB2#
Germano moves into side control, trying to work for a kimura. That looks painful! Will he finish!!?? No, Munson has worked his arm free - good work by Munson!
Munson gives up the full mount - oops, sloppy defensive grappling there! Score +2 for reaching mount: Munson (2) vs (15) Germano
Germano prevents Munson from getting the reversal.#SUB2#
Germano goes for an armbar but he's not got it
Munson turns into him and now he's in Germano's guard.
Score +2 for sweep to guard / half guard: Munson (4) vs (15) Germano#SUB2#
Munson got a little sloppy there for a moment and Germano has worked his way into a loose triangle - can he finish it?! No, Munson has managed to get both his arms back between Germano's legs - danger averted.
Munson preventing the sweep. #T8#
Munson wants to control from the top but Germano keeps moving.
Germano tries to land a sweep but no joy.
Munson pressing down on his opponent's thigh, looking to pass guard. Germano is keeping the position for now.
Germano pulls Munson in close to prevent any damage.
Munson trying to control but Germano is working from the bottom. #T9#
Germano looking to hit a scissor sweep but Munson is one step ahead there.
Munson is fighting to break Germano's control of his arms but Germano is doing a good job of controlling the position at the moment.
Munson looking to pass the guard.
Germano not looking particularly offensive just at the moment.
#SUB#
Munson drops back looking for a leg! Germano is in trouble here! The fighters roll with the hold and Germano manages to kick Munson off! Munson jumps back into Germano's guard.
Germano working a defensive guard here.
#T10#
Germano managing to control the position.
Munson tries to free his leg and advance position but Germano is retaining full guard.
Munson advances position into side control! Score +3 for passing guard: Munson (7) vs (15) Germano
Germano wants to control but Munson postures up.
Munson advances to mount. Score +2 for reaching mount: Munson (9) vs (15) Germano
Germano is in all sorts of trouble here.
Munson seems to be looking to move to his opponent's back but Germano is holding on tight.
Germano is wriggling around trying to escape.
#T11#
Germano is wriggling around here but as he tries to escape, Munson has taken his back.
Score +3 for taking back: Munson (12) vs (15) Germano#SUB#
Munson looking for the choke from the back. #SUB#
Germano won't enjoy being in this position. Munson looking for the choke. Oh... he's slipped the arm under the neck - Germano is tapping - it's over boys! Munson picks up the submission victory!
Ladies and gentlemen, after 11:45 of round 1, we have a winner by way of Submission (RNC). Robert Munson! |
|
|
|
Co-main event
|
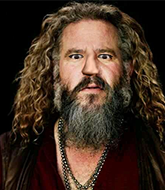
This TWGC bout is 1 fifteen minute round in the super heavyweight division. Introducing today's competitors. In the red corner, competing out of Los Angeles, with a TWGC record of 2 wins and 1 losses; Xandao Couceiro! And in the blue corner, fighting out of Los Angeles, with a TWGC record of 2 wins and 0 losses; Kermit Archer!
The judges for this bout are Saam Ante, Paul Aken and Paulsen Ambrosius.
The fighters bow as they face eachother in the middle of the mat and we are under way.#CL#
Couceiro darts in and clinches Archer up against the cage.
Archer wants to take the fight to the mat but Couceiro manages to get underhooks and keep the fight in the clinch.
Couceiro wants to take the fight to the mat but Archer manages to get underhooks and keep the fight in the clinch.#TD#
Archer is fighting off a takedown attempt but Couceiro is just too persistent for him and manages to trip Archer to the mat. Archer regains guard as soon as the fighters hit the mat. Score +2 for takedown into guard / half guard: Couceiro (2) vs (0) Archer
Archer can't do much from the bottom at the moment, as Couceiro controls the pace.
Couceiro looking to pass the guard.
We've been hearing good reports from Couceiro's training camp. Apparently he has been rolling around with some good quality BJJ practitioners and has been sharpening his skills. Let's see if that has an impact on the fight today.
Couceiro forces his way into half guard.
We've had a slow start to the round here - hopefully the action picks up.
Couceiro perhaps working for something from half guard, or maybe not. It looks like he's just sitting there.
Archer wants to get back to full guard.
Couceiro wants to lay and pray for a moment but Archer keeps working. #T1#
Couceiro controlling the pace.
Archer is looking to improve his position.
Archer wants to control but Couceiro is keeping busy.
Couceiro wants to control but Archer is keeping him busy.
Couceiro content to control rather than advance.
Couceiro prevents Archer from improving his position.#T2#
Couceiro trying to control the action but Archer is working from the bottom.
Couceiro is figuring out what he wants to do next.
Archer works his way to full guard. Good work.
The fighters are pressed up against the cage, both looking to find a bit of space to work.
Couceiro not doing a lot at the moment. He'll have to show some more aggression or the fight will get stood up.
Couceiro won't allow Archer to sweep him here.
Archer is persisting with the attempt to improve his position.
Couceiro controlling from the guard. I say controlling but really, he's stalling. #T3#
Couceiro seems to have a rather negative gameplan on the ground. He seems keen to just score the takedown and hold down Archer for as long as he can get away with.
Couceiro postures up.
Couceiro slows down the pace of the fight for a moment. He'll need to remain active if he doesn't want to see the fight stood back up. #T4#
There's a bit of a scramble here and now Archer is on top in guard.
Score +2 for sweep to guard / half guard: Couceiro (2) vs (2) Archer
Couceiro has a closed guard, preventing anything of note from happening. Perhaps he's looking to stall.
Archer controls the pace of the fight for a moment.
Couceiro has his hands on Archer's head, controlling the position.
Couceiro looking to hit a scissor sweep but Archer is one step ahead there. #T5#
Couceiro has control of Archer's left arm, preventing Archer from doing any damage.
Archer controlling from the guard. I say controlling but really, he's stalling.
Couceiro looking to sweep here. No luck so far.
Couceiro working a defensive guard here.
Couceiro wants to hit a sweep here but Archer passes into full mount! Oh no, disaster for Couceiro there! Score +3 for passing guard: Couceiro (2) vs (5) Archer#T6#
Archer fails to take his opponent's back.
Couceiro is looking to improve his position but Archer isn't that keen on the idea.
Couceiro is working hard here to advance position.
Archer tucks in and makes sure he doesn't lose the dominant position. #T7#
Couceiro is writhing around trying to get back to his feet.
Couceiro tries to improve his position but instead Archer has taken his back! Score +3 for taking back: Couceiro (2) vs (8) Archer
Archer keeps control of the position easily here as Couceiro tries to buck him off.
Couceiro just trying to survive but Archer is wriggling into a better position, looking to finish.
Couceiro is very frustrated here, being controlled quite effectively by Archer.
#SUB2#
Archer is looking for the choke from the back position but Couceiro is controlling his hands well. #T8#
Couceiro trying to control but not successfully.
Couceiro is in a bad position, trying to hold on for dear life but he is really struggling to maintain any sort of control.
A bit of a pause in the action here. Archer controlling the positon.
Couceiro tries to escape the position - he's now mounted. Is that better or worse? Hard to tell!
Couceiro is working to get back to half guard.
#T9#
Couceiro regains half guard.
Archer is figuring out what he wants to do next.
Archer tries to pass the half guard into mount. Couceiro knows what he's doing though and prevents the attempt.
Couceiro wants to control but Archer is keeping busy and won't allow it.
Archer wants to pass to mount but Couceiro is defending the position.
Couceiro is doing well to avoid being mounted. He's controlling the position at the moment.#T10#
Archer works his way into side control. Score +3 for passing guard: Couceiro (2) vs (11) Archer
Couceiro can't do much from the bottom here.
A bit of a lull in the action here.
Couceiro is trying to improve his position.
Couceiro wants to control but Archer postures up.#T11#
Archer trying to control the position but Couceiro is working away.
Couceiro is looking for a sweep.
Couceiro seems a little lost for a moment, as Archer dominates the positioning.
Couceiro is trying to control Archer's posture but Archer avoids it.
Couceiro manages to work his way to half guard, despite Archer's best efforts.
Couceiro tries to get to full guard but Archer has control of the leg.
Well, if Archer is going to just lie there, perhaps we should talk about what we're having for dinner tonight
I'm having a ham and pineapple pizza
Yum. Can't wait.
#T12#
Archer passes the half guard and he's now in mount! Big trouble for Couceiro! Score +3 for passing guard: Couceiro (2) vs (14) Archer
Archer looking to control but Couceiro is working nicely, looking to advance position himself.
Couceiro wants to control but Archer is having none of it.#T13#
Couceiro tries to reverse the position but Archer maintains control.
Archer fails to move to back control.
Couceiro wants to control but Archer is having none of it.
Archer looking to control but Couceiro is working nicely, looking to advance position himself.
The ref warns both fighters not to hold the cage as they work up against the meshing.
Couceiro wants to control but Archer is having none of it.
Couceiro is trying desperately to improve position.#T14#
Couceiro is squirming around, avoiding Archer's attempts to control the action.
Couceiro wants to hold on but Archer pushes him away.
Boooooooooooooooooooo!!! God, this has been a terrible round. Come on you two, sort yourselves out!
Archer trying to control but he's not successful this time.
Couceiro tries to lock up and control but Archer gives him a forearm to the face and pushes him away.
And that's the end of the fight!
Archer wins on points by 14 to 2.
A relieved looking Kermit Archer thanked the fans for their support and gave the usual line about them being amazing. They seemed to believe that he actually meant it. |
|
|
|
Main event
|
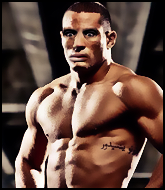
This TWGC bout is 1 fifteen minute round in the super heavyweight division. Introducing today's competitors. In the red corner, competing out of New York, with a TWGC record of 1 wins and 1 losses; Doug Bell! And in the blue corner, fighting out of Los Angeles, with a TWGC record of 1 wins and 0 losses; Hassan Galvao!
The judges for this bout are Daniel Blasius, Radbod Blank and Aafke Stam.
The fighters connect hands in the middle of the mat and we are under way.#TD#
Galvao gets caught napping as Bell dives in and scores a takedown. Galvao manages to retain guard. Score +2 for takedown into guard / half guard: Bell (2) vs (0) Galvao
Galvao keeping full guard, as Bell tries to pass.
Bell is working hard here to advance position.#SUB2#
Galvao is looking for a guillotine. You can't force these things though and Bell defends well.
There's a bit of a scramble here and now Galvao is on top in guard.
Score +2 for sweep to guard / half guard: Bell (2) vs (2) Galvao
We've had a slow start to the round here - hopefully the action picks up.
Bell keeping full guard, as Galvao tries to pass.
Galvao trying to control but Bell is working from the bottom. #T1#
Galvao stands up and looks to throw the legs aside to pass to side control. Bell swivels though and keeps the full guard.
Galvao trying to control but Bell is working from the bottom.
Galvao is in a good position here but he's just trying to control... And he's not even managing to do that successfully.#T2#
Galvao looking to sit in guard and control but Bell gets the butterfly guard and sweeps. He's now in the guard on the top. Score +2 for sweep to guard / half guard: Bell (4) vs (2) Galvao
Bell stopping the sweep attempt from Galvao.
Galvao trying to control the position.
Galvao is working an open guard here, looking to improve his position. No doubt that will leave him open to counters but at least he's being more offensive.
Galvao looking to control.
#T3##SUB2#
Galvao is working for submissions here. He's thrown up his legs looking for a triangle but Bell frees his head nicely. Oh but Galvao has switched to an armbar! Bell is tapping furiously! Lovely submission there!
Ladies and gentlemen, after 3:22 of round 1, we have a winner by way of Submission (Triangle Armbar). Hassan Galvao! |
|
|
|
|
|
|