|
TWGC 35 (185lbs, D2): New York Qualifier - Round 1 PBP Commentary |
Co-main event
|
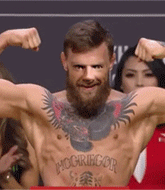
This TWGC bout is 1 fifteen minute round in the middleweight division. Introducing today's competitors. In the red corner, competing out of Montreal, with a TWGC record of 0 wins and 0 losses; McGregor Lee! And in the blue corner, fighting out of Rio de Janeiro, with a TWGC record of 0 wins and 0 losses; Slon Mamontov!
The judges for this bout are Bruno Lombardi, Dean Styles and Joseph Jones.
The official calls the fighters to the middle and the contest is under way.
Lee shoots in but no luck this time.
Mamontov tries a counter takedown but it's more of a dummy move, and he uses it to push himself away.#CL#
Lee has Mamontov up against the cage in a clinch.
#TD#
Lee turns his hips and lands a very nice judo throw into side control! Score +4 for clean takedown past guard: Lee (4) vs (0) Mamontov
The ref warns both fighters not to hold the cage as they work up against the meshing.
Mamontov tries to improve position but can't.
Mamontov struggling a bit here.
Lee trying to control the position but Mamontov is working away. #SUB#
Lee working hard here to secure a kimura but he's not really in the right position for it.
We've had a slow start to the round here - hopefully the action picks up.#SUB#
Lee tries for a kimura. Not really close to a finish though.
Mamontov sneaks back into half guard.#T1#
Lee prevents Mamontov from improving his position.
Lee perhaps working for something from half guard, or maybe not. It looks like he's just sitting there. #SUB2#
Mamontov actively working from the bottom here.
Lee trying to control the pace.
Lee is working hard to pass the guard. He's done it - he's now in full mount! Trouble for Mamontov! Score +3 for passing guard: Lee (7) vs (0) Mamontov#SUB#
Lee with some aggressive grappling here. He's looking for submissions here, rather than waiting for the opportunity to counter.
Mamontov is working to get back to half guard.
The fighters are pressed up against the cage, both looking to find a bit of space to work.#T2#
Lee content just to control the position here.
Mamontov really doesn't want to stay on the ground with Lee. If he can't get it back to his feet, it's only a matter of time before he'll be tapping out.
Lee wants to control the pace but Mamontov is squirming around nicely.
Lee wants to take his opponent's back but he's not managed it. #SUB#
Lee jumps to side control looking for an arm triangle but Mamontov manages to avoid the submission attempt. #T3##SUB#
Lee is looking to finish here, going for an Americana. Mamontov knows the correct defense though, so he's OK. #SUB#
Lee wants to work for a kimura but he's foiled early by Mamontov, who protects the arm well.
Mamontov regains half guard.
Lee sitting and controlling from the half guard.
Lee wants to free his trapped foot but Mamontov is holding on for dear life with his legs. #T4#
Lee looks over to his corner - he wants some instructions but his corner are not responding.
We've been hearing good reports from Lee's training camp. Apparently he has been rolling around with some good quality BJJ practitioners and has been sharpening his skills. Let's see if that has an impact on the fight today.
Mamontov is staying active underneath Lee, who seems content to just control the action from this position. #SUB#
Lee is trying to work for a kimura but Mamontov is defending well.
Mamontov regains full guard. Nicely done.
Mamontov keeping moving, preventing Lee from controlling successfully.
Mamontov being controlled here, momentarily. #T5##SUB2#
Mamontov is looking for a triangle here but Lee uses the submission attempt to pass into side control.
Score +3 for passing guard: Lee (10) vs (0) Mamontov
Mamontov is not content to let Lee control the position. #SUB#
Lee tries for an arm triangle. That looks pretty tight to me. Is this one over!?! Possibly, maybe, no Lee has let go of the choke. Obviously it wasn't as tight as we thought!
Lee is looking to take a break and control but Mamontov is keeping him honest, looking to work from the bottom.
A lull in the action here.#T6#
Lee's ground tactics aren't going to win him many fans. Let's hope he's got fireworks for us if he gets back to his feet because he's not doing much on the ground.#SUB#
Lee tries for an arm triangle. That looks pretty tight to me. Is this one over!?! Possibly, maybe, no Lee has let go of the choke. Obviously it wasn't as tight as we thought! #SUB#
Lee tries for a kimura. Not really close to a finish though.
Lee wants to control but Mamontov is keeping him busy. #T7#
Lee controlling from side mount.
Mamontov tries to work a leg under to get back to half guard but Lee wriggles his own leg back out and remains in side control.
Mamontov stops Lee from passing to mount. #SUB#
Lee working hard here to secure a kimura but he's not really in the right position for it.
Lee working away.#SUB#
Lee is trying to land an Americana. He has the arm isolated but Mamontov is keeping cool and he's avoided the danger for now.
Mamontov is looking to reverse the position.#T8#
Lee content to control the pace. The referee will try and keep them active though.
Mamontov manages to land a sweep and he's now on top! Lovely Jiu Jitsu! Score +2 for sweep to guard / half guard: Lee (10) vs (2) Mamontov
Mamontov trying to pass the guard but Lee defending well.
Lee moves his hips nicely and gets into full guard.#T9#
Mamontov looking to pass the guard.
Lee controls Mamontov momentarily but Mamontov frees himself.
Mamontov looking to sit in guard and control but Lee gets the butterfly guard and sweeps. He's now in the guard on the top. Score +2 for sweep to guard / half guard: Lee (12) vs (2) Mamontov
Lee trying to control but Mamontov is working from the bottom.
Lee stands up and looks to throw the legs aside to pass to side control. Mamontov swivels though and keeps the full guard. #T10#
Lee trying to move into half guard but instead Mamontov has managed to sweep! Score +2 for sweep to guard / half guard: Lee (12) vs (4) Mamontov
Lee trying to control the position.
Lee keeping full guard, as Mamontov tries to pass. #SUB#
Lee looking for a guillotine here but Mamontov defends easily.
Mamontov looking to pass the guard.
Lee is avoiding any damage by keeping wrist control. #T11#
Mamontov trying to pass the guard but can't manage it just yet. #SUB#
Mamontov avoids a guillotine attempt easily.
Lee tries to land a sweep but no joy. #SUB#
Lee had isolated an arm as going for a kimura. Mamontov defends it easily.#SUB#
Lee looking for submissions from the bottom here. Moving his hips around, possibly looking for an armbar.
#SUB#
Lee is throwing his legs up, looking for submissions. Mamontov is aware though and is defending well.
Lee tries to land a sweep but no joy.
Mamontov is stalling in the full guard. #T12#
Lee keeping moving, preventing Mamontov from controlling successfully.
Mamontov slows down the pace of the fight, as he sits in guard. #SUB#
Lee is working actively off his back, looking to secure an arm or perhaps work for a triangle.
Mamontov advances to half guard.
Mamontov tries to pass to full mount but Lee defends it.
Mamontov stalling. #T13#
Lee is trying to get back to full guard.#SUB#
Lee looking for submissions from an awkward position here.
Lee tries to roll over but Mamontov keeps him under control.
Mamontov wants to pass the guard but Lee is defending well. #T14#
Mamontov content to control rather than advance.
Lee is pressing down on Mamontov's left leg trying to get back to full guard. He's managed it.
Mamontov wants to control from the top but Lee keeps moving.
Mamontov is stalling in the full guard.
Lee not looking particularly offensive just at the moment.
Boooooooooooooooooooo!!! God, this has been a terrible round. Come on you two, sort yourselves out!
Mamontov's corner is telling him to maintain position.#SUB#
Lee working for a triangle but Mamontov defends it easily.
And that's the end of the fight!
Lee takes the fight on points by 12 to 4. |
|
|
|
Main event
|
This TWGC bout is 1 fifteen minute round in the middleweight division. Introducing today's competitors. In the red corner, competing out of Las Vegas, with a TWGC record of 0 wins and 0 losses; Michael Scarn! And in the blue corner, fighting out of Sydney, with a TWGC record of 0 wins and 0 losses; Captain Gonza!
The judges for this bout are Eddie Farnsworth, Jorge Garcia and Steve Montenegro.
The fighters bow as they face eachother in the middle of the mat and we are under way.
Gonza keeps the fight on the outside.
Wow, both these guys are really going for it!
Scarn is looking to clinch but Gonza is avoiding it.
#TD2#
Gonza closes the distance and gets a trip takedown into side control. Scarn quickly recovers to half guard. Score +2 for takedown into guard / half guard: Scarn (0) vs (2) Gonza
We could do with one of the fighters taking the initiative a bit more on the ground - they're both waiting to capitalize on a mistake.
Scarn is looking to control Gonza's leg but it's slowly edging free. Can Scarn avoid being mounted?
Scarn controlling the position for now.
Gonza wants to pass the guard but Scarn is defending well.
Scarn keeping control of the position.
We've had a slow start to the round here - hopefully the action picks up.
Scarn wants to improve his position but Gonza is controlling well.
#T1#
Gonza keeping composed on the top, looking to control the action.
Scarn is trying to control but can't.
Gonza is just content to waste time from the top position. Scarn takes advantage of the situation and regains full guard.
Scarn keeping full guard, as Gonza tries to pass.
Gonza looking to sit in guard and control but Scarn gets the butterfly guard and sweeps. He's now in the guard on the top. Score +2 for sweep to guard / half guard: Scarn (2) vs (2) Gonza
Scarn postures up.
Gonza is working the butterfly guard. He manages to land a nice scissor sweep and is now in half guard on the top. Nice move. Score +2 for sweep to guard / half guard: Scarn (2) vs (4) Gonza
Gonza is thwarting Scarn's attempts to control the position.#T2#
Gonza keeping composed on the top, looking to control the action.
Gonza tries to pass the half guard into mount. Scarn knows what he's doing though and prevents the attempt.
Scarn is looking to regain full guard. Not this time though.
Gonza looking to pass the half guard. Not this time.
Gonza slows the pace down in half guard.
Scarn moves into full guard.
#T3#
Gonza trying to control the position from guard on top but Scarn is wriggling around, looking for whatever he can.
Gonza pressing down on his opponent's thigh, looking to pass guard. Scarn is keeping the position for now.
Scarn might be looking to lock onto one of his opponent's long limbs for a submission, whilst we're on the ground.
Scarn controlling Gonza's posture.
Gonza slips nicely into half guard.#SUB2#
Gonza is looking for a kimura. It's pretty deep but Scarn still has the half guard so he's probably OK. Oh, Scarn has exploded into a beautiful escape there and after a quick scramble, he's ended up in side control on top! Nice work! Score +4 for clean sweep to past guard: Scarn (6) vs (4) Gonza#T4#
Scarn is looking to take a break and control but Gonza is keeping him honest, looking to work from the bottom.
Gonza tries to work a leg under to get back to half guard but Scarn wriggles his own leg back out and remains in side control.
Gonza is sneaking out the side here. He's bucked Scarn off and has taken his back! Score +4 for clean sweep to past guard: Scarn (6) vs (8) Gonza
Gonza tries to get the hooks in deep but Scarn pushed the leg off.
Scarn is really stuck here.
Scarn is working hard here to advance position.
Scarn staying busy and making it hard for Gonza to control.
Gonza controlling from the back.#T5##SUB2#
Scarn is staying cool under pressure, defending well against the rear naked choke attempt from his opponent.
Gonza controlling well, preventing Scarn from escaping the position.
Gonza trying desperately to keep hold of the dominant position.
Gonza is trying to stick to Scarn's back but Scarn is turning into Gonza. He's managed to reverse the position - now he's in Gonza's guard. Polite applause from the crowd in appreciation of some nice Jiu Jitsu by Scarn. Score +2 for sweep to guard / half guard: Scarn (8) vs (8) Gonza
Scarn trying to control but Gonza is working from the bottom. #SUB2#
Scarn got a little sloppy there for a moment and Gonza has worked his way into a loose triangle - can he finish it?! No, Scarn has managed to get both his arms back between Gonza's legs - danger averted.#T6#
Gonza wants to sweep but no luck.
Scarn passes Gonza's left leg - he's now in half guard.
Gonza is working for an escape here. He's hooked one of Scarn's legs and he's managed to sneak out and take Scarn's back! Score +4 for clean sweep to past guard: Scarn (8) vs (12) Gonza#SUB2#
Gonza has his hand under the chin of his opponent looking for the choke. He's nearly got it! This one could be all over! But no, Scarn has freed his hand and lives to survive another
well, another couple of seconds at least!
Scarn trying to control the position but Gonza manages to sink in the hooks. #SUB2#
Scarn defending nicely against the rear naked choke attempt.
I really don't envy Scarn right now.
#T7#
Scarn looks to control his opponent's hands but he's not mananging it at the moment.
The crowd hopeful of a finish here - Gonza's supporters are on their feet, screaming for him to go for the rear naked choke.
#SUB2#
Scarn showing good submission defense here.
Gonza is looking to control Scarn but Scarn is wriggling around and keeping busy. #SUB2#
Gonza is looking to finish the fight by rear naked choke. Scarn knows exactly what he's got planned though, so he's defending well. Maybe a few strikes would soften Scarn for a finish. #T8#
Scarn trying to control the hands but Gonza won't let him.
Scarn tries to escape the position.
#SUB2#
Gonza is working for the rear naked choke. He has one arm under the chin but Scarn has hold of the other arm. A bit of a stalemate here.
Gonza controlling well, preventing Scarn from escaping the position.
The ref warns both fighters not to hold the cage as they work up against the meshing.#T9##SUB2#
Gonza is looking to finish the fight by rear naked choke. Scarn knows exactly what he's got planned though, so he's defending well. Maybe a few strikes would soften Scarn for a finish. #SUB2#
Scarn defends a rear naked choke attempt by controlling one of Gonza's arms.
Gonza gets his hands free as Scarn looks to control. #SUB2#
Gonza tightening his grip on Scarn, looking for the choke.
The fighters are pressed up against the cage, both looking to find a bit of space to work.#SUB2#
Scarn defends a rear naked choke attempt by controlling one of Gonza's arms. #T10##SUB2#
Scarn is staying cool under pressure, defending well against the rear naked choke attempt from his opponent.
#SUB2#
Scarn is staying cool under pressure, defending well against the rear naked choke attempt from his opponent.
#SUB2#
Gonza working for the choke. #T11#
Scarn is in bad spot here.
#SUB2#
Gonza is looking to finish the fight by rear naked choke. Scarn knows exactly what he's got planned though, so he's defending well. Maybe a few strikes would soften Scarn for a finish.
Gonza is looking to control Scarn but Scarn is wriggling around and keeping busy. #SUB2#
Gonza is working for the rear naked choke. He has one arm under the chin but Scarn has hold of the other arm. A bit of a stalemate here.
Scarn breaks Gonza's hooks off and manages to turn into his guard.
Score +2 for sweep to guard / half guard: Scarn (10) vs (12) Gonza#T12#
Scarn tries to free his leg and advance position but Gonza is retaining full guard.
Scarn not doing a lot at the moment. He'll have to show some more aggression or the fight will get stood up.
Scarn tries to free his leg and advance position but Gonza is retaining full guard.
Gonza looking for a sweep. Not yet Gonza, not yet.
Scarn trying to control but Gonza is working from the bottom. #SUB#
Scarn drops back looking for a heel hook - he quickly realises he's not going to get it but Gonza manages to dive on top of him before he can escape and now Scarn has Gonza in his guard. Score +2 for sweep to guard / half guard: Scarn (10) vs (14) Gonza
Gonza stopping the sweep attempt from Scarn.#T13#
Gonza trying to control but Scarn is working from the bottom.
Gonza seems content to control from guard here. He's going to have to remain active though if he doesn't want to get stood back up.
Gonza trying to control the position from guard on top but Scarn is wriggling around, looking for whatever he can. #SUB2#
Gonza has gone for a leg lock! Scarn slips out almost immediately though and dives into Gonza's guard. Score +2 for sweep to guard / half guard: Scarn (12) vs (14) Gonza
Gonza can't keep his opponent in guard - Scarn advances to half guard, no doubt looking to mount. #T14#
Gonza wants to improve his position but Scarn is controlling well.
Scarn trying to control from half guard but Gonza is working away. #SUB2#
Gonza actively working from the bottom here.
Boooooooooooooooooooo!!! God, this has been a terrible round. Come on you two, sort yourselves out!
Gonza is trying to get back to full guard.
Scarn moves into full mount! Gonza won't be happy about that! Score +3 for passing guard: Scarn (15) vs (14) Gonza
And that's the end of the fight!
Scarn takes the fight on points by 15 to 14.
Michael Scarn was full of energy after the big win and talked about how he thinks he can do big things in this sport. The crowd were appreciative of his determination to succeed. |
|
|
|
|
|
|