|
TWGC 35 (145lbs, D1): Finals - Round 1 PBP Commentary |
Undercard bout
|
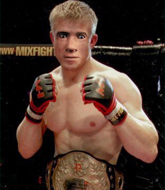
This TWGC bout is 1 fifteen minute round in the featherweight division. Introducing today's competitors. In the red corner, competing out of Los Angeles, with a TWGC record of 10 wins and 5 losses; Reijo Halli! And in the blue corner, fighting out of Los Angeles, with a TWGC record of 15 wins and 19 losses; Roman Boesku!
The judges for this bout are James Atkins, Chris Edwards and Richard Clark.
The official calls the fighters to the middle and the contest is under way.#TD2#
Boesku shoots in looking for a single leg takedown. Halli is trying to defend but Boesku finishes it well and ends up in half guard. Let's see if he can advance position further. Score +2 for takedown into guard / half guard: Halli (0) vs (2) Boesku
Halli is looking to regain full guard. Not this time though.
Halli is working hard here to advance position.
Halli is in a tricky position but he's been working on his transitions down at Finish the Fight, so we'll see if he gets out of it.
Halli is in trouble now - Boesku has advanced to mount! Score +3 for passing guard: Halli (0) vs (5) Boesku#SUB2#
Boesku is looking to secure an arm. He's managed it! He's pivoting for an armbar - that looks tight! But Halli has managed to get out of it and now he's in a dominant position. Nice work from Halli! Score +2 for sweep to guard / half guard: Halli (2) vs (5) Boesku
Boesku seems keen to control Halli's posture.
We've had a slow start to the round here - hopefully the action picks up.
Halli slows down the pace of the fight, as he sits in guard.
Boesku looking to sweep here. No luck so far. #T1#
Halli's corner is telling him to maintain position.
Boesku is working an open guard here, looking to improve his position. No doubt that will leave him open to counters but at least he's being more offensive.#SUB2#
Boesku is looking for a guillotine. You can't force these things though and Halli defends well.
Halli pressing down on his opponent's thigh, looking to pass guard. Boesku is keeping the position for now.
Halli is taking a break and basically stalling. The referee will not allow him to do that for long.
Boesku is trying to control the position from the bottom.
#T2#
Boesku manages to sweep nicely, so he's now on top. Halli manages to get himself to full guard.
Score +2 for sweep to guard / half guard: Halli (2) vs (7) Boesku
Boesku trying to control the position from guard on top but Halli is wriggling around, looking for whatever he can.
Boesku is stalling in the full guard.
Boesku trying to control the position from guard on top but Halli is wriggling around, looking for whatever he can.
Boesku sitting in guard, not really doing much.
Halli controlling the position.#T3#
Halli wants to sweep here but Boesku controlling him for the moment.
Boesku trying to control but Halli is working from the bottom.
Halli trying to keep a closed guard but Boesku is proving a slippery customer.
Boesku trying to control but Halli is working from the bottom. #T4#
Boesku postures up.
#SUB#
Halli looking for a guillotine here but Boesku defends easily.
Boesku looking to sit in guard and control but Halli gets the butterfly guard and sweeps. He's now in the guard on the top. Score +2 for sweep to guard / half guard: Halli (4) vs (7) Boesku
Boesku manages to sweep nicely, so he's now on top. Halli manages to get himself to full guard.
Score +2 for sweep to guard / half guard: Halli (4) vs (9) Boesku
Halli looking to control.
Boesku wants to control from the top but Halli keeps moving. #T5##SUB#
Halli is looking for a guillotine. You can't force these things though and Boesku defends well.
Halli is adopting a defensive guard.#T6##SUB2#
Boesku is holding a leg here, probably looking for an ankle lock - he drops back and goes for it! Halli is in trouble! Is it all over??? No! Halli has escaped and now he's on top! Score +2 for sweep to guard / half guard: Halli (6) vs (9) Boesku
Boesku is pulling down on Halli's head. It's preventing any offense from Halli, at least for the moment.
Boesku not looking particularly offensive just at the moment.
The fighters are pressed up against the cage, both looking to find a bit of space to work.
Boesku has a butterfly guard looking to sweep but Halli has passed into side control.
Score +3 for passing guard: Halli (9) vs (9) Boesku#T7#
Boesku is trying to control Halli's posture but Halli avoids it.
Boesku tries to improve position but can't.
Boesku is persisting with the attempt to improve his position.
Boesku stops Halli from passing to mount.
Halli moves into full mount! Score +2 for reaching mount: Halli (11) vs (9) Boesku
Boesku slips a leg in and gets back to half guard.
Halli is thwarting Boesku's attempts to control the position.#SUB#
Halli is sneakily working for an arm triangle but Boesku sees it coming and defends easily.#T8#
Halli is thwarting Boesku's attempts to control the position.
Halli wants to pass to mount but Boesku is defending the position.
Boesku keeping control of the leg, stopping his opponent passing to mount.
Boesku wants to control but Halli is keeping busy and won't allow it.
Boesku is looking to regain full guard. Not this time though. #T9#
Halli sitting and controlling from the half guard.
Boesku wants to control the action here but instead Halli manages to pass to full mount! Score +3 for passing guard: Halli (14) vs (9) Boesku
Halli controlling from the full mount.
Halli works his way to his opponent's back.
Score +3 for taking back: Halli (17) vs (9) Boesku
Boesku trying to control the hands but Halli won't let him.
Halli controlling from the back.
Halli doesn't have the hooks in and Boesku manages to turn into his guard.
Score +2 for sweep to guard / half guard: Halli (17) vs (11) Boesku#T10#
Boesku looking to sit in guard and control but Halli gets the butterfly guard and sweeps. He's now in the guard on the top. Score +2 for sweep to guard / half guard: Halli (19) vs (11) Boesku
Boesku is trying to control the position from the bottom.
Halli tries to free his leg and advance position but Boesku is retaining full guard. #SUB2#
Boesku is looking for a triangle but Halli pushes his legs off easily.
Halli wants to pass the guard but Boesku is keeping the position.#SUB2#
Boesku has an active guard here but Halli has managed to pass into half guard.
Halli trying to mount his opponent but Boesku defends it. #T11#
Boesku trying to hold on to Halli's head to control him but Halli postures up.
Halli passes into side control, despite Boesku's attempt to control the position.
Score +3 for passing guard: Halli (22) vs (11) Boesku
Boesku is trying to get back to half guard.
Boesku is trying to get back to half guard. He's pushing on Halli's leg. He's managed it. Nice work.
Halli sitting and controlling from the half guard.
Halli is looking to take a break and control but Boesku is keeping him honest, looking to work from the bottom. #T12#
Boesku is looking for a sweep. Halli is wise to his cunning plan and keeps the top position.
Halli trying to pass the guard but Boesku defending well. #SUB#
Halli is working for a submission of some sort.
Halli is thwarting Boesku's attempts to control the position.
Boesku trying to get back to full guard but Halli takes advantage of the position and moves to full mount! Score +3 for passing guard: Halli (25) vs (11) Boesku#T13#
Halli looking to control and managing it successfully.
Boesku is wriggling around trying to escape.
Halli controlling from the full mount.
Halli can't quite control the action as he would like just now, as Boesku is looking to escape.
Boesku really trying hard to get back to half guard here.
Boesku wants to control but Halli is having none of it.#T14#
Halli tries to control but Boesku wriggling away.
Boesku wants to control but Halli is having none of it.
Boesku is just holding on here. Halli manages to take his back.
Score +3 for taking back: Halli (28) vs (11) Boesku
Boesku is really stuck here.
#SUB#
Halli is remaining active here, looking for the choke. The more discerning members of the crowd will appreciate his efforts.
Boooooooooooooooooooo!!! God, this has been a terrible round. Come on you two, sort yourselves out!
Halli gets his hands free as Boesku looks to control.
And that's the end of the fight!
Halli takes the fight on points by 28 to 11.
A less than humble Reijo Halli misjudged his post fight interview somewhat and came across a little too arrogant whilst trying to hype up his own abilities. |
|
|
|
Undercard bout
|
This TWGC bout is 1 fifteen minute round in the featherweight division. Introducing today's competitors. In the red corner, competing out of Montreal, with a TWGC record of 5 wins and 6 losses; Sacha Gardet! And in the blue corner, fighting out of New York, with a TWGC record of 40 wins and 29 losses; Dado Mata!
The judges for this bout are Colin Fotheringham, Phil Schofield and Paul Tew.
The fighters connect hands in the middle of the mat and we are under way.#CL#
Gardet has taken the fight to the clinch.
Gardet stops a takedown attempt from Mata.
We can't be sure of the tactics at this early stage but we have heard that Mata has been working on his takedowns a lot in the buildup to the fight and we can only assume he's going to look to take this to the mat.
Mata has Gardet pressed up against the cage and is working for takedown. Gardet manages to improve position though and keeps the fight standing. #TD#
Gardet drags the fight down to the ground.
Mata pushes down on Gardet's leg and manages to get into half guard.#SUB2#
Mata is looking for an arm triangle, whilst trying to pass to side control. Gardet doesn't seem that keen to cooperate though. No luck this time Mata.
Gardet is looking to control Mata's leg but it's slowly edging free. Can Gardet avoid being mounted?
We've had a slow start to the round here - hopefully the action picks up.
Mata is figuring out what he wants to do next.
Gardet is in a tricky position but he's been working on his transitions down at The Foundry, so we'll see if he gets out of it.
Gardet tries to get to full guard but Mata has control of the leg. #T1#
Mata controlling the action here.#SUB2#
Mata is trying a forearm choke
I don't think that's going to do much at this level of the game.
Mata trying to control from half guard but Gardet is working away.
Gardet is looking to improve his position.
Gardet is trying to control but Mata manages to pass to mount!
Score +3 for passing guard: Gardet (0) vs (3) Mata
Gardet is trying desperately to improve position.#T2#
Gardet wants to hold on but Mata pushes him away.
Mata trying to control but Gardet is having none of it. #SUB2#
Mata with some aggressive grappling here. He's looking for submissions here, rather than waiting for the opportunity to counter.
Gardet has given up his back. Will we see Mata going for some submissions?
Score +3 for taking back: Gardet (0) vs (6) Mata#SUB2#
Mata has the rear naked choke here! This is very bad for Gardet! Can he survive? No! He's out! Mata gets to his feet and celebrates with his cornermen. He looks absolutely delighted. In the post fight interviews he takes time to thank his parents and everyone who has believed in him from the start. How sweet.
Ladies and gentlemen, after 3:56 of round 1, we have a winner by way of Submission (RNC). Dado Mata!
A victorious Dado Mata thanked his army of followers in his post fight interview, telling people to make sure they follow him on Twitter. |
|
|
|
Co-main event
|
This TWGC bout is 1 fifteen minute round in the featherweight division. Introducing today's competitors. In the red corner, competing out of New York, with a TWGC record of 10 wins and 1 losses; Toshi Hijikata! And in the blue corner, fighting out of Rio de Janeiro, with a TWGC record of 15 wins and 6 losses; Marcinho Sitsongrit!
The judges for this bout are James Atkins, Sam Margolis and Daniel Bishop.
The fighters bow as they face eachother in the middle of the mat and we are under way.#TD#
Hijikata looking for a takedown here - he's got it. Score +2 for takedown into guard / half guard: Hijikata (2) vs (0) Sitsongrit
Sitsongrit looking to sweep here. No luck so far. #SUB2#
Sitsongrit is looking for a triangle but Hijikata pushes his legs off easily.
Hijikata trying to pass the guard but can't manage it just yet.
Hijikata postures up.
We've had a slow start to the round here - hopefully the action picks up.
Hijikata stays in close to Sitsongrit's body and controls the position.
Hijikata looking to sit in guard and control but Sitsongrit gets the butterfly guard and sweeps. He's now in the guard on the top. Score +2 for sweep to guard / half guard: Hijikata (2) vs (2) Sitsongrit#T1#
Sitsongrit wants to control from the top but Hijikata keeps moving.
Sitsongrit controls the pace of the fight for a moment.
Hijikata is trying to control the position from the bottom.
Sitsongrit pressing down on his opponent's thigh, looking to pass guard. Hijikata is keeping the position for now.
Sitsongrit is fighting to break Hijikata's control of his arms but Hijikata is doing a good job of controlling the position at the moment.#T2#
Hijikata keeping full guard, as Sitsongrit tries to pass.
Sitsongrit trying to control the position from guard on top but Hijikata is wriggling around, looking for whatever he can.
Hijikata manages to sweep nicely, so he's now on top. Sitsongrit manages to get himself to full guard.
Score +2 for sweep to guard / half guard: Hijikata (4) vs (2) Sitsongrit
Sitsongrit wants to sweep but no luck.
Sitsongrit has his hands on Hijikata's head, controlling the position. #SUB2#
Sitsongrit isolates an arm and boxes in a triangle. Hijikata stacks Sitsongrit on his neck as he steps over and passes to the side. He's now in a much more dominant position where he can look to do some serious damage. Nice move by Hijikata! Score +3 for passing guard: Hijikata (7) vs (2) Sitsongrit#T3#
The referee tells the fighters to keep busy.
The fighters are pressed up against the cage, both looking to find a bit of space to work.
Sitsongrit regains half guard.
Sitsongrit has found himself in a tricky position here. He's been working his transitions in training so let's see if he can work his way out of it.
Sitsongrit tries to roll over but Hijikata keeps him under control.
Hijikata is just sitting in half guard, waiting for something to happen.#T4#
Sitsongrit is trying is best to control the position here. #SUB2#
Sitsongrit looking for submissions off his back.
Well, if Hijikata is going to just lie there, perhaps we should talk about what we're having for dinner tonight
I'm having a ham and pineapple pizza
Yum. Can't wait.
Sitsongrit has no desire to be mounted, so is trying to control. Hijikata is working away from the top position though.#T5##SUB2#
Sitsongrit looking for submissions off his back.
The fighters are starting to perspire pretty heavily.
Sitsongrit has his hands clasped together around Hijikata's back. He's all about the action.
Sitsongrit is looking to regain full guard. Not this time though.
Hijikata works his way into side control. Score +3 for passing guard: Hijikata (10) vs (2) Sitsongrit#T6#
Hijikata takes a little break here. Sitsongrit wants to take advantage but he is being controlled well.
The ref warns both fighters not to hold the cage as they work up against the meshing.
Sitsongrit struggling a bit here.
Hijikata is moving around in side control but his primary objective seems to be to maintain the position.
Sitsongrit manages to get one leg in to regain half guard. #T7#
Sitsongrit is trying to get back to full guard.
Sitsongrit is trying to maintain the position but Hijikata is very close to passing his half guard.
Sitsongrit tries to get to full guard but Hijikata has control of the leg.
Sitsongrit trying to control from the bottom.
#T8#
Hijikata is pressing down on Sitsongrit's thigh, looking to free his foot. Sitsongrit is holding on for now.
Hijikata prevents Sitsongrit from improving his position.
Hijikata not doing much here.
Hijikata is thwarting Sitsongrit's attempts to control the position.#T9#
Hijikata seems content to maintain position for now, rather than mounting any offense.
Sitsongrit has no desire to be mounted, so is trying to control. Hijikata is working away from the top position though.
Hijikata takes a deep breath and rests his weight momentarily on top of his opponent, to control the position.
Sitsongrit trying to control but Hijikata postures up.
Hijikata stalling. #T10#
Sitsongrit trying to control from the bottom.
Sitsongrit wants to improve his position but Hijikata is controlling well.
Hijikata perhaps working for something from half guard, or maybe not. It looks like he's just sitting there. #T11#
Hijikata seems to have a rather negative gameplan on the ground. He seems keen to just score the takedown and hold down Sitsongrit for as long as he can get away with.
Sitsongrit is looking to improve his position.
Sitsongrit is positioning himself well to prevent Hijikata advancing to mount.
Sitsongrit wants to control but Hijikata is keeping busy.
#T12#
Sitsongrit is looking for a sweep. Hijikata is wise to his cunning plan and keeps the top position.#SUB2#
Sitsongrit looking for submissions from an awkward position here.
Sitsongrit is trying is best to control the position here.
Hijikata keeping composed on the top, looking to control the action.
Sitsongrit has no desire to be mounted, so is trying to control. Hijikata is working away from the top position though.
Sitsongrit is looking for a sweep. Hijikata is wise to his cunning plan and keeps the top position.#T13#
Sitsongrit manages to get to full guard.
Hijikata trying to control but Sitsongrit is working from the bottom. #SUB2#
Sitsongrit looking for a guillotine here but Hijikata defends easily.
Sitsongrit keeping moving, preventing Hijikata from controlling successfully. #T14#
Hijikata postures up.
#SUB2#
Sitsongrit had isolated an arm as going for a kimura. Hijikata defends it easily.
Sitsongrit wants to control the position but Hijikata says "no thanks buddy" and passes to half guard.
Boooooooooooooooooooo!!! God, this has been a terrible round. Come on you two, sort yourselves out!
Sitsongrit wants to get back to full guard but Hijikata has mounted him! Score +3 for passing guard: Hijikata (13) vs (2) Sitsongrit
And that's the end of the fight!
Hijikata takes the fight on points by 13 to 2.
Toshi Hijikata managed to slip a mention for his sponsors, Ma Balls Is Hot Clothing, into his post fight interview. |
|
|
|
Main event
|
This TWGC bout is 1 fifteen minute round in the featherweight division. Introducing today's competitors. In the red corner, competing out of Amsterdam, with a TWGC record of 2 wins and 0 losses; Valen Dreth! And in the blue corner, fighting out of Montreal, with a TWGC record of 6 wins and 2 losses; Rene Neri!
The judges for this bout are Phil Schofield, Andrew Berry and Chris Edwards.
Let's get this grappling contest under way! Who will be victorious?
Dreth shoots in for a takedown. He's persisting with it as Neri sprawls well. Neri wins this battle and keeps the fight standing. Dreth gets slowly back to his feet.
Dreth displays good takedown defense there as he swats away a double leg from Neri. #CL#
Dreth pushes Neri up against the cage in a clinch.
Neri tries to pull guard but Dreth won't allow it.
We've had a slow start to the round here - hopefully the action picks up.#TD2#
Neri ties up his opponent against the cage and manages to drag the fight down to the ground. Neri no doubt will be looking to work submissions from his guard.
Neri looking to sweep here. No luck so far.
Dreth trying to pass the guard but can't manage it just yet.
Neri keeping moving, preventing Dreth from controlling successfully. #T1#
Dreth controlling from the top position.
Neri wants to control here, rather than go for any submissions from the bottom. At least for now.
Neri wants to sweep but no luck.
Neri is pulling down on Dreth's head to control his posture. #T2#
Neri is continuing to stall.
Our spies down at at The Foundry inform us that Neri has really been working on his submissions in the buildup to this fight. Will it pay off?
Dreth wants to pass the guard but Neri is keeping the position.
Neri has control of Dreth's left arm, preventing Dreth from doing any damage.
The fighters are pressed up against the cage, both looking to find a bit of space to work.#T3#
Neri wants to control the position but Dreth says "no thanks buddy" and passes to half guard.
Neri trying to hold on to Dreth's head to control him but Dreth postures up.
Dreth will need to keep those long limbs tucked in whilst he's on the ground, to prevent any submissions.
The fighters are battling for position here. Neri manages to regain full guard. Nice work.
Neri trying to keep a closed guard but Dreth is proving a slippery customer.
Neri is adopting a defensive guard.#SUB#
Dreth drops back, looking for a kneebar! Neri looks panicked! The fighters roll across the mat, one looking to finish, one looking to escape. Neri looks to have wriggled free... Yes, he's got his leg free and he's dived into side control! Good work there from Neri! Score +4 for clean sweep to past guard: Dreth (0) vs (4) Neri#T4##SUB2#
Neri thinks about going for a far side armbar but bails out and retains the dominant position instead.
Dreth seems a little lost for a moment, as Neri dominates the positioning.
Neri tries to move to full mount but Dreth actually manages to regain half guard. #T5#
Neri is looking to pass the guard... He's managed it - he's now in full mount! Score +3 for passing guard: Dreth (0) vs (7) Neri
Neri trying to control but he's not successful this time.
Dreth is trying to escape the mount.
Dreth sneaks a leg back under and regains half guard and is working straight away to try and get back to guard. He hasn't managed just yet though.
Dreth is looking to get back to full guard here but Neri has managed to pass to side control instead. Score +3 for passing guard: Dreth (0) vs (10) Neri#T6#
Neri trying to control the action but Dreth is working from the bottom.
Dreth tries to buck Neri off but Neri is having none of it.
Neri wants to control but Dreth is keeping him busy. #T7#
Dreth tries to control but Neri manages to take his back. Score +3 for taking back: Dreth (0) vs (13) Neri
I really don't envy Dreth right now.
#SUB2#
Dreth showing good submission defense here.
Dreth tries to roll but Neri sticks to his back.
Dreth is keeping busy.
#T8#
Dreth tries to roll but Neri sticks to his back.
Neri looking to hold on to the position here but Dreth rolls and ends up regaining guard.
There's a bit of a scramble here and now Dreth is on top in guard.
Score +2 for sweep to guard / half guard: Dreth (2) vs (13) Neri
Dreth works a leg free and moves into half guard.
Dreth looking to pass the half guard. Not this time.
Neither fighter is being very active at the moment, with Dreth in particular looking to stall.#T9#
Dreth trying to pass the guard but Neri defending well.
Neri wants to improve his position but Dreth is controlling well.
Neri is working for an escape here. He's hooked one of Dreth's legs and he's managed to sneak out and take Dreth's back! Score +4 for clean sweep to past guard: Dreth (2) vs (17) Neri
Dreth tries to roll but Neri sticks to his back.
Neri controlling the position well here. Dreth rolled but Neri kept the hooks locked in and stayed in the dominant position.
#T10#
Dreth is trying to break free.
Good control from Neri.#SUB2#
Neri is remaining active here, looking for the choke. The more discerning members of the crowd will appreciate his efforts.
Neri struggling to keep hold of the position.
#T11#
Dreth rolls and manages to get back to half guard. Nicely done.
Neri is thwarting Dreth's attempts to control the position.
The fighters are battling for position here. Dreth manages to regain full guard. Nice work.
Neri passes easily into side control. Nice work. Score +3 for passing guard: Dreth (2) vs (20) Neri
Dreth trying his best to control but Neri has mounted him. Score +2 for reaching mount: Dreth (2) vs (22) Neri#T12#
Neri trying to control but he's not successful this time.
Neri is trying to take his opponent's back.
Dreth sneaks a leg under to get to half guard.
The ref warns both fighters not to hold the cage as they work up against the meshing.
Neri passes to side control. Score +3 for passing guard: Dreth (2) vs (25) Neri
Dreth gets back to half guard.#T13#
Neri moves nicely into side control. Score +3 for passing guard: Dreth (2) vs (28) Neri
Dreth gives up the full mount - oops, sloppy defensive grappling there! Score +2 for reaching mount: Dreth (2) vs (30) Neri
Dreth slips a leg in and gets back to half guard.
Neri is looking to stall here but Dreth recovers full guard. #T14#
Neri trying to move into half guard but instead Dreth has managed to sweep! Score +2 for sweep to guard / half guard: Dreth (4) vs (30) Neri
Dreth passes Neri's left leg - he's now in half guard.
Neri makes his way to full guard. A much better position for Neri.
Boooooooooooooooooooo!!! God, this has been a terrible round. Come on you two, sort yourselves out!
Neri keeping moving, preventing Dreth from controlling successfully.
And that's the end of the fight!
Neri wins on points by 30 to 4.
Rene Neri seemed lost for words in his post fight interview but he remembered to thank his fans and directed everyone to his website. |
|
|
|
|
|
|