 |
LAFC 16 PBP Commentary |
Undercard bout
|
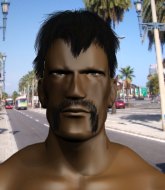
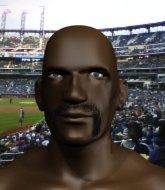
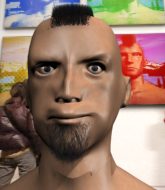
Coming up we have a welterweight MMA rules bout between Jack Ryker (ranked 24223 p4p, 24056 weight class) and John MacBurgh (ranked 599 p4p, 616 weight class). John MacBurgh struggled to make weight for this fight. He only made it down to 172.0lbs at the first attempt and had to take the additional two hours to make the official bout weight. Let's see how much it's taken out of him. Over to our ring announcer for the fighter introductions!
 |
|
 |
| 169 cm
26
172
1 - 4 - 0 |
|
187 cm
21
180
4 - 2 - 0 |
BJJ Blue Belt
Solid Muay Thai
Experienced |
|
BJJ Blue Belt
Counter fighter
Knockout power |
|
| |
|
Ladies and gentlemen. This fight is 3 rounds, in the welterweight division.
Introducing the fighter to my left, fighting out of the red corner.
With a record of 1 - 4 - 0, fighting out of New York, Jack Ryker!
And introducing the fighter to my right, fighting out of the blue corner.
With a record of 4 - 2 - 0, fighting out of New York, John MacBurgh!
The judges for this bout are Jack Bonds, Percy O'Donnell and Don Winkell.

The bell rings for round one and we are underway!

Ryker has MacBurgh up against the cage in a clinch.
The referee calls for MacBurgh to work.
Ryker fails to pull guard.

MacBurgh gets the body lock takedown. After a quick scramble, Ryker regains guard.
MacBurgh is pushing down on Ryker's leg trying to pass to half guard. Ryker is fighting to maintain full guard but MacBurgh has managed to sneak the leg through.
The fighters are pressed up against the cage, both looking to find a bit of space to work.
The fighters are battling for position here. Ryker manages to regain full guard. Nice work.
Ryker keeping full guard, as MacBurgh tries to pass.
Ryker is working the butterfly guard. He manages to land a nice scissor sweep and is now in half guard on the top. Nice move.

Ryker throws a strike but MacBurgh avoids it easily and moves to full guard.
Ryker showing good wrestling skills to control the position.

That's one minute gone in the round.

MacBurgh had isolated an arm as going for a kimura. Ryker defends it easily.
MacBurgh looking to control.
MacBurgh has Ryker pulled in close to control his posture.
Ryker works a leg free and moves into half guard.
Ryker wants to control but MacBurgh is keeping him busy.
MacBurgh looking to force a kimura from the bottom here. He's concentrating on that move too much though and Ryker pushes past his half guard into mount!

That's two minutes gone in the round.
MacBurgh manages to regain half guard. Good work.
MacBurgh keeping his head moving to avoid the ground and pound.

Ryker seems to be looking for submissions.
MacBurgh wants to improve his position but Ryker is controlling well.
Ryker is trying for a guillotine from the top but the pressure isn't in the right place so MacBurgh is just riding it out for now. Ryker eventually gives up the hold.
Ryker trying to mount his opponent but MacBurgh defends it.

That's three minutes gone in the round.
Ryker missing with the ground and pound from half guard.
Ryker missing with some ground and pound from the half guard.
Ryker passes to side control.
Ryker controlling the position from side mount.
MacBurgh is looking for a sweep.
We've been informed that MacBurgh has been working hard on his conditioning in the buildup to the fight.

That's four minutes gone in the round.
The crowd are starting to boo a lack of action.
MacBurgh prevents Ryker from improving position.
Ryker wants to lay and pray for a moment but MacBurgh keeps working.
MacBurgh can't do much from the bottom here.
MacBurgh is looking for a sweep.
Boooooooooooooooooooo!!! God, this has been a terrible round. Come on you two, sort yourselves out!
Ryker in side control, trying to ground and pound but not landing this time.
MacBurgh gets back to half guard.
And that is the end of the round. The fighters go back to their corners.
Jack Ryker dominated that round.
That's the end of the interval. I'm sure that seemed a lot quicker than a minute for our two fighters! Back to the action.

Ryker has MacBurgh up against the cage in a clinch.

Ryker jumps guard.
Ryker keeping moving, preventing MacBurgh from controlling successfully.
Ryker bucks up whilst keeping hold of a body lock, managing to reverse the position. Now he's in top in MacBurgh's guard.
Ryker postures up to throw the ground and pound strikes but they don't connect.
We've had a slow start to the round here - hopefully the action picks up.
MacBurgh working for a triangle but Ryker defends it easily.
MacBurgh is looking for a guillotine. You can't force these things though and Ryker defends well.
MacBurgh is breathing heavily.
That's one minute gone in the round.
MacBurgh will have to put a bit more behind his punches if he's going to do any damage from this position.
MacBurgh is trying to hold Ryker in close to prevent damage but Ryker has managed to pass into half guard.
MacBurgh is looking to regain full guard. Not this time though.
MacBurgh keeps trying to improve his position.
Ryker content to sit in half guard and control for a moment.
MacBurgh blocking the ground and pound attempt from Ryker.
That's two minutes gone in the round.
The crowd are starting to boo a lack of action.
Ryker moves into side control, avoiding a weak kimura attempt from MacBurgh.
MacBurgh is positioning himself to get back to half guard.

Ryker decides to stand back up. Ryker steps back and let's MacBurgh get back to his feet.
MacBurgh dives in and grabs Ryker's left leg, looking for a takedown. Ryker pushes down on MacBurgh's head and hops out.
Ryker fails with the takedown.
An inside leg kick from MacBurgh misses.
That's three minutes gone in the round.
Ryker throws a front kick that sends MacBurgh stumbling back into the cage.
Ryker tries to clinch but fails miserably
and MacBurgh counters with a driving takedown into guard. Nice work there by MacBurgh.
Ryker has control of MacBurgh's left arm, preventing MacBurgh from doing any damage.
Ryker has controlled the position for a good 20 seconds, which will no doubt be starting to frustrate his opponent.
Ryker is trying to control the position but MacBurgh postures up.
MacBurgh wants to control from the top but Ryker keeps moving.
Ryker is really dominating this fight. Is there anything that MacBurgh can do to turn this around?
Ryker striking off his back but it's not causing MacBurgh any problems.
That's four minutes gone in the round.
Ryker escapes his hips to the side and looks to be working for an armbar. MacBurgh gives him a little smile and shakes his head. No chance.
Ryker looking to sweep here. No luck so far.
Ryker looking for submissions from the bottom here. Moving his hips around, possibly looking for an armbar.

The referee has stepped in and called for a break in the action. We'll restart on the feet.
MacBurgh is trying hard to land a takedown here. Ryker sprawls well and keeps this one on the feet.
MacBurgh tries for a takedown but Ryker circles away easily
and Ryker counters with a two punch combo.
Jack Ryker has stuffed three takedown attempts in the round now. That's going to take a lot out of John MacBurgh.
Ryker shoots in but no luck this time.
Boooooooooooooooooooo!!! God, this has been a terrible round. Come on you two, sort yourselves out!
Ryker stuffs a takedown. It's all about dictating where the fight takes place and Ryker wants it to stay on the feet.
Ryker shoots in but no luck this time.
And that is the end of the round. The fighters go back to their corners.
Jack Ryker dominated that second round.
The corners get their ten second warning. Both fighters stand from their stools and stare each other down, ready to get back to the action. This is the final round!

Ryker gets in close and instigates a clinch.
Ryker tries to jump guard but he falls flat on his backside. MacBurgh smiles and moves away.
Ryker throws a nice looking combination but MacBurgh bobs and weaves to avoid any damage.
Good leg kick by Ryker.
MacBurgh closes the distance and looks for a trip takedown... aaaand he's got it - MacBurgh lands in his opponent's guard.

Ryker uses the cage to get back to his feet.
We've had a slow start to the round here - hopefully the action picks up.
MacBurgh throws a looping left and ducks down for a takedown. He's got his arms around Ryker's waist but Ryker gets an underhook and avoids the takedown by throwing MacBurgh off to one side.
MacBurgh takes a big intake of breath there - he's definitely tired.
Ryker lands a high kick!
The crowd are loving this. Great action here.
MacBurgh keeps the fight standing with a nice sprawl.
MacBurgh lets it all go there with a big combo counter but none of the punches connected.
That's one minute gone in the round.
MacBurgh closes this distance looking for a takedown but Ryker circles away.
Ryker fails with the takedown.
That's three failed takedown attempts in the round for Jack Ryker. That's going to take a lot out of him.
Ryker slaps away a takedown attempt from MacBurgh, before circling back to the center of the mat.
Jack Ryker seems to be the more aggressive standup fighter in this bout.
Ryker goes for a double leg but MacBurgh avoids the attempt and the two fighters end up clinched against the cage as MacBurgh continues to drive forward.
MacBurgh doesn't fully commit to the body shot counter.
Ryker successfully pulls guard.
Ryker working a defensive guard here.
MacBurgh pressing down on his opponent's thigh, looking to pass guard. Ryker is keeping the position for now.
That's two minutes gone in the round.
Ryker working a defensive guard here.
Ryker might be looking to lock onto one of his opponent's long limbs for a submission, whilst we're on the ground.
Ryker has MacBurgh pulled in close to control his posture.
MacBurgh seems content to control from guard here. He's going to have to remain active though if he doesn't want to get stood back up.
Jack Ryker overall seems to be getting the better of the ground position in the fight so far.
Ryker keeping moving, preventing MacBurgh from controlling successfully.
The referee has stepped in and called for a break in the action. We'll restart on the feet.
That's three minutes gone in the round.
Ryker clinches with his opponent.
Ryker drops to a knee looking for a takedown but MacBurgh gets the underhooks and prevents it.

Ryker escapes the clinch and we're back to striking.
MacBurgh shoots in for a takedown. "I don't think so" says Ryker as he avoids it easily.
Ryker shoots in looking for a takedown but MacBurgh manages to keep the fight standing, pushing Ryker's face into the canvas for good measure before circling away.
Jack Ryker is winning the standup battle so far.
Ryker lands a slapping body shot.
Ryker could do with losing a few pounds - he looks very soft around the mid section, to put it politely.
That's four minutes gone in the round.
MacBurgh is trying hard to land a takedown here. Ryker sprawls well and keeps this one on the feet.
Ryker thinks about countering with a head kick.
Ryker moves into range and clinches up with MacBurgh.
Ryker's corner calls for him to break the clinch, which he does.
MacBurgh has his hands up protecting his head but a hook from Ryker finds it's way round the side to connect with MacBurgh's head.
MacBurgh has a takedown stuffed.
Ryker darts in and clinches MacBurgh up against the cage.
The crowd thankful this round is nearly over.
MacBurgh goes for a takedown attempt but Ryker pushes him away and we're back to fighting at a distance.
John MacBurgh has stepped it up - he knows he needs a finish here!
Jack Ryker is fighting for a decision here - he's started to take the cautious approach.
Ryker shoots in looking for a takedown but MacBurgh manages to keep the fight standing, pushing Ryker's face into the canvas for good measure before circling away.
And that's the end of the fight!
Jack Ryker showed his dominance in that final round.
Well Ryker has outscored his opponent in every aspect of the fight today. Only a scarily incompetent judge or two will keep him from a well deserved win... Over to the ring announcer for the scorecards.
Ladies and gentlemen, after 3 rounds of action, we go to the scorecards for a decision.
Judge Jack Bonds scores the fight 30:27
Judge Percy O'Donnell scores the fight 30:27
Judge Don Winkell scores the fight 30:27
In favor of your winner, by unanimous decision... Jack Ryker!
John MacBurgh spoke after the fight, saying 'Good fight, I will come back, respect for my opponent thank you all.'.
|
|
|
|
|
|
|
|
|
|
|
|
|
|
|
|
|
|
|
|
|
|
|
| S |
C
A |
G |
S |
C
B |
G |
|
S |
C |
G |
|
energy
A | B |
|
hype
A | B |
|
pop
A | B |
|
mgr
A | B |
|
FIGHT
RATING
30% |
|
|
|
|
|
|
|
Undercard bout
|
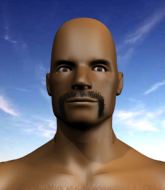
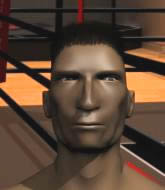
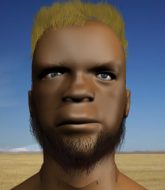
Coming up we have a middleweight MMA rules bout between Janky Jankens (ranked 3691 p4p, 3617 weight class) and Lubor Straka (ranked 474 p4p, 468 weight class). Jankens comes to the cage accompanied by Straight Outta Compton by- NWA. Both fighters will be looking to make this an exciting fight for the fans, I'm sure!
 |
|
 |
| 189 cm
24
190
3 - 4 - 0 |
|
190 cm
20
192
2 - 2 - 0 |
Good wrestling
Basic striking
Big heart |
|
BJJ Blue Belt
Brawler
Powerful |
|
| |
|
Ladies and gentlemen. This fight is 3 rounds, in the middleweight division.
Introducing the fighter to my left, fighting out of the red corner.
With a record of 3 - 4 - 0, fighting out of Hilo, Janky Jankens!
And introducing the fighter to my right, fighting out of the blue corner.
With a record of 2 - 2 - 0, fighting out of Helsinki, Lubor Straka!
The judges for this bout are Percy O'Donnell, Frank Antenori and Don Winkell.
The bell rings for round one and we are underway!
Nice sprawl there from Jankens as Straka shoots in.
Straka misses with a wild body shot.
Straka misses with a jab and misses with a cross straight after too.
We can't be sure of the tactics at this early stage but we have heard that Straka has been working on his takedowns a lot in the buildup to the fight and we can only assume he's going to look to take this to the mat.
Wow, both these guys are really going for it!
Straka needs to keep his hands up - Jankens had a free shot at his head there.
Straka looks to throw the jab but Jankens is out of range.
Jankens fakes low and throws an overhand right that catches Straka on the side of the head.
Straka takes a jab right on the nose. That must have hurt but he shrugs his shoulders and looks to return the favor.
Jankens throws a shot to the body.
Straka moves into range and throws a lovely three punch combination.
Straka throws a jab but it's blocked by Jankens.
Fantastic stuff here - a very entertaining period of action, which has drawn cheers from the crowd.
Jankens lands an overhand left. A wild punch that just about connected.
Lubor Straka seems to be the more aggressive standup fighter in this bout.
Jankens tries to bum rush Straka with a series of wild strikes but Straka uses good footwork to avoid the assault.
Jankens uses some good footwork to avoid the body shot by Straka.
Jankens cracks Straka with a hook to the temple - Straka is on wobbly legs here! Jankens swarms him with hook after hook, landing with each one! Straka falls to the canvas face first and the referee dives in to stop the fight! Jankens wins by TKO!
Ladies and gentlemen, after 0:42 of round 1, we have a winner by way of TKO (Punches). Janky Jankens!
A victorious Janky Jankens thanked his army of followers in his post fight interview, telling people to make sure they follow him on Twitter.
|
|
|
|
|
|
|
|
|
|
|
|
|
|
|
|
|
|
|
|
|
|
|
| S |
C
A |
G |
S |
C
B |
G |
|
S |
C |
G |
|
energy
A | B |
|
hype
A | B |
|
pop
A | B |
|
mgr
A | B |
|
FIGHT
RATING
100% |
|
|
|
|
|
|
|
Undercard bout
|
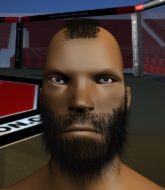
Coming up we have a welterweight MMA rules bout between Worf Mogh (ranked 2540 p4p, 4319 weight class) and Israel Adesanya (ranked 335 p4p, 485 weight class). Both these guys have solid standup skills and neither is particularly fantastic on the ground, so let's hope for a nice standup war!
 |
|
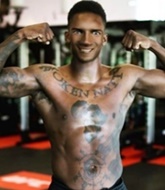 |
| 183 cm
20
176
6 - 4 - 0 |
|
185 cm
26
177
4 - 2 - 0 |
BJJ Blue Belt
Excellent boxer
Experienced |
|
BJJ White Belt
Excellent MT
Heavy handed |
|
| |
|
Ladies and gentlemen. This fight is 3 rounds, in the welterweight division.
Introducing the fighter to my left, fighting out of the red corner.
With a record of 6 - 4 - 0, fighting out of Las Vegas, Worf Mogh!
And introducing the fighter to my right, fighting out of the blue corner.
With a record of 4 - 2 - 0, fighting out of New York, Israel Adesanya!
The judges for this bout are Timothy Bukovac, Don Winkell and Jack Bonds.
The bell rings for round one and we are underway!
Adesanya swings away with a body shot that misses
and Mogh counters with a two punch combo.
Adesanya throws a jab but it's blocked by Mogh.
Mogh attempts a counter takedown but Adesanya avoids it well and moves away.
Adesanya throws out a loose jab but Mogh uses good head movement to avoid it.
Mogh tries to counter by clinching up but Adesanya breaks away and moves out of range.
Adesanya throws a hook but Mogh avoids it easily.
Mogh is trying to close the distance and clinch up, after that failed offence from Adesanya.
Mogh ducks under a wild hook from Adesanya.
Mogh looked to counter with a high kick but didn't commit.
Mogh looks to have improved his striking defense since last time we saw him fight.
Mogh uses some good footwork to avoid the body shot by Adesanya.
Mogh tries to counter by clinching up but Adesanya breaks away and moves out of range.
We've had a slow start to the round here - hopefully the action picks up.
Adesanya getting the better of the striking in that exchange.
Adesanya misses with a wild body shot.
Mogh feinted there with a counter leg kick.
Adesanya throws an ugly left hook that misses
and Adesanya takes a counter punch right on the button for his troubles.
That's one minute gone in the round.
Adesanya throws a big shot that misses.
Mogh wants to take advantage of his opponent's missed offense by moving into the clinch.
Adesanya throws a sloppy body shot
and Adesanya takes a counter punch right on the button for his troubles.
Adesanya misses with a hook. Mogh ducked under it nicely.
Mogh half commits to a counter takedown before pushing away, out of range.
Adesanya takes a swing at Mogh's ribcage but misses.
Mogh wants to take advantage of his opponent's missed offense by moving into the clinch.
A slow jab from Adesanya misses its intended target.
Adesanya misses with a straight left.
Mogh went nuts there looking for a big combo counter but none of the flurry connected.
Mogh uses some good footwork to avoid the body shot by Adesanya.
Mogh appears to be looking for a big counter.
Israel Adesanya seems to be the more aggressive standup fighter in this bout.
Adesanya throws an overhand right that lands on Mogh's shoulder, as Mogh tries to avoid the shot.
That's two minutes gone in the round.
Adesanya misses with a body shot. Nice footwork from Mogh.
Adesanya throws a body punch but Mogh moves out of range.
Adesanya misses with an uppercut
and Mogh counters with a three punch combo that has Adesanya backing up. Adesanya nods at Mogh to acknowledge the strikes.
Mogh moves away from the strike by Adesanya.
Adesanya throws out a token jab with nothing on it.
Mogh uses good footwork to avoid the strikes from Adesanya.
Adesanya throws a lazy right hand but Mogh sees it coming a mile off and sidesteps it easily.
Adesanya throws a hard body shot but it just misses.
That's three minutes gone in the round.
A jab from Adesanya misses.
Mogh seemed to be looking to counter by closing the distance.
Adesanya misses the body punch
and Mogh counters with a three punch combo that has Adesanya backing up. Adesanya nods at Mogh to acknowledge the strikes.
Mogh needs to keep his hands up - Adesanya had a free shot at his head there.
Mogh moves out of range as Adesanya strikes.
Israel Adesanya is looking to keep the fight on the feet at all costs.
Mogh ducks under a wild hook from Adesanya.
Adesanya throws a big shot that misses.
Mogh tries to counter by moving into the clinch but Adesanya manages to circle out of the way.
Adesanya lands a jab to the nose.
Adesanya throws a hook to the body but it doesn't connect.
Mogh seem to be loading up, looking for a big counter.
That's four minutes gone in the round.
Adesanya throws out a loose jab but Mogh uses good head movement to avoid it.
Mogh seemed to be looking to counter by closing the distance.
Mogh slips a jab from Adesanya.
Mogh seem to be loading up, looking for a big counter.
Adesanya swings widly with a right hand
enabling Mogh to counter with a crisp jab.
Mogh ducks right into an uppercut from Adesanya.
The fans in attendance giving it up for the two fighters, who have really let it all hang out in the last minute or so!
Mogh slips a jab from Adesanya.
Mogh seemed to be looking to counter by closing the distance.
Adesanya throws a hook to the body but it doesn't connect.
Mogh appears to be looking for a big counter.
Adesanya misses with a body shot. Nice footwork from Mogh.
Adesanya fakes a head punch and goes low to the body. Nicely done.
And that is the end of the round. The fighters go back to their corners.
Israel Adesanya dominated that round.
That's time! Mogh's corner gives him a slap on the ass as he gets ready to fight.
Adesanya throws a monster uppercut resembling something out of street fighter but it doesn't land.
Mogh was looking to counter that last move with a shot to the body but he didn't commit.
Mogh uses decent footwork to sidestep a right hand from Adesanya.
Mogh changes levels looking for a counter takedown but doesn't commit.
Adesanya throws a poor cross that misses
and Mogh moves into the clinch.
Adesanya has Mogh pressed against the cage, preventing Mogh from circling away and getting back to striking at range.
Adesanya lands a short shot on the inside that snaps the head of Mogh backwards.
Adesanya tried to land a shot to the body but connects with Mogh's elbow.
We've had a slow start to the round here - hopefully the action picks up.
Adesanya throws a blind hook that connects with the side of Moghs head.
Adesanya swings away with an uppercut that misses.
Adesanya lands a left hand that snaps the head of Mogh backwards.
That's one minute gone in the round.
Mogh blocks a couple of punches on the inside.
Mogh blocks a punch to the side of the head.

Adesanya's corner calls for him to break the clinch, which he does.
Worf Mogh is looking to throw some combinations by the looks of things.
Adesanya misses with a hook.
Mogh moves away from the strike by Adesanya.
Mogh uses decent footwork to sidestep a right hand from Adesanya.
Mogh wants to take advantage of his opponent's missed offense by moving into the clinch.
Adesanya ducks down and throws a hook to the body but Mogh moves away.
A swing and a miss from Adesanya.
That's two minutes gone in the round.
Adesanya misses with an uppercut.
Mogh changes levels looking for a counter takedown but doesn't commit.
Adesanya throws a lazy uppercut
and Mogh counters with a three punch combo that has Adesanya backing up. Adesanya nods at Mogh to acknowledge the strikes.
Israel Adesanya seems to be getting the better of the standup.
Adesanya throws the left hand but Mogh avoids the punch easily.
Adesanya looks to score with a jab to the body but Mogh is just out of range.
Adesanya misses with an uppercut
and Mogh connects with a straight left hand counter down the middle.
Adesanya thows a left - swing and a miss!
Adesanya misses with a hook. Mogh ducked under it nicely.
Adesanya throws a lazy uppercut
and Mogh counters with a good right hand that lands right on the jaw.
That's three minutes gone in the round.
Adesanya throws a hook to the body but it doesn't connect.
Adesanya ducks down and throws a hook to the body.
Adesanya throws a big shot that misses.
It looked like Mogh was looking amped, ready to throw a big counter but didn't commit.
Adesanya throws a poor cross that misses
and Mogh counters with a two punch combo.
A swing and a miss from Adesanya.
Adesanya misses with a right hand
and Mogh counters with a three punch combination, finished off with a leg kick. Nice work.
Mogh ducks under a wild hook from Adesanya.
Adesanya throws a lazy uppercut
and Mogh counters with a crisp hook to the side of the head.
That's four minutes gone in the round.
Adesanya misses with a lunging right hand
and Mogh counters with a three punch combination, finished off with a leg kick. Nice work.
The crowd are loving this. Great action here.
Mogh bobs and weaves well there to avoid the strikes.
Mogh tries to counter by moving into the clinch but Adesanya manages to circle out of the way.
Mogh ducks under a wild hook from Adesanya.
Mogh half committed to a counter leg kick.
Adesanya misses with a straight left.
Adesanya throws a lazy right hand but Mogh sees it coming a mile off and sidesteps it easily.
Mogh seemed to be looking to counter by closing the distance.
Adesanya looks to land a right hand but Mogh moved out of range.
Adesanya misses with a right hand
and Mogh counters with a lovely shot to the body.
Adesanya misses with a telegraphed body shot
and Mogh counters with a two punch combo.
And that is the end of the round. The fighters go back to their corners.
That was a close second round but I would say that Worf Mogh will probably get the nod.
The corners get their ten second warning. Both fighters stand from their stools and stare each other down, ready to get back to the action. This is the final round!
Adesanya is the aggressor but that punch slipped nicely by Mogh.
Mogh appears to be looking for a counter takedown.
Adesanya throws the left hand but Mogh avoids the punch easily.
Mogh is looking to counter punch.
A swing and a miss from Adesanya.
Adesanya looks to throw the jab but Mogh is out of range.
Mogh is looking to counter the offense by Adesanya and move into the clinch.
Adesanya throws a body shot but no joy.
A big left from Adesanya misses.
Mogh was looking to counter that move with a punch but didn't quite pull the trigger.
We've had a slow start to the round here - hopefully the action picks up.
Adesanya rushes in with a sloppy looking punch
and Mogh counters into the clinch. Nicely done.
Adesanya tries a body shot but Mogh blocks it.
That's one minute gone in the round.
Adesanya working aggressively here.
Mogh blocking some punches.
Adesanya has a couple of punches blocked by Mogh.
Adesanya pushes Mogh back against the cage and lands a hook to the side of the head.
Adesanya has had enough of the clinch but Mogh keeps him there for the moment.
Mogh breaks the clinch and we return to the middle of the mat.
Adesanya misses with an uppercut. Mogh saw that one coming.
Mogh feinted with a counter takedown.
Adesanya misses with an uppercut
and Mogh counters with a left to the body.
Adesanya misses with a looping right.
That's two minutes gone in the round.
A big right from Adesanya misses.
Adesanya lands a jab to the head.
Adesanya missing with a left hand there. Mogh was out of range so wasted energy throwing that one.
Mogh looked to counter with a high kick but didn't commit.
Adesanya misses with a hook
and Mogh counters by moving into the clinch. Good anticipation by Mogh.
Adesanya pushes Mogh back against the cage and lands a hook to the side of the head.
Adesanya blocking some punches.
Mogh is trying to force a seperation but Adesanya has the dominant position.
With the fighters clinched against the cage, Adesanya creates a bit of distance for himself and scores with a nice uppercut.
That's three minutes gone in the round.
Adesanya breaks the clinch and we return to the middle of the mat.
Mogh slips under a jab.
Mogh tries to counter by moving into the clinch but Adesanya manages to circle out of the way.
A shot to the body from Adesanya misses
and Mogh counters with a left and a right that stings Adesanya.
Adesanya swings widly with a right hand
and Mogh counters with a straight right hand.
Adesanya fakes high and swings low for a body shot but Mogh manages to avoid it.
Adesanya misses with a straight left.
Adesanya misses with a shot to the body
and Mogh counters with a nice uppercut.
Adesanya throws a hook to the body but it doesn't connect.
That's four minutes gone in the round.
Mogh moves away from the strike by Adesanya.
Adesanya jabbing away but nothing is landing.
Adesanya throws a shot from downtown. Mogh moves away and avoids it.
Adesanya misses with a hook
and Mogh counters with a one-two to the body.
Adesanya connects with a body shot.
We've seen a great period of action over the last minute or so - credit to both fighters for going all out!
Adesanya just misses with a punch to the body.
Mogh seemed to be looking to counter by closing the distance.
The crowd thankful this round is nearly over.
Mogh with poor footwork there. He got himself in a bit of a tangle, enabling Adesanya to score with a decent uppercut.
And that's the end of the fight!
Israel Adesanya comfortably won the final round on my scorecard.
Well Adesanya has outworked and out performed his opponent in all aspects of the game today. He was simply too good and the decision should be no more than a formality. Over to the ring announcer for the scorecards.
Ladies and gentlemen, after 3 rounds of action, we go to the scorecards for a decision.
Judge Timothy Bukovac scores the fight 28:29
Judge Don Winkell scores the fight 28:29
Judge Jack Bonds scores the fight 28:29
In favor of your winner, by unanimous decision... Israel Adesanya!
|
|
|
|
|
|
|
|
|
|
|
|
|
|
|
|
|
|
|
|
|
|
|
| S |
C
A |
G |
S |
C
B |
G |
|
S |
C |
G |
|
energy
A | B |
|
hype
A | B |
|
pop
A | B |
|
mgr
A | B |
|
FIGHT
RATING
43% |
|
|
|
|
|
|
|
Undercard bout
|
Coming up we have a lightweight MMA rules bout between Paulo Lima (ranked 2398 p4p, 3966 weight class) and Renato Oliveira (ranked 289 p4p, 444 weight class). Paulo Lima has the better chin. Will he look to stand and bang today?
 |
|
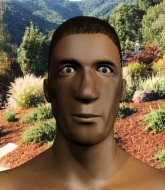 |
| 178 cm
29
158
7 - 1 - 0 |
|
178 cm
20
160
6 - 1 - 0 |
Good takedowns
Counter fighter
Very quick |
|
BJJ Purple Belt
Basic striking
Good gas tank |
|
| |
|
Ladies and gentlemen. This fight is 3 rounds, in the lightweight division.
Introducing the fighter to my left, fighting out of the red corner.
With a record of 7 - 1 - 0, fighting out of Los Angeles, Paulo Lima!
And introducing the fighter to my right, fighting out of the blue corner.
With a record of 6 - 1 - 0, fighting out of Tokyo, Renato Oliveira!
The judges for this bout are Frank Antenori, Timothy Bukovac and Percy O'Donnell.
The bell rings for round one and we are underway!
Lima moves into the clinch.
The pace slowing considerably in the clinch, as Oliveira takes a break from that fighting nonsense to think about the finer things in life.
Lima ties up his opponent against the cage and manages to drag the fight down to the ground. Lima no doubt will be looking to work submissions from his guard.
Lima had isolated an arm as going for a kimura. Oliveira defends it easily.
Oliveira pressing down on his opponent's thigh, looking to pass guard. Lima is keeping the position for now.
Oliveira must be cautious of submissions here, given that his opponent has the superior Jiu Jitsu.
Oliveira is pushing down on Lima's leg trying to pass to half guard. Lima is fighting to maintain full guard but Oliveira has managed to sneak the leg through.
Oliveira is trying for a kimura here. Lima looks like he's in a lot of pain... and he's tapping out! Oliveira wins by kimura!
Ladies and gentlemen, after 0:44 of round 1, we have a winner by way of Submission (Kimura). Renato Oliveira!
|
|
|
|
|
|
|
|
|
|
|
|
|
|
|
|
|
|
|
|
|
|
|
| S |
C
A |
G |
S |
C
B |
G |
|
S |
C |
G |
|
energy
A | B |
|
hype
A | B |
|
pop
A | B |
|
mgr
A | B |
|
FIGHT
RATING
100% |
|
|
|
|
|
|
|
Undercard bout
|
Coming up we have a heavyweight MMA rules bout between Warmaster Barnett (ranked 3353 p4p, 2548 weight class) and Bruce Banger (ranked 384 p4p, 301 weight class). Barnett comes to the cage accompanied by This is WAR by - GWAR. Bruce Banger will no doubt be trying to keep this one on the feet, where he has a distinct advantage.
 |
|
 |
| 194 cm
26
285
2 - 2 - 0 |
|
209 cm
26
282
5 - 2 - 0 |
Good wrestling
Basic striking
Granite chin |
|
BJJ White Belt
Excellent boxer
Heavy handed |
|
| |
|
Ladies and gentlemen. This fight is 3 rounds, in the heavyweight division.
Introducing the fighter to my left, fighting out of the red corner.
With a record of 2 - 2 - 0, fighting out of Hilo, Warmaster Barnett!
And introducing the fighter to my right, fighting out of the blue corner.
With a record of 5 - 2 - 0, fighting out of Los Angeles, Bruce Banger!
The judges for this bout are Don Winkell, Frank Antenori and Percy O'Donnell.
The bell rings for round one and we are underway!
Barnett misses with a straight left.
Banger feints a straight left to the body, then turns around with a flashy move and hits Barnetts jaw with a dramatic spinning back fist!
Warmaster Barnett seems to be the more aggressive standup fighter in this bout.
Banger misses with a hook. Barnett ducked under it nicely.
Barnett shoots in for a takedown but Banger shows good takedown defense.
Barnett throws a jab when Banger was well out of range.
Banger feints the counter takedown.
Banger is looking to chop away at Barnett's legs.
Barnett keeping his hands up high there, blocking the jab from Banger.
Barnett checks a low kick from Banger.
Banger slips a straight right by Barnett.
Barnett shoots in for a takedown - he's clinched up with Banger but Banger pushes him off and we're back to square one.
Banger defending well as Barnett loads up on a big left hand.
Barnett definitely looks more muscular than last time we saw him fight.
We've had a slow start to the round here - hopefully the action picks up.
Barnett dives in and grabs Banger's left leg, looking for a takedown. Banger pushes down on Barnett's head and hops out.
That's three failed takedown attempts in the round for Warmaster Barnett. That's going to take a lot out of him.
Banger throws a nice looking combination but Barnett bobs and weaves to avoid any damage.
A jab from Banger misses.
Banger throws a series of strikes that have Barnett backpedaling.
Barnett looks to land a right hand but Banger moved out of range.
Fantastic stuff here - a very entertaining period of action, which has drawn cheers from the crowd.
Barnett dives in for a single leg takedown but Banger sprawls and the fighters end up clinched against the cage.
That's one minute gone in the round.
Banger breaks from the clinch.
Banger gets caught on his heels momentarily as he allows Barnett to score an easy takedown into full guard.
Banger wants to get back to his feet but he's too absorbed in his own little project and Barnett manages to pass to side control.

Banger wants to control but Barnett is keeping busy.
Barnett controlling the action here.
Barnett looking to pass the half guard. Not this time.
Barnett trying to control from Banger's half guard. Banger has other ideas though and has regained full guard.
That's two minutes gone in the round.
Barnett won't allow Banger to sweep him here.
Barnett wants to control from the top but Banger keeps moving.
Banger is working an open guard here, looking to improve his position. No doubt that will leave him open to counters but at least he's being more offensive.
Barnett's corner is telling him to maintain position.
Barnett looking to pass the guard.
Barnett trying to control but Banger is working from the bottom.
Barnett trying to pass the guard but can't manage it just yet.
That's three minutes gone in the round.
Barnett passes easily into side control. Nice work.
The fighters are pressed up against the cage, both looking to find a bit of space to work.
Barnett working hard here to secure a kimura but he's not really in the right position for it.
Barnett tries for a kimura but Banger is defending well.
The fighters are starting to perspire pretty heavily.
Banger tries to bench press Barnett off him but Barnett keeps the position.
Banger is being controlled here.
Barnett goes for an armbar here - this could be all over! But no, Banger has escaped beautifully and is now on top in side control! Oh, that's unlucky for Barnett but great work by Banger.
That's four minutes gone in the round.

Banger stands up.
Banger ducks under a wild hook from Barnett.
Barnett goes for a double leg but Banger avoids the attempt and the two fighters end up clinched against the cage as Banger continues to drive forward.
Banger manages to break the clinch.
A left lands for Barnett.
Banger scores with a crisp jab that stopped Barnett in his tracks.
Banger throws out a loose jab but Barnett uses good head movement to avoid it.
Barnett shoots in for a takedown but Banger shows good takedown defense.
This is a great period of action - very entertaining stuff!
Good shot there by Banger.
Barnett dives in and grabs Banger's left leg, looking for a takedown. Banger pushes down on Barnett's head and hops out.
Banger drops down looking to force a counter takedown but Barnett defends it well.
Barnett takes a push kick to the midsection and stumbles backwards.
Barnett is breathing heavily.
Barnett closes the distance and clinches up, looking for a takedown. He shifts his weight and gets a nice trip into half guard.
Banger tries to get to full guard but Barnett has control of the leg.
Banger is looking to get full guard. It looks like he might be successful but at the last minute Barnett jumps into side control!
And that is the end of the round. The fighters go back to their corners.
Bruce Banger dominated that round.
The referee calls time. The cornermen exit stage left and we're back to business.
Banger is the aggressor but that punch slipped nicely by Barnett.
Banger takes a jab right on the nose. That must have hurt but he shrugs his shoulders and looks to return the favor.
Banger misses with a straight left.
Barnett attempts a counter takedown but Banger avoids it well and moves away.
Banger misses with a straight right.
Barnett uses some good footwork to avoid the body shot by Banger.
Barnett misses with a hook.
Barnett throws a loose over hand right and dives in with a double leg takedown. Banger tries to sprawl but it's too late and the fighters hit the mat. Barnett is in Banger's guard.
Banger bucks up whilst keeping hold of a body lock, managing to reverse the position. Now he's in top in Barnett's guard.
Barnett trying to control the position.
Banger trying to control but Barnett is working from the bottom.
We've had a slow start to the round here - hopefully the action picks up.
Barnett looking for submissions from the bottom here. Moving his hips around, possibly looking for an armbar.
Banger tries to free his leg and advance position but Barnett is retaining full guard.
That's one minute gone in the round.
Banger is pushing down on Barnett's leg trying to pass to half guard. Barnett is fighting to maintain full guard but Banger has managed to sneak the leg through.
Barnett wants to control but Banger passes into side.
Barnett is looking to slip a leg under and get half guard but Banger is one step ahead and moves to full mount!
Barnett tries to hold on but Banger pushes him away.
Banger stands up from the dominant position. He obviously fancies his chances standing.
Banger lands a really nice looking cross but Barnett seems unphased.
Bruce Banger is looking to throw some combinations by the looks of things.
Barnett scores with a nice takedown into half guard. Let's see what he's got on the ground.

Banger kicks off Barnett and gets to his feet.
The fans in attendance giving it up for the two fighters, who have really let it all hang out in the last minute or so!
Banger throws a jab but it's blocked by Barnett.
That's two minutes gone in the round.
No joy there for Banger, who threw a few shots but didn't land.
Banger stuns Barnett with a nice body shot, before stepping back out of range.
Barnett shoots in and bounces Banger off the cage to secure the takedown into guard.
Barnett looking to control the position here, rather than advance.
Banger looking for a sweep. Not yet Banger, not yet.
Barnett drops back for a leg! It's a sloppy attempt though and Barnett jumps back into guard quickly, to retain the dominant position.
Barnett won't allow Banger to get back to his feet.
Banger has been the more effective fighter overall so far.
That's three minutes gone in the round.
Barnett tries to free his leg and advance position but Banger is retaining full guard.
Barnett preventing the sweep.
Barnett drops back for a leg here. A bit of a high risk move... He's looking for a kneebar by the looks of things. Now both of them are looking for submissions. Barnett seems to have locked his on tight now - Banger screams in pain and taps out furiously! It certainly was a high risk move but it's paid off for Barnett, as he picks up the win!
Ladies and gentlemen, after 3:33 of round 2, we have a winner by way of Submission (Kneebar). Warmaster Barnett!
Warmaster Barnett spent the whole post fight interview bigging himself up. It didn't go down that well with the fans after a while as they thought it was a bit arrogant.
|
|
|
|
|
|
|
|
|
|
|
|
|
|
|
|
|
|
|
|
|
|
|
| S |
C
A |
G |
S |
C
B |
G |
|
S |
C |
G |
|
energy
A | B |
|
hype
A | B |
|
pop
A | B |
|
mgr
A | B |
|
FIGHT
RATING
52% |
|
|
|
|
|
|
|
Co-main event
|
Coming up we have a welterweight MMA rules bout between Easy Ee (ranked 1759 p4p, 2880 weight class) and Bens Jamins (ranked 241 p4p, 364 weight class). Both these guys have solid standup skills and neither is particularly fantastic on the ground, so let's hope for a nice standup war!
 |
|
 |
| 167 cm
20
181
8 - 4 - 0 |
|
169 cm
25
180
5 - 2 - 0 |
BJJ Blue Belt
Excellent boxer
KO power |
|
BJJ Blue Belt
Excellent boxer
Granite chin |
|
| |
|
Ladies and gentlemen. This fight is 3 rounds, in the welterweight division.
Introducing the fighter to my left, fighting out of the red corner.
With a record of 8 - 4 - 0, fighting out of Las Vegas, Easy Ee!
And introducing the fighter to my right, fighting out of the blue corner.
With a record of 5 - 2 - 0, fighting out of Hilo, Bens Jamins!
The judges for this bout are Frank Antenori, Don Winkell and Timothy Bukovac.
The bell rings for round one and we are underway!
Ee misses with a jab, cross combination.
Jamins is looking for the big counter here.
A punch lands to the side of Ee 's head but he takes it in his stride.
Jamins should think about turning a few of those tyres round his middle into muscle if he wants people to take him seriously as an athlete.
Jamins fakes high and swings low for a body shot but Ee manages to avoid it.
We've been told by Ee's head coaches at Outlier Martial Arts that he's been working on his takedown defense in preparation for this fight.
Jamins swings away but doesn't land with a series of punches.
Jamins throws a jab, cross combination which is slipped
and Ee counters with a quick right hand to the jaw.
Jamins misses with an uppercut. Ee saw that one coming.
Ee misses with a looping right.
As Ee backs off Jamins throws a huge counter combo but Ee manages to avoid it all.
Ee moves into range and throws a lovely three punch combination.
 It looks like Bens Jamins has been cut. It looks like Bens Jamins has been cut.
Ee throws an uppercut from half a mile away. Jamins sees it coming and avoids it easily.
Jamins listening to his corner there, landing a nice uppercut.
The crowd are loving this. Great action here.
Jamins jabbing away but nothing is landing.
Ee is looking for a counter combo.
Ee misses with a hook. Jamins ducked under it nicely.
Jamins lands a nice shot to the body.
Ee avoids a punch combination nicely.
Jamins throws a looping overhand right but Ee ducks down to avoid it.
Ee misses with a looping left.
Jamins misses with a jab, cross combination.
Jamins scores with a jab.
That's one minute gone in the round.
Ee misses with a hook
and Jamins counters with a left and a right that stings Ee.
Jamins takes a jab on the nose. He smiles like he loves it and keeps coming.
Ee misses with an uppercut.
Jamins uses decent footwork to sidestep a right hand from Ee.

Ee lands a left and a right that send Jamins crashing to the mat, dazed. Ee thinks about following him to the mat but decides to wave him back up to his feet!
 Jamins is rocked! Jamins is rocked!
This is a great period of action - very entertaining stuff!
Jamins scores with a nice looking left hook and follows it up with an uppercut!
Jamins is still on wobbly legs! Can Ee finish him?
Ee misses with a double jab.
Jamins looks like he wants to counter punch here.
Jamins seems to have recovered his senses.
Ee takes a shot to the body in his stride.
Jamins tries to bum rush Ee with a series of wild strikes but Ee uses good footwork to avoid the assault.
Jamins on the wrong end of an overhand right that came out of nowhere.
Ee misses with an uppercut
enabling Jamins to counter with a crisp jab.
Ee throws an overhand right that has Jamins reeling! Ee follows up with more punches and Jamins is out cold! This one is all over!
Ladies and gentlemen, after 1:47 of round 1, we have a winner by way of KO (Punches). Easy Ee!
|
|
|
|
|
|
|
|
|
|
|
|
|
|
|
|
|
|
|
|
|
|
|
| S |
C
A |
G |
S |
C
B |
G |
|
S |
C |
G |
|
energy
A | B |
|
hype
A | B |
|
pop
A | B |
|
mgr
A | B |
|
FIGHT
RATING
93% |
|
|
|
|
|
|
|
Main event
|
Coming up we have a middleweight MMA rules bout between Inacio Azevedo (ranked 1671 p4p, 2242 weight class) and Nick Spangler (ranked 254 p4p, 317 weight class). Spangler has chosen Bad Company by - BAD COMPANY as his entrance music. Nick Spangler told me before the fight that he's been watching a lot of DVDs so let's see if that helps him in this one! I can't wait to find out!
 |
|
 |
| 184 cm
26
194
5 - 1 - 0 |
|
187 cm
24
195
6 - 2 - 0 |
BJJ Brown Belt
Counter fighter
Granite chin |
|
BJJ White Belt
Excellent boxer
Heavy handed |
|
| |
|
Ladies and gentlemen. This fight is 5 rounds, for the middleweight championship of the world!
Introducing the champion to my left, fighting out of the red corner.
With a record of 5 - 1 - 0, fighting out of Rio de Janeiro, Inacio Azevedo!
And introducing the challenger to my right, fighting out of the blue corner.
With a record of 6 - 2 - 0, fighting out of Hilo, Nick Spangler!
The judges for this bout are Don Winkell, Jack Bonds and Frank Antenori.
The bell rings for round one and we are underway!
A jab from Spangler finds it's way through Azevedo's defenses.
Spangler ducks down and throws a hook to the body.
Spangler will need to tighten up his combinations if he doesn't want to gas himself out, swinging at thin air.
Azevedo appears to be looking for a counter takedown.
Azevedo takes one on the button.
Spangler scores with a jab.
Spangler connects with a jab.
Spangler scores with a straight right hand, right through his opponent's guard.
Spangler swings wildly with a couple of big hooks
and Azevedo decides to take the opportunity to score a takedown. He's landed in Spangler's guard.
We've seen a great period of action over the last minute or so - credit to both fighters for going all out!
Spangler looking to sweep using the butterfly guard but Azevedo puts pay to that idea as he passes nicely into half guard.
Azevedo wants to work for an arm triangle but Spangler is really keeping half guard well and defending the submission attempt.
The fighters are pressed up against the cage, both looking to find a bit of space to work.
Spangler wants to control but Azevedo is keeping busy.
That's one minute gone in the round.
Azevedo prevents Spangler from improving his position.
Spangler trying to control from the bottom.
Azevedo is working for a submission of some sort.
Spangler wants to control but Azevedo is keeping busy and won't allow it.
Azevedo maintaining the dominant position here and is working for a kimura. He's locked it up! Spangler could be in real trouble here! He's trying to wriggle out but Azevedo has cracked it and Spangler is screaming in pain - he's tapped out! Great finish by Azevedo!
Ladies and gentlemen, after 2:57 of round 1, we have a winner by way of Submission (Kimura). Inacio Azevedo!
Inacio Azevedo retains his middleweight title!
Inacio Azevedo made sure to give a little speech post fight, saying 'Obrigado fãs, família e time! Isso é para você, campeão do LAFC. Thank you LAFC for opportunity and fans!'.
Nick Spangler was interviewed post fight and said 'I'll be back for your soul'.
|
|
|
|
|
|
|
|
|
|
|
|
|
|
|
|
|
|
|
|
|
|
|
| S |
C
A |
G |
S |
C
B |
G |
|
S |
C |
G |
|
energy
A | B |
|
hype
A | B |
|
pop
A | B |
|
mgr
A | B |
|
FIGHT
RATING
56% |
|
|
|
|
|
|
|
|
|
|
