|
TWGC 36 (205lbs, D2): Tokyo Qualifier - Round 2 PBP Commentary |
Co-main event
|
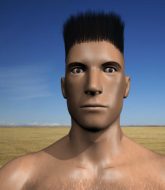
This TWGC bout is 1 fifteen minute round in the light heavyweight division. Introducing today's competitors. In the red corner, competing out of St Petersburg, with a TWGC record of 1 wins and 1 losses; Hassan Takhti! And in the blue corner, fighting out of St Petersburg, with a TWGC record of 1 wins and 2 losses; Brian Baker!
The judges for this bout are Shigeki Sano, Sosuke Kotani and Yukihiro Shimada.
The official calls the fighters to the middle and the contest is under way.#TD#
Takhti drives through with a really nice takedown into side control. Score +4 for clean takedown past guard: Takhti (4) vs (0) Baker#SUB#
Takhti is looking to finish here, going for an Americana. Baker knows the correct defense though, so he's OK. #SUB#
Takhti is trying to get an arm triangle but Baker is defending well. #SUB#
Takhti tries for a kimura. Not really close to a finish though.
Takhti has improved his flexibility recently so we will have to see if he can use that to his advantage.#SUB#
Takhti is looking for a kimura. He might have it! No, Baker has escaped the position, nice work there.
We've had a slow start to the round here - hopefully the action picks up.#SUB#
Takhti wants to work for a kimura but he's foiled early by Baker, who protects the arm well. #SUB#
Takhti goes for an armbar here - this could be all over! But no, Baker has escaped beautifully and is now on top in side control! Oh, that's unlucky for Takhti but great work by Baker. Score +4 for clean sweep to past guard: Takhti (4) vs (4) Baker#T1#
Takhti is looking for a sweep.
Baker trying to control the position but Takhti is working away.
Takhti is positioning himself to get back to half guard.
The ref warns both fighters not to hold the cage as they work up against the meshing.#SUB2#
Baker thinks about going for a far side armbar but bails out and retains the dominant position instead.
Takhti is trying to escape the position but Baker is controlling the position.
Takhti tries to improve position but can't.
Baker controls the position from side control.
My spies in The Factory inform me that Baker has been getting involved in the gym's BJJ sparring sessions. Let's see whether that pays dividends!
Takhti looks to move to half guard but instead Baker has passed into mount! Damn! Score +2 for reaching mount: Takhti (4) vs (6) Baker#T2#
Baker prevents Takhti from getting the reversal.
Baker controlling the pace for now.
Baker wants to take his opponent's back but Takhti doesn't allow it.
Takhti bucks up and manages to get a nice reversal! He's in guard on the top - nicely done! Score +2 for sweep to guard / half guard: Takhti (6) vs (6) Baker
Baker can't keep his opponent in guard - Takhti advances to half guard, no doubt looking to mount. #SUB#
Takhti is working for a kimura but Baker is defending it quite comfortably.
#SUB#
Takhti is looking for a kimura. It's going to be difficult to finish that from half guard though and Baker defends it well. #SUB2#
Baker is looking to sinch up a guillotine here but Takhti pulls his head out easily. #T3##SUB#
Takhti is looking for an arm triangle, whilst trying to pass to side control. Baker doesn't seem that keen to cooperate though. No luck this time Takhti.
Baker is trying is best to control the position here. #SUB2#
Baker looking for submissions from an awkward position here.#SUB#
Takhti is looking for a kimura. It's pretty deep but Baker still has the half guard so he's probably OK. Oh, Baker has exploded into a beautiful escape there and after a quick scramble, he's ended up in side control on top! Nice work! Score +4 for clean sweep to past guard: Takhti (6) vs (10) Baker#SUB2#
Baker looking for an arm triangle but it's way too loose to do anything.
Takhti manages to land a sweep and he's now on top! Lovely Jiu Jitsu! Score +2 for sweep to guard / half guard: Takhti (8) vs (10) Baker#SUB#
Takhti is trying to work for a kimura but Baker is defending well.
#T4#
Baker is looking to improve his position.
Baker is controlling Takhti's trapped leg to prevent Takhti from advancing to side control.
Baker tries to roll over but Takhti keeps him under control.#SUB#
Takhti is looking for a kimura but he's never going to get it from there.
Baker is doing well to avoid being mounted. He's controlling the position at the moment.#SUB#
Takhti is trying to work for a kimura. This could be trouble! No, Baker has managed to free his arm - good work.
Baker is looking to regain full guard. Not this time though. #T5##SUB#
Takhti is working for submissions here but there's nothing on.
Baker gets back to full guard.
Takhti advances position into side control! Score +3 for passing guard: Takhti (11) vs (10) Baker
Baker tries to buck Takhti off but Takhti is having none of it.#SUB#
Takhti goes for an armbar here - this could be all over! But no, Baker has escaped beautifully and is now on top in side control! Oh, that's unlucky for Takhti but great work by Baker. Score +4 for clean sweep to past guard: Takhti (11) vs (14) Baker
Takhti tries to buck Baker off but Baker is having none of it.
Baker advances to full mount. Score +2 for reaching mount: Takhti (11) vs (16) Baker
Takhti keeping his composure momentarily, calmly looking to get back to half guard.
Baker tries to control but Takhti wriggling away.
Baker avoids the attempt from Takhti to control.#T6#
Baker controlling his opponent.
Takhti is trying to reverse the position but instead Baker has taken his back - oops! Score +3 for taking back: Takhti (11) vs (19) Baker
Takhti can't escape the position.
Baker doesn't have the hooks in and Takhti manages to turn into his guard.
Score +2 for sweep to guard / half guard: Takhti (13) vs (19) Baker
Baker looking to sweep here. No luck so far. #SUB#
Takhti drops back looking for a heel hook - he quickly realises he's not going to get it but Baker manages to dive on top of him before he can escape and now Takhti has Baker in his guard. Score +2 for sweep to guard / half guard: Takhti (13) vs (21) Baker
Takhti can't do much from the bottom at the moment, as Baker controls the pace.#SUB#
Takhti looking for submissions from the bottom but instead Baker passes into half guard.
#SUB#
Takhti actively working from the bottom here.#T7#
Baker seems content to maintain position for now, rather than mounting any offense. #SUB#
Takhti looking for submissions from an awkward position here.#SUB#
Takhti looking for submissions from an awkward position here.
Baker not doing much here.
#SUB#
Takhti looking to work for a kimura from the bottom.
The fighters are pressed up against the cage, both looking to find a bit of space to work.#SUB#
Takhti looking for subs from the bottom but Baker mounts him! Score +3 for passing guard: Takhti (13) vs (24) Baker#T8#
Takhti tries to get back to half guard but can't.
Takhti is working hard here to advance position.
Baker tucks in and makes sure he doesn't lose the dominant position.
Takhti tries to improve his position but instead Baker has taken his back! Score +3 for taking back: Takhti (13) vs (27) Baker
Baker controlling well, preventing Takhti from escaping the position.
Baker is controlling his opponent, waiting for an opportunity to finish.
Takhti tries to roll but Baker sticks to his back.
Baker is riding his opponent, not letting Takhti buck him off.
Takhti is trying to break free.
#T9##SUB2#
Takhti fending off the submission attempt from Baker. #SUB2#
Baker looking for the choke but no joy.
Takhti tries to break free.
Baker tries to keep control of the position but Takhti is staying busy.
Baker controlling well, preventing Takhti from escaping the position.
Baker controlling the position well here. Takhti rolled but Baker kept the hooks locked in and stayed in the dominant position.
Takhti is trying to break free.
#T10#
Takhti is keeping busy.
Takhti might be looking to lock onto one of his opponent's long limbs for a submission, whilst we're on the ground.
You can see the frustration on Takhti's face
He knows he is in trouble unless he improves his position sooner rather than later.
#SUB2#
Takhti defending nicely against the rear naked choke attempt.
#SUB2#
Takhti is displaying good submission defense - not really looking in danger of submitting to the rear naked choke at the moment. That could change in an instant of course if Baker gets his way!
Takhti trying to control the hands but Baker breaks the grip.
Takhti rolls and manages to get back to half guard. Nicely done.
#SUB2#
Baker is sneakily working for an arm triangle but Takhti sees it coming and defends easily.#SUB#
Takhti actively working from the bottom here.#T11#
Takhti tries to roll over but Baker keeps him under control.#SUB2#
Baker is looking for an arm triangle, whilst trying to pass to side control. Takhti doesn't seem that keen to cooperate though. No luck this time Baker.
Takhti works his way to full guard. Good work.
Takhti keeping moving, preventing Baker from controlling successfully. #SUB#
Takhti looking for a guillotine here but Baker defends easily.
Takhti keeping moving, preventing Baker from controlling successfully. #T12##SUB#
Takhti is active off his back here, looking for submissions.
#SUB#
Takhti working away from the bottom but not quite defensive enough there because Baker has passed into half guard!
#SUB2#
Baker is trying for a guillotine from the top but the pressure isn't in the right place so Takhti is just riding it out for now. Baker eventually gives up the hold.
Baker controlling the action here. #SUB#
Takhti looking to work for a kimura from the bottom.#T13##SUB2#
Baker is trying to work for a kimura but Takhti is defending well.
Baker looks over to his corner - he wants some instructions but his corner are not responding. #SUB#
Takhti looking for submissions from an awkward position here.#SUB#
Takhti looking for submissions off his back.#SUB2#
Baker looking for a kimura but he'll have to free his other leg if he wants to finish that. Perhaps he's just using it as a distraction technique.
Takhti trying to get back to full guard but Baker takes advantage of the position and moves to full mount! Score +3 for passing guard: Takhti (13) vs (30) Baker#T14#
Baker can't quite control the action as he would like just now, as Takhti is looking to escape. #SUB2#
Takhti defends a decent attempt at a guillotine from Baker.
Takhti keeping his composure momentarily, calmly looking to get back to half guard.
Baker trying to control but he's not successful this time.
Boooooooooooooooooooo!!! God, this has been a terrible round. Come on you two, sort yourselves out!
Takhti is trying desperately to improve position.
And that's the end of the fight!
Baker wins on points by 30 to 13. |
|
|
|
Main event
|
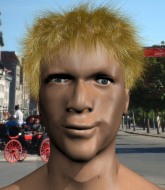
This TWGC bout is 1 fifteen minute round in the light heavyweight division. Introducing today's competitors. In the red corner, competing out of New York, with a TWGC record of 2 wins and 2 losses; Zachary Benjamins! And in the blue corner, fighting out of Amsterdam, with a TWGC record of 1 wins and 1 losses; Happy Chukwudu!
The judges for this bout are Ren Mimura, Hirohito Nitta and Yasuomi Hirokawa.
The fighters connect hands in the middle of the mat and we are under way.
Benjamins misses with a takedown attempt. He shot from a bit too far out.#TD2#
Chukwudu looking to shoot here. He's gone for it and he's landed a takedown into side control! Oh, that's bad for Benjamins! Score +4 for clean takedown past guard: Benjamins (0) vs (4) Chukwudu
Benjamins can't do much from the bottom here.
Benjamins is trying to improve his position.
A bit of a lull in the action. I'm sure it will pick up again soon... even if the ref has to physically pick them up and put them back on their feet.
We've had a slow start to the round here - hopefully the action picks up.
Benjamins is looking for a sweep.
Benjamins struggling a bit here.
Benjamins gets back to half guard.#T1#
Benjamins trying to hold on to Chukwudu's head to control him but Chukwudu postures up.
#SUB2#
Benjamins is defending against the submission attempts here by Chukwudu.
Benjamins keeping hold of Chukwudu's head, controlling as best he can.
Benjamins is working for an escape here. He's hooked one of Chukwudu's legs and he's managed to sneak out and take Chukwudu's back! Score +4 for clean sweep to past guard: Benjamins (4) vs (4) Chukwudu
Chukwudu just trying to survive but Benjamins is wriggling into a better position, looking to finish.
Chukwudu staying busy and making it hard for Benjamins to control. #T2#
Chukwudu trying to control the action but Benjamins just sinks the hooks in. #SUB#
Chukwudu preventing the rear naked choke attempt from Benjamins.
Chukwudu holding on to Benjamins's left wrist, preventing the choke.
A lull in the action here.
Chukwudu is in a world of trouble here. He's outmatched on the ground here and he'd better get Benjamins off his back sharpish unless he wants to be submitted.#SUB#
Chukwudu fending off the submission attempt from Benjamins.
You can see the frustration on Chukwudu's face
He knows he is in trouble unless he improves his position sooner rather than later.
#SUB#
Chukwudu defends a rear naked choke attempt by controlling one of Benjamins's arms. #T3#
Benjamins controlling well, preventing Chukwudu from escaping the position.
Benjamins is trying to stick to Chukwudu's back but Chukwudu is turning into Benjamins. He's managed to reverse the position - now he's in Benjamins's guard. Polite applause from the crowd in appreciation of some nice Jiu Jitsu by Chukwudu. Score +2 for sweep to guard / half guard: Benjamins (4) vs (6) Chukwudu#SUB2#
Chukwudu thinks about going for a leg but decides against it, in order to maintain the position.
Chukwudu preventing the sweep.
Benjamins manages to sweep nicely, so he's now on top. Chukwudu manages to get himself to full guard.
Score +2 for sweep to guard / half guard: Benjamins (6) vs (6) Chukwudu
Benjamins stands up and looks to throw the legs aside to pass to side control. Chukwudu swivels though and keeps the full guard.
Benjamins trying to control but Chukwudu is working from the bottom.
Benjamins tries to free his leg and advance position but Chukwudu is retaining full guard. #T4#
Chukwudu can't keep his opponent in guard - Benjamins advances to half guard, no doubt looking to mount.
Chukwudu tries to get to full guard but Benjamins has control of the leg.
Benjamins trying to pass the guard but Chukwudu defending well.
Chukwudu tries to roll over but Benjamins keeps him under control.
Benjamins is looking to advance position but Chukwudu won't allow it. #T5#
Benjamins seems very keen to just sit and control from half guard but Chukwudu does not like that idea so much and is remaining active off his back. #SUB2#
Chukwudu looking for submissions off his back.#SUB#
Benjamins wants to work for an arm triangle but Chukwudu is really keeping half guard well and defending the submission attempt.
Benjamins prevents Chukwudu from improving his position.
Benjamins is trying to control. Chukwudu wants to improve his position but can't escape this time.
Chukwudu holds on for dear life, maintaining half guard for now.
Benjamins tries to pass the half guard into mount. Chukwudu knows what he's doing though and prevents the attempt.
Chukwudu trying to control but Benjamins postures up.
Chukwudu keeping control of the leg, stopping his opponent passing to mount. #T6#
Chukwudu is staying active underneath Benjamins, who seems content to just control the action from this position.
Benjamins working to pass to mount. He's got his hand pressing down on Chukwudu's thigh. Chukwudu counters though and makes it back to full guard.
Benjamins trying to pass the guard but can't manage it just yet.
Benjamins trying to control but Chukwudu is working from the bottom.
Benjamins works a leg free and moves into half guard.
Benjamins is looking to pass the guard... He's managed it - he's now in full mount! Score +3 for passing guard: Benjamins (9) vs (6) Chukwudu
Chukwudu regains half guard.#T7#
Benjamins is thwarting Chukwudu's attempts to control the position.
Chukwudu keeps control of the position for the meantime.
Benjamins trying to control from half guard but Chukwudu is working away.
Chukwudu wants to get back to full guard.
Benjamins trying to mount his opponent but Chukwudu defends it.
Benjamins trying to advance position but Chukwudu counters by regaining guard.
A real slowdown in the pace of the fight for a moment, as Chukwudu holds on and takes a little breather. #T8#
Benjamins trying to control the position from guard on top but Chukwudu is wriggling around, looking for whatever he can.
Benjamins pushes down on Chukwudu's leg and manages to get into half guard.
Benjamins trying to control from Chukwudu's half guard. Chukwudu has other ideas though and has regained full guard.
Chukwudu looking for a sweep. Not yet Chukwudu, not yet. #SUB2#
Chukwudu working from the bottom, still in full guard. He's managed to get a loose triangle. Benjamins doesn't seem to be doing much to defend here, obviously he feels comfortable in the position. Benjamins manages to throw the legs off his shoulder and he's back into guard - no problem.
Benjamins trying to control but Chukwudu is working from the bottom.
The fighters are pressed up against the cage, both looking to find a bit of space to work.#T9#
Benjamins passes Chukwudu's left leg - he's now in half guard.
Chukwudu regains full guard. Nicely done. #SUB#
Benjamins drops back looking for a heel hook - he quickly realises he's not going to get it but Chukwudu manages to dive on top of him before he can escape and now Benjamins has Chukwudu in his guard. Score +2 for sweep to guard / half guard: Benjamins (9) vs (8) Chukwudu
Benjamins is trying to control the position from the bottom.
Benjamins looking for a sweep. Not yet Benjamins, not yet.
Chukwudu controlling from the guard. I say controlling but really, he's stalling.
It looks like Chukwudu might be adopting somewhat of a lay and pray gameplan here, which I'm sure won't go down too well with the paying fans in attendance... Or the ring announcers come to think of it.#T10#
Chukwudu looking to pass the guard.
Benjamins working a defensive guard here.
Benjamins wants to sweep but no luck.
Chukwudu stays in close to Benjamins's body and controls the position.
Benjamins lands a beautiful sweep and he's now moved into his opponent's guard. Score +2 for sweep to guard / half guard: Benjamins (11) vs (8) Chukwudu#T11#
Benjamins advances to half guard.
The ref warns both fighters not to hold the cage as they work up against the meshing.
Benjamins prevents Chukwudu from improving his position.
Benjamins is keen to just control but Chukwudu is a slippery customer.
Benjamins prevents Chukwudu from improving his position.
Benjamins is trying to advance to mount but he's lost his balance and Chukwudu reverses the position - he's now on top in Benjamins's guard. Score +2 for sweep to guard / half guard: Benjamins (11) vs (10) Chukwudu
Benjamins pulls Chukwudu in close to his closed guard and prevents Chukwudu from doing any damage or advancing position.
Benjamins trying to control the position.
#T12##SUB#
Benjamins looking for a guillotine here but Chukwudu defends easily.
Benjamins looking to hit a scissor sweep but Chukwudu is one step ahead there. #SUB#
Benjamins escapes his hips to the side and looks to be working for an armbar. Chukwudu gives him a little smile and shakes his head. No chance.
Benjamins is working an open guard here, looking to improve his position. No doubt that will leave him open to counters but at least he's being more offensive.#T13#
Benjamins trying to keep a closed guard but Chukwudu is proving a slippery customer.
Chukwudu controls the pace of the fight for a moment.
Benjamins wants to sweep but no luck.
Benjamins trying to control the position here.
Benjamins is trying to keep Chukwudu in close.
#T14#
Benjamins wants to sweep but no luck. #SUB#
Benjamins has an active guard here but Chukwudu has managed to pass into half guard.
#SUB2#
Chukwudu is looking for an arm triangle, whilst trying to pass to side control. Benjamins doesn't seem that keen to cooperate though. No luck this time Chukwudu.
Chukwudu is just sitting in half guard, waiting for something to happen.
And that's the end of the fight!
Benjamins takes the fight on points by 11 to 10. |
|
|
|
|
|
|