 |
SENSEI FC 15 PBP Commentary |
Undercard bout
|
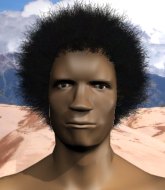
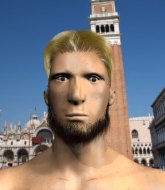
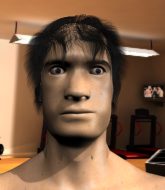
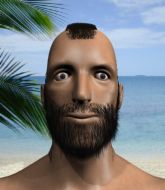
Coming up we have a light heavyweight MMA rules bout between Marcus Wheeler (ranked 6196 p4p, 25041 weight class) and Guilherme Pereira (ranked 658 p4p, 731 weight class). This should be a great matchup!
 |
|
 |
| 189 cm
19
215
0 - 1 - 0 |
|
181 cm
19
205
0 - 2 - 0 |
BJJ Blue Belt
Excellent boxer
Good chin |
|
Good wrestler
Counter fighter
Good gas tank |
|
| |
|
Ladies and gentlemen. This fight is 3 rounds, in the light heavyweight division.
Introducing the fighter to my left, fighting out of the red corner.
With a record of 0 - 1 - 0, fighting out of Las Vegas, Marcus Wheeler!
And introducing the fighter to my right, fighting out of the blue corner.
With a record of 0 - 2 - 0, fighting out of Los Angeles, Guilherme Pereira!
The judges for this bout are Yuuki Gou, Yasuomi Hirokawa and Tatsuya Matsuyama.

The bell rings for round one and we are underway!

Pereira throws a loose over hand right and dives in with a double leg takedown. Wheeler tries to sprawl but it's too late and the fighters hit the mat. Pereira is in Wheeler's guard.
Pereira slips effortlessly into side control - very nice.
Wheeler is letting Pereira control him for a moment.

Pereira is looking to finish here, going for an Americana. Wheeler knows the correct defense though, so he's OK.
Pereira is trying to land an Americana. He has the arm isolated but Wheeler is keeping cool and he's avoided the danger for now.
We've had a slow start to the round here - hopefully the action picks up.
Pereira wants to work for a kimura but he's foiled early by Wheeler, who protects the arm well.

That's one minute gone in the round.
Wheeler is trying to control Pereira's posture but Pereira avoids it.
Pereira is looking to finish here, going for an Americana. Wheeler knows the correct defense though, so he's OK.
Wheeler definitely looks more muscular than last time we saw him fight.
The ref warns both fighters not to hold the cage as they work up against the meshing.
A bit of a lull in the action. I'm sure it will pick up again soon... even if the ref has to physically pick them up and put them back on their feet.
Pereira has hold of Wheeler's arm here. He's working for an Americana. It looks like he might have it! Wheeler tries to escape but he's just digging himself in deeper - Pereira cranks the arm and Wheeler screams in pain! The ref makes a decision and ends the fight before the tap - no complains from Wheeler, who is just happy to have his arm attached to his body.
Ladies and gentlemen, after 2:57 of round 1, we have a winner by way of Submission (Americana). Guilherme Pereira!
|
|
|
|
|
|
|
|
|
|
|
|
|
|
|
|
|
|
|
|
|
|
|
| S |
C
A |
G |
S |
C
B |
G |
|
S |
C |
G |
|
energy
A | B |
|
hype
A | B |
|
pop
A | B |
|
mgr
A | B |
|
FIGHT
RATING
36% |
|
|
|
|
|
|
|
Undercard bout
|
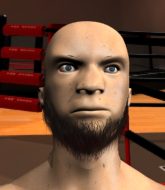
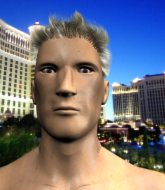
Coming up we have a heavyweight MMA rules bout between Mikail Spartakov (ranked 5867 p4p, 6007 weight class) and Long Gon (ranked 683 p4p, 694 weight class). Over to our ring announcer for the fighter introductions!
 |
|
 |
| 197 cm
19
245
1 - 1 - 0 |
|
182 cm
21
240
0 - 2 - 0 |
BJJ Blue Belt
Dangerous knees
Granite chin |
|
BJJ Blue Belt
Decent boxing
Heavy handed |
|
| |
|
Ladies and gentlemen. This fight is 3 rounds, in the heavyweight division.
Introducing the fighter to my left, fighting out of the red corner.
With a record of 1 - 1 - 0, fighting out of New York, Mikail Spartakov!
And introducing the fighter to my right, fighting out of the blue corner.
With a record of 0 - 2 - 0, fighting out of Montreal, Long Gon!
The judges for this bout are Shigeki Fujiwara, Shigeki Sano and Shirou Masuda.
The bell rings for round one and we are underway!
Gon looks to clinch
enabling Spartakov to counter with a crisp jab.
Mikail Spartakov seems to be the more aggressive standup fighter in this bout.

Spartakov lands a big uppercut and Gon crumbles to the floor! The ref thinks about stopping the fight but Gon looks OK. Spartakov waves Gon back to his feet!
 Gon is rocked! Gon is rocked!
 It looks like Long Gon has been cut. It looks like Long Gon has been cut.
Gon doesn't manage to clinch there - Spartakov circles away.
Gon is still on wobbly legs! Can Spartakov finish him?
Spartakov pulls out of a head kick attempt.
Spartakov misses with a looping left.
Gon seems to have recovered his senses.
Spartakov throws an uppercut from half a mile away. Gon sees it coming and avoids it easily.
Spartakov looks to have improved his striking defense since last time we saw him fight.
We've seen a great period of action over the last minute or so - credit to both fighters for going all out!
Gon blocks the body kick.
Gon is loading up here, looking for a big counter of his own.
Gon tries to clinch but is not successful on this occasion.
Gon tries to bum rush Spartakov with a series of wild strikes but Spartakov uses good footwork to avoid the assault.
Spartakov tries to land with a swinging hook to the body but Gon was well out of range. Poor timing from Spartakov.
Gon lands with an uppercut that bounces Spartakov off the cage and back into range.

Gon has closed the distance and engaged Spartakov in a clinch.
Spartakov is stalling here.
Gon working on landing some head shots here - that one got through nicely.

Spartakov breaks the clinch and we return to the middle of the mat.
Gon is looking to clinch.
Spartakov throws a leg kick but Gon sees it coming and checks it nicely.
Gon doesn't fully commit to the body shot counter.
That's one minute gone in the round.
Gon tries to clinch up.
Gon avoids the body shot from Spartakov.
The fight stays on the outside here - Gon looks like he's thinking about clinching though.
Spartakov tries a head kick but it misses.
Gon defending well as Spartakov loads up on a big left hand.
Gon defending well as Spartakov loads up on a big left hand.
Gon tries to close the distance and clinch but Spartakov swats him to one side with an open hand palm strike and circles away.
Spartakov lands a nice looking body shot.
Spartakov tests Gon's chin there with a solid looking shot.
Spartakov tries a switch kick but it misses it's target.
Gon lands a head shot.
Gon misses with a few strikes there.
Gon misses with a few strikes there.
Spartakov looks to land a left hand but Gon moved out of range nicely.
Spartakov jabs Gon to the body, keeping him at a distance.

That's two minutes gone in the round.
The crowd cheering loudly, showing their appreciation for the quality fight we're seeing here.
Nice defenses there by Gon.
Spartakov scores with a sloppy punch to the body. Not much technique there but it did the business.
Gon wants to clinch but Spartakov slips to the side
enabling Spartakov to counter with a crisp jab.
Spartakov scores with a reasonable looking shot to the body. Gon doesn't seem bothered though.
Gon looks winded!
Spartakov scores with a shot to the body.
Spartakov drops Gon with a huge uppercut! Gon drops to the floor like a sack of potatoes. Spartakov is raining down punches and the ref stops the fight! This one is all over!
Ladies and gentlemen, after 2:29 of round 1, we have a winner by way of TKO (Strikes). Mikail Spartakov!
|
|
|
|
|
|
|
|
|
|
|
|
|
|
|
|
|
|
|
|
|
|
|
| S |
C
A |
G |
S |
C
B |
G |
|
S |
C |
G |
|
energy
A | B |
|
hype
A | B |
|
pop
A | B |
|
mgr
A | B |
|
FIGHT
RATING
66% |
|
|
|
|
|
|
|
Undercard bout
|
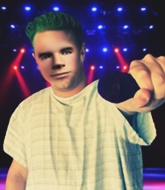
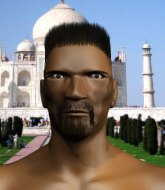
Coming up we have a lightweight MMA rules bout between Pacome Thibodeaux (ranked 6124 p4p, 5043 weight class) and Romeo Julieta (ranked 594 p4p, 520 weight class). Pacome Thibodeaux has the edge in experience - let's see if he can make that count tonight.
 |
|
 |
| 180 cm
19
166
2 - 1 - 0 |
|
171 cm
19
162
1 - 0 - 0 |
BJJ White Belt
Dangerous knees
Cardio machine |
|
Good takedowns
Counter fighter
Solid chin |
|
| |
|
Ladies and gentlemen. This fight is 3 rounds, in the lightweight division.
Introducing the fighter to my left, fighting out of the red corner.
With a record of 2 - 1 - 0, fighting out of Las Vegas, Pacome Thibodeaux!
And introducing the fighter to my right, fighting out of the blue corner.
With a record of 1 - 0 - 0, fighting out of Las Vegas, Romeo Julieta!
The judges for this bout are Tatsuya Matsuyama, Ren Mimura and Yukihiro Shimada.
The bell rings for round one and we are underway!
Julieta misses the shot to the body.
Julieta throws a leg kick that misses.
Thibodeaux is looking to counter with a shot to the body.
Julieta circles away from the clinch attempt.
Julieta throws a counter combo.
Julieta circles away from the clinch attempt.
And an attempted straight right on the counter from Julieta! But no joy.
Julieta motions for Thibodeaux to come forward. Julieta throws a leg kick but it misses it's target.
Thibodeaux lands a powerful looking uppercut that connected with his opponent's jaw.
It looks like Romeo Julieta has been cut.
Donk. Thibodeaux catches Julieta right on the button with a cross.
Julieta is trying hard to land a takedown here. Thibodeaux sprawls well and keeps this one on the feet.
Julieta showing good head movement there, avoiding the strikes from Thibodeaux.
We've had a slow start to the round here - hopefully the action picks up.
Julieta lands a pitter patter jab to the forehead of his opponent.
Thibodeaux tries to clinch there but Julieta circles away.
Thibodeaux tries to clinch up against the cage, rushing in to close the distance. Julieta manages to break the clinch and circles back to the middle of the mat.
A little jabbing left from Julieta on the counter but it doesn't find it's target.
Thibodeaux scores with a jab. Julieta acknowledges it with a nod of the head.
That's one minute gone in the round.
Thibodeaux feints and then winds up with a huge right hand that connects perfectly and sends Julieta sprawling to the canvas! Julieta rolls over backwards and springs off the cage and manages to regain his footing - how acrobatic! Oh, he's still wobbly - can Thibodeaux finish him?!
Julieta is rocked!
Julieta avoids the clinch attempt nicely.
Thibodeaux lands a big uppercut and this one is all over! His foe lies motionless on the canvas - a massive one punch knockout!
Ladies and gentlemen, after 1:19 of round 1, we have a winner by way of KO (Punch). Pacome Thibodeaux!
|
|
|
|
|
|
|
|
|
|
|
|
|
|
|
|
|
|
|
|
|
|
|
| S |
C
A |
G |
S |
C
B |
G |
|
S |
C |
G |
|
energy
A | B |
|
hype
A | B |
|
pop
A | B |
|
mgr
A | B |
|
FIGHT
RATING
73% |
|
|
|
|
|
|
|
Undercard bout
|
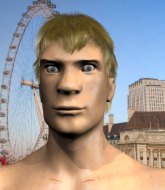
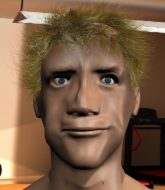
Coming up we have a middleweight MMA rules bout between Tatsuo Sato (ranked 5373 p4p, 5455 weight class) and Chris Maurelli (ranked 609 p4p, 613 weight class). We have two fighters making their debuts here, so let's see who comes out of this one with their first professional victory.
 |
|
 |
| 182 cm
18
193
0 - 0 - 0 |
|
188 cm
18
195
0 - 0 - 0 |
BJJ Blue Belt
Counter fighter
Granite chin |
|
BJJ White Belt
Excellent MT
Solid chin |
|
| |
|
Ladies and gentlemen. This fight is 3 rounds, in the middleweight division.
Introducing the fighter to my left, fighting out of the red corner.
With a record of 0 - 0 - 0, fighting out of London, Tatsuo Sato!
And introducing the fighter to my right, fighting out of the blue corner.
With a record of 0 - 0 - 0, fighting out of London, Chris Maurelli!
The judges for this bout are Shigeki Fujiwara, Yukihiro Shimada and Yukihiro Yamamoto.
The bell rings for round one and we are underway!
Maurelli lunges in with an uppercut that skims his opponent's chin.
A lazy left from Maurelli finds it's target.
Boom, another hit is landed. "You're gunna get knocked out" taunts Maurelli, as that shot connected.
Maurelli connects with a hook to the side of his opponent's head.
Sato misses the shot to the body.
Sato throws out a loose jab but Maurelli uses good head movement to avoid it.
Sato swings away but doesn't land with a series of punches.
Maurelli lands a jab to the nose.
Maurelli feints a straight left to the body, then turns around with a flashy move and hits Satos jaw with a dramatic spinning back fist!
Sato has his head snapped back a nice jab. A little nod from Sato there as he acknowledges the shot.
Maurelli connects with a single shot there.
We've seen a great period of action over the last minute or so - credit to both fighters for going all out!
Maurelli connects with a right hand. Sato shakes it off.
Sato throws a half hearted mid kick.
Sato lands a nice hook to Maurelli's body. Maurelli takes it in his stride and looks to land his own strikes.
Sato misses with a straight left.
That's one minute gone in the round.
Maurelli lands with a cross to side of his opponent's head.
Sato throws a combination but comes up with nothing but fresh air.
Sato takes a body punch that cleary hurt but he's trying not to show any weakness.
Jab from Maurelli.
Sato misses with a jab and misses with a cross straight after too.
Maurelli connects with the punch.
Jab from Maurelli.
Sato takes one to the side of the head.
Chris Maurelli is looking to keep the fight on the feet at all costs.
Sato drops his hands and takes a jab to the jaw for his troubles.
A lazy left from Maurelli finds it's target.
Wooooo! Give it up for these two warriors! They are putting on a show!
Maurelli darts in and out, connecting with a jab.
Maurelli moves into range and connects with a jab.
Sato throws a series of punches but Maurelli moves out of range.
That's two minutes gone in the round.
Maurelli scores with a jab to the head.
Maurelli connects with a slap. Keep your fist closed son.
Sato swings wildly with a couple of big hooks
and Maurelli counters with a stiff right hand.
Maurelli thuds his right hand into Sato's forehead from close range. That could be painful for both fighters.
Sato lands with a shot to the body.
Sato misses with a jab and misses with a cross straight after too.
Maurelli is clearly trying to counter these attacks from Sato with a body shot.
Sato pivots as if he's going to throw a leg kick but stops half way.
Sato gets cracked with a nice right hand there by Maurelli.
Maurelli lands a beauty of a right hand that gets the crowd cheering.
Sato fakes high and swings low for a body shot but Maurelli manages to avoid it.
Sato walks straight into an uppercut. Luckily it didn't land flush.
Chris Maurelli seems to be the more aggressive standup fighter in this bout.
Sato moves his head to the side to avoid a jab but walks straight into a cross.
Maurelli thuds his right hand into Sato's forehead from close range. That could be painful for both fighters.

That's three minutes gone in the round.
Sato misses with a body shot.
Maurelli lands a glancing blow to the side of Sato's head.
Maurelli scores with a jab to the body.
Maurelli darts in and out, connecting with a jab.
Sato takes one on the chin but keeps coming.
A looping hook to the body misses from Sato. Maurelli does a little dance to reset his feet.
Maurelli changes levels and scores with a jab to the body.
Sato's hands are dropping dangerously low here and Maurelli connects clean with a right hook that sends him down to one knee! Sato scrambles back to his feet.
Maurelli connects with the punch.
Maurelli dodges the punch combination from Sato.
Maurelli bobbing and weaving, closes the distance and lands a hook to the side of Sato's head.

That's four minutes gone in the round.
This has been an exciting period of action!
Maurelli connects with a slap. Keep your fist closed son.
Sato looks like he's developed a pretty tasty lump over his left eye. He'll need to avoid taking much more damage to that.
Maurelli sizes up Sato with a pawing jab and scores with a straight right down the middle.
Maurelli fakes a jab and then connects with a hook.
Boom, another hit is landed. "You're gunna get knocked out" taunts Maurelli, as that shot connected.
Sato misses the jab.
Maurelli lands with a straight right. Sato didn't see that one coming.
Sato throws a hook to the body but it doesn't connect.
Sato takes a big uppercut there. He seems a bit wobbly but no, he's OK.
Maurelli with a nice cross.
The crowd applaud the fighters' efforts here as the round comes to an end.
Sato rushes forward with a series of wild hooks but Maurelli moves out of range and avoids them all easily.
Sato walks straight into a jab right on the nose. That one stung - he's blinking and trying to clear his head.
Sato is looking to wear down Maurelli with body shots, infact he's throwing more body shots than head shots at the moment.
Maurelli connects with a crisp jab.
Maurelli takes a body punch but keeps moving.
And that is the end of the round. The fighters go back to their corners.
Chris Maurelli dominated that round.
OK. That's time! The bell goes and we're back to the action.

Maurelli scores with a jab to the head.
Maurelli fakes a head punch and goes low to the body. Nicely done.
Sato takes a shot to the eye socket. That's gotta hurt.
A slow jab from Sato misses its intended target.
As Sato backs off Maurelli throws a huge counter combo but Sato manages to avoid it all.
Nice defenses there by Maurelli.
The crowd cheers as Maurelli lands an impressive looking overhand right. Sato doesn't seem phased though.
Sato needs to keep his hands up - Maurelli had a free shot at his head there.
Maurelli lands a jab to the head.
Maurelli has been the more effective fighter overall so far.
Maurelli moving in and out of range nicely, whilst landing the scoring shot.
Maurelli scores with a nice head shot.
Maurelli connects with a body shot.
We've seen a great period of action over the last minute or so - credit to both fighters for going all out!
Maurelli slips in close and lands a nice hook before moving back out of range.
Maurelli lands a really nice looking cross but Sato seems unphased.
That's one minute gone in the round.
Maurelli lands an overhand left. A wild punch that just about connected.
Chris Maurelli seems to be getting the better of the standup.
Maurelli bobs and weaves and throws out a fast jab that snaps Sato's head backwards.
Maurelli lands a vicious shot with the stealth of a sniper and the strength of a viper. Are vipers that strong? I can think of lots of things that are stronger than a viper - not many rhyme with sniper though.
Maurelli lands a head shot.
Sato fails with a takedown attempt.
It seemed like Maurelli was going to counter with the hook but didn't fully commit to it.
Maurelli connects with the punch.
Sato takes a shot right to the liver - Bas would have been proud of that punch.
Maurelli lands an overhand left. A wild punch that just about connected.
Maurelli is moving around nicely and scores here with a single head shot.
Maurelli lands with an overhand left.
Maurelli is moving around nicely and scores here with a single head shot.
This entire fight has taken place on the feet so far and you wonder whether Sato might be better served trying to take this one to the ground because he's losing the standup battle so far.
That's two minutes gone in the round.
Wooooo! Give it up for these two warriors! They are putting on a show!
Sato throws a body punch but Maurelli moves out of range.
Maurelli connects with a nice looking jab.
Sato gets cracked with a nice right hand there by Maurelli.
Tatsuo Sato is looking to throw some combinations by the looks of things.
A jab from Maurelli does it's job there.
Maurelli takes a step towards his opponent and connects with a left hand, before circling away.
Maurelli avoids the body shot from Sato.
Maurelli misses the shot to the body.
Sato is looking to counter punch.
Maurelli uses good footwork to get in and out and land a nice right hand before Sato has time to react.
Maurelli slips a jab from Sato.
Sato on the wrong end of a decent looking cross there.
A punch lands to the side of Sato 's head but he takes it in his stride.
Maurelli getting the better of the striking in that exchange.
Maurelli lands a pitter patter jab to the forehead of his opponent.
That's three minutes gone in the round.
Sato on the wrong end of a decent looking cross there.
Maurelli keeping a good distance there, avoiding the body shot.
Jab, jab by Maurelli - just one landing.
Sato takes a jab right on the nose. That must have hurt but he shrugs his shoulders and looks to return the favor.
Sato walks straight into a jab right on the nose. That one stung - he's blinking and trying to clear his head.
Nice cross by Maurelli.
Sato throws a jab but it's blocked by Maurelli.
Sato throws a body punch but Maurelli moves out of range.
Maurelli cracks Sato with an open hand slap.
Maurelli dips to his left and cracks Sato with an uppercut!
Sato needs to keep his hands up - Maurelli had a free shot at his head there.
Sato on the wrong end of an overhand right that came out of nowhere.
That's four minutes gone in the round.
The crowd cheering loudly, showing their appreciation for the quality fight we're seeing here.
Maurelli clobbers Sato with an overhand right that has the crowd gasping. That made a horrendous noise.
Maurelli scores with a jab to the jaw.
Sato is pinned up against the cage taking some big shots here. The referee is looking closely deciding whether he should stop the fight.
Sato takes one on the button.
Good standup being displayed there by Maurelli as he connects with a hook.
Nice uppercut lands for Maurelli. That snapped Sato's head back.
Maurelli lands with a cross to side of his opponent's head.
Sato throws a wild combination but nothing lands.
Sato takes one to the side of the head.
Maurelli thuds his right hand into Sato's forehead from close range. That could be painful for both fighters.
The crowd applaud the fighters' efforts here as the round comes to an end.
Maurelli connects with the punch.
Maurelli lands a jab.
Maurelli connects with a nice looking jab.
And that is the end of the round. The fighters go back to their corners.
Chris Maurelli showed his class in that round. I'd imagine he'll take it on all the scorecards.
That's the end of the round. The referee orders the cornermen out of the cage so we can get back down to business. Ladies and gentlemen, this is the final round!

Maurelli lands the left hand.
Sato takes a shot to the eye socket. That's gotta hurt.
Maurelli might want to mix his strikes up a bit more. He's just going for head shots at the moment and that can become a bit predictable.
Sato throws a right hand that misses
and Maurelli counters with a nice uppercut.
Jab from Maurelli.
Maurelli lands with an overhand left.
Sato gets cracked with a nice right hand there by Maurelli.
Sato just misses with a punch to the body.
Boom, another hit is landed. "You're gunna get knocked out" taunts Maurelli, as that shot connected.
The fighters circle momentarily. Maurelli darts into range and connects with a nice straight punch.
Maurelli lands an overhand left. A wild punch that just about connected.
Maurelli scores with a nice head shot.
The crowd cheering loudly, showing their appreciation for the quality fight we're seeing here.
Maurelli smiles there as he lands a nice right hand right on the button.
A jab from Maurelli does it's job there.
That's one minute gone in the round.
Maurelli catches Sato with a nice straight right. He seems pissed - ooooh, it's on now! On like donkey kong!
Maurelli keeping his hands up high there, blocking the jab from Sato.
Maurelli throws out a counter right but Sato avoids it with no problem.
Maurelli sizes up Sato with a pawing jab and scores with a straight right down the middle.
Maurelli lands an overhand right.
Sato throws a series of punches but Maurelli moves out of range.
Sato takes one on the chin but keeps coming.
Maurelli stooping low to avoid any incoming strikes and then lunges in with an uppercut come cross that lands flush.
Maurelli thuds a left hand into Sato's body.
Sato takes one to the side of the head.
Maurelli lunges in with an uppercut that skims his opponent's chin.
The fighters are starting to perspire pretty heavily.
Maurelli cracks Sato with a good jab.
The fans in attendance giving it up for the two fighters, who have really let it all hang out in the last minute or so!
Maurelli staying out of range there.
Sato swings wildly with a right hand that was never going to find it's target.
That's two minutes gone in the round.
Maurelli jabs at Sato's body.
Sato misses with a lunging right hand
and Maurelli counters with a nice uppercut.
Sato takes one on the chin but seems OK.
Sato drops his hands and takes a jab to the jaw for his troubles.
Sato shoots and misses
and Maurelli cracks him with a counter punch right on the button.
Sato throws a series of punches but Maurelli avoids them all with ease.
Maurelli lands with a two punch combination before moving back out of range.
Maurelli scores with a crisp jab that stopped Sato in his tracks.
Maurelli scores with a nice head shot.
Sato takes a jab on the nose. He smiles like he loves it and keeps coming.
Sato takes a shot to the eye socket. That's gotta hurt.
Maurelli lunges in with an uppercut that skims his opponent's chin.
That's three minutes gone in the round.
Maurelli staying out of range there.
Sato has his head snapped back a nice jab. A little nod from Sato there as he acknowledges the shot.
Maurelli scores with a jab to the body.
Sato loads up on a big right hand but Maurelli slips the punch.
Maurelli lands a nice shot that snaps Sato's head back.
Sato fails to land the takedown.
A decent looking cross lands there for Maurelli.
Maurelli connects with a right hand. Sato shakes it off.
Maurelli scores with a jab to the body.
Sato on the wrong end of a nice jab.
That's four minutes gone in the round.
Maurelli staying out of range there.
Maurelli connects with a right hand. Sato shakes it off.
Maurelli throws a nice looking combination but Sato bobs and weaves to avoid any damage.
The crowd are loving this. Great action here.
Nice cross by Maurelli.
Maurelli connects with a crisp jab.
Sato slips a jab and a cross from Maurelli.
Sato takes a shot to the eye socket. That's gotta hurt.
Maurelli lands a beauty of a right hand that gets the crowd cheering.
Sato throws a lazy right hand but Maurelli sees it coming a mile off and sidesteps it easily.
The crowd applaud the fighters' efforts here as the round comes to an end.
Maurelli slips in close and lands a nice hook before moving back out of range.
Maurelli dips to his left and cracks Sato with an uppercut!
Tatsuo Sato has stepped it up - he knows he needs a finish here!
Chris Maurelli is fighting for a decision - hopefully he's judged it right and he's actually winning the fight.
Maurelli keeps his opponent at a distance with a nice jab.
And that's the end of the fight!
Chris Maurelli comfortably won the final round on my scorecard.
Well Maurelli has outworked and out performed his opponent in all aspects of the game today. He was simply too good and the decision should be no more than a formality. Over to the ring announcer for the scorecards.
Ladies and gentlemen, after 3 rounds of action, we go to the scorecards for a decision.
Judge Shigeki Fujiwara scores the fight 25:30
Judge Yukihiro Shimada scores the fight 26:30
Judge Yukihiro Yamamoto scores the fight 25:30
In favor of your winner, by unanimous decision... Chris Maurelli!
Chris Maurelli seemed lost for words in his post fight interview but he remembered to thank his fans and directed everyone to his website.
|
|
|
|
|
|
|
|
|
|
|
|
|
|
|
|
|
|
|
|
|
|
|
| S |
C
A |
G |
S |
C
B |
G |
|
S |
C |
G |
|
energy
A | B |
|
hype
A | B |
|
pop
A | B |
|
mgr
A | B |
|
FIGHT
RATING
87% |
|
|
|
|
|
|
|
Undercard bout
|
Coming up we have a middleweight MMA rules bout between Sidroy Covington (ranked 5625 p4p, 4168 weight class) and Nori Tatewaki (ranked 627 p4p, 534 weight class). Nori Tatewaki is the more experienced fighter, so let's see if that makes a difference tonight.
 |
|
 |
| 175 cm
19
197
0 - 0 - 0 |
|
174 cm
19
195
0 - 1 - 0 |
BJJ White Belt
Excellent boxer
Very quick |
|
Good wrestler
Counter fighter
Good gas tank |
|
| |
|
Ladies and gentlemen. This fight is 3 rounds, in the middleweight division.
Introducing the fighter to my left, fighting out of the red corner.
With a record of 0 - 0 - 0, fighting out of New York, Sidroy Covington!
And introducing the fighter to my right, fighting out of the blue corner.
With a record of 0 - 1 - 0, fighting out of London, Nori Tatewaki!
The judges for this bout are Kenichi Hosakawa, Yukihiro Shimada and Ren Mimura.
The bell rings for round one and we are underway!
Covington lands a big uppercut and Tatewaki crumbles to the floor! The ref thinks about stopping the fight but Tatewaki looks OK. Covington waves Tatewaki back to his feet!
Tatewaki is rocked!
It looks like Nori Tatewaki has been cut.
Covington fakes the body blow, causing Tatewaki to drop his hands! Left hook to the temple! Tatewaki goes stiff, and falls face first into the mat. Goodnight!
Ladies and gentlemen, after 0:05 of round 1, we have a winner by way of KO (Punch). Sidroy Covington!
|
|
|
|
|
|
|
|
|
|
|
|
|
|
|
|
|
|
|
|
|
|
|
| S |
C
A |
G |
S |
C
B |
G |
|
S |
C |
G |
|
energy
A | B |
|
hype
A | B |
|
pop
A | B |
|
mgr
A | B |
|
FIGHT
RATING
100% |
|
|
|
|
|
|
|
Undercard bout
|
Coming up we have a lightweight MMA rules bout between Toby MacAlister (ranked 3409 p4p, 5100 weight class) and Joey Crash (ranked 382 p4p, 524 weight class). Well, I have no idea who's going to take this one!
 |
|
 |
| 176 cm
19
163
2 - 0 - 0 |
|
175 cm
19
166
1 - 0 - 0 |
BJJ White Belt
Lethal high kicks
Cardio machine |
|
BJJ White Belt
Excellent boxer
Powerful |
|
| |
|
Ladies and gentlemen. This fight is 3 rounds, in the lightweight division.
Introducing the fighter to my left, fighting out of the red corner.
With a record of 2 - 0 - 0, fighting out of Las Vegas, Toby MacAlister!
And introducing the fighter to my right, fighting out of the blue corner.
With a record of 1 - 0 - 0, fighting out of New York, Joey Crash!
The judges for this bout are Shigeki Fujiwara, Hirohito Nitta and Shigeki Sano.
The bell rings for round one and we are underway!
Crash fails with an attempt to clinch.
MacAlister showing good head movement there, avoiding the strikes from Crash.
MacAlister looking to take his opponent's legs away with the low kicks.
MacAlister is looking to slow Crash down with leg kicks.
MacAlister definitely looks more muscular than last time we saw him fight.
MacAlister looks to land a combination but Crash avoids it well.
A leg kick checked by Crash.
MacAlister scores with a nice looking left hook and follows it up with an uppercut!
It looks like Joey Crash has been cut.
MacAlister throws a body shot but no joy.
MacAlister feints and then cracks Crash's leading leg with a nice low kick. He's obviously looking to slow Crash down.
Crash has done a lot of speed work in the buildup to this fight.
A slapping leg kick lands for MacAlister.
MacAlister lands with a shot to the body.
Crash misses with the combination.
The crowd cheering loudly, showing their appreciation for the quality fight we're seeing here.
Crash tries to clinch but MacAlister is having none of it.
MacAlister seem to be loading up, looking for a big counter.
MacAlister just misses with a punch to the body.
Crash staying out of range there.
Crash appears to be waiting to throw a counter punch to the body.
That's one minute gone in the round.
Crash ducks under a wild hook from MacAlister.
Crash thows a left - swing and a miss!
A combination from Crash does no damage.
MacAlister fakes with the hands and throws a leg kick but Crash is out of range.
Despite the aggression on Crash's face he doesn't fully commit to the counter.
MacAlister tries to land with a swinging hook to the body but Crash was well out of range. Poor timing from MacAlister.
Crash misses with a jab, cross combination.
MacAlister throws a wild combination but nothing lands.
MacAlister stuns Crash with a nice body shot, before stepping back out of range.
MacAlister throws a combination but comes up with nothing but fresh air.
Crash darts in and clinches MacAlister up against the cage.
Crash wants to get back to striking at distance but MacAlister won't allow it.
Crash misses with a body punch.
MacAlister lands a nice uppercut.
A frustrated look appears on Crash's face as he tries to break the clinch.
Stalling in the clinch from MacAlister.
A quick uppercut on the inside from MacAlister.
A head punch blocked on the inside by Crash.
MacAlister lands a body shot.
That's two minutes gone in the round.
The crowd cheering loudly, showing their appreciation for the quality fight we're seeing here.
MacAlister lands a body shot.
MacAlister breaks the clinch and we return to the middle of the mat.
Crash throws a right hand that MacAlister ducks under and follows up with a left that MacAlister also avoids with ease.
Crash moves into range and connects with a jab.
MacAlister lands with a cross to side of his opponent's head.
Crash uses some good footwork to avoid the body shot by MacAlister.
That's a knee to de groin and it's over and out! Crash crumples to the ground after an illegal strike from MacAlister - the referee stops the clock and Crash gets 5 minutes to recover from that one. "I'm sorry" says MacAlister. Crash manages to get back to his feet and the fight resumes.
MacAlister smiles there as he lands a nice right hand right on the button.
Crash looks to score with a combo but nothing lands.
Nice cross by MacAlister.
Crash is rocked!
MacAlister cracks Crash with a big right hand that sees him stumbling back against the cage! Crash falls to his knees and MacAlister doesn't need a second invitatation - he rushes in and fires off several unanswered shots that force the referee to stop the fight! This one is all over!
Ladies and gentlemen, after 2:43 of round 1, we have a winner by way of TKO (Strikes). Toby MacAlister!
Toby MacAlister decided to thank the fans in attendance for making a great atmosphere. It seemed to go down pretty well.
|
|
|
|
|
|
|
|
|
|
|
|
|
|
|
|
|
|
|
|
|
|
|
| S |
C
A |
G |
S |
C
B |
G |
|
S |
C |
G |
|
energy
A | B |
|
hype
A | B |
|
pop
A | B |
|
mgr
A | B |
|
FIGHT
RATING
59% |
|
|
|
|
|
|
|
Undercard bout
|
Coming up we have a featherweight MMA rules bout between Joshua Whitlock (ranked 3422 p4p, 3655 weight class) and Zlatko Dedic (ranked 338 p4p, 354 weight class). Joshua Whitlock is staring across the cage at his opponent, tweaking his nipples... Tweaking his own nipples that is.
 |
|
 |
| 173 cm
19
146
2 - 0 - 0 |
|
160 cm
19
150
2 - 0 - 0 |
BJJ Blue Belt
Excellent boxer
Cardio machine |
|
Good takedowns
Brawler
Solid chin |
|
| |
|
Ladies and gentlemen. This fight is 3 rounds, in the featherweight division.
Introducing the fighter to my left, fighting out of the red corner.
With a record of 2 - 0 - 0, fighting out of Los Angeles, Joshua Whitlock!
And introducing the fighter to my right, fighting out of the blue corner.
With a record of 2 - 0 - 0, fighting out of New York, Zlatko Dedic!
The judges for this bout are Sosuke Kotani, Shigeki Fujiwara and Ren Mimura.
The bell rings for round one and we are underway!
Whitlock connects with a hook to the side of his opponent's head.
Whitlock throws a couple of head shots and lands with the final one - a decent hook, which struck Dedic on the side of the head.
Whitlock connects with a body shot that sends Dedic's belly button to the back.
Whitlock throws a jab to the body, straight down the pipe. Boom. That sent Dedic stumbling backwards but he manages to regain his composure quickly.
Whitlock scores with a sloppy right hand. Dedic should have avoided that one.
Whitlock definitely looks more muscular than last time we saw him fight.
Whitlock lands a body shot.
A head kick misses from Dedic.
Whitlock works his jab well there, keeping his opponent at a distance.
Whitlock lands a jab. Then a cross. Then finally a nice hook to the body. Good work there by Whitlock.
The fans in attendance giving it up for the two fighters, who have really let it all hang out in the last minute or so!
Whitlock scores with a hook.
Dedic is rocked!
Dedic throws a sloppy body shot
and Whitlock counters with a big right hand! Oh Dedic is in trouble here! Whitlock follows up with more strikes and that's it! The ref has stopped it!
Ladies and gentlemen, after 0:32 of round 1, we have a winner by way of TKO (Strikes). Joshua Whitlock!
Joshua Whitlock seemed lost for words in his post fight interview but he remembered to thank his fans and directed everyone to his website.
|
|
|
|
|
|
|
|
|
|
|
|
|
|
|
|
|
|
|
|
|
|
|
| S |
C
A |
G |
S |
C
B |
G |
|
S |
C |
G |
|
energy
A | B |
|
hype
A | B |
|
pop
A | B |
|
mgr
A | B |
|
FIGHT
RATING
100% |
|
|
|
|
|
|
|
Undercard bout
|
Coming up we have a middleweight MMA rules bout between Karl White (ranked 2795 p4p, 5556 weight class) and Steve Rogers (ranked 386 p4p, 620 weight class). Steve Rogers will no doubt be trying to keep this one on the feet, where he has a distinct advantage.
 |
|
 |
| 186 cm
26
195
4 - 1 - 0 |
|
182 cm
25
200
0 - 0 - 0 |
Good takedowns
Brawler
Very quick |
|
BJJ Brown Belt
Basic striking
Powerful |
|
| |
|
Ladies and gentlemen. This fight is 3 rounds, in the middleweight division.
Introducing the fighter to my left, fighting out of the red corner.
With a record of 4 - 1 - 0, fighting out of Las Vegas, Karl White!
And introducing the fighter to my right, fighting out of the blue corner.
With a record of 0 - 0 - 0, fighting out of Sydney, Steve Rogers!
The judges for this bout are Yasuomi Hirokawa, Shigeki Fujiwara and Hirohito Nitta.
The bell rings for round one and we are underway!
No luck with that takedown attempt from White.
Rogers gets the takedown into side control.
Rogers trying to control the position but White is working away.
Rogers might have to switch it up a bit here because his efforts to control White haven't been going to plan, at least at the current moment in time.
The ref warns both fighters not to hold the cage as they work up against the meshing.
We've had a slow start to the round here - hopefully the action picks up.
White is looking to reverse the position.
White is trying to escape the position but Rogers is controlling the position.
The fighters are pressed up against the cage, both looking to find a bit of space to work.
White is positioning himself to get back to half guard.
Rogers trying to control the position but White is working away.
That's one minute gone in the round.
Rogers staying calm.
White can't do much from the bottom here.
The referee tells the fighters to keep busy.
White tries to work a leg under to get back to half guard but Rogers wriggles his own leg back out and remains in side control.
Rogers content to control the pace. The referee will try and keep them active though.
Rogers trying to control the position but White is working away.
White is looking to regain half guard here but Rogers keeps moving and retains side control.
That's two minutes gone in the round.
My god... these two guys really need to pick up the pace or everyone will leave to go get a beer.
White looks to be in better condition than last time we saw him fight. Obviously he's been working hard on his cardio.
Rogers wants to control but White is keeping him busy.
Rogers wants to control for a moment but White uses the opportunity to move back to half guard.
Rogers trying to control the action but White is working from the bottom.
Rogers trying to mount his opponent but White defends it.
White manages to get to full guard.

White is looking for a triangle but Rogers pushes his legs off easily.
Rogers pressing down on his opponent's thigh, looking to pass guard. White is keeping the position for now.
That's three minutes gone in the round.
White throwing his legs up looking for a triangle.
White trying to keep a closed guard but Rogers is proving a slippery customer.
Rogers wants to control from the top but White keeps moving.
Rogers stands up and looks to throw the legs aside to pass to side control. White swivels though and keeps the full guard.
White looking to hit a scissor sweep but Rogers is one step ahead there.
Rogers tries to free his leg and advance position but White is retaining full guard.
That's four minutes gone in the round.
The crowd are hurling abuse towards the fighters... You can hardly blame them though because there isn't a lot going on in the fight.
White is trying to control the position from the bottom.
White has control of Rogers's left arm, preventing Rogers from doing any damage.
Rogers pressing down on his opponent's thigh, looking to pass guard. White is keeping the position for now.
Rogers passes White's left leg - he's now in half guard.
Rogers frees up his trapped foot and advances to mount.
White is in all sorts of trouble here.
Boooooooooooooooooooo!!! God, this has been a terrible round. Come on you two, sort yourselves out!
Rogers wants to control the pace but White is squirming around nicely.
And that is the end of the round. The fighters go back to their corners.
Steve Rogers dominated that round.
That's time! Back to the action!
White tries to drive through with a takedown attempt but Rogers defends well and White ends up having to push Rogers into the cage where they will battle it out in the clinch.
Rogers gets a trip takedown into half guard.
White keeps control of the position for the meantime.
White is pressing down on Rogers's left leg trying to get back to full guard. He's managed it.
White managing to control the position.
Rogers trying to control but White is working from the bottom.
White throwing his legs up looking for a triangle.
We've had a slow start to the round here - hopefully the action picks up.
Rogers is taking a break and basically stalling. The referee will not allow him to do that for long.
White lands a beautiful sweep and he's now moved into his opponent's guard.

That's one minute gone in the round.
White tries to free his leg and advance position but Rogers is retaining full guard.
Rogers wants to hit a sweep here but White passes into full mount! Oh no, disaster for Rogers there!
Rogers really trying hard to get back to half guard here.
Rogers is still trying to improve position.
White tucks in and makes sure he doesn't lose the dominant position.
White trying to control but Rogers is having none of it.
White thuds his fist into the canvas! Oooouch!
That's two minutes gone in the round.
White takes a little breather and maintains the position. The referee will be looking for him to stay active from such a dominant position though.
White working for a submission but Rogers is keeping him at bay.
Rogers wants to hold on but White pushes him away.
White is in full mount, looking to secure a guillotine but Rogers is surviving well by controlling White's body position as best he can.
White working for a guillotine from mount but Rogers is in no mood to give up.
Rogers can't escape the position.
White wants to finish this one by submission but Rogers is holding onto his waist, trying to prevent any attacks from White.
Rogers slips a leg in and gets back to half guard.
Rogers tries to get to full guard but White has control of the leg.
Rogers is trying to maintain the position but White is very close to passing his half guard.
That's three minutes gone in the round.
White wants to control but Rogers is keeping him busy.
White is working for a submission of some sort.
Rogers trying to control from the bottom.
Rogers is not content to let White control the position.
Rogers is looking for a sweep. White is wise to his cunning plan and keeps the top position.
Steve Rogers has got the better of the ground game so far.
The fighters are battling for position here. Rogers manages to regain full guard. Nice work.
White trying to control but Rogers is working from the bottom.
White wants to pass the guard but Rogers is keeping the position.
White wants to control from the top but Rogers keeps moving.
That's four minutes gone in the round.
The crowd are getting on the fighters' backs, as the pace has dropped off in the last minute or so.
White wants to pass the guard but Rogers is keeping the position.
White trying to control but Rogers is working from the bottom.
White is going to have to think about doing something other than just controlling because Rogers is managing to avoid having the position dictated to him.
White preventing the sweep.
Boooooooooooooooooooo!!! God, this has been a terrible round. Come on you two, sort yourselves out!
White trying to control but Rogers is working from the bottom.

The referee has decided to stand the fighters back up, so we'll restart on the feet.
And that is the end of the round. The fighters go back to their corners.
Karl White dominated that second round.
The fighters get back to their feet, the hooter sounds and we're back to the action! This is the final round!
Rogers shoots in for a takedown. He's persisting with it as White sprawls well. White wins this battle and keeps the fight standing. Rogers gets slowly back to his feet.
Wow, both these guys are really going for it!
Rogers has a takedown stuffed.
Karl White seems to be the more aggressive standup fighter in this bout.
White dives in and grabs Rogers's left leg, looking for a takedown. Rogers pushes down on White's head and hops out.
Rogers misses with a takedown attempt. He shot from a bit too far out.
Karl White has stuffed three takedown attempts in the round now. That's going to take a lot out of Steve Rogers.
White shoots for a double leg takedown but Rogers sprawls well. He's pushed White's face into the mat and manages to get back to his feet relatively easily.
White keeps the fight standing with a nice sprawl.
White fails with a takedown attempt.
We've had a slow start to the round here - hopefully the action picks up.
Rogers jabs at White's body.
Rogers throws a loose over hand right and dives in with a double leg takedown. White tries to sprawl but it's too late and the fighters hit the mat. Rogers is in White's guard.
White pulls Rogers in to control the position.
That's one minute gone in the round.
Rogers wants to control from the top but White keeps moving.
Rogers stands and throws White's legs to the side, diving into side control.
White gets back to half guard.
White has no desire to be mounted, so is trying to control. Rogers is working away from the top position though.
Rogers is trying to control. White wants to improve his position but can't escape this time.
White trying to control from the bottom.
White tries to roll over but Rogers keeps him under control.
Rogers wants to control but White is keeping him busy.
That's two minutes gone in the round.
The crowd are showing their displeasure at the lack of action as loud boos ring out around the arena.
Rogers uses his free foot to push down on White's thigh. Eventually he works his other foot free and he's advanced to mount - this is trouble for White.
Rogers tries to control but White wriggling away.
Rogers takes a little breather and maintains the position. The referee will be looking for him to stay active from such a dominant position though.
White is desperately trying to improve his position but Rogers has a good base and remains in mount.
Rogers sitting in mount, just looking to control for the moment.
Rogers prevents White from getting the reversal.
White sneaks a leg back under and regains half guard and is working straight away to try and get back to guard. He hasn't managed just yet though.
That's three minutes gone in the round.
Rogers is trying a forearm choke
I don't think that's going to do much at this level of the game.
White is not content to let Rogers control the position.
Rogers takes a big intake of breath there - he's definitely tired.
Rogers trying to mount his opponent but White defends it.
White wants to improve his position but Rogers is controlling well.
White is refusing to be controlled, as Rogers sits in half guard.
Rogers has been the more effective fighter overall so far.
White gets back to full guard.
That's four minutes gone in the round.
A lull in the action here being met with boos from the crowd.
White trying to control the position.
Rogers tries to free his leg and advance position but White is retaining full guard.
Rogers trying to control but White is working from the bottom.
White is trying to control the position from the bottom.
White is avoiding any damage by keeping wrist control.
White controls Rogers momentarily but Rogers frees himself.
The referee has decided to stand the fighters back up, so we'll restart on the feet.
Boooooooooooooooooooo!!! God, this has been a terrible round. Come on you two, sort yourselves out!
Rogers shoots in for a takedown from distance. He catches White napping and manages to drive through into side control!
Rogers wants to lay and pray for a moment but White keeps working.
White has one of Rogers's arms on lockdown, trying to prevent him from doing any damage.
And that's the end of the fight!
Steve Rogers comfortably won the final round on my scorecard.
Well Rogers has outworked and out performed his opponent in all aspects of the game today. He was simply too good and the decision should be no more than a formality. Over to the ring announcer for the scorecards.
Ladies and gentlemen, after 3 rounds of action, we go to the scorecards for a decision.
Judge Yasuomi Hirokawa scores the fight 28:29
Judge Shigeki Fujiwara scores the fight 28:29
Judge Hirohito Nitta scores the fight 28:29
In favor of your winner, by unanimous decision... Steve Rogers!
|
|
|
|
|
|
|
|
|
|
|
|
|
|
|
|
|
|
|
|
|
|
|
| S |
C
A |
G |
S |
C
B |
G |
|
S |
C |
G |
|
energy
A | B |
|
hype
A | B |
|
pop
A | B |
|
mgr
A | B |
|
FIGHT
RATING
26% |
|
|
|
|
|
|
|
Co-main event
|
Coming up we have a lightweight MMA rules bout between Charlie Crucifer (ranked 2518 p4p, 4398 weight class) and Aiden Redding (ranked 308 p4p, 474 weight class). Aiden Redding has the eye of the tiger tonight.
 |
|
 |
| 182 cm
24
166
2 - 0 - 0 |
|
178 cm
26
158
1 - 0 - 0 |
Good takedowns
Basic striking
Cuts easily |
|
BJJ Brown Belt
Brawler
Powerful |
|
| |
|
Ladies and gentlemen. This fight is 3 rounds, in the lightweight division.
Introducing the fighter to my left, fighting out of the red corner.
With a record of 2 - 0 - 0, fighting out of Tokyo, Charlie Crucifer!
And introducing the fighter to my right, fighting out of the blue corner.
With a record of 1 - 0 - 0, fighting out of Helsinki, Aiden Redding!
The judges for this bout are Shirou Masuda, Yukihiro Yamamoto and Shigeki Fujiwara.
The bell rings for round one and we are underway!
Redding tries to clinch but fails miserably

and Crucifer counters with a nice double leg into guard.
Crucifer passes Redding's left leg - he's now in half guard.
The ref warns both fighters not to hold the cage as they work up against the meshing.
Redding controlling the position well.
Crucifer is looking for a kimura but he's never going to get it from there.
The fighters are pressed up against the cage, both looking to find a bit of space to work.
Redding wants to control but Crucifer is keeping busy and won't allow it.
Crucifer thows a huge punch but Redding dodges it nicely.
Redding looking to work for a kimura from the bottom.
We've had a slow start to the round here - hopefully the action picks up.
Crucifer moves nicely into side control.
Redding is looking to reverse the position.
Redding is not in a great position here, taking some shots.
Redding has found himself in a tricky position here. He's been working his transitions in training so let's see if he can work his way out of it.
That's one minute gone in the round.
Crucifer thinks about going for a far side armbar but bails out and retains the dominant position instead.
Crucifer has been talking about how he's improved his wrestling in the run up to the fight so let's see if that's enough to sway the balance.
Redding tries to improve position but can't.
You can see the frustration on Redding's face, being in this tough position on the bottom.
Redding tries to bench press Crucifer off him but Crucifer keeps the position.
Redding can't do much from the bottom here.
Redding tries to buck Crucifer off but Crucifer is having none of it.
Crucifer wants to work for a kimura but he's foiled early by Redding, who protects the arm well.
Redding tries to bench press Crucifer off him but Crucifer keeps the position.
Crucifer wants to control but Redding is keeping him busy.
That's two minutes gone in the round.
Crucifer scores with a couple of short elbows.
Crucifer cracks Redding with an elbow. That is naaassty.
Redding gives up the full mount - oops, sloppy defensive grappling there!
Crucifer controlling the position easily from mount.
Redding sneaks a leg back under and regains half guard and is working straight away to try and get back to guard. He hasn't managed just yet though.
Crucifer works his way into full mount!
Crucifer lands a shot to the body, followed up by a shot to the exposed head of his trapped opponent.
Crucifer landing strikes from the mount.
This is a great period of action - very entertaining stuff!
Crucifer working the ground and pound effectively.
Redding tries to hold on but Crucifer postures up.
That's three minutes gone in the round.
Crucifer is looking to secure an arm. He's managed it! He's pivoting for an armbar - that looks tight! But Redding has managed to get out of it and now he's in a dominant position. Nice work from Redding!
Crucifer tries to land a sweep but no joy.
Crucifer is working hard here to advance position.
Redding trying to control the position from guard on top but Crucifer is wriggling around, looking for whatever he can.
Redding controls the pace of the fight for a moment.
Crucifer has been looking to land a fair amount of strikes on the ground. He might be looking to soften his opponent up in order to work for a submission.
Redding trying to control but Crucifer is working from the bottom.
Crucifer bucks up whilst keeping hold of a body lock, managing to reverse the position. Now he's in top in Redding's guard.
That's four minutes gone in the round.
Crucifer cracks Redding with a solid left hand.
Crucifer avoids a guillotine attempt easily.
Redding is working from a closed guard but he's struggling to control his opponent.
Crucifer looking to pass the guard.
Redding working from the bottom, still in full guard. He's managed to get a loose triangle. Crucifer doesn't seem to be doing much to defend here, obviously he feels comfortable in the position. Oh but Redding is tightening it up a little... Crucifer has to be careful here... He's got his foot tucked under now, this looks tight! Crucifer reacted too slowly and this one could be over in a matter of seconds! YES! Crucifer taps out! Nice BJJ there by Redding!
Ladies and gentlemen, after 4:52 of round 1, we have a winner by way of Submission (Triangle Choke). Aiden Redding!
|
|
|
|
|
|
|
|
|
|
|
|
|
|
|
|
|
|
|
|
|
|
|
| S |
C
A |
G |
S |
C
B |
G |
|
S |
C |
G |
|
energy
A | B |
|
hype
A | B |
|
pop
A | B |
|
mgr
A | B |
|
FIGHT
RATING
37% |
|
|
|
|
|
|
|
Main event
|
Coming up we have a light heavyweight MMA rules bout between Olavi White (ranked 2760 p4p, 2281 weight class) and Dave Sub (ranked 366 p4p, 302 weight class). Both fighters look pumped up here. Let's hope this is a good fight!
 |
|
 |
| 194 cm
26
215
4 - 0 - 0 |
|
199 cm
26
212
2 - 0 - 0 |
BJJ White Belt
Excellent MT
Big heart |
|
Good takedowns
Counter fighter
Intelligent |
|
| |
|
Ladies and gentlemen. This fight is 5 rounds, in the light heavyweight division.
Introducing the fighter to my left, fighting out of the red corner.
With a record of 4 - 0 - 0, fighting out of Helsinki, Olavi White!
And introducing the fighter to my right, fighting out of the blue corner.
With a record of 2 - 0 - 0, fighting out of London, Dave Sub!
The judges for this bout are Hirohito Nitta, Yukihiro Shimada and Yasuomi Hirokawa.
The bell rings for round one and we are underway!
Sub fails with a takedown attempt from distance.
Sub goes for a double leg but White avoids the attempt and the two fighters end up clinched against the cage as White continues to drive forward.
White fakes a head punch and goes low to the body. Nicely done.
Sub misses with a takedown attempt. He shot from a bit too far out.
Olavi White has stuffed three takedown attempts in the round now. That's going to take a lot out of Dave Sub.
Sub takes a hook to the side of the head. I wonder if that's got his ears ringing.
White fails with a rather predictable takedown attempt.

White closes the distance and pushes Sub back into the cage.
We've had a slow start to the round here - hopefully the action picks up.
White lands a shoulder strike.
White tries to score a body lock takedown but Sub shows good agility there to stay on his feet.
White lands with a light punch inside.
Sub is working for a takedown up against the cage. He can't get it on this occasion though.
That's one minute gone in the round.
Sub controlling the action here for a moment.
White lands a shot to the body.
White gets underhooks to prevent Sub's takedown attempt.
Sub is trying to drag White to the mat but White just about manages to keep his footing. He used the cage to his advantage there.
White lands a right hand that snaps the head of Sub backwards.
White gets underhooks to prevent Sub's takedown attempt.
Sub drops down looking for an ankle pick but White pulls his leg out and moves away.
White rushes Sub and presses him up against the cage.
White scores with an uppercut up the middle.
White looks to be in better condition than last time we saw him fight. Obviously he's been working hard on his cardio.
White lands with a short punch from the clinch.
That's two minutes gone in the round.
White lands with a short head shot on the inside.
White stops a takedown attempt from Sub.
Sub looking for a takedown.
Sub looks winded!
White scores with a shoulder strike.
Sub's head jolts backwards as he takes an uppercut right on the button!
White lands a short shot on the inside that snaps the head of Sub backwards.
The crowd cheering loudly, showing their appreciation for the quality fight we're seeing here.
White drops Sub onto one knee with a big uppercut from the clinch! Sub is propped up by the cage and works his way back to his feet!
Sub is rocked!
White lands a hook to the body. It's hard to tell if that hurt Sub or not.
Sub is still on wobbly legs! Can White finish him?
White lands with a light punch inside.
White lands an uppercut in the clinch that drops Sub to his knees! White keeps firing more shots against his stricken opponent and the referee jumps in to save him!
Ladies and gentlemen, after 2:42 of round 1, we have a winner by way of TKO (Strikes). Olavi White!
Olavi White made sure to mention his sponsor, X-Treme Clothing⢠in his post fight interview.
|
|
|
|
|
|
|
|
|
|
|
|
|
|
|
|
|
|
|
|
|
|
|
| S |
C
A |
G |
S |
C
B |
G |
|
S |
C |
G |
|
energy
A | B |
|
hype
A | B |
|
pop
A | B |
|
mgr
A | B |
|
FIGHT
RATING
47% |
|
|
|
|
|
|
|
|
|
|
