 |
LAFC Pizziconi vs Haze PBP Commentary |
Undercard bout
|
Coming up we have a super heavyweight MMA rules bout between Friend Friendly (ranked 3626 p4p, 6575 weight class) and Timofey Babinski (ranked 131 p4p, 185 weight class). On his way into the cage it seems that Friend Friendly has been attacked by a crazed fan! It looks like it might have been the just bleed guy! Luckily Friend Friendly seems to be OK! I thought that lunatic was in prison!?
 |
|
 |
| 225 cm
20
300
0 - 1 - 0 |
|
202 cm
20
293
0 - 1 - 0 |
BJJ Blue Belt
Brawler
Big heart |
|
BJJ White Belt
Excellent MT
Granite chin |
|
| |
|
Ladies and gentlemen. This fight is 3 rounds, in the super heavyweight division.
Introducing the fighter to my left, fighting out of the red corner.
With a record of 0 - 1 - 0, fighting out of Sydney, Friend Friendly!
And introducing the fighter to my right, fighting out of the blue corner.
With a record of 0 - 1 - 0, fighting out of St Petersburg, Timofey Babinski!
The judges for this bout are Percy O'Donnell, Don Winkell and Jack Bonds.

The bell rings for round one and we are underway!
Friendly fails with the takedown
and Babinski cracks him with a counter punch right on the button.
 It looks like Friend Friendly has been cut. It looks like Friend Friendly has been cut.
Friendly tries to clinch but Babinski moves out of range.

Babinski rushes Friendly and presses him up against the cage.

Babinski breaks the clinch.
Friendly shoots and misses
and Babinski counters with a good right hand that lands right on the jaw.
Babinski darts in looking for a takedown but Friendly gets double underhooks and turns Babinski into the cage.
Friendly throws a combination but it was largely blocked by Babinski.
Babinski tries a head kick but it misses.
Friendly appears to be looking for a big counter.

Friendly moves into the clinch successfully.
Babinski wants a takedown but no success here.
Babinski drops down for a takedown but doesn't get it.
Friend Friendly has stuffed three takedown attempts in the round now. That's going to take a lot out of Timofey Babinski.
Babinski jumps guard but Friendly turns him against the cage and keeps the fight standing.
Babinski tries to take the fight to the ground by pulling guard but can't manage it.

That's one minute gone in the round.
The referee calls for Babinski to work.

Friendly has managed to pull guard. Let's see whether he can work an aggressive guard. It will also be interesting to see what tactics Babinski uses from the top position.

Friendly has his foot on Babinski's thigh. He's trying to push off and get in position for a triangle, I think. Babinski works his way back into a safe position though.
Friendly working for a triangle but Babinski defends it easily.
Babinski trying to move into half guard but instead Friendly has managed to sweep!

Friendly is trying to work a guillotine from the top, or something like that? Don't know how he thinks he's going to get a finish from there.
Babinski wants to get back to his feet but Friendly passes into half guard.

That's two minutes gone in the round.
Babinski is looking to regain full guard. Not this time though.
Friendly is looking for a kimura but Babinski is holding onto that half guard position, so it's hard for Friendly to get the leverage.
Babinski is defending against the submission attempts here by Friendly.
Friendly winds up and cracks Babinski with a swinging punch to the side of the head.
Ground and pound from Friendly.
Babinski looks more muscular than last time we saw him. He must have been on the weights.

That's three minutes gone in the round.
Babinski taking some punishment here, with Friendly in his half guard.
Babinski really doesn't want to stay on the ground with Friendly. If he can't get it back to his feet, it's only a matter of time before he'll be tapping out.
Friendly throwing shots but Babinski is blocking nicely.
Babinski is trying to defend against the ground and pound but Friendly scores with a couple of nice shots.
Friendly not landing any meaningful shots this time.
Babinski is trying to get back to full guard.
Friendly has improved his flexibility recently so we will have to see if he can use that to his advantage.
The fighters are going at a pretty good pace and they're both starting to sweat now.
Babinski wants to get back to his feet.
Friendly performing his best blanket impression for a moment.
Friendly wants to lay and pray for a moment but Babinski keeps working.

That's four minutes gone in the round.
Babinski has no desire to be mounted, so is trying to control. Friendly is working away from the top position though.
The referee claps his hands together and tells the fighters to work.
Friendly not throwing his punches with enough precision this time.
Babinski is defending against the submission attempts here by Friendly.
Babinski tries to roll over but Friendly keeps him under control.

The referee has decided to stand the fighters back up, so we'll restart on the feet.
Boooooooooooooooooooo!!! God, this has been a terrible round. Come on you two, sort yourselves out!
Friendly clinches.
And that is the end of the round. The fighters go back to their corners.
Friend Friendly dominated that round.
The cut man is working on Friend Friendly's cut.
The referee calls time. The cornermen exit stage left and we're back to business.

Friendly rushes Babinski and presses him up against the cage.
Friendly tries to jump guard but he falls flat on his backside. Babinski smiles and moves away.
Babinski is trying hard to land a takedown here. Friendly sprawls well and keeps this one on the feet.
Babinski closes the distance looking to clinch
and Friendly counters with a nice double leg into half guard.
Babinski is defending against the submission attempts here by Friendly.
Friendly is trying for a kimura here. Babinski looks like he's in a lot of pain... and he's tapping out! Friendly wins by kimura!
Ladies and gentlemen, after 0:48 of round 2, we have a winner by way of Submission (Kimura). Friend Friendly!
A pretty intense looking Friend Friendly took the opportunity post-fight to ask for a shot at the title.
|
|
|
|
|
|
|
|
|
|
|
|
|
|
|
|
|
|
|
|
|
|
|
| S |
C
A |
G |
S |
C
B |
G |
|
S |
C |
G |
|
energy
A | B |
|
hype
A | B |
|
pop
A | B |
|
mgr
A | B |
|
FIGHT
RATING
32% |
|
|
|
|
|
|
|
Undercard bout
|
Coming up we have a super heavyweight MMA rules bout between Cletus McQuire (ranked 6607 p4p, 4923 weight class) and Hebrew Noah (ranked 187 p4p, 160 weight class). Cletus McQuire has the better chin. Will he look to stand and bang today?
 |
|
 |
| 150 cm
18
300
1 - 2 - 0 |
|
205 cm
18
276
2 - 1 - 0 |
Good wrestling
Brawler
Good chin |
|
BJJ White Belt
Excellent MT
Determined |
|
| |
|
Ladies and gentlemen. This fight is 3 rounds, in the super heavyweight division.
Introducing the fighter to my left, fighting out of the red corner.
With a record of 1 - 2 - 0, fighting out of London, Cletus McQuire!
And introducing the fighter to my right, fighting out of the blue corner.
With a record of 2 - 1 - 0, fighting out of Tokyo, Hebrew Noah!
The judges for this bout are Frank Antenori, Timothy Bukovac and Jack Bonds.
The bell rings for round one and we are underway!
McQuire throws a loose over hand right and dives in with a double leg takedown. Noah tries to sprawl but it's too late and the fighters hit the mat. McQuire is in Noah's guard.
McQuire postures up as if he's going to throw some strikes but drops back for an ankle! Noah is in big trouble! He looks ready to tap! But no, he's escaped and dives on top of McQuire, into his guard.

Noah stopping the sweep attempt from McQuire.
McQuire is throwing his legs up, looking for submissions. Noah is aware though and is defending well.
The ref warns both fighters not to hold the cage as they work up against the meshing.
We've had a slow start to the round here - hopefully the action picks up.
McQuire is working the butterfly guard. He manages to land a nice scissor sweep and is now in half guard on the top. Nice move.
McQuire keeping composed on the top, looking to control the action.
McQuire passes the half guard and he's now in mount! Big trouble for Noah!
That's one minute gone in the round.
Noah really wants to buck McQuire off and get back to his feet.
McQuire controlling the position easily from mount.
Noah is trying to escape but when you're mounted that's not too easy.
McQuire sitting in mount, just looking to control for the moment.
McQuire looking to finish with strikes here!
That's two minutes gone in the round.
The crowd are showing their displeasure at the lack of action as loud boos ring out around the arena.
McQuire controlling his opponent.
McQuire lands an elbow that was bordering on illegal but the referee lets it go with a warning.
McQuire controlling the pace for now.
McQuire looks to be in better condition than last time we saw him fight. Obviously he's been working hard on his cardio.
McQuire throwing shots from mount but they're not landing.
That's three minutes gone in the round.
Noah is trying to escape but when you're mounted that's not too easy.
McQuire landing strikes, looking to finish!
Noah really doesn't want to stay on the ground with McQuire. If he can't get it back to his feet, it's only a matter of time before he'll be tapping out.
McQuire controlling his opponent.
McQuire throwing sloppy strikes here. Perhaps if he tightened up his striking from such a dominant position, he'd be able to finish easier.
McQuire sitting in mount, just looking to control for the moment.
That's four minutes gone in the round.
The crowd growing excited in anticipation of a finish here! Right on cue, McQuire cracks his opponent with a massive right hand that draws loud cheers!
McQuire is controlling this nicely and is looking to make no mistakes. Noah is trying to wiggle out of this horrible position. Noah flips to his side and attempts to get a leg in for half guard. McQuire anticipates the leg and manages to get behind Noah and secures both hooks! This could be bad! McQuire slips an arm under Noah chin and tries to position for a rear naked choke. McQuire has worked the choke in now and it looks tight. McQuire is squeezing on Noah like an anaconda would it's prey. Noah fails to tap and has fallen unconscious! We've got ourselves a winner by way of a rear naked choke!
Ladies and gentlemen, after 4:33 of round 1, we have a winner by way of Submission (RNC). Cletus McQuire!
The defeated Hebrew Noah had this to say: 'I think its hilarious you kids talking about Hebrew Noah. You wouldn't say this stuff to him in a real street fight, hes jacked. Not only that but he wears the freshest clothes, eats at the chillest restaurants and hangs out with the hottest dudes. Yall are pathetic lol'.
|
|
|
|
|
|
|
|
|
|
|
|
|
|
|
|
|
|
|
|
|
|
|
| S |
C
A |
G |
S |
C
B |
G |
|
S |
C |
G |
|
energy
A | B |
|
hype
A | B |
|
pop
A | B |
|
mgr
A | B |
|
FIGHT
RATING
30% |
|
|
|
|
|
|
|
Undercard bout
|
Coming up we have a featherweight MMA rules bout between Nick Law (ranked 6055 p4p, 3786 weight class) and Philip Marcus (ranked 443 p4p, 345 weight class). Nick Law has the edge in experience - let's see if he can make that count tonight.
 |
|
 |
| 185 cm
25
145
5 - 6 - 0 |
|
175 cm
20
148
2 - 2 - 0 |
BJJ Brown Belt
Counter fighter
KO power |
|
Good wrestler
Excellent MT
Heavy handed |
|
| |
|
Ladies and gentlemen. This fight is 3 rounds, in the featherweight division.
Introducing the fighter to my left, fighting out of the red corner.
With a record of 5 - 6 - 0, fighting out of Los Angeles, Nick Law!
And introducing the fighter to my right, fighting out of the blue corner.
With a record of 2 - 2 - 0, fighting out of Helsinki, Philip Marcus!
The judges for this bout are Percy O'Donnell, Don Winkell and Timothy Bukovac.
The bell rings for round one and we are underway!
Marcus lands with an uppercut that bounces Law off the cage and back into range.
Law takes a hook to the side of the head. I wonder if that's got his ears ringing.
Nice shot lands for Marcus.
A lazy left from Marcus finds it's target.
 Law is rocked! Law is rocked!
Marcus throws an overhand right from the outside, which connects and sends Law stumbling backwards into the cage! Law bounces back off the cage towards Marcus, who cracks him with a two punch combination that drops him to his knees! Marcus lands two more shots before the referee has chance to intervene - what a finish! Marcus celebrates with his corner as the crowd cheer loudly.
Ladies and gentlemen, after 0:25 of round 1, we have a winner by way of TKO (Punches). Philip Marcus!
An out of breath Philip Marcus thanked his loyal fans in his post fight interview, giving them credit for his success over the course of his career.
|
|
|
|
|
|
|
|
|
|
|
|
|
|
|
|
|
|
|
|
|
|
|
| S |
C
A |
G |
S |
C
B |
G |
|
S |
C |
G |
|
energy
A | B |
|
hype
A | B |
|
pop
A | B |
|
mgr
A | B |
|
FIGHT
RATING
100% |
|
|
|
|
|
|
|
Undercard bout
|
Coming up we have a middleweight MMA rules bout between Lubor Straka (ranked 4106 p4p, 24243 weight class) and Lou Sabatory (ranked 496 p4p, 648 weight class). Well, I have no idea who's going to take this one!
 |
|
 |
| 190 cm
22
192
4 - 6 - 0 |
|
187 cm
21
185
3 - 6 - 0 |
BJJ Purple Belt
Brawler
Very quick |
|
BJJ Purple Belt
Brawler
Solid chin |
|
| |
|
Ladies and gentlemen. This fight is 3 rounds, in the middleweight division.
Introducing the fighter to my left, fighting out of the red corner.
With a record of 4 - 6 - 0, fighting out of Helsinki, Lubor Straka!
And introducing the fighter to my right, fighting out of the blue corner.
With a record of 3 - 6 - 0, fighting out of Los Angeles, Lou Sabatory!
The judges for this bout are Percy O'Donnell, Jack Bonds and Frank Antenori.
The bell rings for round one and we are underway!
Straka connects with a looping left hand that seems like it dazed Sabatory momentarily.
 It looks like Lou Sabatory has been cut. It looks like Lou Sabatory has been cut.
Straka closes the distance and gets a trip takedown into side control. Sabatory quickly recovers to half guard.
Straka lands with a punch from half guard.
 Sabatory is rocked! Sabatory is rocked!
Sabatory looks winded!
Straka slips a nice elbow through Sabatory's hands, connecting with Sabatory's forehead.
Sabatory is still in real trouble! Can Straka finish him?
Straka works his way into side control.
Sabatory is looking to regain half guard here but Straka keeps moving and retains side control.
Straka scores with a big shot from side control... and another... and another! Oh Sabatory is done here - save him referee! More strikes land and eventually the ref does step in and Straka can finally stop beating on his defenseless opponent!
Ladies and gentlemen, after 0:32 of round 1, we have a winner by way of TKO (Strikes). Lubor Straka!
|
|
|
|
|
|
|
|
|
|
|
|
|
|
|
|
|
|
|
|
|
|
|
| S |
C
A |
G |
S |
C
B |
G |
|
S |
C |
G |
|
energy
A | B |
|
hype
A | B |
|
pop
A | B |
|
mgr
A | B |
|
FIGHT
RATING
100% |
|
|
|
|
|
|
|
Undercard bout
|
Coming up we have a middleweight MMA rules bout between Bruno Fortuna (ranked 4153 p4p, 3780 weight class) and Deepen Cider (ranked 503 p4p, 468 weight class). Fortuna's entrance music is Godfather Theme by Nino Rota. A fine choice. Both these guys have really solid chins. Will we see a standup war or will they both decide that a knockout is unlikely and try to win the fight elsewhere?
 |
|
 |
| 188 cm
22
198
4 - 5 - 1 |
|
185 cm
23
199
4 - 5 - 0 |
Good wrestling
World class boxer
Cardio machine |
|
Decent wrestler
Excellent MT
Granite chin |
|
| |
|
Ladies and gentlemen. This fight is 3 rounds, in the middleweight division.
Introducing the fighter to my left, fighting out of the red corner.
With a record of 4 - 5 - 1, fighting out of Montreal, Bruno Fortuna!
And introducing the fighter to my right, fighting out of the blue corner.
With a record of 4 - 5 - 0, fighting out of London, Deepen Cider!
The judges for this bout are Don Winkell, Frank Antenori and Percy O'Donnell.
The bell rings for round one and we are underway!
Fortuna misses with a series of wild punches.
Fortuna takes a shot to the body in his stride.
Fortuna misses with a hook.
Cider smiles there as he lands a nice right hand right on the button.
Deepen Cider seems to be the more aggressive standup fighter in this bout.
Fortuna keeping his hands up high there, blocking the jab from Cider.
Cider lands with a hook. Fortuna tried to avoid it but it clipped the top of his head.
It looks like Bruno Fortuna has been cut.
Fortuna uses good head movement to avoid the hook from Cider.
We've had a slow start to the round here - hopefully the action picks up.
A big right from Cider misses.
A quick step to the side and Fortuna tries to counter with a shot to the body but it doesn't connect.
Fortuna moves into the clinch successfully.
Cider avoids the elbow strike from Fortuna, against the cage.

Fortuna breaks the clinch.
Cider digs a good hook to Fortuna's body.
Fortuna avoids the body shot from Cider.
That's one minute gone in the round.
A punch combination from Fortuna misses.
Fortuna looks to have improved his striking defense since last time we saw him fight.
Fortuna slips a jab from Cider.
Fortuna is looking to counter punch.
Cider throws a lazy right hand but Fortuna sees it coming a mile off and sidesteps it easily.
Fortuna is looking to counter the offense by Cider and move into the clinch.
A looping hook to the body misses from Cider. Fortuna does a little dance to reset his feet.
Fortuna appears to be looking for a big counter.
Cider listening to his corner there, landing a nice uppercut.
Cider bobs and weaves well there to avoid the strikes.
The fighters circling - Cider throws out the jab but it was never going to land.
Cider connects with a nice looking jab.
Fortuna is rocked!
Fortuna looks to land a combination but Cider avoids it well.
Fortuna just misses with a punch to the body.
Fortuna gets clipped by a big right hand and goes down spinning to the canvas! Cider gets the back mount and begins to drop bombs on his rocked foe! Fortuna is too out of it to defend against the strikes and the referee jumps in to save him from the beatdown!
Ladies and gentlemen, after 1:54 of round 1, we have a winner by way of TKO (Strikes). Deepen Cider!
An out of breath Deepen Cider thanked his loyal fans in his post fight interview, giving them credit for his success over the course of his career.
|
|
|
|
|
|
|
|
|
|
|
|
|
|
|
|
|
|
|
|
|
|
|
| S |
C
A |
G |
S |
C
B |
G |
|
S |
C |
G |
|
energy
A | B |
|
hype
A | B |
|
pop
A | B |
|
mgr
A | B |
|
FIGHT
RATING
52% |
|
|
|
|
|
|
|
Undercard bout
|
Coming up we have a lightweight MMA rules bout between Orange Cassidy (ranked 3763 p4p, 3214 weight class) and Dosh Oh (ranked 416 p4p, 357 weight class). Cassidy's ring entrance music is that housewives' favourite, Enter Sandman by METALLICA . Dosh Oh has the eye of the tiger tonight.
 |
|
 |
| 171 cm
27
160
5 - 4 - 0 |
|
170 cm
28
155
9 - 7 - 0 |
Good wrestling
Basic striking
Granite chin |
|
Good wrestler
Decent boxing
Powerful |
|
| |
|
Ladies and gentlemen. This fight is 3 rounds, in the lightweight division.
Introducing the fighter to my left, fighting out of the red corner.
With a record of 5 - 4 - 0, fighting out of Hilo, Orange Cassidy!
And introducing the fighter to my right, fighting out of the blue corner.
With a record of 9 - 7 - 0, fighting out of Las Vegas, Dosh Oh!
The judges for this bout are Timothy Bukovac, Don Winkell and Percy O'Donnell.
The bell rings for round one and we are underway!
Cassidy gets cracked there but stands up to it.
Cassidy throws a jab but it's blocked by Oh.
Cassidy shoots in for a takedown! He's got it and he's managed to land in side control! That's better than Cassidy was expecting from the takedown attempt, I'm sure!
Cassidy goes for an armbar! This could be all over! Wait, no, Oh rolls with the submission and now he's on top in Cassidy's guard! Nice work there by Oh!
We've been hearing good reports from Cassidy's training camp. Apparently he has been rolling around with some good quality BJJ practitioners and has been sharpening his skills. Let's see if that has an impact on the fight today.
Cassidy is working actively off his back, looking to secure an arm or perhaps work for a triangle.
Oh slows down the pace of the fight for a moment. He'll need to remain active if he doesn't want to see the fight stood back up.
Oh tries to free his leg and advance position but Cassidy is retaining full guard.
The ref warns both fighters not to hold the cage as they work up against the meshing.
Cassidy isolates an arm and boxes in a triangle. Oh stacks Cassidy on his neck as he steps over and passes to the side. He's now in a much more dominant position where he can look to do some serious damage. Nice move by Oh!
You can see the frustration on Cassidy's face, being in this tough position on the bottom.
Cassidy manages to work his way to half guard, despite Oh's best efforts.
Oh is taking a breather. Cassidy says something to him but it's hard to make out. Perhaps he's telling him to get on with it and actually do something.
That's one minute gone in the round.
Oh seems very keen to just sit and control from half guard but Cassidy does not like that idea so much and is remaining active off his back.
Oh slips a nice elbow through Cassidy's hands, connecting with Cassidy's forehead.
The fighters are pressed up against the cage, both looking to find a bit of space to work.
Oh perhaps working for something from half guard, or maybe not. It looks like he's just sitting there.
Cassidy is working for an escape here. He's hooked one of Oh's legs and he's managed to sneak out and take Oh's back!
Cassidy is working really hard to secure the rear naked choke. Oh defends successfully for a significant amount of time. Both fighters are looking very determined.
Oh tries to break free.
Cassidy trying to control.
Oh wants to escape the position.
Oh showing good submission defense here.
Cassidy is working for the rear naked choke. He has one arm under the chin but Oh has hold of the other arm. A bit of a stalemate here.
That's two minutes gone in the round.
Oh staying busy and making it hard for Cassidy to control.
Oh looks to control his opponent's hands but he's not mananging it at the moment.
Cassidy tightening his grip on Oh, looking for the choke.
Oh trying to control the hands but Cassidy won't let him.
That's three minutes gone in the round.
A bit of a pause in the action here. Cassidy controlling the positon.
Oh is defending well here and trying to improve his position.
Cassidy is looking to finish the fight by rear naked choke. Oh knows exactly what he's got planned though, so he's defending well. Maybe a few strikes would soften Oh for a finish.
Cassidy is hanging on to Oh's back as he tries to escape.
Cassidy is working really hard to secure the rear naked choke. Oh defends successfully for a significant amount of time. Both fighters are looking very determined.
Cassidy has his hand under the chin of his opponent looking for the choke. He's nearly got it! This one could be all over! But no, Oh has freed his hand and lives to survive another
well, another couple of seconds at least!
That's four minutes gone in the round.
Oh showing good submission defense here.
Cassidy has his opponent's back and is working for the choke.
Oh defending nicely against the rear naked choke attempt.
Cassidy is looking to control Oh but Oh is wriggling around and keeping busy.
The crowd thankful this round is nearly over.
Cassidy controlling well, preventing Oh from escaping the position.
And that is the end of the round. The fighters go back to their corners.
Orange Cassidy dominated that round.
The fighters get back to their feet, the hooter sounds and we're back to the action!

Oh shoots in from a long way out. He's driving through with the takedown attempt and he eventually gets it, landing in Cassidy's guard.
Oh passes Cassidy's right leg, so he's now in half guard.
Oh scores with a couple of good hammerfists.
Cassidy is looking to sinch up a guillotine here but Oh pulls his head out easily.
Oh lands with an elbow from half guard - that looked like it hurt.
Oh is keen to just control but Cassidy is a slippery customer.
Cassidy taking some punishment here, with Oh in his half guard.
Cassidy looking for submissions off his back.
We've had a slow start to the round here - hopefully the action picks up.
Oh trying to control the action but Cassidy is working from the bottom.

Oh maintaining the dominant position here and is working for a kimura. He's locked it up! Cassidy could be in real trouble here! He's trying to wriggle out but Oh has cracked it and Cassidy is screaming in pain - he's tapped out! Great finish by Oh!
Ladies and gentlemen, after 1:58 of round 2, we have a winner by way of Submission (Kimura). Dosh Oh!
|
|
|
|
|
|
|
|
|
|
|
|
|
|
|
|
|
|
|
|
|
|
|
| S |
C
A |
G |
S |
C
B |
G |
|
S |
C |
G |
|
energy
A | B |
|
hype
A | B |
|
pop
A | B |
|
mgr
A | B |
|
FIGHT
RATING
33% |
|
|
|
|
|
|
|
Undercard bout
|
Coming up we have a lightweight MMA rules bout between Chest Mangold (ranked 4030 p4p, 3221 weight class) and Tourney Warrior (ranked 435 p4p, 358 weight class). Warrior is bobbing his head along to his entrance song: Mortal Kombat by- some techno guy. I don't know about you partner, but I'm pumped for this one!
 |
|
 |
| 179 cm
23
155
5 - 5 - 1 |
|
175 cm
23
164
6 - 4 - 0 |
Good wrestling
Excellent boxer
Granite chin |
|
Good wrestler
Good kicks
Good gas tank |
|
| |
|
Ladies and gentlemen. This fight is 3 rounds, in the lightweight division.
Introducing the fighter to my left, fighting out of the red corner.
With a record of 5 - 5 - 1, fighting out of Las Vegas, Chest Mangold!
And introducing the fighter to my right, fighting out of the blue corner.
With a record of 6 - 4 - 0, fighting out of Hilo, Tourney Warrior!
The judges for this bout are Frank Antenori, Jack Bonds and Percy O'Donnell.
The bell rings for round one and we are underway!
Mangold scores with a crisp jab that stopped Warrior in his tracks.
Warrior closes the distance and clinches.
Warrior misses with a body punch.
A short uppercut from Warrior.
Mangold is working Warrior over against the cage.
Warrior swings away with an uppercut that misses.
Warrior lands a right uppercut that snaps the head of Mangold backwards.
Still in the clinch, Mangold scores with a nice short uppercut.
Warrior blocks a body shot from Mangold.
Mangold has a couple of punches blocked by Warrior.
Warrior looks more muscular than last time we saw him. He must have been on the weights.
Mangold blocks a couple of punches on the inside.
Warrior misses with the head strike.
Warrior blocks a punch to the side of the head.
Warrior fails to land with a short punch on the inside.
Warrior makes some space for himself and lands an uppercut.
The crowd cheering loudly, showing their appreciation for the quality fight we're seeing here.
Warrior misses with a hook from the clinch.
Warrior lands a right hand that snaps the head of Mangold backwards.
Mangold misses with a hook from the clinch.
Mangold misses with the head strike.
Mangold tries a shoulder strike but it doesn't do any damage.
Mangold misses with a shot to the kidneys.
Mangold scores with a shoulder strike.
Warrior misses with a punch on the inside.
Warrior swings away with an uppercut that misses.
That's one minute gone in the round.
Mangold blocks an uppercut.
Mangold prevents a body shot from Warrior.
Warrior misses with a punch to the body.
Warrior lands an uppercut.
Mangold blocks a couple of punches on the inside.
Warrior tries a shoulder strike but it doesn't do any damage.
Mangold misses with a punch on the inside.
Mangold swings wildly with an uppercut but Warrior uses good head movement to avoid it.
An uppercut on the inside fails to land for Warrior.
Mangold blocks a punch to the side of the head.
Mangold lands with a short shot to the head.
Warrior blocks an uppercut.
A short uppercut from Mangold.
Mangold tries a shoulder strike but it doesn't do any damage.
Mangold tries to throw a body punch but Warrior avoids it by throwing Mangold back against the cage.
Warrior tries to land a shot to the body but it's blocked.
A nice left hand lands by Mangold.
Mangold lands with a short head shot on the inside.
Warrior misses with the head strike.
Warrior blocking some punches.
This has been an exciting period of action!
Mangold lands a shot to the body.
That's two minutes gone in the round.
Warrior lands a hook to the body. It's hard to tell if that hurt Mangold or not.
Mangold goes for a body shot but it's blocked.
A head punch blocked on the inside by Mangold.
Warrior throws a punch but it's blocked by Mangold.
Warrior swings wildly with an uppercut but Mangold uses good head movement to avoid it.
With the fighters clinched against the cage, Warrior creates a bit of distance for himself and scores with a nice uppercut.
Mangold digs a right hand into Warrior's ribs. Those have got to be taking their toll on Warrior's gas tank.
Mangold blocks an uppercut.
A head punch on the inside from Warrior fails to land.
Mangold lands a right hand that snaps the head of Warrior backwards.
An uppercut on the inside fails to land for Mangold.
Mangold lands on the inside with an uppercut.
Mangold lands with a right to the head.
Mangold blocks a couple of punches on the inside.
Mangold blocks a punch to the side of the head.
Mangold pushes off and circles away, back to the middle of the mat.
Mangold feints a straight left to the body, then turns around with a flashy move and hits Warriors jaw with a dramatic spinning back fist!
It looks like Tourney Warrior has been cut.
Tourney Warrior seems to be the more aggressive standup fighter in this bout.
Warrior drives through and clinches with Mangold against the cage.
Mangold tries a shoulder strike but it doesn't do any damage.
A right hook to the body lands for Warrior.
That's three minutes gone in the round.
A left hand lands to the body for Warrior.
Warrior misses with a punch on the inside.
Mangold blocks an uppercut.
Mangold prevents a body shot from Warrior.
Warrior throws a punch but it's blocked by Mangold.
Warrior tries to throw a body punch but Mangold avoids it by throwing Warrior back against the cage.
Warrior blocks a punch to the side of the head.
Mangold lands a nice uppercut.
A short uppercut from Mangold.
Warrior misses with the head strike.
Warrior throws a punch but it's blocked by Mangold.
Warrior misses with a short punch on the inside.
Mangold tries a shoulder strike but it doesn't do any damage.
A short right from Mangold.
Mangold blocks a couple of punches on the inside.
Mangold misses with some punches.
Mangold lands an uppercut.
A head punch blocked on the inside by Warrior.
Mangold misses with a punch on the inside.
Warrior tries to land a shot to the body but it's blocked.
That's four minutes gone in the round.
Mangold breaks from the clinch.
The fans in attendance giving it up for the two fighters, who have really let it all hang out in the last minute or so!
Mangold punishes Warrior's body with a nice straight punch.
Mangold scores with a jab to the jaw.
Mangold lands a right hook to the body.
Mangold moves out of range of the strikes.
Warrior swings away with a body shot that misses
and Mangold connects with a straight left hand counter down the middle.
Warrior throws an ugly left hook that misses
and Mangold counters with a lovely straight right hand!
Warrior is rocked!
Warrior has his front leg slapped to the side - a nice low kick landing there from Mangold.
Warrior is still on wobbly legs! Can Mangold finish him?
Mangold cracks Warrior with a nasty uppercut that draws ooohs from the crowd and sends Warrior tumbling backwards onto the mat. He tries to recover but Mangold pounces and lands a hail of unanswered strikes that forces the referee to step in to end the fight! Warrior is not happy but he gave the referee no choice!
Ladies and gentlemen, after 4:34 of round 1, we have a winner by way of TKO (Strikes). Chest Mangold!
Our winner, Chest Mangold, made sure he spent some time buttering up the crowd during his post fight interview, which will no doubt bring him a few more fans.
|
|
|
|
|
|
|
|
|
|
|
|
|
|
|
|
|
|
|
|
|
|
|
| S |
C
A |
G |
S |
C
B |
G |
|
S |
C |
G |
|
energy
A | B |
|
hype
A | B |
|
pop
A | B |
|
mgr
A | B |
|
FIGHT
RATING
66% |
|
|
|
|
|
|
|
Undercard bout
|
Coming up we have a middleweight MMA rules bout between Janky Jankens (ranked 2897 p4p, 2623 weight class) and Barkeep Quark (ranked 378 p4p, 350 weight class). Jankens's entrance music is Straight Outta Compton by- NWA. A fine choice. These two fighters really are very evenly matched on the feet - it will be fascinating to see who can assert themselves in that aspect of the fight.
 |
|
 |
| 189 cm
26
190
6 - 6 - 0 |
|
180 cm
22
187
4 - 1 - 0 |
Good wrestling
Solid boxing
Very quick |
|
Good wrestler
Counter fighter
Good gas tank |
|
| |
|
Ladies and gentlemen. This fight is 3 rounds, in the middleweight division.
Introducing the fighter to my left, fighting out of the red corner.
With a record of 6 - 6 - 0, fighting out of Hilo, Janky Jankens!
And introducing the fighter to my right, fighting out of the blue corner.
With a record of 4 - 1 - 0, fighting out of Las Vegas, Barkeep Quark!
The judges for this bout are Jack Bonds, Timothy Bukovac and Frank Antenori.
The bell rings for round one and we are underway!
Quark ducks under an overhand right and circles away with a smile on his face.
Jankens swings and misses with a hook to the body.
Quark unleashes a big counter combination but Jankens bobs and weaves and avoids any damage.
Jankens fakes a head shot and lands one to the body.
Jankens misses with a hook.
Jankens connects with a slap. Keep your fist closed son.
Jankens throws a hard body shot but it just misses.
We've had a slow start to the round here - hopefully the action picks up.
Jankens throws a body shot but no joy.
Quark unleashes a big counter combination but Jankens bobs and weaves and avoids any damage.
Jankens clobbers Quark with an overhand right that has the crowd gasping. That made a horrendous noise.
Jankens has taken the fight to the clinch.
That's one minute gone in the round.
Quark drops to a knee looking for a takedown but Jankens gets the underhooks and prevents it.
Jankens definitely looks more muscular than last time we saw him fight.
Jankens misses with a hook to the ribs.
Jankens is trying to maintain a safe position but Quark gets an underhook and turns Jankens into the cage.
Jankens lands a left hand that snaps the head of Quark backwards.
Jankens misses with a short punch on the inside.
Quark blocks a couple of punches on the inside.
Jankens misses with the head strike.
Jankens cracks Quark with a nice body shot.
Jankens throws a head punch that misses.
Quark tries for a takedown but Jankens manages to get underhooks.
Jankens leaning against his opponent.
Quark blocks a punch to the side of the head.
Quark has been looking to improve his clinch game in recent weeks. Jankens seems to have the measure of him in the clinch so far, so let's see if Quark can turn it around.
That's two minutes gone in the round.
Jankens working some nice short punches in the clinch.
Quark escapes the clinch and we're back to striking.
Quark closes this distance looking for a takedown but Jankens circles away.
Janky Jankens has stuffed three takedown attempts in the round now. That's going to take a lot out of Barkeep Quark.
Jankens throws an overhand right that lands on Quark's shoulder, as Quark tries to avoid the shot.
Quark is looking for the big counter here.
Jankens throws a hook but Quark blocks it.
Jankens fakes low and throws an overhand right that catches Quark on the side of the head.
Jankens misses with a straight left.
Jankens throws a hook to the side of Quark's head but Quark sees it coming and ducks under it beautifully.
Quark throws a counter combo.
Jankens gets caught flat footed, as Quark shoots in with a quick takedown into guard.
That's three minutes gone in the round.
Jankens utilising some decent striking defenses from the guard, preventing the ground and pound.
Hammerfist, elbow! yells Quark's corner. There ya go! There ya go!
Quark is sitting in guard, working some ground and pound.
Quark postures up and lands a big shot to Jankens's brow.
Quark is sitting in guard, working some ground and pound.
Jankens wants to stand but Quark is controlling the position.
Quark throwing strikes but missing.
Jankens knows he needs to get back to his feet asap. He's simply no match for Quark on the ground.
Quark is in close to Jankens's body, working some short punches and elbows.
Quark scores with a decent looking elbow strike.
Quark working from the guard for now, landing some ground and pound.
Jankens wants to get back to his feet but Quark is in a dominant position and won't allow it.
Quark stands up over Jankens, holding his feet. He dives back in and lands a decent shot to the head.
That's four minutes gone in the round.
Quark connects with a couple of short punches.
Quark won't allow Jankens to get back to his feet.
Quark cracks Jankens with a solid left hand.
Quark has the superior BJJ but he's also working some ground strikes into his gameplan.
Jankens wants to get back to his feet but Quark is in a dominant position and won't allow it.
Jankens trying desperately to get back to his feet here but he's not having any joy at all. He's going to tire himself out if he's not careful.
Quark scoring with punches to the head and body.
The fighters are pressed up against the cage, both looking to find a bit of space to work.
Jankens is looking to get back to his feet but can't, whilst Quark is controlling him.
Quark content to strike from guard, landing some decent shots.
We've seen a great period of action over the last minute or so - credit to both fighters for going all out!
Quark postures up and lands a big shot to Jankens's brow.
And that is the end of the round. The fighters go back to their corners.
That was a close round but I would say that Janky Jankens will probably get the nod.
Well, the break between rounds is over. Let's get back to the scrappin!
Jankens throws out a loose jab but Quark uses good head movement to avoid it.
Quark defending well as Jankens loads up on a big left hand.
Quark keeping a good distance there, avoiding the body shot.
And an attempted straight right on the counter from Quark! But no joy.
Jankens throws a hard body shot but it just misses.
Quark throws a counter combo.
Jankens throws a combination but comes up with nothing but fresh air.
Quark tries to drive through with a takedown attempt but Jankens defends well and Quark ends up having to push Jankens into the cage where they will battle it out in the clinch.
Janky Jankens seems to be the more aggressive standup fighter in this bout.
We've had a slow start to the round here - hopefully the action picks up.
Jankens missing with a left hand there. Quark was out of range so wasted energy throwing that one.
Jankens lands an overhand left. A wild punch that just about connected.
Jankens misses with a wild body shot.
Janky Jankens is winning the standup battle so far.
That's one minute gone in the round.
Jankens misses with an uppercut.
Quark slips a jab from Jankens.
Despite the aggression on Quark's face he doesn't fully commit to the counter.
Jankens just misses with a punch to the body.
Quark unleashes a big counter combination but Jankens bobs and weaves and avoids any damage.
Jankens tries to land with a swinging hook to the body but Quark was well out of range. Poor timing from Jankens.
Jankens defends well against a solid takedown attempt from Quark.
Jankens misses the jab.
It seemed like Quark was going to counter with the hook but didn't fully commit to it.
Nice defenses there by Quark.
As Jankens backs off Quark throws a huge counter combo but Jankens manages to avoid it all.
Jankens throws a hook but Quark blocks it.
Quark lets it all go there with a big combo counter but none of the punches connected.
That's two minutes gone in the round.
Jankens misses with a hook. Quark ducked under it nicely.
Quark throws a counter combo.
Jankens swings for the body but Quark moves out of range.
Nice sprawl there from Jankens as Quark shoots in.
Jankens was looking to counter that move with a punch but didn't quite pull the trigger.
Janky Jankens has stuffed three takedown attempts in the round now. That's going to take a lot out of Barkeep Quark.
Quark shoots in with a takedown attempt and he has Jankens pinned against the cage. Jankens gets the underhooks and manages to circle away.
Jankens pushing out the jab but it's not landing.
Jankens swings for the body but Quark moves out of range.
Quark is loading up here, looking for a big counter of his own.
That's three minutes gone in the round.
Jankens throws a hook to the body but it doesn't connect.
Jankens stuffs a takedown. It's all about dictating where the fight takes place and Jankens wants it to stay on the feet.
Jankens swung with a counter right hand that didn't connect.
Quark shoots and misses
and Jankens connects with a straight left hand counter down the middle.
Jankens swings and misses with a hook to the body.
Quark ducks under a wild hook from Jankens.
Quark lets it all go there with a big combo counter but none of the punches connected.
Jankens swings and misses with a hook to the body.
Jankens misses with an uppercut.
That's four minutes gone in the round.
Jankens misses with a hook.
Quark throws a looping left and ducks down for a takedown. He's got his arms around Jankens's waist but Jankens gets an underhook and avoids the takedown by throwing Quark off to one side.
Jankens was looking to counter that last move with a shot to the body but he didn't commit.
Quark shoots in and bounces Jankens off the cage to secure the takedown into guard.
Quark chips away with some ground and pound.
Quark trying to control the position from guard on top but Jankens is wriggling around, looking for whatever he can.
Jankens on his back here. We all know that wrestlers don't like being on their back so let's see if Jankens tries to get out of the position.
Quark lands a couple of digs.
The crowd thankful this round is nearly over.
The fighters are starting to get a bit slippery now, which will make submissions a bit more difficult.
Quark is working the ground and pound from guard. He might want to try advancing position though to get more of an impact.
Quark is working Jankens over from the guard. He should look to pass the guard and do a little more damage with these strikes.
The fans in attendance giving it up for the two fighters, who have really let it all hang out in the last minute or so!
Quark landing with the ground and pound.
And that is the end of the round. The fighters go back to their corners.
Janky Jankens dominated that second round.
The minute break is over - no more time for sponges and pep talks - back to the action! This is the final round!

Quark ducks under an overhand right and circles away with a smile on his face.
Quark displays some good footwork, moving neatly out of range as Jankens throws out the jab.
Quark lets it all go there with a big combo counter but none of the punches connected.
Quark shoots in and gets a takedown into half guard. Quark showed some decent athleticism there.
Quark slips a nice elbow through Jankens's hands, connecting with Jankens's forehead.
Quark has freed up his trapped foot and advances to mount.
Jankens is trying to get back to his feet but can't.
We've had a slow start to the round here - hopefully the action picks up.
Quark lands with some vicious ground and pound - can Jankens hang on?
Quark working away from the top, dropping strikes.
That's one minute gone in the round.
Jankens is trying to get to the cage to help him get back to his feet.
Jankens is bucking up trying to escape but Quark cracks him with another couple of good strikes.
Quark connects with a couple of good shots from mount.
Jankens is rocked!
Quark postures up and throws a couple of big shots that have Jankens in real trouble here! The ref calls for Jankens to improve his position which he doesn't do, so the referee has no choice but to end the fight due to the strikes!
Ladies and gentlemen, after 1:32 of round 3, we have a winner by way of TKO (Strikes). Barkeep Quark!
Our winner, Barkeep Quark, made sure he spent some time buttering up the crowd during his post fight interview, which will no doubt bring him a few more fans.
Janky Jankens spoke after the fight, saying 'Fucking janky'.
|
|
|
|
|
|
|
|
|
|
|
|
|
|
|
|
|
|
|
|
|
|
|
| S |
C
A |
G |
S |
C
B |
G |
|
S |
C |
G |
|
energy
A | B |
|
hype
A | B |
|
pop
A | B |
|
mgr
A | B |
|
FIGHT
RATING
50% |
|
|
|
|
|
|
|
Co-main event
|
Coming up we have a welterweight MMA rules bout between Tommy Vercetti (ranked 1677 p4p, 4046 weight class) and Ray Ruthlessness (ranked 227 p4p, 473 weight class). Vercetti comes to the cage accompanied by Vice City. The crowd seem to be enjoying Ruthlessness's choice of entrance music: Meek Mill - Going Bad (feat. Drake). Both fighters look fresh as a daisy as they make their way towards the cage.
 |
|
 |
| 182 cm
23
174
5 - 0 - 0 |
|
182 cm
23
175
6 - 7 - 0 |
Good wrestling
World class MT
Cardio machine |
|
Good wrestler
Excellent boxer
Fast |
|
| |
|
Ladies and gentlemen. This fight is 3 rounds, in the welterweight division.
Introducing the fighter to my left, fighting out of the red corner.
With a record of 5 - 0 - 0, fighting out of Hilo, Tommy Vercetti!
And introducing the fighter to my right, fighting out of the blue corner.
With a record of 6 - 7 - 0, fighting out of Las Vegas, Ray Ruthlessness!
The judges for this bout are Frank Antenori, Percy O'Donnell and Jack Bonds.
The bell rings for round one and we are underway!
Ruthlessness misses with an uppercut.
Ruthlessness lunges in with an uppercut that skims his opponent's chin.
Nice defenses there by Vercetti.
Ruthlessness uses good footwork to avoid the strikes from Vercetti.
Ruthlessness throws a body punch but Vercetti moves out of range.
Vercetti has been working on his boxing with his coaches at Finch Gym in the buildup to the fight.
Vercetti fakes low and throws an overhand right that catches Ruthlessness on the side of the head.
It looks like Ray Ruthlessness has been cut.
Vercetti connects with a right hand. Ruthlessness shakes it off.
Vercetti closes the distance and takes a jab right on the nose as he does so.
Ruthlessness has done a lot of speed work in the buildup to this fight.
Ruthlessness misses the jab.
Vercetti jabbing away but nothing is landing.
A big left from Vercetti misses.
Ruthlessness clinches up against the cage.
Ruthlessness lands punches inside but they're not really causing much damage.
Fantastic stuff here - a very entertaining period of action, which has drawn cheers from the crowd.
Ruthlessness lands a hook that snaps the head of Vercetti backwards.
Vercetti swings wildly with an uppercut but Ruthlessness uses good head movement to avoid it.
Vercetti misses with some punches.
A head punch on the inside from Vercetti fails to land.
A shot in the inside from Vercetti.
Vercetti lands a hook that snaps the head of Ruthlessness backwards.
Vercetti prevents a body shot from Ruthlessness.
Vercetti swings wildly with an uppercut but Ruthlessness uses good head movement to avoid it.
That's one minute gone in the round.
Ruthlessness misses with a body punch.
Ruthlessness lands a left hand.
Ruthlessness lands a left hand.
Ruthlessness has a couple of punches blocked by Vercetti.
Vercetti taking a break, stalling in the clinch.
Ruthlessness scores with an uppercut up the middle.
Vercetti can't find room to land a body shot as Ruthlessness controls the action.
Ruthlessness blocks a body shot from Vercetti.
A real battle for position is taking place between these two warriors.
Vercetti blocks a couple of punches on the inside.
Vercetti misses with a shot to the kidneys.
Vercetti throws a punch but it's blocked by Ruthlessness.
Ruthlessness pushes Vercetti back against the cage and lands a hook to the side of the head.
Vercetti blocks a couple of punches on the inside.
A head punch on the inside from Vercetti fails to land.
Vercetti misses with a punch to the body.
Ruthlessness misses with a short punch on the inside.
Vercetti blocks a couple of punches on the inside.
Vercetti goes for a body shot but it's blocked.
Vercetti blocks a punch to the side of the head.
Vercetti lands with a short punch from the clinch.
That's two minutes gone in the round.
Ruthlessness prevents a body shot from Vercetti.
Vercetti lands a right uppercut that snaps the head of Ruthlessness backwards.
The fans in attendance giving it up for the two fighters, who have really let it all hang out in the last minute or so!
Ruthlessness lands a nice uppercut.
Vercetti is struggling to control the position.
Vercetti will no doubt start fighting again in a minute but for now he's just having a little rest, leaning Ruthlessness up against the cage.
Ruthlessness swings wildly with an uppercut but Vercetti uses good head movement to avoid it.
An uppercut on the inside fails to land for Ruthlessness.
Vercetti blocks a couple of punches on the inside.
Ruthlessness tries to throw a body punch but Vercetti avoids it by throwing Ruthlessness back against the cage.
Both guys are working to get underhooks.
Ruthlessness scores with a nice hook to the head.
A nice right hand lands inside from Ruthlessness.
Ruthlessness is working Vercetti over against the cage.
Ruthlessness lands a shot to the body.
Vercetti working aggressively here.
Ruthlessness lands with a left to the head.
Vercetti looking to slow down the pace here.
Ruthlessness misses with some punches.
That's three minutes gone in the round.
Ruthlessness lands a nice uppercut.
An uppercut on the inside fails to land for Ruthlessness.
Ruthlessness misses with the head strike.
Ruthlessness lands an uppercut.
Ruthlessness lands with a short punch from the clinch.
Both guys are working to get underhooks.
Ruthlessness gets through Vercetti's defenses to land a nice punch to the side of the head.
Nice body punch from Ruthlessness.
Vercetti is pushing Ruthlessness up against the cage, for a bit of lean and pray action. Action being used the in the loosest possible sense of the word.
Vercetti lands a short shot on the inside that snaps the head of Ruthlessness backwards.
Ruthlessness can't find room to land a body shot as Vercetti controls the action.
Ruthlessness misses with a punch on the inside.
Ruthlessness fails to land with a short punch on the inside.
Ruthlessness misses with the head strike.
Vercetti lands an uppercut.
Ruthlessness doesn't land with the attempted body shot.
Ruthlessness misses with the head strike.
Vercetti working aggressively here.
Vercetti misses with some punches.
That's four minutes gone in the round.
The crowd are loving this. Great action here.
Ruthlessness scores with a shoulder strike.
Ruthlessness lands a hook to the side of the head.
Ruthlessness lands an uppercut.
Vercetti prevents a body shot from Ruthlessness.
An uppercut on the inside fails to land for Vercetti.
Ruthlessness misses with a punch on the inside.
An uppercut to the body lands inside from Ruthlessness.
Vercetti blocks a couple of punches on the inside.
Vercetti tries a shoulder strike but it doesn't do any damage.
Ruthlessness lands a body shot.
Ruthlessness lands a hook to the body. It's hard to tell if that hurt Vercetti or not.
Vercetti swings wildly with an uppercut but Ruthlessness uses good head movement to avoid it.
Ruthlessness tries to work over Vercetti's body with a swooping hook but it only glances the target.
Ruthlessness struggles to land a body shot inside as Vercetti controls his hands.
Ruthlessness presses Vercetti against the cage and delivers a mid-strength body shot.
The crowd applaud the fighters' efforts here as the round comes to an end.
A short right from Vercetti on the inside.
Both guys are working to get underhooks.
Ruthlessness struggles to land a body shot inside as Vercetti controls his hands.
Vercetti can't find room to land a body shot as Ruthlessness controls the action.
Ruthlessness tries to throw a body punch but Vercetti avoids it by throwing Ruthlessness back against the cage.
And that is the end of the round. The fighters go back to their corners.
Ray Ruthlessness dominated that round.
The cut man is working on Ray Ruthlessness's cut.
The fighters get back to their feet, the hooter sounds and we're back to the action!
Ruthlessness throws a big shot that misses.
Vercetti waving his hands out in front of him, looking to distract Ruthlessness.
Ruthlessness clinches with his opponent.
Vercetti blocks an uppercut.
Ruthlessness lands a body punch.
Ruthlessness fails to land with a short punch on the inside.
Ruthlessness misses with a body punch.
Vercetti misses with the head strike.
Ruthlessness has been the more effective fighter overall so far.
Vercetti fails to land with a short punch on the inside.
Ruthlessness lands an uppercut.
A battle for position here, against the cage.
Ruthlessness lands a hook to the side of the head.
A short left from Vercetti.
Ruthlessness misses with a shot to the kidneys.
We've had a slow start to the round here - hopefully the action picks up.
Ruthlessness lands with a quick shot inside that doesn't really do much damage.
A head punch on the inside from Ruthlessness fails to land.
Ruthlessness misses with a shot to the kidneys.
Ruthlessness misses with the head strike.
Vercetti looking to stall.
Vercetti misses with a punch on the inside.
That's one minute gone in the round.
Vercetti blocking some punches.
Ruthlessness misses with a hook to the ribs.
Ruthlessness working aggressively here.
Vercetti has a couple of punches blocked by Ruthlessness.
Ruthlessness swings away with an uppercut that misses.
A head punch on the inside from Ruthlessness fails to land.
Vercetti throws a head punch that misses.
Ruthlessness lands a body punch - he's looking to wear down Vercetti.
Ruthlessness blocks a couple of punches on the inside.
Ruthlessness struggles to land a body shot inside as Vercetti controls his hands.
Ray Ruthlessness seems to be working more effectively in the clinch in the fight so far.
Ruthlessness blocking some punches.
Ruthlessness scores with a hook to the body.
Ruthlessness tries a body shot but Vercetti blocks it.
A short right hand to the side of the head by Vercetti.
Ruthlessness softening up his opponent with strikes, against the cage.
Ruthlessness tries to throw a body punch but Vercetti avoids it by throwing Ruthlessness back against the cage.
Ruthlessness blocks an uppercut.
Ruthlessness's head jolts backwards as he takes an uppercut right on the button!
Vercetti throws a punch but it's blocked by Ruthlessness.
Vercetti lands on the inside with an uppercut.
Ruthlessness lands with a short head shot on the inside.
That's two minutes gone in the round.
We've seen a great period of action over the last minute or so - credit to both fighters for going all out!
Vercetti working aggressively here.
Vercetti misses with the head strike.
Ruthlessness blocking some punches.
A head punch blocked on the inside by Vercetti.
A nice left hand lands by Vercetti.
Ruthlessness lands with a left to the head.
Vercetti stalling in the clinch but Ruthlessness improves position.
Ruthlessness blocks a couple of punches on the inside.
Vercetti tries a shoulder strike but it doesn't do any damage.
Vercetti lands with a short head shot on the inside.
Vercetti scores with a nice hook to the head.
Ruthlessness lands with a short shot to the head.
Both guys are working to get underhooks.
Vercetti misses with the head strike.
An uppercut on the inside fails to land for Ruthlessness.
Ruthlessness misses with a body punch.
Ruthlessness misses with a shot to the kidneys.
Vercetti can't break the clinch.
Vercetti's head jolts backwards as he takes an uppercut right on the button!
Ruthlessness lands a hook to the side of the head.
Ruthlessness lands with a short shot to the head.
That's three minutes gone in the round.
A head punch on the inside from Ruthlessness fails to land.
Ruthlessness misses with the head strike.
Ruthlessness misses with a short punch on the inside.
Vercetti lands a shoulder strike that jolts his opponent's head backwards.
Ruthlessness swings wildly with an uppercut but Vercetti uses good head movement to avoid it.
Ruthlessness takes a shot to the head.
Vercetti blocks an uppercut.
Ruthlessness scores with an uppercut up the middle.
Vercetti misses with a punch on the inside.
Vercetti misses with a punch on the inside.
Ruthlessness throws a hook to the body. More of an arm punch but it's all scoring with the judges.
A head punch on the inside from Ruthlessness fails to land.
Vercetti blocking some punches.
Ruthlessness blocks an uppercut.
Vercetti blocks a body shot from Ruthlessness.
Ruthlessness goes for a body shot but it's blocked.
Ruthlessness blocks a couple of punches on the inside.
Vercetti scores with an uppercut up the middle.
Vercetti misses with the head strike.
That's four minutes gone in the round.
Vercetti tries to stall but Ruthlessness uses the opportunity to gain a better position.
Vercetti misses with a hook from the clinch.
Ruthlessness misses with a hook from the clinch.
Ruthlessness tried to land a shot to the body but connects with Vercetti's elbow.
The fans in attendance giving it up for the two fighters, who have really let it all hang out in the last minute or so!
A short right from Ruthlessness on the inside.
Ruthlessness misses with a short punch on the inside.
Ruthlessness working aggressively here.
Vercetti pushes Ruthlessness back against the cage and lands a hook to the side of the head.
Vercetti is working hard here but doesn't seem to be able to control effectively, up against the cage.
Ruthlessness misses with a body punch.
Vercetti lands with a right to the head.
Ruthlessness misses with a hook from the clinch.
Ruthlessness blocking some punches.
A short right from Vercetti on the inside.
Vercetti breaks the clinch and we're back to striking at distance.
Ruthlessness lands with an uppercut that bounces Vercetti off the cage and back into range.
A jab from Vercetti misses.
A swing and a miss from Vercetti.
A jab from Vercetti misses.
And that is the end of the round. The fighters go back to their corners.
A close second round but Ray Ruthlessness will probably get the nod - 10:9.
The cut man is working on Ray Ruthlessness's cut.
That's time! Vercetti's corner gives him a slap on the ass as he gets ready to fight. This is the final round!
Ruthlessness takes a hook to the side of the head. I wonder if that's got his ears ringing.
Ruthlessness lands a pitter patter jab to the forehead of his opponent.
Vercetti slips under a jab from Ruthlessness.
Ruthlessness slips in close and lands a nice hook before moving back out of range.
The fighters circling - Ruthlessness throws out the jab but it was never going to land.
Vercetti looks to throw the jab but Ruthlessness is out of range.
Ray Ruthlessness seems to be the more aggressive standup fighter in this bout.
Vercetti steps to the side to avoid the strikes from Ruthlessness.
Vercetti walks into a jab.
Ruthlessness pushing out the jab but it's not landing.
Ruthlessness lands a jab.
Ruthlessness scores with a hook.
Ray Ruthlessness seems to be getting the better of the standup.
Vercetti walks straight into an uppercut. Luckily it didn't land flush.
Fantastic stuff here - a very entertaining period of action, which has drawn cheers from the crowd.
Vercetti misses the jab.
Ruthlessness misses with a lunging right hand
and Vercetti counters with a crisp hook to the side of the head.
Vercetti lands a powerful looking uppercut that connected with his opponent's jaw.
Vercetti throws a jab when Ruthlessness was well out of range.
Vercetti misses with a hook.
Ruthlessness swings widly with a right hand
enabling Vercetti to counter with a crisp jab.
Ruthlessness is rocked!
That's one minute gone in the round.
Ruthlessness throws a shot from downtown. Vercetti moves away and avoids it.
Ruthlessness is still on wobbly legs! Can Vercetti finish him?
Ruthlessness lands a lovely overhand right.
Ruthlessness seems to have recovered his senses.
Vercetti throws out a token jab with nothing on it.
A jab from Ruthlessness does it's job there.
Vercetti ducks under a wild hook from Ruthlessness.
Vercetti throws the left hand but Ruthlessness avoids the punch easily.
Ruthlessness throws a hook to the body but it doesn't connect.
Ruthlessness bobs and weaves well there to avoid the strikes.
Ruthlessness throws an uppercut from half a mile away. Vercetti sees it coming and avoids it easily.
Ruthlessness lands a body shot.
A jab from Ruthlessness misses.
Ruthlessness throws a big shot that misses.
Ruthlessness scores with a shot to the body.
Ruthlessness swings and misses with a hook to the body.
Vercetti throws out a token jab with nothing on it.
Ruthlessness blocks a jab.
Ruthlessness tries to close the distance and clinch but Vercetti swats him to one side with an open hand palm strike and circles away.
Vercetti takes a really solid shot there but just smiles back and shrugs his shoulders.
That's two minutes gone in the round.
We've seen a great period of action over the last minute or so - credit to both fighters for going all out!
Ruthlessness lands a beauty of a right hand that gets the crowd cheering.
Ruthlessness slips under a jab.
Ruthlessness looked like he wanted to counter with a punch but didn't throw it.
Ruthlessness wings a very wild body shot but it does the job and lands to the midsection.
A shot to the liver by Ruthlessness. Beautiful body shot.
Ruthlessness misses with a wild body shot.
A swing and a miss from Vercetti.
Ruthlessness takes one to the chin there.
Ruthlessness dips down and scores with a jab to the body.
Vercetti missing with a left hand there. Ruthlessness was out of range so wasted energy throwing that one.
Ruthlessness lands a body shot.
Nice cross by Ruthlessness.
Vercetti avoids the body shot from Ruthlessness.
Ruthlessness connects nicely with a jab. Noted by the judges no doubt.
Ruthlessness looks to score with a jab to the body but Vercetti is just out of range.
A cross from Ruthlessness lands.
Ruthlessness lands with a shot to the body.
Decent striking displayed by Vercetti there.
A jab from Ruthlessness misses.
That's three minutes gone in the round.
Vercetti throws out a loose jab but Ruthlessness uses good head movement to avoid it.
Ruthlessness lands a jab to the head.
Tommy Vercetti is looking to keep the fight on the feet at all costs.
Vercetti throws out a loose jab but Ruthlessness uses good head movement to avoid it.
Vercetti blocks a jab.
A swing and a miss from Ruthlessness.
Ruthlessness throws a sloppy body shot
and Vercetti cracks him with a counter punch right on the button.
Ruthlessness missing with a left hand there. Vercetti was out of range so wasted energy throwing that one.
Ruthlessness slips under a jab.
Ruthlessness now looks to counter with a shot at the body.
Vercetti drops his hands momentarily and Ruthlessness takes advantage with a crisp shot to the head.
Ruthlessness misses with an uppercut.
Vercetti bobs and weaves well there to avoid the strikes.
Vercetti moves away from the strike by Ruthlessness.
Vercetti bobs and weaves well there to avoid the strikes.
Ruthlessness swings widly with a right hand
and Ruthlessness takes a counter punch right on the button for his troubles.
Ruthlessness moves away from the strike by Vercetti.
Vercetti misses with a hook.
Ruthlessness bobs and weaves and throws out a fast jab that snaps Vercetti's head backwards.
That's four minutes gone in the round.
The crowd are loving this. Great action here.
Vercetti throws a shot from downtown. Ruthlessness moves away and avoids it.
Ruthlessness loads up on a big right hand but Vercetti slips the punch.
The crowd cheers as Vercetti lands an impressive looking overhand right. Ruthlessness doesn't seem phased though.
Ruthlessness misses with an uppercut
and Vercetti counters with a huge right that knocks Ruthlessness out cold! Vercetti is running around with a crazed look on his face - you can see how much that meant to him!
Ladies and gentlemen, after 4:18 of round 3, we have a winner by way of KO (Punch). Tommy Vercetti!
Our winner, Tommy Vercetti, made sure he spent some time buttering up the crowd during his post fight interview, which will no doubt bring him a few more fans.
|
|
|
|
|
|
|
|
|
|
|
|
|
|
|
|
|
|
|
|
|
|
|
| S |
C
A |
G |
S |
C
B |
G |
|
S |
C |
G |
|
energy
A | B |
|
hype
A | B |
|
pop
A | B |
|
mgr
A | B |
|
FIGHT
RATING
99% |
|
|
|
|
|
|
|
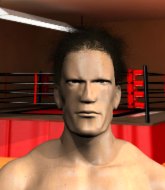
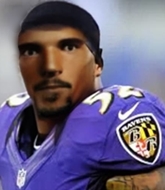
Main event
|
Coming up we have a welterweight MMA rules bout between Osmany Pizziconi (ranked 2219 p4p, 2515 weight class) and Darryl Haze (ranked 297 p4p, 327 weight class). Darryl Haze has the better chin. Will he look to stand and bang today?
 |
|
 |
| 186 cm
22
180
5 - 2 - 0 |
|
179 cm
23
170
7 - 6 - 0 |
Abu Dhabi Champ
Basic striking
Cardio machine |
|
Good wrestler
Decent boxing
Granite chin |
|
| |
|
Ladies and gentlemen. This fight is 5 rounds, in the welterweight division.
Introducing the fighter to my left, fighting out of the red corner.
With a record of 5 - 2 - 0, fighting out of Montreal, Osmany Pizziconi!
And introducing the fighter to my right, fighting out of the blue corner.
With a record of 7 - 6 - 0, fighting out of Amsterdam, Darryl Haze !
The judges for this bout are Jack Bonds, Percy O'Donnell and Timothy Bukovac.
The bell rings for round one and we are underway!
Pizziconi shoots in for a takedown. "I don't think so" says Haze as he avoids it easily.
Pizziconi backing away here, and Haze unleashes a leg kick that just misses.
Pizziconi misses with a takedown attempt - Haze sprawls well and throws a nice strike on the way out which just misses.
Haze tries a quick counter leg kick but Pizziconi is wise to it.
Pizziconi staying out of range there.
Pizziconi shoots in for a takedown. He's persisting with it as Haze sprawls well. Haze wins this battle and keeps the fight standing. Pizziconi gets slowly back to his feet.
Haze flicks out a counter leg kick but Pizziconi steps away.
That's three failed takedown attempts in the round for Osmany Pizziconi. That's going to take a lot out of him.
Haze leaves Pizziconi with his face pressed against the mat as he sprawls beautifully, defending against a solid takedown attempt.
Haze stuffs a takedown. It's all about dictating where the fight takes place and Haze wants it to stay on the feet.
Pizziconi misses with a takedown
and Haze counters with a shot to the ribs. That looked like it hurt.
Haze fakes high and swings low for a body shot but Pizziconi manages to avoid it.
We've had a slow start to the round here - hopefully the action picks up.
Haze lands with a nice low kick. That'll leave a bruise.
Nice shot lands for Haze .
A solid leg kick lands there for Haze .
Pizziconi will have to do better than that with his takedown attempts.
Haze dances in quickly and lands a nice inside leg kick on Pizziconi. That did some damage!
Pizziconi shoots in looking for a double leg takedown. Haze defends it nicely.
That's one minute gone in the round.
Pizziconi shoots in for a takedown! He's got it and he's managed to land in side control! That's better than Pizziconi was expecting from the takedown attempt, I'm sure!
We could do with one of the fighters taking the initiative a bit more on the ground - they're both waiting to capitalize on a mistake.
Pizziconi scoring with punches from side control.
Haze is trying to escape the position but Pizziconi is controlling the position.
Haze is looking for a sweep.
Pizziconi working away.
Pizziconi working the ground and pound.
Haze has found himself in a tricky position here. He's been working his transitions in training so let's see if he can work his way out of it.
Pizziconi wants to lay and pray for a moment but Haze keeps working.
Haze tries to get back to half guard but can't.
That's two minutes gone in the round.
Pizziconi wants to control but Haze is keeping him busy.
We've been hearing that Pizziconi has been drilling a lot of ground and pound in training, so let's see if he get the finish.
Haze manages to get back to half guard.
Pizziconi perhaps working for something from half guard, or maybe not. It looks like he's just sitting there.
Haze trying to hold on to Pizziconi's head to control him but Pizziconi postures up.
Haze regains full guard. Nicely done.
Haze is doing well to control the posture of his opponent and prevent any damage.
Pizziconi trying to land body shots but he keeps hitting the mat.
Pizziconi working some ground and pound from guard but it's not doing any damage.
Pizziconi is just sitting in guard, looking to avoid any submissions.
That's three minutes gone in the round.
Haze working a defensive guard here.
Pizziconi scoring with punches to the head and body.
Haze wants to control here, rather than go for any submissions from the bottom. At least for now.
Pizziconi content to stall in guard here.
Pizziconi throws a big right hand that misses.
Haze is trying to control the position from the bottom.
The referee has decided to stand the fighters back up, so we'll restart on the feet.
Nice sprawl there from Haze as Pizziconi shoots in.
Haze with the counter takedown but Pizziconi avoids it easily.
Pizziconi shoots in looking for a takedown. Haze tries to sprawl out of it but Pizziconi keeps driving through. The fighters are pinned against the cage. Haze manages to get underhooks and after a bit of a struggle, circles away and we're back to standing.
That's four minutes gone in the round.
There's not a lot going on here and the crowd are letting the fighters know they're not willing to tolerate a lack of action.
Haze leaves Pizziconi with his face pressed against the mat as he sprawls beautifully, defending against a solid takedown attempt.
Pizziconi shoots in but doesn't get the takedown
and Haze counters with a nice body shot.
Pizziconi shoots in looking for a double leg takedown. Haze defends it nicely.
Pizziconi tries to score a power double leg takedown but Haze sees that one coming and sprawls well. That will dishearten Pizziconi somewhat.
Haze takes a swing at Pizziconi's ribcage but misses.
Pizziconi drops down looking for a counter takedown but Haze sprawls and moves away.
Pizziconi steps to the side to avoid the strikes from Haze .
Pizziconi tries to shoot in for a takedown. He's got hold of a leg but Haze swivels and escapes.
The crowd thankful this round is nearly over.
Pizziconi shoots in from a long way out. He's driving through with the takedown attempt and he eventually gets it, landing in Haze 's guard.
Haze has momentary wrist control but Pizziconi slips an elbow through the middle.
Haze controls Pizziconi momentarily but Pizziconi frees himself.
Pizziconi trying to control the position from guard on top but Haze is wriggling around, looking for whatever he can.
And that is the end of the round. The fighters go back to their corners.
A close round but Darryl Haze will probably get the nod.
That's time! Back to the action!
Pizziconi closes the distance and clinches up with Haze , looking for a takedown. Pizziconi pushes Haze against the cage but Haze circles to the side and manages to break the clinch.
Pizziconi has his takedown stuffed
and Haze counters with a nice double leg into side control. Pizziconi won't be happy with that.
Pizziconi manages to get back to half guard.
The fighters are pressed up against the cage, both looking to find a bit of space to work.
Pizziconi preventing any damage for now, controlling his opponent's head.
Haze is stalling here. Pizziconi is in no mood to hang around though. He's locked up a kimura from the bottom! Haze seems to be keeping calm but he's forced to roll out of the hold and Pizziconi has ended up in side control on the top. Nice work.
Pizziconi has been looking to land a fair amount of strikes on the ground. He might be looking to soften his opponent up in order to work for a submission.
Haze is trying to improve his position.
We've had a slow start to the round here - hopefully the action picks up.
Pizziconi wants to take a breather but Haze manages to regain guard - a lesson learnt for Pizziconi.
Pizziconi looking to control the position here, rather than advance.
Haze has been the more effective fighter overall so far.
That's one minute gone in the round.
Haze looking to sweep here. No luck so far.
Haze is working from a closed guard but he's struggling to control his opponent.
Haze looking for a sweep. Not yet Haze , not yet.
That's two minutes gone in the round.
The crowd are showing their displeasure at the lack of action as loud boos ring out around the arena.
Haze controls Pizziconi momentarily but Pizziconi frees himself.
Pizziconi with a nice head shot there.
Pizziconi is in close to Haze 's body, working some short punches and elbows.
Pizziconi wants to control from the top but Haze keeps moving.
Pizziconi seems content to control from guard here. He's going to have to remain active though if he doesn't want to get stood back up.
Pizziconi is sitting in guard, working some ground and pound.
That's three minutes gone in the round.
Pizziconi with a couple of shots to the head there. Not particularly brutal.
Pizziconi postures up and lands some nice ground and pound.
Haze is trying to control the position from the bottom.
Pizziconi drops back looking for a heel hook - he quickly realises he's not going to get it but Haze manages to dive on top of him before he can escape and now Pizziconi has Haze in his guard.
Haze advances position into side control!
Pizziconi is not content to let Haze control the position.
Pizziconi tries to work a leg under to get back to half guard but Haze wriggles his own leg back out and remains in side control.
That's four minutes gone in the round.
I wouldn't like to be where Pizziconi is right now.
Haze working the ground and pound but he's contacting the mat, not the fighter.
Pizziconi tries to get back to half guard but can't.
Pizziconi dodges the ground and pound from Haze .
Haze wants to control but Pizziconi is keeping him busy.
Pizziconi is positioning himself to get back to half guard.
Boooooooooooooooooooo!!! God, this has been a terrible round. Come on you two, sort yourselves out!
Pizziconi manages to get one leg in to regain half guard.
And that is the end of the round. The fighters go back to their corners.
A close second round but Darryl Haze will probably get the nod - 10:9.
The fighters' corners scream their final instructions, as the referee calls time. Here we go, back to the action!
Haze displays good takedown defense there as he swats away a double leg from Pizziconi.
Haze drops down looking to force a counter takedown but Pizziconi defends it well.
No luck for Pizziconi with that takedown attempt.
Pizziconi closes the distance and clinches up with Haze , looking for a takedown. Pizziconi pushes Haze against the cage but Haze circles to the side and manages to break the clinch.
That's three failed takedown attempts in the round for Osmany Pizziconi. That's going to take a lot out of him.
Pizziconi shoots in for a double leg but Haze sprawls well. That's going to sap some energy.
Haze closes the distance and scores a nice trip takedown into half guard. Pizziconi did well to prevent Haze getting side control.
Osmany Pizziconi overall seems to be getting the better of the ground position in the fight so far.
Haze is keen to just control but Pizziconi is a slippery customer.
Haze thumps the canvas. Not on purpose obviously - he just missed Pizziconi's head.
Pizziconi desperately trying to maintain half guard.
Haze wants to control but Pizziconi is keeping him busy.
We've had a slow start to the round here - hopefully the action picks up.
Haze lands with an elbow from half guard - that looked like it hurt.
Haze is figuring out what he wants to do next.
That's one minute gone in the round.
Pizziconi works his way to full guard. Good work.
Haze trying to control the position from guard on top but Pizziconi is wriggling around, looking for whatever he can.
Pizziconi trying to control the position.
Haze stays in close to Pizziconi's body and controls the position.
Haze pushes down on Pizziconi's leg and manages to get into half guard.
Haze trying to control from half guard but Pizziconi is working away.
That's two minutes gone in the round.
A few boos can be heard. I'm sure they will multiply if the fighters don't pick up the pace.
Haze throws a strike but Pizziconi avoids it easily and moves to full guard.
Haze trying to control the position from guard on top but Pizziconi is wriggling around, looking for whatever he can.
Haze wants to pass the guard but Pizziconi is keeping the position.
We've had a lack of effective grappling in the last minute or so, which could well see a referee standup.
Haze throwing shots from guard but he's hitting more mat than opponent.
The referee has stepped in and called for a break in the action. We'll restart on the feet.
Pizziconi closes the distance and clinches up with Haze , looking for a takedown. Pizziconi pushes Haze against the cage but Haze circles to the side and manages to break the clinch.
A nice side step and Haze releases a counter shot to the body, but it doesn't find it's home.
Haze ducks down and throws a hook to the body.
That's three minutes gone in the round.
Haze misses with a body shot. Nice footwork from Pizziconi.
A punch combination from Haze misses.
Pizziconi misses with a takedown attempt
and Haze counters with a straight punch to the midsection.
Pizziconi avoids the body shot from Haze .
Haze defends well against a solid takedown attempt from Pizziconi.
Haze feints the counter takedown.
Pizziconi checks a low kick from Haze .
Haze lands a nice hook to Pizziconi's body. Pizziconi takes it in his stride and looks to land his own strikes.
Pizziconi shoots in for a takedown. "Ole!" shouts Haze as he jumps to the side.
Pizziconi throws a looping left and ducks down for a takedown. He's got his arms around Haze 's waist but Haze gets an underhook and avoids the takedown by throwing Pizziconi off to one side.
Haze defends well against a solid takedown attempt from Pizziconi.
Haze with the counter takedown but Pizziconi avoids it easily.
Pizziconi fails to land the takedown.
Haze lets it all go there with a big combo counter but none of the punches connected.
Both fighters are breathing heavily.
Haze lands an overhand left. A wild punch that just about connected.
Haze throws a nice hook to the body that draws an oooh from the crowd.
Pizziconi tries to shoot in for a takedown. He's got hold of a leg but Haze swivels and escapes.
Haze is throwing a lot of body shots here, looking to wear down Pizziconi rather than just go for the knockout.
That's four minutes gone in the round.
Haze misses with a body shot.
Pizziconi gets taken down but at least he's managed to land in guard.
Fantastic stuff here - a very entertaining period of action, which has drawn cheers from the crowd.
Haze is pushing down on Pizziconi's leg trying to pass to half guard. Pizziconi is fighting to maintain full guard but Haze has managed to sneak the leg through.
Haze not landing any meaningful shots this time.
Haze thows a wild elbow that connects with the canvas.
Haze passes to full mount!
Pizziconi holding onto his opponent's waist for dear life, as Haze tries to land some strikes to get him to release his grip.
Haze tries to control but Pizziconi wriggling away.
The crowd thankful this round is nearly over.
Haze throws an elbow from mount that misses. Lucky escape for Pizziconi because Haze loaded up on that one.
And that is the end of the round. The fighters go back to their corners.
Darryl Haze really dominated that round.
The fighters' corners scream their final instructions, as the referee calls time. Here we go, back to the action!

Haze stuffs a takedown. It's all about dictating where the fight takes place and Haze wants it to stay on the feet.
Pizziconi looks for a takedown but Haze sprawls well.
Pizziconi fails with a rather predictable takedown attempt.
That's three failed takedown attempts in the round for Osmany Pizziconi. That's going to take a lot out of him.
Pizziconi tries to check a leg kick but that clearly hurt him.
Osmany Pizziconi seems to be the more aggressive standup fighter in this bout.
Haze cracks a nice hook into Pizziconi's ribs.
Pizziconi darts in and lands a nice takedown into half guard.
Pizziconi is just sitting in half guard, waiting for something to happen.
We've had a slow start to the round here - hopefully the action picks up.
Haze manages to get to full guard.
That's one minute gone in the round.
Haze has momentary wrist control but Pizziconi slips an elbow through the middle.
Pizziconi stopping the sweep attempt from Haze .
Pizziconi with a couple of shots to the head there. Not particularly brutal.
Hammerfist, elbow! yells Pizziconi's corner. There ya go! There ya go!
Pizziconi throws a big elbow that misses.
Haze is trying to control the position but Pizziconi postures up.
Pizziconi is taking a break and basically stalling. The referee will not allow him to do that for long.
Haze is pulling down on Pizziconi's head. It's preventing any offense from Pizziconi, at least for the moment.
Haze keeping moving, preventing Pizziconi from controlling successfully.
That's two minutes gone in the round.
My god... these two guys really need to pick up the pace or everyone will leave to go get a beer.
Pizziconi postures up and lands some nice ground and pound.
Haze keeping full guard, as Pizziconi tries to pass.
Pizziconi throws a strike but Haze rolls with it and manages to sweep. Now he's in guard on top.
Haze is taking a break and basically stalling. The referee will not allow him to do that for long.
Pizziconi seems keen to control rather than go for a submission, at least for now.
That's three minutes gone in the round.
Pizziconi keeping moving, preventing Haze from controlling successfully.
Pizziconi working the defensive guard well to avoid strikes from Haze .
The ref stands the fighters back up due to a lack of activity.
Haze fails with a rather predictable takedown attempt.
Haze gets caught napping as Pizziconi dives in and scores a takedown. Haze manages to retain guard.
Haze is active off his back here, looking for submissions.
Pizziconi is looking to work some ground and pound but Haze has wrist control.
Pizziconi controlling from the top position.
That's four minutes gone in the round.
Haze working from the bottom, still in full guard. He's managed to get a loose triangle. Pizziconi doesn't seem to be doing much to defend here, obviously he feels comfortable in the position. Pizziconi manages to throw the legs off his shoulder and he's back into guard - no problem.
Pizziconi stands up over Haze , holding his feet. He dives back in and lands a decent shot to the head.
Pizziconi sitting in guard, not really doing much.
Boooooooooooooooooooo!!! God, this has been a terrible round. Come on you two, sort yourselves out!
Pizziconi looking to pass the guard.
And that is the end of the round. The fighters go back to their corners.
Osmany Pizziconi had his way with Darryl Haze in that round.
The fighters' corners scream their final instructions, as the referee calls time. Here we go, back to the action! This is the final round!

Haze tries to score with a low kick but Pizziconi moves his leg out of the way.
Haze stuffs the takedown attempt from Pizziconi. Pizziconi gets slowly back to his feet.
Haze appeared to try and counter that last move with a leg kick.
Haze does a little shimmy and throws a leg kick. The leg kick missed by a considerable margin though, making him look a little bit silly for doing the shimmy.
Pizziconi shoots for a double leg takedown but Haze sprawls well. He's pushed Pizziconi's face into the mat and manages to get back to his feet relatively easily.
A cross from Haze lands.
Pizziconi tries to shoot in for a takedown. He's got hold of a leg but Haze swivels and escapes.
That's three failed takedown attempts in the round for Osmany Pizziconi. That's going to take a lot out of him.
Pizziconi closes the distance and clinches up with Haze , looking for a takedown. Pizziconi pushes Haze against the cage but Haze circles to the side and manages to break the clinch.
Pizziconi misses with a takedown attempt
and Haze makes him pay by landing a nice hook to the body before moving out of range.
Pizziconi fails to land the takedown.
We've had a slow start to the round here - hopefully the action picks up.
Haze lands a really nice looking cross but Pizziconi seems unphased.
Pizziconi fakes high and shoots in for a takedown but Haze avoids it really well and circles away.
Both of our modern day gladiators look out of it here - a gruelling 5 rounds of action taking it's toll on them, no doubt.
Pizziconi ducks under a wild hook from Haze .
That's one minute gone in the round.
Pizziconi uses some good footwork to avoid the body shot by Haze .
A really sloppy takedown attempt there from Pizziconi.
Pizziconi throws a looping left and ducks down for a takedown. He's got his arms around Haze 's waist but Haze gets an underhook and avoids the takedown by throwing Pizziconi off to one side.
Pizziconi decides to change it up a bit and drives through with a nice takedown into half guard.
Haze wants to get back to full guard.
Pizziconi content to sit in half guard and control for a moment.
Haze is looking to control Pizziconi's leg but it's slowly edging free. Can Haze avoid being mounted?
Pizziconi throwing shots but they're hitting the canvas more than the man.
That's two minutes gone in the round.
Pizziconi content to sit in half guard and control for a moment.
Pizziconi thumps the canvas. Not on purpose obviously - he just missed Haze 's head.
Pizziconi drops an elbow to the side of Haze 's head.
Pizziconi passes to full mount!
Pizziconi breaks from Haze 's wrist control and lands an elbow.
Pizziconi with a couple of short strikes.
Wooooo! Give it up for these two warriors! They are putting on a show!
Haze tries to get back to half guard but can't.
Osmany Pizziconi has stepped it up - he knows he needs a finish here!
That's three minutes gone in the round.
Pizziconi working Haze over with strikes here.
Pizziconi connects with a couple of good shots from mount.
A nice elbow there by Pizziconi.
Pizziconi working the ground and pound effectively.
Pizziconi fakes a shot to the body and cracks his opponent in the head. Nice ground and pound there!
Haze wants to hold on but Pizziconi pushes him away.
Pizziconi putting on the heat here with some good ground and pound!
Haze is rocked!
Haze really trying hard to get back to half guard here.
Haze is still in real trouble! Can Pizziconi finish him?
Pizziconi controlling the pace for now.
Pizziconi unloads with some vicious shots from mount and Haze wants out - he looks towards the referee who steps in to save him! Pizziconi celebrates on the cage and the crowd goes wild!
Ladies and gentlemen, after 4:56 of round 5, we have a winner by way of TKO (Strikes). Osmany Pizziconi!
After the fight, Osmany Pizziconi was humble in paying tribute to his opponent but made it clear he wants to go on to bigger and better things. It seemed to go down well with the crowd who cheered him loudly.
|
|
|
|
|
|
|
|
|
|
|
|
|
|
|
|
|
|
|
|
|
|
|
| S |
C
A |
G |
S |
C
B |
G |
|
S |
C |
G |
|
energy
A | B |
|
hype
A | B |
|
pop
A | B |
|
mgr
A | B |
|
FIGHT
RATING
48% |
|
|
|
|
|
|
|
|
|
|

