 |
QFC Tournament 1104 Round 1 PBP Commentary |
Undercard bout
|
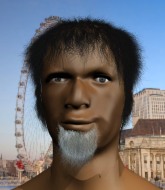
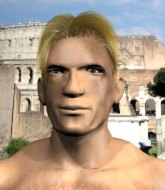
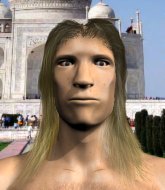
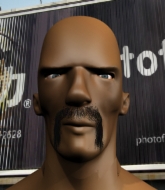
Coming up we have a super heavyweight MMA rules bout between Edol Kirkyos (ranked 4566 p4p, 4769 weight class) and Marquis Chriss (ranked 0 p4p, 0 weight class). We have two fighters making their debuts here, so let's see who comes out of this one with their first professional victory.
 |
|
 |
| 194 cm
18
219
0 - 0 - 0 |
|
169 cm
23
233
0 - 0 - 0 |
BJJ Purple Belt
Brawler
KO power |
|
Decent wrestler
Counter fighter
Solid chin |
|
| |
|
Ladies and gentlemen. This fight is 3 rounds, in the super heavyweight division.
Introducing the fighter to my left, fighting out of the red corner.
With a record of 0 - 0 - 0, fighting out of Sydney, Edol Kirkyos!
And introducing the fighter to my right, fighting out of the blue corner.
With a record of 0 - 0 - 0, fighting out of Sydney, Marquis Chriss!
The judges for this bout are Ron Honeybunn, Darius Henderson and Damien Edna.

The bell rings for round one and we are underway!
Kirkyos throws a lazy head kick
and Chriss counters with a nice uppercut.
Kirkyos looks to clinch

and Chriss counters with a nice double leg into side control. Kirkyos won't be happy with that.
Kirkyos manages to get back to half guard.

Chriss seems to be looking for submissions.
Chriss is just sitting in half guard, waiting for something to happen.
Kirkyos is trying to stand up here but Chriss is controlling him well.
Chriss is keen to just control but Kirkyos is a slippery customer.
We've had a slow start to the round here - hopefully the action picks up.
Chriss is looking for an arm triangle, whilst trying to pass to side control. Kirkyos doesn't seem that keen to cooperate though. No luck this time Chriss.
Kirkyos taking some punishment here, with Chriss in his half guard.

That's one minute gone in the round.
Kirkyos is trying to defend against the ground and pound but Chriss scores with a couple of nice shots.
The ref warns both fighters not to hold the cage as they work up against the meshing.
Chriss looks over to his corner - he wants some instructions but his corner are not responding.
Chriss takes advantage of the dominant position to land a couple of big hammer fists.
Kirkyos wants to control but Chriss is keeping busy.
Chriss landing with strikes to the body and head, softening up his opponent.
Kirkyos gets back to full guard.
Chriss is sitting in guard, working some ground and pound.

That's two minutes gone in the round.
Kirkyos is working from a closed guard but he's struggling to control his opponent.
Kirkyos is working the butterfly guard. He manages to land a nice scissor sweep and is now in half guard on the top. Nice move.

Chriss controlling the position for now.
Kirkyos prevents Chriss from improving his position.
Kirkyos trying to control the action but Chriss is working from the bottom.
Kirkyos is really struggling to control Chriss but he's trying to hold on to the position.

That's three minutes gone in the round.
Chriss keeping control of the leg, stopping his opponent passing to mount.
Chriss landing strikes from the bottom.
Kirkyos is looking to stall here but Chriss recovers full guard.

That's four minutes gone in the round.
My god... these two guys really need to pick up the pace or everyone will leave to go get a beer.
Kirkyos wants to control from the top but Chriss keeps moving.

The referee decides to stand the fighters back up.
Chriss punishes Kirkyos's body with a nice straight punch.
Kirkyos fails with the takedown.
Boooooooooooooooooooo!!! God, this has been a terrible round. Come on you two, sort yourselves out!
Kirkyos blocks a head kick by Chriss.
And that is the end of the round. The fighters go back to their corners.
Marquis Chriss dominated that round.
The corners get their ten second warning. Both fighters stand from their stools and stare each other down, ready to get back to the action.

Kirkyos throws a leg kick that is checked

and Chriss counters into the clinch. Nicely done.
Chriss turns his hips and lands a very nice judo throw into side control!
Kirkyos is looking to get back to his feet here but Chriss is keeping cool and he's managed to take Kirkyos's back.
Oooh a big shot gets through from Chriss. Many more shots like that and the referee will have to think about stepping in!
Chriss punishes Kirkyos with strikes from the back mount.
Chriss scores with some strikes to the side of the head there. Good, points scoring shots.
Kirkyos showing good submission defense here.
Wooooo! Give it up for these two warriors! They are putting on a show!
Chriss scores with punches from the back.
Chriss scores with some strikes to the side of the head there. Good, points scoring shots.
The fighters are pressed up against the cage, both looking to find a bit of space to work.
That's one minute gone in the round.
Chriss keeps control of the position as Kirkyos tries to break free.
Chriss scores with strikes from the back.
 Kirkyos is rocked! Kirkyos is rocked!
Kirkyos is staying cool under pressure, defending well against the rear naked choke attempt from his opponent.
Oh Kirkyos is still in real trouble! Will he be able to recover?!!
I really don't envy Kirkyos right now.
Kirkyos seems to have got his legs back now.
Chriss is working the ground and pound here and the referee is taking a close look at Kirkyos. He must escape soon or this one will be stopped.
A lull in the action here.
That's two minutes gone in the round.
Chriss gets his hooks in and is throwing strikes.
Chriss controls the action.
Chriss punishes Kirkyos with strikes from the back mount.
Both fighters are absolutely exhausted here.
Chriss is working the ground and pound here and the referee is taking a close look at Kirkyos. He must escape soon or this one will be stopped.
Chriss is punishing Kirkyos with some ground and pound.
Chriss lands a punch that was close to the back of the head but the ref thinks it's OK.
Chriss lands a big shot to the side of the head and Kirkyos goes limp! He's out cold - the ref jumps in to save him from more punishment!
Ladies and gentlemen, after 2:58 of round 2, we have a winner by way of KO (Strikes). Marquis Chriss!
During a confident post fight interview, Marquis Chriss thanked all his fans. He seemed very genuine when describing how motivated his fans keep him.
|
|
|
|
|
|
|
|
|
|
|
|
|
|
|
|
|
|
|
|
|
|
|
| S |
C
A |
G |
S |
C
B |
G |
|
S |
C |
G |
|
energy
A | B |
|
hype
A | B |
|
pop
A | B |
|
mgr
A | B |
|
FIGHT
RATING
37% |
|
|
|
|
|
|
|
Undercard bout
|
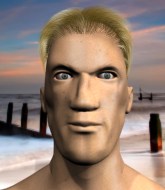
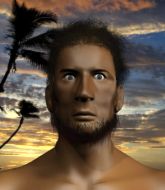
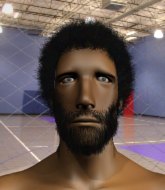
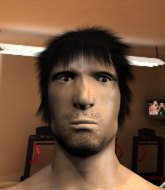
Coming up we have a super heavyweight MMA rules bout between Guy Lusignan (ranked 4684 p4p, 4531 weight class) and Bob Munt (ranked 0 p4p, 157 weight class). We have two fighters making their debuts here, so let's see who comes out of this one with their first professional victory.
 |
|
 |
| 191 cm
18
255
0 - 0 - 0 |
|
200 cm
23
300
0 - 0 - 0 |
Good wrestling
Brawler
Granite chin |
|
BJJ Blue Belt
Decent boxing
Solid chin |
|
| |
|
Ladies and gentlemen. This fight is 3 rounds, in the super heavyweight division.
Introducing the fighter to my left, fighting out of the red corner.
With a record of 0 - 0 - 0, fighting out of Sydney, Guy Lusignan!
And introducing the fighter to my right, fighting out of the blue corner.
With a record of 0 - 0 - 0, fighting out of Sydney, Bob Munt!
The judges for this bout are Skip Squint, Topper Green and John Mangel.
The bell rings for round one and we are underway!
Munt rushes forward with a series of wild hooks but Lusignan moves out of range and avoids them all easily.
Munt lands a head shot.

Lusignan gets in close and instigates a clinch.
Munt lands with a good tight uppercut to the head.
Lusignan being controlled against the cage.
Munt gets underhooks to prevent Lusignan's takedown attempt.
Munt is looking to control Lusignan's arms but Lusignan gets an underhook and turns him. Now Munt has his back to the cage.
Munt lands a body punch - he's looking to wear down Lusignan.
Lusignan can't get the takedown.
A battle for position here, against the cage.
We've had a slow start to the round here - hopefully the action picks up.
A battle for position here, against the cage.
Lusignan has had enough of the clinch but Munt keeps him there for the moment.
Lusignan's head jolts backwards as he takes an uppercut right on the button!
Munt keeps control of Lusignan as he tries to wriggle out of the double underhooks.
That's one minute gone in the round.
Munt lands with a short shot to the head.
Munt taking a breather.
Munt lands a right uppercut that snaps the head of Lusignan backwards.
Munt keeps control of Lusignan as he tries to wriggle out of the double underhooks.
Munt lands with a right to the head.
Lusignan goes for a body shot but it's blocked.
Munt wants to stall.
Lusignan looking for a takedown.
That's three failed takedown attempts in the round for Guy Lusignan. That's going to take a lot out of him.
Munt lands a left hand.

Lusignan pushes off and circles away, back to the middle of the mat.
Bob Munt is looking to keep the fight on the feet at all costs.
Munt sizes up Lusignan with a pawing jab and scores with a straight right down the middle.
Munt clinches with his opponent.
Lusignan jumps guard but his hands slip and he falls flat on his back. Well, he's made himself look a right mug there, as Munt walks away with a smile on his face. Lusignan gets slowly back to his feet and shakes his head.
Lusignan is breathing heavily.
Munt is looking to clinch but Lusignan is avoiding it.
That's two minutes gone in the round.
Munt fakes with an overhand right and moves in to clinch with Lusignan, pushing him back against the cage.
A short right hand to the side of the head by Munt.
This has been an exciting period of action!
Munt makes some space for himself and lands an uppercut.
Munt lands a nice shot to the body.
Munt wants to break free. God knows he wants to breaaaak freeee.
Munt lands with a right to the head.
Still in the clinch, Munt scores with a nice short uppercut.
Munt lands a short shot on the inside that snaps the head of Lusignan backwards.
Munt is trying to break the clinch but Lusignan is controlling him.
A short right hand to the side of the head by Munt.
A body shot lands from Munt.

Munt drops Lusignan with a big right hand! Munt charges in looking to finish - Lusignan manages to keep Munt in his guard and seems to have recovered somewhat.
Lusignan is rocked!
Munt gets to his feet and stands over Lusignan, holding his ankles. He dives in with a big left hand that connects! Lusignan felt that one! Munt unloads more punches and elbows and this one is over! The ref has dived in to save Lusignan from any more punishment!
Ladies and gentlemen, after 3:57 of round 1, we have a winner by way of TKO (Strikes). Bob Munt!
|
|
|
|
|
|
|
|
|
|
|
|
|
|
|
|
|
|
|
|
|
|
|
| S |
C
A |
G |
S |
C
B |
G |
|
S |
C |
G |
|
energy
A | B |
|
hype
A | B |
|
pop
A | B |
|
mgr
A | B |
|
FIGHT
RATING
59% |
|
|
|
|
|
|
|
Undercard bout
|
Coming up we have a super heavyweight MMA rules bout between Jayson Howard (ranked 4665 p4p, 4778 weight class) and Seck Holland (ranked 0 p4p, 0 weight class). We have two fighters making their debuts here, so let's see who comes out of this one with their first professional victory.
 |
|
 |
| 185 cm
18
175
0 - 0 - 0 |
|
185 cm
18
217
0 - 0 - 0 |
BJJ Blue Belt
Basic striking
Likes comics |
|
Good wrestler
Brawler
Intelligent |
|
| |
|
Ladies and gentlemen. This fight is 3 rounds, in the super heavyweight division.
Introducing the fighter to my left, fighting out of the red corner.
With a record of 0 - 0 - 0, fighting out of Sydney, Jayson Howard!
And introducing the fighter to my right, fighting out of the blue corner.
With a record of 0 - 0 - 0, fighting out of Sydney, Seck Holland!
The judges for this bout are Hugh Johnson, Damien Edna and Chris Dean.
The bell rings for round one and we are underway!
Holland closes the distance and clinches.
Howard has Holland pressed against the cage, preventing Holland from circling away and getting back to striking at range.
Holland jumps guard but Howard stands there with Holland around his waist. Holland gives up and drops back to his feet. We remain in the clinch.
Howard stops a takedown attempt from Holland.
Holland tries to pull guard but Howard holds him up against the cage and eventually Holland drops back down to his feet.
Jayson Howard has stuffed three takedown attempts in the round now. That's going to take a lot out of Seck Holland.
Howard has had enough of the clinch but Holland keeps him there for the moment.

Holland breaks from the clinch.
Howard is looking to clinch but Holland is avoiding it.
We've had a slow start to the round here - hopefully the action picks up.
Howard shoots in for a takedown but doesn't get it.
Howard throws a sloppy head kick and Holland moves out of range easily.
Holland tries to counter with a clinch but Howard shakes him off and moves away.
Howard pulls out of a head kick attempt.
Jayson Howard seems to be the more aggressive standup fighter in this bout.
Holland fakes with an overhand right and moves in to clinch with Howard, pushing him back against the cage.
Holland struggles to land a body shot inside as Howard controls his hands.
That's one minute gone in the round.
Howard lands a hook that snaps the head of Holland backwards.
Howard is trying to break the clinch but Holland is controlling him.
Holland breaks the clinch and we return to the middle of the mat.
Howard doesn't manage to clinch there - Holland circles away.
Holland bobs and weaves into range and then changes levels and scores with a nice takedown into side control.

Howard bucks up and manages to escape back to his feet!
Howard dives in for a single leg takedown but Holland sprawls and the fighters end up clinched against the cage.
Holland tries to pull guard but Howard forces him back to his feet, against the cage.
Holland misses the knee to the body. Nice hip positioning from Howard.
We've seen a great period of action over the last minute or so - credit to both fighters for going all out!
Howard gets underhooks to prevent Holland's takedown attempt.
Holland is trying to break the clinch but Howard has him pressed against the cage.
Holland fails to pull guard.
That's two minutes gone in the round.
Howard looks like he'd prefer to be striking at range right now.
Howard is trying to work out of this bad position, with his back against the cage.
Howard wants to break free but Holland has control.
Howard has Holland pressed against the cage, preventing Holland from circling away and getting back to striking at range.
Holland tries to jump guard but he falls flat on his backside. Howard smiles and moves away.
Howard fails with an attempt to clinch.
Howard fakes a head shot and lands one to the body.
Holland avoids the head kick by Howard.
Howard scores to the head and body with a nice combination!
A decent looking cross lands there for Howard.
Howard goes for a double leg but Holland avoids the attempt and the two fighters end up clinched against the cage as Holland continues to drive forward.
Holland has a body lock and is looking for a takedown. Howard is bouncing around trying to prevent the takedown and somehow he has indeed managed to stay on his feet.
Holland holding his opponent close, against the cage.
That's three minutes gone in the round.
Holland with an attempt at a knee that misses.
Holland has dropped down and is looking to force the takedown but it's defended by Howard after a bit of a struggle.
Holland is trying to pull guard but being pressed up against the cage enables Howard to keep the fight standing.
Holland working hard to break the clinch.
Howard wants to get back to striking at distance but Holland won't allow it.
With the two fighters working up against the cage, Holland just misses with a elbow thrown towards Howard's brow.
Holland tries to pull guard but Howard holds him up against the cage and eventually Holland drops back down to his feet.
Howard wants to get back to striking at distance but Holland won't allow it.
That's four minutes gone in the round.
A few boos can be heard. I'm sure they will multiply if the fighters don't pick up the pace.
Holland wants to push off and get back to the center of the mat but Howard has him pressed against the cage.
Howard is trying to force a seperation but Holland has the dominant position.
Howard has Holland pressed against the cage, preventing Holland from circling away and getting back to striking at range.
Howard wants to break the clinch but can't.
Howard blocks an uppercut.
Holland wants a takedown.
Holland has dropped down and is working for a takedown. Howard is trying to keep an underhook but Holland manages to get the takedown into half guard.
Howard is holding on to half guard well.
Holland thows a wild elbow that connects with the canvas.
Howard is doing well to avoid being mounted. He's controlling the position at the moment.
And that is the end of the round. The fighters go back to their corners.
Jayson Howard dominated that round.
The fighters' corners scream their final instructions, as the referee calls time. Here we go, back to the action!
Howard misses with a half-hearted attempt at a head kick.
Howard moves into range and throws a lovely three punch combination.
Holland darts in and lands a nice takedown into half guard.
Howard makes some distance and scrambles quickly back to his feet. Nice work!
Howard fakes high and shoots in for a takedown but Holland avoids it really well and circles away.
Fantastic stuff here - a very entertaining period of action, which has drawn cheers from the crowd.
Howard throws a head kick but Holland moves out of range.
Holland looks to score with a combo but nothing lands.
Howard dives in for a single leg takedown but Holland sprawls and the fighters end up clinched against the cage.
Holland is looking for a takedown up against the cage. Howard gets underhooks though and prevents the takedown attempt.
That's one minute gone in the round.
Holland jumps guard but Howard stands there with Holland around his waist. Holland gives up and drops back to his feet. We remain in the clinch.
Howard is really dominating this fight. Is there anything that Holland can do to turn this around?
Holland taking a break, stalling in the clinch.
Howard gets underhooks to prevent Holland's takedown attempt.
Jayson Howard has stuffed three takedown attempts in the round now. That's going to take a lot out of Seck Holland.
Holland fails to pull guard.
Holland tries to jump guard but he falls flat on his backside. Howard smiles and moves away.
Howard shoots in for a takedown but doesn't get it.
Howard will have to do better than that with his takedown attempts.
Holland feints the counter takedown.
Howard displays good takedown defense there as he swats away a double leg from Holland.
Howard misses with a half-hearted attempt at a head kick.
Holland is trying to counter with his kicks.
Howard changes levels and looks for a double leg takedown. Holland tries to avoid it but Howard manages to keep hold of a leg and drag Holland to the ground. Holland escapes though and pops straight back up to his feet.
Both fighters are absolutely exhausted here.
That's two minutes gone in the round.
Holland closes the distance and pushes Howard back into the cage.
Stalling in the clinch from Holland.
Holland jumps guard but Howard stands there with Holland around his waist. Holland gives up and drops back to his feet. We remain in the clinch.
Holland escapes the clinch and we're back to striking.
Howard throws a head kick but Holland moves out of range.
Holland swats away the attempt to clinch by Howard.
Holland on the wrong end of a vicious looking body shot.
Howard throws a head kick but Holland moves out of range.
Howard throws a head kick but Holland moves out of range.
Howard tries to clinch but is not successful on this occasion.
That's three minutes gone in the round.
Howard moves out of range of the body kick from Holland.
Holland shoots in for a takedown from distance. He catches Howard napping and manages to drive through into side control!
Holland wants to control for a moment but Howard uses the opportunity to move back to half guard.
Howard is refusing to be controlled, as Holland sits in half guard.
Howard is looking to control Holland's leg but it's slowly edging free. Can Howard avoid being mounted?
Holland wants to free his trapped foot but Howard is holding on for dear life with his legs.
Holland really doesn't want to stay on the ground with Howard. If he can't get it back to his feet, it's only a matter of time before he'll be tapping out.
Holland thows a huge punch but Howard dodges it nicely.
That's four minutes gone in the round.
Holland seems very keen to just sit and control from half guard but Howard does not like that idea so much and is remaining active off his back.
Holland controlling the pace.
Holland missing with some ground and pound from the half guard.
Well, if Holland is going to just lie there, perhaps we should talk about what we're having for dinner tonight
I'm having a ham and pineapple pizza
Yum. Can't wait.
Holland tries to pass to full mount but Howard defends it.
The referee has decided to stand the fighters back up, so we'll restart on the feet.
Holland drives through with a takedown into Howard's guard. Let's see what he can do from the top position.
And that is the end of the round. The fighters go back to their corners.
That was a close second round but I would say that Jayson Howard will probably get the nod.
The minute break is over - no more time for sponges and pep talks - back to the action! This is the final round!

Howard tries to clinch up against the cage, rushing in to close the distance. Holland manages to break the clinch and circles back to the middle of the mat.
Holland fails miserably with a takedown attempt.
Howard has a takedown stuffed.
Holland changes levels for a counter takedown but doesn't follow through with his attempt.
Holland drops down and drives through with a powerful takedown into guard.
Holland is intent on slowing down the pace of the fight, simply looking to control.
Holland must be cautious of submissions here, given that his opponent has the superior Jiu Jitsu.
Holland trying to control the position from guard on top but Howard is wriggling around, looking for whatever he can.
The fighters are pressed up against the cage, both looking to find a bit of space to work.
We've had a slow start to the round here - hopefully the action picks up.
Holland engaging in some classic timewasting tactics.
Holland pressing down on his opponent's thigh, looking to pass guard. Howard is keeping the position for now.
That's one minute gone in the round.
Holland is still trying to improve position.
Howard wants to sweep here but Holland controlling him for the moment.
The referee is asking the fighters to pick up the pace.
Holland looking to pass the guard.
The referee decides to stand the fighters back up.
That's two minutes gone in the round.
The crowd are showing their displeasure at the lack of action as loud boos ring out around the arena.
A slapping leg kick lands for Howard.
Holland dives in and grabs Howard's left leg, looking for a takedown. Howard pushes down on Holland's head and hops out.
Holland ducks down and throws a hook to the body but Howard moves away.
Jab, cross, leg kick. Nice combination by Howard!
Howard fails with an attempt to clinch.
Holland shoots in for a takedown. "I don't think so" says Howard as he avoids it easily.
Jayson Howard has stuffed three takedown attempts in the round now. That's going to take a lot out of Seck Holland.
Howard closes the distance and lands a one-two.
Holland shoots in for a takedown but Howard shows good takedown defense there and keeps this one on the feet.
Howard is looking for a counter combo.
Holland closes the distance and clinches.
Holland tries to jump guard but he falls flat on his backside. Howard smiles and moves away.
Holland closes the distance and clinches up with Howard, looking for a takedown. Holland pushes Howard against the cage but Howard circles to the side and manages to break the clinch.
Holland takes a big intake of breath there - he's definitely tired.
Howard lands with a kick to the temple. Holland shrugs as if to say "is that all you've got?"
A head kick misses from Howard.
That's three minutes gone in the round.
Howard tries to clinch but is not successful on this occasion.
Jayson Howard is looking to throw some combinations by the looks of things.
Howard throws a head kick but Holland moves out of range.
Howard shoots in and drives through. Holland sprawls well.
Jayson Howard is winning the standup battle so far.
Howard is looking to take this fight into the clinch.
Howard throws a head kick that misses and slips in the process. He scrambles back to his feet and the fighters circle.
Howard tries to clinch up but Holland circles away and keeps his distance.
Howard tries to land a front kick but Holland steps back. That was a bit too telegraphed.
Holland flicks out a counter leg kick but Howard steps away.
Holland clinches.
The referee is keeping an eye on Holland - much more stalling and he will separate the fighters.
Holland tries to pull guard but Howard holds him up against the cage and eventually Holland drops back down to his feet.
Holland drops down looking for an ankle pick but Howard pulls his leg out and moves away.
That's four minutes gone in the round.
Howard fails to land the takedown.
Holland tried to score with a low kick but Howard checks it.
Howard is looking for a counter combo.
Howard looks for the body kick but Holland saw that one coming.
Holland shoots in for a takedown. He's persisting with it as Howard sprawls well. Howard wins this battle and keeps the fight standing. Holland gets slowly back to his feet.
Howard lets the fists fly and connects with a left straight followed by a right hook.
The crowd thankful this round is nearly over.
Howard throws a quick head kick that skims the top of Holland's head.
Seck Holland has stepped it up - he knows he needs a finish here!
Jayson Howard is fighting for a decision here - he's started to take the cautious approach.
Holland throws a half hearted mid kick.
Howard is trying to close the distance and clinch up, after that failed offence from Holland.
And that's the end of the fight!
Jayson Howard showed his dominance in that final round.
Well I reckon that's a shut out for Howard, winning every round. Will the judges agree? They are the ones who matter, even if they are often depressingly incompetent. Over to the ring announcer for the scorecards.
Ladies and gentlemen, after 3 rounds of action, we go to the scorecards for a decision.
Judge Hugh Johnson scores the fight for Jayson Howard!
Judge Damien Edna scores the fight for Jayson Howard!
Judge Chris Dean scores the fight for Jayson Howard!
Jayson Howard wins by unanimous decision!
|
|
|
|
|
|
|
|
|
|
|
|
|
|
|
|
|
|
|
|
|
|
|
| S |
C
A |
G |
S |
C
B |
G |
|
S |
C |
G |
|
energy
A | B |
|
hype
A | B |
|
pop
A | B |
|
mgr
A | B |
|
FIGHT
RATING
44% |
|
|
|
|
|
|
|
Undercard bout
|
Coming up we have a super heavyweight MMA rules bout between Jon Nurmagomedov (ranked 4464 p4p, 4710 weight class) and Chris Bellemy (ranked 0 p4p, 0 weight class). We have two fighters making their debuts here, so let's see who comes out of this one with their first professional victory.
 |
|
 |
| 185 cm
18
190
0 - 0 - 0 |
|
200 cm
23
200
0 - 0 - 0 |
BJJ Blue Belt
Counter fighter
Big heart |
|
BJJ White Belt
Good kicks
Determined |
|
| |
|
Ladies and gentlemen. This fight is 3 rounds, in the super heavyweight division.
Introducing the fighter to my left, fighting out of the red corner.
With a record of 0 - 0 - 0, fighting out of Sydney, Jon Nurmagomedov!
And introducing the fighter to my right, fighting out of the blue corner.
With a record of 0 - 0 - 0, fighting out of Sydney, Chris Bellemy!
The judges for this bout are Donatello Bradman, Darius Henderson and Ben Hemmingworth.
The bell rings for round one and we are underway!
Bellemy drives through with a takedown into guard.
Nurmagomedov utilising some decent striking defenses from the guard, preventing the ground and pound.
Nurmagomedov is avoiding any damage by keeping wrist control.
Nurmagomedov might be looking to lock onto one of his opponent's long limbs for a submission, whilst we're on the ground.
Bellemy wants to control from the top but Nurmagomedov keeps moving.
The ref warns both fighters not to hold the cage as they work up against the meshing.

Bellemy stands up and waves to Nurmagomedov to follow him.
Bellemy rushes Nurmagomedov and presses him up against the cage.
We've had a slow start to the round here - hopefully the action picks up.
Bellemy is defending well against a takedown attempt.
That's one minute gone in the round.
Bellemy wants a takedown.
Nurmagomedov goes for a takedown in the clinch but Bellemy prevents it.
Bellemy wants to break free but Nurmagomedov has control.
Bellemy is trying to work out of this bad position, with his back against the cage.
Bellemy gets through Nurmagomedov's defenses to land a nice punch to the side of the head.
Bellemy is looking for a takedown up against the cage. Nurmagomedov gets underhooks though and prevents the takedown attempt.
Bellemy is looking for a takedown up against the cage. Nurmagomedov gets underhooks though and prevents the takedown attempt.
Jon Nurmagomedov has stuffed three takedown attempts in the round now. That's going to take a lot out of Chris Bellemy.
Bellemy has had enough of the clinch but Nurmagomedov keeps him there for the moment.
Nurmagomedov drops to a knee looking for a takedown but Bellemy gets the underhooks and prevents it.
That's two minutes gone in the round.
The crowd are hurling abuse towards the fighters... You can hardly blame them though because there isn't a lot going on in the fight.
Bellemy's corner calls for him to break the clinch, which he does.
Bellemy clinches up with Nurmagomedov and pushes him back against the cage.

Nurmagomedov turns his hips and lands a very nice judo throw into side control!
Nurmagomedov is pausing for a moment. What's he doing? It looks like he's clearing his nose. Oh dude! He's shot a load of snot all down Bellemy's shoulder. That is not cool.
Nurmagomedov working away.
Bellemy trying to remain calm as Nurmagomedov controls from the top position.
The fighters are pressed up against the cage, both looking to find a bit of space to work.
Nurmagomedov working away.
That's three minutes gone in the round.
Bellemy misses with an elbow from the bottom.
We get told so often about how wrestlers don't like to be on their backs. Let's see if Bellemy can do anything to dispel that myth.
Nurmagomedov just content to control the position.
Bellemy sneaks a leg under to get back to half guard.
Nurmagomedov looks over to his corner - he wants some instructions but his corner are not responding.
Bellemy trying to control here.
Nurmagomedov seems content to maintain position for now, rather than mounting any offense.
Bellemy is trying to maintain the position but Nurmagomedov is very close to passing his half guard.
Bellemy looks winded!
That's four minutes gone in the round.
The crowd are getting on the fighters' backs, as the pace has dropped off in the last minute or so.
Nurmagomedov takes a deep breath and rests his weight momentarily on top of his opponent, to control the position.
Nurmagomedov's ground tactics aren't going to win him many fans. Let's hope he's got fireworks for us if he gets back to his feet because he's not doing much on the ground.
The ref stands the fighters back up due to a lack of activity.
Bellemy falls off balance throwing a combination
so Nurmagomedov counters with a double leg into guard. Good agility.
Nurmagomedov controlling from the top position.
Nurmagomedov seems to have a rather negative gameplan on the ground. He seems keen to just score the takedown and hold down Bellemy for as long as he can get away with.
The crowd thankful this round is nearly over.
Bellemy wants to stand up but Nurmagomedov is controlling him.
And that is the end of the round. The fighters go back to their corners.
A close round but Chris Bellemy will probably get the nod.
The fighters' corners scream their final instructions, as the referee calls time. Here we go, back to the action!
Bellemy with a poor takedown
and Nurmagomedov counters with a nice double leg into side control. Bellemy won't be happy with that.
Bellemy being controlled for a moment.
Further stalling from Nurmagomedov.
Jon Nurmagomedov overall seems to be getting the better of the ground position in the fight so far.
Bellemy is looking to regain half guard here but Nurmagomedov keeps moving and retains side control.
Nurmagomedov remains in side control and seems content to stay there. It's a versatile position from which he can work both strikes and submissions, whilst maintaining that control, so maybe he'll sit here for a while.
We've had a slow start to the round here - hopefully the action picks up.
That's one minute gone in the round.
Bellemy is looking for a sweep.
The referee asks Nurmagomedov politely if he wouldn't mind getting on with it and actually doing something. Nurmagomedov prefers to stall for the moment though.
Bellemy wants to get back to his feet.
Nurmagomedov is staying tight to Bellemy's torso, preventing him from escaping.
Nurmagomedov continues to stall.
Bellemy is breathing heavily.
That's two minutes gone in the round.
The crowd are showing their displeasure at the lack of action as loud boos ring out around the arena.
The referee has stepped in and called for a break in the action. We'll restart on the feet.
Bellemy has Nurmagomedov up against the cage in a clinch.
Bellemy lands a damaging elbow.
Bellemy has had enough of the clinch and is looking to separate.
Bellemy breaks the clinch.
Nice takedown defense from Nurmagomedov. No joy for Bellemy on that attempt.
Nurmagomedov changes levels looking for a counter takedown but doesn't commit.
Bellemy misses with a body shot.
Nurmagomedov attempts a counter takedown but Bellemy avoids it well and moves away.
That's three minutes gone in the round.
Bellemy fails with a rather predictable takedown attempt.
Nurmagomedov changes levels looking for a counter takedown but doesn't commit.
Jon Nurmagomedov has stuffed three takedown attempts in the round now. That's going to take a lot out of Chris Bellemy.
No luck with that takedown attempt from Bellemy.
Nurmagomedov feinted with a counter takedown.
Nurmagomedov stuffs the takedown.
Nurmagomedov drops down looking for a counter takedown but Bellemy sprawls and moves away.
Bellemy shoots in for a takedown. "I don't think so" says Nurmagomedov as he avoids it easily.
Nurmagomedov feinted with a counter takedown.
Bellemy misses with a body shot. Nice footwork from Nurmagomedov.
Nurmagomedov appears to be looking for a counter takedown.
Bellemy wants to clinch.
Nurmagomedov half commits to a counter takedown before pushing away, out of range.
That's four minutes gone in the round.
Bellemy tries to close the distance and clinch up against the cage but Nurmagomedov paws at him with a jab and circles away.
Bellemy shoots in but Nurmagomedov avoids the takedown attempt easily.
Nurmagomedov tries to counter with a takedown but Bellemy is quick to defend against it.
Boooooooooooooooooooo!!! God, this has been a terrible round. Come on you two, sort yourselves out!
Bellemy looks for a takedown here. Will he get it? Nurmagomedov is fending him off so far but Bellemy persists. Nope, Nurmagomedov circles away and we're back to standing.
Bellemy fails miserably with a takedown attempt.
Nurmagomedov half commits to a counter takedown before pushing away, out of range.
And that is the end of the round. The fighters go back to their corners.
Jon Nurmagomedov dominated that second round.
That's time! Back to the action! Let's get this one finished - here comes the final round!
Bellemy thows a leg kick but Nurmagomedov checks it
and Nurmagomedov counters with a nice shoot takedown that brings the fighters to the ground.
Nurmagomedov stays in close to Bellemy's body and controls the position.
Bellemy not looking particularly offensive just at the moment.
Bellemy can't do much from the bottom at the moment, as Nurmagomedov controls the pace.
Bellemy working a defensive guard here.
We've had a slow start to the round here - hopefully the action picks up.
Bellemy had isolated an arm as going for a kimura. Nurmagomedov defends it easily.
Nurmagomedov is taking a break and basically stalling. The referee will not allow him to do that for long.
The referee is pacing around the two fighters, thinking about a standup.
Bellemy takes a big intake of breath there - he's definitely tired.
That's one minute gone in the round.
More hug and hope from Nurmagomedov.
The referee has decided to stand the fighters back up, so we'll restart on the feet.
Bellemy goes for a double leg but Nurmagomedov avoids the attempt and the two fighters end up clinched against the cage as Nurmagomedov continues to drive forward.
Nurmagomedov drops down looking for a counter takedown but Bellemy sprawls and moves away.
Bellemy is looking to take this fight into the clinch.
Bellemy shoots for a takedown but Nurmagomedov saw that one coming a mile off and avoided it easily.
Nurmagomedov appears to be looking for a counter takedown.
Bellemy shoots for a takedown but Nurmagomedov saw that one coming a mile off and avoided it easily.
Jon Nurmagomedov has stuffed three takedown attempts in the round now. That's going to take a lot out of Chris Bellemy.
Bellemy moves to clinch but Nurmagomedov breaks away
and Nurmagomedov decides to take the opportunity to score a takedown. He's landed in Bellemy's guard.
That's two minutes gone in the round.
Nurmagomedov controls the pace of the fight for a moment.
That's three minutes gone in the round.
Nurmagomedov stops Bellemy from standing up.
We've had a lack of effective grappling in the last minute or so, which could well see a referee standup.
Nurmagomedov controls from within his opponent's guard.
The referee has stepped in and called for a break in the action. We'll restart on the feet.
Chris Bellemy seems to be the more aggressive standup fighter in this bout.
Bellemy shoots in for a takedown. He's persisting with it as Nurmagomedov sprawls well. Nurmagomedov wins this battle and keeps the fight standing. Bellemy gets slowly back to his feet.
Bellemy has a takedown stuffed.
Bellemy shoots in but no luck this time.
Nurmagomedov appears to be looking for a counter takedown.
That's four minutes gone in the round.
A lull in the action here being met with boos from the crowd.
Bellemy doesn't succeed with the takedown
and Nurmagomedov counters with a shoot takedown. Bellemy fights it but they end up in guard.
Nurmagomedov stands and throws Bellemy's legs to the side, diving into side control.
Nurmagomedov controlling from side mount.
Nurmagomedov has controlled the position for a good 20 seconds, which will no doubt be starting to frustrate his opponent.
Chris Bellemy has stepped it up - he knows he needs a finish here!
Jon Nurmagomedov is fighting for a decision here - he's started to take the cautious approach.
Boooooooooooooooooooo!!! God, this has been a terrible round. Come on you two, sort yourselves out!
Bellemy tries to buck Nurmagomedov off but Nurmagomedov is having none of it.
Bellemy is being controlled here.
And that's the end of the fight!
Jon Nurmagomedov showed his dominance in that final round.
I think Nurmagomedov has won this one but let's see what the judges have to say. Over to the ring announcer for the scorecards.
Ladies and gentlemen, after 3 rounds of action, we go to the scorecards for a decision.
Judge Donatello Bradman scores the fight for Jon Nurmagomedov!
Judge Darius Henderson scores the fight for Jon Nurmagomedov!
Judge Ben Hemmingworth scores the fight for Jon Nurmagomedov!
Jon Nurmagomedov wins by unanimous decision!
|
|
|
|
|
|
|
|
|
|
|
|
|
|
|
|
|
|
|
|
|
|
|
| S |
C
A |
G |
S |
C
B |
G |
|
S |
C |
G |
|
energy
A | B |
|
hype
A | B |
|
pop
A | B |
|
mgr
A | B |
|
FIGHT
RATING
27% |
|
|
|
|
|
|
|
Undercard bout
|
Coming up we have a super heavyweight MMA rules bout between Ramon Reems (ranked 0 p4p, 4670 weight class) and Dammt Tauwi (ranked 0 p4p, 0 weight class). We have two fighters making their debuts here, so let's see who comes out of this one with their first professional victory.
 |
|
 |
| 190 cm
18
265
0 - 0 - 0 |
|
156 cm
21
155
0 - 0 - 0 |
Good wrestling
Brawler
Cuts easily |
|
BJJ Purple Belt
Brawler
Enjoys gardening |
|
| |
|
Ladies and gentlemen. This fight is 3 rounds, in the super heavyweight division.
Introducing the fighter to my left, fighting out of the red corner.
With a record of 0 - 0 - 0, fighting out of Sydney, Ramon Reems!
And introducing the fighter to my right, fighting out of the blue corner.
With a record of 0 - 0 - 0, fighting out of Sydney, Dammt Tauwi!
The judges for this bout are John Mangel, Hugh Johnson and Francis DeMontford.
The bell rings for round one and we are underway!
Reems connects nicely with a jab. Noted by the judges no doubt.
Reems could do with losing a few pounds - he looks very soft around the mid section, to put it politely.
Reems misses with a right hand
and Tauwi counters with a three punch combo that has Reems backing up. Reems nods at Tauwi to acknowledge the strikes.
Reems is the aggressor but that punch slipped nicely by Tauwi.
Reems has managed to clinch.
Reems misses with a hook from the clinch.
Tauwi trying to control the position but instead, Reems has worked for underhooks and has pushed Tauwi into the cage.
Tauwi blocks a punch to the side of the head.
An uppercut on the inside fails to land for Reems.
A head punch on the inside from Reems fails to land.
Tauwi is trying to pull guard but Reems turns him against the cage and we stay in the clinch.
Reems misses with the head strike.
Tauwi tries to score a body lock takedown but Reems shows good agility there to stay on his feet.
Tauwi blocking some punches.
Reems misses with some punches.
Tauwi is struggling to control the position.
Tauwi tries to pull guard but Reems holds him up against the cage and eventually Tauwi drops back down to his feet.
Ramon Reems has stuffed three takedown attempts in the round now. That's going to take a lot out of Dammt Tauwi.
Reems fails to land with a short punch on the inside.
That's one minute gone in the round.
Tauwi tries to pull guard but Reems holds him up against the cage and eventually Tauwi drops back down to his feet.
Tauwi manages to pull guard. Let's see whether he can land a sub off his back.
Reems is intent on slowing down the pace of the fight, simply looking to control.
Reems trying to control but Tauwi is working from the bottom.
Reems controls the pace of the fight for a moment.
Tauwi is working from a closed guard but he's struggling to control his opponent.
Tauwi keeping moving, preventing Reems from controlling successfully.
Reems is intent on slowing down the pace of the fight, simply looking to control.
Tauwi tries to strike from the bottom.
We've had a lack of effective grappling in the last minute or so, which could well see a referee standup.
Reems will need to keep those long limbs tucked in whilst he's on the ground, to prevent any submissions.
That's two minutes gone in the round.
There's not a lot going on here and the crowd are letting the fighters know they're not willing to tolerate a lack of action.
Reems sitting in guard here, content to control.
The referee has stepped in and called for a break in the action. We'll restart on the feet.
Tauwi gets caught napping as Reems dives in and scores a takedown. Tauwi manages to retain guard.
Reems wants to control from the top but Tauwi keeps moving.
Reems has to be careful here, sitting in the guard of a superior BJJ player.
Reems wants to pass the guard but Tauwi is keeping the position.
Tauwi not looking particularly offensive just at the moment.
Reems sitting in guard here, content to control.
Reems wants to control from the top but Tauwi keeps moving.
It looks like the ref is thinking about a standup.
That's three minutes gone in the round.
The ref stands the fighters back up due to a lack of activity.
Reems throws an off balance right hand
and Tauwi counters with a crisp hook to the side of the head.
Tauwi gets tackled into the cage by Reems. Reems maintains the clinch.
Reems misses with a short punch on the inside.
Tauwi has a body lock and is looking for a takedown. Reems is bouncing around trying to prevent the takedown and somehow he has indeed managed to stay on his feet.
Reems throws a head punch that misses.
Tauwi drops down looking for an ankle pick but Reems pulls his leg out and moves away.
Reems is looking to take this fight into the clinch.
Reems misses with a takedown attempt. He shot from a bit too far out.
Reems misses with a right hand
and Tauwi counters with a stiff right hand.
Reems throws the left hand but Tauwi avoids the punch easily.
Reems gets caught napping as Tauwi dives in and scores a takedown. Reems manages to retain guard.
Tauwi looks winded!
Tauwi won't allow Reems to get back to his feet.
That's four minutes gone in the round.
Reems wants to get back to his feet but Tauwi passes into half guard.
Tauwi stops Reems from getting back to his feet.
Reems knows he needs to get back to his feet asap. He's simply no match for Tauwi on the ground.
Reems is trying to escape back to his feet but Tauwi uses the scramble to pass into side control.
The fighters are pressed up against the cage, both looking to find a bit of space to work.
This has been an exciting period of action!
Reems tries to get back to his feet but has found himself mounted instead. Damn, that's gotta suck.
Reems is trying to stand up.
Reems trying desperately to get back to his feet here but he's not having any joy at all. He's going to tire himself out if he's not careful.
Tauwi is in the full mount, landing strikes.
Reems squirming around on the bottom, looking to escape.
Reems tries to buck Tauwi off but Tauwi takes his back!
And that is the end of the round. The fighters go back to their corners.
A close round but Dammt Tauwi will probably get the nod.
The corners get their ten second warning. Both fighters stand from their stools and stare each other down, ready to get back to the action.
Tauwi slips a straight right by Reems.
Reems throws an overhand right that lands on Tauwi's shoulder, as Tauwi tries to avoid the shot.
Reems tries to close the distance and clinch up against the cage but Tauwi paws at him with a jab and circles away.
Tauwi fails with a takedown attempt.
Reems closes the distance and clinches.
Reems working aggressively here.
Tauwi has a body lock and is looking for a takedown. Reems is bouncing around trying to prevent the takedown and somehow he has indeed managed to stay on his feet.
Reems misses with the head strike.
We've had a slow start to the round here - hopefully the action picks up.
An uppercut on the inside fails to land for Reems.
Tauwi blocking some punches.
Reems working aggressively here.
Tauwi wants a takedown but no success here.
Ramon Reems has stuffed three takedown attempts in the round now. That's going to take a lot out of Dammt Tauwi.
Reems misses with a hook from the clinch.
Tauwi jumps guard but Reems turns him against the cage and keeps the fight standing.
That's one minute gone in the round.
Tauwi tries to take the fight to the ground by pulling guard but can't manage it.
Tauwi is trying to push Reems away but Reems has him pressed against the cage, so he's going nowhere.
An uppercut on the inside fails to land for Reems.
Tauwi trying to land knees to the body.
Reems misses with a punch on the inside.
Reems gets underhooks to prevent Tauwi's takedown attempt.
Reems misses with a hook from the clinch.
Reems misses with a punch on the inside.
A head punch blocked on the inside by Tauwi.
A head punch on the inside from Reems fails to land.
A head punch on the inside from Reems fails to land.
Reems tries a shoulder strike but it doesn't do any damage.
Reems fails to land with a short punch on the inside.
Ramon Reems has scored more points in the clinch so far.
Reems has a couple of punches blocked by Tauwi.
Tauwi tries to break the clinch but Reems is controlling the position.
Tauwi jumps guard.
Reems trying to control the position from guard on top but Tauwi is wriggling around, looking for whatever he can.
That's two minutes gone in the round.
Reems looking to pass the guard.
Reems slows down the pace of the fight, as he sits in guard.
Tauwi is trying to control the position from the bottom.
Tauwi is breathing heavily.
Reems wants to pass the guard but Tauwi is keeping the position.
Reems is working hard here to advance position.
Reems slows down the pace of the fight for a moment. He'll need to remain active if he doesn't want to see the fight stood back up.
Reems wants to control from the top but Tauwi keeps moving.
Reems is going to have to think about doing something other than just controlling because Tauwi is managing to avoid having the position dictated to him.
That's three minutes gone in the round.
Reems tries to free his leg and advance position but Tauwi is retaining full guard.
Dammt Tauwi has got the better of the ground game so far.
Reems trying to control the position from guard on top but Tauwi is wriggling around, looking for whatever he can.
Reems slows down the pace of the fight for a moment. He'll need to remain active if he doesn't want to see the fight stood back up.
The referee has stepped in and called for a break in the action. We'll restart on the feet.
Reems misses with a lunging right hand
letting Tauwi counter with a right hand.
Tauwi closes the distance and clinches.
Reems fails to land with a short punch on the inside.
Tauwi blocking some punches.
Tauwi looking for a takedown.
Reems swings away with an uppercut that misses.
Reems misses with the head strike.
Tauwi working hard to break the clinch.
An uppercut on the inside fails to land for Reems.
Tauwi blocking some punches.
Reems swings away with an uppercut that misses.
A head punch on the inside from Reems fails to land.
That's four minutes gone in the round.
Reems misses with a punch on the inside.
A real battle for position is taking place between these two warriors.
Tauwi tries to break the clinch but Reems is controlling the position.
Reems can't get the takedown.
Reems has a couple of punches blocked by Tauwi.
Reems working aggressively here.
Tauwi tries to break free but Reems pushes him back against the cage.
Reems misses with the head strike.
A head punch on the inside from Reems fails to land.
Reems misses with a short punch on the inside.
Reems throws a head punch that misses.
Tauwi taking a breather.
Reems is really dominating this fight. Is there anything that Tauwi can do to turn this around?
The crowd thankful this round is nearly over.
Tauwi blocks a punch to the side of the head.
Tauwi blocks a couple of punches on the inside.
Reems misses with a hook from the clinch.
Reems has Tauwi pressed up against the cage and is working for takedown. Tauwi manages to improve position though and keeps the fight standing.
And that is the end of the round. The fighters go back to their corners.
Ramon Reems dominated that second round.
The minute break is over - no more time for sponges and pep talks - back to the action! This is the final round!
Tauwi looking for a takedown here - he's got it.
Reems wants to get back to his feet but Tauwi passes into half guard.
Reems is trying to stand back up but Tauwi is controlling him
Reems is not content to let Tauwi control the position.
Tauwi takes a deep breath and rests his weight momentarily on top of his opponent, to control the position.
Reems wants to stand back up but Tauwi manages to pass into side control.
Reems is trying to stand and escape here. He's got onto all fours but that's just let Tauwi take his back! Uh oh - Tauwi has got a rear naked choke here! Reems is forced to tap! It's all over! One monent is all it takes in this sport!
Ladies and gentlemen, after 0:43 of round 3, we have a winner by way of Submission (RNC). Dammt Tauwi!
|
|
|
|
|
|
|
|
|
|
|
|
|
|
|
|
|
|
|
|
|
|
|
| S |
C
A |
G |
S |
C
B |
G |
|
S |
C |
G |
|
energy
A | B |
|
hype
A | B |
|
pop
A | B |
|
mgr
A | B |
|
FIGHT
RATING
43% |
|
|
|
|
|
|
|
Undercard bout
|
Coming up we have a super heavyweight MMA rules bout between Finan McFlanagon (ranked 4467 p4p, 4711 weight class) and Thrall Nithstang (ranked 0 p4p, 0 weight class). We have two fighters making their debuts here, so let's see who comes out of this one with their first professional victory.
 |
|
 |
| 203 cm
23
270
0 - 0 - 0 |
|
181 cm
18
193
0 - 0 - 0 |
BJJ White Belt
Good knees
KO power |
|
Good wrestler
Brawler
Likes musicals |
|
| |
|
Ladies and gentlemen. This fight is 3 rounds, in the super heavyweight division.
Introducing the fighter to my left, fighting out of the red corner.
With a record of 0 - 0 - 0, fighting out of Sydney, Finan McFlanagon!
And introducing the fighter to my right, fighting out of the blue corner.
With a record of 0 - 0 - 0, fighting out of Sydney, Thrall Nithstang!
The judges for this bout are Ben Hemmingworth, Ron Honeybunn and Francis DeMontford.
The bell rings for round one and we are underway!
McFlanagon tries to clinch up but Nithstang circles away and keeps his distance.
McFlanagon darts in and out, connecting with a jab.
Nithstang is looking to clinch.
McFlanagon tries to clinch up but Nithstang circles away and keeps his distance.
Nithstang throws a nice looking combination but McFlanagon bobs and weaves to avoid any damage.
McFlanagon displays good takedown defense there as he swats away a double leg from Nithstang.
Finan McFlanagon seems to be the more aggressive standup fighter in this bout.
Nice body punch from McFlanagon.
McFlanagon is looking to clinch but Nithstang is avoiding it.
McFlanagon is looking to clinch but Nithstang is avoiding it.
Nithstang closes the distance and gets a trip takedown into side control. McFlanagon quickly recovers to half guard.
McFlanagon wants to control but Nithstang is keeping busy.
McFlanagon tries to roll over but Nithstang keeps him under control.
McFlanagon is looking to regain full guard. He's left an arm up in the air though and Nithstang has latched onto it... Big trouble! Nithstang pivots for an armbar - it's in tight and it McFlanagon is tapping in no time flat! Great counter grappling there from Nithstang!
Ladies and gentlemen, after 1:56 of round 1, we have a winner by way of Submission (Armbar). Thrall Nithstang!
|
|
|
|
|
|
|
|
|
|
|
|
|
|
|
|
|
|
|
|
|
|
|
| S |
C
A |
G |
S |
C
B |
G |
|
S |
C |
G |
|
energy
A | B |
|
hype
A | B |
|
pop
A | B |
|
mgr
A | B |
|
FIGHT
RATING
68% |
|
|
|
|
|
|
|
Co-main event
|
Coming up we have a super heavyweight MMA rules bout between Lauricio Aranda (ranked 4637 p4p, 4544 weight class) and Bon Gamin (ranked 0 p4p, 0 weight class). We have two fighters making their debuts here, so let's see who comes out of this one with their first professional victory.
 |
|
 |
| 190 cm
18
220
0 - 0 - 0 |
|
196 cm
23
247
0 - 0 - 0 |
BJJ Purple Belt
Brawler
Cuts easily |
|
BJJ White Belt
Excellent boxer
Heavy handed |
|
| |
|
Ladies and gentlemen. This fight is 3 rounds, in the super heavyweight division.
Introducing the fighter to my left, fighting out of the red corner.
With a record of 0 - 0 - 0, fighting out of Sydney, Lauricio Aranda!
And introducing the fighter to my right, fighting out of the blue corner.
With a record of 0 - 0 - 0, fighting out of Sydney, Bon Gamin!
The judges for this bout are Bruno Hogan, Darius Henderson and Francis DeMontford.
The bell rings for round one and we are underway!
Aranda tries to drive through with a takedown attempt but Gamin defends well and Aranda ends up having to push Gamin into the cage where they will battle it out in the clinch.
Gamin gets double underhooks to prevent a takedown attempt from Aranda.
Stalling in the clinch from Aranda.
Aranda tries to pull guard but Gamin won't allow it.
That's three failed takedown attempts in the round for Lauricio Aranda. That's going to take a lot out of him.
Gamin lands an elbow inside that Aranda shrugs off.
 It looks like Lauricio Aranda has been cut. It looks like Lauricio Aranda has been cut.
Aranda is working on a leg, looking for a takedown but Gamin is defending well.
Aranda breaks the clinch and we return to the middle of the mat.
Gamin connects with a single shot there.
We've had a slow start to the round here - hopefully the action picks up.
Nice straight punches there by Gamin. You know Roy Jones Jr respects the hands of Gamin.
Lauricio Aranda's cut is getting worse.
Aranda looks up at the clock. Bad move! Gamin lands a right hand from hell, dropping Aranda. Gamin pounces and finishes the fight with a flurry of punches and elbows.
Ladies and gentlemen, after 0:54 of round 1, we have a winner by way of TKO (Strikes). Bon Gamin!
|
|
|
|
|
|
|
|
|
|
|
|
|
|
|
|
|
|
|
|
|
|
|
| S |
C
A |
G |
S |
C
B |
G |
|
S |
C |
G |
|
energy
A | B |
|
hype
A | B |
|
pop
A | B |
|
mgr
A | B |
|
FIGHT
RATING
62% |
|
|
|
|
|
|
|
Main event
|
Coming up we have a super heavyweight MMA rules bout between Walt White (ranked 3105 p4p, 4525 weight class) and Sebastiao Dias (ranked 0 p4p, 156 weight class). We have two fighters making their debuts here, so let's see who comes out of this one with their first professional victory.
 |
|
 |
| 174 cm
18
140
0 - 0 - 0 |
|
200 cm
21
280
0 - 0 - 0 |
BJJ White Belt
Solid Muay Thai
Granite chin |
|
BJJ Purple Belt
Solid Muay Thai
Prefers standup |
|
| |
|
Ladies and gentlemen. This fight is 3 rounds, in the super heavyweight division.
Introducing the fighter to my left, fighting out of the red corner.
With a record of 0 - 0 - 0, fighting out of Sydney, Walt White!
And introducing the fighter to my right, fighting out of the blue corner.
With a record of 0 - 0 - 0, fighting out of Sydney, Sebastiao Dias!
The judges for this bout are Francis DeMontford, Ron Honeybunn and Winston Howard.
The bell rings for round one and we are underway!
Excellent takedown into side control there by White.

White decides to stand up, so the ref orders Dias to his feet.
Dias waves his right hand out in front of him, looking to distract White. Oh, he's unloaded a beast of a left hand - it worked! He's dropped White to the canvas! Can he finish him!?
It looks like Walt White has been cut.
The crowd cheering loudly, showing their appreciation for the quality fight we're seeing here.
Dias throws a big right hand that misses.

White looking for a guillotine here but Dias defends easily.
Dias working some ground and pound from guard but it's not doing any damage.
White avoiding any damage from the ground and pound.
Dias is taking a break and basically stalling. The referee will not allow him to do that for long.
Dias scoring with some ground and pound.
White is rocked!
The fighters are pressed up against the cage, both looking to find a bit of space to work.
Dias postures up, still in guard. A huge hammer fist lands that bounces White's head off the mat! White is out! He's out! Dias jumps to his feet and celebrates with his corner!
Ladies and gentlemen, after 1:55 of round 1, we have a winner by way of KO (Strikes). Sebastiao Dias!
|
|
|
|
|
|
|
|
|
|
|
|
|
|
|
|
|
|
|
|
|
|
|
| S |
C
A |
G |
S |
C
B |
G |
|
S |
C |
G |
|
energy
A | B |
|
hype
A | B |
|
pop
A | B |
|
mgr
A | B |
|
FIGHT
RATING
86% |
|
|
|
|
|
|
|
|
|
|
