|
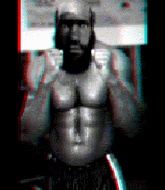
TWGC 37 (265+lbs, D1): New York Qualifier - Round 1 PBP Commentary |
Undercard bout
|
This TWGC bout is 1 fifteen minute round in the super heavyweight division. Introducing today's competitors. In the red corner, competing out of New York, with a TWGC record of 14 wins and 21 losses; Don Lemieux! And in the blue corner, fighting out of New York, with a TWGC record of 18 wins and 10 losses; Shaka Zulu!
The judges for this bout are Eddie Farnsworth, Jonathan Paton and Bruno Lombardi.
The official calls the fighters to the middle and the contest is under way.
Zulu swats away the attempt to clinch by Lemieux.#TD#
Lemieux manages to get an easy takedown there - catching Zulu on his heels. He'll look to pass Zulu's guard now, I'm sure. Score +2 for takedown into guard / half guard: Lemieux (2) vs (0) Zulu
Lemieux pressing down on his opponent's thigh, looking to pass guard. Zulu is keeping the position for now.
Zulu trying to control the position here.
We've had a slow start to the round here - hopefully the action picks up.
Lemieux preventing the sweep.
The fighters are pressed up against the cage, both looking to find a bit of space to work.#T1#
Lemieux stands up and looks to throw the legs aside to pass to side control. Zulu swivels though and keeps the full guard.
Lemieux preventing the sweep.
Zulu is working the butterfly guard. He manages to land a nice scissor sweep and is now in half guard on the top. Nice move. Score +2 for sweep to guard / half guard: Lemieux (2) vs (2) Zulu
Lemieux wants to control but Zulu is keeping busy and won't allow it.
Lemieux wants to get back to full guard.
Zulu content to control rather than advance.
Lemieux has been talking about how he's improved his wrestling in the run up to the fight so let's see if that's enough to sway the balance.
Lemieux is looking to regain full guard. Not this time though. #T2#
Lemieux won't allow Zulu to pass to mount.
Lemieux is trying is best to control the position here.
Lemieux is looking to regain full guard. Not this time though.
Zulu controlling the pace.
Lemieux wants to get back to full guard.
Lemieux is concentrating on defense, preventing Zulu from advancing position.
Zulu is just sitting in half guard, waiting for something to happen.#T3#
Lemieux has no desire to be mounted, so is trying to control. Zulu is working away from the top position though.
Zulu looking to pass the half guard. Not this time.
Zulu not doing much here.
Lemieux is looking to regain full guard. Not this time though.
Lemieux is trying to maintain the position but Zulu is very close to passing his half guard.#T4#
Lemieux is trying is best to control the position here.
Zulu seems content to maintain position for now, rather than mounting any offense.
Zulu trying to pass the guard but Lemieux defending well. #SUB#
Lemieux looking for submissions from an awkward position here.
Lemieux is working for an escape here. He's hooked one of Zulu's legs and he's managed to sneak out and take Zulu's back! Score +4 for clean sweep to past guard: Lemieux (6) vs (2) Zulu#T5##SUB#
Lemieux goes for a risky armbar from back mount and it's not paid off. Zulu escapes and is now in half guard on top. Score +2 for sweep to guard / half guard: Lemieux (6) vs (4) Zulu
Lemieux might be looking to lock onto one of his opponent's long limbs for a submission, whilst we're on the ground.
Lemieux has his hands clasped together around Zulu's back. He's all about the action.
Zulu seems content to maintain position for now, rather than mounting any offense.
Lemieux wants to improve his position but Zulu is controlling well.
#T6#
Zulu is just sitting in half guard, waiting for something to happen.
Lemieux moves his hips nicely and gets into full guard.
The ref warns both fighters not to hold the cage as they work up against the meshing.
Zulu is stalling in the full guard.
Lemieux is trying to control the position but Zulu postures up.
Zulu is intent on slowing down the pace of the fight, simply looking to control.#T7#
Lemieux working a defensive guard here.
Lemieux being controlled here, momentarily.
Lemieux wants to control the position but Zulu says "no thanks buddy" and passes to half guard.
Neither fighter is being very active at the moment, with Zulu in particular looking to stall.
Zulu moves nicely into side control. Score +3 for passing guard: Lemieux (6) vs (7) Zulu#T8#
Lemieux stops Zulu from passing to mount.
Lemieux is looking to regain half guard here but Zulu keeps moving and retains side control.
Lemieux is trying to control Zulu's posture but Zulu avoids it.
Zulu controlling from side mount. #T9#
Lemieux sneaks back into half guard.
Zulu seems content to maintain position for now, rather than mounting any offense. #SUB#
Lemieux is looking to sinch up a guillotine here but Zulu pulls his head out easily.
Zulu wants to free his trapped foot but Lemieux is holding on for dear life with his legs. #T10#
Zulu is figuring out what he wants to do next.#T11#
Lemieux is trying to get back to full guard.
Lemieux wants to get back to full guard but Zulu has passed into side control. Score +3 for passing guard: Lemieux (6) vs (10) Zulu
Lemieux prevents Zulu from improving position.
Zulu controls the position.#T12#
Lemieux is looking to regain half guard here but Zulu keeps moving and retains side control.
A lull in the action here as Zulu stalls from top position.
Lemieux is trying to control Zulu's posture but Zulu avoids it.
Zulu moving around in side mount but really he's just happy to control for now. #T13#
Lemieux is looking to reverse the position.
Zulu is pausing for a moment. What's he doing? It looks like he's clearing his nose. Oh dude! He's shot a load of snot all down Lemieux's shoulder. That is not cool.
You can see the frustration on Lemieux's face, being in this tough position on the bottom.
Zulu controls the position.
Zulu wants to control but Lemieux is keeping him busy.
Zulu advances to mount. Score +2 for reaching mount: Lemieux (6) vs (12) Zulu#T14#
Lemieux wants to control but Zulu is having none of it.
Zulu looking to control and managing it successfully.
Zulu avoids the attempt from Lemieux to control.
Lemieux stops Zulu from taking his back. Still, being mounted isn't any better.
Boooooooooooooooooooo!!! God, this has been a terrible round. Come on you two, sort yourselves out!
Zulu controlling the position easily from mount.
Lemieux tries to get back to half guard but can't.
And that's the end of the fight!
Zulu wins on points by 12 to 6.
Shaka Zulu decided to thank the fans in attendance for making a great atmosphere. It seemed to go down pretty well. |
|
|
|
Undercard bout
|
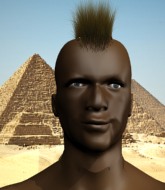
This TWGC bout is 1 fifteen minute round in the super heavyweight division. Introducing today's competitors. In the red corner, competing out of Los Angeles, with a TWGC record of 0 wins and 0 losses; Bobby Chunks! And in the blue corner, fighting out of Las Vegas, with a TWGC record of 0 wins and 0 losses; Stevo Caruga!
The judges for this bout are Reed Andrews, John Roberts and Jonathan Paton.
The official calls the fighters to the middle and the contest is under way.
Caruga has his takedown stuffed#CL#
and Chunks counters by moving into the clinch. #TD#
Chunks works for the underhooks and manages to get a trip takedown into guard. Score +2 for takedown into guard / half guard: Chunks (2) vs (0) Caruga
Chunks will need to keep those long limbs tucked in whilst he's on the ground, to prevent any submissions.
Chunks is just sitting in guard, looking to avoid any submissions.
Chunks wants to control from the top but Caruga keeps moving. #SUB2#
Caruga working for a triangle but Chunks defends it easily.
Chunks passes easily into side control. Nice work. Score +3 for passing guard: Chunks (5) vs (0) Caruga
Caruga is not content to let Chunks control the position.
Caruga looks more muscular than last time we saw him. He must have been on the weights.
We've had a slow start to the round here - hopefully the action picks up.
The referee tells the fighters to keep busy.
Chunks trying to control the action but Caruga is working from the bottom.
Caruga is looking for a sweep.#T1#
You can see the frustration on Caruga's face as Chunks controls the position.
Caruga tries to buck Chunks off but Chunks is having none of it.
Caruga holds on to Chunks's head and controls the position momentarily.
The ref warns both fighters not to hold the cage as they work up against the meshing.
Chunks is looking to take a break and control but Caruga is keeping him honest, looking to work from the bottom. #SUB#
Chunks thinks about going for a far side armbar but bails out and retains the dominant position instead. #SUB#
Chunks tries for an arm triangle. That looks pretty tight to me. Is this one over!?! Possibly, maybe, no Chunks has let go of the choke. Obviously it wasn't as tight as we thought!
Caruga sneaks back into half guard.
Caruga is trying to control but can't.
Chunks has been talking about how he's improved his wrestling in the run up to the fight so let's see if that's enough to sway the balance.
Caruga is trying to avoid being dragged into an even worse position than he's already in but Chunks is staying active.#T2#
Chunks is looking to pass the guard... He's managed it - he's now in full mount! Score +3 for passing guard: Chunks (8) vs (0) Caruga#SUB#
Chunks wants to finish this one by submission but Caruga is holding onto his waist, trying to prevent any attacks from Chunks.
Caruga tries to hold on but Chunks pushes him away.
Caruga is trying desperately to improve position.
Chunks moves to the back position. Score +3 for taking back: Chunks (11) vs (0) Caruga
Caruga staying busy and making it hard for Chunks to control. #SUB#
Chunks has his opponent's back and is working for the choke. #SUB#
Chunks is persistently looking for the submission but Caruga is defending it well.
#SUB#
Chunks is working hard for the rear naked choke here.
#SUB#
Chunks is working for the rear naked choke. He has one arm under the chin but Caruga has hold of the other arm. A bit of a stalemate here. #T3#
Chunks not allowing Caruga to control his hands.
Caruga wants to escape the position.
Chunks avoiding Caruga 's attempts to control his hands. #SUB#
Chunks working from the back looking to end the fight with a rear naked choke. Caruga is doing well to defend. Chunks seems to have got his hand under the chin though and he's sunk the choke in! Caruga is forced to tap and this one is over!
Ladies and gentlemen, after 3:37 of round 1, we have a winner by way of Submission (RNC). Bobby Chunks!
Bobby Chunks decided to go for the less than humble approach in his post fight interview, telling everyone how he is going to conquer the world. The crowd seemed to like it when really that sort of approach could have gone either way. |
|
|
|
Co-main event
|
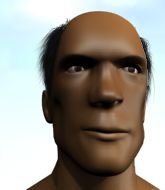
This TWGC bout is 1 fifteen minute round in the super heavyweight division. Introducing today's competitors. In the red corner, competing out of New York, with a TWGC record of 2 wins and 1 losses; Ibrahim Camara! And in the blue corner, fighting out of Sydney, with a TWGC record of 0 wins and 0 losses; Lasha Abashidze!
The judges for this bout are Reed Andrews, Bruno Lombardi and Russell Pearce.
Let's get this grappling contest under way! Who will be victorious?#TD2#
Abashidze is looking for a takedown here. He's shot in and has managed to get it, finishing up in Camara's half guard. Score +2 for takedown into guard / half guard: Camara (0) vs (2) Abashidze
Abashidze not doing much here.
Camara has been talking about how he's improved his wrestling in the run up to the fight so let's see if that's enough to sway the balance.
Abashidze's corner are shouting for him to control the position and he seems happy to oblige.
Abashidze trying to mount his opponent but Camara defends it.
We've had a slow start to the round here - hopefully the action picks up.
Abashidze stalling away here and it's allowed Camara to slip out his trapped foot and regain full guard.
Abashidze is just sitting in guard, looking to avoid any submissions. #T1#
Camara is trying to control the position but Abashidze postures up.
Abashidze looking to pass the guard.
Abashidze showing good wrestling skills to control the position.
Abashidze trying to control the position from guard on top but Camara is wriggling around, looking for whatever he can. #T2#
Camara is pulling down on Abashidze's head to control his posture.
Camara trying to control the position.
Camara is avoiding any damage by keeping wrist control. #T3#
Abashidze showing good wrestling skills to control the position.
The fighters are pressed up against the cage, both looking to find a bit of space to work.
Abashidze wants to control from the top but Camara keeps moving.
Abashidze might have to switch it up a bit here because his efforts to control Camara haven't been going to plan, at least at the current moment in time.
Abashidze tries to free his leg and advance position but Camara is retaining full guard. #T4#
Abashidze forces his way into half guard.
Camara keeps control of the position for the meantime.
Camara is looking to improve his position.
Abashidze looking to pass the half guard. Not this time.
Abashidze stalling.
Abashidze wants to pass to mount but Camara is defending the position. #T5#
Abashidze is figuring out what he wants to do next.
The ref warns both fighters not to hold the cage as they work up against the meshing.
Abashidze seems very keen to just sit and control from half guard but Camara does not like that idea so much and is remaining active off his back.
Abashidze not doing much here.
Camara trying to control but Abashidze postures up.
#T6#
Abashidze is trying to control. Camara wants to improve his position but can't escape this time.
Abashidze is figuring out what he wants to do next.
Abashidze working to pass to mount. He's got his hand pressing down on Camara's thigh. Camara counters though and makes it back to full guard.
Camara not looking particularly offensive just at the moment.
Abashidze is taking a break and basically stalling. The referee will not allow him to do that for long.
Camara keeping full guard, as Abashidze tries to pass. #T7#
Abashidze trying to control but Camara is working from the bottom.
Abashidze pushing down on Camara's thigh, trying to pass to half guard. He's managed it... Nice work.
Camara is staying active underneath Abashidze, who seems content to just control the action from this position.
Camara tries to get to full guard but Abashidze has control of the leg.
Abashidze trying to control the action but Camara is working from the bottom.
Abashidze is looking to advance position but Camara won't allow it.
Abashidze perhaps working for something from half guard, or maybe not. It looks like he's just sitting there. #T8#
Camara regains full guard. Nicely done.
Camara can't do much from the bottom at the moment, as Abashidze controls the pace.
Let's hope that Abashidze has the urge to step up the pace any second now because for the last 15 or 20 seconds he's just been holding on tight.
Camara controlling Abashidze's posture. #T9#
Camara keeping moving, preventing Abashidze from controlling successfully.
Camara keeping full guard, as Abashidze tries to pass.
Abashidze trying to control the position from guard on top but Camara is wriggling around, looking for whatever he can.
Abashidze looking to pass the guard.
Abashidze stays in close to Camara's body and controls the position. #T10#
Camara controls Abashidze momentarily but Abashidze frees himself.
Abashidze trying to control the position from guard on top but Camara is wriggling around, looking for whatever he can.
Camara keeping full guard, as Abashidze tries to pass.
Abashidze wants to control from the top but Camara keeps moving.
Abashidze controlling from the top position. #T11#
Camara keeping full guard, as Abashidze tries to pass.
Abashidze trying to control but Camara is working from the bottom.
Camara is pulling down on Abashidze's head. It's preventing any offense from Abashidze, at least for the moment.
Abashidze forces his way into half guard.#SUB2#
Abashidze is looking for a kimura but Camara is holding onto that half guard position, so it's hard for Abashidze to get the leverage. #T12#
Abashidze wants to pass the guard but Camara is defending well.
Abashidze works his way into full mount! Score +3 for passing guard: Camara (0) vs (5) Abashidze
Abashidze wants to control the pace but Camara is squirming around nicely. #SUB2#
Abashidze is working on an americana here. Ooh, that looks pretty nasty! Nope, Camara has managed to escape the submission attempt.
Abashidze controlling his opponent. #T13#
Abashidze wants to control the pace but Camara is squirming around nicely.
Camara tries to get back to half guard but can't.
Abashidze tries to control but Camara wriggling away.
Camara keeping his composure momentarily, calmly looking to get back to half guard.
Abashidze wants to control the pace but Camara is squirming around nicely.
Abashidze controlling the pace for now.
Abashidze looking to control but Camara is working nicely, looking to advance position himself. #T14#
Abashidze tucks in and makes sure he doesn't lose the dominant position.
Abashidze tries to control but Camara wriggling away.
Abashidze tucks in and makes sure he doesn't lose the dominant position.
Boooooooooooooooooooo!!! God, this has been a terrible round. Come on you two, sort yourselves out!
Camara is wriggling around trying to escape.
And that's the end of the fight!
Abashidze wins on points by 5 to 0. |
|
|
|
Main event
|
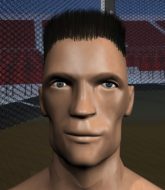
This TWGC bout is 1 fifteen minute round in the super heavyweight division. Introducing today's competitors. In the red corner, competing out of Las Vegas, with a TWGC record of 10 wins and 10 losses; Charley Hanagan! And in the blue corner, fighting out of Montreal, with a TWGC record of 9 wins and 2 losses; Bob Le Boulder!
The judges for this bout are Columbo Gatti, Reed Andrews and Russell Pearce.
Let's get this grappling contest under way! Who will be victorious?
Hanagan has a takedown stuffed.
Le Boulder throws a looping left and ducks down for a takedown. He's got his arms around Hanagan's waist but Hanagan gets an underhook and avoids the takedown by throwing Le Boulder off to one side. #TD#
Le Boulder tries to sprawl but Hanagan drives through with a takedown into half guard. Score +2 for takedown into guard / half guard: Hanagan (2) vs (0) Le Boulder
Hanagan keeping composed on the top, looking to control the action.
Hanagan will need to keep those long limbs tucked in whilst he's on the ground, to prevent any submissions.
Hanagan wants to lay and pray for a moment but Le Boulder keeps working.
Hanagan prevents Le Boulder from improving his position.
Still in half guard, Hanagan seems content to control.
Hanagan trying to pass the guard but Le Boulder defending well.
Le Boulder is trying to get back to full guard.
We've had a slow start to the round here - hopefully the action picks up.
Hanagan is pressing down on Le Boulder's thigh, looking to free his foot. Le Boulder is holding on for now.
Hanagan seems content to maintain position for now, rather than mounting any offense.
Hanagan has been talking about how he's improved his wrestling in the run up to the fight so let's see if that's enough to sway the balance.
Hanagan's ground tactics aren't going to win him many fans. Let's hope he's got fireworks for us if he gets back to his feet because he's not doing much on the ground.#T1#
Hanagan prevents Le Boulder from improving his position.
Hanagan not doing much here.
Le Boulder wants to control but Hanagan is keeping busy and won't allow it.
Le Boulder is trying to avoid being dragged into an even worse position than he's already in but Hanagan is staying active.
Le Boulder wants to get back to full guard.
Le Boulder has found himself in a tricky position here. He's been working his transitions in training so let's see if he can work his way out of it.
Hanagan looking to pass the half guard. Not this time.
Le Boulder wants to get back to full guard.
Le Boulder trying to control but Hanagan postures up.
Le Boulder wants to control the action here but instead Hanagan manages to pass to full mount! Score +3 for passing guard: Hanagan (5) vs (0) Le Boulder
Hanagan wants to take his opponent's back but Le Boulder doesn't allow it.
Le Boulder is looking to improve his position but Hanagan isn't that keen on the idea.#T2#
Hanagan controlling from mount.
Le Boulder tries to reverse the position but Hanagan maintains control.
Le Boulder prevents Hanagan from taking his back.
Le Boulder really trying hard to get back to half guard here.
Hanagan avoids the attempt from Le Boulder to control.
Le Boulder manages to regain half guard. Good work.
Le Boulder wants to control but Hanagan is keeping busy and won't allow it.
Hanagan tries to pass to full mount but Le Boulder defends it.
The referee calls for the fighters to work.
Le Boulder wants to improve his position but Hanagan is controlling well.
Hanagan trying to control the pace. #T3#
Le Boulder tries to get to full guard but Hanagan has control of the leg.
Le Boulder is doing well to avoid being mounted. He's controlling the position at the moment.
Le Boulder is looking for a sweep. Hanagan is wise to his cunning plan and keeps the top position.
Le Boulder trying to control here.
Hanagan trying to pass the guard but Le Boulder defending well.
Le Boulder trying to hold on to Hanagan's head to control him but Hanagan postures up.
Hanagan is trying to control. Le Boulder wants to improve his position but can't escape this time.
Le Boulder is trying to get back to full guard.
Hanagan looks over to his corner - he wants some instructions but his corner are not responding. #T4#
Le Boulder tries to roll over but Hanagan keeps him under control.
Le Boulder is looking to control Hanagan's leg but it's slowly edging free. Can Le Boulder avoid being mounted?
Le Boulder tries to get to full guard but Hanagan has control of the leg.
Hanagan trying to control the action but Le Boulder is working from the bottom.
Hanagan controlling the pace.
Le Boulder is pressing down on Hanagan's left leg trying to get back to full guard. He's managed it.
Hanagan wants to control from the top but Le Boulder keeps moving.
Le Boulder tries to land a sweep but no joy. #T5#
Le Boulder working a defensive guard but Hanagan manages to pass into side control anyway.
Score +3 for passing guard: Hanagan (8) vs (0) Le Boulder
Le Boulder is moving his hips around well on the bottom and has managed to get back to half guard.
Le Boulder keeping control of the leg, stopping his opponent passing to mount.
Le Boulder regains full guard. Nicely done.
Le Boulder is adopting a defensive guard.
Le Boulder not looking particularly offensive just at the moment.
Hanagan is intent on slowing down the pace of the fight, simply looking to control.
Hanagan stopping the sweep attempt from Le Boulder.
Hanagan trying to control the position from guard on top but Le Boulder is wriggling around, looking for whatever he can.
Hanagan controls the pace of the fight for a moment.#T6#
Hanagan passes Le Boulder's right leg, so he's now in half guard.
Hanagan sitting and controlling from the half guard.
Le Boulder is trying to maintain the position but Hanagan is very close to passing his half guard.
Hanagan is controlling the pace.
The fighters are pressed up against the cage, both looking to find a bit of space to work.
Le Boulder is looking to regain full guard. Not this time though.
Le Boulder preventing any damage for now, controlling his opponent's head.
Hanagan wants to control but Le Boulder is keeping him busy.
Hanagan looking to pass the half guard. Not this time.
Le Boulder is looking for a sweep. Hanagan is wise to his cunning plan and keeps the top position.#T7#
Le Boulder is trying to maintain the position but Hanagan is very close to passing his half guard.
Hanagan wants to pass to mount but Le Boulder is defending the position.
Le Boulder wants to improve his position but Hanagan is controlling well.
Hanagan wants to control but Le Boulder is keeping him busy. #SUB#
Hanagan is working for a kimura but Le Boulder is defending it quite comfortably.
Le Boulder works his way to full guard. Good work.
Le Boulder looking to sweep here. No luck so far.
Le Boulder working a defensive guard but Hanagan manages to pass into side control anyway.
Score +3 for passing guard: Hanagan (11) vs (0) Le Boulder
Le Boulder is looking for a sweep.
Hanagan is staying tight to Le Boulder's torso, preventing him from escaping. #T8#
Hanagan working away.
Le Boulder is looking for a sweep.
Le Boulder being controlled for a moment.
Hanagan tries to move into full mount but can't pass Le Boulder's legs.
Le Boulder tries to improve position but can't.
Hanagan trying to control the action but Le Boulder is working from the bottom.
Le Boulder is looking for a sweep.
Le Boulder seems a little lost for a moment, as Hanagan dominates the positioning.
Le Boulder tries to work a leg under to get back to half guard but Hanagan wriggles his own leg back out and remains in side control.
Le Boulder is still trying to improve position.#T9#
Hanagan just content to control the position.
Le Boulder tries to get back to half guard but can't.
Hanagan tries to move to mount but Le Boulder blocks the move with his legs.
Le Boulder is moving his hips around well on the bottom and has managed to get back to half guard.
Hanagan wants to pass the guard but Le Boulder is defending well.
Le Boulder has no desire to be mounted, so is trying to control. Hanagan is working away from the top position though.
Hanagan slows the pace down in half guard. #T10##SUB#
Hanagan is trying for a guillotine from the top but the pressure isn't in the right place so Le Boulder is just riding it out for now. Hanagan eventually gives up the hold.
Le Boulder is looking for a sweep. Hanagan is wise to his cunning plan and keeps the top position.
Hanagan with a momentary lay and pray from half guard.
Hanagan prevents Le Boulder from improving his position.
Le Boulder trying to control from the bottom.
Hanagan wants to free his trapped foot but Le Boulder is holding on for dear life with his legs.
Hanagan prevents Le Boulder from improving his position.
Hanagan content to sit in half guard and control for a moment. #T11#
Le Boulder is controlling Hanagan's position as best he can from this difficult position.
Le Boulder won't allow Hanagan to pass to mount.
Le Boulder is trying to control but Hanagan passes into side control!
Score +3 for passing guard: Hanagan (14) vs (0) Le Boulder
Hanagan trying to control the position but Le Boulder is working away.
Le Boulder is trying to control Hanagan's posture but Hanagan avoids it.
Le Boulder is looking to reverse the position.
Le Boulder can't do much from the bottom here.
Le Boulder manages to get one leg in to regain half guard.
Hanagan trying to pass the guard but Le Boulder defending well.
Hanagan is thwarting Le Boulder's attempts to control the position.#T12#
Le Boulder moves into full guard.
Le Boulder can't do much from the bottom at the moment, as Hanagan controls the pace.
Le Boulder has Hanagan pulled in close to control his posture.
Hanagan is intent on slowing down the pace of the fight, simply looking to control.
Hanagan trying to control but Le Boulder is working from the bottom.
A real slowdown in the pace of the fight for a moment, as Le Boulder holds on and takes a little breather.
Le Boulder working a defensive guard here.
Le Boulder looking for a sweep. Not yet Le Boulder, not yet.
Le Boulder has a closed guard, preventing anything of note from happening. Perhaps he's looking to stall.
Le Boulder working a defensive guard here.
#T13#
Hanagan won't allow Le Boulder to sweep him here. #SUB2#
Le Boulder has his foot on Hanagan's thigh. He's trying to push off and get in position for a triangle, I think. Hanagan works his way back into a safe position though.
Le Boulder can't do much from the bottom at the moment, as Hanagan controls the pace.
Le Boulder has a closed guard, preventing anything of note from happening. Perhaps he's looking to stall.
The ref warns both fighters not to hold the cage as they work up against the meshing.#T14#
Hanagan is intent on slowing down the pace of the fight, simply looking to control.
There's a bit of a scramble here and now Le Boulder is on top in guard.
Score +2 for sweep to guard / half guard: Hanagan (14) vs (2) Le Boulder
Le Boulder preventing the sweep.
Le Boulder slows down the pace of the fight, as he sits in guard.
Hanagan is trying to control the position from the bottom.
Hanagan keeping moving, preventing Le Boulder from controlling successfully.
Boooooooooooooooooooo!!! God, this has been a terrible round. Come on you two, sort yourselves out!
Le Boulder slows down the pace of the fight for a moment. He'll need to remain active if he doesn't want to see the fight stood back up.
And that's the end of the fight!
Hanagan takes the fight on points by 14 to 2.
A victorious Charley Hanagan thanked his army of followers in his post fight interview, telling people to make sure they follow him on Twitter. |
|
|
|
|
|
|