 |
WCMMA Semi-Final PBP Commentary |
Undercard bout
|
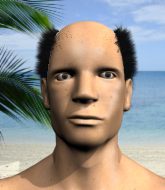
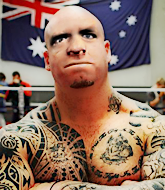
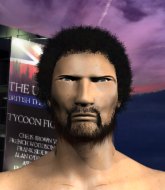
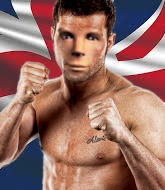
Coming up we have a super heavyweight MMA rules bout between Judas Gonzalez (ranked 25070 p4p, 3204 weight class) and Ryan Wallaby (ranked 235 p4p, 165 weight class). Over to our ring announcer for the fighter introductions!
 |
|
 |
| 225 cm
19
300
1 - 3 - 0 |
|
195 cm
19
300
3 - 2 - 0 |
BJJ White Belt
Excellent boxer
Very strong |
|
BJJ White Belt
Excellent boxer
Heavy handed |
|
| |
|
Ladies and gentlemen. This fight is 3 rounds, in the super heavyweight division.
Introducing the fighter to my left, fighting out of the red corner.
With a record of 1 - 3 - 0, fighting out of Amsterdam, Judas Gonzalez!
And introducing the fighter to my right, fighting out of the blue corner.
With a record of 3 - 2 - 0, fighting out of Sydney, Ryan Wallaby!
The judges for this bout are Jonathan Paton, Lou da Vinci and David Schapiro.

The bell rings for round one and we are underway!
Gonzalez misses with a straight left.
Wallaby digs a good hook to Gonzalez's body.
Wallaby throws a poor cross that misses
and Gonzalez counters with a straight right hand.
 It looks like Ryan Wallaby has been cut. It looks like Ryan Wallaby has been cut.
Wallaby fakes high and swings low for a body shot but Gonzalez manages to avoid it.
Gonzalez misses with a right hand
and Wallaby counters with a lovely straight right hand!
 It looks like Judas Gonzalez has been cut. It looks like Judas Gonzalez has been cut.
Gonzalez jabbing away but nothing is landing.
Wallaby punishes Gonzalez's body with a nice straight punch.
Gonzalez swings and misses with a hook to the body.
Wallaby scores with a reasonable looking shot to the body. Gonzalez doesn't seem bothered though.
Wallaby misses with a straight right.
Wallaby's coach down at Combat Wombat Burrow was telling us pre-fight that they have been working on Wallaby's balance. Obviously they view that as a key factor in the outcome of this fight.
Gonzalez loads up on a big right hand but Wallaby slips the punch.
And an attempted straight right on the counter from Wallaby! But no joy.
Wallaby lands with a good body shot.
Gonzalez is breathing heavily.
Gonzalez uses decent footwork to sidestep a right hand from Wallaby.
A telegraphed right hand from Wallaby misses the target.
This has been an exciting period of action!
Wallaby bobs and weaves well there to avoid the strikes.
Gonzalez misses the shot to the body.
Wallaby throws a poor cross that misses
and Gonzalez counters with a one-two to the body.

That's one minute gone in the round.
Wallaby lands a nice looking body shot.
Wallaby scores with a sloppy punch to the body. Not much technique there but it did the business.
Wallaby scores with a hook.
Wallaby misses with a jab and misses with a cross straight after too.
Ryan Wallaby seems to be the more aggressive standup fighter in this bout.
Jab from Wallaby.
Wallaby fakes a head punch and goes low to the body. Nicely done.

Wallaby lands a big right hand that sends Gonzalez crashing to the mat! Wallaby stays standing though and waves Gonzalez back to his feet!
 Gonzalez is rocked! Gonzalez is rocked!
The crowd cheering loudly, showing their appreciation for the quality fight we're seeing here.
Gonzalez loses concentration momentarily and Wallaby pounces with a three punch combo! Right, left, right! Gonzalez crashes face first to the mat, out cold! Wallaby finishes this one with a fantastically precise combo! Great stuff.
Ladies and gentlemen, after 1:35 of round 1, we have a winner by way of KO (Punches). Ryan Wallaby!
After winning the bout, Ryan Wallaby thanked all his fans and promised he'd do even better in his next fight. The crowd seemed to love his humility.
|
|
|
|
|
|
|
|
|
|
|
|
|
|
|
|
|
|
|
|
|
|
|
| S |
C
A |
G |
S |
C
B |
G |
|
S |
C |
G |
|
energy
A | B |
|
hype
A | B |
|
pop
A | B |
|
mgr
A | B |
|
FIGHT
RATING
81% |
|
|
|
|
|
|
|
Undercard bout
|
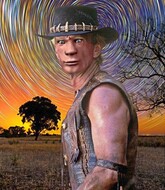
Coming up we have a welterweight MMA rules bout between Loco Coco (ranked 2403 p4p, 3353 weight class) and Drew Peacock (ranked 311 p4p, 404 weight class). Coco kept the crowd waiting but all that was forgotten when his ring entrance music started. The incomparable musical genius that is KORDHELL - MURDER PLOT. Peacock is bobbing his head along to his entrance song: John Williamson - True Blue. The atmosphere really building for this one as we go over to our ring announcer for the fighter introductions!
 |
|
 |
| 180 cm
19
170
2 - 3 - 0 |
|
177 cm
19
170
3 - 2 - 0 |
BJJ Blue Belt
Solid boxing
Very strong |
|
Good wrestler
Counter fighter
Granite chin |
|
| |
|
Ladies and gentlemen. This fight is 3 rounds, in the welterweight division.
Introducing the fighter to my left, fighting out of the red corner.
With a record of 2 - 3 - 0, fighting out of Las Vegas, Loco Coco!
And introducing the fighter to my right, fighting out of the blue corner.
With a record of 3 - 2 - 0, fighting out of New York, Drew Peacock!
The judges for this bout are John Kavanagh, Franklyn Lucas and John Roberts.
The bell rings for round one and we are underway!
Coco throws an uppercut from half a mile away. Peacock sees it coming and avoids it easily.
Coco swings away with a body shot that misses
and Peacock cracks him with a counter punch right on the button.

Peacock closes the distance and presses his opponent up against the cage.
Peacock throws a head punch that misses.
A short right from Coco.
A shot in the inside from Coco.
Peacock looks more muscular than last time we saw him. He must have been on the weights.
Coco blocks a punch to the side of the head.
Peacock lands with a good tight uppercut to the head.
Peacock struggles to land a body shot inside as Coco controls his hands.
Peacock lands a body punch.
Coco throws a head punch that misses.
Coco tries to throw a body punch but Peacock avoids it by throwing Coco back against the cage.
Peacock lands with a quick shot inside that doesn't really do much damage.
Peacock lands a body punch in the clinch.
Coco works for underhooks and lands a body shot in the process.
The crowd cheering loudly, showing their appreciation for the quality fight we're seeing here.
A short left from Peacock.
Peacock doesn't land with the attempted body shot.
Peacock misses with some punches.
Coco misses with a shot to the kidneys.
Coco working some nice short punches in the clinch.
Coco lands a right hand that snaps the head of Peacock backwards.
Coco blocks a couple of punches on the inside.
Coco lands with a short head shot on the inside.
That's one minute gone in the round.
Peacock misses with the head strike.
Peacock misses with a shot to the kidneys.
Coco swings wildly with an uppercut but Peacock uses good head movement to avoid it.
Coco can't find room to land a body shot as Peacock controls the action.
With the fighters clinched against the cage, Coco creates a bit of distance for himself and scores with a nice uppercut.
Peacock pushes Coco back against the cage and lands a hook to the side of the head.
A left hand lands to the body for Coco.
Coco lands a left hand.
Coco misses with a hook to the ribs.
Coco digs a right hand into Peacock's ribs. Those have got to be taking their toll on Peacock's gas tank.
Peacock tries a body shot but Coco blocks it.
Peacock throws a punch but it's blocked by Coco.
Coco misses with a body punch.
Peacock throws a head punch that misses.
Peacock's head jolts backwards as he takes an uppercut right on the button!
Peacock lands a body shot.
A head punch blocked on the inside by Coco.
Coco works on Peacock's body with a couple of short punches.
Peacock misses with a punch on the inside.
Peacock lands with a short punch from the clinch.
Fantastic stuff here - a very entertaining period of action, which has drawn cheers from the crowd.
Peacock tries to work over Coco's body with a swooping hook but it only glances the target.
Coco scores with a hook to the body.

That's two minutes gone in the round.
Coco prevents a body shot from Peacock.
Coco lands a body punch.
Peacock working on landing some head shots here - that one got through nicely.
Still in the clinch, Coco scores with a nice short uppercut.
Peacock blocks an uppercut.
Coco misses with a hook from the clinch.
An uppercut to the body lands inside from Coco.
Coco digs a right hand underneath Peacock's ribcage. Peacock let out a lung full of air as it connected.
Nice body punch from Coco.
Coco misses with a hook to the ribs.
Peacock softening up his opponent with strikes, against the cage.
Peacock lands with a left to the head.
A head punch on the inside from Peacock fails to land.
Peacock working some nice short punches in the clinch.
Coco misses with a punch to the body.
Peacock prevents a body shot from Coco.
Coco lands a nice looking hook to the body, against the cage.
Peacock doesn't land with the attempted body shot.
Peacock lands with a right to the head.
An uppercut to the body lands inside from Coco.
A short right hand to the side of the head by Coco.
Coco tries to throw a body punch but Peacock avoids it by throwing Coco back against the cage.
A short right hand to the side of the head by Peacock.

That's three minutes gone in the round.
Peacock struggles to land a body shot inside as Coco controls his hands.
A nice left hand lands by Peacock.
Coco swings away with an uppercut that misses.
Coco lands a hook that snaps the head of Peacock backwards.
Coco gets through Peacock's defenses to land a nice punch to the side of the head.
Coco lands a left hand that snaps the head of Peacock backwards.
Peacock can't find room to land a body shot as Coco controls the action.
Peacock blocks a body shot from Coco.
A short right from Coco on the inside.
A head punch on the inside from Peacock fails to land.
Coco lands a shot to the body.
Peacock works on Coco's body with a couple of short punches.
Coco misses with a hook to the ribs.
A short right hand to the side of the head by Peacock.
Peacock tries to work over Coco's body with a swooping hook but it only glances the target.
A right hook to the body lands for Coco.
Peacock throws a punch but it's blocked by Coco.
A quick uppercut on the inside from Coco.
The fans in attendance giving it up for the two fighters, who have really let it all hang out in the last minute or so!
With the fighters clinched against the cage, Peacock creates a bit of distance for himself and scores with a nice uppercut.
A short uppercut from Coco.
Coco lands a short shot on the inside that snaps the head of Peacock backwards.
Coco throws a punch but it's blocked by Peacock.

That's four minutes gone in the round.
Coco swings away with an uppercut that misses.
Peacock misses with the head strike.
Peacock struggles to land a body shot inside as Coco controls his hands.
Good body shot from Peacock.
Peacock blocks a punch to the side of the head.
Coco misses with a body punch.
Coco works for underhooks and lands a body shot in the process.
A head punch blocked on the inside by Peacock.
Peacock blocks a punch to the side of the head.
A head punch blocked on the inside by Peacock.
Coco tried to land a shot to the body but connects with Peacock's elbow.
Coco lands with a light punch inside.
Coco lands with a left to the head.
Peacock tries to work over Coco's body with a swooping hook but it only glances the target.
Coco tries to work over Peacock's body with a swooping hook but it only glances the target.
Coco blocks a couple of punches on the inside.
I was talking to Coco's coach per-fight and he was telling me that they'd been working on the clinch in the runup to this fight.
The crowd applaud the fighters' efforts here as the round comes to an end.
Peacock slows down the pace here.
Coco misses with some punches.
Nice body punch from Coco - that landed with a thud.
Coco lands a body punch.
And that is the end of the round. The fighters go back to their corners.
Loco Coco dominated that round.
That's the end of the interval. I'm sure that seemed a lot quicker than a minute for our two fighters! Back to the action.

Peacock tries to clinch but Coco moves out of range.
Coco throws a shot from downtown. Peacock moves away and avoids it.
Peacock slips under a jab.
Peacock doesn't fully commit to the body shot counter.
Peacock avoids the body shot from Coco.
Peacock has closed the distance and engaged Coco in a clinch.
A quick uppercut on the inside from Coco.
Coco tried to land a shot to the body but connects with Peacock's elbow.
Coco fails to land with a short punch on the inside.
A right hand to the body from Peacock.

Coco breaks the clinch and we return to the middle of the mat.
Peacock throws a hard body shot but it just misses.
Peacock missing with a left hand there. Coco was out of range so wasted energy throwing that one.
Coco falls off balance throwing a combination
and Coco takes a counter punch right on the button for his troubles.
We are yet to see a takedown attempt from Peacock in the fight. On paper you would think he is the more dominant ground fighter so let's see if these unusual tactics pay off.
We've had a slow start to the round here - hopefully the action picks up.
Coco misses with a body shot. Nice footwork from Peacock.
Peacock looks like he wants to counter punch here.
Peacock has closed the distance and engaged Coco in a clinch.
Peacock presses Coco against the cage and delivers a mid-strength body shot.
Coco misses with some punches.
That's one minute gone in the round.
A head punch on the inside from Coco fails to land.
Coco tried to land a shot to the body but connects with Peacock's elbow.
Coco tries to work over Peacock's body with a swooping hook but it only glances the target.
Peacock lands with a good tight uppercut to the head.
A head punch on the inside from Peacock fails to land.
Coco struggles to land a body shot inside as Peacock controls his hands.
Peacock lands a short shot on the inside that snaps the head of Coco backwards.
Peacock tries to throw a body punch but Coco avoids it by throwing Peacock back against the cage.
Peacock doesn't land with the attempted body shot.
Coco lands a body punch in the clinch.
Coco scores with a shot to the side of Peacock's head.
Peacock fails to land with a short punch on the inside.
Peacock pushes Coco back against the cage and lands a hook to the side of the head.
Coco tried to land a shot to the body but connects with Peacock's elbow.
Peacock misses with a punch to the body.
Peacock throws a blind hook that connects with the side of Cocos head.
Peacock doesn't land with the attempted body shot.
Peacock misses with a body punch.
Peacock is looking to control Coco's arms but Coco gets an underhook and turns him. Now Peacock has his back to the cage.
Peacock blocks a body shot from Coco.
Peacock can't find room to land a body shot as Coco controls the action.
Coco breaks the clinch.
That's two minutes gone in the round.
Coco misses with a hook. Peacock ducked under it nicely.
Peacock uses decent footwork to sidestep a right hand from Coco.
The crowd are loving this. Great action here.
Peacock rushes Coco and presses him up against the cage.
Coco lands a right hand.
Loco Coco has scored more points in the clinch so far.
Coco can't find room to land a body shot as Peacock controls the action.
A nice left hand lands by Coco.
Coco tries to throw a body punch but Peacock avoids it by throwing Coco back against the cage.
Peacock lands with a right to the head.
Peacock lands with a right to the head.
Coco gets through Peacock's defenses to land a nice punch to the side of the head.
Coco throws a punch but it's blocked by Peacock.
A head punch on the inside from Coco fails to land.
Peacock goes for a body shot but it's blocked.
Coco lands with a left to the head.
Coco tries a body shot but Peacock blocks it.
A short right from Coco.
Peacock scores with an uppercut up the middle.
Coco lands a right hand that snaps the head of Peacock backwards.
A short left from Peacock.
Peacock is working Coco over against the cage.
That's three minutes gone in the round.
A nice right hand lands inside from Coco.
Coco misses with the head strike.
Coco blocks an uppercut.
A left hand lands to the body for Peacock.
Coco lands an uppercut.
Peacock throws a punch but it's blocked by Coco.
Coco lands a shoulder strike.
Coco blocks an uppercut.
Peacock lands with a light punch inside.
Coco lands a nice shot to the body.
Peacock lands a shot to the body.
Coco wants to break free. God knows he wants to breaaaak freeee.
An uppercut on the inside fails to land for Peacock.
Peacock lands a body punch in the clinch.
A right hook to the body lands for Peacock.
Both fighters are absolutely exhausted here.
Peacock misses with a hook to the ribs.
Peacock tries to throw a body punch but Coco avoids it by throwing Peacock back against the cage.
Peacock tries to work over Coco's body with a swooping hook but it only glances the target.
Peacock prevents Coco from breaking the clinch.
Coco lands a hook that snaps the head of Peacock backwards.
Peacock misses with a body punch.
That's four minutes gone in the round.
The crowd cheering loudly, showing their appreciation for the quality fight we're seeing here.
Coco tries to land a shot to the body but it's blocked.
Coco blocks a body shot from Peacock.
Coco blocks a body shot from Peacock.
Coco can't find room to land a body shot as Peacock controls the action.
Peacock misses with a punch to the body.
Peacock doesn't land with the attempted body shot.
Peacock lands with a short shot to the head.
Peacock lands with a short head shot on the inside.
Coco misses with the head strike.
Coco throws a blind hook that connects with the side of Peacocks head.
A short right from Peacock.
Coco blocks a couple of punches on the inside.
Peacock lands with a short head shot on the inside.
Coco misses with a body punch.
A head punch blocked on the inside by Coco.
A short left from Peacock.
The crowd applaud the fighters' efforts here as the round comes to an end.
Coco lands a body punch in the clinch.
Peacock working aggressively here.
Coco lands a left hand that snaps the head of Peacock backwards.
A head punch on the inside from Peacock fails to land.
And that is the end of the round. The fighters go back to their corners.
A close second round but Drew Peacock will probably get the nod - 10:9.
That's the end of the round. The referee orders the cornermen out of the cage so we can get back down to business. This is the final round!

Coco lands a really nice looking cross but Peacock seems unphased.
Peacock dodges the punch combination from Coco.
Peacock throws a shot from downtown. Coco moves away and avoids it.
Coco misses with a body shot
letting Peacock counter with a right hand.
Peacock takes a body punch but keeps moving.
Coco uses good footwork to get in and out and land a nice right hand before Peacock has time to react.
Coco lands a lovely overhand right.
Coco swings and misses with a shot to the body
and Peacock counters with a straight right hand.
Peacock on the wrong end of a nice jab.
Coco misses with a body shot.
A telegraphed right hand from Coco misses the target.
Wooooo! Give it up for these two warriors! They are putting on a show!
Coco catches Peacock with a nice straight right. He seems pissed - ooooh, it's on now! On like donkey kong!
Peacock on the wrong end of a nice hook.
A big left from Coco misses.
That's one minute gone in the round.
Coco misses the jab.
Peacock is looking to take this fight into the clinch.
Coco connects with a hook to the side of his opponent's head.
Coco tries to land with a swinging hook to the body but Peacock was well out of range. Poor timing from Coco.
And an attempted straight right on the counter from Peacock! But no joy.
Peacock avoids the body shot from Coco.
Coco throws a hard body shot but it just misses.
Peacock moves away from the strike by Coco.
Peacock closes the distance and clinches.
Coco misses with a hook from the clinch.
Peacock misses with a shot to the kidneys.
Coco lands a right hand.
Peacock lands a nice shot to the body.
Peacock lands a right uppercut that snaps the head of Coco backwards.
Peacock digs a right hand underneath Coco's ribcage. Coco let out a lung full of air as it connected.
Coco blocks a couple of punches on the inside.
That's two minutes gone in the round.
Coco lands a shot to the body.
Peacock misses with a hook from the clinch.
Peacock makes some space for himself and lands an uppercut.
This has been an exciting period of action!
Peacock swings wildly with an uppercut but Coco uses good head movement to avoid it.
Coco lands a body shot in the clinch.
Peacock misses with a punch to the body.
Peacock lands a hook that snaps the head of Coco backwards.
A head punch blocked on the inside by Coco.
A short right from Peacock on the inside.
Coco can't break the clinch.
Peacock blocks a body shot from Coco.
Coco escapes the clinch and we're back to striking.
Coco throws an uppercut from half a mile away. Peacock sees it coming and avoids it easily.
Coco dodges the punch combination from Peacock.
Coco throws out a token jab with nothing on it.
Coco changes levels and scores with a jab to the body.
That's three minutes gone in the round.
Peacock avoids a lazy jab quite easily.
Coco misses with a shot to the body
and Peacock counters with a straight punch to the midsection.
Loco Coco seems to be the more aggressive standup fighter in this bout.
Coco takes a shot right to the liver - Bas would have been proud of that punch.
Peacock lands a beauty of a right hand that gets the crowd cheering.
Loco Coco is winning the standup battle so far.
Coco scores with a hook.
Peacock bobs and weaves well there to avoid the strikes.
A jab lands there for Coco.
The fight moves into the clinch position.
Coco lands with a left to the head.
Peacock lands with a light punch inside.
Peacock prevents Coco from breaking the clinch.
Coco misses with a body punch.
Coco swings away with an uppercut that misses.
Coco tries a shoulder strike but it doesn't do any damage.
This has been an exciting period of action!
Peacock pushes Coco back against the cage and unloads with a body punch.
Coco tries a shoulder strike but it doesn't do any damage.
That's four minutes gone in the round.
Peacock throws a blind hook that connects with the side of Cocos head.
Coco misses with the head strike.
A head punch on the inside from Coco fails to land.
Peacock tries to work over Coco's body with a swooping hook but it only glances the target.
Peacock lands an uppercut.
Coco misses with a short punch on the inside.
Coco throws a blind hook that connects with the side of Peacocks head.
Peacock struggles to land a body shot inside as Coco controls his hands.
Coco misses with a short punch on the inside.
A shot in the inside from Peacock.
Coco goes for a body shot but it's blocked.
Peacock struggles to land a body shot inside as Coco controls his hands.
Coco throws a punch but it's blocked by Peacock.
Peacock lands a right hand that snaps the head of Coco backwards.
Peacock tries to land a shot to the body but it's blocked.
Peacock goes for a body shot but it's blocked.
A quick uppercut on the inside from Coco.
Peacock misses with a punch to the body.
Peacock lands a nice looking hook to the body, against the cage.
Coco misses with a body punch.
And that's the end of the fight!
That was a close round. You could make an argument for either fighter but I would give it to Loco Coco.
I think Coco has won this one but let's see what the judges have to say. Over to the ring announcer for the scorecards.
Ladies and gentlemen, after 3 rounds of action, we go to the scorecards for a decision.
Judge John Kavanagh scores the fight 29:28
Judge Franklyn Lucas scores the fight 29:28
Judge John Roberts scores the fight 29:28
In favor of your winner, by unanimous decision... Loco Coco!
An out of breath Loco Coco thanked his loyal fans in his post fight interview, giving them credit for his success over the course of his career.
|
|
|
|
|
|
|
|
|
|
|
|
|
|
|
|
|
|
|
|
|
|
|
| S |
C
A |
G |
S |
C
B |
G |
|
S |
C |
G |
|
energy
A | B |
|
hype
A | B |
|
pop
A | B |
|
mgr
A | B |
|
FIGHT
RATING
82% |
|
|
|
|
|
|
|
Undercard bout
|
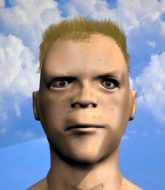
Coming up we have a bantamweight MMA rules bout between Ominous Odinson (ranked 1855 p4p, 1918 weight class) and Mick Taylor (ranked 125 p4p, 127 weight class). Taylor has chosen Better Get A Lawyer as his entrance music, which hasn't gone down very well with the crowd. The key to victory for Ominous Odinson has got to be keeping the fight on the feet.
 |
|
 |
| 170 cm
19
135
5 - 0 - 0 |
|
180 cm
19
135
4 - 1 - 0 |
Decent wrestler
Lethal high kicks
Cardio machine |
|
Good wrestler
Basic striking
Good gas tank |
|
| |
|
Ladies and gentlemen. This fight is 3 rounds, in the bantamweight division.
Introducing the fighter to my left, fighting out of the red corner.
With a record of 5 - 0 - 0, fighting out of London, Ominous Odinson!
And introducing the fighter to my right, fighting out of the blue corner.
With a record of 4 - 1 - 0, fighting out of Sydney, Mick Taylor!
The judges for this bout are Jorge Garcia, Dean Styles and Franklyn Lucas.
The bell rings for round one and we are underway!
Taylor shoots in but doesn't get the takedown
and Odinson counters with a crisp hook to the side of the head.
Odinson stuffs the takedown attempt from Taylor. Taylor gets slowly back to his feet.
Taylor shoots in and drives through. Odinson sprawls well.
Ominous Odinson has stuffed three takedown attempts in the round now. That's going to take a lot out of Mick Taylor.
Ooooh, nice body kick lands from Odinson. Taylor shrugs it off though.
Taylor fails to land the takedown.
We've been told by Odinson's head coaches at Slaughterhouse that he's been working on his takedown defense in preparation for this fight.
Taylor moves out of range as Odinson strikes.
Taylor changes levels and looks for a double leg takedown. Odinson tries to avoid it but Taylor manages to keep hold of a leg and drag Odinson to the ground. Odinson escapes though and pops straight back up to his feet.
Horrible takedown attempt by Taylor or perhaps it was just good defense by Odinson, which made it look bad.
Taylor is a painfully thin specimen of a man. You do wonder whether a good body kick would snap him clean in two.
We've had a slow start to the round here - hopefully the action picks up.
Odinson throws a wild body kick that Taylor sees coming a mile off.
Taylor drops down looking to force a counter takedown but Odinson defends it well.
Taylor misses with a hook to the body
enabling Odinson to counter with a crisp jab.
Taylor shoots in but doesn't get the takedown
and Odinson counters with a nice uppercut.
Taylor shoots in looking for a takedown but Odinson manages to keep the fight standing, pushing Taylor's face into the canvas for good measure before circling away.
That's one minute gone in the round.

Odinson cracks Taylor with a big right hand that sends him crashing to the floor. Odinson has the opportunity to follow him to the ground but instead he's beckoning Taylor to stand back up!
 Taylor is rocked! Taylor is rocked!
Taylor displays some good footwork, moving neatly out of range as Odinson throws out the jab.
Odinson defends well against a solid takedown attempt from Taylor.
Odinson jinks towards his opponent looking like he wants to counter with a mid kick but doesn't commit.
Taylor checks a low kick. Bone on bone - not my idea of a good time.
A telegraphed takedown attempt from Taylor is defended easily by Odinson.
Taylor changes levels and looks for a double leg takedown. Odinson tries to avoid it but Taylor manages to keep hold of a leg and drag Odinson to the ground. Odinson escapes though and pops straight back up to his feet.
Odinson swung with a counter right hand that didn't connect.
Taylor shoots and misses
letting Odinson counter with a right hand.
The crowd are loving this. Great action here.
Taylor on the wrong end of an overhand right that came out of nowhere.
A telegraphed right hand from Odinson misses the target.
Taylor with a poor takedown
and Odinson counters with a crisp hook to the side of the head.
Odinson lands a leg kick that knocks Taylor off balance momentarily.
Taylor uses good footwork to avoid the strikes from Odinson.
Odinson connects with a body shot that sends Taylor's belly button to the back.
That's two minutes gone in the round.
Odinson goes for a spinning back kick but it misses.
Taylor looks frustrated there after his takedown attempt is stuffed easily.
Odinson throws a shot from downtown. Taylor moves away and avoids it.
Taylor shoots in for a double leg but Odinson sprawls well. That's going to sap some energy.
Donk. Odinson catches Taylor right on the button with a cross.
A big left from Odinson misses.
Odinson fakes a head punch and goes low to the body. Nicely done.
Odinson is really peppering his opponent's head with punches.
Odinson scores with a nice body kick.
Taylor doesn't succeed with the takedown
and Odinson counters with a shot to the ribs. That looked like it hurt.

Taylor shoots in from a long way out. He's driving through with the takedown attempt and he eventually gets it, landing in Odinson's guard.
A real slowdown in the pace of the fight for a moment, as Odinson holds on and takes a little breather.
Odinson keeping moving, preventing Taylor from controlling successfully.
That's three minutes gone in the round.
Taylor's corner is telling him to maintain position.
Odinson is working from a closed guard but he's struggling to control his opponent.
Odinson has control of Taylor's left arm, preventing Taylor from doing any damage.

Taylor drops back looking for a leg! Odinson is in trouble here! The fighters roll with the hold and Odinson manages to kick Taylor off! Taylor jumps back into Odinson's guard.
Taylor slows down the pace of the fight, as he sits in guard.
That's four minutes gone in the round.
The crowd are starting to boo a lack of action.
Taylor pressing down on his opponent's thigh, looking to pass guard. Odinson is keeping the position for now.

The referee decides to stand the fighters back up.
Taylor throws a looping overhand right but Odinson ducks down to avoid it.
A little feinted left hand from Odinson on the counter but he doesn't commit to it.
Taylor fails with the takedown
and Odinson counters with a lovely shot to the body.
Odinson lands with a kick to the ribs.
Odinson misses with an attempted mid kick.
Odinson lands a leg kick and bounces back out of range.
Mick Taylor seems to be the more aggressive standup fighter in this bout.
Taylor shoots in for a takedown - he's clinched up with Odinson but Odinson pushes him off and we're back to square one.
Odinson is looking to counter punch.
Odinson lands with a nice low kick. That'll leave a bruise.
And that is the end of the round. The fighters go back to their corners.
Ominous Odinson dominated that round.
That's the end of the interval. I'm sure that seemed a lot quicker than a minute for our two fighters! Back to the action.
Odinson swings for the body but Taylor moves out of range.
Odinson tries to land a front kick but Taylor steps back. That was a bit too telegraphed.
Odinson misses with a head kick.
Taylor fails miserably with a takedown attempt.
Taylor defending well as Odinson loads up on a big left hand.
Taylor throws a hook to the side of Odinson's head but Odinson sees it coming and ducks under it beautifully.
And Odinson counters with a quick kick to the body but Taylor blocks it.
Ominous Odinson is winning the standup battle so far.
Odinson is looking to land body kicks.
Odinson thuds a left hand into Taylor's body.
Odinson loads up on a big right hand but Taylor slips the punch.
Taylor tries to counter with a clinch but Odinson shakes him off and moves away.
We've had a slow start to the round here - hopefully the action picks up.
Taylor shoots in for a double leg but Odinson sprawls well. That's going to sap some energy.
Odinson is looking to counter punch.
Taylor closes this distance looking for a takedown but Odinson circles away.
Ominous Odinson has stuffed three takedown attempts in the round now. That's going to take a lot out of Mick Taylor.
Odinson with the inside leg kick.
Taylor fakes a strike and closes the distance, dragging Odinson to the ground. Taylor is now in Odinson's guard.
Odinson is trying to control the position but Taylor postures up.
That's one minute gone in the round.
Taylor trying to pass the guard but can't manage it just yet.
Odinson knows he needs to get back to his feet asap. He's simply no match for Taylor on the ground.
Taylor stops Odinson from standing up.
Odinson trying to keep a closed guard but Taylor is proving a slippery customer.
Odinson trying to control the position here.
Taylor passes Odinson's right leg, so he's now in half guard.
Taylor is trying to control the action in half guard but Odinson is working away on the bottom, looking perhaps to get back to full guard.
The fighters are pressed up against the cage, both looking to find a bit of space to work.
Odinson is looking to control Taylor's leg but it's slowly edging free. Can Odinson avoid being mounted?
The ref warns both fighters not to hold the cage as they work up against the meshing.
That's two minutes gone in the round.
Well. There's a bit of a lull in the action here and the crowd are starting to get restless.
Taylor wants to work for an arm triangle but Odinson is really keeping half guard well and defending the submission attempt.
Well, if Taylor is going to just lie there, perhaps we should talk about what we're having for dinner tonight
I'm having a ham and pineapple pizza
Yum. Can't wait.
Odinson wants to improve his position but Taylor is controlling well.
Odinson is trying to maintain the position but Taylor is very close to passing his half guard.
We've had a lack of effective grappling in the last minute or so, which could well see a referee standup.
Taylor is trying to work for a kimura but Odinson is defending well.
That's three minutes gone in the round.
Taylor not doing much here.
Taylor's corner are shouting for him to control the position and he seems happy to oblige.
Odinson won't allow Taylor to pass to mount.
The referee has motioned to the fighters to stand back up.
Odinson looks to score with a jab to the body but Taylor is just out of range.
Odinson with a nice calf kick.
That's four minutes gone in the round.
The crowd are hurling abuse towards the fighters... You can hardly blame them though because there isn't a lot going on in the fight.
Taylor gets his takedown attempt stuffed easily
and Odinson counters with a good right hand that lands right on the jaw.
Taylor fails with the takedown.
Taylor fails with a takedown attempt.
Taylor has a takedown stuffed.
Odinson looked to counter that last move with a leg kick but didn't pull the trigger.
Taylor scores a trip takedown into side control. Nice.
The crowd thankful this round is nearly over.
Odinson sneaks back into half guard.
Taylor trying to control the pace.
And that is the end of the round. The fighters go back to their corners.
Ominous Odinson dominated that second round.
OK. That's time! The bell goes and we're back to the action. This is the final round!
Odinson scores with a leg kick.
The crowd cheers as Odinson lands an impressive looking overhand right. Taylor doesn't seem phased though.
Taylor takes one to the side of the head.
A swing and a miss from Odinson.
Taylor feints the counter takedown.
Odinson misses with a looping left.
Taylor avoids a kick to the body.
Odinson connects nicely with a jab. Noted by the judges no doubt.
Taylor avoids the body shot from Odinson.
We've had a slow start to the round here - hopefully the action picks up.
Odinson with a nice looking leg kick. You could hear that one land in a back row.
Odinson lands a big head kick that sends Taylor tumbling to the mat! Odinson takes a step backwards and waves Taylor back to his feet - he wants the finish!
Taylor is still on wobbly legs! Can Odinson finish him?
We've seen a great period of action over the last minute or so - credit to both fighters for going all out!
Taylor with a lazy takedown attempt
and Odinson counters with a solid body kick.
A cross from Odinson lands.
A slapping leg kick lands for Odinson.
That's one minute gone in the round.
Odinson looks to score with a jab to the body but Taylor is just out of range.
Odinson drops Taylor with a big left hand! Taylor is injured, injured bad! Odinson jumps in and finished him with strikes! The fight is over!
Ladies and gentlemen, after 1:11 of round 3, we have a winner by way of TKO (Strikes). Ominous Odinson!
Ominous Odinson seemed lost for words in his post fight interview but he remembered to thank his fans and directed everyone to his website.
|
|
|
|
|
|
|
|
|
|
|
|
|
|
|
|
|
|
|
|
|
|
|
| S |
C
A |
G |
S |
C
B |
G |
|
S |
C |
G |
|
energy
A | B |
|
hype
A | B |
|
pop
A | B |
|
mgr
A | B |
|
FIGHT
RATING
61% |
|
|
|
|
|
|
|
Undercard bout
|
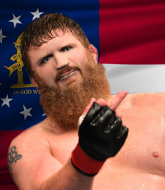
Coming up we have a super heavyweight MMA rules bout between Robbie Banks (ranked 3325 p4p, 1940 weight class) and Vyvyan Bastard (ranked 174 p4p, 108 weight class). Robbie Banks is staring across the cage at his opponent, tweaking his nipples... Tweaking his own nipples that is.
 |
|
 |
| 175 cm
19
300
2 - 2 - 0 |
|
198 cm
19
300
2 - 2 - 0 |
Good wrestling
Counter fighter
Cardio machine |
|
Decent wrestler
Decent boxing
Heavy handed |
|
| |
|
Ladies and gentlemen. This fight is 3 rounds, in the super heavyweight division.
Introducing the fighter to my left, fighting out of the red corner.
With a record of 2 - 2 - 0, fighting out of Helsinki, Robbie Banks!
And introducing the fighter to my right, fighting out of the blue corner.
With a record of 2 - 2 - 0, fighting out of London, Vyvyan Bastard!
The judges for this bout are Reed Andrews, John Kavanagh and Dean Styles.
The bell rings for round one and we are underway!
Banks avoids the body shot from Bastard.
Horrible takedown attempt by Banks or perhaps it was just good defense by Bastard, which made it look bad.
Bastard unleashes a big counter combination but Banks bobs and weaves and avoids any damage.
Banks shoots in but doesn't get the takedown
enabling Bastard to counter with a crisp jab.
We've had a slow start to the round here - hopefully the action picks up.
A decent looking cross lands there for Bastard.
Banks tries for a takedown but Bastard circles away easily
and Bastard counters with a straight right hand.
That's three failed takedown attempts in the round for Robbie Banks. That's going to take a lot out of him.
That's one minute gone in the round.
Banks shoots for a double leg takedown but Bastard sprawls well. He's pushed Banks's face into the mat and manages to get back to his feet relatively easily.
Bastard looks to score with a combo but nothing lands.
Banks throwing a counter right hand but Bastard manages to avoid it.
Banks fails with the takedown.
Banks seems to be moving with more speed, compared to his last bout. He must have been working on that in the gym.
Bastard connects with a lovely right hand, straight down the pipe.
That's two minutes gone in the round.
Banks has a takedown stuffed.
It seemed like Bastard was going to counter with the hook but didn't fully commit to it.
Bastard has worked on his takedown defense in the runup to this fight and it is paying off so far.
Banks closes this distance looking for a takedown but Bastard circles away.
Bastard is clearly trying to counter these attacks from Banks with a body shot.
Banks steps to the side to avoid the strikes from Bastard.
Vyvyan Bastard is looking to keep the fight on the feet at all costs.
Bastard ducks down and throws a hook to the body but Banks moves away.
Banks was looking to counter that move with a punch but didn't quite pull the trigger.
Bastard thuds his right hand into Banks's forehead from close range. That could be painful for both fighters.
That's three minutes gone in the round.
Banks uses good footwork to avoid the strikes from Bastard.
Bastard has used his reach advantage pretty well so far tonight.
Banks fakes high and shoots in for a takedown but Bastard avoids it really well and circles away.
Bastard cracks Banks with a big right hand that sends him crashing to the floor. Bastard has the opportunity to follow him to the ground but instead he's beckoning Banks to stand back up!
That's four minutes gone in the round.
Banks tries for a takedown but Bastard circles away easily
enabling Bastard to counter with a crisp jab.
Banks has his takedown stuffed
and Bastard counters with a crisp one two that drops Banks! Bastard thinks about following him to the mat for a moment but instead steps back and waves Banks to his feet! Banks is in big trouble!
Banks is rocked!
The crowd cheering loudly, showing their appreciation for the quality fight we're seeing here.
Bastard misses with a series of wild punches.
And that is the end of the round. The fighters go back to their corners.
Vyvyan Bastard dominated that round.
The referee calls time. The cornermen exit stage left and we're back to business.
Bastard misses with an uppercut. Banks saw that one coming.
Bastard lands with a cross to side of his opponent's head.
It looks like Robbie Banks has been cut.
This entire fight has taken place on the feet so far and you wonder whether Banks might be better served trying to take this one to the ground because he's losing the standup battle so far.
Banks looks frustrated there after his takedown attempt is stuffed easily.
Bastard has been the more effective fighter overall so far.
Bastard scores with a hook to the body. Banks takes a step back and tries to catch his breath.
We've had a slow start to the round here - hopefully the action picks up.
Banks doesn't succeed with the takedown
and Bastard counters with a nice right hand that sends Banks toppling to the canvas! Banks scrambles and gets back to his feet - can Bastard finish him?!
That's one minute gone in the round.
Banks uses good footwork to avoid the strikes from Bastard.
Banks misses with a takedown attempt
and Bastard counters nicely by changing levels and landing a hook to the body.
That's three failed takedown attempts in the round for Robbie Banks. That's going to take a lot out of him.
Bastard throws a hook but Banks blocks it.
Bastard throws a body shot but no joy.
An attempted straight right counter from Banks misses the target.
Both fighters are looking to counter, which isn't making for the most exciting fight in the world.
Banks shoots in for a takedown. He's persisting with it as Bastard sprawls well. Bastard wins this battle and keeps the fight standing. Banks gets slowly back to his feet.
That's two minutes gone in the round.
Banks gets his takedown attempt stuffed easily
and Bastard cracks him with a counter punch right on the button.
Banks tries to drive through with a takedown attempt but Bastard defends well and Banks ends up having to push Bastard into the cage where they will battle it out in the clinch.
Banks has a body lock and is looking for a takedown. Bastard is bouncing around trying to prevent the takedown and somehow he has indeed managed to stay on his feet.
Bastard struggles to land a body shot inside as Banks controls his hands.
Bastard stops a takedown attempt from Banks.
Banks has hold of a leg and is looking for a trip takedown. Bastard avoids it nicely though and we remain in the clinch.
Bastard pushes Banks back against the cage and unloads with a body punch.
Both fighters are absolutely exhausted here.

Bastard escapes the clinch and we're back to striking.
Banks shoots in but doesn't get the takedown
and Bastard counters with a crisp right hand that drops Banks! Bastard lets Banks back up to his feet, looking for a finish!
Oh Banks is still all over the place! His legs are completely gone! Will he be able to recover?!!
That's three minutes gone in the round.
Banks on the wrong end of a vicious looking body shot.
Banks seems to have got his legs back now.
Bastard drops Banks with a huge uppercut! Banks drops to the floor like a sack of potatoes. Bastard is raining down punches and the ref stops the fight! This one is all over!
Ladies and gentlemen, after 3:29 of round 2, we have a winner by way of TKO (Strikes). Vyvyan Bastard!
Our winner, Vyvyan Bastard, made sure he spent some time buttering up the crowd during his post fight interview, which will no doubt bring him a few more fans.
|
|
|
|
|
|
|
|
|
|
|
|
|
|
|
|
|
|
|
|
|
|
|
| S |
C
A |
G |
S |
C
B |
G |
|
S |
C |
G |
|
energy
A | B |
|
hype
A | B |
|
pop
A | B |
|
mgr
A | B |
|
FIGHT
RATING
42% |
|
|
|
|
|
|
|
Co-main event
|
Coming up we have a welterweight MMA rules bout between Buck Bolkvadze (ranked 2978 p4p, 2093 weight class) and Charles Traynor (ranked 369 p4p, 272 weight class). Traynor has chosen Crazy Train by Ozzy Osbourne as his entrance music. These two fighters really are very evenly matched on the feet - it will be fascinating to see who can assert themselves in that aspect of the fight.
 |
|
 |
| 179 cm
19
170
3 - 2 - 0 |
|
182 cm
19
170
3 - 2 - 0 |
BJJ Blue Belt
Dangerous knees
Cardio machine |
|
Decent wrestler
Excellent MT
Heavy handed |
|
| |
|
Ladies and gentlemen. This fight is 3 rounds, in the welterweight division.
Introducing the fighter to my left, fighting out of the red corner.
With a record of 3 - 2 - 0, fighting out of Tokyo, Buck Bolkvadze!
And introducing the fighter to my right, fighting out of the blue corner.
With a record of 3 - 2 - 0, fighting out of Montreal, Charles Traynor!
The judges for this bout are Joseph Jones, Lou da Vinci and Chad Campbell.
The bell rings for round one and we are underway!
Bolkvadze misses with a straight left.
Bolkvadze goes for a spinning back kick but it misses.
A countering left hand to the body from Traynor misses.
Bolkvadze lands with a thumping leg kick.
Bolkvadze pulls out of a head kick attempt.
Traynor looks more muscular than last time we saw him. He must have been on the weights.
Bolkvadze throws a nice hook to the body that draws an oooh from the crowd.
Bolkvadze tries to land a leg kick but Traynor saw it coming and moves away.
Traynor tries to counter with a clinch but Bolkvadze shakes him off and moves away.
Traynor drives through and clinches with Bolkvadze against the cage.
Bolkvadze missing with knees to the body.
Still in the clinch, Traynor scores with a nice short uppercut.
Traynor managing to block the knees to the body from Bolkvadze.
Traynor misses with a punch to the body.
Bolkvadze throws a knee to the head but misses.
We've had a slow start to the round here - hopefully the action picks up.
Bolkvadze tries to land knees in the clinch but Traynor avoids the damage to the body.
Traynor works for underhooks and lands a body shot in the process.
Traynor blocking some punches.
Bolkvadze putting his Muay Thai to good use. He has Traynor in a tight clinch and is doing some damage with knees to the body.
Traynor breaks the clinch.
The crowd cheering loudly, showing their appreciation for the quality fight we're seeing here.
Bolkvadze misses with a body shot.
That's one minute gone in the round.
Traynor moves out of range of the body kick.
Traynor looked like he wanted to counter with a punch but didn't throw it.
Traynor misses with a low kick.
Bolkvadze throws a hook but Traynor blocks it.
Bolkvadze lands a jab to the nose.
A big right from Bolkvadze misses.
Bolkvadze is moving around nicely and scores here with a single head shot.
It looks like Charles Traynor has been cut.
Bolkvadze pushing out the jab but it's not landing.
Traynor moves into the clinch.
Bolkvadze throws a head punch that misses.
An uppercut on the inside fails to land for Bolkvadze.
Traynor breaks from the clinch.
Bolkvadze seems to be moving with more speed, compared to his last bout. He must have been working on that in the gym.
Bolkvadze bobs and weaves and then throws a good body kick.
Traynor takes a head kick and shrugs it off.
Bolkvadze is looking to take this fight into the clinch.
Bolkvadze misses with a wild body shot.
This has been an exciting period of action!
Traynor staying out of range there.
That's two minutes gone in the round.
Bolkvadze cracks Traynor with a hook to the jaw. Both fighters smile at eachother and high-five before getting back down to business.
Traynor moves into range and clinches up with Bolkvadze.
Traynor misses with a hook to the ribs.
A right hook to the body lands for Traynor.
Traynor is pushing Bolkvadze up against the cage, for a bit of lean and pray action. Action being used the in the loosest possible sense of the word.
Traynor lands with a light punch inside.
With the fighters clinched against the cage, Traynor creates a bit of distance for himself and scores with a nice uppercut.
A shot in the inside from Bolkvadze.
Traynor throws a head punch that misses.
Traynor lands with a left to the head.
Bolkvadze lands a shot to the body.
Kneeeeees! The crowd are calling for knees to the body. Bolkvadze obliges.
Traynor swings away with an uppercut that misses.
Traynor is leaning against Bolkvadze and scores with a nice uppercut to the body.
Traynor tries to work over Bolkvadze's body with a swooping hook but it only glances the target.
That's three minutes gone in the round.
Traynor lands with a short punch from the clinch.
A short right hand to the side of the head by Traynor.
Traynor escapes the clinch and we're back to striking.

Bolkvadze drives through and clinches with Traynor against the cage.
Traynor blocks a knee to the body. He'll have a nicely bruised forearm in the morning.
Bolkvadze lands a nice knee to the body.
Bolkvadze tries to land a knee to the head but misses.
Bolkvadze looking to slow down the pace here.
Traynor breaks the clinch and we're back to striking at distance.
Traynor tries to land with a swinging hook to the body but Bolkvadze was well out of range. Poor timing from Traynor.
Bolkvadze lands a nice looking kick to the body. Traynor takes a step back to recover.
Traynor throws a right hand that Bolkvadze ducks under and follows up with a left that Bolkvadze also avoids with ease.
Traynor avoids the head kick by Bolkvadze.
Traynor steps in looking to clinch after the strikes miss from Bolkvadze.
Traynor connects with a jab.
It looks like Buck Bolkvadze has been cut.
This has been an exciting period of action!
Traynor bobs and weaves well there to avoid the strikes.
That's four minutes gone in the round.
Bolkvadze lands with a slapping head kick.
Traynor misses with a body shot.
Bolkvadze jinks towards his opponent looking like he wants to counter with a mid kick but doesn't commit.
A jab from Traynor misses.
Bolkvadze misses with a kick to the body
and Bolkvadze takes a counter punch right on the button for his troubles.
Bolkvadze fakes a jab and scores with a low kick.
Bolkvadze digs a good body shot into Traynor's ribs.
Bolkvadze throws a wild body kick that Traynor sees coming a mile off.
Traynor moves out of range of the leg kick from Bolkvadze.
Bolkvadze lands with an overhand left.
Traynor fails to land with a series of punches.
Bolkvadze gets a clinch.
Bolkvadze tries to land a knee to the body but he is off balance and Traynor avoids it.
The crowd applaud the fighters' efforts here as the round comes to an end.
Traynor's corner calls for him to break the clinch, which he does.
Bolkvadze with a body punch. A glancing blow.
Bolkvadze digs a good body shot into Traynor's ribs.
Bolkvadze fakes with a right hand and throws a good leg kick, right into the thigh. That had to hurt Traynor.
And that is the end of the round. The fighters go back to their corners.
Buck Bolkvadze dominated that round.
Both fighters have cut men working on them during the interval.
That's the end of the interval. I'm sure that seemed a lot quicker than a minute for our two fighters! Back to the action.
Bolkvadze scores with a jab to the body.
Charles Traynor has stepped it up - he knows he needs a finish here!
Traynor takes a swing at Bolkvadze's ribcage but misses.
Bolkvadze tries to close the distance and clinch up against the cage but Traynor paws at him with a jab and circles away.
Bolkvadze just misses with a punch to the body.
Traynor now looks to counter with a shot at the body.
Traynor looks to land a right hand but Bolkvadze moved out of range.
Bolkvadze misses with a wild body shot.
Traynor steps in looking to clinch after the strikes miss from Bolkvadze.
Bolkvadze moves in looking to clinch but Traynor pushes him off.
A little jabbing left from Traynor on the counter but it doesn't find it's target.
Bolkvadze digs a good body shot into Traynor's ribs.
Bolkvadze scores with a body shot.
Traynor takes a punch right to his stomach. That took the wind out of him momentarily.
Bolkvadze is really dominating this fight. Is there anything that Traynor can do to turn this around?
Bolkvadze throws a low kick but Traynor avoids it.
And an attempted straight right on the counter from Traynor! But no joy.
We've had a slow start to the round here - hopefully the action picks up.
Bolkvadze throws an ugly left hook that misses
enabling Traynor to counter with a crisp jab.
Bolkvadze throws a front kick that sends Traynor stumbling back into the cage.
Traynor avoids the clinch attempt nicely.
A jab from Bolkvadze finds it's way through Traynor's defenses.
Wooooo! Give it up for these two warriors! They are putting on a show!
A punch combination from Traynor misses.
That's one minute gone in the round.
Bolkvadze lands a jab.
Traynor is rocked!
Buck Bolkvadze seems to be the more aggressive standup fighter in this bout.
Bolkvadze measures up his opponent and throws a superman punch that connects to the jaw! Down goes Traynor! The ref steps in, and that's the ball game folks!
Ladies and gentlemen, after 1:12 of round 2, we have a winner by way of KO (Superman Punch). Buck Bolkvadze!
A victorious Buck Bolkvadze thanked his army of followers in his post fight interview, telling people to make sure they follow him on Twitter.
|
|
|
|
|
|
|
|
|
|
|
|
|
|
|
|
|
|
|
|
|
|
|
| S |
C
A |
G |
S |
C
B |
G |
|
S |
C |
G |
|
energy
A | B |
|
hype
A | B |
|
pop
A | B |
|
mgr
A | B |
|
FIGHT
RATING
66% |
|
|
|
|
|
|
|
Main event
|
Coming up we have a bantamweight MMA rules bout between Mikheil Berishvili (ranked 2019 p4p, 2307 weight class) and Luke Smith (ranked 133 p4p, 148 weight class). Berishvili comes to the cage accompanied by Acharuli Gandagana. Rumors backstage are that the fighters have been paid to keep it standing but we know that would never happen in MMA!
 |
|
 |
| 159 cm
19
135
3 - 2 - 0 |
|
171 cm
19
135
3 - 2 - 0 |
BJJ Brown Belt
Basic striking
Cardio machine |
|
Decent wrestler
Excellent MT
Granite chin |
|
| |
|
Ladies and gentlemen. This fight is 3 rounds, in the bantamweight division.
Introducing the fighter to my left, fighting out of the red corner.
With a record of 3 - 2 - 0, fighting out of Montreal, Mikheil Berishvili!
And introducing the fighter to my right, fighting out of the blue corner.
With a record of 3 - 2 - 0, fighting out of Tokyo, Luke Smith!
The judges for this bout are Chad Campbell, John Roberts and Lou da Vinci.
The bell rings for round one and we are underway!
Berishvili darts in trying to clinch
and Smith cracks him with a counter punch right on the button.
Smith misses with an uppercut.
Berishvili moves out of range as Smith strikes.
Smith looks more muscular than last time we saw him. He must have been on the weights.
Berishvili takes a body punch but keeps moving.
Berishvili uses good footwork to avoid the strikes from Smith.
Berishvili is looking to counter the offense by Smith and move into the clinch.
Smith throws a hook but Berishvili blocks it.
Smith lands a head shot.
Berishvili is looking to take this fight into the clinch.
We've had a slow start to the round here - hopefully the action picks up.
A looping hook to the body misses from Smith. Berishvili does a little dance to reset his feet.
Berishvili wants to take advantage of his opponent's missed offense by moving into the clinch.
Berishvili fails with an attempt to clinch.
Berishvili tries to close the distance and clinch but Smith swats him to one side with an open hand palm strike and circles away.
The fighters circle momentarily. Smith darts into range and connects with a nice straight punch.
A left lands for Smith.
Berishvili closes the distance and presses his opponent up against the cage.
That's one minute gone in the round.
Berishvili blocks a body shot from Smith.
Berishvili takes a shot to the head.
Smith throws a punch but it's blocked by Berishvili.
Smith lands a right hand that snaps the head of Berishvili backwards.
Berishvili tries to pull guard but Smith forces him back to his feet, against the cage.
Berishvili tries to jump guard but he falls flat on his backside. Smith smiles and moves away.
Smith lands with a cross to side of his opponent's head.
Berishvili tries to clinch there but Smith circles away.
Smith doesn't fully commit to the body shot counter.
Smith throws a monster uppercut resembling something out of street fighter but it doesn't land.
Berishvili fails in his attempt to clinch.
A little jabbing left from Smith on the counter but it doesn't find it's target.
Berishvili clinches up with Smith and pushes him back against the cage.
Berishvili definitely looks more muscular than last time we saw him fight.
Berishvili jumps guard but Smith stands there with Berishvili around his waist. Berishvili gives up and drops back to his feet. We remain in the clinch.
That's three failed takedown attempts in the round for Mikheil Berishvili. That's going to take a lot out of him.
A right hand to the body from Smith.
Smith scores with an uppercut up the middle.
Berishvili jumps guard but Smith turns him against the cage and keeps the fight standing.
Smith lands a right hand.
That's two minutes gone in the round.
Smith swings away with an uppercut that misses.
We've seen a great period of action over the last minute or so - credit to both fighters for going all out!
Smith goes for a body shot but it's blocked.
With the fighters clinched against the cage, Smith creates a bit of distance for himself and scores with a nice uppercut.
Smith lands a shoulder strike.
Smith goes for a body shot but it's blocked.
Good body shot from Smith.
Berishvili tries to take the fight to the ground by pulling guard but can't manage it.
Smith gets through Berishvili's defenses to land a nice punch to the side of the head.
Smith throws a head punch that misses.
Smith lands a left hand that snaps the head of Berishvili backwards.
Smith lands a left hand.

Berishvili manages to pull guard. Let's see whether he can land a sub off his back.
Smith looking to pass the guard.
Smith forces his way into half guard.

Berishvili looking to work for a kimura from the bottom.
That's three minutes gone in the round.
Smith is figuring out what he wants to do next.
Berishvili is looking to sinch up a guillotine here but Smith pulls his head out easily.
Smith content to sit in half guard and control for a moment.
Berishvili is doing well to control the position and prevent Smith from advancing to side control.
That's four minutes gone in the round.
There's not a lot going on here and the crowd are letting the fighters know they're not willing to tolerate a lack of action.
Berishvili tries to roll over but Smith keeps him under control.
Berishvili trying to hold on to Smith's head to control him but Smith postures up.
Smith really doesn't want to stay on the ground with Berishvili. If he can't get it back to his feet, it's only a matter of time before he'll be tapping out.
Berishvili is doing well to avoid being mounted. He's controlling the position at the moment.
The referee has motioned to the fighters to stand back up.
And that is the end of the round. The fighters go back to their corners.
Luke Smith dominated that round.
That's time! Berishvili's corner gives him a slap on the ass as he gets ready to fight.
Berishvili wants to clinch up but Smith keeps it at a distance.
Smith takes a step towards his opponent and connects with a left hand, before circling away.
Smith connects with a looping left hand that seems like it dazed Berishvili momentarily.
A jab lands there for Smith.
Decent striking displayed by Smith there.
Smith has been the more effective fighter overall so far.
Berishvili misses with a body shot.
Smith thows a left - swing and a miss!
Smith connects with a lovely right hand, straight down the pipe.
Smith fakes high and swings low for a body shot but Berishvili manages to avoid it.
Berishvili bobs and weaves well there to avoid the strikes.
Smith avoids the clinch attempt nicely.
Smith misses with a body shot.
Berishvili is looking to take this fight into the clinch.
Smith circles away from the clinch attempt
enabling Smith to counter with a crisp jab.
That's one minute gone in the round.
Berishvili has closed the distance and engaged Smith in a clinch.
Berishvili jumps guard but Smith turns him against the cage and keeps the fight standing.
A short right hand to the side of the head by Smith.
Berishvili jumps guard but Smith stands there with Berishvili around his waist. Berishvili gives up and drops back to his feet. We remain in the clinch.
An uppercut on the inside fails to land for Smith.
Smith has used his reach advantage pretty well so far tonight.
Smith lands a right uppercut that snaps the head of Berishvili backwards.
A head punch blocked on the inside by Berishvili.
Luke Smith seems to be working more effectively in the clinch in the fight so far.
Berishvili jumps guard but Smith stands there with Berishvili around his waist. Berishvili gives up and drops back to his feet. We remain in the clinch.
That's three failed takedown attempts in the round for Mikheil Berishvili. That's going to take a lot out of him.
Berishvili tries to pull guard but Smith forces him back to his feet, against the cage.
Smith lands a hook to the side of the head.
Berishvili blocks a body shot from Smith.
Smith lands a nice shot to the body.
Smith misses with the head strike.
Berishvili is trying to pull guard but Smith turns him against the cage and we stay in the clinch.
Smith tries to land a shot to the body but it's blocked.
Berishvili has managed to pull guard. Let's see whether he can work an aggressive guard. It will also be interesting to see what tactics Smith uses from the top position.
Berishvili is looking for a triangle but Smith pushes his legs off easily.
That's two minutes gone in the round.
Berishvili has his feet on Smith's thighs here. He's pushed Smith off and worked for a very quick armbar from the bottom! He's flipped onto his stomach and he's cranking hard on the arm! Smith screams in pain and taps out! This one is all over!
Ladies and gentlemen, after 2:22 of round 2, we have a winner by way of Submission (Armbar). Mikheil Berishvili!
A very excited looking Mikheil Berishvili made sure he remembered to thank all the fans both in the arena and on the internet. He said all the coolest people spend all day on MMA websites, which got a big reaction.
|
|
|
|
|
|
|
|
|
|
|
|
|
|
|
|
|
|
|
|
|
|
|
| S |
C
A |
G |
S |
C
B |
G |
|
S |
C |
G |
|
energy
A | B |
|
hype
A | B |
|
pop
A | B |
|
mgr
A | B |
|
FIGHT
RATING
50% |
|
|
|
|
|
|
|
|
|
|
