|
TWGC 39 (265lbs, D1): Amsterdam Qualifier - Round 2 PBP Commentary |
Co-main event
|
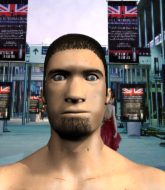
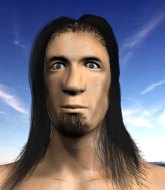
This TWGC bout is 1 fifteen minute round in the heavyweight division. Introducing today's competitors. In the red corner, competing out of Los Angeles, with a TWGC record of 1 wins and 0 losses; Harvey Smith! And in the blue corner, fighting out of Hilo, with a TWGC record of 1 wins and 0 losses; Mr Spar!
The judges for this bout are Paulsen Ambrosius, Aafke Stam and Daniel Blasius.
The fighters bow as they face eachother in the middle of the mat and we are under way.#CL#
Smith moves into the clinch.#TD#
Smith wants the takedown. Spar is fighting it off but Smith persists and manages to bring the fight to the ground, ending up in Spar's guard against the cage. Score +2 for takedown into guard / half guard: Smith (2) vs (0) Spar
Smith is stalling in the full guard.
Spar trying to control the position.
Smith has been talking about how he's improved his wrestling in the run up to the fight so let's see if that's enough to sway the balance.
Smith trying to pass the guard but can't manage it just yet.
We've had a slow start to the round here - hopefully the action picks up.
The ref warns both fighters not to hold the cage as they work up against the meshing.#T1#
Spar is trying to control the position from the bottom.
Smith looking to pass the guard.
Smith passes Spar's right leg, so he's now in half guard.
Spar is trying to control but can't.
Smith trying to control the action but Spar is working from the bottom. #SUB#
Smith is looking for a kimura but he's never going to get it from there. #T2##SUB#
Smith is thinking about going for an arm triangle but he can't free his leg.
Spar tries to get to full guard but Smith has control of the leg. #SUB#
Smith is working for a kimura but Spar is defending it quite comfortably.
#T3##SUB#
Smith is thinking about going for an arm triangle but he can't free his leg.
Smith wants to advance to full mount but Spar doesn't think that's going to happen and regains full guard instead.
Smith is pushing down on Spar's leg trying to pass to half guard. Spar is fighting to maintain full guard but Smith has managed to sneak the leg through.#T4#
Smith trying to advance position but Spar counters by regaining guard.
Spar trying to control the position here.
Smith wants to control from the top but Spar keeps moving. #T5#
Spar is pulling down on Smith's head to control his posture.
Spar is trying to control the position from the bottom.
The fighters are pressed up against the cage, both looking to find a bit of space to work.
Smith wants to control from the top but Spar keeps moving.
Spar working a defensive guard here.
Spar is controlling Smith's posture.#T6#
Spar trying to control the position.
Smith wants to pass the guard but Spar is keeping the position.
Spar wants to sweep here but Smith controlling him for the moment. #T7#
Spar working a defensive guard here.
Smith advances position into side control! Score +3 for passing guard: Smith (5) vs (0) Spar#SUB#
Smith tries for a kimura but Spar is defending well.
Smith tries to advance to mount but Spar denies him. #T8##SUB#
Smith tries for a kimura. Not really close to a finish though.
Spar is looking for a sweep.
Spar gets one leg under and gets the fight to half guard.
Spar wants to control but Smith is keeping busy and won't allow it. #T9#
Smith seems very keen to just sit and control from half guard but Spar does not like that idea so much and is remaining active off his back. #SUB#
Smith is looking for a kimura but Spar is holding onto that half guard position, so it's hard for Smith to get the leverage.
Smith wants to pass the guard but Spar is defending well.
Spar tries to get to full guard but Smith has control of the leg.
Smith passes to full mount! Score +3 for passing guard: Smith (8) vs (0) Spar#T10#
Smith moves to his opponent's back but Spar bucks him off and ends up in guard. A bit of a disaster there for Smith. Score +2 for sweep to guard / half guard: Smith (8) vs (2) Spar
Spar pressing down on his opponent's thigh, looking to pass guard. Smith is keeping the position for now.
Smith wants to sweep but no luck. #T11#
Spar wants to control from the top but Smith keeps moving.
Smith being controlled here, momentarily.
Spar wants to control from the top but Smith keeps moving. #T12#
Spar preventing the sweep.
Smith keeping full guard, as Spar tries to pass.
Smith tries to land a sweep but no joy.
Spar controlling from the top position.
Spar trying to control the position from guard on top but Smith is wriggling around, looking for whatever he can. #T13#
Smith has control of Spar's left arm, preventing Spar from doing any damage.
Spar pressing down on his opponent's thigh, looking to pass guard. Smith is keeping the position for now.
Smith looking to control the pace of the fight rather than finish it. #T14#
Spar trying to control but Smith is working from the bottom.
Smith pulls Spar in close to prevent any damage.
Boooooooooooooooooooo!!! God, this has been a terrible round. Come on you two, sort yourselves out!
Spar stopping the sweep attempt from Smith.
And that's the end of the fight!
Smith takes the fight on points by 8 to 2. |
|
|
|
Main event
|
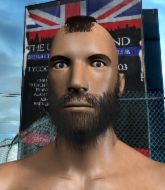
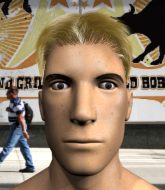
This TWGC bout is 1 fifteen minute round in the heavyweight division. Introducing today's competitors. In the red corner, competing out of Las Vegas, with a TWGC record of 1 wins and 0 losses; Harris Mint! And in the blue corner, fighting out of Las Vegas, with a TWGC record of 1 wins and 0 losses; John Lawrence!
The judges for this bout are Aafke Stam, Saam Ante and Patrick Alders.
The fighters connect hands in the middle of the mat and we are under way.#TD2#
Lawrence drops down and drives through with a powerful takedown into guard. Score +2 for takedown into guard / half guard: Mint (0) vs (2) Lawrence
Lawrence trying to pass the guard but can't manage it just yet.
Mint can't do much from the bottom at the moment, as Lawrence controls the pace.
Mint keeping full guard, as Lawrence tries to pass.
Lawrence is taking a break and basically stalling. The referee will not allow him to do that for long.
Let's hope that Lawrence has the urge to step up the pace any second now because for the last 15 or 20 seconds he's just been holding on tight.
Lawrence works a leg free and moves into half guard.
We've had a slow start to the round here - hopefully the action picks up.
Lawrence trying to control the action but Mint is working from the bottom. #T1#
Lawrence trying to control the pace. #SUB2#
Lawrence is trying a forearm choke
I don't think that's going to do much at this level of the game.
Lawrence tries to pass to full mount but Mint defends it.
Mint keeping hold of Lawrence's head, controlling as best he can.
Mint is refusing to be controlled, as Lawrence sits in half guard.
We've been hearing good reports from Mint's training camp. Apparently he has been rolling around with some good quality BJJ practitioners and has been sharpening his skills. Let's see if that has an impact on the fight today.#T2#
Mint is concentrating on defense, preventing Lawrence from advancing position.
Lawrence content to sit in half guard and control for a moment. #SUB2#
Lawrence is looking for a kimura but he's never going to get it from there.
Lawrence trying to control the pace.
Lawrence is trying to control the action in half guard but Mint is working away on the bottom, looking perhaps to get back to full guard. #T3#
Lawrence keeping composed on the top, looking to control the action.
Lawrence wants to take a breather but Mint is having none of it.
In the pre-fight buildup videos we saw Lawrence working his ground and pound in the gym. He isn't landing a great percentage of his ground strikes so far though.
Mint is controlling Lawrence's trapped leg to prevent Lawrence from advancing to side control.
Lawrence is pressing down on Mint's thigh, looking to free his foot. Mint is holding on for now.
Lawrence trying to control the action but Mint is working from the bottom.
The ref warns both fighters not to hold the cage as they work up against the meshing.
Lawrence controlling the pace. #T4#
Lawrence tries to pass to full mount but Mint defends it.
Lawrence wants to take a breather but Mint is having none of it.
Lawrence is controlling the pace.
Lawrence wants to pass to mount but Mint is defending the position.
Lawrence slows the pace down in half guard.
Lawrence wants to lay and pray for a moment but Mint keeps working. #T5#
Lawrence looks over to his corner - he wants some instructions but his corner are not responding.
Lawrence prevents Mint from improving his position.#T6#
Mint moves his hips nicely and gets into full guard.
Mint is controlling Lawrence's posture.
Mint keeping moving, preventing Lawrence from controlling successfully.
Mint has his hands on Lawrence's head, controlling the position.
Mint keeping moving, preventing Lawrence from controlling successfully.
Mint keeping full guard, as Lawrence tries to pass. #T7#
Lawrence is still trying to improve position.
Mint is trying to control the position but Lawrence postures up.
Lawrence looking to pass the guard.
Lawrence wants to control from the top but Mint keeps moving.
Lawrence showing good wrestling skills to control the position. #T8#
Lawrence works a leg free and moves into half guard.
Lawrence controlling the pace. #SUB2#
Lawrence seems to be looking for submissions.
Lawrence trying to control the action but Mint is working from the bottom. #SUB2#
Mint is defending against the submission attempts here by Lawrence.
#SUB2#
Lawrence is trying a forearm choke
I don't think that's going to do much at this level of the game.
#T9#
Mint is refusing to be controlled, as Lawrence sits in half guard.
Lawrence is stalling here. Mint is in no mood to hang around though. He's locked up a kimura from the bottom! Lawrence seems to be keeping calm but he's forced to roll out of the hold and Mint has ended up in side control on the top. Nice work. Score +4 for clean sweep to past guard: Mint (4) vs (2) Lawrence
The referee asks Mint politely if he wouldn't mind getting on with it and actually doing something. Mint prefers to stall for the moment though.#T10#
Lawrence is trying to get back to half guard.
Lawrence manages to get one leg in to regain half guard.
Lawrence is looking for a sweep. Mint is wise to his cunning plan and keeps the top position.
Lawrence manages to get to full guard.
Lawrence has a butterfly guard looking to sweep but Mint has passed into side control.
Score +3 for passing guard: Mint (7) vs (2) Lawrence
Mint just content to control the position. #T11#
Lawrence struggling a bit here.
The fighters are pressed up against the cage, both looking to find a bit of space to work.
Lawrence tries to get back to half guard but can't.
Lawrence can't do much from the bottom here.
Lawrence is looking for a sweep.#T12#
Lawrence is persisting with the attempt to improve his position.
You can see the frustration on Lawrence's face as Mint controls the position.
Lawrence is looking to reverse the position.
You can see the frustration on Lawrence's face, being in this tough position on the bottom.#T13#
Lawrence tries to control but Mint manages to take his back. Score +3 for taking back: Mint (10) vs (2) Lawrence
Lawrence is defending well here and trying to improve his position.
Mint doesn't have the hooks in and Lawrence manages to turn into his guard.
Score +2 for sweep to guard / half guard: Mint (10) vs (4) Lawrence
Mint pulls Lawrence in close to prevent any damage.
Lawrence stands and throws Mint's legs to the side, diving into side control. Score +3 for passing guard: Mint (10) vs (7) Lawrence
Mint regains half guard there - taking advantage of Lawrence's attempt to lay and pray for a moment.
Mint won't allow Lawrence to pass to mount. #T14#
Lawrence is looking to take a break and control but Mint is keeping him honest, looking to work from the bottom.
Lawrence stalling.
Lawrence trying to mount his opponent but Mint defends it.
Boooooooooooooooooooo!!! God, this has been a terrible round. Come on you two, sort yourselves out!
Mint moves his hips nicely and gets into full guard.
Mint controlling the position.
And that's the end of the fight!
Mint takes the fight on points by 10 to 7.
Harris Mint decided to thank the fans in attendance for making a great atmosphere. It seemed to go down pretty well.
In defeat, John Lawrence stepped up to the mic, saying 'Cobra Kai Rules!! Ill be back. No retreat! No surrender! Strike First! Strike Hard!'. |
|
|
|
|
|
|