 |
AFC #13 PBP Commentary |
Undercard bout
|
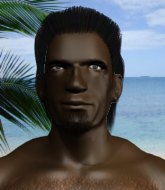
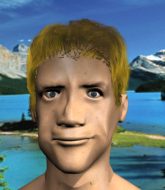
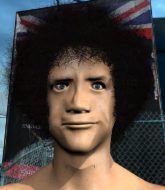
Coming up we have a welterweight MMA rules bout between Guust Altenaar (ranked 4769 p4p, 3610 weight class) and Pedro Oliveira (ranked 532 p4p, 441 weight class). Pedro Oliveira is the more experienced fighter, so let's see if that makes a difference tonight.
 |
|
 |
| 184 cm
18
179
1 - 0 - 0 |
|
162 cm
19
178
1 - 0 - 0 |
Good takedowns
Brawler
Cuts easily |
|
BJJ Brown Belt
Counter fighter
Likes musicals |
|
| |
|
Ladies and gentlemen. This fight is 3 rounds, in the welterweight division.
Introducing the fighter to my left, fighting out of the red corner.
With a record of 1 - 0 - 0, fighting out of Amsterdam, Guust Altenaar!
And introducing the fighter to my right, fighting out of the blue corner.
With a record of 1 - 0 - 0, fighting out of Amsterdam, Pedro Oliveira !
The judges for this bout are Aafke Stam, Paulsen Ambrosius and Saam Ante.

The bell rings for round one and we are underway!

Oliveira gets taken down but at least he's managed to land in guard.
Altenaar trying to control the position from guard on top but Oliveira is wriggling around, looking for whatever he can.

Oliveira is active off his back here, looking for submissions.
Altenaar trying to control but Oliveira is working from the bottom.
The fighters are pressed up against the cage, both looking to find a bit of space to work.
We've had a slow start to the round here - hopefully the action picks up.
Altenaar lying in Oliveira 's guard like a wet fish here, stalling away. Oliveira decides he's had enough of all that nonsense - he escapes his hips and locks up an armbar! Wow, that was slick! Altenaar taps! This one is aaaaaaaaaaall over!
Ladies and gentlemen, after 1:59 of round 1, we have a winner by way of Submission (Armbar). Pedro Oliveira !
A very excited looking Pedro Oliveira made sure he remembered to thank all the fans both in the arena and on the internet. He said all the coolest people spend all day on MMA websites, which got a big reaction.
|
|
|
|
|
|
|
|
|
|
|
|
|
|
|
|
|
|
|
|
|
|
|
| S |
C
A |
G |
S |
C
B |
G |
|
S |
C |
G |
|
energy
A | B |
|
hype
A | B |
|
pop
A | B |
|
mgr
A | B |
|
FIGHT
RATING
63% |
|
|
|
|
|
|
|
Undercard bout
|
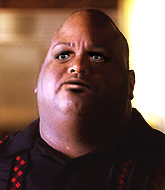
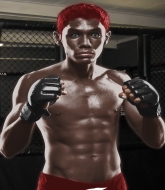
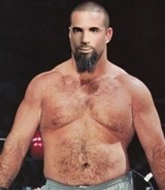
Coming up we have a light heavyweight MMA rules bout between Ton Tyk (ranked 2789 p4p, 3793 weight class) and Shawn Porter (ranked 439 p4p, 539 weight class). I'm sure you'll be fascinated to know that I was talking to some pointless Z list celebrity before the fight and he thought that Shawn Porter was going to win. Let's see if he was right.
 |
|
 |
| 190 cm
19
210
2 - 0 - 0 |
|
180 cm
25
200
2 - 0 - 0 |
Good takedowns
Brawler
Big heart |
|
Good takedowns
Brawler
Intelligent |
|
| |
|
Ladies and gentlemen. This fight is 3 rounds, in the light heavyweight division.
Introducing the fighter to my left, fighting out of the red corner.
With a record of 2 - 0 - 0, fighting out of Amsterdam, Ton Tyk!
And introducing the fighter to my right, fighting out of the blue corner.
With a record of 2 - 0 - 0, fighting out of Rio de Janeiro, Shawn Porter!
The judges for this bout are Wagner Zegers, Aafke Stam and Saam Ante.
The bell rings for round one and we are underway!
The fight stays on the outside here - Tyk looks like he's thinking about clinching though.
Tyk shoots in with a takedown attempt and he has Porter pinned against the cage. Porter gets the underhooks and manages to circle away.
Tyk throws a combination that misses

and Porter counters with a nice double leg into half guard.
Tyk gets back to full guard.
Tyk wants to sweep but no luck.
We've had a slow start to the round here - hopefully the action picks up.
Hammerfist, elbow! yells Porter's corner. There ya go! There ya go!
Tyk seems to have improved his submission grappling technique since last time we saw him. Let's see if he can pull off a submission.
Porter trying to control but Tyk is working from the bottom.
Tyk tries to land a sweep but no joy.

That's one minute gone in the round.
Tyk is trying to control the position from the bottom.
The ref warns both fighters not to hold the cage as they work up against the meshing.
Porter throws a big right hand that misses.
Tyk working a defensive guard here.
Porter wants to stand but Tyk is controlling his posture from full guard.
Porter slows down the pace of the fight, as he sits in guard.
It looks like the ref is thinking about a standup.
Tyk working a defensive guard but Porter manages to pass into side control anyway.

That's two minutes gone in the round.
Neither fighter has done anything of merit for a good minute or two here and the crowd are not happy about it.
Porter misses with the ground and pound.
Tyk tries to bench press Porter off him but Porter keeps the position.
A lull in the action here.
Tyk defending against the ground and pound.
Porter has the superior BJJ but he's also working some ground strikes into his gameplan.

That's three minutes gone in the round.
Tyk gets one leg under and gets the fight to half guard.
Tyk tries to strike from the bottom but it doesn't land.
Tyk looks like he's trying to stand up.

The referee has decided to stand the fighters back up, so we'll restart on the feet.
Porter tries to clinch there but Tyk circles away.
Porter closes the distance and scores a nice trip takedown into half guard. Tyk did well to prevent Porter getting side control.
Porter performing his best blanket impression for a moment.
Tyk is trying to get back to full guard.

That's four minutes gone in the round.
Tyk is not content to let Porter control the position.
Tyk slips a foot under and gets full guard. Nice work.
Tyk tries to land a sweep but no joy.
Porter throwing strikes but missing.
Boooooooooooooooooooo!!! God, this has been a terrible round. Come on you two, sort yourselves out!
Porter wants to control from the top but Tyk keeps moving.
Porter tries to free his leg and advance position but Tyk is retaining full guard.
And that is the end of the round. The fighters go back to their corners.
Shawn Porter dominated that round.
The corners get their ten second warning. Both fighters stand from their stools and stare each other down, ready to get back to the action.

Porter looks to land a combination but Tyk avoids it well.
Tyk misses with a takedown attempt - Porter sprawls well and throws a nice strike on the way out which just misses.
Porter fails with a rather predictable takedown attempt.
Tyk drops down looking for a counter takedown but Porter sprawls and moves away.
Tyk shoots in looking for a takedown but Porter manages to keep the fight standing, pushing Tyk's face into the canvas for good measure before circling away.
Porter unleashes a big counter combination but Tyk bobs and weaves and avoids any damage.
Ton Tyk is looking to throw some combinations by the looks of things.
Porter closes this distance looking for a takedown but Tyk circles away.
Tyk looking to shoot here. He's gone for it and he's landed a takedown into side control! Oh, that's bad for Porter!
Sloppy strikes there by Tyk.
We've had a slow start to the round here - hopefully the action picks up.
You can see the frustration on Porter's face, being in this tough position on the bottom.
Porter might have to switch it up a bit here because his efforts to control Tyk haven't been going to plan, at least at the current moment in time.
That's one minute gone in the round.

Tyk decides to stand back up. Tyk steps back and let's Porter get back to his feet.
Porter changes levels and looks for a double leg takedown. Tyk tries to avoid it but Porter manages to keep hold of a leg and drag Tyk to the ground. Tyk escapes though and pops straight back up to his feet.
Tyk is looking for a counter combo.
Ton Tyk has stuffed three takedown attempts in the round now. That's going to take a lot out of Shawn Porter.
Porter defends well against a solid takedown attempt from Tyk.
Tyk fakes high and shoots in for a takedown but Porter avoids it really well and circles away.
Porter fails with a rather predictable takedown attempt.
Tyk tries to clinch but Porter is having none of it.
Tyk throws a leg kick but he was too far away and it doesn't land.
Tyk tries to clinch but is not successful on this occasion.
Porter gets caught on his heels momentarily as he allows Tyk to score an easy takedown into full guard.
That's two minutes gone in the round.
Porter has his foot on Tyk's thigh. He's trying to push off and get in position for a triangle, I think. Tyk works his way back into a safe position though.
Porter is breathing heavily.
Porter wants to control the position but Tyk says "no thanks buddy" and passes to half guard.
Tyk is looking to take a break and control but Porter is keeping him honest, looking to work from the bottom.
Porter makes his way to full guard. A much better position for Porter.
Porter can't do much from the bottom at the moment, as Tyk controls the pace.
Tyk stands up from guard. Let's bang!
That's three minutes gone in the round.
Tyk looks for a takedown. He's got it. We're now in half guard.
Tyk wants to control but Porter is keeping him busy.
Tyk seems content to maintain position for now, rather than mounting any offense.
Porter has hold of Tyk's hands but Tyk slips his arm to the side and lands an elbow.
Tyk is just sitting in half guard, waiting for something to happen.
Porter wants to get back to his feet.
That's four minutes gone in the round.
Porter is looking to improve his position.
Tyk content to sit in half guard and control for a moment.
The crowd thankful this round is nearly over.
Porter trying to keep hold of his opponent's head but Tyk manages to pass to mount!
And that is the end of the round. The fighters go back to their corners.
Ton Tyk dominated that second round.
Well, the break between rounds is over. Let's get back to the scrappin! This is the final round!

Porter misses with a head kick.
Porter shoots in for a takedown but Tyk shows good takedown defense.
Tyk takes a punch right to his stomach. That took the wind out of him momentarily.
Tyk throws a loose over hand right and dives in with a double leg takedown. Porter tries to sprawl but it's too late and the fighters hit the mat. Tyk is in Porter's guard.
Porter is wriggling around but Tyk manages to pass to half guard.
Porter wants to get back to full guard but Tyk has mounted him!
Tyk controlling from the full mount.
We've had a slow start to the round here - hopefully the action picks up.
Tyk punching from mount but Porter doing a good job of avoiding damage.
Tyk controlling his opponent.

Tyk is looking to secure an arm. He's managed it! He's pivoting for an armbar - that looks tight! But Porter has managed to get out of it and now he's in a dominant position. Nice work from Porter!
The fighters are pressed up against the cage, both looking to find a bit of space to work.
That's one minute gone in the round.
Porter's corner is telling him to maintain position.
Tyk pulls Porter in close to prevent any damage.

Tyk pushes Porter off for just long enough to get back to his feet. Very athletic spring there.
Porter darts in looking for a takedown but Tyk gets double underhooks and turns Porter into the cage.
Tyk throws a leg kick
and Porter counters with a driving takedown into guard. Nice work there by Porter.
Ton Tyk overall seems to be getting the better of the ground position in the fight so far.
Porter takes a big intake of breath there - he's definitely tired.
Tyk manages to sweep nicely, so he's now on top. Porter manages to get himself to full guard.

That's two minutes gone in the round.
Porter working the defensive guard well to avoid strikes from Tyk.
Tyk stands up and looks to throw the legs aside to pass to side control. Porter swivels though and keeps the full guard.
Tyk gets to his feet and steps away from his opponent.
Porter avoids the clinch attempt nicely.
Porter tries for a takedown but Tyk sees it coming a mile off and avoids it easily.
Tyk is trying to close the distance and clinch up, after that failed offence from Porter.
Ton Tyk has stuffed three takedown attempts in the round now. That's going to take a lot out of Shawn Porter.
Porter avoids the head kick by Tyk.
That's three minutes gone in the round.
Tyk looks for a takedown but Porter sprawls well.
Porter checks a low kick. Bone on bone - not my idea of a good time.

Porter clinches up with Tyk and pushes him back against the cage.
Porter decides to pull guard.
Tyk advances to half guard.
Tyk is keen to just control but Porter is a slippery customer.
Tyk is trying to work for a kimura. This could be trouble! No, Porter has managed to free his arm - good work.
Tyk thows a wild elbow that connects with the canvas.
That's four minutes gone in the round.
Tyk trying to control from Porter's half guard. Porter has other ideas though and has regained full guard.
Tyk gets to his feet. Porter looking to butt scoot but the ref puts an end to that. On your feet son!
Tyk wants to clinch but Porter slips to the side
and Porter counters with a shoot takedown. Tyk fights it but they end up in guard.
Tyk is trying to keep Porter in close.
Tyk is working the butterfly guard. He manages to land a nice scissor sweep and is now in half guard on the top. Nice move.
This is a great period of action - very entertaining stuff!
Porter is trying to stand back up but Tyk is controlling him
And that's the end of the fight!
Ton Tyk showed his dominance in that final round.
I think Tyk has won this one but let's see what the judges have to say. Over to the ring announcer for the scorecards.
Ladies and gentlemen, after 3 rounds of action, we go to the scorecards for a decision.
Judge Wagner Zegers scores the fight 29:28
Judge Aafke Stam scores the fight 29:28
Judge Saam Ante scores the fight 29:28
In favor of your winner, by unanimous decision... Ton Tyk!
During a confident post fight interview, Ton Tyk thanked all his fans. He seemed very genuine when describing how motivated his fans keep him.
|
|
|
|
|
|
|
|
|
|
|
|
|
|
|
|
|
|
|
|
|
|
|
| S |
C
A |
G |
S |
C
B |
G |
|
S |
C |
G |
|
energy
A | B |
|
hype
A | B |
|
pop
A | B |
|
mgr
A | B |
|
FIGHT
RATING
33% |
|
|
|
|
|
|
|
Undercard bout
|
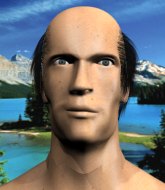
Coming up we have a lightweight MMA rules bout between Jack Grave (ranked 2651 p4p, 3310 weight class) and Ditlev Truelsen (ranked 342 p4p, 409 weight class). Both fighters look fresh as a daisy as they make their way towards the cage.
 |
|
 |
| 175 cm
19
160
4 - 1 - 0 |
|
180 cm
20
164
5 - 3 - 0 |
BJJ White Belt
Excellent boxer
Big right hand |
|
Good takedowns
Brawler
Good gas tank |
|
| |
|
Ladies and gentlemen. This fight is 3 rounds, in the lightweight division.
Introducing the fighter to my left, fighting out of the red corner.
With a record of 4 - 1 - 0, fighting out of Montreal, Jack Grave!
And introducing the fighter to my right, fighting out of the blue corner.
With a record of 5 - 3 - 0, fighting out of Hilo, Ditlev Truelsen!
The judges for this bout are Saam Ante, Nard Betker and Patrick Alders.
The bell rings for round one and we are underway!
Grave fakes low and throws an overhand right that catches Truelsen on the side of the head.
Truelsen misses with a takedown attempt
and Truelsen takes a counter punch right on the button for his troubles.
Grave scores with the left hand. Truelsen knows he should have avoided that one.
 Truelsen is rocked! Truelsen is rocked!
Grave closes the distance and lands a brutal uppercut that knocks Truelsen out! We're looking at the replay now - he was out before he hit the floor!
Ladies and gentlemen, after 0:12 of round 1, we have a winner by way of KO (Punch). Jack Grave!
In his post fight interview, Jack Grave started talking himself up. Luckily his charisma kept the crowd on side and gave him a good reception.
|
|
|
|
|
|
|
|
|
|
|
|
|
|
|
|
|
|
|
|
|
|
|
| S |
C
A |
G |
S |
C
B |
G |
|
S |
C |
G |
|
energy
A | B |
|
hype
A | B |
|
pop
A | B |
|
mgr
A | B |
|
FIGHT
RATING
100% |
|
|
|
|
|
|
|
Undercard bout
|
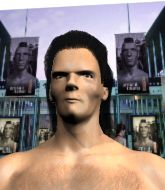
Coming up we have a welterweight MMA rules bout between Captain Blood (ranked 3289 p4p, 2950 weight class) and Bronson Hamhog (ranked 410 p4p, 375 weight class). Both these guys have solid standup skills and neither is particularly fantastic on the ground, so let's hope for a nice standup war!
 |
|
 |
| 190 cm
24
180
5 - 2 - 0 |
|
179 cm
24
179
2 - 0 - 0 |
Dangerous GnP
Excellent boxer
Big right hand |
|
BJJ White Belt
Excellent boxer
Heavy handed |
|
| |
|
Ladies and gentlemen. This fight is 3 rounds, in the welterweight division.
Introducing the fighter to my left, fighting out of the red corner.
With a record of 5 - 2 - 0, fighting out of Helsinki, Captain Blood!
And introducing the fighter to my right, fighting out of the blue corner.
With a record of 2 - 0 - 0, fighting out of Montreal, Bronson Hamhog!
The judges for this bout are Daniel Blasius, Saam Ante and Paul Aken.
The bell rings for round one and we are underway!
The fight stays on the outside here - Blood looks like he's thinking about clinching though.
Hamhog misses with a hook. Blood ducked under it nicely.
Blood fakes a head punch and goes low to the body. Nicely done.
Blood closes the distance and clinches up with Hamhog, looking for a takedown. Blood pushes Hamhog against the cage but Hamhog circles to the side and manages to break the clinch.
Hamhog looks to score with a combo but nothing lands.
Blood throws a hook but Hamhog blocks it.
Hamhog unleashes a big counter combination but Blood bobs and weaves and avoids any damage.
Blood closes the distance but Hamhog moves to the side
and Hamhog counters with a straight right hand.
Captain Blood seems to be the more aggressive standup fighter in this bout.
Blood shoots in for a double leg but Hamhog sprawls well. That's going to sap some energy.
Blood cracks Hamhog with an open hand slap.
We've had a slow start to the round here - hopefully the action picks up.
Hamhog misses with a shot to the body
and Blood counters with a right hand to the body.
Blood lands with a hook. Hamhog tried to avoid it but it clipped the top of his head.
Blood scores with the left hand. Hamhog knows he should have avoided that one.
Blood lands an overhand left. A wild punch that just about connected.
That's one minute gone in the round.
Blood misses with a body shot.
Blood tries for a takedown but Hamhog sees it coming a mile off and avoids it easily.
That's three failed takedown attempts in the round for Captain Blood. That's going to take a lot out of him.
Blood lands with an uppercut that bounces Hamhog off the cage and back into range.
Hamhog with a body punch. A glancing blow.
Blood lands a beauty of a right hand that gets the crowd cheering.
Blood misses with a body shot
letting Hamhog counter with a right hand.
Blood tries to grapple but his opponent circles
and Hamhog connects with a straight left hand counter down the middle.
Blood tries to score a power double leg takedown but Hamhog sees that one coming and sprawls well. That will dishearten Blood somewhat.
And an attempted straight right on the counter from Hamhog! But no joy.
Blood throws a hook but Hamhog blocks it.
Nice defenses there by Blood.
Blood is using his height advantage well here, landing a good percentage of his punches.
That's two minutes gone in the round.
Blood fakes high and swings low for a body shot but Hamhog manages to avoid it.
Blood scores with a shot to the body.
Blood misses with a takedown
and Hamhog counters nicely by changing levels and landing a hook to the body.
The crowd are loving this. Great action here.
Hamhog swings and misses with a hook to the body.
Blood misses with a low kick.
A little jabbing left from Hamhog on the counter but it doesn't find it's target.
Blood doesn't succeed with the takedown
letting Hamhog counter with a right hand.
Blood lands a pitter patter jab to the forehead of his opponent.
Blood feints a straight left to the body, then turns around with a flashy move and hits Hamhogs jaw with a dramatic spinning back fist!
Hamhog misses with a straight right.
Blood half commits to a counter takedown before pushing away, out of range.
Hamhog slips under a jab.
Hamhog ducks down and throws a hook to the body but Blood moves away.
Blood scores with a big left there. The judges will like that one.
That's three minutes gone in the round.
Hamhog waving his hands out in front of him, looking to distract Blood.
Hamhog throws a body punch but Blood moves out of range.
Blood throws a hard body shot but it just misses.
Blood cracks Hamhog with an open hand slap.
We've been informed that Hamhog has been working hard on his conditioning in the buildup to the fight.
Hamhog misses the shot to the body.
Jab by Blood.
Hamhog misses with a hook.
Hamhog blocks a jab.
Hamhog has his head snapped back a nice jab. A little nod from Hamhog there as he acknowledges the shot.
Hamhog looks to land a right hand but Blood moved out of range.
Blood scores with a body shot.
Blood swings for the body but Hamhog moves out of range.
Hamhog walks into a stiff left hand from Blood.
That's four minutes gone in the round.
Blood misses with a body shot.
Hamhog misses with a jab, cross combination.
Blood is looking to counter punch.
Hamhog looks winded!
Blood shoots in looking for a takedown. Hamhog tries to sprawl out of it but Blood keeps driving through. The fighters are pinned against the cage. Hamhog manages to get underhooks and after a bit of a struggle, circles away and we're back to standing.
Good shot there by Blood.
This is a great period of action - very entertaining stuff!
Blood misses with a hook to the body
and Hamhog counters with a straight right hand.
Blood tries to drive through with a takedown attempt but Hamhog defends well and Blood ends up having to push Hamhog into the cage where they will battle it out in the clinch.
Blood misses with a punch on the inside.
Blood tried to land a shot to the body but connects with Hamhog's elbow.
An uppercut on the inside fails to land for Blood.
Blood pushes Hamhog back against the cage and lands a hook to the side of the head.
And that is the end of the round. The fighters go back to their corners.
Captain Blood dominated that round.
The minute break is over - no more time for sponges and pep talks - back to the action!
Blood scores with a decent looking hook.
Hamhog throws a hook to the side of Blood's head but Blood sees it coming and ducks under it beautifully.
Hamhog misses with a body shot. Nice footwork from Blood.
Hamhog takes a swing at Blood's ribcage but misses.
Hamhog looks to score with a jab to the body but Blood is just out of range.
Hamhog jabbing away but nothing is landing.
A counter left hand to the body from Blood misses its target.
Blood lands a lovely overhand right.
Blood definitely looks more muscular than last time we saw him fight.
Blood throws a series of punches but Hamhog moves out of range.
Blood punishes Hamhog's body with a nice straight punch.
Blood looks to score with a jab to the body but Hamhog is just out of range.
We've had a slow start to the round here - hopefully the action picks up.
Blood has a takedown stuffed.
Hamhog now looks to counter with a shot at the body.
Blood is using his reach advantage well here, landing the more effective single shots from range.
Hamhog throws out a token jab with nothing on it.
Blood misses with a body shot.
That's one minute gone in the round.
Hamhog takes an uppercut right on the button but keeps his composure.
Bronson Hamhog is looking to keep the fight on the feet at all costs.
Blood misses with a right hand
and Hamhog cracks him with a counter punch right on the button.
Blood lands with a straight right. Hamhog didn't see that one coming.
Blood tries to grapple but his opponent circles
and Hamhog connects with a straight left hand counter down the middle.
Hamhog takes one on the button.
Hamhog misses with a body shot.
A looping hook to the body misses from Blood. Hamhog does a little dance to reset his feet.
A jab lands there for Blood.
Hamhog takes a really solid shot there but just smiles back and shrugs his shoulders.
Blood wants to land a leg kick but Hamhog is out of range.
Hamhog throws a body shot but no joy.
Blood is really dominating this fight. Is there anything that Hamhog can do to turn this around?
Blood lands with a straight right. Hamhog didn't see that one coming.
That's two minutes gone in the round.
We've seen a great period of action over the last minute or so - credit to both fighters for going all out!
Blood tries to drive through with a takedown attempt but Hamhog defends well and Blood ends up having to push Hamhog into the cage where they will battle it out in the clinch.
A left hand lands to the body for Blood.
Hamhog is breathing heavily.
Hamhog blocks an elbow strike from Blood.
Blood swings away with an uppercut that misses.
Blood throws a punch but it's blocked by Hamhog.
A right hook to the body lands for Blood.
A head punch blocked on the inside by Hamhog.
Hamhog blocks a body shot from Blood.
Hamhog's head jolts backwards as he takes an uppercut right on the button!
Blood misses with a hook to the ribs.
Nice body punch from Blood - that landed with a thud.
Blood lands a right hand.
Hamhog blocking some punches.
That's three minutes gone in the round.
Blood fails to land with a short punch on the inside.
Blood tries a shoulder strike but it doesn't do any damage.
A head punch blocked on the inside by Hamhog.
Blood misses with a punch to the body.
A hook to the body from Blood.
Blood lands a nice shot to the body.
A head punch blocked on the inside by Hamhog.
Blood throws a head punch that misses.
Blood throws a head punch that misses.
A head punch on the inside from Blood fails to land.
Hamhog blocking some punches.
Blood lands an uppercut.
Blood misses with some punches.
That's four minutes gone in the round.
Blood lands a right hand.
Blood misses with a shot to the kidneys.
Blood presses Hamhog against the cage and delivers a mid-strength body shot.
Hamhog blocks a couple of punches on the inside.
A head punch blocked on the inside by Hamhog.
Blood tries to work over Hamhog's body with a swooping hook but it only glances the target.
A shot in the inside from Blood.
Nice body punch from Blood.
Blood is working Hamhog over against the cage.
The crowd are loving this. Great action here.
Hamhog blocking some punches.
Still in the clinch, Blood scores with a nice short uppercut.
Blood scores with a shot to the side of Hamhog's head.
Blood has a couple of punches blocked by Hamhog.
Blood swings away with an uppercut that misses.
And that is the end of the round. The fighters go back to their corners.
Captain Blood dominated that second round.
The fighters' corners scream their final instructions, as the referee calls time. Here we go, back to the action! So, we enter the final round. Let's see if either fighter can bring us a finish, or whether we're going to the judges scorecards.
Blood lands a pitter patter jab to the forehead of his opponent.
Blood slips a straight right by Hamhog.
Hamhog fakes high and swings low for a body shot but Blood manages to avoid it.
Blood cracks Hamhog with a nice right hand that draws applause from the crowd.
Hamhog throws the left hand but Blood avoids the punch easily.
Blood jabs Hamhog right on the nose. Hamhog blinks but takes it well.
Blood misses with a takedown attempt
and Hamhog counters with a stiff right hand.
Blood throws a shot to the body.
Blood throws a front kick aimed at Hamhog's knee but Hamhog avoids it well.
A little jabbing left from Hamhog on the counter but it doesn't find it's target.
Captain Blood is winning the standup battle so far.
We've had a slow start to the round here - hopefully the action picks up.
Blood lands a pitter patter jab to the forehead of his opponent.
Blood shoots in for a double leg but Hamhog sprawls well. That's going to sap some energy.
Blood throws a combination but comes up with nothing but fresh air.
Hamhog takes a big intake of breath there - he's definitely tired.
Blood lands a lovely overhand right.
Wooooo! Give it up for these two warriors! They are putting on a show!
Blood scores with a body shot.
That's one minute gone in the round.
Blood with a hook.
Blood is looking to clinch.
Hamhog gets his head snapped back by a nice shot there.
Hamhog fakes high and swings low for a body shot but Blood manages to avoid it.
Blood shoots in but no luck this time.
That's three failed takedown attempts in the round for Captain Blood. That's going to take a lot out of him.
Blood fails in his attempt to clinch.
Blood fakes low and throws an overhand right that catches Hamhog on the side of the head.
Hamhog has his head snapped back a nice jab. A little nod from Hamhog there as he acknowledges the shot.
Blood just misses with a punch to the body.
Hamhog on the wrong end of a nice jab.
Nice defenses there by Blood.
Hamhog closes the distance and takes a jab right on the nose as he does so.
That's two minutes gone in the round.
Blood lands a really nice looking cross but Hamhog seems unphased.
Blood fails with a takedown attempt from distance.
Hamhog has his head snapped back a nice jab. A little nod from Hamhog there as he acknowledges the shot.
Hamhog is rocked!
The crowd cheering loudly, showing their appreciation for the quality fight we're seeing here.
Blood ducks down and throws a hook to the body but Hamhog moves away.
Hamhog appears to be waiting to throw a counter punch to the body.
Hamhog is still on wobbly legs! Can Blood finish him?
Blood shoots for a takedown but Hamhog saw that one coming a mile off and avoided it easily.
Hamhog seems to have recovered his senses.
Blood scores with a jab. Hamhog acknowledges it with a nod of the head.
Blood shuffles to his left behind two crisp jabs. Hamhog eats them both and turns towards Blood to reposition himself and eats a stinging right hand-left hook combo.
Hamhog takes a jab right on the kisser.
Blood ducks down and throws a hook to the body but Hamhog moves away.
Hamhog looked like he wanted to counter with a punch but didn't throw it.
Blood dodges the punch combination from Hamhog.
Blood misses with a two punch combination.
That's three minutes gone in the round.

Blood rushes Hamhog and presses him up against the cage.
Blood tried to land a shot to the body but connects with Hamhog's elbow.
Blood misses with a punch on the inside.
Hamhog blocks a body shot from Blood.
Blood misses with a punch to the body.
Blood misses with a short punch on the inside.
Hamhog blocks a couple of punches on the inside.
Blood creates a bit of distance and throws an elbow that only just misses.
Blood tries a shoulder strike but it doesn't do any damage.
A short body shot lands from Blood as the two fighters clinch.
Blood working some nice short punches in the clinch.
Blood misses with a shot to the kidneys.
That's four minutes gone in the round.
Blood tries a shoulder strike but it doesn't do any damage.
Bronson Hamhog has stepped it up - he knows he needs a finish here!
Blood gets through Hamhog's defenses to land a nice punch to the side of the head.
Still in the clinch, Blood scores with a nice short uppercut.
Blood makes some space for himself and lands an uppercut.
Blood misses with some punches.
Blood lands with a short head shot on the inside.
A right handed body shot lands from Blood.
Captain Blood is fighting for a decision here - he's started to take the cautious approach.
Fantastic stuff here - a very entertaining period of action, which has drawn cheers from the crowd.
A head punch on the inside from Blood fails to land.
Hamhog takes a shot to the head.
Blood working on landing some head shots here - that one got through nicely.
And that's the end of the fight!
Captain Blood showed his dominance in that final round.
Well Blood has outscored his opponent in every aspect of the fight today. Only a scarily incompetent judge or two will keep him from a well deserved win... Over to the ring announcer for the scorecards.
Ladies and gentlemen, after 3 rounds of action, we go to the scorecards for a decision.
Judge Daniel Blasius scores the fight 30:27
Judge Saam Ante scores the fight 30:27
Judge Paul Aken scores the fight 30:27
In favor of your winner, by unanimous decision... Captain Blood!
A very excited looking Captain Blood made sure he remembered to thank all the fans both in the arena and on the internet. He said all the coolest people spend all day on MMA websites, which got a big reaction.
|
|
|
|
|
|
|
|
|
|
|
|
|
|
|
|
|
|
|
|
|
|
|
| S |
C
A |
G |
S |
C
B |
G |
|
S |
C |
G |
|
energy
A | B |
|
hype
A | B |
|
pop
A | B |
|
mgr
A | B |
|
FIGHT
RATING
59% |
|
|
|
|
|
|
|
Undercard bout
|
Coming up we have a welterweight MMA rules bout between Isoa Tawake (ranked 2287 p4p, 2768 weight class) and Sabas Mendiola (ranked 298 p4p, 357 weight class). Isoa Tawake has a significant reach advantage - let's see if he can make it count.
 |
|
 |
| 193 cm
19
185
3 - 2 - 0 |
|
173 cm
19
179
3 - 1 - 0 |
BJJ Blue Belt
Excellent MT
Cardio machine |
|
Good wrestler
Decent boxing
Powerful |
|
| |
|
Ladies and gentlemen. This fight is 3 rounds, in the welterweight division.
Introducing the fighter to my left, fighting out of the red corner.
With a record of 3 - 2 - 0, fighting out of Amsterdam, Isoa Tawake!
And introducing the fighter to my right, fighting out of the blue corner.
With a record of 3 - 1 - 0, fighting out of Helsinki, Sabas Mendiola!
The judges for this bout are Patrick Alders, Aafke Stam and Radbod Blank.
The bell rings for round one and we are underway!
Tawake throws a low kick but Mendiola moves out of range easily.
Tawake misses with a right hand
and Mendiola decides to take the opportunity to score a takedown. He's landed in Tawake's guard.
Tawake has momentary wrist control but Mendiola slips an elbow through the middle.
Tawake looking to hit a scissor sweep but Mendiola is one step ahead there.
Mendiola working some strikes from top position.
Tawake thows some rabbit punches from the bottom but they don't do any damage.
Tawake is striking off his back. Mendiola thinks nothing of it though and passes easily into half guard.
Mendiola working some ground and pound from close in. He's looking to maintain this position and strike for a while by the looks of things... although he'll probably advance to full mount in a minute now I've said that.
Tawake regains full guard. Nicely done.
Mendiola is working Tawake over from the guard. He should look to pass the guard and do a little more damage with these strikes.
Mendiola has the superior BJJ but he's also working some ground strikes into his gameplan.
Mendiola scoring with punches to the head and body.
Mendiola is working the ground and pound from guard. He might want to try advancing position though to get more of an impact.
Tawake has a butterfly guard looking to sweep but Mendiola has passed into side control.
We've seen a great period of action over the last minute or so - credit to both fighters for going all out!
Mendiola lands a knee to the body and a forearm to the face.
Mendiola working the ground and pound from side control.
That's one minute gone in the round.
Mendiola working away diligently from side control. Landing strikes effectively there - that will score him some points on the judges scorecards.
 Tawake is rocked! Tawake is rocked!
Mendiola lands a few punches from side control.
Oh Tawake is still in real trouble! Will he be able to recover?!!
Mendiola is looking to take a break and control but Tawake is keeping him honest, looking to work from the bottom.
Mendiola scores with a couple of nice shots to the head there. The referee takes a look at Tawake to see if he's OK.
Tawake is looking to regain half guard here but Mendiola keeps moving and retains side control.
Mendiola working the head and body with strikes.
Mendiola is working Tawake over with some ground and pound from side control.
Tawake's coaches at Glory 4 Boxing have been working on his defensive grappling in preparation for this fight so let's see if he can get out of this tricky position.
Tawake tries to buck Mendiola off but Mendiola is having none of it.
Tawake is being controlled here.
Tawake is looking for a sweep.
Tawake seems to have got his legs back now.
Tawake is working hard here to advance position.
Mendiola working the ground and pound.
 It looks like Isoa Tawake has been cut. It looks like Isoa Tawake has been cut.
That's two minutes gone in the round.
A big shot lands for Mendiola! That's hurt Tawake! Will he recover? Mendiola fires away with more strikes and the referee has to step in to stop the fight!
Ladies and gentlemen, after 2:21 of round 1, we have a winner by way of TKO (Strikes). Sabas Mendiola!
|
|
|
|
|
|
|
|
|
|
|
|
|
|
|
|
|
|
|
|
|
|
|
| S |
C
A |
G |
S |
C
B |
G |
|
S |
C |
G |
|
energy
A | B |
|
hype
A | B |
|
pop
A | B |
|
mgr
A | B |
|
FIGHT
RATING
56% |
|
|
|
|
|
|
|
Undercard bout
|
Coming up we have a heavyweight MMA rules bout between Constable Odo (ranked 1980 p4p, 2373 weight class) and Huell Babineaux (ranked 229 p4p, 281 weight class). These two fighters really are very evenly matched on the feet - it will be fascinating to see who can assert themselves in that aspect of the fight.
 |
|
 |
| 190 cm
20
265
3 - 1 - 0 |
|
196 cm
20
270
3 - 0 - 0 |
BJJ Blue Belt
Dangerous knees
Granite chin |
|
BJJ Blue Belt
Excellent boxer
Powerful |
|
| |
|
Ladies and gentlemen. This fight is 3 rounds, in the heavyweight division.
Introducing the fighter to my left, fighting out of the red corner.
With a record of 3 - 1 - 0, fighting out of Las Vegas, Constable Odo!
And introducing the fighter to my right, fighting out of the blue corner.
With a record of 3 - 0 - 0, fighting out of Las Vegas, Huell Babineaux!
The judges for this bout are Albert Achterberg, Aafke Stam and Wagner Zegers.
The bell rings for round one and we are underway!
Odo misses the shot to the body.
We've been told by Odo's head coaches at The House Of Pain that he's been working on his takedown defense in preparation for this fight.
Odo avoids a lazy jab quite easily.
Babineaux shakes his hands off, looking to compose himself, but takes a jab to the jaw whilst he does it.
 It looks like Huell Babineaux has been cut. It looks like Huell Babineaux has been cut.
Odo takes a body punch but keeps moving.
Constable Odo seems to be the more aggressive standup fighter in this bout.
Nice defenses there by Odo.
Odo misses with a telegraphed body shot
and Babineaux counters with a lovely shot to the body.
Babineaux misses with a body shot.
Babineaux just misses with a punch to the body.
We've had a slow start to the round here - hopefully the action picks up.
Babineaux scores with a jab.
Babineaux lands a nice looking body shot.
Babineaux wings a very wild body shot but it does the job and lands to the midsection.
Odo throws a front kick that sends Babineaux stumbling back into the cage.
That's one minute gone in the round.
Odo moves out of range as Babineaux strikes.
Odo tries to clinch
and Babineaux counters with a crisp hook to the side of the head.
Odo bobs and weaves well there to avoid the strikes.
Odo tries to land a front kick but Babineaux steps back. That was a bit too telegraphed.
Odo pulls out of a head kick attempt.
Odo moves out of range of the strikes.
As Babineaux tries to get set, Odo tries to push him back and clinch up but Babineaux manages to avoid the attempt.
Odo steps to the side to avoid the strikes from Babineaux.
Odo tries to counter by moving into the clinch but Babineaux manages to circle out of the way.
Nice cross by Babineaux.
Babineaux cracks Odo with a hook to the jaw. Both fighters smile at eachother and high-five before getting back down to business.
Babineaux throws a shot to the body.
A low kick from Odo is predictable there
and Babineaux counters with a good right hand that lands right on the jaw.
That's two minutes gone in the round.
Babineaux misses with a hook to the body
and Odo counters with a leg kick that reverborates around the arena.
Odo darts in and clinches Babineaux up against the cage.
This has been an exciting period of action!
An uppercut on the inside fails to land for Babineaux.
A head punch on the inside from Babineaux fails to land.
Odo scores with a knee to the head.
Babineaux throws a head punch that misses.
Babineaux lands a nice shot to the body.
Babineaux tried to land a shot to the body but connects with Odo's elbow.
A short uppercut from Babineaux.
Babineaux pushes Odo back against the cage and lands a hook to the side of the head.
Babineaux lands with a good tight uppercut to the head.
Odo blocks a body shot from Babineaux.
Babineaux misses with some punches.
Babineaux swings away with an uppercut that misses.

Babineaux breaks the clinch and we're back to striking at distance.
Babineaux loads up on a big right hand but Odo slips the punch.
That's three minutes gone in the round.
Babineaux jabbing away but nothing is landing.
A little feinted left hand from Odo on the counter but he doesn't commit to it.
Good standup being displayed there by Babineaux as he connects with a hook.
Odo takes the fight into the clinch.
An uppercut on the inside fails to land for Babineaux.
Babineaux works on Odo's body with a couple of short punches.
A nice right hand lands inside from Babineaux.
Babineaux throws a punch but it's blocked by Odo.
Babineaux pushes Odo back against the cage and lands a hook to the side of the head.
A left hand lands to the body for Babineaux.
Babineaux throws a head punch that misses.
Babineaux's corner calls for him to break the clinch, which he does.
Odo throws a poor cross that misses
and Babineaux counters with a straight right hand.
Babineaux throws a jab when Odo was well out of range.
That's four minutes gone in the round.
Odo avoids the body shot from Babineaux.
Babineaux connects nicely with a jab. Noted by the judges no doubt.
We've seen a great period of action over the last minute or so - credit to both fighters for going all out!
Nice cross by Babineaux.
A low kick from Odo misses
letting Babineaux counter with a right hand.
Odo on the wrong end of an overhand right that came out of nowhere.
A low kick from Odo misses
and Babineaux counters with a left to the body.
Babineaux scores with a jab.
Babineaux digs a good body shot into Odo's ribs.
Babineaux is landing a lot of head punches in this opening round! Odo had better start moving his head a bit unless he wants his face to turn into mush.
Babineaux throws a combination. Odo tries to block but a couple of punches get through.
Babineaux throws an overhand right that drops Odo like a sack of potatoes! Babineaux dives in to finish the fight with more strikes and this one is all over!
Ladies and gentlemen, after 4:58 of round 1, we have a winner by way of TKO (Strikes). Huell Babineaux!
A very excited looking Huell Babineaux rambled incoherently for about 5 minutes post fight about how awesome he is. It was kinda funny for a while but then everyone got annoyed.
|
|
|
|
|
|
|
|
|
|
|
|
|
|
|
|
|
|
|
|
|
|
|
| S |
C
A |
G |
S |
C
B |
G |
|
S |
C |
G |
|
energy
A | B |
|
hype
A | B |
|
pop
A | B |
|
mgr
A | B |
|
FIGHT
RATING
56% |
|
|
|
|
|
|
|
Undercard bout
|
Coming up we have a featherweight MMA rules bout between Gunt Jernit (ranked 1439 p4p, 2434 weight class) and Ray Apollo (ranked 140 p4p, 203 weight class). Apollo comes into a darkened arena with his song building. Circus - Britney Spears kicks in, the lights come on and the crowd goes wild! What a showman! Both fighters look fresh as a daisy as they make their way towards the cage.
 |
|
 |
| 177 cm
18
157
5 - 0 - 0 |
|
167 cm
26
154
3 - 1 - 0 |
BJJ Purple Belt
Excellent MT
Cardio machine |
|
Good takedowns
Counter fighter
Solid chin |
|
| |
|
Ladies and gentlemen. This fight is 5 rounds, for the featherweight championship of the world!
Introducing the champion to my left, fighting out of the red corner.
With a record of 5 - 0 - 0, fighting out of Las Vegas, Gunt Jernit!
And introducing the challenger to my right, fighting out of the blue corner.
With a record of 3 - 1 - 0, fighting out of Los Angeles, Ray Apollo!
The judges for this bout are Paulsen Ambrosius, Aafke Stam and Daniel Blasius.
The bell rings for round one and we are underway!
Apollo shoots for a takedown but Jernit saw that one coming a mile off and avoided it easily.
Apollo fails with a takedown attempt.
We've been told by Jernit's head coaches at Team Grunt that he's been working on his takedown defense in preparation for this fight.
Apollo is pinned up against the cage taking some big shots here. The referee is looking closely deciding whether he should stop the fight.
Jernit misses the body punch
and Apollo counters with a nice shoot takedown that brings the fighters to the ground.
Jernit is doing well to control the posture of his opponent and prevent any damage.
Apollo drops back for a leg but he's not going to get it - he lets go and Jernit dives on top into guard.
Jernit got a little sloppy there for a moment and Apollo has worked his way into a loose triangle - can he finish it?! No, Jernit has managed to get both his arms back between Apollo's legs - danger averted.
Apollo is working from a closed guard but he's struggling to control his opponent.
Jernit knows he needs to get back to his feet asap. He's simply no match for Apollo on the ground.
Apollo looking for a guillotine here but Jernit defends easily.
That's one minute gone in the round.
Jernit seems content to control from guard here. He's going to have to remain active though if he doesn't want to get stood back up.
Apollo has Jernit pulled in close to control his posture.
Apollo has an omoplata and is looking to use it perhaps as a submission or perhaps to transition. Jernit is in a bit of discomfort here, but he's managed to free himself and has dived into side control! That didn't work out too well for Apollo.
Apollo manages to land a sweep and he's now on top! Lovely Jiu Jitsu!
Jernit manages to get to full guard.
Apollo drops back looking for a heel hook - he quickly realises he's not going to get it but Jernit manages to dive on top of him before he can escape and now Apollo has Jernit in his guard.
That's two minutes gone in the round.
Apollo working a defensive guard here.
Apollo is throwing his legs up, looking for submissions. Jernit is aware though and is defending well.
The ref warns both fighters not to hold the cage as they work up against the meshing.
Apollo is looking for a triangle but Jernit pushes his legs off easily.
Apollo has a loose triangle. He'll be looking to tighten that up but Jernit can see exactly what he's planning and manages to posture up and free himself.
Apollo has a loose triangle. He'll be looking to tighten that up but Jernit can see exactly what he's planning and manages to posture up and free himself.
Apollo looking to hit a scissor sweep but Jernit is one step ahead there.
That's three minutes gone in the round.
Jernit is intent on slowing down the pace of the fight, simply looking to control.
The fighters are starting to get a bit slippery now, which will make submissions a bit more difficult.
Jernit tries to free his leg and advance position but Apollo is retaining full guard.
We've been informed that Apollo has been working hard on his conditioning in the buildup to the fight.
Jernit's corner is telling him to maintain position.
Apollo is throwing his legs up, looking for submissions. Jernit is aware though and is defending well.
Apollo is working actively off his back, looking to secure an arm or perhaps work for a triangle.
Apollo looking for a guillotine here but Jernit defends easily.
Apollo looking for a guillotine here but Jernit defends easily.
That's four minutes gone in the round.
The crowd are starting to boo a lack of action.
Apollo working from the bottom, still in full guard. He's managed to get a loose triangle. Jernit doesn't seem to be doing much to defend here, obviously he feels comfortable in the position. Jernit manages to throw the legs off his shoulder and he's back into guard - no problem.
Apollo throws his legs up looking for a submission but Jernit uses it to pass to side control.
Jernit just content to control the position.
Apollo tries to get back to half guard but can't.
The crowd thankful this round is nearly over.
Apollo regains half guard.
Jernit seems content to maintain position for now, rather than mounting any offense.
And that is the end of the round. The fighters go back to their corners.
That was a close round but I would say that Gunt Jernit will probably get the nod.
Well, the break between rounds is over. Let's get back to the scrappin!
Jernit throws out a loose jab but Apollo uses good head movement to avoid it.
Apollo shoots in and gets a takedown into Jernit's guard.
Apollo has gone for a leg lock! Jernit slips out almost immediately though and dives into Apollo's guard.
Jernit's corner is telling him to maintain position.
Apollo isolates an arm and boxes in a triangle. Jernit stacks Apollo on his neck as he steps over and passes to the side. He's now in a much more dominant position where he can look to do some serious damage. Nice move by Jernit!
Apollo is not content to let Jernit control the position.
We've had a slow start to the round here - hopefully the action picks up.
Apollo is positioning himself to get back to half guard.
Apollo regains half guard.
That's one minute gone in the round.
The referee calls for the fighters to work.
Apollo looking for a kimura from the bottom but Jernit passes into side control!
Jernit just content to control the position.
Jernit has controlled the position for a good 20 seconds, which will no doubt be starting to frustrate his opponent.
Apollo is positioning himself to get back to half guard.
Apollo wants to control but Jernit postures up.
Jernit taking a breather here.
That's two minutes gone in the round.
Well. There's a bit of a lull in the action here and the crowd are starting to get restless.
The fighters are pressed up against the cage, both looking to find a bit of space to work.
Apollo gets one leg under and gets the fight to half guard.
Apollo wants to control but Jernit is keeping busy and won't allow it.
Apollo is looking to get back to full guard here but Jernit has managed to pass to side control instead.
Apollo is looking to regain half guard here but Jernit keeps moving and retains side control.
That's three minutes gone in the round.
Apollo wants to control but Jernit postures up.
Jernit controls the position.
Apollo tries to bench press Jernit off him but Jernit keeps the position.
Apollo is moving his hips around well on the bottom and has managed to get back to half guard.
Apollo looking to work for a kimura from the bottom.
Apollo is looking to regain full guard. Not this time though.
That's four minutes gone in the round.
The crowd are hurling abuse towards the fighters... You can hardly blame them though because there isn't a lot going on in the fight.
Apollo looking for submissions off his back.
Jernit is just sitting in half guard, waiting for something to happen.
Jernit prevents Apollo from improving his position.
Apollo keeping his head moving to avoid the ground and pound.
Boooooooooooooooooooo!!! God, this has been a terrible round. Come on you two, sort yourselves out!
Apollo looking to work for a kimura from the bottom.
Apollo trying to control here.
And that is the end of the round. The fighters go back to their corners.
Gunt Jernit dominated that second round.
That's the end of the round. The referee orders the cornermen out of the cage so we can get back down to business.
Jernit throws a jab but it's blocked by Apollo.
Jernit scores with a jab to the body.
Apollo gets his takedown attempt stuffed easily
and Jernit counters with a nice body shot.
Jernit sizes up Apollo with a pawing jab and scores with a straight right down the middle.
Jernit fakes a head punch and goes low to the body. Nicely done.
Boom, another hit is landed. "You're gunna get knocked out" taunts Jernit, as that shot connected.
It looks like Ray Apollo has been cut.
Jernit lands a powerful looking uppercut that connected with his opponent's jaw.
Jernit cracks Apollo with an open hand slap.
Jernit misses with a looping right.
Jernit is really dominating this fight. Is there anything that Apollo can do to turn this around?
Jernit lands three nice shots there - that looked like it hurt!
The crowd cheering loudly, showing their appreciation for the quality fight we're seeing here.
Jernit misses with a body shot. Nice footwork from Apollo.
Apollo uses some good footwork to avoid the body shot by Jernit.
That's one minute gone in the round.
A jab from Jernit misses.
Jernit looks to throw the jab but Apollo is out of range.
Good exchange - Jernit coming out on top.
Jernit throws a hard body shot but it just misses.
Apollo shoots and misses
and Jernit counters with a huge left! Apollo is in big trouble! He's backing up but Jernit isn't giving him chance to recover. Under a barage of punches the ref has to step in to save Apollo from any more damage. A dominating finish by Jernit!
Ladies and gentlemen, after 1:27 of round 3, we have a winner by way of TKO (Strikes). Gunt Jernit!
Gunt Jernit retains his featherweight title!
Ray Apollo was interviewed post fight and said 'I had ants in my pants'.
|
|
|
|
|
|
|
|
|
|
|
|
|
|
|
|
|
|
|
|
|
|
|
| S |
C
A |
G |
S |
C
B |
G |
|
S |
C |
G |
|
energy
A | B |
|
hype
A | B |
|
pop
A | B |
|
mgr
A | B |
|
FIGHT
RATING
30% |
|
|
|
|
|
|
|
Co-main event
|
Coming up we have a heavyweight MMA rules bout between Donnie Baker (ranked 1992 p4p, 2190 weight class) and Quail Contra (ranked 231 p4p, 258 weight class). Quail Contra will no doubt be trying to keep this one on the feet, where he has a distinct advantage.
 |
|
 |
| 190 cm
26
280
4 - 2 - 0 |
|
190 cm
26
260
4 - 1 - 0 |
Good wrestling
Basic striking
KO power |
|
Decent wrestler
Decent boxing
Heavy handed |
|
| |
|
Ladies and gentlemen. This fight is 5 rounds, in the heavyweight division.
Introducing the fighter to my left, fighting out of the red corner.
With a record of 4 - 2 - 0, fighting out of London, Donnie Baker !
And introducing the fighter to my right, fighting out of the blue corner.
With a record of 4 - 1 - 0, fighting out of Rio de Janeiro, Quail Contra!
The judges for this bout are Paul Aken, Daniel Blasius and Wagner Zegers.
The bell rings for round one and we are underway!
Contra needs to keep his hands up - Baker had a free shot at his head there.
Contra throws out a token jab with nothing on it.
Contra displays good takedown defense there as he swats away a double leg from Baker .
Baker closes the distance and gets a double leg, slamming Contra to the mat! Contra manages to get full guard.

Contra pushes Baker off and gets back to his feet.
Contra throws a hook to the body but it doesn't connect.
Contra moving in and out of range nicely, whilst landing the scoring shot.
Contra catches Baker with a nice straight right. He seems pissed - ooooh, it's on now! On like donkey kong!
This has been an exciting period of action!
Contra uses decent footwork to sidestep a right hand from Baker .
Baker takes a jab on the nose there. A little bit of blood seems to be coming out. Hopefully that won't affect his breathing.
Contra throws a right and a left that Baker avoids nicely.
Baker was looking to counter that move with a punch but didn't quite pull the trigger.
Contra scores with a sloppy punch to the body. Not much technique there but it did the business.
Baker throws a jab to the body, straight down the pipe. Boom. That sent Contra stumbling backwards but he manages to regain his composure quickly.
Baker lunges in with an uppercut that skims his opponent's chin.
Baker looks to have improved his striking defense since last time we saw him fight.
Contra misses with a looping right.
Baker shoots in but no luck this time.
That's one minute gone in the round.
Contra pushing out the jab but it's not landing.
Contra digs a good body shot into Baker 's ribs.
Baker looks for a takedown but Contra sprawls well.
That's three failed takedown attempts in the round for Donnie Baker . That's going to take a lot out of him.
Baker ducks under a wild hook from Contra.
Baker was looking to counter that move with a punch but didn't quite pull the trigger.
Baker fails with a takedown attempt.
Contra swats away the attempt to clinch by Baker .
Contra displays good takedown defense there as he swats away a double leg from Baker .
Contra is loading up here, looking for a big counter of his own.
Contra scores with a shot to the body.
Baker tries to drive through with a takedown attempt but Contra defends well and Baker ends up having to push Contra into the cage where they will battle it out in the clinch.
Baker tries to pull guard but Contra won't allow it.
That's two minutes gone in the round.
Baker takes a shot to the head.
A hook to the body from Contra.
Contra stays in close to his opponent and throws a right hand to the body.
Baker is breathing heavily.
Contra lands with a left to the head.
Contra lands a hook that snaps the head of Baker backwards.
An uppercut to the body lands inside from Contra.
Contra pushes Baker back against the cage and unloads with a body punch.
The fans in attendance giving it up for the two fighters, who have really let it all hang out in the last minute or so!
A nice right hand lands inside from Contra.
Contra is leaning against Baker and scores with a nice uppercut to the body.
Contra lands a shot to the body.
Contra lands a body punch in the clinch.
A hook to the body from Contra.
Contra lands a left hand.
With the fighters clinched against the cage, Contra creates a bit of distance for himself and scores with a nice uppercut.
That's three minutes gone in the round.
Baker misses with a shot to the kidneys.
Still in the clinch, Contra scores with a nice short uppercut.
Contra pushes Baker back against the cage and unloads with a body punch.
Baker tries to pull guard but can't drag his opponent to the mat. Contra just stands there and leans against the cage.
Contra lands a body punch in the clinch.
Contra is working Baker over against the cage.
Contra digs a right hand into Baker 's ribs. Those have got to be taking their toll on Baker 's gas tank.
Contra lands a nice shot to the body.
A hook to the body from Contra.
Contra looks more muscular than last time we saw him. He must have been on the weights.
Contra lands a body punch in the clinch.
Contra scores with a shot to the side of Baker 's head.
Contra lands with a short head shot on the inside.
Contra lands a left hand that snaps the head of Baker backwards.
Contra lands a hook that snaps the head of Baker backwards.
That's four minutes gone in the round.
A shot in the inside from Contra.
The crowd are loving this. Great action here.
Contra scores with a shoulder strike.
Contra breaks the clinch.
Baker on the wrong end of a decent looking cross there.
Baker shoots in for a takedown. He's persisting with it as Contra sprawls well. Contra wins this battle and keeps the fight standing. Baker gets slowly back to his feet.
Baker moves forwards but Contra connects with a nice, crisp jab.
Baker thows a left - swing and a miss!
Baker dives in and grabs Contra's left leg, looking for a takedown. Contra pushes down on Baker 's head and hops out.
Contra throws a combination but comes up with nothing but fresh air.
Contra lands an overhand left. A wild punch that just about connected.
The crowd applaud the fighters' efforts here as the round comes to an end.
Contra moving in and out of range nicely, whilst landing the scoring shot.
And that is the end of the round. The fighters go back to their corners.
Quail Contra dominated that round.
The corners get their ten second warning. Both fighters stand from their stools and stare each other down, ready to get back to the action.
Contra cracks Baker with a good shot that sees him stumbling back into the cage.
Baker will have to do better than that with his takedown attempts.
Baker misses with a takedown
and Contra cracks him with a counter punch right on the button.
Baker fails with an attempt to clinch.
A telegraphed right hand from Baker misses the target.
Contra lands a right hook to the body.
Contra circles away from the clinch attempt
and Contra counters with a nice uppercut.
Baker takes a body punch that cleary hurt but he's trying not to show any weakness.
We've had a slow start to the round here - hopefully the action picks up.
Contra lands a right hook to the body.
Both fighters are absolutely exhausted here.
Baker walks straight into an uppercut. Luckily it didn't land flush.
A jab from Contra does it's job there.
Contra stuns Baker with a nice body shot, before stepping back out of range.
The crowd are loving this. Great action here.
Contra feints with a jab and clips Baker right behind the ear with a massive overhand right! Baker is sent crashing into the canvas and Contra leaps in for the kill! Baker tries to get to his feet but Contra is just battering him from every conceivable angle. The ref decides that Baker is in need of a savior and steps in!
Ladies and gentlemen, after 1:57 of round 2, we have a winner by way of TKO (Strikes). Quail Contra!
|
|
|
|
|
|
|
|
|
|
|
|
|
|
|
|
|
|
|
|
|
|
|
| S |
C
A |
G |
S |
C
B |
G |
|
S |
C |
G |
|
energy
A | B |
|
hype
A | B |
|
pop
A | B |
|
mgr
A | B |
|
FIGHT
RATING
52% |
|
|
|
|
|
|
|
Main event
|
Coming up we have a light heavyweight MMA rules bout between Miles Levesque (ranked 1428 p4p, 2362 weight class) and Malcolm Farquharson (ranked 228 p4p, 379 weight class). Both fighters look fresh as a daisy as they make their way towards the cage.
 |
|
 |
| 194 cm
20
210
3 - 0 - 0 |
|
193 cm
20
218
3 - 0 - 0 |
BJJ Brown Belt
Counter fighter
Cardio machine |
|
Good wrestler
Basic striking
Granite chin |
|
| |
|
Ladies and gentlemen. This fight is 5 rounds, for the light heavyweight championship of the world!
Introducing the champion to my left, fighting out of the red corner.
With a record of 3 - 0 - 0, fighting out of Montreal, Miles Levesque!
And introducing the challenger to my right, fighting out of the blue corner.
With a record of 3 - 0 - 0, fighting out of Amsterdam, Malcolm Farquharson!
The judges for this bout are Wagner Zegers, Nard Betker and Paul Aken.
The bell rings for round one and we are underway!
Farquharson shoots in for a takedown. "Ole!" shouts Levesque as he jumps to the side.
Farquharson dives in and grabs Levesque's left leg, looking for a takedown. Levesque pushes down on Farquharson's head and hops out.
Farquharson shoots in from a long way out. He's driving through with the takedown attempt and he eventually gets it, landing in Levesque's guard.
Levesque escapes his hips to the side and looks to be working for an armbar. Farquharson gives him a little smile and shakes his head. No chance.
Levesque had isolated an arm as going for a kimura. Farquharson defends it easily.
Farquharson scoring with punches to the head and body.
Farquharson postures up and scores with a shot to the body and a follow up elbow to the head.
Levesque has a loose triangle. He'll be looking to tighten that up but Farquharson can see exactly what he's planning and manages to posture up and free himself.
We've had a slow start to the round here - hopefully the action picks up.
Farquharson works over Levesque with some ground and pound from guard.
Levesque has an omoplata and is looking to use it perhaps as a submission or perhaps to transition. Farquharson is in a bit of discomfort here, but he's managed to free himself and has dived into side control! That didn't work out too well for Levesque.
The ref warns both fighters not to hold the cage as they work up against the meshing.
Levesque is trying to escape the position but Farquharson is controlling the position.
That's one minute gone in the round.
Farquharson is chipping away with strikes.
Farquharson is trying to land an Americana. He has the arm isolated but Levesque is keeping cool and he's avoided the danger for now.
Levesque regains half guard.
Farquharson lands strikes from half guard.
Ground and pound from Farquharson.
The two fighters exchange a few words. I couldn't hear what they were saying but maybe it's more fun if you make it up yourself. Farquharson connects with a nice short shot to Levesque's temple.
Levesque is looking to sinch up a guillotine here but Farquharson pulls his head out easily.
Levesque looking to work for a kimura from the bottom.
Farquharson winds up and cracks Levesque with a swinging punch to the side of the head.
Farquharson is scoring with some nice ground and pound from the dominant position.
Farquharson takes advantage of the dominant position to land a couple of big hammer fists.
Farquharson is nestled in close to Levesque, controlling him well. He's worked in a nice elbow to the side of the head as well, for good measure.
That's two minutes gone in the round.
Levesque actively working from the bottom here.
Levesque looking for submissions from an awkward position here.
Farquharson working over Levesque with some ground and pound. Levesque looks like he wants out of this position, which is understandable.
Farquharson slips a nice elbow through Levesque's hands, connecting with Levesque's forehead.
Levesque is rocked!
Levesque wants to get back to full guard.
Levesque has hold of Farquharson's hands but Farquharson slips his arm to the side and lands an elbow.
Oh Levesque is still in real trouble! Will he be able to recover?!!
Both fighters have adopted an aggressive gameplan on the ground!
Farquharson working over Levesque with some ground and pound. Levesque looks like he wants out of this position, which is understandable.
Levesque is looking to sinch up a guillotine here but Farquharson pulls his head out easily.
Levesque is defending against the submission attempts here by Farquharson.
Levesque seems to have got his legs back now.
The crowd are loving this. Great action here.
Levesque has hold of Farquharson's hands but Farquharson slips his arm to the side and lands an elbow.
Farquharson passes to side control.
Levesque is sneaking out the side here. He's bucked Farquharson off and has taken his back!
That's three minutes gone in the round.
Farquharson tries to roll but Levesque sticks to his back.
Farquharson trying to control the action but Levesque just sinks the hooks in.
Levesque working for a RNC but it's not happening just yet.
Levesque is trying to stick to Farquharson's back but Farquharson is turning into Levesque. He's managed to reverse the position - now he's in Levesque's guard. Polite applause from the crowd in appreciation of some nice Jiu Jitsu by Farquharson.
Farquharson works over Levesque with some ground and pound from guard.
Farquharson connects with a couple of short punches.
Levesque throwing his legs up looking for a triangle.
Farquharson lands a couple of elbows.
Levesque has his foot on Farquharson's thigh. He's trying to push off and get in position for a triangle, I think. Farquharson works his way back into a safe position though.
Farquharson lands a nice shot whilst sitting in his opponent's guard.
Farquharson is in close to Levesque's body, working some short punches and elbows.
Farquharson is taking a break and basically stalling. The referee will not allow him to do that for long.
That's four minutes gone in the round.
Farquharson distracts Levesque with his right hand and drops a big elbow with his other arm.
Farquharson trying to control but Levesque is working from the bottom.
Farquharson keeps in close for a moment and lands a decent shot to the side of Levesque's head.
Levesque has momentary wrist control but Farquharson slips an elbow through the middle.
Levesque has his foot on Farquharson's thigh. He's trying to push off and get in position for a triangle, I think. Farquharson works his way back into a safe position though.
Farquharson scores with a decent looking elbow strike.
Levesque has a loose triangle. He'll be looking to tighten that up but Farquharson can see exactly what he's planning and manages to posture up and free himself.
Farquharson postures up and scores with a shot to the body and a follow up elbow to the head.
Levesque is actively looking for submissions from his back. He's worked himself a little space on the bottom and seems to be going for a triangle. No, he's switched into an armbar! That was slick! Farquharson rolls with it to try and escape but Levesque cranks on the arm and Farquharson is forced to tap out! This one is aaaaaaaaall over!
Ladies and gentlemen, after 4:57 of round 1, we have a winner by way of Submission (Armbar). Miles Levesque!
Miles Levesque retains his light heavyweight title!
Miles Levesque decided to thank the fans in attendance for making a great atmosphere. It seemed to go down pretty well.
|
|
|
|
|
|
|
|
|
|
|
|
|
|
|
|
|
|
|
|
|
|
|
| S |
C
A |
G |
S |
C
B |
G |
|
S |
C |
G |
|
energy
A | B |
|
hype
A | B |
|
pop
A | B |
|
mgr
A | B |
|
FIGHT
RATING
37% |
|
|
|
|
|
|
|
|
|
|

