|
TWGC 40 (145lbs, D3): Finals - Round 1 PBP Commentary |
Undercard bout
|
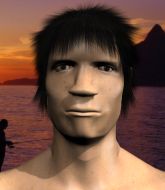
This TWGC bout is 1 fifteen minute round in the featherweight division. Introducing today's competitors. In the red corner, competing out of St Petersburg, with a TWGC record of 2 wins and 3 losses; Lox Sleech! And in the blue corner, fighting out of New York, with a TWGC record of 1 wins and 0 losses; Sota Takahashi!
The judges for this bout are James Ackerman, Daniel Bishop and William Gold.
The official calls the fighters to the middle and the contest is under way.#CL2#
Takahashi rushes Sleech and presses him up against the cage.#TD#
Sleech turns his back and goes for a hip toss. It's a bit messy but it gets the job done and Sleech manages to end up in side control. Score +4 for clean takedown past guard: Sleech (4) vs (0) Takahashi
Sleech staying calm.
Takahashi is looking for a sweep.
A lull in the action here.
The fighters are pressed up against the cage, both looking to find a bit of space to work.
Takahashi is trying to improve his position.
We've had a slow start to the round here - hopefully the action picks up.
Sleech moves into full mount! Score +2 for reaching mount: Sleech (6) vs (0) Takahashi#T1#
Takahashi looking to escape from mount but he's given up his back! Score +3 for taking back: Sleech (9) vs (0) Takahashi
Sleech avoiding Takahashi 's attempts to control his hands.
You can see the frustration on Takahashi's face
He knows he is in trouble unless he improves his position sooner rather than later.
Takahashi is still trying to improve position.
Sleech controls the position.#SUB#
Sleech has both hooks in and is working for a choke. Takahashi is in real trouble here. Sleech gets an arm under the chin and tightens the submission attempt... is this the end? Yes, Takahashi is tapping out! Sleech wins by rear naked choke!
Ladies and gentlemen, after 2:59 of round 1, we have a winner by way of Submission (RNC). Lox Sleech! |
|
|
|
Undercard bout
|
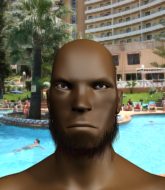
This TWGC bout is 1 fifteen minute round in the featherweight division. Introducing today's competitors. In the red corner, competing out of Sydney, with a TWGC record of 3 wins and 1 losses; Julian Hopson! And in the blue corner, fighting out of Rio de Janeiro, with a TWGC record of 1 wins and 0 losses; Charles Abel!
The judges for this bout are Chris Edwards, James Atkins and James Ackerman.
The fighters connect hands in the middle of the mat and we are under way.#TD#
Hopson looking to score a takedown here. Abel is defending well but Hopson drives through and ends up in Abel's guard. Score +2 for takedown into guard / half guard: Hopson (2) vs (0) Abel
Hopson slows down the pace of the fight, as he sits in guard. #SUB2#
Abel throwing his legs up looking for a triangle.
#SUB2#
Abel had isolated an arm as going for a kimura. Hopson defends it easily.
Hopson is taking a break and basically stalling. The referee will not allow him to do that for long.
We've had a slow start to the round here - hopefully the action picks up.
Abel wants to sweep here but Hopson controlling him for the moment.
Hopson stands up and looks to throw the legs aside to pass to side control. Abel swivels though and keeps the full guard. #T1#
Hopson stands and throws Abel's legs to the side, diving into side control. Score +3 for passing guard: Hopson (5) vs (0) Abel
The fighters are pressed up against the cage, both looking to find a bit of space to work.
Hopson controls the position from side control.
Hopson tries to cartwheel into mount but he doesn't manage it. #SUB#
Hopson thinks about going for a far side armbar but bails out and retains the dominant position instead.
Abel is trying to get back to half guard.#T2##SUB#
Hopson tries for a kimura but Abel is defending well.
Hopson tries to cartwheel into mount but he doesn't manage it.
Hopson staying calm.
Abel prevents Hopson from moving into mount. #T3##SUB#
Hopson wants to work for a kimura but he's foiled early by Abel, who protects the arm well.
Hopson tries to move into full mount but can't pass Abel's legs.
Hopson controls the position.
Abel prevents Hopson from improving position.
Abel is trying to control Hopson's posture but Hopson avoids it.
A lull in the action here as Hopson stalls from top position.
The ref warns both fighters not to hold the cage as they work up against the meshing.#T4#
Abel gets one leg under and gets the fight to half guard.
Hopson controlling the action here.
Abel is trying to maintain the position but Hopson is very close to passing his half guard.#T5#
Hopson keeping composed on the top, looking to control the action.#SUB#
Hopson wants to work for an arm triangle but Abel is really keeping half guard well and defending the submission attempt.
#SUB2#
Abel actively working from the bottom here.
Hopson sitting and controlling from the half guard.
Abel is looking for a sweep. Hopson is wise to his cunning plan and keeps the top position.
Hopson slows the pace down in half guard. #T6#
Hopson wants to pass to mount but Abel is defending the position.
Hopson controlling the pace.
Hopson has controlled the position for a good 20 seconds, which will no doubt be starting to frustrate his opponent.#T7#
This is a sustained period of stalling by Hopson.
Abel is looking for a sweep. Hopson is wise to his cunning plan and keeps the top position.#T8#
Hopson is pressing down on Abel's thigh, looking to free his foot. Abel is holding on for now.
Hopson stalling.
Hopson trying to mount his opponent but Abel defends it.
Abel tries to roll over but Hopson keeps him under control.#T9#
Neither fighter is being very active at the moment, with Hopson in particular looking to stall.
Hopson passes to full mount! Score +3 for passing guard: Hopson (8) vs (0) Abel
Hopson takes a little breather and maintains the position. The referee will be looking for him to stay active from such a dominant position though.
Abel keeping his composure momentarily, calmly looking to get back to half guard.
Hopson controlling from mount. #T10#
Hopson seems to have a rather negative gameplan on the ground. He seems keen to just score the takedown and hold down Abel for as long as he can get away with.#T11#
Abel is desperately trying to get back to half guard.
#SUB#
Hopson jumps to side control looking for an arm triangle but Abel manages to avoid the submission attempt.
Hopson controlling the position.
Hopson advances nicely into full mount. Score +2 for reaching mount: Hopson (10) vs (0) Abel
Hopson wants to take his opponent's back but he's not managed it. #T12#
Hopson content just to control the position here.
Hopson's ground tactics aren't going to win him many fans. Let's hope he's got fireworks for us if he gets back to his feet because he's not doing much on the ground.
Abel is trying to reverse the position but instead Hopson has taken his back - oops! Score +3 for taking back: Hopson (13) vs (0) Abel
Abel tries to escape the position - he's now mounted. Is that better or worse? Hard to tell!
Hopson content just to control the position here.
Abel has given up his back - I dont know if this is a deliberate ploy to try and escape or if he is just struggling down there.
Score +3 for taking back: Hopson (16) vs (0) Abel#T13#
I would not like to be Abel right now.
Further stalling from Hopson.
Hopson continues to stall.
Abel looks to control his opponent's hands but he's not mananging it at the moment.
Abel is defending well here and trying to improve his position.
#T14#
Hopson has good solid back control here.
Abel tries to escape the position.
Abel is persisting with the attempt to improve his position.
Hopson controlling from the back.
Boooooooooooooooooooo!!! God, this has been a terrible round. Come on you two, sort yourselves out!#SUB#
Hopson is staying calm and holding on to the back position, whilst working on a rear naked choke. Abel is defending well though. Hopson let's go of the attempt for now.#SUB#
Hopson working for a choke but Abel reverses nicely into Hopson 's guard. Score +2 for sweep to guard / half guard: Hopson (16) vs (2) Abel
And that's the end of the fight!
Hopson takes the fight on points by 16 to 2.
Julian Hopson thanked the fans post fight for their support. |
|
|
|
Co-main event
|
This TWGC bout is 1 fifteen minute round in the featherweight division. Introducing today's competitors. In the red corner, competing out of Rio de Janeiro, with a TWGC record of 1 wins and 0 losses; Jett Robins! And in the blue corner, fighting out of Las Vegas, with a TWGC record of 7 wins and 0 losses; Myuki Yoshida!
The judges for this bout are Colin Fotheringham, Paul Tew and Sam Margolis.
Let's get this grappling contest under way! Who will be victorious?#CL#
Robins rushes Yoshida and pushes him back against the cage in a clinch.#TD#
Robins decides to pull guard.
Robins keeping moving, preventing Yoshida from controlling successfully.
Robins is trying to keep Yoshida in close.
#SUB#
Robins working for a triangle but Yoshida defends it easily.
Robins looking to control.
We've had a slow start to the round here - hopefully the action picks up.
Yoshida wants to control from the top but Robins keeps moving.
Yoshida won't allow Robins to sweep him here. #T1##SUB#
Yoshida got a little sloppy there for a moment and Robins has worked his way into a loose triangle - can he finish it?! No, Yoshida has managed to get both his arms back between Robins's legs - danger averted.
Yoshida stands up and looks to throw the legs aside to pass to side control. Robins swivels though and keeps the full guard.
Robins is trying to control the position from the bottom.
Yoshida stopping the sweep attempt from Robins.
Yoshida wants to control from the top but Robins keeps moving. #SUB#
Robins is looking for a triangle but Yoshida pushes his legs off easily.
Robins is working the butterfly guard. He manages to land a nice scissor sweep and is now in half guard on the top. Nice move. Score +2 for sweep to guard / half guard: Robins (2) vs (0) Yoshida#T2#
Yoshida is doing well to control the position and prevent Robins from advancing to side control.
Yoshida tries to get to full guard but Robins has control of the leg.
The ref warns both fighters not to hold the cage as they work up against the meshing.
Robins takes a deep breath and rests his weight momentarily on top of his opponent, to control the position.
Yoshida is looking to control Robins's leg but it's slowly edging free. Can Yoshida avoid being mounted?
Robins is taking a breather. Yoshida says something to him but it's hard to make out. Perhaps he's telling him to get on with it and actually do something.#T3#
Robins works his foot free and advances to mount. Score +3 for passing guard: Robins (5) vs (0) Yoshida
Yoshida tries to lock up and control but Robins gives him a forearm to the face and pushes him away.
Yoshida keeping his composure momentarily, calmly looking to get back to half guard.
Robins looking to control but Yoshida is working nicely, looking to advance position himself.
Robins seems to be looking to move to his opponent's back but Yoshida is holding on tight.
Robins takes a little breather and maintains the position. The referee will be looking for him to stay active from such a dominant position though.
Yoshida is squirming around, avoiding Robins's attempts to control the action. #T4#
Robins controlling from the full mount.
Robins is trying to take his opponent's back.
#SUB#
Robins is working for a guillotine from mount but Yoshida frees his head quite easily.
Robins controlling from mount. #T5#
Robins trying to control but he's not successful this time.
Robins is going to have to think about doing something other than just controlling because Yoshida is managing to avoid having the position dictated to him.
Yoshida can't escape the position.
Yoshida holds of for dear life.#T6#
Robins looking to control but Yoshida is working nicely, looking to advance position himself.
Robins controlling his opponent.
Yoshida stops Robins from taking his back. Still, being mounted isn't any better.
The fighters are pressed up against the cage, both looking to find a bit of space to work.#SUB#
Robins looking to secure an arm triangle but Yoshida defends it well.
Yoshida is desperately trying to get back to half guard.
Yoshida is squirming around, avoiding Robins's attempts to control the action. #T7#
Robins controlling from mount.
Robins tries to control but Yoshida wriggling away.
Robins sitting in mount, just looking to control for the moment.
Robins trying to control but Yoshida is having none of it.
Robins controlling from mount. #T8#
Robins can't quite control the action as he would like just now, as Yoshida is looking to escape.
Yoshida tries to hold on but Robins postures up.#SUB#
Yoshida defends a decent attempt at a guillotine from Robins. #SUB#
Robins throws some shoulder strikes here and then postures up. Oh, he's gone for an armbar! Yoshida has his hands clasped together but Robins breaks the hold and Yoshida is forced to tap! This one is aaaaaaaaaaall over! That was lightning fast by Robins!
Ladies and gentlemen, after 8:51 of round 1, we have a winner by way of Submission (Armbar). Jett Robins! |
|
|
|
Main event
|
This TWGC bout is 1 fifteen minute round in the featherweight division. Introducing today's competitors. In the red corner, competing out of Tokyo, with a TWGC record of 3 wins and 5 losses; Mitsuhiro Ishida! And in the blue corner, fighting out of Rio de Janeiro, with a TWGC record of 1 wins and 0 losses; Sammy KJ!
The judges for this bout are Steven Brown, Paul Tew and Richard Clark.
The official calls the fighters to the middle and the contest is under way.
KJ shoots in for a takedown but Ishida shows good takedown defense.
Ishida closes the distance and clinches up with KJ, looking for a takedown. Ishida pushes KJ against the cage but KJ circles to the side and manages to break the clinch.
Ishida fails miserably with a takedown attempt.#TD#
Ishida decides to change it up a bit and drives through with a nice takedown into half guard. Score +2 for takedown into guard / half guard: Ishida (2) vs (0) KJ#SUB#
Ishida is trying to work for a kimura. This could be trouble! No, KJ has managed to free his arm - good work. #SUB#
Ishida is looking for a kimura. It's going to be difficult to finish that from half guard though and KJ defends it well.
We've had a slow start to the round here - hopefully the action picks up.
KJ is trying to maintain the position but Ishida is very close to passing his half guard.#T1#
KJ makes his way to full guard. A much better position for KJ.#SUB2#
KJ has his foot on Ishida's thigh. He's trying to push off and get in position for a triangle, I think. Ishida works his way back into a safe position though.
We get told so often about how wrestlers don't like to be on their backs. Let's see if KJ can do anything to dispel that myth.#SUB2#
KJ has an active guard here but Ishida has managed to pass into half guard.
#SUB#
KJ is trying to control Ishida's posture. Ishida takes advantage of the lull and advances to side control. He also appears to have an arm triangle here! Uh oh, big trouble for KJ! Ishida is rotating here... this could be the end... KJ is out! Ishida has ended this one emphatically! Great submission!
Ladies and gentlemen, after 1:52 of round 1, we have a winner by way of Submission (Arm Triangle). Mitsuhiro Ishida! |
|
|
|
|
|
|