|
SSG 214 Elvul vs Shalit PBP Commentary |
Undercard bout
|
This TWGC bout is 1 fifteen minute round in the super heavyweight division. Introducing today's competitors. In the red corner, competing out of London, with a TWGC record of 1 wins and 2 losses; Benny Igbko! And in the blue corner, fighting out of Las Vegas, with a TWGC record of 2 wins and 5 losses; Teddy Driscoll Jr!
The judges for this bout are Franklyn Lucas, Columbo Gatti and Eddie Farnsworth.
Let's get this grappling contest under way! Who will be victorious?
Driscoll Jr shoots in and drives through. Igbko sprawls well.#CL#
Igbko drives through and clinches with Driscoll Jr against the cage.
Driscoll Jr tries to pull guard but Igbko holds him up against the cage and eventually Driscoll Jr drops back down to his feet.
Driscoll Jr has Igbko pressed up against the cage and is working for takedown. Igbko manages to improve position though and keeps the fight standing.
Benny Igbko has stuffed three takedown attempts in the round now. That's going to take a lot out of Teddy Driscoll Jr.#TD#
Igbko pulls guard effortlessly.
Driscoll Jr passes Igbko's right leg, so he's now in half guard. #SUB#
Igbko is looking to sinch up a guillotine here but Driscoll Jr pulls his head out easily. #SUB2#
Driscoll Jr is working for a submission of some sort.
We've had a slow start to the round here - hopefully the action picks up.#SUB#
Igbko actively working from the bottom here.
Igbko is breathing heavily.
Driscoll Jr seems very keen to just sit and control from half guard but Igbko does not like that idea so much and is remaining active off his back. #T1#
Igbko makes his way to full guard. A much better position for Igbko.
Igbko seems to have improved his submission grappling technique since last time we saw him. Let's see if he can pull off a submission.#SUB#
Igbko has his foot on Driscoll Jr's thigh. He's trying to push off and get in position for a triangle, I think. Driscoll Jr works his way back into a safe position though.
Driscoll Jr slips nicely into half guard.#SUB#
Igbko looking for a kimura from the bottom but Driscoll Jr passes into side control! Score +3 for passing guard: Igbko (0) vs (3) Driscoll Jr
Driscoll Jr wants to lay and pray for a moment but Igbko keeps working. #SUB2#
Driscoll Jr has hold of Igbko's arm here. He's working for an Americana. It looks like he might have it! Igbko tries to escape but he's just digging himself in deeper - Driscoll Jr cranks the arm and Igbko screams in pain! The ref makes a decision and ends the fight before the tap - no complains from Igbko, who is just happy to have his arm attached to his body.
Ladies and gentlemen, after 2:56 of round 1, we have a winner by way of Submission (Americana). Teddy Driscoll Jr! |
|
|
|
Undercard bout
|
This TWGC bout is 1 fifteen minute round in the super heavyweight division. Introducing today's competitors. In the red corner, competing out of Las Vegas, with a TWGC record of 6 wins and 2 losses; Gurney Halleck! And in the blue corner, fighting out of Las Vegas, with a TWGC record of 2 wins and 1 losses; Bailey Simmons!
The judges for this bout are Steve Montenegro, Bruno Lombardi and Alyssa Summers.
Let's get this grappling contest under way! Who will be victorious?#TD#
Halleck shoots in and gets a takedown into Simmons's guard. Score +2 for takedown into guard / half guard: Halleck (2) vs (0) Simmons
Simmons can't keep his opponent in guard - Halleck advances to half guard, no doubt looking to mount.
Halleck slows the pace down in half guard.
Halleck trying to mount his opponent but Simmons defends it.
Halleck keeping composed on the top, looking to control the action.#SUB#
Halleck is looking for a kimura. It's going to be difficult to finish that from half guard though and Simmons defends it well.
We've had a slow start to the round here - hopefully the action picks up.
Simmons won't allow Halleck to pass to mount.
Halleck wants to lay and pray for a moment but Simmons keeps working. #T1#
Halleck is pressing down on Simmons's thigh, looking to free his foot. Simmons is holding on for now.
Halleck is controlling the pace.
Simmons wants to control but Halleck is keeping busy.
Halleck is controlling the pace.
Halleck wants to free his trapped foot but Simmons is holding on for dear life with his legs.
The ref warns both fighters not to hold the cage as they work up against the meshing.#T2##SUB#
Halleck is sneakily working for an arm triangle but Simmons sees it coming and defends easily.
Halleck works his way into side control. Score +3 for passing guard: Halleck (5) vs (0) Simmons
Halleck moves into full mount! Score +2 for reaching mount: Halleck (7) vs (0) Simmons#SUB#
Halleck working from mount. He moves in close and looks like he might be going for an arm triangle... He's hopped off to the side and he's transitioned into an Anaconda choke. Simmons turning a nasty shade of purple. He's refusing to tap but he's gone! He's out! The ref rips Halleck off and cradles Simmons's limp body as Halleck celebrates with his corner.
Ladies and gentlemen, after 2:55 of round 1, we have a winner by way of Submission (Anaconda Choke). Gurney Halleck! |
|
|
|
Undercard bout
|
This TWGC bout is 1 fifteen minute round in the super heavyweight division. Introducing today's competitors. In the red corner, competing out of Helsinki, with a TWGC record of 5 wins and 8 losses; Leenart Kuningas! And in the blue corner, fighting out of Helsinki, with a TWGC record of 6 wins and 5 losses; Huug Schlepper!
The judges for this bout are Chad Campbell, Eddie Farnsworth and Franklyn Lucas.
The fighters connect hands in the middle of the mat and we are under way.#TD2#
Schlepper closes the distance and looks for a trip takedown... aaaand he's got it - Schlepper lands in his opponent's guard. Score +2 for takedown into guard / half guard: Kuningas (0) vs (2) Schlepper#SUB#
Kuningas has thrown up a leg looking for a triangle. Schlepper doesn't defend quickly enough and Kuningas has managed to lock this one up! Can Schlepper escape?! NO! He's tapping out! Damn, that was a quick submission - congrats to Kuningas on a fantastic submission victory.
Ladies and gentlemen, after 0:18 of round 1, we have a winner by way of Submission (Triangle). Leenart Kuningas! |
|
|
|
Undercard bout
|
This TWGC bout is 1 fifteen minute round in the super heavyweight division. Introducing today's competitors. In the red corner, competing out of Las Vegas, with a TWGC record of 8 wins and 18 losses; Diego Hageman! And in the blue corner, fighting out of Sydney, with a TWGC record of 8 wins and 19 losses; Gordon Plant!
The judges for this bout are Joseph Jones, Franklyn Lucas and Chad Campbell.
The official calls the fighters to the middle and the contest is under way.#CL2#
Plant pushes Hageman up against the cage in a clinch.#TD#
Hageman pulls Plant into guard.
Plant slows down the pace of the fight, as he sits in guard.
Plant advances to half guard.
Plant frees up his trapped foot and advances to mount. Score +3 for passing guard: Hageman (0) vs (3) Plant
Plant seems to be looking to move to his opponent's back but Hageman is holding on tight.
Plant wants to control the pace but Hageman is squirming around nicely.
We've had a slow start to the round here - hopefully the action picks up.#SUB2#
Plant looking for a guillotine from mount but Hageman is having none of it.
Plant controlling the pace for now.
Plant wants to take his opponent's back but Hageman doesn't allow it. #T1#
Plant controlling his opponent. #SUB2#
Plant looks like he's working for a submission but he's not found anything just yet.
The fighters are pressed up against the cage, both looking to find a bit of space to work.
Hageman is squirming around, avoiding Plant's attempts to control the action.
Plant tucks in and makes sure he doesn't lose the dominant position.
Plant seems to be looking to move to his opponent's back but Hageman is holding on tight.
The ref warns both fighters not to hold the cage as they work up against the meshing.#T2#
Plant trying to control but Hageman is having none of it.
Plant mounts Hageman! Really nice guard pass there!
Plant tries to control but Hageman wriggling away.
Plant tucks in and makes sure he doesn't lose the dominant position. #T3#
Plant seems to be looking to move to his opponent's back but Hageman is holding on tight.
#SUB2#
Plant wants to finish this one by submission but Hageman is holding onto his waist, trying to prevent any attacks from Plant.
The fighters are starting to perspire pretty heavily.
Plant looking to control and managing it successfully.
Plant trying to control but he's not successful this time.
Hageman tries to reverse the position but Plant maintains control.
Plant wants to control but Hageman has made it back to half guard. Nice work.
Plant works his way into full mount! Score +3 for passing guard: Hageman (0) vs (6) Plant#T4#
Plant is trying to control here but Hageman has managed to regain half guard.
Hageman holds on for dear life, maintaining half guard for now.
Plant wants to lay and pray for a moment but Hageman keeps working.
Plant trying to mount his opponent but Hageman defends it.
Hageman wants to improve his position but Plant is controlling well.
#T5#
Plant wants to lay and pray for a moment but Hageman keeps working.
Plant passes the guard and advances to mount! Score +3 for passing guard: Hageman (0) vs (9) Plant
Plant trying to control but Hageman is having none of it.
Plant takes a little breather and maintains the position. The referee will be looking for him to stay active from such a dominant position though.
Plant pushing the pace here, looking to move to his opponents back and work for a finish.
#T6#
Hageman is squirming around, avoiding Plant's attempts to control the action.
Hageman tries to lock up and control but Plant gives him a forearm to the face and pushes him away.
Plant controlling from the full mount.
Plant tries to control but Hageman wriggling away.
Hageman tries to lock up and control but Plant gives him a forearm to the face and pushes him away.#T7#
Hageman is trying desperately to improve position.#SUB2#
Plant with some aggressive grappling here. He's looking for submissions here, rather than waiting for the opportunity to counter.
Plant can't quite control the action as he would like just now, as Hageman is looking to escape.
Plant wants to take his opponent's back but he's not managed it.
Plant looking to control but Hageman is working nicely, looking to advance position himself. #T8##SUB2#
Plant goes for an armbar but Hageman turns quickly into his guard - lovely anticipation from Hageman. Score +2 for sweep to guard / half guard: Hageman (2) vs (9) Plant
Hageman trying to control the position from guard on top but Plant is wriggling around, looking for whatever he can.
Plant controlling the position.
Plant looking to control.
Plant working a defensive guard but Hageman passes into half guard.
#SUB#
Hageman wants to work for an arm triangle but Plant is really keeping half guard well and defending the submission attempt.
#T9##SUB#
Hageman is looking for a kimura here.
Plant trying to control here.
Plant moves his hips nicely and gets into full guard.
There's a bit of a scramble here and now Plant is on top in guard.
Score +2 for sweep to guard / half guard: Hageman (2) vs (11) Plant
Plant trying to control but Hageman is working from the bottom.
Plant looking to pass the guard. #T10##SUB2#
Plant drops back for a leg! It's a sloppy attempt though and Plant jumps back into guard quickly, to retain the dominant position.
Hageman can't do much from the bottom at the moment, as Plant controls the pace.
Hageman keeping moving, preventing Plant from controlling successfully.
Plant passes easily into side control. Nice work. Score +3 for passing guard: Hageman (2) vs (14) Plant
Plant advances to mount. Score +2 for reaching mount: Hageman (2) vs (16) Plant#T11#
Hageman prevents Plant from taking his back.
Hageman is squirming around, avoiding Plant's attempts to control the action.
Plant takes Hageman's back. Could be looking for a rear naked choke here - either way, Hageman is in trouble. Score +3 for taking back: Hageman (2) vs (19) Plant#SUB2#
Plant looking to break Hageman's wrist control so he can sink in the choke. Hageman remaining controlled and patient though - he really has to keep calm otherwise Plant will wrap this one up with the rear naked choke!#SUB2#
Plant is staying calm and holding on to the back position, whilst working on a rear naked choke. Hageman is defending well though. Plant let's go of the attempt for now.#SUB2#
Plant working for a RNC but it's not happening just yet. #T12##SUB2#
Hageman defending nicely against the rear naked choke attempt.
Plant biding his time, controlling Hageman. #SUB2#
Hageman is staying cool under pressure, defending well against the rear naked choke attempt from his opponent.
Plant is trying to control but Hageman is trying to escape here - he's now mounted.
#T13#
Plant wants to take his opponent's back but he's not managed it. #SUB2#
Plant looks like he's working for a submission but he's not found anything just yet.
Plant looking to control but Hageman is working nicely, looking to advance position himself. #SUB2#
Plant looking for a guillotine from mount but Hageman is having none of it.
Hageman tries to get back to half guard but can't. #T14#
Plant seems to be looking to move to his opponent's back but Hageman is holding on tight.
#SUB2#
Plant working for a guillotine from mount but Hageman is in no mood to give up.
Plant prevents Hageman from getting the reversal.
Plant fails to advance to Hageman's back.
Plant tries to control but Hageman wriggling away.
Hageman is desperately trying to improve his position but Plant has a good base and remains in mount.
Boooooooooooooooooooo!!! God, this has been a terrible round. Come on you two, sort yourselves out!#SUB2#
Plant moves into side control, trying to work for a kimura. That looks painful! Will he finish!!?? No, Hageman has worked his arm free - good work by Hageman!
And that's the end of the fight!
Plant wins on points by 19 to 2. |
|
|
|
Undercard bout
|
This TWGC bout is 1 fifteen minute round in the super heavyweight division. Introducing today's competitors. In the red corner, competing out of Montreal, with a TWGC record of 6 wins and 5 losses; Flavio De Rossi! And in the blue corner, fighting out of Tokyo, with a TWGC record of 5 wins and 3 losses; Mike Hunt!
The judges for this bout are Steve Montenegro, Jorge Garcia and John Roberts.
The official calls the fighters to the middle and the contest is under way.
De Rossi tries to clinch but fails miserably #TD2#
and Hunt decides to take the opportunity to score a takedown. He's landed in De Rossi's guard. Score +2 for takedown into guard / half guard: De Rossi (0) vs (2) Hunt
De Rossi has a closed guard, preventing anything of note from happening. Perhaps he's looking to stall.
Hunt advances position into side control! Score +3 for passing guard: De Rossi (0) vs (5) Hunt
Hunt in side control, just content to control the action for now.
The ref warns both fighters not to hold the cage as they work up against the meshing.
We've had a slow start to the round here - hopefully the action picks up.
Hunt working away.#T1#
Hunt wants to control but De Rossi is keeping him busy.
De Rossi is trying to get back to half guard.
Hunt is looking to take a break and control but De Rossi is keeping him honest, looking to work from the bottom.
Hunt advances to full mount. Score +2 for reaching mount: De Rossi (0) vs (7) Hunt
De Rossi is wriggling around trying to escape.
Hunt controlling his opponent. #T2#
De Rossi really trying hard to get back to half guard here.
De Rossi sneaks a leg back under and regains half guard and is working straight away to try and get back to guard. He hasn't managed just yet though.#SUB#
De Rossi looking to work for a kimura from the bottom.
Hunt controlling the pace.
Hunt is looking to advance position but De Rossi won't allow it.
Hunt controlling the action here.
De Rossi has improved his flexibility recently so we will have to see if he can use that to his advantage.#T3#
De Rossi trying to control from the bottom.
Hunt trying to mount his opponent but De Rossi defends it.
Hunt controlling the action here.
De Rossi is looking to control Hunt's leg but it's slowly edging free. Can De Rossi avoid being mounted?#SUB2#
Hunt is looking for a kimura but De Rossi is holding onto that half guard position, so it's hard for Hunt to get the leverage. #SUB2#
Hunt seems to be working for a kimura but De Rossi defends the submission attempt.#T4#
De Rossi wants to control but Hunt is keeping busy.
Hunt wants to free his trapped foot but De Rossi is holding on for dear life with his legs.
Hunt is keen to just control but De Rossi is a slippery customer.#SUB#
De Rossi looking to work for a kimura from the bottom.
Hunt is working hard to pass the guard. He's done it - he's now in full mount! Trouble for De Rossi! Score +3 for passing guard: De Rossi (0) vs (10) Hunt#T5#
Hunt is trying to take his opponent's back.
#SUB2#
Hunt working to secure an arm triangle but it's not happening for him just yet.
De Rossi tries to lock up and control but Hunt gives him a forearm to the face and pushes him away.
De Rossi keeping his composure momentarily, calmly looking to get back to half guard.
Hunt avoids the attempt from De Rossi to control.
De Rossi gets back to half guard.
The fighters are battling for position here. De Rossi manages to regain full guard. Nice work. #SUB#
De Rossi looking for a guillotine here but Hunt defends easily.
#T6#
De Rossi looking to control.
Hunt advances to half guard.
De Rossi is trying to control but can't.
Hunt is looking to pass the guard... He's managed it - he's now in full mount! Score +3 for passing guard: De Rossi (0) vs (13) Hunt
Hunt wants to control the pace but De Rossi is squirming around nicely.
Hunt avoids the attempt from De Rossi to control.
Hunt takes a little breather and maintains the position. The referee will be looking for him to stay active from such a dominant position though.#T7#
Hunt trying to control but he's not successful this time.
De Rossi tries to hold on but Hunt postures up.
Hunt wants to take his opponent's back but De Rossi doesn't allow it.
De Rossi wants to control but Hunt is having none of it.
Hunt trying to control but he's not successful this time. #T8#
De Rossi wants to control but Hunt is having none of it.
Hunt tries to control but De Rossi wriggling away.
De Rossi stops Hunt from taking his back. Still, being mounted isn't any better.
De Rossi is trying to escape the mount.
Hunt controlling from the full mount.
Hunt avoids the attempt from De Rossi to control.#T9##SUB2#
Hunt jumps to the side looking to secure the arm triangle
. Ooooh, that looks tight
De Rossi is gargling but he's managed to escape! Nice work there by De Rossi and Hunt has given up the dominant position trying to land that submission.
De Rossi manages to work his way to half guard, despite Hunt's best efforts.
Hunt is figuring out what he wants to do next.
De Rossi keeps control of the position for the meantime.
Hunt tries to pass to full mount but De Rossi defends it. #T10#
Hunt prevents De Rossi from improving his position.
De Rossi wants to control but Hunt is keeping busy.
De Rossi keeping hold of Hunt's head, controlling as best he can.
De Rossi has no desire to be mounted, so is trying to control. Hunt is working away from the top position though.#T11#
Hunt content to sit in half guard and control for a moment.
De Rossi is not content to let Hunt control the position.
Hunt looking to pass the half guard. Not this time.
De Rossi tries to roll over but Hunt keeps him under control.
De Rossi is looking to control Hunt's leg but it's slowly edging free. Can De Rossi avoid being mounted?#T12#
Hunt trying to control the action but De Rossi is working from the bottom. #SUB2#
Hunt is looking for a kimura but he's never going to get it from there.
The fighters are pressed up against the cage, both looking to find a bit of space to work.#SUB#
De Rossi looking for submissions from an awkward position here.
De Rossi preventing any damage for now, controlling his opponent's head.
Hunt tries to pass to full mount but De Rossi defends it. #T13#
De Rossi is staying active underneath Hunt, who seems content to just control the action from this position.
De Rossi is pressing down on Hunt's left leg trying to get back to full guard. He's managed it.#SUB#
De Rossi is looking for a guillotine. You can't force these things though and Hunt defends well.#SUB#
De Rossi is looking for a guillotine. You can't force these things though and Hunt defends well.#SUB#
De Rossi is throwing his legs up, looking for submissions. Hunt is aware though and is defending well.#T14#
Hunt stands up and looks to throw the legs aside to pass to side control. De Rossi swivels though and keeps the full guard.
Hunt seems content to control from guard here. He's going to have to remain active though if he doesn't want to get stood back up.
Hunt trying to control but De Rossi is working from the bottom.
De Rossi looking to control the pace of the fight rather than finish it.
Boooooooooooooooooooo!!! God, this has been a terrible round. Come on you two, sort yourselves out!
Hunt passes easily into side control. Nice work. Score +3 for passing guard: De Rossi (0) vs (16) Hunt
And that's the end of the fight!
Hunt wins on points by 16 to 0.
Mike Hunt looked relieved post fight as he said the following; 'Which way to the fat chicks? Wooooooooooo!'. |
|
|
|
Undercard bout
|
This TWGC bout is 1 fifteen minute round in the super heavyweight division. Introducing today's competitors. In the red corner, competing out of London, with a TWGC record of 16 wins and 15 losses; Gaston Cahute! And in the blue corner, fighting out of Los Angeles, with a TWGC record of 20 wins and 13 losses; Tanner Kyng!
The judges for this bout are Anthony Taglia, Eddie Farnsworth and Lou da Vinci.
Let's get this grappling contest under way! Who will be victorious?#TD#
Kyng gets taken down but at least he's managed to land in guard. Score +2 for takedown into guard / half guard: Cahute (2) vs (0) Kyng
Cahute tries to free his leg and advance position but Kyng is retaining full guard.
Kyng is avoiding any damage by keeping wrist control.
Cahute looking to pass the guard.
Kyng looking to hit a scissor sweep but Cahute is one step ahead there.
Cahute pressing down on his opponent's thigh, looking to pass guard. Kyng is keeping the position for now.
Cahute being controlled here momentarily.
The ref warns both fighters not to hold the cage as they work up against the meshing.
We've had a slow start to the round here - hopefully the action picks up.
Kyng being controlled here, momentarily. #T1#
Cahute passes into half guard. #SUB#
Cahute is looking for a kimura but Kyng is holding onto that half guard position, so it's hard for Cahute to get the leverage.
Kyng trying to control from the bottom.
Cahute looking to pass the half guard. Not this time.
Kyng desperately trying to maintain half guard.
Cahute content to control rather than advance.
Cahute wants to lay and pray for a moment but Kyng keeps working. #T2#
Kyng is looking for a sweep. Cahute is wise to his cunning plan and keeps the top position.
Cahute trying to control the action but Kyng is working from the bottom.
Kyng controlling the position for now.
Kyng is looking to regain full guard. Not this time though. #SUB#
Cahute seems to be looking for submissions.
Kyng is refusing to be controlled, as Cahute sits in half guard.
Cahute is pressing down on Kyng's thigh, looking to free his foot. Kyng is holding on for now.
Kyng is controlling Cahute's position as best he can from this difficult position.#T3#
Kyng tries to roll over but Cahute keeps him under control.
Kyng won't allow Cahute to pass to mount.
Kyng is pressing down on Cahute's left leg trying to get back to full guard. He's managed it.
The fighters are pressed up against the cage, both looking to find a bit of space to work.
Cahute is intent on slowing down the pace of the fight, simply looking to control.
Cahute won't allow Kyng to sweep him here.
Kyng keeping full guard, as Cahute tries to pass. #T4#
There's a bit of a scramble here and now Kyng is on top in guard.
Score +2 for sweep to guard / half guard: Cahute (2) vs (2) Kyng
Kyng won't allow Cahute to sweep him here.
Kyng showing good wrestling skills to control the position.
Kyng's corner are shouting for him to control the position and he seems happy to oblige.
Cahute is trying to keep Kyng in close.
Kyng sitting in guard, not really doing much. #T5#
Kyng looking to pass the guard.
Cahute looking to control.
Kyng controlling from the top position.
Kyng pressing down on his opponent's thigh, looking to pass guard. Cahute is keeping the position for now. #SUB#
Cahute escapes his hips to the side and looks to be working for an armbar. Kyng gives him a little smile and shakes his head. No chance.
Cahute working a defensive guard here.
#T6#
Kyng slows down the pace of the fight, as he sits in guard.
Cahute trying to control the position.
Cahute can't do much from the bottom at the moment, as Kyng controls the pace.
Cahute looking to control.
Kyng slows down the pace of the fight for a moment. He'll need to remain active if he doesn't want to see the fight stood back up.
Cahute looking to control.
#T7#
Cahute keeping full guard, as Kyng tries to pass.
Cahute working a defensive guard here.
Kyng not doing a lot at the moment. He'll have to show some more aggression or the fight will get stood up.
Cahute seems to have improved his submission grappling technique since last time we saw him. Let's see if he can pull off a submission.
More stalling from Kyng.
Cahute is trying to keep Kyng in close.
#T8#
Kyng not doing a lot at the moment. He'll have to show some more aggression or the fight will get stood up.
Kyng stopping the sweep attempt from Cahute.
Kyng postures up.
Kyng content to stall in guard here.
Kyng postures up.
Kyng is stalling in the full guard. #T9#
Kyng is continuing to stall.
The adventures of Kyng the control monster continue. Boring.
Cahute looking for a sweep. Not yet Cahute, not yet. #T10#
Kyng postures up.
Kyng stands and throws Cahute's legs to the side, diving into side control. Score +3 for passing guard: Cahute (2) vs (5) Kyng
Kyng controlling the position from side mount.
Let's hope that Kyng has the urge to step up the pace any second now because for the last 15 or 20 seconds he's just been holding on tight.
Cahute tries to work a leg under to get back to half guard but Kyng wriggles his own leg back out and remains in side control. #T11#
Cahute manages to work his way to half guard, despite Kyng's best efforts.
Cahute is looking to regain full guard. Not this time though.
Kyng tries to pass the half guard into mount. Cahute knows what he's doing though and prevents the attempt.
Cahute trying to hold on to Kyng's head to control him but Kyng postures up.
Kyng looking to pass the half guard. Not this time.
Cahute trying to hold on to Kyng's head to control him but Kyng postures up.
#T12#
Kyng is taking a breather. Cahute says something to him but it's hard to make out. Perhaps he's telling him to get on with it and actually do something.
Kyng wants to pass to mount but Cahute is defending the position.
Kyng sitting and controlling from the half guard.
Cahute is trying to control but can't.
Cahute tries to roll over but Kyng keeps him under control.
Kyng keeping composed on the top, looking to control the action.#T13#
Kyng trying to mount his opponent but Cahute defends it.
Kyng takes a deep breath and rests his weight momentarily on top of his opponent, to control the position.
Cahute is looking to regain full guard. Not this time though.
Cahute trying to control here.
Cahute tries to get to full guard but Kyng has control of the leg.
Kyng controlling the action here.
Cahute won't allow Kyng to pass to mount. #T14#
Kyng works his way into side control. Score +3 for passing guard: Cahute (2) vs (8) Kyng
Cahute is looking for a sweep.
You can see the frustration on Cahute's face, being in this tough position on the bottom.
Cahute manages to get one leg in to regain half guard.
Cahute is doing well to avoid being mounted. He's controlling the position at the moment.
Neither fighter is being very active at the moment, with Kyng in particular looking to stall.
Boooooooooooooooooooo!!! God, this has been a terrible round. Come on you two, sort yourselves out!
Cahute is trying to control but can't.
Kyng looking to pass the half guard. Not this time.
Cahute works his way to full guard. Good work.
And that's the end of the fight!
Kyng wins on points by 8 to 2.
Jumping up and down and very excited, Tanner Kyng waved his t-shirt featuring Silverback Sweatshop's logo in front of the cameras. |
|
|
|
Undercard bout
|
This TWGC bout is 1 fifteen minute round in the heavyweight division. Introducing today's competitors. In the red corner, competing out of Los Angeles, with a TWGC record of 22 wins and 26 losses; Cyrus Ozymandias! And in the blue corner, fighting out of Las Vegas, with a TWGC record of 13 wins and 9 losses; Gul Dukat!
The judges for this bout are Anthony Taglia, Eddie Farnsworth and Steve Montenegro.
Let's get this grappling contest under way! Who will be victorious?
Dukat shoots in for a takedown. "I don't think so" says Ozymandias as he avoids it easily.
Dukat shoots in with a takedown attempt and he has Ozymandias pinned against the cage. Ozymandias gets the underhooks and manages to circle away. #TD#
Ozymandias shoots in and bounces Dukat off the cage to secure the takedown into guard. Score +2 for takedown into guard / half guard: Ozymandias (2) vs (0) Dukat
Ozymandias stays in close to Dukat's body and controls the position.
The ref warns both fighters not to hold the cage as they work up against the meshing.
Ozymandias passes into half guard.
We've had a slow start to the round here - hopefully the action picks up.
Dukat makes his way to full guard. A much better position for Dukat.
Dukat pulls Ozymandias in close to prevent any damage.
Ozymandias seems content to control from guard here. He's going to have to remain active though if he doesn't want to get stood back up. #T1#
Ozymandias looking to pass the guard.
Ozymandias has been talking about how he's improved his wrestling in the run up to the fight so let's see if that's enough to sway the balance.
Ozymandias won't allow Dukat to sweep him here.
Dukat trying to control the position.
Dukat managing to control the position.
Ozymandias will need to keep those long limbs tucked in whilst he's on the ground, to prevent any submissions.
Dukat can't do much from the bottom at the moment, as Ozymandias controls the pace.
Ozymandias looking to pass the guard. #T2#
Ozymandias is taking a break and basically stalling. The referee will not allow him to do that for long.
Dukat keeping moving, preventing Ozymandias from controlling successfully.
Dukat is trying to control the position from the bottom.
Our spies down at at The House Of Pain inform us that Dukat has really been working on his submissions in the buildup to this fight. Will it pay off?
Ozymandias trying to pass the guard but can't manage it just yet. #T3#
Ozymandias is frustrating his opponent with some stalling tactics from top position.#SUB2#
Dukat has a loose triangle. He'll be looking to tighten that up but Ozymandias can see exactly what he's planning and manages to posture up and free himself.
Dukat is working from a closed guard but he's struggling to control his opponent.
The fighters are pressed up against the cage, both looking to find a bit of space to work.
Dukat pulls Ozymandias in close to prevent any damage. #T4#
Ozymandias showing good wrestling skills to control the position.
Ozymandias advances to half guard.
Neither fighter is being very active at the moment, with Ozymandias in particular looking to stall.
Ozymandias trying to mount his opponent but Dukat defends it.
Ozymandias is just sitting in half guard, waiting for something to happen.
Ozymandias prevents Dukat from improving his position.#T5#
Ozymandias tries to pass to full mount but Dukat defends it.
Dukat tries to get to full guard but Ozymandias has control of the leg.
Dukat is pressing down on Ozymandias's left leg trying to get back to full guard. He's managed it.
Ozymandias is taking a break and basically stalling. The referee will not allow him to do that for long.
A real slowdown in the pace of the fight for a moment, as Dukat holds on and takes a little breather.
Ozymandias sitting in guard, not really doing much.
Ozymandias seems to have a rather negative gameplan on the ground. He seems keen to just score the takedown and hold down Dukat for as long as he can get away with.
Dukat trying to control the position.
#T6#
Ozymandias slips effortlessly into side control - very nice. Score +3 for passing guard: Ozymandias (5) vs (0) Dukat
Ozymandias in side control, just content to control the action for now.
Ozymandias continues to stall.
Ozymandias wants to take a breather but Dukat manages to regain guard - a lesson learnt for Ozymandias.
Ozymandias trying to move into half guard but instead Dukat has managed to sweep! Score +2 for sweep to guard / half guard: Ozymandias (5) vs (2) Dukat
Dukat trying to pass the guard but can't manage it just yet. #T7#
Dukat is still trying to improve position.
Ozymandias is pulling down on Dukat's head to control his posture.
Ozymandias bucks up whilst keeping hold of a body lock, managing to reverse the position. Now he's in top in Dukat's guard. Score +2 for sweep to guard / half guard: Ozymandias (7) vs (2) Dukat
Dukat looking to hit a scissor sweep but Ozymandias is one step ahead there.
Ozymandias being controlled here momentarily.
Ozymandias wants to pass the guard but Dukat is keeping the position.#T8#
Ozymandias won't allow Dukat to sweep him here.
Ozymandias not doing a lot at the moment. He'll have to show some more aggression or the fight will get stood up.
Dukat keeping moving, preventing Ozymandias from controlling successfully.
Ozymandias stays in close to Dukat's body and controls the position.
Ozymandias postures up.
Dukat keeping moving, preventing Ozymandias from controlling successfully.
Ozymandias controls the pace of the fight for a moment.#T9#
Ozymandias trying to move into half guard but instead Dukat has managed to sweep! Score +2 for sweep to guard / half guard: Ozymandias (7) vs (4) Dukat
Dukat is stalling in the full guard.
Dukat trying to control but Ozymandias is working from the bottom.
Dukat content to stall in guard here.
Dukat looking to pass the guard.
Ozymandias has control of Dukat's left arm, preventing Dukat from doing any damage.
Dukat passes Ozymandias's right leg, so he's now in half guard. #T10#
Ozymandias is looking for a sweep. Dukat is wise to his cunning plan and keeps the top position.
Ozymandias keeping hold of Dukat's head, controlling as best he can. #SUB2#
Dukat is trying to work for a kimura. This could be trouble! No, Ozymandias has managed to free his arm - good work.
Ozymandias is positioning himself well to prevent Dukat advancing to mount.
Ozymandias is looking to regain full guard. Not this time though.
Ozymandias makes his way to full guard. A much better position for Ozymandias.
Ozymandias is working an open guard here, looking to improve his position. No doubt that will leave him open to counters but at least he's being more offensive.#T11#
Ozymandias pulls Dukat in close to his closed guard and prevents Dukat from doing any damage or advancing position.
Ozymandias wants to sweep here but Dukat controlling him for the moment.
Dukat trying to control but Ozymandias is working from the bottom.
Ozymandias wants to sweep here but Dukat controlling him for the moment.
Dukat trying to control the position from guard on top but Ozymandias is wriggling around, looking for whatever he can.
Ozymandias is working an open guard here, looking to improve his position. No doubt that will leave him open to counters but at least he's being more offensive.#T12#
Dukat tries to free his leg and advance position but Ozymandias is retaining full guard.
Ozymandias wants to improve his position but instead Dukat has moved into half guard.
Ozymandias wants to get back to full guard.
Ozymandias is looking to control Dukat's leg but it's slowly edging free. Can Ozymandias avoid being mounted?
Dukat wants to pass to mount but Ozymandias is defending the position.
Ozymandias is looking for a sweep. Dukat is wise to his cunning plan and keeps the top position.
Ozymandias is controlling Dukat's position as best he can from this difficult position.#T13#
Ozymandias trying to hold on to Dukat's head to control him but Dukat postures up.
Dukat trying to control the action but Ozymandias is working from the bottom.
Still in half guard, Dukat seems content to control.
Ozymandias is looking to improve his position.
Dukat is pressing down on Ozymandias's thigh, looking to free his foot. Ozymandias is holding on for now.
Ozymandias moves into full guard.
Dukat is frustrating his opponent with some stalling tactics from top position.#T14#
Ozymandias pulls Dukat in close to prevent any damage.
Dukat looking to pass the guard.
Ozymandias trying to keep a closed guard but Dukat is proving a slippery customer.
Boooooooooooooooooooo!!! God, this has been a terrible round. Come on you two, sort yourselves out!
Ozymandias is looking to sweep but instead, Dukat has passed into half guard.
And that's the end of the fight!
Ozymandias takes the fight on points by 7 to 4.
After the big win, Cyrus Ozymandias made sure to do all the important stuff like thanking his sponsors Silverback Sweatshop and telling the interviewer how much he loves him. |
|
|
|
Undercard bout
|
This TWGC bout is 1 fifteen minute round in the super heavyweight division. Introducing today's competitors. In the red corner, competing out of Sydney, with a TWGC record of 8 wins and 2 losses; Saad Sadiq ! And in the blue corner, fighting out of London, with a TWGC record of 30 wins and 7 losses; Olyksandr Chai!
The judges for this bout are Russell Pearce, Anthony Taglia and Columbo Gatti.
The fighters bow as they face eachother in the middle of the mat and we are under way.#CL2#
Chai forces Sadiq back against the cage and clinches.
Chai is working for a takedown up against the cage. He can't get it on this occasion though.
Chai is working for a takedown up against the cage. He can't get it on this occasion though.#TD2#
Chai lands a nice trip takedown into half guard.
Score +2 for takedown into guard / half guard: Sadiq (0) vs (2) Chai
Chai seems very keen to just sit and control from half guard but Sadiq does not like that idea so much and is remaining active off his back. #SUB2#
Chai is looking for an arm triangle, whilst trying to pass to side control. Sadiq doesn't seem that keen to cooperate though. No luck this time Chai.
Sadiq is refusing to be controlled, as Chai sits in half guard.
We've had a slow start to the round here - hopefully the action picks up.
Chai content to sit in half guard and control for a moment. #T1#
Chai is trying to advance to mount but he's lost his balance and Sadiq reverses the position - he's now on top in Chai's guard. Score +2 for sweep to guard / half guard: Sadiq (2) vs (2) Chai
Chai working a defensive guard but Sadiq passes into half guard.
#SUB#
Sadiq is trying for a guillotine from the top but the pressure isn't in the right place so Chai is just riding it out for now. Sadiq eventually gives up the hold.
Chai is looking to improve his position.
#T2#
Chai wants to control but Sadiq is keeping busy.
Chai wants to get back to full guard.
Chai moves into full guard.
Chai trying to control the position.
#SUB2#
Chai working from the bottom, still in full guard. He's managed to get a loose triangle. Sadiq doesn't seem to be doing much to defend here, obviously he feels comfortable in the position. Sadiq manages to throw the legs off his shoulder and he's back into guard - no problem.
Chai keeping moving, preventing Sadiq from controlling successfully. #T3#
Sadiq stopping the sweep attempt from Chai.
Chai pulls Sadiq in close to his closed guard and prevents Sadiq from doing any damage or advancing position.
Chai controls Sadiq momentarily but Sadiq frees himself. #SUB2#
Chai has his foot on Sadiq 's thigh. He's trying to push off and get in position for a triangle, I think. Sadiq works his way back into a safe position though.#T4#
Chai seems keen to control rather than go for a submission, at least for now.
Sadiq pressing down on his opponent's thigh, looking to pass guard. Chai is keeping the position for now.
The ref warns both fighters not to hold the cage as they work up against the meshing.
Sadiq won't allow Chai to sweep him here.
Sadiq trying to control the position from guard on top but Chai is wriggling around, looking for whatever he can.
Sadiq trying to move into half guard but instead Chai has managed to sweep! Score +2 for sweep to guard / half guard: Sadiq (2) vs (4) Chai#T5#
Sadiq has a closed guard, preventing anything of note from happening. Perhaps he's looking to stall.
Chai's corner is telling him to maintain position.
Chai trying to move into half guard but instead Sadiq has managed to sweep! Score +2 for sweep to guard / half guard: Sadiq (4) vs (4) Chai
Sadiq advances to half guard.
Chai gets full guard.
Chai is trying to keep Sadiq in close.
Sadiq won't allow Chai to sweep him here. #T6#
Chai is trying to keep Sadiq in close.
Sadiq trying to control the position from guard on top but Chai is wriggling around, looking for whatever he can.
Chai bucks up whilst keeping hold of a body lock, managing to reverse the position. Now he's in top in Sadiq 's guard. Score +2 for sweep to guard / half guard: Sadiq (4) vs (6) Chai
Chai wants to pass the guard but Sadiq is keeping the position.
Chai pushes down on Sadiq 's leg and manages to get into half guard.
Chai is looking to advance position but Sadiq won't allow it. #T7#
Chai is keen to just control but Sadiq is a slippery customer.#SUB2#
Chai seems to be looking for submissions.
Chai perhaps working for something from half guard, or maybe not. It looks like he's just sitting there.
Chai wants to free his trapped foot but Sadiq is holding on for dear life with his legs.
Sadiq is looking to control Chai's leg but it's slowly edging free. Can Sadiq avoid being mounted?#T8#
Chai is looking to take a break and control but Sadiq is keeping him honest, looking to work from the bottom. #SUB2#
Chai trying to work for an americana but Sadiq has managed to regain full guard.
Chai showing good wrestling skills to control the position.
Chai stands up and looks to throw the legs aside to pass to side control. Sadiq swivels though and keeps the full guard. #T9#
Sadiq has a closed guard, preventing anything of note from happening. Perhaps he's looking to stall.
Chai trying to pass the guard but can't manage it just yet.
Sadiq wants to control here, rather than go for any submissions from the bottom. At least for now.
Chai trying to pass the guard. He's being very persistent here but Sadiq manages to land a sweep and now he's on top! Score +2 for sweep to guard / half guard: Sadiq (6) vs (6) Chai#T10#
Sadiq stopping the sweep attempt from Chai.
The fighters are pressed up against the cage, both looking to find a bit of space to work.
Sadiq trying to control the position from guard on top but Chai is wriggling around, looking for whatever he can.
Chai wants to sweep but no luck.
Sadiq is pushing down on Chai's leg trying to pass to half guard. Chai is fighting to maintain full guard but Sadiq has managed to sneak the leg through.
Chai is looking to regain full guard. Not this time though. #T11#
Chai manages to get to full guard.
#SUB2#
Sadiq avoids a guillotine attempt easily.
Sadiq forces his way into half guard.
Sadiq is pressing down on Chai's thigh, looking to free his foot. Chai is holding on for now. #T12#
Sadiq passes to full mount! Score +3 for passing guard: Sadiq (9) vs (6) Chai#SUB#
Sadiq is going oldschool here, as he tries to force Chai to tap using a forearm choke. This isn't 1993 though, so Chai shrugs it off.
Chai really trying hard to get back to half guard here.
Well,Sadiq is on his way to losing a decision here. Can he use his experience to pull something off in the closing minutes?
Chai is trying to reverse the position but instead Sadiq has taken his back - oops! Score +3 for taking back: Sadiq (12) vs (6) Chai
Sadiq controlling well, preventing Chai from escaping the position.
#T13##SUB#
Chai defends a rear naked choke attempt by controlling one of Sadiq 's arms.
Chai is trying to break free.
Chai trying to control but not successfully.
Chai turns into Sadiq and is now in his guard.
Score +2 for sweep to guard / half guard: Sadiq (12) vs (8) Chai
Chai stands up and looks to throw the legs aside to pass to side control. Sadiq swivels though and keeps the full guard. #T14#
Chai trying to pass the guard. He's being very persistent here but Sadiq manages to land a sweep and now he's on top! Score +2 for sweep to guard / half guard: Sadiq (14) vs (8) Chai
Chai is working from a closed guard but he's struggling to control his opponent.
Chai keeping moving, preventing Sadiq from controlling successfully.
Chai working a defensive guard here.
Boooooooooooooooooooo!!! God, this has been a terrible round. Come on you two, sort yourselves out!
Sadiq forces his way into half guard.
And that's the end of the fight!
Sadiq takes the fight on points by 14 to 8.
A very excited looking Saad Sadiq rambled incoherently for about 5 minutes post fight about how awesome he is. It was kinda funny for a while but then everyone got annoyed. |
|
|
|
Co-main event
|
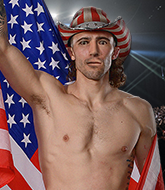
This TWGC bout is 1 fifteen minute round in the super heavyweight division. Introducing today's competitors. In the red corner, competing out of Sydney, with a TWGC record of 11 wins and 3 losses; Darrell Darkins! And in the blue corner, fighting out of Las Vegas, with a TWGC record of 11 wins and 8 losses; Nedry Kuang!
The judges for this bout are Franklyn Lucas, Jonathan Paton and Anthony Taglia.
The fighters connect hands in the middle of the mat and we are under way.#TD#
Darkins fakes a strike and closes the distance, dragging Kuang to the ground. Darkins is now in Kuang's guard. Score +2 for takedown into guard / half guard: Darkins (2) vs (0) Kuang
Kuang wants to sweep but no luck.
Darkins stays in close to Kuang's body and controls the position.
Kuang is trying to control the position but Darkins postures up.
Kuang trying to control the position here.
Kuang is working an open guard here, looking to improve his position. No doubt that will leave him open to counters but at least he's being more offensive.
Kuang working a defensive guard here.
Kuang is in a good position here but he's just trying to control... And he's not even managing to do that successfully.
We've had a slow start to the round here - hopefully the action picks up.
Kuang can't do much from the bottom at the moment, as Darkins controls the pace.
Darkins looking to pass the guard.
Darkins might be looking to lock onto one of his opponent's long limbs for a submission, whilst we're on the ground.#T1#
Darkins wants to control from the top but Kuang keeps moving.
There's a bit of a scramble here and now Kuang is on top in guard.
Score +2 for sweep to guard / half guard: Darkins (2) vs (2) Kuang#SUB#
Darkins had isolated an arm as going for a kimura. Kuang defends it easily.
Kuang looking to pass the guard.
Darkins is working from a closed guard but he's struggling to control his opponent.#SUB#
Darkins is working actively off his back, looking to secure an arm or perhaps work for a triangle.
Kuang looking to pass the guard.
Kuang has been taking part in the yoga sessions down at Doom\'s Gym. Presumably he's going to look for a slick submission... Or maybe he's looking to avoid one.#T2#
Kuang keeps trying to improve his position.
The fighters are pressed up against the cage, both looking to find a bit of space to work.#SUB#
Darkins is looking for a guillotine. You can't force these things though and Kuang defends well.
Darkins keeping moving, preventing Kuang from controlling successfully. #SUB#
Kuang content to sit in guard, stalling... Great. Oh but he could get punished here because Darkins has locked up a guillotine! Darkins's face is contorted as he sqeezes tight on the submission attempt - will he finish? Kuang is holding on here and Darkins must be using up a lot of energy. Kuang has gone limp! He's out! He's out cold! Darkins gets to his feet, tossing aside his stricken foe. Arms raised, he milks the applause from the crowd. Great submission!
Ladies and gentlemen, after 2:55 of round 1, we have a winner by way of Submission (Guillotine). Darrell Darkins!
A very excited looking Darrell Darkins made sure he remembered to thank all the fans both in the arena and on the internet. He said all the coolest people spend all day on MMA websites, which got a big reaction.
The defeated Nedry Kuang had this to say: 'å°ç¬ä¸å²ï¼ä¸ä¸å²ï¼'. |
|
|
|
Main event
|
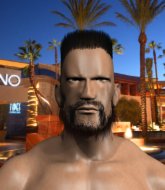
This TWGC bout is 1 fifteen minute round in the middleweight division. Introducing today's competitors. In the red corner, competing out of New York, with a TWGC record of 20 wins and 9 losses; Dreynos Elvul! And in the blue corner, fighting out of Las Vegas, with a TWGC record of 11 wins and 12 losses; Elazar Shalit!
The judges for this bout are John Roberts, Anthony Taglia and Joseph Jones.
The official calls the fighters to the middle and the contest is under way.#CL#
Elvul has managed to clinch.
Elvul is trying to work for a single leg takedown but Shalit pulls him back up using the underhooks. #TD#
Elvul drags the fight down to the ground.
My spies in The House Of Pain inform me that Shalit has been getting involved in the gym's BJJ sparring sessions. Let's see whether that pays dividends!#SUB#
Elvul looking for submissions from the bottom here. Moving his hips around, possibly looking for an armbar.
The ref warns both fighters not to hold the cage as they work up against the meshing.
Shalit stands up and looks to throw the legs aside to pass to side control. Elvul swivels though and keeps the full guard. #SUB#
Elvul has thrown up a leg looking for a triangle. Shalit doesn't defend quickly enough and Elvul has managed to lock this one up! Can Shalit escape?! NO! He's tapping out! Damn, that was a quick submission - congrats to Elvul on a fantastic submission victory.
Ladies and gentlemen, after 0:43 of round 1, we have a winner by way of Submission (Triangle). Dreynos Elvul!
Dreynos Elvul retains his middleweight title!
During a confident post fight interview, Dreynos Elvul thanked all his fans. He seemed very genuine when describing how motivated his fans keep him. |
|
|
|
|
|
|