 |
NYF 55: Makoba vs Crusher PBP Commentary |
Undercard bout
|
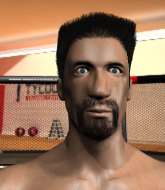
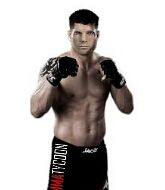
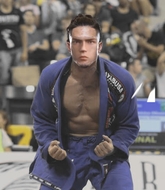
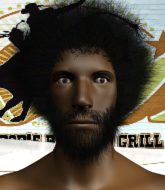
Coming up we have a lightweight MMA rules bout between Michael Dawson (ranked 1904 p4p, 3054 weight class) and Sam Morril (ranked 198 p4p, 294 weight class). Both fighter's entrance songs getting the crowd jumping here.
 |
|
 |
| 178 cm
22
165
5 - 5 - 0 |
|
180 cm
21
168
6 - 5 - 0 |
BJJ Purple Belt
Excellent MT
Very quick |
|
Good wrestler
Excellent MT
Good gas tank |
|
| |
|
Ladies and gentlemen. This fight is 3 rounds, in the lightweight division.
Introducing the fighter to my left, fighting out of the red corner.
With a record of 5 - 5 - 0, fighting out of Los Angeles, Michael Dawson!
And introducing the fighter to my right, fighting out of the blue corner.
With a record of 6 - 5 - 0, fighting out of Las Vegas, Sam Morril!
The judges for this bout are Bruno Lombardi, John Kavanagh and Lou da Vinci.

The bell rings for round one and we are underway!
Morril swings away but doesn't land with a series of punches.
Morril chopped to the floor by a nice leg kick but he springs right back up before Dawson can pounce on him.
Dawson with a nice calf kick.
A combination from Dawson does no damage.
Dawson throws a shot to the body.
Dawson feints a straight left to the body, then turns around with a flashy move and hits Morrils jaw with a dramatic spinning back fist!
Morril takes a step towards his opponent and connects with a left hand, before circling away.
Michael Dawson seems to be the more aggressive standup fighter in this bout.
Morril throws a looping overhand right but Dawson ducks down to avoid it.
Morril misses with a hook. Dawson ducked under it nicely.
Decent striking displayed by Morril there.
Dawson lands a leg kick that knocks Morril off balance momentarily.
Dawson throws a monster uppercut resembling something out of street fighter but it doesn't land.
The fans in attendance giving it up for the two fighters, who have really let it all hang out in the last minute or so!
Morril lands with a cross to side of his opponent's head.
Dawson throws a body kick but he was well out of range there.
Morril walks straight into an uppercut. Luckily it didn't land flush.

That's one minute gone in the round.
Dawson slips under a jab.
Morril uses good head movement to avoid the hook from Dawson.
And an attempted straight right on the counter from Morril! But no joy.
Dawson moves out of range as Morril strikes.
Morril looks more muscular than last time we saw him. He must have been on the weights.
Dawson jabs Morril right on the nose. Morril blinks but takes it well.
Morril misses with a straight right.
Dawson misses with a body punch
and Morril connects with a straight left hand counter down the middle.
Morril defending well as Dawson loads up on a big left hand.
Morril looks like he wants to counter punch here.
Dawson misses with a jab, cross combination.
Dawson on the wrong end of a nice low kick. He's acting like it's no big deal but he doesn't want to take many more of those.
Dawson lands with a hook. Morril tried to avoid it but it clipped the top of his head.
Dawson misses with a jab, cross combination.
Morril ducks down and throws a hook to the body but Dawson moves away.
Dawson throws a low kick, looking for Morril's leg but Morril calmly moves out of range.

That's two minutes gone in the round.
Morril moves away from the strike by Dawson.
A slow jab from Dawson misses its intended target.
Dawson fakes and then throws a beautiful body shot. Morril looks a bit winded and takes a step backwards to take a breath.
Fantastic stuff here - a very entertaining period of action, which has drawn cheers from the crowd.
A combination from Morril does no damage.
Dawson looks to score with a jab to the body but Morril is just out of range.
Dawson walks into a left hand.
Morril has his hands up protecting his head but a hook from Dawson finds it's way round the side to connect with Morril's head.
Morril swings for the body but Dawson moves out of range.
Morril stooping low to avoid any incoming strikes and then lunges in with an uppercut come cross that lands flush.
Morril missing with a left hand there. Dawson was out of range so wasted energy throwing that one.
Morril moves out of range of the strikes.
Dawson avoids the body shot from Morril.
Dawson throws a one two combo.

That's three minutes gone in the round.
Dawson misses with an uppercut
and Morril counters with a right hand to the body.
A nice leg kick from Morril, right into the meat of the thigh.
Dawson throws a wild combination but nothing lands.
Morril throws an uppercut from half a mile away. Dawson sees it coming and avoids it easily.
Dawson uses some good footwork to avoid the body shot by Morril.
Morril with a jab.
Morril fakes high and swings low for a body shot but Dawson manages to avoid it.
Dawson takes a shot to the body in his stride.
The fighters circling - Dawson throws out the jab but it was never going to land.
We've been told by Dawson's head coaches at California Top Team that he's been working on his takedown defense in preparation for this fight.
Morril sees a low kick coming and goes to check it, but it's actually a body kick and it thuds into his unprotected ribs.
A big right from Dawson misses.
Dawson uses good footwork to avoid the strikes from Morril.
Dawson bobs and weaves and throws out a fast jab that snaps Morril's head backwards.
Dawson throws a lazy body kick
and Morril cracks him with a counter punch right on the button.

That's four minutes gone in the round.
The crowd cheering loudly, showing their appreciation for the quality fight we're seeing here.
Dawson misses with a wild combination.
Dawson throws a shot to the body.
Dawson has his hands up protecting his head but a hook from Morril finds it's way round the side to connect with Dawson's head.
Morril keeping a good distance there, avoiding the body shot.
And an attempted straight right on the counter from Morril! But no joy.
Dawson misses with a double jab
and Morril connects with a straight left hand counter down the middle.
Morril comes forward and lands a shot to the body, then darts back out of range.
Dawson connects with a lovely right hand, straight down the pipe.
Morril feints a straight left to the body, then turns around with a flashy move and hits Dawsons jaw with a dramatic spinning back fist!
The crowd applaud the fighters' efforts here as the round comes to an end.
Dawson misses with a double jab
and Morril counters with a crisp hook to the side of the head.
And that is the end of the round. The fighters go back to their corners.
That was a close round but I would say that Michael Dawson will probably get the nod.
That's the end of the round. The referee orders the cornermen out of the cage so we can get back down to business.

Morril cracks Dawson with a hook to the jaw. Both fighters smile at eachother and high-five before getting back down to business.
Dawson throws a combination but it was largely blocked by Morril.
Dawson moves away from the strike by Morril.
Dawson throws a jab when Morril was well out of range.
Dawson misses with a jab and misses with a cross straight after too.
Morril checks a leg kick.
Michael Dawson is looking to throw some combinations by the looks of things.
Dawson throws a hook but Morril blocks it.
Morril now looks to counter with a shot at the body.
Dawson misses with a jab, cross combination.
Dawson moves into range and connects with a jab.
We've had a slow start to the round here - hopefully the action picks up.
Dawson misses with a few strikes there.
Nice shot lands for Morril.
Dawson displays some good footwork, moving neatly out of range as Morril throws out the jab.
Dawson throws a body kick that misses.
Oooooooooooh, not good. A low kick from Dawson lands where it shouldn't have, right in the... well, you know what he did? He kicked him in the penis. He's injured, injured bad. The referee sends both fighters to their corners and Morril has 5 minutes to recover. He's OK now though... a thumbs up from Morril and we're back underway with a touch of gloves.
That's one minute gone in the round.
Morril dips down and scores with a jab to the body.
Dawson has his front leg slapped to the side - a nice low kick landing there from Morril.
Morril slips a straight right by Dawson.
Dawson throws a right hand that Morril ducks under and follows up with a left that Morril also avoids with ease.
Morril ducks under a wild hook from Dawson.
Morril takes a jab right on the nose. That must have hurt but he shrugs his shoulders and looks to return the favor.
Dawson attempts a leg kick but it's missed by a good margin.
Dawson throws a big shot that misses.
Morril misses with a body shot. Nice footwork from Dawson.
Morril slips under a jab.
Dawson scores with a hook.
Michael Dawson is winning the standup battle so far.
Morril throws a monster uppercut resembling something out of street fighter but it doesn't land.
A jab from Morril misses.
That's two minutes gone in the round.
Dawson ducks under a wild hook from Morril.
Dawson smiles there as he lands a nice right hand right on the button.
Dawson thumps Morril with a low kick.
Fantastic stuff here - a very entertaining period of action, which has drawn cheers from the crowd.
Morril uses some good footwork to avoid the body shot by Dawson.
Dawson misses the jab.
Dawson misses with a wild combination.
Morril buckles his opponent's knee momentarily with a nice leg kick.
Dawson lands an overhand left. A wild punch that just about connected.
Nice defenses there by Morril.
Morril misses with a series of wild punches.
That's three minutes gone in the round.
Dawson connects with a lovely jab that went straight through the gap between Morril's hands.
Morril showing good head movement there, avoiding the strikes from Dawson.
Both these guys seem content to just stand up and trade with each other but Morril might want to think about changing up his gameplan a bit because over the course of the fight, Dawson has got the better of the exchanges.
Morril throws an overhand right that lands on Dawson's shoulder, as Dawson tries to avoid the shot.
Morril takes a swing at Dawson's ribcage but misses.
Dawson takes one to the side of the head.
Morril lands a straight punch to the body, keeping Dawson at a distance.
Some bone on bone action there as Dawson checks a low kick. Luckily it wasn't a particularly hard one.
Dawson throws an ugly left hook that misses
and Morril cracks him with a counter punch right on the button.
Dawson lands a really nice looking cross but Morril seems unphased.
Dawson takes a shot right to the liver - Bas would have been proud of that punch.
Morril uses decent footwork to sidestep a right hand from Dawson.
Morril swings away with a counter right hand but no contact made.
That's four minutes gone in the round.
Morril lands a head shot.
The crowd cheering loudly, showing their appreciation for the quality fight we're seeing here.
Morril throws a combination but it was largely blocked by Dawson.
Morril misses with a wild body shot.
Dawson with a jab.
Morril cracks Dawson with a nice right hand that draws applause from the crowd.
 Dawson is rocked! Dawson is rocked!
Morril lands a slapping body shot.
Oh Dawson is still all over the place! His legs are completely gone! Will he be able to recover?!!
Both fighters are absolutely exhausted here.
Morril dips down and scores with a jab to the body.
Crack! Morril connects with the perfect overhand right and Dawson falls face first to the canvas. Timbeeeeeeeer! Beautiful knockout for Morril!
Ladies and gentlemen, after 4:32 of round 2, we have a winner by way of KO (Punch). Sam Morril!
A very excited looking Sam Morril rambled incoherently for about 5 minutes post fight about how awesome he is. It was kinda funny for a while but then everyone got annoyed.
|
|
|
|
|
|
|
|
|
|
|
|
|
|
|
|
|
|
|
|
|
|
|
| S |
C
A |
G |
S |
C
B |
G |
|
S |
C |
G |
|
energy
A | B |
|
hype
A | B |
|
pop
A | B |
|
mgr
A | B |
|
FIGHT
RATING
68% |
|
|
|
|
|
|
|
Undercard bout
|
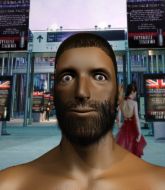
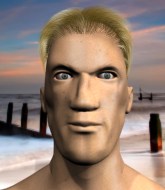
Coming up we have a light heavyweight MMA rules bout between Danny Chase (ranked 2817 p4p, 2724 weight class) and Frank Jaxon (ranked 312 p4p, 305 weight class). Chase comes to the cage accompanied by Ambitionz Az a Ridah. Danny Chase could well score a knockout today. He has the power to get to Frank Jaxon's chin.
 |
|
 |
| 190 cm
21
205
2 - 3 - 0 |
|
170 cm
26
210
6 - 5 - 0 |
Good wrestling
Excellent boxer
Cardio machine |
|
Good wrestler
Counter fighter
Powerful |
|
| |
|
Ladies and gentlemen. This fight is 3 rounds, in the light heavyweight division.
Introducing the fighter to my left, fighting out of the red corner.
With a record of 2 - 3 - 0, fighting out of Los Angeles, Danny Chase!
And introducing the fighter to my right, fighting out of the blue corner.
With a record of 6 - 5 - 0, fighting out of Montreal, Frank Jaxon!
The judges for this bout are Franklyn Lucas, Steve Montenegro and Jorge Garcia.
The bell rings for round one and we are underway!
Nice sprawl there from Chase as Jaxon shoots in.
Chase throws a jab when Jaxon was well out of range.
It seemed like Jaxon was going to counter with the hook but didn't fully commit to it.
Chase tries to land with a swinging hook to the body but Jaxon was well out of range. Poor timing from Chase.
Jaxon swings away with a counter right hand but no contact made.
Jaxon takes a jab on the nose. He smiles like he loves it and keeps coming.
No luck for Jaxon with that takedown attempt.
Chase throws a head kick that Jaxon semi-blocks.
 It looks like Frank Jaxon has been cut. It looks like Frank Jaxon has been cut.
Chase lands a beauty of a right hand that gets the crowd cheering.
We've had a slow start to the round here - hopefully the action picks up.
Chase ducks low and lands a nice hook to the body of his opponent.

Jaxon closes the distance and gets a trip takedown into side control. Chase quickly recovers to half guard.
Wooooo! Give it up for these two warriors! They are putting on a show!
Chase is trying to defend against the ground and pound but Jaxon scores with a couple of nice shots.
Jaxon frees up his trapped foot and advances to mount.
That's one minute gone in the round.

Jaxon moves into side control, trying to work for a kimura. That looks painful! Will he finish!!?? No, Chase has worked his arm free - good work by Chase!
Chase is looking to get back to his feet here but Jaxon is keeping cool and he's managed to take Chase's back.
Chase trying to get back to his feet but Jaxon is in full control for now.
Jaxon working for a RNC but it's not happening just yet.
Our spies down at at Jim Gym inform us that Jaxon has really been working on his submissions in the buildup to this fight. Will it pay off?
Jaxon looking to hold on to the position here but Chase rolls and ends up regaining guard.
That's two minutes gone in the round.
Jaxon is in close to Chase's body, working some short punches and elbows.
The ref warns both fighters not to hold the cage as they work up against the meshing.
Jaxon trying to control the position from guard on top but Chase is wriggling around, looking for whatever he can.
Jaxon trying to land body shots but he keeps hitting the mat.
Chase keeping moving, preventing Jaxon from controlling successfully.
Jaxon postures up in Chase's guard and throws a big left but Chase blocks it.
Jaxon stops Chase from standing up.
Jaxon missing there with some ground and pound from the guard.
Chase being controlled here, momentarily.
That's three minutes gone in the round.
Jaxon throws a strike but Chase rolls with it and manages to sweep. Now he's in guard on top.

Jaxon not looking particularly offensive just at the moment.
Chase looking to control the position here, rather than advance.
Jaxon wants to improve his position but instead Chase has moved into half guard.
Chase is trying to control. Jaxon wants to improve his position but can't escape this time.
Chase will need to keep those long limbs tucked in whilst he's on the ground, to prevent any submissions.
That's four minutes gone in the round.
Chase wants to get back to his feet.
Jaxon gets full guard.
Jaxon is doing well to control the posture of his opponent and prevent any damage.
Chase trying to control the position from guard on top but Jaxon is wriggling around, looking for whatever he can.

The referee decides to stand the fighters back up.
The crowd thankful this round is nearly over.
Chase throws out a token jab with nothing on it.
Chase lands a powerful looking uppercut that connected with his opponent's jaw.
Jaxon shoots in and drives through. Chase sprawls well.
A little feinted left hand from Chase on the counter but he doesn't commit to it.
And that is the end of the round. The fighters go back to their corners.
Danny Chase dominated that round.
The cut man is working on Frank Jaxon's cut.
The referee calls time. The cornermen exit stage left and we're back to business.
Good standup being displayed there by Chase as he connects with a hook.
Jaxon avoids a lazy jab quite easily.
Jaxon uses good footwork to avoid the strikes from Chase.
A shot to the liver by Chase. Beautiful body shot.
Nice straight punches there by Chase. You know Roy Jones Jr respects the hands of Chase.
Chase scores with a reasonable looking shot to the body. Jaxon doesn't seem bothered though.
Chase paws at his opponent with the jab and then lunges in with a straight, right on the button.
Frank Jaxon is looking to throw some combinations by the looks of things.
Chase scores with a crisp jab that stopped Jaxon in his tracks.
Chase takes a swing at Jaxon's ribcage but misses.
Jaxon keeping a good distance there, avoiding the body shot.
It seemed like Jaxon was going to counter with the hook but didn't fully commit to it.
Chase throws an overhand right that lands on Jaxon's shoulder, as Jaxon tries to avoid the shot.
Chase looks to throw the jab but Jaxon is out of range.
A cross from Chase lands.
That's one minute gone in the round.
Chase throws a sloppy head kick and Jaxon moves out of range easily.
Chase misses with a looping right.
Jaxon looks for a takedown but Chase sprawls well.
Danny Chase seems to be the more aggressive standup fighter in this bout.
Jaxon with poor footwork there. He got himself in a bit of a tangle, enabling Chase to score with a decent uppercut.
Jaxon on the wrong end of a nice hook.
The crowd cheers as Chase lands an impressive looking overhand right. Jaxon doesn't seem phased though.
Decent striking displayed by Chase there.
Chase takes a swing at Jaxon's ribcage but misses.
Chase is using his reach advantage well here, landing the more effective single shots from range.
A slow jab from Chase misses its intended target.
Jaxon swings away with a counter right hand but no contact made.
Jaxon shoots in but doesn't get the takedown
letting Chase counter with a right hand.
That's two minutes gone in the round.
Jaxon changes levels and looks for a double leg takedown. Chase tries to avoid it but Jaxon manages to keep hold of a leg and drag Chase to the ground. Chase escapes though and pops straight back up to his feet.
Danny Chase has stuffed three takedown attempts in the round now. That's going to take a lot out of Frank Jaxon.
Good exchange - Chase coming out on top.
 Jaxon is rocked! Jaxon is rocked!
Chase misses with a body shot. Nice footwork from Jaxon.
The fans in attendance giving it up for the two fighters, who have really let it all hang out in the last minute or so!
Jaxon takes a shot to the nose. Hopefully that hasn't broken it.
Jaxon is still on wobbly legs! Can Chase finish him?
Chase drops Jaxon with a straight right hand, right on the button! Chase follows him down to the mat and pounds him out with hammerfists until the referee jumps in to end the fight!
Ladies and gentlemen, after 2:34 of round 2, we have a winner by way of TKO (Strikes). Danny Chase!
A relieved looking Danny Chase thanked the fans for their support and gave the usual line about them being amazing. They seemed to believe that he actually meant it.
|
|
|
|
|
|
|
|
|
|
|
|
|
|
|
|
|
|
|
|
|
|
|
| S |
C
A |
G |
S |
C
B |
G |
|
S |
C |
G |
|
energy
A | B |
|
hype
A | B |
|
pop
A | B |
|
mgr
A | B |
|
FIGHT
RATING
42% |
|
|
|
|
|
|
|
Undercard bout
|
Coming up we have a light heavyweight MMA rules bout between Euan Daxton (ranked 1885 p4p, 1731 weight class) and Tristan Zigaro (ranked 224 p4p, 207 weight class). Daxton comes to the cage accompanied by Mr Brightside. Both fighters look fresh as a daisy as they make their way towards the cage.
 |
|
 |
| 190 cm
34
224
12 - 10 - 0 |
|
190 cm
22
206
3 - 1 - 0 |
Good wrestling
Excellent boxer
Cardio machine |
|
Good wrestler
World class MT
Granite chin |
|
| |
|
Ladies and gentlemen. This fight is 3 rounds, in the light heavyweight division.
Introducing the fighter to my left, fighting out of the red corner.
With a record of 12 - 10 - 0, fighting out of Tokyo, Euan Daxton!
And introducing the fighter to my right, fighting out of the blue corner.
With a record of 3 - 1 - 0, fighting out of Las Vegas, Tristan Zigaro!
The judges for this bout are Anthony Taglia, Bruno Lombardi and John Kavanagh.
The bell rings for round one and we are underway!
Daxton jabbing away but nothing is landing.
Daxton fails with an attempt to clinch.
Zigaro jabs Daxton right on the nose. Daxton blinks but takes it well.
Zigaro tries to clinch up.
A leg kick checked by Daxton.
Daxton is moving around nicely and scores here with a single head shot.
Daxton misses with an uppercut. Zigaro saw that one coming.
Nice jab there from Zigaro.
Daxton misses with a low kick.
Zigaro swings wildly with a hook that is half blocked by Daxton.
Zigaro uses decent footwork to sidestep a right hand from Daxton.
Daxton misses with a low kick.

Zigaro clinches.
Daxton gets through Zigaro's defenses to land a nice punch to the side of the head.
Zigaro blocks a couple of punches on the inside.
We've seen a great period of action over the last minute or so - credit to both fighters for going all out!
Zigaro takes a shot to the head.
Zigaro softening up his opponent with strikes, against the cage.
Nice body punch from Zigaro.
That's one minute gone in the round.
A head punch on the inside from Zigaro fails to land.
Daxton lands a body punch.
Daxton lands a short shot on the inside that snaps the head of Zigaro backwards.
Daxton's head jolts backwards as he takes an uppercut right on the button!
Zigaro fails to land with a short punch on the inside.
Zigaro swings wildly with an uppercut but Daxton uses good head movement to avoid it.
Daxton digs a right hand into Zigaro's ribs. Those have got to be taking their toll on Zigaro's gas tank.
Daxton misses with a short punch on the inside.
Zigaro avoiding damage as Daxton throws knees to the body.
Zigaro avoids the elbow strike from Daxton, against the cage.
Daxton tried to land a shot to the body but connects with Zigaro's elbow.

Daxton's corner calls for him to break the clinch, which he does.
A head kick from Zigaro lands but Daxton takes it in his stride.
 It looks like Euan Daxton has been cut. It looks like Euan Daxton has been cut.
Daxton tries to close the distance and clinch up but Zigaro swats him away and circles back towards the center.
Daxton throws a hook but Zigaro blocks it.
Zigaro looks to land a body kick but Daxton moved away.
Zigaro on the wrong end of a nice jab.
Daxton misses the jab.
That's two minutes gone in the round.
The fans in attendance giving it up for the two fighters, who have really let it all hang out in the last minute or so!
Daxton lands with a nice low kick. That'll leave a bruise.

Daxton clinches.
Zigaro misses with some punches.
Daxton lands an elbow inside that Zigaro shrugs off.
Daxton misses with a punch on the inside.
Zigaro misses with the head strike.
A nice left hand lands by Zigaro.
Daxton misses with a hook from the clinch.
Daxton looks to be in better condition than last time we saw him fight. Obviously he's been working hard on his cardio.
Zigaro lands an uppercut.
Zigaro lands with a short shot to the head.
Daxton lands punches inside but they're not really causing much damage.
Zigaro avoiding damage as Daxton throws knees to the body.
Zigaro throws a hook to the body. More of an arm punch but it's all scoring with the judges.
Zigaro lands a left hand that snaps the head of Daxton backwards.

Zigaro manages to break the clinch.
Zigaro lands with a head kick! That's gotta hurt.
Daxton will need to close the distance a bit before he attacks - that leg kick was thrown from too far away.
Zigaro counters with a body kick.
A cross from Daxton lands.
That's three minutes gone in the round.
Daxton with a jab.
Daxton digs a good hook to Zigaro's body.
Daxton circles away from the clinch attempt
enabling Daxton to counter with a crisp jab.
Zigaro slips under a jab.
Zigaro lands a body shot.
Tristan Zigaro is looking to keep the fight on the feet at all costs.
Zigaro connects with a solid leg kick.
Zigaro lands with a nice body kick.
Zigaro clinches with his opponent.
Daxton's head jolts backwards as he takes an uppercut right on the button!
Daxton blocks a couple of punches on the inside.
Zigaro breaks the clinch.
Daxton throws a monster uppercut resembling something out of street fighter but it doesn't land.
This has been an exciting period of action!
The crowd cheers as Zigaro lands an impressive looking overhand right. Daxton doesn't seem phased though.
Zigaro ducks under a wild hook from Daxton.
That's four minutes gone in the round.
Zigaro avoids a punch combination nicely.
Daxton takes a swing at Zigaro's ribcage but misses.
Daxton backing away here, and Zigaro unleashes a leg kick that just misses.
Zigaro lands a glancing blow to the side of Daxton's head.
Zigaro throws a body punch but Daxton moves out of range.

Zigaro lands a big head kick that sends Daxton tumbling to the mat! Zigaro takes a step backwards and waves Daxton back to his feet - he wants the finish!
Daxton is rocked!
Zigaro delivers a nice body kick.
Oh Daxton is still all over the place! His legs are completely gone! Will he be able to recover?!!
Zigaro cracks Daxton with a hook to the temple - Daxton is on wobbly legs here! Zigaro swarms him with hook after hook, landing with each one! Daxton falls to the canvas face first and the referee dives in to stop the fight! Zigaro wins by TKO!
Ladies and gentlemen, after 4:32 of round 1, we have a winner by way of TKO (Punches). Tristan Zigaro!
Euan Daxton spoke after the fight, saying 'I'd like to thank my opponent for stepping in here with me. It was an honour to eat his punches.'.
|
|
|
|
|
|
|
|
|
|
|
|
|
|
|
|
|
|
|
|
|
|
|
| S |
C
A |
G |
S |
C
B |
G |
|
S |
C |
G |
|
energy
A | B |
|
hype
A | B |
|
pop
A | B |
|
mgr
A | B |
|
FIGHT
RATING
70% |
|
|
|
|
|
|
|
Undercard bout
|
Coming up we have a lightweight MMA rules bout between Pablo Blades (ranked 1660 p4p, 2548 weight class) and Justin Case (ranked 175 p4p, 251 weight class). Blades kept the crowd waiting but all that was forgotten when his ring entrance music started. The incomparable musical genius that is Three 6 Mafia - It's a fight. Buckle up people - heeeeeeeeeere we go!
 |
|
 |
| 175 cm
25
165
8 - 4 - 1 |
|
178 cm
23
165
6 - 6 - 1 |
Good wrestling
World class MT
Cardio machine |
|
Excellent grappler
Counter fighter
Good gas tank |
|
| |
|
Ladies and gentlemen. This fight is 3 rounds, in the lightweight division.
Introducing the fighter to my left, fighting out of the red corner.
With a record of 8 - 4 - 1, fighting out of Los Angeles, Pablo Blades!
And introducing the fighter to my right, fighting out of the blue corner.
With a record of 6 - 6 - 1, fighting out of Montreal, Justin Case!
The judges for this bout are John Roberts, Alyssa Summers and Reed Andrews.
The bell rings for round one and we are underway!
Blades pushes forward with a 1-2 combination that forces Case back to the cage. Blades follows up with a solid lead hook to the liver.
It looks like Justin Case has been cut.
Blades swings wildly with a right hand that was never going to find it's target.
Case moves out of range as Blades strikes.
Blades displays some good footwork, moving neatly out of range as Case throws out the jab.
Blades throws a head kick but Case moves out of range.
Blades fails to land with the punch combination there - jab, cross, hook, miss, miss, miss.
Case with the counter takedown but Blades avoids it easily.
Blades lands with a cross.
Blades sizes up Case with a pawing jab and scores with a straight right down the middle.
Blades lands a jab to the head.
Case avoids the head kick by Blades.
This is a great period of action - very entertaining stuff!
Blades swings wildly with a right hand that was never going to find it's target.
Case tries a counter takedown but it's more of a dummy move, and he uses it to push himself away.
The fighters circling - Blades throws out the jab but it was never going to land.
That's one minute gone in the round.
Case blocks a head kick by Blades.
Blades lands with a hook. Case tried to avoid it but it clipped the top of his head.
Blades lands a powerful looking uppercut that connected with his opponent's jaw.
Case is rocked!
Blades pushing out the jab but it's not landing.
Blades tries a head kick but it misses.
Blades throws a head kick that misses.

Blades drops Case with a beautiful combination! Case stares up at his opponent, who ushers him back to his feet - Blades is looking for the KO!
Case is still on wobbly legs! Can Blades finish him?
Wooooo! Give it up for these two warriors! They are putting on a show!
Blades gets in close and tags Case with a short punch that almost sends Case to the mat! Oh Case is in big trouble! He turns his back on Blades, trying to create some distance but Blades rushes him, striking wildly and Case goes down! The referee tackles Blades into the cage to end the fight! Blades is one violent man!
Ladies and gentlemen, after 1:52 of round 1, we have a winner by way of TKO (Strikes). Pablo Blades!
Pablo Blades was full of energy after the big win and talked about how he thinks he can do big things in this sport. The crowd were appreciative of his determination to succeed.
|
|
|
|
|
|
|
|
|
|
|
|
|
|
|
|
|
|
|
|
|
|
|
| S |
C
A |
G |
S |
C
B |
G |
|
S |
C |
G |
|
energy
A | B |
|
hype
A | B |
|
pop
A | B |
|
mgr
A | B |
|
FIGHT
RATING
63% |
|
|
|
|
|
|
|
Undercard bout
|
Coming up we have a bantamweight MMA rules bout between Antonio Bellavia (ranked 2566 p4p, 2545 weight class) and Money Pacman (ranked 188 p4p, 187 weight class). These two fighters really are very evenly matched on the feet - it will be fascinating to see who can assert themselves in that aspect of the fight.
 |
|
 |
| 170 cm
29
134
10 - 4 - 0 |
|
165 cm
25
135
10 - 2 - 0 |
Powerful takedowns
Excellent boxer
Granite chin |
|
BJJ Blue Belt
Decent boxing
Heavy handed |
|
| |
|
Ladies and gentlemen. This fight is 3 rounds, in the bantamweight division.
Introducing the fighter to my left, fighting out of the red corner.
With a record of 10 - 4 - 0, fighting out of Rio de Janeiro, Antonio Bellavia!
And introducing the fighter to my right, fighting out of the blue corner.
With a record of 10 - 2 - 0, fighting out of Sydney, Money Pacman!
The judges for this bout are John Kavanagh, Reed Andrews and Steve Montenegro.
The bell rings for round one and we are underway!

Bellavia shoots in for a takedown! He's got it and he's managed to land in side control! That's better than Bellavia was expecting from the takedown attempt, I'm sure!

Pacman throws Bellavia to one side and escapes!
Pacman instigates a clinch.
Bellavia tries for a takedown. No joy.
Pacman stops a takedown attempt from Bellavia.
Pacman jumps into guard, dragging Bellavia to the mat.
Bellavia trying to pass the guard. He's being very persistent here but Pacman manages to land a sweep and now he's on top!

The fighters are pressed up against the cage, both looking to find a bit of space to work.
The crowd cheering loudly, showing their appreciation for the quality fight we're seeing here.
Pacman drops back for a leg! It's a sloppy attempt though and Pacman jumps back into guard quickly, to retain the dominant position.

Bellavia is working actively off his back, looking to secure an arm or perhaps work for a triangle.
Bellavia is looking for a guillotine. You can't force these things though and Pacman defends well.
Bellavia looking for submissions off his back, moving his hips, looking for an opening.
The ref warns both fighters not to hold the cage as they work up against the meshing.
That's one minute gone in the round.
Pacman missing there with some ground and pound from the guard.
Bellavia is looking for a triangle but Pacman pushes his legs off easily.
Bellavia is looking for a guillotine. You can't force these things though and Pacman defends well.
Pacman tries to stand but Bellavia is controlling from the bottom.
Bellavia had isolated an arm as going for a kimura. Pacman defends it easily.
Pacman really doesn't want to stay on the ground with Bellavia. If he can't get it back to his feet, it's only a matter of time before he'll be tapping out.
Pacman got a little sloppy there for a moment and Bellavia has worked his way into a loose triangle - can he finish it?! No, Pacman has managed to get both his arms back between Bellavia's legs - danger averted.
Pacman trying to stand up but can't free himself from Bellavia's guard.
Bellavia is working actively off his back, looking to secure an arm or perhaps work for a triangle.
That's two minutes gone in the round.
Bellavia working for submissions but it's allowed Pacman to get to half guard.
Bellavia actively working from the bottom here.
Bellavia looking for submissions from an awkward position here.
Bellavia looking for submissions off his back.
Bellavia looking to work for a kimura from the bottom.
Bellavia moves his hips nicely and gets into full guard.

Pacman decides to stand up and beckons his opponent to follow.
That's three minutes gone in the round.
Bellavia lands a vicious shot with the stealth of a sniper and the strength of a viper. Are vipers that strong? I can think of lots of things that are stronger than a viper - not many rhyme with sniper though.
A big left from Pacman misses.
Pacman throws a big shot that misses.
Bellavia shoots in but Pacman avoids the takedown attempt easily.
Pacman throws out a counter right but Bellavia avoids it with no problem.
That's three failed takedown attempts in the round for Antonio Bellavia. That's going to take a lot out of him.
Pacman throws a lazy right hand but Bellavia sees it coming a mile off and sidesteps it easily.
Pacman looks to land a right hand but Bellavia moved out of range.
It looked like Bellavia was looking amped, ready to throw a big counter but didn't commit.
Pacman throws a hook but Bellavia avoids it easily.
Bellavia shoots in but no luck this time.
Bellavia defending well as Pacman loads up on a big left hand.
Pacman throws out a powerful jab.
Bellavia walks straight into an uppercut. Luckily it didn't land flush.
Pacman misses with an uppercut.
A slow jab from Pacman misses its intended target.
That's four minutes gone in the round.
Bellavia shoots in for a takedown. "Ole!" shouts Pacman as he jumps to the side.
A telegraphed right hand from Pacman misses the target.
Bellavia tries to move into range but Pacman moves to the side and lands with a nice right hand.
Fantastic stuff here - a very entertaining period of action, which has drawn cheers from the crowd.
Pacman loads up on a big right hand but Bellavia slips the punch.
Pacman has done a lot of speed work in the buildup to this fight.
Pacman misses with a straight left.
Pacman misses with a lunging right hand
and Bellavia counters with a crisp hook to the side of the head.
Bellavia moves his head to the side to avoid a jab but walks straight into a cross.
Pacman misses with a looping right.
Bellavia looks to be in better condition than last time we saw him fight. Obviously he's been working hard on his cardio.
Pacman might want to mix his strikes up a bit more. He's just going for head shots at the moment and that can become a bit predictable.
Pacman gets caught flat footed, as Bellavia shoots in with a quick takedown into guard.
Bellavia postures up and lands a big shot to Pacman's brow.
Bellavia won't allow Pacman to get back to his feet.
And that is the end of the round. The fighters go back to their corners.
Money Pacman dominated that round.
The minute break is over - no more time for sponges and pep talks - back to the action!
Bellavia throws a nice looking combination but Pacman bobs and weaves to avoid any damage.
Pacman connects with a lovely jab that went straight through the gap between Bellavia's hands.
Antonio Bellavia is looking to throw some combinations by the looks of things.
Nice shot by Bellavia.
Pacman rushes in with a sloppy looking punch
and Bellavia counters with a good right hand that lands right on the jaw.
Pacman throws out a loose jab but Bellavia uses good head movement to avoid it.
Pacman throws a poor cross that misses
and Bellavia counters with a left to the body.
Bellavia fails to land the takedown.
Pacman is looking to take this fight into the clinch.
A counter left hand to the body from Bellavia misses its target.
Bellavia scores with a jab.
We've had a slow start to the round here - hopefully the action picks up.
Pacman misses with a hook. Bellavia ducked under it nicely.
Pacman misses with a left hand
and Pacman takes a counter punch right on the button for his troubles.
Bellavia ducks under a wild hook from Pacman.
Bellavia works over Pacman's head and body with a nice combination.
That's one minute gone in the round.
Pacman looks to land a right hand but Bellavia moved out of range.
Bellavia slips under a jab.
Pacman throws a right hand that misses
and Bellavia counters with a straight right hand.
Bellavia shoots in but no luck this time.
Pacman throws out a loose jab but Bellavia uses good head movement to avoid it.
Bellavia dives in and grabs Pacman's left leg, looking for a takedown. Pacman pushes down on Bellavia's head and hops out.
That's three failed takedown attempts in the round for Antonio Bellavia. That's going to take a lot out of him.
Bellavia uses some good footwork to avoid the body shot by Pacman.
Bellavia slips a jab from Pacman.
Bellavia throws a series of punches but Pacman moves out of range.
Pacman swinging wildly here.
Money Pacman seems to be getting the better of the standup.
Pacman scores with a jab to the jaw of his opponent.
Bellavia tries to score a power double leg takedown but Pacman sees that one coming and sprawls well. That will dishearten Bellavia somewhat.
That's two minutes gone in the round.
Bellavia takes an uppercut right on the jaw but it doesn't phase him.
Pacman looks to land a left hand but Bellavia moved out of range nicely.
Bellavia went nuts there looking for a big combo counter but none of the flurry connected.
Bellavia connects with a lovely right hand, straight down the pipe.
The crowd are loving this. Great action here.
Bellavia has his hands up protecting his head but a hook from Pacman finds it's way round the side to connect with Bellavia's head.
Bellavia throws a body shot but no joy.
Bellavia fakes an overhand right and shoots for a takedown. Pacman sprawls well initially but Bellavia persists and gets the takedown into half guard.
Pacman looks like he's trying to stand up.
Pacman is defending against the submission attempts here by Bellavia.
Pacman wants to get back to his feet.
That's three minutes gone in the round.
Pacman tries to get to full guard but Bellavia has control of the leg.
Pacman avoiding damage under a succession of punches from Bellavia.
Pacman is trying to stand.
Bellavia thows a wild elbow that connects with the canvas.
Bellavia passes to side control.
Pacman wants to control but Bellavia postures up.
That's four minutes gone in the round.
The crowd are showing their displeasure at the lack of action as loud boos ring out around the arena.
Pacman is looking to work his way out of this bad position but Bellavia is controlling him well.
Bellavia is working to tighten his grip on Pacman's neck. He's isolated an arm and is working for an arm triangle. Pacman has recognised the danger and is trying to turn with the submission but Bellavia is really squeezing tight and eventually Pacman passes out! Bellavia breaks the hold and jumps onto the cage to celebrate! Submission of the night, I'd say!
Ladies and gentlemen, after 4:25 of round 2, we have a winner by way of Submission (Arm Triangle). Antonio Bellavia!
|
|
|
|
|
|
|
|
|
|
|
|
|
|
|
|
|
|
|
|
|
|
|
| S |
C
A |
G |
S |
C
B |
G |
|
S |
C |
G |
|
energy
A | B |
|
hype
A | B |
|
pop
A | B |
|
mgr
A | B |
|
FIGHT
RATING
55% |
|
|
|
|
|
|
|
Undercard bout
|
Coming up we have a welterweight MMA rules bout between Jokubas Antukis (ranked 615 p4p, 1769 weight class) and Hideyoshi Yamasaki (ranked 86 p4p, 220 weight class). Antukis's entrance music is "Terminator" - Sevendust. A fine choice. Yamasaki has chosen 2Pac - Only God Can Judge Me as his entrance music. Well, the cameraman is lingering on a pretty young lady for a bit too long there. Keep your eyes on the prize buddy or you'll miss the fighter intros!
 |
|
 |
| 178 cm
26
170
10 - 4 - 0 |
|
178 cm
22
170
7 - 3 - 0 |
BJJ White Belt
Excellent MT
Very strong |
|
BJJ Blue Belt
Excellent boxer
Good gas tank |
|
| |
|
Ladies and gentlemen. This fight is 3 rounds, in the welterweight division.
Introducing the fighter to my left, fighting out of the red corner.
With a record of 10 - 4 - 0, fighting out of New York, Jokubas Antukis!
And introducing the fighter to my right, fighting out of the blue corner.
With a record of 7 - 3 - 0, fighting out of Los Angeles, Hideyoshi Yamasaki!
The judges for this bout are Franklyn Lucas, David Schapiro and Dean Styles.
The bell rings for round one and we are underway!
Antukis takes a solid shot to the body. That one hurt him but he's trying not to show it.
Yamasaki throws a hook but Antukis avoids it easily.
A telegraphed right hand from Yamasaki misses the target.
Hideyoshi Yamasaki seems to be the more aggressive standup fighter in this bout.
Yamasaki scores with a jab. Antukis acknowledges it with a nod of the head.
Antukis uses good head movement to avoid the hook from Yamasaki.
We've been told by Antukis's head coaches at Ironbound MMA that he's been working on his takedown defense in preparation for this fight.
Yamasaki throws a jab when Antukis was well out of range.
Yamasaki takes a shot to the body in his stride.
Yamasaki scores with a three punch combo!
Yamasaki misses with a straight left.
A right-left combo lands from Yamasaki.
We've seen a great period of action over the last minute or so - credit to both fighters for going all out!
Yamasaki throws out a loose jab but Antukis uses good head movement to avoid it.
Yamasaki getting the better of the striking in that exchange.
Yamasaki misses with a body shot. Nice footwork from Antukis.
That's one minute gone in the round.
Yamasaki pushing out the jab but it's not landing.
Yamasaki lands with an uppercut that bounces Antukis off the cage and back into range.
Yamasaki displaying good standup as he scores with a three punch combination.
Antukis takes one to the chin there.
Yamasaki fails to land with the punch combination there - jab, cross, hook, miss, miss, miss.
Yamasaki misses the jab.
Yamasaki misses with a wild combination.
Antukis misses with a leg kick
and Yamasaki counters with a good right hand that lands right on the jaw.
Yamasaki misses with a low kick.
A little feinted left hand from Antukis on the counter but he doesn't commit to it.
Antukis takes an uppercut right on the jaw but it doesn't phase him.
That's two minutes gone in the round.
Yamasaki misses with a telegraphed body shot
and Antukis counters with an inside leg kick.
We've seen a great period of action over the last minute or so - credit to both fighters for going all out!
Antukis chopped to the floor by a nice leg kick but he springs right back up before Yamasaki can pounce on him.
Sloppy strikes from Yamasaki. Those never looked like landing.
Yamasaki throws a hook but Antukis blocks it.
Yamasaki throws a series of punches but Antukis moves out of range.
Yamasaki misses with a hook.
Antukis throws a leg kick but Yamasaki sees it coming and moves out of range.
Antukis slips under a jab.
Antukis is looking to counter punch.
Antukis lands with a right hand.
Yamasaki misses with a right hand
and Antukis counters nicely by changing levels and landing a hook to the body.
Antukis on the wrong end of a decent looking cross there.
Yamasaki fakes and then throws a beautiful body shot. Antukis looks a bit winded and takes a step backwards to take a breath.
That's three minutes gone in the round.
Yamasaki throws a series of punches but Antukis avoids them all with ease.
Yamasaki misses with a hook. Antukis ducked under it nicely.
A looping hook to the body misses from Yamasaki. Antukis does a little dance to reset his feet.
Antukis swung with a counter punch to the body but it didn't connect.
A punch combination from Yamasaki misses.
Antukis looked to counter that last move with a leg kick but didn't pull the trigger.
Antukis blocks a jab.
Antukis is looking to counter with a shot to the body.
Yamasaki with a hook.
Yamasaki uses good footwork to get in and out, landing a nice hook.
Yamasaki scores with a nice head shot.
Yamasaki swings widly with a right hand
and Antukis counters with a crisp hook to the side of the head.
Yamasaki lands a really nice looking cross but Antukis seems unphased.
A decent looking cross lands there for Yamasaki.
That's four minutes gone in the round.
Antukis moves out of range as Yamasaki strikes.
Antukis feinted there with a counter leg kick.
Wooooo! Give it up for these two warriors! They are putting on a show!
A leg kick checked by Yamasaki.
Antukis thows a left - swing and a miss!
Yamasaki is landing a lot of head punches in this opening round! Antukis had better start moving his head a bit unless he wants his face to turn into mush.
Yamasaki cracks Antukis with a right hand to the side of the head.
Yamasaki misses the jab.
Yamasaki throws a lazy right hand but Antukis sees it coming a mile off and sidesteps it easily.
Antukis is looking to counter punch.
A punch lands to the side of Antukis 's head but he takes it in his stride.
Antukis swings and misses with a hook to the body.
Yamasaki's coach down at California Top Team was telling us pre-fight that they have been working on Yamasaki's balance. Obviously they view that as a key factor in the outcome of this fight.
Antukis's hands are dropping dangerously low here and Yamasaki connects clean with a right hook that sends him down to one knee! Antukis scrambles back to his feet.
Yamasaki misses with a straight left.
Yamasaki scores with a nice right hand.
And that is the end of the round. The fighters go back to their corners.
Hideyoshi Yamasaki dominated that round.
That's the end of the interval. I'm sure that seemed a lot quicker than a minute for our two fighters! Back to the action.
Antukis uses good head movement to avoid the hook from Yamasaki.
Antukis half committed to a counter leg kick.
Yamasaki throws a shot to the body.
Yamasaki throws a leg kick
and Antukis counters with a nice body shot.
Yamasaki throws a monster uppercut resembling something out of street fighter but it doesn't land.
It looked like Antukis was looking amped, ready to throw a big counter but didn't commit.
Antukis is looking to wear down Yamasaki with body shots, infact he's throwing more body shots than head shots at the moment.
Yamasaki misses with a low kick.
Yamasaki throws a lazy head kick
and Antukis counters with a nice uppercut.
Yamasaki loads up on a big right hand but Antukis slips the punch.
Yamasaki throws a monster uppercut resembling something out of street fighter but it doesn't land.
We've had a slow start to the round here - hopefully the action picks up.
Yamasaki takes a swing at Antukis's ribcage but misses.
A punch combination from Yamasaki misses.
Antukis swings and misses with a hook to the body.
Antukis scores with a jab to the jaw of his opponent.
That's one minute gone in the round.
A head kick from Antukis lands but Yamasaki takes it in his stride.
Yamasaki is rocked!
Antukis lands with a big right hook that stumbles Yamasaki - he's out on his feet here! Antukis follows up with another monster hook that separates Yamasaki from consciousness! Yamasaki falls, almost in slow motion to the canvas! Antukis stands and admires his work as the crowd go wild.
Ladies and gentlemen, after 1:16 of round 2, we have a winner by way of KO (Punches). Jokubas Antukis!
Jokubas Antukis decided to thank the fans in attendance for making a great atmosphere. It seemed to go down pretty well.
|
|
|
|
|
|
|
|
|
|
|
|
|
|
|
|
|
|
|
|
|
|
|
| S |
C
A |
G |
S |
C
B |
G |
|
S |
C |
G |
|
energy
A | B |
|
hype
A | B |
|
pop
A | B |
|
mgr
A | B |
|
FIGHT
RATING
58% |
|
|
|
|
|
|
|
Undercard bout
|
Coming up we have a light heavyweight MMA rules bout between DeShaun Dupree Holton (ranked 1659 p4p, 1197 weight class) and Jayson Tatum (ranked 203 p4p, 151 weight class). These two fighters really are very evenly matched on the feet - it will be fascinating to see who can assert themselves in that aspect of the fight.
 |
|
 |
| 190 cm
25
215
9 - 3 - 0 |
|
202 cm
22
210
5 - 0 - 0 |
Powerful takedowns
Solid boxing
Cardio machine |
|
BJJ Blue Belt
Excellent boxer
Powerful |
|
| |
|
Ladies and gentlemen. This fight is 3 rounds, in the light heavyweight division.
Introducing the fighter to my left, fighting out of the red corner.
With a record of 9 - 3 - 0, fighting out of Sydney, DeShaun Dupree Holton!
And introducing the fighter to my right, fighting out of the blue corner.
With a record of 5 - 0 - 0, fighting out of Las Vegas, Jayson Tatum!
The judges for this bout are Reed Andrews, Steve Montenegro and John Roberts.
The bell rings for round one and we are underway!
Dupree Holton tries for a takedown but Tatum sees it coming a mile off and avoids it easily.
Tatum misses with a hook. Dupree Holton ducked under it nicely.
Tatum is the aggressor but that punch slipped nicely by Dupree Holton.
Tatum misses with a looping left.
Dupree Holton attempts a counter takedown but Tatum avoids it well and moves away.
Tatum displays good takedown defense there as he swats away a double leg from Dupree Holton.
Tatum swings for the body but Dupree Holton moves out of range.
Dupree Holton fakes an overhand right and shoots for a takedown. Tatum sprawls well initially but Dupree Holton persists and gets the takedown into half guard.
Tatum manages to escape and get back to his feet!
Tatum lands a two punch combo.
Fantastic stuff here - a very entertaining period of action, which has drawn cheers from the crowd.
Tatum fails to land with a series of punches.
Dupree Holton shoots in for a takedown. "I don't think so" says Tatum as he avoids it easily.
Tatum appears to be waiting to throw a counter punch to the body.
That's three failed takedown attempts in the round for DeShaun Dupree Holton. That's going to take a lot out of him.
That's one minute gone in the round.
Dupree Holton closes this distance looking for a takedown but Tatum circles away.
Tatum let fly with a counter punch to the body but it didn't land.
Dupree Holton closes the distance, clinches up and gets a nice trip takedown into side control. Very smooth.
Dupree Holton is looking to take a break and control but Tatum is keeping him honest, looking to work from the bottom.
Tatum wants to control but Dupree Holton postures up.
Dupree Holton controlling the position from side mount.
Tatum is looking to reverse the position.
Tatum is not content to let Dupree Holton control the position.
Tatum struggling a bit here.
The fighters are pressed up against the cage, both looking to find a bit of space to work.
That's two minutes gone in the round.
Tatum tries to get back to half guard but can't.
Dupree Holton slows the pace down.
Dupree Holton has controlled the position for a good 20 seconds, which will no doubt be starting to frustrate his opponent.
Dupree Holton is trying to land an Americana. He has the arm isolated but Tatum is keeping cool and he's avoided the danger for now.
Dupree Holton thinks about going for a far side armbar but bails out and retains the dominant position instead.
Dupree Holton tries for a kimura. Not really close to a finish though.
Both fighters have adopted an aggressive gameplan on the ground!
Tatum can't do much from the bottom here.
Tatum is looking to regain half guard here but Dupree Holton keeps moving and retains side control.
Dupree Holton moving around in side mount but really he's just happy to control for now.
That's three minutes gone in the round.
Dupree Holton is looking for a kimura. He might have it! No, Tatum has escaped the position, nice work there.
Tatum is trying to improve his position.
Tatum wants to control but Dupree Holton postures up.
Tatum tries to buck Dupree Holton off but Dupree Holton is having none of it.
Dupree Holton is looking to take a break and control but Tatum is keeping him honest, looking to work from the bottom.
Dupree Holton looking for an arm triangle but it's way too loose to do anything.
Tatum tries to get back to half guard but can't.
Dupree Holton looking for an arm triangle but it's way too loose to do anything.
That's four minutes gone in the round.
Dupree Holton controlling the position from side mount.
Tatum is looking to regain half guard here but Dupree Holton keeps moving and retains side control.
Dupree Holton tries for a kimura. Not really close to a finish though.
You can see the frustration on Tatum's face, being in this tough position on the bottom.
Tatum really doesn't want to stay on the ground with Dupree Holton. If he can't get it back to his feet, it's only a matter of time before he'll be tapping out.
Dupree Holton is trying to land an Americana. He has the arm isolated but Tatum is keeping cool and he's avoided the danger for now.
Tatum is being controlled here.
Dupree Holton trying to control the position but Tatum is working away.
The ref warns both fighters not to hold the cage as they work up against the meshing.
Tatum is letting Dupree Holton control him for a moment.
And that is the end of the round. The fighters go back to their corners.
A close round but Jayson Tatum will probably get the nod.
Well, the break between rounds is over. Let's get back to the scrappin!
Dupree Holton fakes high and shoots in for a takedown but Tatum avoids it really well and circles away.
Tatum throws a hook to the side of Dupree Holton's head but Dupree Holton sees it coming and ducks under it beautifully.
Dupree Holton drops down looking for a counter takedown but Tatum sprawls and moves away.
Dupree Holton closes the distance and clinches up with Tatum, looking for a takedown. Dupree Holton pushes Tatum against the cage but Tatum circles to the side and manages to break the clinch.
Dupree Holton dives in and scores a takedown into Tatum's guard.
Tatum controlling Dupree Holton's posture.
Dupree Holton is intent on slowing down the pace of the fight, simply looking to control.
We've had a slow start to the round here - hopefully the action picks up.
Tatum is trying to control the position but Dupree Holton postures up.
Dupree Holton wants to control from the top but Tatum keeps moving.
Dupree Holton wants to pass the guard but Tatum is keeping the position.
That's one minute gone in the round.
Tatum keeping moving, preventing Dupree Holton from controlling successfully.
Dupree Holton slows down the pace of the fight for a moment. He'll need to remain active if he doesn't want to see the fight stood back up.
Dupree Holton wants to pass the guard but Tatum is keeping the position.
Tatum working a defensive guard here.
Dupree Holton slips nicely into half guard.
Tatum slips a foot under and gets full guard. Nice work.
Dupree Holton won't allow Tatum to sweep him here.
Dupree Holton might be looking to lock onto one of his opponent's long limbs for a submission, whilst we're on the ground.
Dupree Holton advances position into side control!
Dupree Holton is trying to land an Americana. He has the arm isolated but Tatum is keeping cool and he's avoided the danger for now.
Dupree Holton wants to lay and pray for a moment but Tatum keeps working.
That's two minutes gone in the round.
Dupree Holton working away.
Dupree Holton controls the position from side control.
Tatum manages to get back to half guard.
Tatum looks like he's trying to stand up.
Still in half guard, Dupree Holton seems content to control.
Tatum wants to get back to full guard.
Dupree Holton tries to pass to full mount but Tatum defends it.
Dupree Holton uses his free foot to push down on Tatum's thigh. Eventually he works his other foot free and he's advanced to mount - this is trouble for Tatum.
Tatum is looking to improve his position but Dupree Holton isn't that keen on the idea.
That's three minutes gone in the round.
Tatum wants to control but Dupree Holton is having none of it.
Dupree Holton is working on an americana here. Ooh, that looks pretty nasty! Nope, Tatum has managed to escape the submission attempt.
Dupree Holton can't quite control the action as he would like just now, as Tatum is looking to escape.
Tatum gets back to half guard.
Tatum won't allow Dupree Holton to pass to mount.
Dupree Holton perhaps working for something from half guard, or maybe not. It looks like he's just sitting there.

Tatum kicks off Dupree Holton and gets to his feet.
A really sloppy takedown attempt there from Dupree Holton.
That's three failed takedown attempts in the round for DeShaun Dupree Holton. That's going to take a lot out of him.
Dupree Holton fails miserably with a takedown attempt.
That's four minutes gone in the round.
Tatum ducks down and throws a hook to the body but Dupree Holton moves away.
Dupree Holton shoots in looking for a double leg takedown. Tatum defends it nicely.
Tatum swings for the body but Dupree Holton moves out of range.
Tatum stuffs the takedown attempt from Dupree Holton. Dupree Holton gets slowly back to his feet.
The crowd thankful this round is nearly over.
Tatum tries to sprawl but Dupree Holton drives through with a takedown into half guard.
And that is the end of the round. The fighters go back to their corners.
That was a close second round but I would say that DeShaun Dupree Holton will probably get the nod.
The referee calls time. The cornermen exit stage left and we're back to business. This is the final round!

Dupree Holton shoots in for a takedown but doesn't get it.
Dupree Holton avoids a lazy jab quite easily.
Dupree Holton takes one to the side of the head.
Dupree Holton shoots in looking for a single leg takedown. Tatum is trying to defend but Dupree Holton finishes it well and ends up in half guard. Let's see if he can advance position further.
Tatum won't allow Dupree Holton to pass to mount.
Tatum is staying active underneath Dupree Holton, who seems content to just control the action from this position.
Dupree Holton prevents Tatum from improving his position.
Tatum moves into full guard.
We've had a slow start to the round here - hopefully the action picks up.
Dupree Holton trying to control but Tatum is working from the bottom.
Dupree Holton is just sitting in guard, looking to avoid any submissions.
Dupree Holton passes easily into side control. Nice work.
That's one minute gone in the round.
Dupree Holton trying to control the action but Tatum is working from the bottom.
Tatum tries to work a leg under to get back to half guard but Dupree Holton wriggles his own leg back out and remains in side control.
Dupree Holton is looking to finish here, going for an Americana. Tatum knows the correct defense though, so he's OK.
Tatum is trying to control Dupree Holton's posture but Dupree Holton avoids it.
Tatum tries to bench press Dupree Holton off him but Dupree Holton keeps the position.
Dupree Holton just content to control the position.
That's two minutes gone in the round.
A lull in the action here being met with boos from the crowd.
Dupree Holton trying to control the action but Tatum is working from the bottom.
A lull in the action here as Dupree Holton stalls from top position.
Dupree Holton wants to lay and pray for a moment but Tatum keeps working.
Dupree Holton is looking for a kimura. He might have it! No, Tatum has escaped the position, nice work there.
That's three minutes gone in the round.
Tatum is putting a lot of effort into getting back to his feet here.
Tatum tries to get back to half guard but can't.
Tatum can't do much from the bottom here.
Dupree Holton trying to control the action but Tatum is working from the bottom.
Tatum tries to bench press Dupree Holton off him but Dupree Holton keeps the position.
Dupree Holton remains in side control and seems content to stay there. It's a versatile position from which he can work both strikes and submissions, whilst maintaining that control, so maybe he'll sit here for a while.
Dupree Holton thinks about going for a far side armbar but bails out and retains the dominant position instead.
That's four minutes gone in the round.
The crowd are hurling abuse towards the fighters... You can hardly blame them though because there isn't a lot going on in the fight.
Dupree Holton is moving around in side control but his primary objective seems to be to maintain the position.
Dupree Holton wants to lay and pray for a moment but Tatum keeps working.
Tatum is trying to control Dupree Holton's posture but Dupree Holton avoids it.
Dupree Holton is looking for a kimura. He might have it! No, Tatum has escaped the position, nice work there.
Tatum is not content to let Dupree Holton control the position.
Boooooooooooooooooooo!!! God, this has been a terrible round. Come on you two, sort yourselves out!
Dupree Holton tries for a kimura but Tatum is defending well.
DeShaun Dupree Holton overall seems to be getting the better of the ground position in the fight so far.
Dupree Holton working hard here to secure a kimura but he's not really in the right position for it.
And that's the end of the fight!
DeShaun Dupree Holton showed his dominance in that final round.
I think Dupree Holton has won this one but let's see what the judges have to say. Over to the ring announcer for the scorecards.
Ladies and gentlemen, after 3 rounds of action, we go to the scorecards for a decision.
Judge Reed Andrews scores the fight 29:28
Judge Steve Montenegro scores the fight 30:28
Judge John Roberts scores the fight 29:28
In favor of your winner, by unanimous decision... DeShaun Dupree Holton!
DeShaun Dupree Holton decided to thank the fans in attendance for making a great atmosphere. It seemed to go down pretty well.
|
|
|
|
|
|
|
|
|
|
|
|
|
|
|
|
|
|
|
|
|
|
|
| S |
C
A |
G |
S |
C
B |
G |
|
S |
C |
G |
|
energy
A | B |
|
hype
A | B |
|
pop
A | B |
|
mgr
A | B |
|
FIGHT
RATING
33% |
|
|
|
|
|
|
|
Undercard bout
|
Coming up we have a light heavyweight MMA rules bout between Jackson Thompson (ranked 1252 p4p, 922 weight class) and Samson Dandrakulo (ranked 157 p4p, 126 weight class). Dandrakulo has chosen Don't Push- Sublime as his entrance music. Both fighters look fresh as a daisy as they make their way towards the cage.
 |
|
 |
| 187 cm
28
213
5 - 2 - 0 |
|
190 cm
23
210
10 - 3 - 0 |
BJJ Blue Belt
World class boxer
Cardio machine |
|
Good wrestler
World class MT
Good gas tank |
|
| |
|
Ladies and gentlemen. This fight is 3 rounds, in the light heavyweight division.
Introducing the fighter to my left, fighting out of the red corner.
With a record of 5 - 2 - 0, fighting out of Los Angeles, Jackson Thompson!
And introducing the fighter to my right, fighting out of the blue corner.
With a record of 10 - 3 - 0, fighting out of Las Vegas, Samson Dandrakulo!
The judges for this bout are Jorge Garcia, David Schapiro and John Kavanagh.
The bell rings for round one and we are underway!
Thompson swings away but doesn't land with a series of punches.
Thompson has been working on his boxing with his coaches at 3Band MMA in the buildup to the fight.
Dandrakulo lands a right hook to the body.
Thompson misses with a body shot. Nice footwork from Dandrakulo.
Dandrakulo lunges in with an uppercut that skims his opponent's chin.
Dandrakulo takes one on the chin but keeps coming.
A chopping leg kick lands by Dandrakulo.
Thompson misses with a double jab.
Thompson throws a big shot that misses.
A shot to the body from Thompson misses
and Thompson takes a counter punch right on the button for his troubles.
Thompson swings away but doesn't land with a series of punches.
Dandrakulo avoids the body shot from Thompson.
Thompson misses with a body shot.
The crowd cheering loudly, showing their appreciation for the quality fight we're seeing here.
Dandrakulo throws a right hand that Thompson ducks under and follows up with a left that Thompson also avoids with ease.
Dandrakulo lands a vicious shot with the stealth of a sniper and the strength of a viper. Are vipers that strong? I can think of lots of things that are stronger than a viper - not many rhyme with sniper though.
Dandrakulo closes the distance and lands a one-two.
Thompson connects with a body shot.
Thompson connects with a jab.
Thompson swings away but doesn't land with a series of punches.
That's one minute gone in the round.
Dandrakulo misses with a straight left.
Dandrakulo delivers a nice body kick.
Dandrakulo cracks Thompson with a big right hand that sends him to the floor! Thompson looks wobbly but he's sprung back up to his feet straight away
can Dandrakulo finish him?
Thompson is rocked!
Thompson circles to his right, straight into a beautiful hook by Dandrakulo. Thompson falls face first into the canvas - great knockout victory for Dandrakulo!
Ladies and gentlemen, after 1:18 of round 1, we have a winner by way of KO (Punch). Samson Dandrakulo!
Samson Dandrakulo took to the microphone after his victory and thanked his sponsors, Conviction for their support in the buildup to the fight.
Jackson Thompson spoke after the fight, saying 'Thank you for standing by me through thick and thin. Your unwavering support keeps me going. Keep believing in me, because I'm not done yet. The Bull will rise again.'.
|
|
|
|
|
|
|
|
|
|
|
|
|
|
|
|
|
|
|
|
|
|
|
| S |
C
A |
G |
S |
C
B |
G |
|
S |
C |
G |
|
energy
A | B |
|
hype
A | B |
|
pop
A | B |
|
mgr
A | B |
|
FIGHT
RATING
96% |
|
|
|
|
|
|
|
Co-main event
|
Coming up we have a lightweight MMA rules bout between Mae Joon (ranked 800 p4p, 1417 weight class) and Bill S Preston (ranked 86 p4p, 152 weight class). I can't wait for this one - let's get the fighter introductions out of the way and get this one started!
 |
|
 |
| 170 cm
24
161
11 - 4 - 0 |
|
177 cm
22
163
8 - 5 - 0 |
Abu Dhabi Champ
Solid boxing
Insanely flexible |
|
Good wrestler
Excellent MT
Good gas tank |
|
| |
|
Ladies and gentlemen. This fight is 3 rounds, in the lightweight division.
Introducing the fighter to my left, fighting out of the red corner.
With a record of 11 - 4 - 0, fighting out of Tokyo, Mae Joon!
And introducing the fighter to my right, fighting out of the blue corner.
With a record of 8 - 5 - 0, fighting out of Los Angeles, Bill S Preston!
The judges for this bout are Anthony Taglia, John Kavanagh and Alyssa Summers.
The bell rings for round one and we are underway!
A momentary lapse in concentration from Preston enables Joon to shoot in and score with a neat double leg. Preston manages to secure a closed guard as the fighters hit the mat.
Joon is trying to work a guillotine from the top, or something like that? Don't know how he thinks he's going to get a finish from there.
The ref warns both fighters not to hold the cage as they work up against the meshing.
Joon drops back looking for a heel hook - he quickly realises he's not going to get it but Preston manages to dive on top of him before he can escape and now Joon has Preston in his guard.
Preston wants to control from the top but Joon keeps moving.
Joon has his foot on Preston's thigh. He's trying to push off and get in position for a triangle, I think. Preston works his way back into a safe position though.
Preston wants to get up but he can't break Joon's closed guard. He needs to be careful trying to break the legs open, as he's open to submissions here.
Preston pressing down on his opponent's thigh, looking to pass guard. Joon is keeping the position for now.
We've had a slow start to the round here - hopefully the action picks up.
Joon has a loose triangle. He'll be looking to tighten that up but Preston can see exactly what he's planning and manages to posture up and free himself.
Joon throws his legs up looking for a submission but Preston uses it to pass to side control.
Joon's coaches at Makweingdo Academy have been working on his defensive grappling in preparation for this fight so let's see if he can get out of this tricky position.
Joon is looking for a sweep.
That's one minute gone in the round.
Joon is not content to let Preston control the position.
Joon is trying to get back to half guard.
Joon gets one leg under and gets the fight to half guard.
Joon looking to work for a kimura from the bottom.
Preston thows a wild elbow that connects with the canvas.
Preston trying to control the action but Joon is working from the bottom.
Joon manages to get to full guard.
That's two minutes gone in the round.
Preston has decided he wants to stand but the closed guard of Joon is proving hard to escape from.
Preston has a momentary lapse of concentration, allowing Joon to throw up a leg and lock on what appears to be a pretty tight triangle! Preston is fighting it off but it's all too little too late - Joon pulls down on the head and he's put Preston to sleep! This one is all over!
Ladies and gentlemen, after 2:30 of round 1, we have a winner by way of Submission (Triangle). Mae Joon!
Mae Joon decided to thank the fans in attendance for making a great atmosphere. It seemed to go down pretty well.
|
|
|
|
|
|
|
|
|
|
|
|
|
|
|
|
|
|
|
|
|
|
|
| S |
C
A |
G |
S |
C
B |
G |
|
S |
C |
G |
|
energy
A | B |
|
hype
A | B |
|
pop
A | B |
|
mgr
A | B |
|
FIGHT
RATING
40% |
|
|
|
|
|
|
|
Main event
|
Coming up we have a heavyweight MMA rules bout between Bobojo Makoba (ranked 159 p4p, 150 weight class) and Jack Crusher (ranked 23 p4p, 21 weight class). Makoba's ring entrance music is that housewives' favourite, Zilbacore 2097. I can't wait for this one - let's get the fighter introductions out of the way and get this one started!
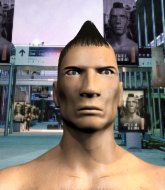 |
|
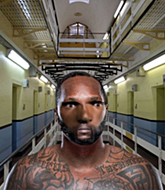 |
| 198 cm
29
280
10 - 2 - 0 |
|
195 cm
25
250
9 - 2 - 0 |
Decent wrestler
Excellent MT
KO power |
|
Good wrestler
Excellent boxer
Granite chin |
|
| |
|
Ladies and gentlemen. This fight is 5 rounds, for the heavyweight championship of the world!
Introducing the champion to my left, fighting out of the red corner.
With a record of 10 - 2 - 0, fighting out of Amsterdam, Bobojo Makoba!
And introducing the challenger to my right, fighting out of the blue corner.
With a record of 9 - 2 - 0, fighting out of London, Jack Crusher !
The judges for this bout are Jorge Garcia, Columbo Gatti and Alyssa Summers.
The bell rings for round one and we are underway!
Both fighters are only really looking to counter, so after a good 30 seconds of circling each other endlessly, the referee has stepped in and told them both to be more aggressive.
Makoba throws a leg kick but Crusher sees it coming and moves out of range.
Crusher tries to counter by closing the distance.
We've had a slow start to the round here - hopefully the action picks up.
Makoba throws a poor cross that misses
and Crusher counters with a shoot takedown. Makoba fights it but they end up in guard.
Makoba keeping moving, preventing Crusher from controlling successfully.
The ref warns both fighters not to hold the cage as they work up against the meshing.
That's one minute gone in the round.
A big thud reverberates around the arena there as Crusher accidentally thumps the mat. Hopefully he's not broken his hand.
Crusher throwing strikes from guard but Makoba blocks nicely.
Crusher stays in close to Makoba's body and controls the position.
Crusher working some ground and pound from guard but it's not doing any damage.
Crusher trying to land body shots but he keeps hitting the mat.
Makoba trying to control the position.
Crusher working some strikes from top position.
That's two minutes gone in the round.
Well. There's a bit of a lull in the action here and the crowd are starting to get restless.
Crusher wants to control from the top but Makoba keeps moving.
Crusher engaging in some classic timewasting tactics.
Makoba keeping full guard, as Crusher tries to pass.
The referee is asking the fighters to pick up the pace.
Crusher is persisting with the attempt to improve his position.
The referee decides to stand the fighters back up.
A looping hook to the body misses from Crusher . Makoba does a little dance to reset his feet.
Makoba is looking to counter with a shot to the body.
That's three minutes gone in the round.
Makoba scores with a jab to the head.
Crusher checks a low kick from Makoba.
Both fighters are looking to counter, which isn't making for the most exciting fight in the world.
Makoba misses with a low kick.
Crusher lands a nice hook to Makoba's body. Makoba takes it in his stride and looks to land his own strikes.
That's four minutes gone in the round.
Makoba misses with a series of wild punches.
Crusher wants to counter with a clinch but Makoba pushes him away.
Makoba looks to land a combination but Crusher avoids it well.
Makoba sets himself, and Crusher steps forward looking for the clinch! Makoba avoids it this time.
Boooooooooooooooooooo!!! God, this has been a terrible round. Come on you two, sort yourselves out!
Makoba keeping a good distance there, avoiding the body shot.
Makoba throwing a counter right hand but Crusher manages to avoid it.
And that is the end of the round. The fighters go back to their corners.
Jack Crusher dominated that round.
That's the end of the interval. I'm sure that seemed a lot quicker than a minute for our two fighters! Back to the action.
Crusher thuds a left hand into Makoba's body.
Crusher has been the more effective fighter overall so far.
Makoba uses some good footwork to avoid the body shot by Crusher .
Crusher throws a hard body shot but it just misses.
An attempted straight right counter from Makoba misses the target.
We've had a slow start to the round here - hopefully the action picks up.
Makoba throws a body shot but no joy.
Crusher steps in looking to clinch after the strikes miss from Makoba.
Crusher lands a straight punch to the body, keeping Makoba at a distance.
That's one minute gone in the round.
Makoba throws a big shot that misses.
Makoba uses some good footwork to avoid the body shot by Crusher .
Makoba was looking to counter that last move with a shot to the body but he didn't commit.
Makoba waving his hands out in front of him, looking to distract Crusher .
Crusher wants to counter the offense by Makoba and move into the clinch position.
Crusher throws a body punch but Makoba moves out of range.
A little feinted left hand from Makoba on the counter but he doesn't commit to it.
That's two minutes gone in the round.
The crowd are getting on the fighters' backs, as the pace has dropped off in the last minute or so.
Makoba keeping a good distance there, avoiding the body shot.
Crusher throws a nice hook to the body that draws an oooh from the crowd.
Makoba takes a shot right to the liver - Bas would have been proud of that punch.
Makoba takes a body punch but keeps moving.
That's three minutes gone in the round.
Crusher tries to land with a swinging hook to the body but Makoba was well out of range. Poor timing from Crusher .
Makoba thows a leg kick but Crusher checks it
and Crusher counters with a nice double leg into half guard.
Crusher thows a huge punch but Makoba dodges it nicely.
The step up in weight doesn't seem to be a problem for Crusher . He's performing admirably here against the bigger man.
Crusher stalling.
Makoba on his back here. We all know that wrestlers don't like being on their back so let's see if Makoba tries to get out of the position.
Makoba taking some punishment here, with Crusher in his half guard.
That's four minutes gone in the round.
Crusher is working for submissions here but there's nothing on.
Makoba has his hands clasped together around Crusher 's back. He's all about the action.
Crusher not landing any meaningful shots this time.
Boooooooooooooooooooo!!! God, this has been a terrible round. Come on you two, sort yourselves out!
Crusher seems content to maintain position for now, rather than mounting any offense.
Makoba blocking the ground and pound attempt from Crusher .
And that is the end of the round. The fighters go back to their corners.
Jack Crusher showed his class in that round. I'd imagine he'll take it on all the scorecards.
That's the end of the interval. I'm sure that seemed a lot quicker than a minute for our two fighters! Back to the action.
Makoba keeping a good distance there, avoiding the body shot.
Makoba is looking to slow Crusher down with leg kicks.
Crusher tries to land with a swinging hook to the body but Makoba was well out of range. Poor timing from Crusher .
Jack Crusher seems to be getting the better of the standup.
We've had a slow start to the round here - hopefully the action picks up.
Makoba ducks down and throws a hook to the body but Crusher moves away.
That's one minute gone in the round.
Makoba tries to land with a swinging hook to the body but Crusher was well out of range. Poor timing from Makoba.
Crusher changes levels for a counter takedown but doesn't follow through with his attempt.
Crusher scores with a punch to the gut of his opponent.
Makoba throws an overhand right that lands on Crusher 's shoulder, as Crusher tries to avoid the shot.
Crusher is trying to avoid his opponent's strikes and get into the clinch.
Crusher slips a jab from Makoba.
That's two minutes gone in the round.
The crowd are starting to boo a lack of action.
Crusher throws a hard body shot but it just misses.
Makoba throws a decent looking leg kick but it doesn't land clean.
Crusher tries a counter takedown but it's more of a dummy move, and he uses it to push himself away.
Crusher misses with a body shot. Nice footwork from Makoba.
Crusher throws a shot to the body.
That's three minutes gone in the round.
Crusher swings and misses with a hook to the body.
Crusher ducks under an overhand right and circles away with a smile on his face.
Crusher is definitely looking for the counter takedowns here.
Makoba throws a lazy right hand but Crusher sees it coming a mile off and sidesteps it easily.
Crusher with the counter takedown but Makoba avoids it easily.
Makoba throws a body punch but Crusher moves out of range.
Crusher feints the counter takedown.
That's four minutes gone in the round.
A lull in the action here being met with boos from the crowd.
Crusher swings for the body but Makoba moves out of range.
A shot to the liver by Crusher . Beautiful body shot.
Makoba swings away with a body shot that misses
and Crusher counters with a nice shoot takedown that brings the fighters to the ground.
Boooooooooooooooooooo!!! God, this has been a terrible round. Come on you two, sort yourselves out!
Crusher distracts Makoba with his right hand and drops a big elbow with his other arm.
Makoba knows he needs to get back to his feet asap. He's simply no match for Crusher on the ground.
Crusher throwing elbows and punches but not connecting, as Makoba works some decent striking defense from the bottom.
Crusher loading up with the ground and pound but he's missing more than he's landing in this flurry.
And that is the end of the round. The fighters go back to their corners.
Jack Crusher really dominated that round.
That's time! Back to the action!

Makoba looks to land a left hand but Crusher moved out of range nicely.
Crusher is definitely looking for the counter takedowns here.
Makoba misses with a body shot
and Crusher decides to take the opportunity to score a takedown. He's landed in Makoba's guard.
Crusher with a flurry of punches that miss.
A big thud reverberates around the arena there as Crusher accidentally thumps the mat. Hopefully he's not broken his hand.
We've had a slow start to the round here - hopefully the action picks up.
Crusher pushes down on Makoba's leg and manages to get into half guard.
Makoba is staying active underneath Crusher , who seems content to just control the action from this position.
Makoba is trying to control but Crusher manages to pass to mount!
That's one minute gone in the round.
Makoba is wriggling around trying to escape.
Makoba is working hard here to advance position.
Crusher landing shots from mount.
Crusher wants to control the pace but Makoba is squirming around nicely.
Makoba is writhing around trying to get back to his feet.
Crusher throws some wild stikes that Makoba manages to avoid easily.
Crusher dominating with strikes here.
That's two minutes gone in the round.
Crusher misses with a series of strikes from mount. He'll no doubt be working on his ground and pound when he gets back to the gym.
Crusher lands a big shot there that rocks Makoba but he's holding on and managing to survive for now.
Makoba is working to get back to half guard.
Crusher thowing strikes but they're hitting the gloves, not doing any damage.
Makoba in a bad spot here, taking shots to the head.
It looks like Bobojo Makoba has been cut.
Crusher cracks Makoba with a nasty head shot there - the crowd let out an audible gasp there, as the noise reverberated around the arena.
Fantastic stuff here - a very entertaining period of action, which has drawn cheers from the crowd.
Crusher looking to control but Makoba is working nicely, looking to advance position himself.
Crusher scoring with strikes but Makoba is staying in there.
Bobojo Makoba's cut is bleeding quite badly. He's got to try and protect it.
Makoba holding onto his opponent's waist for dear life, as Crusher tries to land some strikes to get him to release his grip.
That's three minutes gone in the round.
Crusher punishing his opponent with strikes.
Jeez, Bobojo Makoba's cut is really nasty now. The referee must be thinking about getting that checked.
The referee calls the doctor in to look at Bobojo Makoba's cut. Oh no, the doctor has called an end to the bout!
Ladies and gentlemen, after 3:34 of round 4, we have a winner by way of TKO (Cut). Jack Crusher !
Jack Crusher is the new heavyweight champion!
|
|
|
|
|
|
|
|
|
|
|
|
|
|
|
|
|
|
|
|
|
|
|
| S |
C
A |
G |
S |
C
B |
G |
|
S |
C |
G |
|
energy
A | B |
|
hype
A | B |
|
pop
A | B |
|
mgr
A | B |
|
FIGHT
RATING
21% |
|
|
|
|
|
|
|
|
|
|
