 |
ICW-8 Rumble at da Underground PBP Commentary |
Undercard bout
|
|
|
|
Undercard bout
|
|
|
|
Undercard bout
|
|
|
|
Undercard bout
|
|
|
|
Undercard bout
|
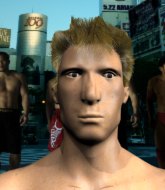
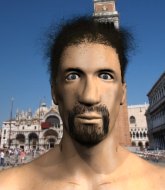
Coming up we have a lightweight MMA rules bout between Ronny Machine (ranked 0 p4p, 0 weight class) and Brad Razor (ranked 0 p4p, 0 weight class). The key to victory for Ronny Machine has got to be keeping the fight on the feet.
 |
|
 |
| 170 cm
24
160 lbs
2 - 3 - 0 |
|
175 cm
25
160 lbs
0 - 0 - 0 |
BJJ Blue Belt
Solid boxing
KO power |
|
Good wrestler
Brawler
Tends to cut |
|
| |
|
Ladies and gentlemen. This fight is 3 rounds, in the lightweight division.
Introducing the fighter to my left, fighting out of the red corner.
With a record of
2 - 3 - 0, fighting out of Amsterdam, Ronny Machine!
And introducing the fighter to my right, fighting out of the blue corner.
With a record of
0 - 0 - 0, fighting out of Amsterdam, Brad Razor!
The judges for this bout are Daniel Blasius, Nard Betker and Wagner Zegers.

The bell rings for round one and we are underway!
Machine changes levels and scores with a jab to the body.
Razor slips a jab and a cross from Machine.
Machine throws a nice looking combination but Razor bobs and weaves to avoid any damage.
Ronny Machine seems to be the more aggressive standup fighter in this bout.
Machine circles away from the clinch attempt.
Machine misses with a wild combination.
Machine misses with a jab and misses with a cross straight after too.

Razor rushes Machine and pushes him back against the cage in a clinch.
Machine goes for a takedown in the clinch but Razor prevents it.

Machine manages to break the clinch.

Razor drives through with a really nice takedown into side control.
Machine is trying to get back to his feet.
Razor is maintaining the dominant position - no doubt Machine will start to get frustrated soon if he's not already.
Machine wants to get back to his feet but Razor drags him back down.

That's one minute gone in the round.
Razor tries to advance to mount but can't.
Machine tries to escape but Razor is in control.
Razor wants to control but Machine is keeping him busy.
Machine takes an elbow right on the bridge of the nose and winces in pain.
Machine wants to get back to his feet.
Machine is breathing heavily.
Razor trying to control the action but Machine is working from the bottom.

That's two minutes gone in the round.
The crowd are starting to boo a lack of action.
Machine wants to escape from the position here - easier said than done!
Razor trying to control the action but Machine is working from the bottom.
Machine is putting a lot of effort into getting back to his feet here.
Razor moving around in side mount but really he's just happy to control for now.
We've had a lack of effective grappling in the last minute or so, which could well see a referee standup.
Razor wants to lay and pray for a moment but Machine keeps working.

That's three minutes gone in the round.
Razor has knee on belly and moves into mount.
Machine is squirming around, avoiding Razor's attempts to control the action.
Razor tucks in and makes sure he doesn't lose the dominant position.
Let's hope that Razor has the urge to step up the pace any second now because for the last 15 or 20 seconds he's just been holding on tight.

Razor looking for a guillotine from mount but Machine is having none of it.
Razor controlling his opponent.

That's four minutes gone in the round.
The crowd are getting on the fighters' backs, as the pace has dropped off in the last minute or so.
Machine trying desperately to get to his feet.
Razor unloading with bombs!
Razor lands a nice shot to the head.
Razor goes for an armbar but he's not got it
Machine turns into him and now he's in Razor's guard.
Razor looking for a guillotine here but Machine defends easily.
And thats the end of the round the fighters go back to their corners.
A close round but Brad Razor will probably get the nod.
The corners get their ten second warning. Both fighters stand from their stools and stare eachother down, ready to get back to the action.

Razor misses with a takedown attempt. He shot from a bit too far out.
Razor throws a loose over hand right and dives in with a double leg takedown. Machine tries to sprawl but it's too late and the fighters hit the mat. Razor is in Machine's guard.
Razor won't allow Machine to get back to his feet.
Razor wants to control from the top but Machine keeps moving.
Razor tries to free his leg and advance position but Machine is retaining full guard.
Razor showing good wrestling skills to control the position.
That's one minute gone in the round.

The ref calls for a clean break and stands the fighters back up. Brad Razor wasn't active enough on the ground.
Razor fails in his attempt to clinch.
Machine throws a combination but it was largely blocked by Razor.
Razor forces Machine back against the cage and clinches.
Machine is looking to break free of the clinch but Razor has double underhooks.
Machine can't break the clinch.
Razor prevents a takedown attempt there.
Both fighters are absolutely exhausted here.
Razor lands a takedown into guard.
Razor scoring with punches to the head and body.
Machine working the defensive guard well to avoid strikes from Razor.
Razor trying to control the position from guard on top but Machine is wriggling around, looking for whatever he can.
That's two minutes gone in the round.

Razor stands up and waves to Machine to follow him.
No luck with that takedown attempt from Razor.
Razor gets a clinch.
Razor breaks the clinch.
A leg kick checked by Machine.
No luck for Razor with that takedown attempt.
Ronny Machine has stuffed three takedown attempts in the round now. That's going to take a lot out of Brad Razor.
Machine defending well as Razor loads up on a big left hand.
Razor looks for a takedown but Machine sprawls well.
Machine misses with a two punch combination.
That's three minutes gone in the round.
Razor fails to land the takedown.
Machine throws a combination but it was largely blocked by Razor.
Some wild striking there from Machine.
Razor gets to the clinch - let's see what his plan is here.
Razor manages to pull guard.
Razor has his feet on Machine's hips. He pushes off and gets to his feet. Nice work.
Machine stuffs the takedown attempt from Razor. Razor gets slowly back to his feet.
Machine misses with a double jab.
Razor pushes Machine up against the cage in a clinch.
That's four minutes gone in the round.
With the fighters clinched against the cage, Razor creates a bit of distance for himself and scores with a nice uppercut.
Machine is looking for a takedown up against the cage. Razor gets underhooks though and prevents the takedown attempt.
Razor gets control of Machine's arms and successfully pulls guard. Razor will no doubt be looking for submissions off his back.
Machine wants to get up but he can't break Razor's closed guard. He needs to be careful trying to break the legs open, as he's open to submissions here.
Razor has a loose triangle. He'll be looking to tighten that up but Machine can see exactly what he's planning and manages to posture up and free himself.
We get told so often about how wrestlers don't like to be on their backs. Let's see if Razor can do anything to dispel that myth.
Machine preventing the sweep.
Razor striking off his back but it's not causing Machine any problems.
And thats the end of the round the fighters go back to their corners.
Brad Razor showed his class in that round. I'd imagine he'll take it on all the scorecards.
That's the end of the round. The referee orders the cornermen out of the cage so we can get back down to business. And we move into the final round!

Razor clinches with his opponent.
Razor stalling.
Machine keeps the fight in the clinch, despite Razor's efforts to push away.
Razor gets a nice trip takedown into half guard.
Razor stops Machine from getting back to his feet.
Brad Razor has got the better of the ground game so far.
Razor controlling the action here.
Machine is looking to get back to is feet but Razor passes into side control.
Both fighters are breathing heavily.
Razor lands a knee to the body and a forearm to the face.
Razor is putting a hurting on Machine here, landing some big shots from side control.
Razor decides to stand back up. Razor steps back and let's Machine get back to his feet.
Machine gets caught on his heels momentarily as he allows Razor to score an easy takedown into full guard.
That's one minute gone in the round.
Razor drops back looking for a leg! Machine is in trouble here! The fighters roll with the hold and Machine manages to kick Razor off! Razor jumps back into Machine's guard.
Razor is taking a break and basically stalling. The referee will not allow him to do that for long.
Razor wants to control from the top but Machine keeps moving.
Razor is in a good position here but he's just trying to control... And he's not even managing to do that successfully.
Razor seems content to control from guard here. He's going to have to remain active though if he doesn't want to get stood back up.
That's two minutes gone in the round.
A lull in the action here being met with boos from the crowd.
We may be looking at a referee standup if the pace doesn't pick up soon.
Razor is sitting in guard, working some ground and pound.
Razor trying to control the position from guard on top but Machine is wriggling around, looking for whatever he can.
The ref stands the fighters back up. Brad Razor was stalling too much, according to the referee.
Razor throws a head kick but Machine moves out of range.
Oooooooooooh, not good. A low kick from Razor lands where it shouldn't have, right in the... well, you know what he did? He kicked him in the penis. He's injured, injured bad. The referee sends both fighters to their corners and Machine has 5 minutes to recover. He's OK now though... a thumbs up from Machine and we're back underway with a touch of gloves.
Razor clinches with his opponent.
Razor stalling the fight.
Razor is looking for a takedown up against the cage. Machine gets underhooks though and prevents the takedown attempt.
Machine is trying to work out of this bad position, with his back against the cage.
Razor jumps into guard, dragging Machine to the mat.
That's three minutes gone in the round.
Razor thows some rabbit punches from the bottom but they don't do any damage.
Razor not looking particularly offensive just at the moment.
Razor is working the butterfly guard. He manages to land a nice scissor sweep and is now in half guard on the top. Nice move.
Razor missing with some ground and pound from the half guard.
Machine manages to escape and get back to his feet!
Razor scores with a takedown into Machine's guard.
Razor must be cautious of submissions here, given that his opponent has the superior Jiu Jitsu.
Razor tries to free his leg and advance position but Machine is retaining full guard.
Razor content to stall in guard here.
Razor decides he's had enough of playing guard and decides to stand. Come on Machine, up you get!
That's four minutes gone in the round.
Razor tries for a takedown but Machine sees it coming a mile off and avoids it easily.
Razor decides to change it up a bit and drives through with a nice takedown into half guard.
Machine tries to push off, looking to stand up, but Razor manages to move to mount!
Razor pausing momentarily but resumes with a couple of decent strikes that do a bit of damage.
Razor stands up from the dominant position. He obviously fancies his chances standing.
This has been an exciting period of action!
Razor closes the distance and gets a trip takedown into side control. Machine quickly recovers to half guard.
Razor wants to lay and pray for a moment but Machine keeps working.
The crowd applaud the fighters efforts here as the round comes to an end.
Razor frees up his trapped foot and advances to mount.
Ronny Machine has stepped it up - he knows he needs a finish here!
Brad Razor is fighting for a decision here - he's started to take the cautious approach.
Machine throws a strike but has given up his back in the process.
And that's the end of the fight!
Brad Razor comfortably won the final round on my scorecard.
I've got Razor winning every round here. Surely the decision will go his way and he'll pick up a well deserved decision victory. Over to the ring announcer for the scorecards.
Ladies and gentlemen, after 3 rounds of action, we go to the scorecards for a decision.
Judge Daniel Blasius scores the fight 27:30
Judge Nard Betker scores the fight 27:30
Judge Wagner Zegers scores the fight 27:30
In favor of your winner, by unanimous decision... Brad Razor!
|
|
|
|
|
|
|
|
|
|
|
|
|
|
|
|
|
|
|
|
|
|
|
| S |
C
A |
G |
S |
C
B |
G |
|
S |
C |
G |
|
energy
A | B |
|
hype
A | B |
|
pop
A | B |
|
mgr
A | B |
|
FIGHT
RATING
53% |
|
|
|
|
|
|
|
Undercard bout
|
|
|
|
Undercard bout
|
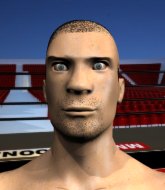
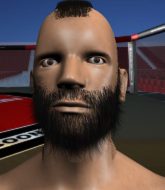
Coming up we have a heavyweight MMA rules bout between Brutus Maximus (ranked 0 p4p, 0 weight class) and Kenny Kempy (ranked 0 p4p, 0 weight class). Well, I have no idea who's going to take this one!
 |
|
 |
| 201 cm
25
270 lbs
0 - 0 - 0 |
|
194 cm
25
230 lbs
1 - 0 - 0 |
Decent wrestler
Brawler
Very strong |
|
BJJ Blue Belt
Counter striker
Very confident |
|
| |
|
Ladies and gentlemen. This fight is 3 rounds, in the heavyweight division.
Introducing the fighter to my left, fighting out of the red corner.
With a record of
0 - 0 - 0, fighting out of Amsterdam, Brutus Maximus!
And introducing the fighter to my right, fighting out of the blue corner.
With a record of
1 - 0 - 0, fighting out of Amsterdam, Kenny Kempy!
The judges for this bout are Saam Ante, Nard Betker and Aafke Stam.
The bell rings for round one and we are underway!
No luck with that takedown attempt from Kempy.
Maximus thows a left - swing and a miss!
Kempy shoots for a takedown but Maximus saw that one coming a mile off and avoided it easily.
Maximus closes the distance and gets a trip takedown into side control. Kempy quickly recovers to half guard.
Kempy looking to work for a kimura from the bottom.
Kempy is trying to get back to full guard.
Maximus scores with a couple of good hammerfists.
The ref warns both fighters not to hold the cage as they work up against the meshing.
Kempy gets full guard.
Kempy is working an open guard here, looking to improve his position. No doubt that will leave him open to counters but at least he's being more offensive.
Kempy avoiding any damage from the ground and pound.
Maximus wants to pass the guard but Kempy is keeping the position.
Kempy working for a triangle but Maximus defends it easily.
Maximus slows down the pace of the fight, as he sits in guard.
That's one minute gone in the round.
Kempy looking for a guillotine here but Maximus defends easily.
Maximus drops back for a leg! It's a sloppy attempt though and Maximus jumps back into guard quickly, to retain the dominant position.
Maximus loading up with the ground and pound but he's missing more than he's landing in this flurry.
Kempy has a loose triangle. He'll be looking to tighten that up but Maximus can see exactly what he's planning and manages to posture up and free himself.
Maximus controlling from the guard. I say controlling but really, he's stalling.
Kempy will have to put a bit more behind his punches if he's going to do any damage from this position.
That's two minutes gone in the round.
Kempy working from the bottom, still in full guard. He's managed to get a loose triangle. Maximus doesn't seem to be doing much to defend here, obviously he feels comfortable in the position. Maximus manages to throw the legs off his shoulder and he's back into guard - no problem.
Maximus trying to control the position from guard on top but Kempy is wriggling around, looking for whatever he can.
Maximus won't allow Kempy to sweep him here.
The referee looks like he's ready to step in and stand the fighters back up.
Maximus would like to get this fight back to the feet but can't get free from the closed guard.
Kempy looking to control.
Maximus got a little sloppy there for a moment and Kempy has worked his way into a loose triangle - can he finish it?! No, Maximus has managed to get both his arms back between Kempy's legs - danger averted.
Kempy keeping moving, preventing Maximus from controlling successfully.
That's three minutes gone in the round.
Kempy not looking particularly offensive just at the moment.
Maximus postures up and lands some nice ground and pound.
Kempy looking for a sweep. Not yet Kempy, not yet.
Kempy kicks Maximus off and gets to his feet.
Maximus keeps the fight on the outside.
Kempy tries to clinch there but Maximus circles away.
Kempy shoots for a double leg takedown but Maximus sprawls well. He's pushed Kempy's face into the mat and manages to get back to his feet relatively easily.
Brutus Maximus has stuffed three takedown attempts in the round now. That's going to take a lot out of Kenny Kempy.
Kempy with a lazy takedown attempt
so Maximus counters with a double leg into guard. Good agility.
The fighters are pressed up against the cage, both looking to find a bit of space to work.
Kempy looks gassed!
Hammerfist, elbow! yells Maximus's corner. There ya go! There ya go!
Kempy looking to hit a scissor sweep but Maximus is one step ahead there.
Kempy can't do much from the bottom at the moment, as Maximus controls the pace.
Both fighters really going for it on the ground here!
Kempy has a closed guard, preventing Maximus from standing up.
That's four minutes gone in the round.
Kempy trying to keep a closed guard but Maximus is proving a slippery customer.
Maximus looking to pass the guard.
Kempy not looking particularly offensive just at the moment.
It looks like we're going to have a standup here. Neither fighter is doing enough on the ground.
Maximus closes the distance and clinches up with Kempy, looking for a takedown. Maximus pushes Kempy against the cage but Kempy circles to the side and manages to break the clinch.
Kempy tries to clinch
and Maximus shoots in, scooping Kempy off his feet. Maximus is holding his opponent over his shoulder. He slams Kempy to the mat and Kempy is in big trouble! Maximus is landing strikes to his unconscious foe and the ref dives in to end the fight! Maximus is celebrating with his corner and rightfully so.
Ladies and gentlemen, after 4:40 of round 1, we have a winner by way of TKO (Slam). Brutus Maximus!
|
|
|
|
|
|
|
|
|
|
|
|
|
|
|
|
|
|
|
|
|
|
|
| S |
C
A |
G |
S |
C
B |
G |
|
S |
C |
G |
|
energy
A | B |
|
hype
A | B |
|
pop
A | B |
|
mgr
A | B |
|
FIGHT
RATING
51% |
|
|
|
|
|
|
|
Undercard bout
|
Coming up we have a welterweight MMA rules bout between Pawel Woljecki (ranked 0 p4p, 0 weight class) and Heath Knight (ranked 0 p4p, 0 weight class). Both these guys have really solid chins. Will we see a standup war or will they both decide that a knockout is unlikely and try to win the fight elsewhere?
 |
|
 |
| 178 cm
25
179 lbs
1 - 0 - 0 |
|
174 cm
25
180 lbs
0 - 0 - 1 |
Good wrestling
Brawler
Good chin |
|
BJJ White Belt
Excellent MT
Solid chin |
|
| |
|
Ladies and gentlemen. This fight is 3 rounds, in the welterweight division.
Introducing the fighter to my left, fighting out of the red corner.
With a record of
1 - 0 - 0, fighting out of Amsterdam, Pawel Woljecki!
And introducing the fighter to my right, fighting out of the blue corner.
With a record of
0 - 0 - 1, fighting out of Amsterdam, Heath Knight!
The judges for this bout are Daniel Blasius, Paul Aken and Radbod Blank.
The bell rings for round one and we are underway!
Woljecki looking to shoot here. He's gone for it and he's landed a takedown into mount! Oh, that's bad for Knight!
Woljecki looks like he's working for a submission but he's not found anything just yet.
Knight is squirming around, avoiding Woljecki's attempts to control the action.
Woljecki misses with a series of strikes from mount. He'll no doubt be working on his ground and pound when he gets back to the gym.
Woljecki looking to control and managing it successfully.
Knight is trying to stand up.
Woljecki trying to control but Knight is having none of it.
Knight tries to buck Woljecki off but he can't manage it.
That's one minute gone in the round.
Woljecki takes Knight's back.
Woljecki is staying calm and holding on to the back position, whilst working on a rear naked choke. Knight is defending well though. Woljecki let's go of the attempt for now.
Knight prevents Woljecki from getting a body triangle.
Woljecki is staying calm and holding on to the back position, whilst working on a rear naked choke. Knight is defending well though. Woljecki let's go of the attempt for now.
Knight is in a bad position with Woljecki working for a choke. Knight manages to spin nicely into guard and the danger is over for the moment.
Knight really doesn't want to stay on the ground with Woljecki. If he can't get it back to his feet, it's only a matter of time before he'll be tapping out.
That's two minutes gone in the round.
A few boos can be heard. I'm sure they will multiply if the fighters don't pick up the pace.
Woljecki is looking to stand up but Knight isn't so interested in that idea.
Woljecki on his back here. We all know that wrestlers don't like being on their back so let's see if Woljecki tries to get out of the position.
Woljecki is pulling down on Knight's head. It's preventing any offense from Knight, at least for the moment.
Woljecki trying to control the position.
Knight wants to stand but Woljecki is controlling his posture from full guard.
That's three minutes gone in the round.
Knight prevents Woljecki from getting back to his feet.
The ref warns both fighters not to hold the cage as they work up against the meshing.
Knight postures up in Woljecki's guard and throws a big left but Woljecki blocks it.
Woljecki tries to land a sweep but no joy.
Woljecki keeping moving, preventing Knight from controlling successfully.
Knight controls the pace of the fight for a moment.
OK we're going to have a standup here. Heath Knight hasn't been effective enough on the ground and the referee wants a restart.
Knight has his takedown stuffed
and Woljecki counters with a shoot takedown. Knight fights it but they end up in guard.
That's four minutes gone in the round.
Woljecki is pushing down on Knight's leg trying to pass to half guard. Knight is fighting to maintain full guard but Woljecki has managed to sneak the leg through.
Woljecki is looking to take a break and control but Knight is keeping him honest, looking to work from the bottom.
Woljecki is looking for a kimura but Knight is holding onto that half guard position, so it's hard for Woljecki to get the leverage.
Woljecki stalling.
Knight is trying to stand.
Woljecki trying to control the action but Knight is working from the bottom.
Woljecki is trying for a guillotine from the top but the pressure isn't in the right place so Knight is just riding it out for now. Woljecki eventually gives up the hold.
Knight is not content to let Woljecki control the position.
And thats the end of the round the fighters go back to their corners.
Pawel Woljecki dominated that round.
Well, the break between rounds is over. Let's get back to the scrappin!
Woljecki shoots in for a takedown and gets it. Oh and he's advanced to full mount straight away.
Knight is squirming around, avoiding Woljecki's attempts to control the action.
Woljecki looking for a guillotine from mount but Knight is having none of it.
Knight is really trying hard to get back to his feet.
Woljecki can't quite control the action as he would like just now, as Knight is looking to escape.
Knight working to try and regain half guard.
That's one minute gone in the round.
Woljecki controlling his opponent.
Woljecki goes for an armbar but he's fallen flat on his backside there and now Knight is on top in guard.
Woljecki is edging up against the cage. He's using the cage to get back to his feet. Nice work there - the fighters are clinched.
Knight blocking some punches.
Knight prevents a takedown attempt there.
Knight tries to take the fight to the ground by pulling guard but can't manage it.
That's two minutes gone in the round.
Knight misses with a punch on the inside.
Knight stays in close to his opponent and throws a right hand to the body.
Woljecki is working for takedown but Knight is calmly controlling the position for now.
Woljecki tries to circle away but Knight has him pinned against the cage.
Woljecki can't get the takedown.
That's three failed takedown attempts in the round for Pawel Woljecki. That's going to take a lot out of him.
Knight breaks from the clinch.
Knight fails with a rather predictable takedown attempt.
Knight connects with a looping left hand that seems like it dazed Woljecki momentarily.
Knight with a poor takedown
and Woljecki counters with a nice single leg takedown and he's in Knight's guard now.
This has been an exciting period of action!
Woljecki wants to pass the guard but Knight is keeping the position.
Woljecki is working hard here to advance position.
That's three minutes gone in the round.
Knight is looking to stand up but Woljecki isn't so interested in that idea.
Knight keeping moving, preventing Woljecki from controlling successfully.
Woljecki is trying to work a guillotine from the top, or something like that? Don't know how he thinks he's going to get a finish from there.
Knight is looking to get back to his feet but can't, whilst Woljecki is controlling him.
Knight is breathing heavily.
Knight is using up a lot of energy trying to get back to his feet. Perhaps he should improve his position first.
That's four minutes gone in the round.
The crowd are starting to boo a lack of action.
Woljecki trying to control the position from guard on top but Knight is wriggling around, looking for whatever he can.
Woljecki is pushing down on Knight's leg trying to pass to half guard. Knight is fighting to maintain full guard but Woljecki has managed to sneak the leg through.
Woljecki uses his free foot to push down on Knight's thigh. Eventually he works his other foot free and he's advanced to mount - this is trouble for Knight.
Woljecki putting on the heat here with some good ground and pound!
Woljecki takes his opponent's back. Perhaps a chance to lock up a rear naked choke here.
Pawel Woljecki overall seems to be getting the better of the ground position in the fight so far.
Woljecki lands with a couple of good shots - one to the side of the head and one questionable shot that could be viewed as to the back of the head but the referee lets it go.
And thats the end of the round the fighters go back to their corners.
Pawel Woljecki dominated that second round.
The referee calls time. The cornermen exit stage left and we're back to business. This is the final round!
Knight gets his takedown attempt stuffed easily
so Woljecki counters with a double leg into guard. Good agility.
Woljecki drops back looking for a leg! Knight is in trouble here! The fighters roll with the hold and Knight manages to kick Woljecki off! Woljecki jumps back into Knight's guard.
Woljecki has gone for a leg lock! Knight slips out almost immediately though and dives into Woljecki's guard.
Woljecki wriggles free and stands up.
Woljecki fails to land the takedown.
That's one minute gone in the round.
Knight throws a combination but comes up with nothing but fresh air.
Woljecki is looking to clinch but Knight is avoiding it.
Knight misses with a takedown attempt
and Woljecki counters with a driving takedown into guard. Nice work there by Woljecki.
Knight takes a big intake of breath there - he's definitely tired.
Woljecki advances to half guard.
The fighters are pressed up against the cage, both looking to find a bit of space to work.
Woljecki content to control rather than advance.
Knight is looking to sinch up a guillotine here but Woljecki pulls his head out easily.
Woljecki working Knight over with strikes.
Neither fighter is being very active at the moment, with Woljecki in particular looking to stall.
That's two minutes gone in the round.
Knight is staying active underneath Woljecki, who seems content to just control the action from this position.
Woljecki works his way into side control.
Woljecki passes to full mount! That's big trouble for Knight!
Woljecki looking to control but Knight is working nicely, looking to advance position himself.
Woljecki manages to capitalize on a mistake by Knight to take his back!
Woljecki tries to keep control of the position but Knight is staying busy.
Knight fending off the submission attempt from Woljecki.
Woljecki looking for the RNC.
That's three minutes gone in the round.
Knight just trying to survive but Woljecki is wriggling into a better position, looking to finish.
Woljecki struggling to keep hold of the position.
Woljecki is working for the rear naked choke. He has one arm under the chin but Knight has hold of the other arm. A bit of a stalemate here.
Woljecki working for the choke.
That's four minutes gone in the round.
Neither fighter has done anything of merit for a good minute or two here and the crowd are not happy about it.
Woljecki is looking for the choke from the back position but Knight is controlling his hands well.
Knight is trying to get back to his feet but Woljecki has full control of the position and if anything, Knight has just worked his way into a worse spot.
Woljecki lands a couple of good shots to his opponent's body and a final shot to the head. Good little attack there by Woljecki.
Woljecki is looking to finish with some ground and pound!
Knight wants to get back to his feet.
Woljecki tightening his grip on Knight, looking for the choke.
Heath Knight has stepped it up - he knows he needs a finish here!
Woljecki trying to control momentarily.
And that's the end of the fight!
Pawel Woljecki showed his dominance in that final round.
Well I reckon that's a shut out for Woljecki, winning every round. Will the judges agree? They are the ones who matter, even if they are often depressingly incompetent. Over to the ring announcer for the scorecards.
Ladies and gentlemen, after 3 rounds of action, we go to the scorecards for a decision.
Judge Daniel Blasius scores the fight 30:27
Judge Paul Aken scores the fight 30:27
Judge Radbod Blank scores the fight 30:27
In favor of your winner, by unanimous decision... Pawel Woljecki!
|
|
|
|
|
|
|
|
|
|
|
|
|
|
|
|
|
|
|
|
|
|
|
| S |
C
A |
G |
S |
C
B |
G |
|
S |
C |
G |
|
energy
A | B |
|
hype
A | B |
|
pop
A | B |
|
mgr
A | B |
|
FIGHT
RATING
44% |
|
|
|
|
|
|
|
Co-main event
|
Coming up we have a light heavyweight MMA rules bout between Tommy Mashburn (ranked 0 p4p, 0 weight class) and Ben Hopkins (ranked 0 p4p, 0 weight class). Rumors backstage are that the fighters have been paid to keep it standing but we know that would never happen in MMA!
 |
|
 |
| 173 cm
26
212 lbs
3 - 1 - 0 |
|
188 cm
22
217 lbs
0 - 0 - 0 |
Good wrestling
Basic striking
Good chin |
|
BJJ Brown Belt
Counter striker
Intelligent |
|
| |
|
Ladies and gentlemen. This fight is 3 rounds, in the light heavyweight division.
Introducing the fighter to my left, fighting out of the red corner.
With a record of
3 - 1 - 0, fighting out of Amsterdam, Tommy Mashburn!
And introducing the fighter to my right, fighting out of the blue corner.
With a record of
0 - 0 - 0, fighting out of Amsterdam, Ben Hopkins!
The judges for this bout are Nard Betker, Paul Aken and Radbod Blank.
The bell rings for round one and we are underway!
Hopkins fails to land the takedown.
Hopkins decides to change it up a bit and drives through with a nice takedown into half guard.
Mashburn is looking to control Hopkins's leg but it's slowly edging free. Can Mashburn avoid being mounted?
Hopkins is trying for a guillotine from the top but the pressure isn't in the right place so Mashburn is just riding it out for now. Hopkins eventually gives up the hold.
Mashburn is looking for a sweep. Hopkins is wise to his cunning plan and keeps the top position.
Hopkins takes advantage of the dominant position to land a couple of big hammer fists.
The fighters are pressed up against the cage, both looking to find a bit of space to work.
Hopkins is keen to just control but Mashburn is a slippery customer.
That's one minute gone in the round.
Hopkins stalling.
Mashburn is looking for a sweep. Hopkins is wise to his cunning plan and keeps the top position.
Hopkins wants to lay and pray for a moment but Mashburn keeps working.
Mashburn on his back here. We all know that wrestlers don't like being on their back so let's see if Mashburn tries to get out of the position.
The referee looks like he's ready to step in and stand the fighters back up.
OK we're going to have a standup here. Ben Hopkins hasn't been effective enough on the ground and the referee wants a restart.
Mashburn drives through with a really nice takedown into side control.
Mashburn taking a break here but Hopkins is having none of it and regains half guard.
That's two minutes gone in the round.
Hopkins manages to get to full guard.
Mashburn is intent on slowing down the pace of the fight, simply looking to control.
Hopkins keeping moving, preventing Mashburn from controlling successfully.
The ref warns both fighters not to hold the cage as they work up against the meshing.
That's three minutes gone in the round.
Hopkins manages to sweep nicely, so he's now on top. Mashburn manages to get himself to full guard.
Mashburn uses the cage to get back to his feet.
Mashburn drops down and drives through with a powerful takedown into guard.
Mashburn missing there with some ground and pound from the guard.
Hopkins working a defensive guard here.
That's four minutes gone in the round.
Mashburn wants to control from the top but Hopkins keeps moving.
Hopkins looking to hit a scissor sweep but Mashburn is one step ahead there.
Mashburn stands up and looks to throw the legs aside to pass to side control. Hopkins swivels though and keeps the full guard.
The referee decides to stand the fighters back up.
Mashburn has his takedown stuffed
and Hopkins counters with a nice double leg into guard.
Hopkins prevents Mashburn from getting back to his feet.
And thats the end of the round the fighters go back to their corners.
Ben Hopkins dominated that round.
That's the end of the round. The referee orders the cornermen out of the cage so we can get back down to business.
Some wild striking there from Mashburn.
Horrible takedown by Mashburn or perhaps it was just good defense by Hopkins which made him look bad.
Mashburn shoots in from a long way out. He's driving through with the takedown attempt and he eventually gets it, landing in Hopkins's guard.
Mashburn slows down the pace of the fight for a moment. He'll need to remain active if he doesn't want to see the fight stood back up.
Mashburn stops Hopkins from standing up.
Hopkins trying to keep a closed guard but Mashburn is proving a slippery customer.
Mashburn trying to control the position from guard on top but Hopkins is wriggling around, looking for whatever he can.
That's one minute gone in the round.
The referee decides to stand the fighters back up, due to lack of activity on the part of Tommy Mashburn.
Hopkins misses with a takedown attempt
and Mashburn counters with a single leg into guard. Hopkins didn't expect that.
Mashburn trying to control but Hopkins is working from the bottom.
Mashburn working some ground and pound from guard but it's not doing any damage.
Mashburn trying to land body shots but he keeps hitting the mat.
Hopkins keeping moving, preventing Mashburn from controlling successfully.
Mashburn has to be careful here, sitting in the guard of a superior BJJ player.
That's two minutes gone in the round.
Hopkins trying to control the position.
Mashburn might be looking to lock onto one of his opponent's long limbs for a submission, whilst we're on the ground.
Mashburn throwing strikes but missing.
Hopkins controls Mashburn momentarily but Mashburn frees himself.
Mashburn stays in close to Hopkins's body and controls the position.
Tommy Mashburn has forced the referee to step in and bring the fight back to the feet.
Mashburn changes levels and looks for a double leg takedown. Hopkins tries to avoid it but Mashburn manages to keep hold of a leg and drag Hopkins to the ground. Hopkins escapes though and pops straight back up to his feet.
That's three minutes gone in the round.
Mashburn shoots in and scores a nice double leg takedown into half guard.
Hopkins is trying to maintain the position but Mashburn is very close to passing his half guard.
Mashburn missing with some ground and pound from the half guard.
Hopkins moves into full guard.
Hopkins trying to keep a closed guard but Mashburn is proving a slippery customer.
That's four minutes gone in the round.
Hopkins keeping full guard, as Mashburn tries to pass.
Mashburn trying to control but Hopkins is working from the bottom.
Mashburn not doing a lot at the moment. He'll have to show some more aggression or the fight will get stood up.
The ref stands the fighters back up. Tommy Mashburn wasn't doing enough on the ground.
Mashburn shoots in but doesn't get the takedown
and Hopkins counters with a nice double leg into half guard.
And thats the end of the round the fighters go back to their corners.
Tommy Mashburn dominated that second round.
The fighters get back to their feet, the hooter sounds and we're back to the action! Let's hear some noise people - this is the final round!
Hopkins shoots in but doesn't get the takedown
and Mashburn counters with a nice single leg takedown and he's in Hopkins's guard now.
Mashburn sitting in guard, not really doing much.
Mashburn stands and steps away. Hopkins gets to his feet too and we're back to the striking game.
Mashburn fails to land the takedown.
Hopkins has his takedown stuffed
and Mashburn counters by moving into the clinch. Good anticipation by Mashburn.
Hopkins jumps guard but his hands slip and he falls flat on his back. Well, he's made himself look a right mug there, as Mashburn walks away with a smile on his face. Hopkins gets slowly back to his feet and shakes his head.
Tommy Mashburn has stuffed three takedown attempts in the round now. That's going to take a lot out of Ben Hopkins.
Hopkins misses with a takedown attempt
and Mashburn decides to take the opportunity to score a takedown. He's landed in Hopkins's guard.
The crowd cheering loudly, showing their appreciation for the quality fight we're seeing here.
Mashburn is stalling in the full guard.
That's one minute gone in the round.
Mashburn looking to sit in guard and control but Hopkins gets the butterfly guard and sweeps. He's now in the guard on the top.
Hopkins won't allow Mashburn to sweep him here.
Mashburn is working hard here to advance position.
Hopkins trying to control but Mashburn is working from the bottom.
That's two minutes gone in the round.
Well. There's a bit of a lull in the action here and the crowd are starting to get restless.
Hopkins looking to sit in guard and control but Mashburn gets the butterfly guard and sweeps. He's now in the guard on the top.
Mashburnis looking to pass into half guard but Hopkins pushes him away with his feet and jumps on top - now Hopkins is in guard.
Hopkins preventing the sweep.
Tommy Mashburn overall seems to be getting the better of the ground position in the fight so far.
That's three minutes gone in the round.
Mashburn looking to control.
Mashburn is pulling down on Hopkins's head to control his posture.
Hopkins is taking a break and basically stalling. The referee will not allow him to do that for long.
We've had a lack of effective grappling in the last minute or so, which could well see a referee standup.
Well, the referee has seen enough. Neither fighter is active enough on the ground so he's stood them back up.
Mashburn decides to change it up a bit and drives through with a nice takedown into half guard.
Hopkins is working for an escape here. He's hooked one of Mashburn's legs and he's managed to sneak out and take Mashburn's back!
Mashburn is keeping busy.
Hopkins looking for the rear naked choke. And he's got it! Mashburn taps!
Ladies and gentlemen, after 4:05 of round 3, we have a winner by way of Submission (RNC). Ben Hopkins!
|
|
|
|
|
|
|
|
|
|
|
|
|
|
|
|
|
|
|
|
|
|
|
| S |
C
A |
G |
S |
C
B |
G |
|
S |
C |
G |
|
energy
A | B |
|
hype
A | B |
|
pop
A | B |
|
mgr
A | B |
|
FIGHT
RATING
49% |
|
|
|
|
|
|
|
Main event
|
Coming up we have a bantamweight MMA rules bout between Nate Cadwallader (ranked 0 p4p, 0 weight class) and Jack Ovaltrades (ranked 0 p4p, 0 weight class). Both fighters look fresh as a daisy as they make their way towards the cage.
 |
|
 |
| 174 cm
26
142 lbs
4 - 0 - 0 |
|
155 cm
25
120 lbs
2 - 0 - 0 |
BJJ Blue Belt
Solid boxing
Very strong |
|
Good takedowns
Basic striking
Determined |
|
| |
|
Ladies and gentlemen. This fight is 3 rounds, for the bantamweight championship of the world!
Introducing the champion to my left, fighting out of the red corner.
With a record of
4 - 0 - 0, fighting out of Amsterdam, Nate Cadwallader!
And introducing the challenger to my right, fighting out of the blue corner.
With a record of
2 - 0 - 0, fighting out of Amsterdam, Jack Ovaltrades!
The judges for this bout are Aafke Stam, Radbod Blank and Nard Betker.
The bell rings for round one and we are underway!
Ovaltrades closes the distance and gets a trip takedown into side control. Cadwallader quickly recovers to half guard.
Cadwallader is refusing to be controlled, as Ovaltrades sits in half guard.
Cadwallader is doing well to control the position and prevent Ovaltrades from advancing to side control.
Cadwallader is looking to escape.
Cadwallader on his back here. We all know that wrestlers don't like being on their back so let's see if Cadwallader tries to get out of the position.
Cadwallader won't allow Ovaltrades to pass to mount.
Cadwallader is trying to stand.
Ovaltrades is looking for a kimura but Cadwallader is holding onto that half guard position, so it's hard for Ovaltrades to get the leverage.
Ovaltrades wants to work for an arm triangle but Cadwallader is really keeping half guard well and defending the submission attempt.
Ovaltrades trying to control from half guard but Cadwallader is working away.
Cadwallader trying to hold on to Ovaltrades's head to control him but Ovaltrades postures up.
That's one minute gone in the round.
Cadwallader moves his hips nicely and gets into full guard.
Cadwallader keeping moving, preventing Ovaltrades from controlling successfully.
Ovaltrades works a leg free and moves into half guard.
Cadwallader is trying to stand.
Ovaltrades wants to pass the guard but Cadwallader is defending well.
Ovaltrades is taking a breather. Cadwallader says something to him but it's hard to make out. Perhaps he's telling him to get on with it and actually do something.
Ovaltrades is trying to work for a kimura but Cadwallader is defending well.
The ref warns both fighters not to hold the cage as they work up against the meshing.
Ovaltrades is trying to control. Cadwallader wants to improve his position but can't escape this time.
That's two minutes gone in the round.
Ovaltrades looking to pass the half guard. Not this time.
Ovaltrades controlling the pace.
Ovaltrades is working for a kimura but Cadwallader is defending it quite comfortably.
Ovaltrades is sneakily working for an arm triangle but Cadwallader sees it coming and defends easily.
Cadwallader is looking to escape.
That's three minutes gone in the round.
Ovaltrades tries to pass to full mount but Cadwallader defends it.
Cadwallader is trying to stand.
Ovaltrades is trying to work for a kimura but Cadwallader is defending well.
Ovaltrades is looking for submissions but instead, Cadwallader has regained full guard.
Cadwallader seems keen to control Ovaltrades's posture.
Cadwallader keeping moving, preventing Ovaltrades from controlling successfully.
That's four minutes gone in the round.
A few boos can be heard. I'm sure they will multiply if the fighters don't pick up the pace.
Ovaltrades wants to pass the guard but Cadwallader is keeping the position.
Ovaltrades is persisting with the attempt to improve his position.
Cadwallader managing to control the position.
Ovaltrades postures up in Cadwallader's guard and throws a big left but Cadwallader blocks it.
Ovaltrades drops back for a leg! It's a sloppy attempt though and Ovaltrades jumps back into guard quickly, to retain the dominant position.
Ovaltrades throwing strikes from guard but Cadwallader blocks nicely.

That's five minutes gone in the round.
Ovaltrades thinks about going for a leg but decides against it, in order to maintain the position.
Cadwallader is looking to stand up but Ovaltrades isn't so interested in that idea.
Cadwallader knows he needs to get back to his feet asap. He's simply no match for Ovaltrades on the ground.
Cadwallader looking to hit a scissor sweep but Ovaltrades is one step ahead there.
Cadwallader is trying to stand up but he's not managed so far.
Ovaltrades missing there with some ground and pound from the guard.
Cadwallader wants to sweep here but Ovaltrades controlling him for the moment.

That's six minutes gone in the round.
The crowd are getting on the fighters' backs, as the pace has dropped off in the last minute or so.
Cadwallader is looking to get back to his feet but can't, whilst Ovaltrades is controlling him.
Ovaltrades trying to control the position from guard on top but Cadwallader is wriggling around, looking for whatever he can.
Ovaltrades controls the pace of the fight for a moment.
Ovaltrades has gone for a leg lock! Cadwallader slips out almost immediately though and dives into Ovaltrades's guard.
Ovaltrades working from the bottom, still in full guard. He's managed to get a loose triangle. Cadwallader doesn't seem to be doing much to defend here, obviously he feels comfortable in the position. Cadwallader manages to throw the legs off his shoulder and he's back into guard - no problem.
Ovaltrades throwing his legs up looking for a triangle.

That's seven minutes gone in the round.
Ovaltrades looking for submissions off his back, moving his hips, looking for an opening.
Cadwallader is looking to stand up but Ovaltrades won't let him.
Ovaltrades has his foot on Cadwallader's thigh. He's trying to push off and get in position for a triangle, I think. Cadwallader works his way back into a safe position though.
Cadwallader wants to control from the top but Ovaltrades keeps moving.
Ovaltrades has a closed guard, preventing Cadwallader from standing up.
Ovaltrades not looking particularly offensive just at the moment.
Cadwallader would like to get this fight back to the feet but can't get free from the closed guard.
Cadwallader has to be careful here, sitting in the guard of a superior BJJ player.

That's eight minutes gone in the round.
A few boos can be heard. I'm sure they will multiply if the fighters don't pick up the pace.
Cadwallader trying desperately to get back to his feet here but he's not having any joy at all. He's going to tire himself out if he's not careful.
Ovaltrades has a loose triangle. He'll be looking to tighten that up but Cadwallader can see exactly what he's planning and manages to posture up and free himself.
Cadwallader advances to half guard.
The fighters are battling for position here. Ovaltrades manages to regain full guard. Nice work.
Ovaltrades controlling the position.
Ovaltrades has a closed guard, preventing Cadwallader from standing up.

That's nine minutes gone in the round.
Ovaltrades throws his legs up looking to secure a triangle. Oh, that looks pretty tight, I gotta say! Cadwallader escapes and throws Ovaltrades's legs to the side, diving into side control!
Cadwallader works to advance to full mount. Ovaltrades defends for a few seconds but eventually he succumbs.
Ovaltrades manages to regain half guard whilst avoiding the strikes.
Ovaltrades wants to control but Cadwallader is keeping busy and won't allow it.
Cadwallader escapes and gets back to his feet.
No luck with that takedown attempt from Ovaltrades.
Ovaltrades avoids a punch combination nicely.
Ovaltrades tries to shoot in for a takedown. He's got hold of a leg but Cadwallader swivels and escapes.
And thats the end of the round the fighters go back to their corners.
Jack Ovaltrades dominated that round.
Well, the break between rounds is over. Let's get back to the scrappin!
Cadwallader tries a head kick but it misses.
Cadwallader bobs and weaves well there to avoid the strikes.
Cadwallader scores with a jab.
Left hook, right uppercut from Cadwallader.
Cadwallader misses with a jab and misses with a cross straight after too.
Cadwallader rushes Ovaltrades and pushes him back against the cage in a clinch.
Cadwallader throws a knee to the head but misses.
Cadwallader landing knees to the body. They look like they could hurt.
Cadwallader scores with a shot to the side of Ovaltrades's head.
A left hand lands to the body for Cadwallader.
Ovaltrades tries for a takedown. No joy.
Cadwallader lands on the inside with an uppercut.
Cadwallader breaks from the clinch.
Ovaltrades moves out of range of the body kick.
Cadwallader misses with a takedown
so Ovaltrades counters with a double leg into guard. Good agility.
Ovaltrades looking to control the position here, rather than advance.
Both fighters are absolutely exhausted here.
A big thud reverberates around the arena there as Ovaltrades accidentally thumps the mat. Hopefully he's not broken his hand.
That's one minute gone in the round.
Cadwallader wants to stand up but Ovaltrades is controlling him.
Ovaltrades thinks about going for a leg but decides against it, in order to maintain the position.
Ovaltrades not doing a lot at the moment. He'll have to show some more aggression or the fight will get stood up.
Ovaltrades trying to control but Cadwallader is working from the bottom.
Ovaltrades is looking to work some ground and pound but Cadwallader has wrist control.
That's two minutes gone in the round.
My god... these two guys really need to pick up the pace or everyone will leave to go get a beer.
Cadwallader keeping moving, preventing Ovaltrades from controlling successfully.
The referee looks like he's ready to step in and stand the fighters back up.
Ovaltrades's corner is telling him to maintain position.
The ref calls for a clean break and stands the fighters back up. Jack Ovaltrades wasn't active enough on the ground.
Cadwallader throws a combination but it was largely blocked by Ovaltrades.
Nate Cadwallader seems to be the more aggressive standup fighter in this bout.
Cadwallader drives through and clinches with Ovaltrades against the cage.
Cadwallader escapes the clinch and we're back to striking.
Crunch! Cadwallader slams his shin into Ovaltrades's torso.
Cadwallader throws a head kick that looked like it stung.
Cadwallader throws a right and a left that both miss.
Ovaltrades gets his takedown attempt stuffed easily
and Cadwallader counters with a nice single leg takedown and he's in Ovaltrades's guard now.
Cadwallader got a little sloppy there for a moment and Ovaltrades has worked his way into a loose triangle - can he finish it?! No, Cadwallader has managed to get both his arms back between Ovaltrades's legs - danger averted.
That's three minutes gone in the round.
Ovaltrades is working an open guard here, looking to improve his position. No doubt that will leave him open to counters but at least he's being more offensive.
Cadwallader stands up and looks to throw the legs aside to pass to side control. Ovaltrades swivels though and keeps the full guard.
Jack Ovaltrades has got the better of the ground game so far.
Cadwallader got a little sloppy there for a moment and Ovaltrades has worked his way into a loose triangle - can he finish it?! No, Cadwallader has managed to get both his arms back between Ovaltrades's legs - danger averted.
Cadwallader gets to his feet - Ovaltrades follows without any prompting.
Cadwallader scores with a jab to the head.
Ovaltrades slips a jab and a cross from Cadwallader.
Cadwallader misses with a head kick.
A good leg kick by Cadwallader.
Cadwallader stalks Ovaltrades and leaps in with a furious combination of punches. Uppercuts and crosses smash into Ovaltrades's face. Ovaltrades staggers backwards, shaken.
Ovaltrades tries to land a front kick but Cadwallader steps back. That was a bit too telegraphed.
That's four minutes gone in the round.
Ovaltrades closes the distance and gets a trip takedown into side control. Cadwallader quickly recovers to half guard.
Ovaltrades wants to control but Cadwallader is keeping him busy.
Cadwallader is looking to regain full guard. Not this time though.
Ovaltrades is looking for a kimura. It's going to be difficult to finish that from half guard though and Cadwallader defends it well.
Cadwallader is trying to get back to full guard.
Ovaltrades with a momentary lay and pray from half guard.
Cadwallader is looking to escape.
The fighters are pressed up against the cage, both looking to find a bit of space to work.
That's five minutes gone in the round.
Ovaltrades wants to pass the guard but Cadwallader is defending well.
Well, if Ovaltrades is going to just lie there, perhaps we should talk about what we're having for dinner tonight
I'm having a ham and pineapple pizza
Yum. Can't wait.
If this pace continues, the referee will definitely step in and force a standup.
Ovaltrades is looking for a kimura but Cadwallader is holding onto that half guard position, so it's hard for Ovaltrades to get the leverage.
Ovaltrades tries to pass the half guard into mount. Cadwallader knows what he's doing though and prevents the attempt.
Ovaltrades looks over to his corner - he wants some instructions but his corner are not responding.
That's six minutes gone in the round.
A few boos can be heard. I'm sure they will multiply if the fighters don't pick up the pace.
Ovaltrades trying to control the action but Cadwallader is working from the bottom.
Ovaltrades passes to full mount!
Ovaltrades forces the positional change into back control.
Ovaltrades has managed to slip his arm under Cadwallader's chin. This could be all over... yep, Cadwallader is tapping out! Submission win for Ovaltrades.
Ladies and gentlemen, after 6:52 of round 2, we have a winner by way of Submission (RNC). Jack Ovaltrades!
Jack Ovaltrades is the new bantamweight champion!
|
|
|
|
|
|
|
|
|
|
|
|
|
|
|
|
|
|
|
|
|
|
|
| S |
C
A |
G |
S |
C
B |
G |
|
S |
C |
G |
|
energy
A | B |
|
hype
A | B |
|
pop
A | B |
|
mgr
A | B |
|
FIGHT
RATING
34% |
|
|
|
|
|
|
|
|
|
|
