|
|
PBP Commentary |
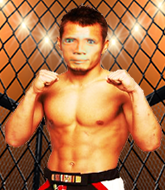
Coming up we have a bantamweight MMA rules bout between Takumi Sagaki (ranked 2480 p4p, 0 weight class) and Dominick Bruise (ranked 3329 p4p, 167 weight class). Sagaki comes into the arena with One Piece - AMV - We Are! (Full Song) blaring out of the sound system. I don't know about you partner, but I'm pumped for this one!
 |
|
 |
| 172 cm
29
147 lbs
15 - 5 - 0 |
|
173 cm
33
142 lbs
10 - 12 - 0 |
Abu Dhabi Champ
Solid boxing
Cardio machine |
|
Good wrestler
World class MT
Good gas tank |
|
| |
|
Ladies and gentlemen. This fight is 3 rounds, in the bantamweight division.
Introducing the fighter to my left, fighting out of the red corner.
With a record of
15 - 5 - 0, fighting out of Las Vegas, Takumi Sagaki!
And introducing the fighter to my right, fighting out of the blue corner.
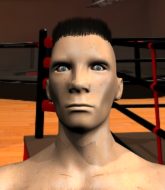
With a record of
10 - 12 - 0, fighting out of Las Vegas, Dominick Bruise!
The judges for this bout are Daniel Franklin, Chris Downing and Gwen Towbar.

The bell rings for round one and we are underway!
Sagaki misses with a lunging right hand
and Bruise cracks him with a counter punch right on the button.
Bruise throws an overhand right that lands on Sagaki's shoulder, as Sagaki tries to avoid the shot.
Sagaki shoots in and drives through. Bruise sprawls well.
Bruise slips a jab and a cross from Sagaki.
Bruise checks a leg kick nicely.
And an attempted straight right on the counter from Bruise! But no joy.
Sagaki shoots in with a takedown attempt and he has Bruise pinned against the cage. Bruise gets the underhooks and manages to circle away.

Sagaki scores with a nice takedown into half guard. Let's see what he's got on the ground.
Sagaki has been talking about how he's improved his wrestling in the run up to the fight so let's see if that's enough to sway the balance.
We've had a slow start to the round here - hopefully the action picks up.
Bruise is trying to control but can't.
Sagaki thows a huge punch but Bruise dodges it nicely.
The fighters are pressed up against the cage, both looking to find a bit of space to work.
Bruise is staying active underneath Sagaki, who seems content to just control the action from this position.
Bruise is trying to control but can't.

That's one minute gone in the round.
The ref warns both fighters not to hold the cage as they work up against the meshing.
Bruise is looking to improve his position.

Sagaki is trying to work for a kimura but Bruise is defending well.
Sagaki tries to pass the half guard into mount. Bruise knows what he's doing though and prevents the attempt.
Bruise tries to roll over but Sagaki keeps him under control.
Sagaki trying to pass the guard but Bruise defending well.
Bruise works his way to full guard. Good work.
Sagaki controls the pace of the fight for a moment.

That's two minutes gone in the round.
A lull in the action here being met with boos from the crowd.
Sagaki looking to pass the guard.
Bruise working the defensive guard well to avoid strikes from Sagaki.
Bruise keeping full guard, as Sagaki tries to pass.
Sagaki trying to control the position from guard on top but Bruise is wriggling around, looking for whatever he can.
Sagaki preventing the sweep.
The referee is asking the fighters to pick up the pace.
Sagaki thinks about going for a leg but decides against it, in order to maintain the position.
Sagaki throwing strikes from guard but Bruise blocks nicely.
A real slowdown in the pace of the fight for a moment, as Bruise holds on and takes a little breather.

The ref stands the fighters back up due to a lack of activity.
A low kick from Sagaki misses

and Bruise decides to take the opportunity to score a takedown. He's landed in Sagaki's guard.

That's three minutes gone in the round.
Bruise wants to control from the top but Sagaki keeps moving.
Bruise slows down the pace of the fight, as he sits in guard.
Sagaki looking to control.
Sagaki bucks up whilst keeping hold of a body lock, managing to reverse the position. Now he's in top in Bruise's guard.

Bruise is trying to control the position but Sagaki postures up.
Sagaki is holding a leg here, probably looking for an ankle lock - he drops back and goes for it! Bruise is in trouble! Is it all over??? No! Bruise has escaped and now he's on top!

Sagaki has a loose triangle. He'll be looking to tighten that up but Bruise can see exactly what he's planning and manages to posture up and free himself.

That's four minutes gone in the round.
Bruise controls the pace of the fight for a moment.
Bruise trying to control but Sagaki is working from the bottom.
Sagaki is avoiding any damage by keeping wrist control.
Bruise trying to control but Sagaki is working from the bottom.
The crowd thankful this round is nearly over.
Bruise throwing strikes but missing.
Sagaki working a defensive guard but Bruise passes into half guard.
And thats the end of the round the fighters go back to their corners.
A close round but Dominick Bruise will probably get the nod.
That's time! Back to the action!

Bruise throws a big shot that misses.
Takumi Sagaki seems to be the more aggressive standup fighter in this bout.
Sagaki throws a jab but it's blocked by Bruise.
Sagaki misses with a left hand
and Bruise counters with a shot to the ribs. That looked like it hurt.
Sagaki misses with a low kick.
Bruise will need to tighten up his combinations if he doesn't want to gas himself out, swinging at thin air.
Sagaki shoots in for a takedown. "Ole!" shouts Bruise as he jumps to the side.
It seemed like Bruise was going to counter with the hook but didn't fully commit to it.
Sagaki tries to land a leg kick but Bruise saw it coming and moves away.
It seemed like Bruise was going to counter with the hook but didn't fully commit to it.
Sagaki throws a leg kick
and Bruise counters with a good right hand that lands right on the jaw.
We've had a slow start to the round here - hopefully the action picks up.
Sagaki throws a low kick but his opponent is out of range.
Bruise connects with a lovely right hand, straight down the pipe.

Bruise closes the distance and clinches.
Sagaki has Bruise pressed up against the cage and is working for takedown. Bruise manages to improve position though and keeps the fight standing.
That's one minute gone in the round.
Sagaki wants a takedown but no success here.
That's three failed takedown attempts in the round for Takumi Sagaki. That's going to take a lot out of him.
Sagaki letting Bruise take a breather here.
Sagaki trying to control the position but instead, Bruise has worked for underhooks and has pushed Sagaki into the cage.
Sagaki swings wildly with an uppercut but Bruise uses good head movement to avoid it.
Bruise lands an elbow that stopped Sagaki in his tracks for a moment.
Bruise prevents the takedown attempt.
Sagaki gets a nice trip takedown into half guard.
Bruise trying to control but Sagaki postures up.
Bruise has his hands clasped together around Sagaki's back. He's all about the action.
Bruise is trying to get back to full guard.
That's two minutes gone in the round.
Bruise blocking the ground and pound attempt from Sagaki.
Bruise is working for an escape here. He's hooked one of Sagaki's legs and he's managed to sneak out and take Sagaki's back!
The crowd hopeful of a finish here - Bruise's supporters are on their feet, screaming for him to go for the rear naked choke.
Sagaki tries to roll but Bruise sticks to his back.
Sagaki is trapped and Bruise is scoring with shots to the head and body.
The crowd are loving this. Great action here.
Bruise is throwing strikes from the back here. Oh that last one was to the back of the head. Bruise gets a warning from the referee. He throws another strike to the back of the head straight away though and the referee has seen enough. He breaks up the two fighters and stands them back up. Bruise gets a real talking to here and is lucky not to get a point deducted. Bruise apologises and we restart here on the feet.
Bruise has been the more effective fighter overall so far.
Sagaki moves out of range of the leg kick from Bruise.
Bruise lands with a straight right. Sagaki didn't see that one coming.
Sagaki lands a nice looking body kick.
That's three minutes gone in the round.
Bruise shoots in for a takedown! He's got it and he's managed to land in side control! That's better than Bruise was expecting from the takedown attempt, I'm sure!
Sagaki is looking to reverse the position.
Bruise throws a strike aimed at the side of Sagaki's head but Sagaki avoids it well.
Bruise misses with the ground and pound.
Sagaki tries to get back to half guard but can't.
Bruise working away.
A lull in the action here.
Sagaki is not in a great position here, taking some shots.
That's four minutes gone in the round.
Sagaki tries to improve position but can't.
Sagaki is sneaking out the side here. He's bucked Bruise off and has taken his back!
Bruise is really stuck here.
Sagaki throwing sloppy strikes.
Bruise breaks Sagaki's hooks off and manages to turn into his guard.
This has been an exciting period of action!
Bruise wants to control from the top but Sagaki keeps moving.
Bruise's corner is telling him to maintain position.
Sagaki looking for a sweep. Not yet Sagaki, not yet.
Sagaki had isolated an arm as going for a kimura. Bruise defends it easily.
Bruise trying to control the position from guard on top but Sagaki is wriggling around, looking for whatever he can.
And thats the end of the round the fighters go back to their corners.
Dominick Bruise showed his class in that round. I'd imagine he'll take it on all the scorecards.
That's time! Back to the action! This is the final round!

Sagaki throws a leg kick but Bruise checks it.
Sagaki takes an uppercut right on the button but keeps his composure.
Bruise throws a monster uppercut resembling something out of street fighter but it doesn't land.
Sagaki wants to slow Bruise down by chopping away at his legs.
Bruise tests Sagaki's chin there with a solid looking shot.
Sagaki keeps the fight on the outside.
An inside leg kick from Sagaki misses.
Sagaki misses with a low kick.
Sagaki throws a decent looking leg kick but it doesn't land clean.
We've had a slow start to the round here - hopefully the action picks up.
Left hook, right uppercut from Bruise.
Sagaki avoids the body shot from Bruise.
Sagaki takes a jab right on the kisser.
Bruise swings and misses with a hook to the body.
That's one minute gone in the round.
Sagaki misses with a takedown attempt. He shot from a bit too far out.
Sagaki keeps the fight on the outside.
Sagaki throws an uppercut from half a mile away. Bruise sees it coming and avoids it easily.
Sagaki takes a shot to the nose. Hopefully that hasn't broken it.
Bruise scores with a slapping inside leg kick.
Sagaki tries to score a power double leg takedown but Bruise sees that one coming and sprawls well. That will dishearten Sagaki somewhat.
Sagaki gets a takedown into half guard.
Sagaki working Bruise over with strikes.
Takumi Sagaki has stepped it up - he knows he needs a finish here!
Dominick Bruise is fighting for a decision - hopefully he's judged it right and he's actually winning the fight.
That's two minutes gone in the round.
Sagaki is trying to control the action in half guard but Bruise is working away on the bottom, looking perhaps to get back to full guard.
Bruise wants to control but Sagaki is keeping busy.
Sagaki trying to control the action but Bruise is working from the bottom.
Bruise wants to control but Sagaki is keeping busy.
Bruise is looking to regain full guard. Not this time though.
Sagaki working over Bruise with some ground and pound. Bruise looks like he wants out of this position, which is understandable.
Bruise keeping his head moving to avoid the ground and pound.
Bruise wants to control the action here but instead Sagaki manages to pass to full mount!
That's three minutes gone in the round.
Bruise just holding on.
Sagaki looking to control but Bruise is working nicely, looking to advance position himself.
Sagaki is working for a guillotine from mount but Bruise frees his head quite easily.
Bruise is trying to escape the mount.
Bruise sneaks a leg under to get to half guard.
Sagaki is thwarting Bruise's attempts to control the position.
That's four minutes gone in the round.
Sagaki seems to be taking a bit of a break to think of his next move. He lands a short punch in the meantime.
Bruise tries to roll over but Sagaki keeps him under control.
Sagaki is working for submissions here but there's nothing on.
Bruise is trying to control but can't.
Sagaki prevents Bruise from improving his position.
Bruise is doing well to avoid being mounted. He's controlling the position at the moment.
The crowd thankful this round is nearly over.
Sagaki thows a wild elbow that connects with the canvas.
Bruise has no desire to be mounted, so is trying to control. Sagaki is working away from the top position though.
And that's the end of the fight!
I would just about give that final round to Dominick Bruise.
I've got Bruise winning every round here. Surely the decision will go his way and he'll pick up a well deserved decision victory. Over to the ring announcer for the scorecards.
Ladies and gentlemen, after 3 rounds of action, we go to the scorecards for a decision.
Judge Daniel Franklin scores the fight 28:30
Judge Chris Downing scores the fight 27:30
Judge Gwen Towbar scores the fight 27:30
In favor of your winner, by unanimous decision... Dominick Bruise!
|
|
|
|
|
|
|
|
|
|
|
|
|
|
|
|
|
|
|
|
|
|
|
| S |
C
A |
G |
S |
C
B |
G |
|
S |
C |
G |
|
energy
A | B |
|
hype
A | B |
|
pop
A | B |
|
mgr
A | B |
|
FIGHT
RATING
38% |
|
|
|
|
|
|
