|
|
PBP Commentary |
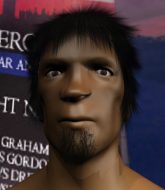
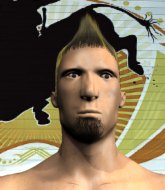
Coming up we have a middleweight MMA rules bout between Reece Foy (ranked 3016 p4p, 5122 weight class) and Juro Fujimoto (ranked 358 p4p, 509 weight class). Juro Fujimoto is the more experienced fighter, so let's see if that makes a difference tonight.
 |
|
 |
| 175 cm
24
175
2 - 0 - 0 |
|
220 cm
23
183
0 - 2 - 0 |
BJJ Blue Belt
Counter fighter
Self confident |
|
BJJ White Belt
Brawler
Enjoys gardening |
|
| |
|
Ladies and gentlemen. This fight is 3 rounds, in the middleweight division.
Introducing the fighter to my left, fighting out of the red corner.
With a record of 2 - 0 - 0, fighting out of London, Reece Foy!
And introducing the fighter to my right, fighting out of the blue corner.
With a record of 0 - 2 - 0, fighting out of New York, Juro Fujimoto!
The judges for this bout are Russell Pearce, John Kavanagh and Columbo Gatti.

The bell rings for round one and we are underway!
The bell rings for round one and we are underway!

Fujimoto instigates a clinch.
Fujimoto misses the knee to the body. Nice hip positioning from Foy.
Foy definitely looks more muscular than last time we saw him fight.
Fujimoto taking a breather.

Foy gets a trip takedown into half guard.
Foy is trying to control the action in half guard but Fujimoto is working away on the bottom, looking perhaps to get back to full guard.
Fujimoto keeping hold of Foy's head, controlling as best he can.
Fujimoto is looking to control Foy's leg but it's slowly edging free. Can Fujimoto avoid being mounted?
We've had a slow start to the round here - hopefully the action picks up.

Foy is looking for a kimura. It's going to be difficult to finish that from half guard though and Fujimoto defends it well.
Foy seems to be looking for submissions.

That's one minute gone in the round.
Fujimoto blocking the ground and pound attempt from Foy.
Foy not landing any meaningful shots this time.
Foy throwing shots but Fujimoto is blocking nicely.
The fighters are pressed up against the cage, both looking to find a bit of space to work.
The referee calls for the fighters to work.
Foy is trying to work for a kimura but Fujimoto is defending well.
Fujimoto looks like he's trying to stand up.
Foy seems to be looking for submissions.

That's two minutes gone in the round.
The crowd are starting to boo a lack of action.
Foy lands strikes from half guard.
Foy seems to be working for a kimura but Fujimoto defends the submission attempt.
Foy thows a huge punch but Fujimoto dodges it nicely.
Foy is looking for a kimura but he's never going to get it from there.
Foy is trying to work for a kimura. This could be trouble! No, Fujimoto has managed to free his arm - good work.
Foy throwing punches and elbows but they're not doing any damage.
Fujimoto really doesn't want to stay on the ground with Foy. If he can't get it back to his feet, it's only a matter of time before he'll be tapping out.

That's three minutes gone in the round.

Fujimoto kicks off Foy and gets to his feet.
Foy fails miserably with a takedown attempt.
Fujimoto has managed to clinch.
Fujimoto looks more muscular than last time we saw him. He must have been on the weights.
Fujimoto tries to land knees in the clinch but Foy avoids the damage to the body.
Fujimoto tries to land a knee to the body but he is off balance and Foy avoids it.
Foy will no doubt start fighting again in a minute but for now he's just having a little rest, leaning Fujimoto up against the cage.
Foy on the defensive, avoiding the knees to the body.
Fujimoto with the Thai clinch. He's looking to land a big knee but he's not managed it this time.

That's four minutes gone in the round.
Foy has Fujimoto pressed up against the cage and is working for takedown. Fujimoto manages to improve position though and keeps the fight standing.
Fujimoto with an attempt at a knee that misses.
Fujimoto tries to throw a body punch but Foy avoids it by throwing Fujimoto back against the cage.
Fujimoto goes for a body shot but it's blocked.
Foy drops to a knee looking for a takedown but Fujimoto gets the underhooks and prevents it.
That's three failed takedown attempts in the round for Reece Foy. That's going to take a lot out of him.
Foy avoiding damage as Fujimoto throws knees to the body.
Foy managing to block the knees to the body from Fujimoto.
The crowd thankful this round is nearly over.
Foy is trying to work for a single leg takedown but Fujimoto pulls him back up using the underhooks.
Fujimoto stalling.
Fujimoto is pressed up against the cage. Foy has hold of a leg and is looking to drag Fujimoto down to the mat. Fujimoto avoids the attempt though and has circled away. We're back to striking at a distance.
And thats the end of the round the fighters go back to their corners.
A close round but Juro Fujimoto will probably get the nod.
That's the end of the round. The referee orders the cornermen out of the cage so we can get back down to business.

Fujimoto has taken the fight to the clinch.
Foy's corner are urging him to control the action in the clinch for a moment, rather than mount any serious offense. I'm sure the crowd appreciate those instructions... not.
Foy is trying to force a seperation but Fujimoto has the dominant position.
Fujimoto tries a knee to the head but he's missed.
Fujimoto tries to land knees in the clinch but Foy avoids the damage to the body.

Fujimoto breaks the clinch and we're back to striking at distance.
Fujimoto is a painfully thin specimen of a man. You do wonder whether a good body kick would snap him clean in two.
Fujimoto tries to close the distance and clinch but Foy swats him to one side with an open hand palm strike and circles away.
We've had a slow start to the round here - hopefully the action picks up.
Fujimoto tries to clinch but Foy is having none of it.
Fujimoto tries to clinch but Foy is having none of it.
As Fujimoto tries to get set, Foy tries to push him back and clinch up but Fujimoto manages to avoid the attempt.
Fujimoto is looking to clinch but Foy is avoiding it.
Fujimoto fails with an attempt to clinch.
Fujimoto tries to clinch but Foy moves out of range.
Foy wants to take advantage of his opponent's missed offense by moving into the clinch.
That's one minute gone in the round.
Foy swats away the attempt to clinch by Fujimoto.
Foy is trying to close the distance and clinch up, after that failed offence from Fujimoto.
Foy circles away from the clinch attempt.
Foy was looking to counter that last move with a shot to the body but he didn't commit.
Fujimoto tries to close the distance and clinch up against the cage but Foy paws at him with a jab and circles away.
Foy shoots in but Fujimoto avoids the takedown attempt easily.
Foy avoids the clinch attempt nicely.
Foy seemed to be looking to counter by closing the distance.
Foy looks frustrated there after his takedown attempt is stuffed easily.
Fujimoto rushes Foy and pushes him back against the cage in a clinch.
Foy is looking to break free of the clinch but Fujimoto has double underhooks.
Foy is looking to break free of the clinch but Fujimoto has double underhooks.
Fujimoto breaks the clinch.
That's two minutes gone in the round.
Foy avoids the clinch attempt nicely.
Foy seem to be loading up, looking for a big counter.
The fight stays on the outside here - Fujimoto looks like he's thinking about clinching though.
Fujimoto tries to clinch there but Foy circles away.
Fujimoto has taken the fight to the clinch.
Fujimoto looking to throw knees to the head but Foy is blocking nicely.
Foy is trying to break the clinch but Fujimoto has him pressed against the cage.
Fujimoto trying to land knees to the body.
Fujimoto landing knees to the body.
A bit of stalling here from Foy.
Fujimoto landing some nice looking knees to the body.
Foy has picked Fujimoto up - he's going for a ride! Foy dumps his opponent to the mat with a thud and settles into half guard.
Fujimoto pushes Foy off and gets back to his feet.
That's three minutes gone in the round.
Fujimoto shoots in for a takedown but Foy shows good takedown defense.
Fujimoto moves in looking to clinch but Foy pushes him off.
Foy shoots in for a takedown but doesn't get it.
That's three failed takedown attempts in the round for Reece Foy. That's going to take a lot out of him.
Both fighters are absolutely exhausted here.
Fujimoto wants to clinch.
Fujimoto moves in looking to clinch but Foy pushes him off.
Foy is looking to counter the offense by Fujimoto and move into the clinch.
Fujimoto tries to clinch but is not successful on this occasion.
Foy avoids the clinch attempt nicely.
Fujimoto tries to clinch there but Foy circles away.
Fujimoto clinches up with Foy and pushes him back against the cage.
Fujimoto keeps control of Foy as he tries to wriggle out of the double underhooks.
Fujimoto has been the more effective fighter overall so far.
Fujimoto holding his opponent close, against the cage.
Foy works for the underhooks and manages to get a trip takedown into guard.
That's four minutes gone in the round.
Foy trying to land body shots but he keeps hitting the mat.
Foy stops Fujimoto from standing up.
Foy drops back looking for a leg! Fujimoto is in trouble here! The fighters roll with the hold and Fujimoto manages to kick Foy off! Foy jumps back into Fujimoto's guard.
Foy cracks Fujimoto with a solid left hand.
Foy postures up as if he's going to throw some strikes but drops back for an ankle! Fujimoto is in big trouble! He looks ready to tap! But no, he's escaped and dives on top of Foy, into his guard.

We've seen a great period of action over the last minute or so - credit to both fighters for going all out!
Foy is trying to stand up but he's not managed so far.
And thats the end of the round the fighters go back to their corners.
Juro Fujimoto showed his class in that round. I'd imagine he'll take it on all the scorecards.
The fighters' corners scream their final instructions, as the referee calls time. Here we go, back to the action! This is the final round!

Fujimoto is looking to clinch.
Fujimoto stuffs the takedown.
Fujimoto moves into the clinch.
Fujimoto's corner calls for him to break the clinch, which he does.
Fujimoto gets to the clinch - let's see what his plan is here.
Foy lands a takedown into guard.
Fujimoto manages to wriggle out and sneak his way back up to his feet, so the fighters are now clinched up against the cage.
Foy goes for a takedown in the clinch but Fujimoto prevents it.
Fujimoto misses with a knee strike.
Juro Fujimoto seems to be working more effectively in the clinch in the fight so far.
This is a great period of action - very entertaining stuff!
Foy is trying to drag Fujimoto to the mat but Fujimoto just about manages to keep his footing. He used the cage to his advantage there.
That's three failed takedown attempts in the round for Reece Foy. That's going to take a lot out of him.
Foy is trying to work out of this bad position, with his back against the cage.
That's one minute gone in the round.
Fujimoto pushes off and circles away, back to the middle of the mat.
Fujimoto tries to close the distance and clinch up against the cage but Foy paws at him with a jab and circles away.
Foy shoots in for a takedown - he's clinched up with Fujimoto but Fujimoto pushes him off and we're back to square one.
Fujimoto is looking to take this fight into the clinch.
Foy is trying to close the distance and clinch up, after that failed offence from Fujimoto.
Foy closes the distance and looks for a trip takedown... aaaand he's got it - Foy lands in his opponent's guard.

Foy gets to his feet - Fujimoto follows without any prompting.
Juro Fujimoto seems to be the more aggressive standup fighter in this bout.
Foy swats away the attempt to clinch by Fujimoto.
Foy half commits to a counter takedown before pushing away, out of range.
Juro Fujimoto is fighting for a decision - hopefully he's judged it right and he's actually winning the fight.
That's two minutes gone in the round.
Fujimoto tries to close the distance and clinch up but Foy swats him away and circles back towards the center.
Foy drops down looking for a counter takedown but Fujimoto sprawls and moves away.
Fujimoto moves into range and clinches up with Foy.
Fujimoto tried to land a shot to the body but connects with Foy's elbow.
Fujimoto scores with a knee to the head.
Fujimoto looking to throw knees to the head but Foy is blocking nicely.
Fujimoto prevents the takedown attempt.
Fujimoto with the Thai clinch. He's looking to land a big knee but he's not managed it this time.
Foy blocks a knee to the body. He'll have a nicely bruised forearm in the morning.
Foy blocks a knee to the body. He'll have a nicely bruised forearm in the morning.
Foy wants to take the fight to the mat but Fujimoto manages to get underhooks and keep the fight in the clinch.
That's three minutes gone in the round.
Foy wants to break free but Fujimoto has control.
Foy avoiding damage as Fujimoto throws knees to the body.
Fujimoto looking to throw knees to the head but Foy is blocking nicely.
Fujimoto prevents a body shot from Foy.
Foy is working on a leg, looking for a takedown but Fujimoto is defending well.
Foy tries to circle away but Fujimoto has him pinned against the cage.
Fujimoto is pressed up against the cage. Foy has hold of a leg and is looking to drag Fujimoto down to the mat. Fujimoto avoids the attempt though and has circled away. We're back to striking at a distance.
Both fighters are breathing heavily.

Fujimoto scores a trip takedown into side control. Nice.
Foy is trying to get back to half guard.

Fujimoto stands up and we're back to a striking position.
That's four minutes gone in the round.
Fujimoto rushes Foy and presses him up against the cage.
Foy tries to score a body lock takedown but Fujimoto shows good agility there to stay on his feet.
Foy manages to pull guard.
Fujimoto stands and steps away. Foy gets to his feet too and we're back to the striking game.
Fujimoto doesn't manage to clinch there - Foy circles away.
Fujimoto rushes Foy and pushes him back against the cage in a clinch.
Reece Foy has stepped it up - he knows he needs a finish here!
Foy is trying to stall.
Foy changes levels and goes for a takedown here. Fujimoto fights it off and pushes away nicely.
And that's the end of the fight!
Juro Fujimoto comfortably won the final round on my scorecard.
I've got Fujimoto winning every round here. Surely the decision will go his way and he'll pick up a well deserved decision victory. Over to the ring announcer for the scorecards.
Ladies and gentlemen, after 3 rounds of action, we go to the scorecards for a decision.
Judge Russell Pearce scores the fight 27:30
Judge John Kavanagh scores the fight 27:30
Judge Columbo Gatti scores the fight 27:30
In favor of your winner, by unanimous decision... Juro Fujimoto!
|
|
|
|
|
|
|
|
|
|
|
|
|
|
|
|
|
|
|
|
|
|
|
| S |
C
A |
G |
S |
C
B |
G |
|
S |
C |
G |
|
energy
A | B |
|
hype
A | B |
|
pop
A | B |
|
mgr
A | B |
|
FIGHT
RATING
39% |
|
|
|
|
|
|

