|
|
PBP Commentary |
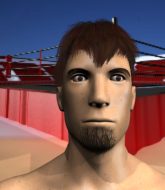
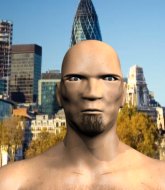
Coming up we have a featherweight MMA rules bout between Hiki Antsa (ranked 2189 p4p, 6868 weight class) and Max Holliday (ranked 234 p4p, 503 weight class). Hiki Antsa has the edge in experience - let's see if he can make that count tonight.
 |
|
 |
| 173 cm
20
152
2 - 1 - 0 |
|
181 cm
18
154
0 - 0 - 0 |
Good wrestling
Basic striking
Cardio machine |
|
BJJ White Belt
Excellent MT
Heavy handed |
|
| |
|
Ladies and gentlemen. This fight is 3 rounds, in the featherweight division.
Introducing the fighter to my left, fighting out of the red corner.
With a record of 2 - 1 - 0, fighting out of Helsinki, Hiki Antsa!
And introducing the fighter to my right, fighting out of the blue corner.
With a record of 0 - 0 - 0, fighting out of Amsterdam, Max Holliday!
The judges for this bout are Ben Hemmingworth, Darius Henderson and Chris Dean.

The bell rings for round one and we are underway!
The bell rings for round one and we are underway!
Holliday tries to close the distance and clinch up but Antsa swats him away and circles back towards the center.
Holliday takes a jab on the nose there. A little bit of blood seems to be coming out. Hopefully that won't affect his breathing.
Holliday leaves Antsa with his face pressed against the mat as he sprawls beautifully, defending against a solid takedown attempt.
Antsa jabbing away but nothing is landing.
Holliday displaying good standup as he scores with a three punch combination.
Holliday lands a body shot.
Holliday scores with a three punch combo!
Holliday throws a jab to the body, straight down the pipe. Boom. That sent Antsa stumbling backwards but he manages to regain his composure quickly.
Antsa shoots in for a takedown but Holliday shows good takedown defense.
Hiki Antsa seems to be the more aggressive standup fighter in this bout.
Holliday tests Antsa's chin there with a solid looking shot.
This is a great period of action - very entertaining stuff!
Holliday ducks under a wild hook from Antsa.
Holliday scores with a nice one two combo and darts back out of range to avoid anything coming in the opposite direction.
A decent looking cross lands there for Holliday.
Holliday jabs. That one connects to the head of his opponent.
Antsa gets cracked there but stands up to it.
Holliday tries to close the distance and clinch but Antsa swats him to one side with an open hand palm strike and circles away.
Holliday throws a shot to the body.

That's one minute gone in the round.
Holliday fakes a head punch and goes low to the body. Nicely done.
Holliday uses good footwork to avoid the strikes from Antsa.
Holliday wings a very wild body shot but it does the job and lands to the midsection.
Antsa closes this distance looking for a takedown but Holliday circles away.
That's three failed takedown attempts in the round for Hiki Antsa. That's going to take a lot out of him.
Holliday closes the distance but Antsa moves to the side

and Antsa counters with a shoot takedown into half guard.
The ref warns both fighters not to hold the cage as they work up against the meshing.
Antsa working the head and body with strikes.
Holliday trying to control but Antsa postures up.
Antsa working over Holliday with some ground and pound. Holliday looks like he wants out of this position, which is understandable.
We get told so often about how wrestlers don't like to be on their backs. Let's see if Holliday can do anything to dispel that myth.
Holliday tries to regain full guard. Instead though, Antsa has advanced to mount. Uh oh.
Antsa raining down shots from the mount!

That's two minutes gone in the round.
The fans in attendance giving it up for the two fighters, who have really let it all hang out in the last minute or so!

Antsa is working for a guillotine from mount but Holliday frees his head quite easily.
Antsa jumps to side control looking for an arm triangle but Holliday manages to avoid the submission attempt.
Antsa in side control, just content to control the action for now.
Holliday tries to get back to half guard but can't.

That's three minutes gone in the round.
Antsa controlling the position from side mount.
Holliday on the wrong end of some ground and pound.
Antsa is working Holliday over with some ground and pound from side control.
Antsa creates a bit of distance and throws down some hard shots.
Holliday is not in a great position here, taking some shots.
Holliday can't do much from the bottom here.
Antsa is looking to take a break and control but Holliday is keeping him honest, looking to work from the bottom.
Antsa remains in side control and seems content to stay there. It's a versatile position from which he can work both strikes and submissions, whilst maintaining that control, so maybe he'll sit here for a while.

That's four minutes gone in the round.
Antsa lands a decent elbow from side control.
You can see the frustration on Holliday's face, being in this tough position on the bottom.
Antsa advances to mount.
Antsa looking to control but Holliday is working nicely, looking to advance position himself.
Holliday takes a big shot to the head but keeps on trying to improve his position.
Holliday can't escape the position.
Antsa controlling the pace for now.
Holliday is squirming around, avoiding Antsa's attempts to control the action.
And thats the end of the round the fighters go back to their corners.
That was a close round but I would say that Hiki Antsa will probably get the nod.
That's the end of the interval. I'm sure that seemed a lot quicker than a minute for our two fighters! Back to the action.

Holliday scores with a hook to the body. Antsa takes a step back and tries to catch his breath.
A telegraphed right hand from Antsa misses the target.
Max Holliday seems to be getting the better of the standup.
Antsa misses the shot to the body.
Holliday throws out a powerful jab.
Left hook, right uppercut from Holliday.
Holliday avoids the body shot from Antsa.
Holliday is throwing a lot of body shots here, looking to wear down Antsa rather than just go for the knockout.
Holliday turns his hip over beautifully as he lands a nice leg kick.
Antsa misses with a straight left.
Antsa sets himself, and Holliday steps forward looking for the clinch! Antsa avoids it this time.
A low kick lands for Holliday.
Holliday moves into range and lands a nice body kick.
Holliday tries to clinch there but Antsa circles away.
Holliday feints a jab promting Antsa to slip. Holliday then demonstrates his capabilities by jabbing again. Antsa slips again and ducks right into an uppercut.
Wooooo! Give it up for these two warriors! They are putting on a show!
Antsa pushing out the jab but it's not landing.
Antsa swings widly with a right hand
and Holliday counters with a nice jab to the body that keeps Antsa thinking.
Holliday uses some good footwork to avoid the body shot by Antsa.
Antsa is looking for a takedown here. He's shot in and has managed to get it, finishing up in Holliday's half guard.
Antsa drops an elbow to the side of Holliday's head.
Antsa has been looking to land a fair amount of strikes on the ground. He might be looking to soften his opponent up in order to work for a submission.
That's one minute gone in the round.
Antsa working the head and body with strikes.
Holliday really doesn't want to stay on the ground with Antsa. If he can't get it back to his feet, it's only a matter of time before he'll be tapping out.
Holliday has hold of Antsa's hands but Antsa slips his arm to the side and lands an elbow.
Holliday taking some punishment here, with Antsa in his half guard.
Ground and pound from Antsa.
Holliday trying to hold on to Antsa's head to control him but Antsa postures up.
Holliday trying to control here but he's found himself mounted! Oh no!
Holliday is in a horrible position here. Antsa smacks him with another shot as he tries to escape the position.
Holliday wants to hold on but Antsa pushes him away.
Antsa unloading with bombs!
That's two minutes gone in the round.
Antsa lands with some strikes.
The referee warns Holliday that he has to improve his position here as he takes two more clean shots to the head.
Wooooo! Give it up for these two warriors! They are putting on a show!
Antsa pausing momentarily but resumes with a couple of decent strikes that do a bit of damage.

Holliday is rocked!
Antsa unloads with some vicious shots from mount and Holliday wants out - he looks towards the referee who steps in to save him! Antsa celebrates on the cage and the crowd goes wild!
Ladies and gentlemen, after 2:36 of round 2, we have a winner by way of TKO (Strikes). Hiki Antsa!
Hiki Antsa decided to go for the less than humble approach in his post fight interview, telling everyone how he is going to conquer the world. The crowd seemed to like it when really that sort of approach could have gone either way.
|
|
|
|
|
|
|
|
|
|
|
|
|
|
|
|
|
|
|
|
|
|
|
| S |
C
A |
G |
S |
C
B |
G |
|
S |
C |
G |
|
energy
A | B |
|
hype
A | B |
|
pop
A | B |
|
mgr
A | B |
|
FIGHT
RATING
64% |
|
|
|
|
|
|

