|
|
PBP Commentary |
Coming up we have a middleweight MMA rules bout between Tyler Killsbrough (ranked 0 p4p, 0 weight class) and Camron Heyward (ranked 0 p4p, 0 weight class). I'm sure you'll be fascinated to know that I was talking to some pointless Z list celebrity before the fight and he thought that Camron Heyward was going to win. Let's see if he was right.
 |
|
 |
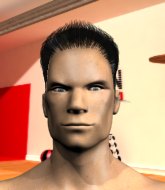
| 182 cm
20
192 lbs
1 - 1 - 0 |
|
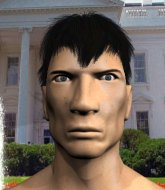
184 cm
22
194 lbs
1 - 0 - 0 |
BJJ Blue Belt
Brawler
Granite chin |
|
Decent wrestler
Counter striker
Powerful |
|
| |
|
Ladies and gentlemen. This fight is 5 rounds, for the middleweight championship of the world!
Introducing the champion to my left, fighting out of the red corner.
With a record of
1 - 1 - 0, fighting out of Las Vegas, Tyler Killsbrough!
And introducing the challenger to my right, fighting out of the blue corner.
With a record of
1 - 0 - 0, fighting out of Las Vegas, Camron Heyward!
The judges for this bout are Robert Twigg, Tiny Johnson and Wesley Smith.

The bell rings for round one and we are underway!
Killsbrough shoots in for a takedown - he's clinched up with Heyward but Heyward pushes him off and we're back to square one.
Heyward lands a jab to the head.

It looks like Tyler Killsbrough has been cut.
Killsbrough misses with a jab, cross combination.

Heyward rushes Killsbrough and presses him up against the cage.
Heyward tries a knee to the head but he's missed.
Killsbrough wants to strike at distance but he can't break free of the clinch.
Heyward misses with a knee to the head.
Killsbrough being controlled against the cage.
Killsbrough wants to break free. God knows he wants to breaaaak freeee.
Both guys are working to get underhooks.

Killsbrough manages to break the clinch.
Decent striking displayed by Killsbrough there.
Killsbrough showing good head movement there, avoiding the strikes from Heyward.
Killsbrough swings and misses with a hook to the body.
Killsbrough throws a head kick that misses.
Killsbrough looks to clinch

and Heyward counters with a shoot takedown into half guard.

That's one minute gone in the round.
Killsbrough has no desire to be mounted, so is trying to control. Heyward is working away from the top position though.
The ref warns both fighters not to hold the cage as they work up against the meshing.
Killsbrough is trying to stand back up but Heyward is controlling him
Heyward not landing any meaningful shots this time.
Heyward is nestled in close to Killsbrough, controlling him well. He's worked in a nice elbow to the side of the head as well, for good measure.
Killsbrough wants to get back to his feet.
Heyward is thwarting Killsbrough's attempts to control the position.
Killsbrough is looking to escape.
Killsbrough blocking the ground and pound attempt from Heyward.
Heyward perhaps working for something from half guard, or maybe not. It looks like he's just sitting there.

That's two minutes gone in the round.
There's not a lot going on here and the crowd are letting the fighters know they're not willing to tolerate a lack of action.
Heyward thows a huge punch but Killsbrough dodges it nicely.
Heyward missing with the ground and pound from half guard.
Heyward content to control rather than advance.

The referee decides to stand the fighters back up.
Heyward misses with a double jab
and Killsbrough counters with a straight right hand.
Killsbrough closes the distance looking to clinch
and Heyward counters by moving into the clinch. Good anticipation by Heyward.
Heyward controlling the action here for a moment.
Killsbrough with a knee to the head.
Killsbrough is trying to work out of this bad position, with his back against the cage.
Killsbrough misses the knee to the body. Nice hip positioning from Heyward.
Killsbrough wants to break the clinch but can't.
Heyward tries a knee to the head but Killsbrough blocks it.

That's three minutes gone in the round.
Killsbrough has had enough of the clinch but Heyward keeps him there for the moment.
Killsbrough wants to break free but Heyward has control.
Heyward trying to land knees to the body.
Heyward manages to get underhooks and slows down the pace for a moment.
Knees to the body from Killsbrough.
Heyward keeps control of Killsbrough as he tries to wriggle out of the double underhooks.
Killsbrough managing to block the knees to the body from Heyward.
Heyward has Killsbrough pushed against the cage.
Heyward with the Thai clinch. He's looking to land a big knee but he's not managed it this time.
Both fighters working to control the clinch.
Heyward looks gassed!
Killsbrough being controlled against the cage.
Knees to the body from Heyward.
Heyward prevents Killsbrough from breaking the clinch.
Heyward slowing the pace effectively.
Heyward tries to land a knee to the head but Killsbrough blocks with his arms.
Killsbrough scores a nice knee to the body.

That's four minutes gone in the round.
Killsbrough is trying to break the clinch but Heyward has him pressed against the cage.
Killsbrough tries to break the clinch but Heyward is controlling the position.
Killsbrough unloads a knee to the mid-section. Heyward lets out a prehistoric sounding urrrrgh.
Both fighters working to control the clinch.
Killsbrough's corner calls for him to break the clinch, which he does.
Killsbrough lands with a thumping leg kick.
Left hook, right uppercut from Killsbrough.
It looks like Camron Heyward has been cut.
Heyward takes a push kick to the midsection and stumbles backwards.
This has been an exciting period of action!
Killsbrough connects with a lovely right hand, straight down the pipe.
Killsbrough throws a head kick that looked like it stung.
Killsbrough fails to land with the punch combination there - jab, cross, hook, miss, miss, miss.
As the round comes to an end the crowd are showing their appreciation for a great round of action.
Killsbrough's corner calls for a 1,2 combination and Killsbrough duly obliges.
Killsbrough throws a right and a left that Heyward avoids nicely.
Killsbrough doesn't manage to clinch there - Heyward circles away.
And thats the end of the round the fighters go back to their corners.
That was a close round but I would say that Tyler Killsbrough will probably get the nod.
Both fighters have cut men working on them during the interval.
That's the end of the interval. I'm sure that seemed a lot quicker than a minute for our two fighters! Back to the action.

Killsbrough misses with a two punch combination.
Heyward takes a nice looking leg kick right on the meat of his thigh there.
Heyward fakes high and swings low for a body shot but Killsbrough manages to avoid it.
Heyward moves forwards but Killsbrough connects with a nice, crisp jab.
Heyward lands a jab-cross combination.
A punch combination from Killsbrough misses.
Killsbrough darts in trying to clinch
The fighters are starting to get sweaty, which will make takedowns a bit more tricky.
and Heyward counters with a nice uppercut.
Killsbrough throws a good cross that connects.
Killsbrough throws a combination but comes up with nothing but fresh air.
Killsbrough stalks Heyward and leaps in with a furious combination of punches. Uppercuts and crosses smash into Heyward's face. Heyward staggers backwards, shaken.
Heyward scores a trip takedown into side control. Nice.
Both fighters are absolutely exhausted here.
The fans in attendance giving it up for the two fighters, who have really let it all hang out in the last minute or so!
You can see the frustration on Killsbrough's face, being in this tough position on the bottom.
That's one minute gone in the round.
Killsbrough tries to get back to half guard but can't.
Killsbrough is working hard to escape and get back to his feet. After a battle for position, Heyward asserts his dominance and retains side control.
Heyward trying to control the action but Killsbrough is working from the bottom.
Killsbrough is pushing Heyward's head away, looking to escape. Heyward manages to hold on to the position though.
That's two minutes gone in the round.
A few boos can be heard. I'm sure they will multiply if the fighters don't pick up the pace.
Heyward sitting in side control, looking to soften his opponent up with elbows and hammerfists but Killsbrough is avoiding damage well and looking to escape the position.
Killsbrough is not content to let Heyward control the position.
Heyward prevents Killsbrough from escaping the position.
The referee decides to stand the fighters back up.
Killsbrough has his takedown stuffed
and Heyward counters with a nice double leg into side control. Killsbrough won't be happy with that.
Killsbrough is trying to control Heyward's posture but Heyward avoids it.
Killsbrough is moving his hips around well on the bottom and has managed to get back to half guard.
That's three minutes gone in the round.
Heyward is trying to control the action in half guard but Killsbrough is working away on the bottom, looking perhaps to get back to full guard.
Killsbrough is looking to improve his position.
Heyward is thwarting Killsbrough's attempts to control the position.
Heyward missing with the ground and pound from half guard.
Heyward controlling the pace.
Heyward drops an elbow to the side of Killsbrough's head.
That's four minutes gone in the round.
There's not a lot going on here and the crowd are letting the fighters know they're not willing to tolerate a lack of action.
Still in half guard, Heyward seems content to control.
Heyward has the superior BJJ but he's also working some ground strikes into his gameplan.
Heyward is nestled in close to Killsbrough, controlling him well. He's worked in a nice elbow to the side of the head as well, for good measure.
Heyward thows a wild elbow that connects with the canvas.
Killsbrough wants to get back to his feet.
Heyward wants to take a breather but Killsbrough is having none of it.
And thats the end of the round the fighters go back to their corners.
Camron Heyward showed his class in that round. I'd imagine he'll take it on all the scorecards.
Both fighters have cut men working on them during the interval.
The referee calls time. The cornermen exit stage left and we're back to business.

Killsbrough misses with a jab and misses with a cross straight after too.
Heyward swings wildly with a right hand that was never going to find it's target.
Tyler Killsbrough is looking to throw some combinations by the looks of things.
A combination from Killsbrough does no damage.
Heyward misses with a jab and misses with a cross straight after too.
Tyler Killsbrough seems to be the more aggressive standup fighter in this bout.
Killsbrough displaying good standup as he scores with a three punch combination.
A combination from Killsbrough does no damage.
Heyward wants to clinch up but Killsbrough keeps it at a distance.
Killsbrough misses with a two punch combination.
Killsbrough lands a straight punch to the body, keeping Heyward at a distance.
Killsbrough fails to land with the punch combination there - jab, cross, hook, miss, miss, miss.
Killsbrough tries to keep at a distance but Heyward has taken the fight into the clinch.
Killsbrough wants to break the clinch but can't.
Both fighters are breathing heavily.
Killsbrough wants to push off and get back to the center of the mat but Heyward has him pressed against the cage.
Heyward prevents Killsbrough from breaking the clinch.
That's one minute gone in the round.
Heyward trying to land knees to the body.
Killsbrough avoiding damage as Heyward throws knees to the body.
Heyward leaning his opponent against the cage.
Heyward with an attempt at a knee that misses.
Heyward slowing the pace effectively.
Killsbrough is trying to break the clinch but Heyward has him pressed against the cage.
Heyward keeps control of Killsbrough as he tries to wriggle out of the double underhooks.
Killsbrough tries to break the clinch but Heyward is controlling the position.
Killsbrough wants to get back to striking at distance but Heyward won't allow it.
Killsbrough is trying to break the clinch but Heyward has him pressed against the cage.
Killsbrough can't break the clinch.
Heyward keeps control of Killsbrough as he tries to wriggle out of the double underhooks.
Heyward stalling.
Killsbrough wants to break the clinch but can't.
Killsbrough is trying to break the clinch but Heyward has him pressed against the cage.
Killsbrough misses with a knee strike.
Heyward misses with a knee strike.
That's two minutes gone in the round.
The crowd are hurling abuse towards the fighters... You can hardly blame them though because there isn't a lot going on in the fight.
Killsbrough wants to break the clinch but can't.
Killsbrough wants to get back to striking at distance but Heyward won't allow it.
Killsbrough wants to break free but Heyward has control.
Heyward holding his opponent close, against the cage.
Killsbrough is trying to break the clinch but Heyward has him pressed against the cage.
Killsbrough tries to break the clinch but Heyward is controlling the position.
Heyward stalling in the clinch.
Killsbrough managing to block the knees to the body from Heyward.
Heyward keeps control of Killsbrough as he tries to wriggle out of the double underhooks.
Heyward prevents a takedown attempt there.
Killsbrough wants to get back to striking at distance but Heyward won't allow it.
Heyward is struggling to control the position.
Killsbrough on the defensive, avoiding the knees to the body.
Heyward avoiding damage.
Heyward misses with a knee strike.
That's three minutes gone in the round.
Killsbrough wants to push off and get back to the center of the mat but Heyward has him pressed against the cage.
Heyward is struggling to control the position.
Killsbrough is trying to break the clinch but Heyward has him pressed against the cage.
Knees to the body from Killsbrough.
Killsbrough on the defensive, avoiding the knees to the body.
Killsbrough manages to pull guard. Let's see whether he can land a sub off his back.
Killsbrough is looking to get back to his feet but can't, whilst Heyward is controlling him.
Killsbrough keeping moving, preventing Heyward from controlling successfully.
Killsbrough trying to keep a closed guard but Heyward is proving a slippery customer.
Killsbrough preventing the ground and pound from doing any damage.
That's four minutes gone in the round.
The crowd are getting on the fighters' backs, as the pace has dropped off in the last minute or so.
Heyward throwing shots from guard but he's hitting more mat than opponent.
Killsbrough avoiding any damage from the ground and pound.

Killsbrough is looking for a triangle but Heyward pushes his legs off easily.
Neither fighter is doing enough for the referee's liking and he's decided to stand them back up.
Killsbrough bobs and weaves and throws out a fast jab that snaps Heyward's head backwards.
Killsbrough lands with an overhand left.
Killsbrough throws a series of punches but Heyward moves out of range.
The crowd thankful this round is nearly over.
Heyward is looking to clinch but Killsbrough is avoiding it.
Heyward closes the distance and takes a jab right on the nose as he does so.
Killsbrough tries to clinch up.
And thats the end of the round the fighters go back to their corners.
Tyler Killsbrough clearly takes that round.
Both fighters have cut men working on them during the interval.
The minute break is over - no more time for sponges and pep talks - back to the action!

Killsbrough swings wildly with a couple of big hooks
and Heyward counters with a crisp hook to the side of the head.
Killsbrough misses with a jab and misses with a cross straight after too.
Heyward has managed to clinch.
Heyward throws a vicious knee straight up the middle but Killsbrough blocks it with crossed arms.
Heyward misses with a knee to the head.
Heyward just leaning against Killsbrough, taking a breather.
Killsbrough wants to push off and get back to the center of the mat but Heyward has him pressed against the cage.
Killsbrough manages to break the clinch.
Killsbrough misses with a few strikes there.
Killsbrough throws a combination. Heyward tries to block but a couple of punches get through.
Killsbrough shoots in for a takedown but doesn't get it.
Heyward misses with an uppercut.
Heyward lands a jab to the head.
Killsbrough misses with a takedown
and Heyward counters with a quick right hand to the jaw.
That's one minute gone in the round.
Heyward connects with a looping right hand.
It's got to the stage where if one of these guys blows hard enough, the other might fall over.
Heyward has managed to clinch.
Heyward slows down the pace here.
Heyward prevents Killsbrough from breaking the clinch.
Killsbrough wants to push off and get back to the center of the mat but Heyward has him pressed against the cage.
Killsbrough wants to get back to striking at distance but Heyward won't allow it.
Heyward with an attempt at a knee that misses.
Killsbrough is looking to break free of the clinch but Heyward has double underhooks.
Heyward trying to land knees to the body.
Heyward has Killsbrough pushed against the cage.
Heyward is trying to slow down the pace in the clinch, to catch his breath.
That's two minutes gone in the round.
The crowd are starting to boo a lack of action.
Killsbrough is looking to break free of the clinch but Heyward has double underhooks.
Killsbrough wants to push off and get back to the center of the mat but Heyward has him pressed against the cage.
Killsbrough wants to break the clinch but can't.
Heyward misses with a knee strike.
Killsbrough wants to strike at distance but he can't break free of the clinch.
Heyward has Killsbrough pushed against the cage.
Heyward keeps control of Killsbrough as he tries to wriggle out of the double underhooks.
Heyward is trying to maintain a safe position but Killsbrough gets an underhook and turns Heyward into the cage.
Killsbrough jumps guard but his hands slip and he falls flat on his back. Well, he's made himself look a right mug there, as Heyward walks away with a smile on his face. Killsbrough gets slowly back to his feet and shakes his head.
That's three failed takedown attempts in the round for Tyler Killsbrough. That's going to take a lot out of him.
A chopping leg kick lands by Killsbrough.
Killsbrough scores with a hook to the body. Heyward takes a step back and tries to catch his breath.
Killsbrough throws a jab, cross combination which is slipped
so Heyward counters with a double leg into guard. Good agility.
The fighters are pressed up against the cage, both looking to find a bit of space to work.
Heyward stopping the sweep attempt from Killsbrough.
That's three minutes gone in the round.
Killsbrough is trying to keep Heyward in close.
Heyward working some ground and pound from guard but it's not doing any damage.
Killsbrough controls Heyward momentarily but Heyward frees himself.
Killsbrough wants to stand but Heyward is controlling the position.
Heyward working some ground and pound from guard but it's not doing any damage.
That's four minutes gone in the round.
Neither fighter has done anything of merit for a good minute or two here and the crowd are not happy about it.
Heyward controlling from the top position.
Heyward is looking to work some ground and pound but Killsbrough has wrist control.
It looks like we're going to have a standup here. Neither fighter is doing enough on the ground.
Heyward is on the wrong end of a nice combination from Killsbrough.
Killsbrough throws a combination but comes up with nothing but fresh air.
Heyward circles away from the clinch attempt.
Heyward throws a hard body shot but it just misses.
Killsbrough misses with a double jab.
Heyward misses with a hook.
And thats the end of the round the fighters go back to their corners.
Camron Heyward dominated that fourth round.
Both fighters have cut men working on them during the interval.
The minute break is over - no more time for sponges and pep talks - back to the action! This is the final round!

Heyward shoots in looking for a takedown. Killsbrough tries to sprawl out of it but Heyward keeps driving through. The fighters are pinned against the cage. Killsbrough manages to get underhooks and after a bit of a struggle, circles away and we're back to standing.
Killsbrough displaying good standup as he scores with a three punch combination.
Heyward closes the distance and looks for a trip takedown... aaaand he's got it - Heyward lands in his opponent's guard.
Killsbrough looking for submissions from the bottom here. Moving his hips around, possibly looking for an armbar.

Killsbrough pushes Heyward off and scrambles back to his feet.
The fighters circle momentarily. Killsbrough darts into range and connects with a nice straight punch.
Both of our modern day gladiators look out of it here - an gruelling 5 rounds of action taking it's toll on them, no doubt.
That's one minute gone in the round.
Heyward fakes with an overhand right and moves in to clinch with Killsbrough, pushing him back against the cage.
Heyward takes a knee right on the jaw!
Killsbrough breaks from the clinch.
Killsbrough throws a shot from downtown. Heyward moves away and avoids it.
Heyward throws a series of punches but Killsbrough moves out of range.
Killsbrough doesn't succeed with the takedown
and Heyward counters with a nice double leg into half guard.
Heyward is looking to take a break and control but Killsbrough is keeping him honest, looking to work from the bottom.
Heyward is pressing down on Killsbrough's thigh, looking to free his foot. Killsbrough is holding on for now.
Killsbrough moves into full guard.
That's two minutes gone in the round.
Heyward stays in close to Killsbrough's body and controls the position.
Killsbrough trying to keep a closed guard but Heyward is proving a slippery customer.
Killsbrough looking to hit a scissor sweep but Heyward is one step ahead there.
Heyward controlling from the guard. I say controlling but really, he's stalling.
That's three minutes gone in the round.
Killsbrough wants to stand and escape but Heyward is having none of it.
Camron Heyward has got the better of the ground game so far.
Killsbrough trying desperately to get back to his feet here but he's not having any joy at all. He's going to tire himself out if he's not careful.
Heyward trying to control the position from guard on top but Killsbrough is wriggling around, looking for whatever he can.
The referee has ruled that neither fighter is active enough on the ground and has stood them back up.
Killsbrough tries to clinch but is not successful on this occasion.
That's four minutes gone in the round.
My god... these two guys really need to pick up the pace or everyone will leave to go get a beer.
Killsbrough will need to tighten up his combinations if he doesn't want to gas himself out, swinging at thin air.
Heyward fails to land with a series of punches.
Killsbrough misses with a double jab
and Heyward counters with a nice jab to the body that keeps Killsbrough thinking.
Heyward shoots in for a takedown and gets it.
Heyward missing with the ground and pound from half guard.
Heyward slips a nice elbow through Killsbrough's hands, connecting with Killsbrough's forehead.
Heyward misses with a head shot. Killsbrough uses the momentum to regain guard.
And that's the end of the fight!
Camron Heyward comfortably won the final round on my scorecard.
I think Heyward has won this one but let's see whether the judges agree with me. Over to the ring announcer for the scorecards.
Ladies and gentlemen, after 5 rounds of action, we go to the scorecards for a decision.
Judge Robert Twigg scores the fight 47:48
Judge Tiny Johnson scores the fight 47:48
Judge Wesley Smith scores the fight 47:48
In favor of your winner, by unanimous decision... Camron Heyward!
Camron Heyward is the new middleweight champion!
|
|
|
|
|
|
|
|
|
|
|
|
|
|
|
|
|
|
|
|
|
|
|
| S |
C
A |
G |
S |
C
B |
G |
|
S |
C |
G |
|
energy
A | B |
|
hype
A | B |
|
pop
A | B |
|
mgr
A | B |
|
FIGHT
RATING
95% |
|
|
|
|
|
|
