|
|
PBP Commentary |
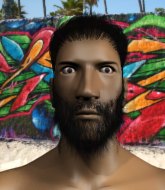
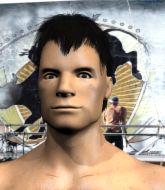
Coming up we have a welterweight MMA rules bout between Solo Rebel (ranked 2976 p4p, 6730 weight class) and Twee Kerr (ranked 0 p4p, 0 weight class). Twee Kerr told me before the fight that he's been watching a lot of DVDs so let's see if that helps him in this one! I can't wait to find out!
 |
|
 |
| 180 cm
24
170
3 - 1 - 0 |
|
168 cm
20
167
0 - 1 - 0 |
Good wrestling
Basic striking
Granite chin |
|
Good takedowns
Counter fighter
Determined |
|
| |
|
Ladies and gentlemen. This fight is 3 rounds, in the welterweight division.
Introducing the fighter to my left, fighting out of the red corner.
With a record of 3 - 1 - 0, fighting out of New York, Solo Rebel!
And introducing the fighter to my right, fighting out of the blue corner.
With a record of 0 - 1 - 0, fighting out of Montreal, Twee Kerr!
The judges for this bout are Gregory Folan, Steve Smith and William Peck.

The bell rings for round one and we are underway!
The bell rings for round one and we are underway!
Rebel stuffs the takedown attempt from Kerr. Kerr gets slowly back to his feet.

Rebel shoots in looking for a single leg takedown. Kerr is trying to defend but Rebel finishes it well and ends up in half guard. Let's see if he can advance position further.
Rebel looks towards his corner to check for any instructions. The corner give him nothing to work with, so he cracks Kerr with a short hammerfist. I guess that's as good as any advice he could get in this position.
Rebel scores with a couple of good hammerfists.
Rebel will need to keep those long limbs tucked in whilst he's on the ground, to prevent any submissions.
Kerr keeping his head moving to avoid the ground and pound.
Kerr is trying to defend against the ground and pound but Rebel scores with a couple of nice shots.
Kerr works his way to full guard. Good work.
Rebel working some strikes from top position.
There's a bit of a scramble here and now Kerr is on top in guard.

Fantastic stuff here - a very entertaining period of action, which has drawn cheers from the crowd.

Rebel has a loose triangle. He'll be looking to tighten that up but Kerr can see exactly what he's planning and manages to posture up and free himself.
Rebel preventing the ground and pound from doing any damage.
Kerr has the superior BJJ but he's also working some ground strikes into his gameplan.
Rebel looking for a guillotine here but Kerr defends easily.
Kerr trying to control but Rebel is working from the bottom.

That's one minute gone in the round.
Kerr passes easily into side control. Nice work.
Rebel is trying to improve his position.
Rebel is moving his hips around well on the bottom and has managed to get back to half guard.
Rebel is trying to get back to full guard.
Kerr is keen to just control but Rebel is a slippery customer.

Kerr is looking for a kimura here.
Rebel is defending against the submission attempts here by Kerr.
The fighters are starting to perspire pretty heavily.
Rebel is looking to sinch up a guillotine here but Kerr pulls his head out easily.

That's two minutes gone in the round.
Kerr is trying to control the action in half guard but Rebel is working away on the bottom, looking perhaps to get back to full guard.
Rebel tries to get to full guard but Kerr has control of the leg.
Rebel manages to get to full guard.
Kerr tries to stand but Rebel is controlling from the bottom.
Rebel working from the bottom, still in full guard. He's managed to get a loose triangle. Kerr doesn't seem to be doing much to defend here, obviously he feels comfortable in the position. Kerr manages to throw the legs off his shoulder and he's back into guard - no problem.
Rebel wants to sweep here but Kerr controlling him for the moment.
Rebel is working hard here to advance position.
Kerr trying to control the position from guard on top but Rebel is wriggling around, looking for whatever he can.
Kerr is trying to work a guillotine from the top, or something like that? Don't know how he thinks he's going to get a finish from there.
Rebel looks to be in better condition than last time we saw him fight. Obviously he's been working hard on his cardio.

That's three minutes gone in the round.
Rebel looking for a guillotine here but Kerr defends easily.
Rebel looking for submissions from the bottom but instead Kerr passes into half guard.
Rebel wants to improve his position but Kerr is controlling well.
The fighters are pressed up against the cage, both looking to find a bit of space to work.
Rebel looking to work for a kimura from the bottom.
Rebel wants to get back to full guard.

That's four minutes gone in the round.
The crowd are getting on the fighters' backs, as the pace has dropped off in the last minute or so.
Rebel is staying active underneath Kerr, who seems content to just control the action from this position.
Kerr is pressing down on Rebel's thigh, looking to free his foot. Rebel is holding on for now.
Rebel is refusing to be controlled, as Kerr sits in half guard.
Rebel tries to roll over but Kerr keeps him under control.
Rebel looking to work for a kimura from the bottom.
Rebel is looking to regain full guard. Not this time though.
Kerr is trying to control the action in half guard but Rebel is working away on the bottom, looking perhaps to get back to full guard.
Nice strikes from Kerr there.
The crowd thankful this round is nearly over.
Rebel gets full guard.
Kerr got a little sloppy there for a moment and Rebel has worked his way into a loose triangle - can he finish it?! No, Kerr has managed to get both his arms back between Rebel's legs - danger averted.
Rebel manages to sweep nicely, so he's now on top. Kerr manages to get himself to full guard.

And thats the end of the round the fighters go back to their corners.
Solo Rebel dominated that round.
The referee calls time. The cornermen exit stage left and we're back to business.

Rebel tries for a takedown but Kerr sees it coming a mile off and avoids it easily.
Kerr tries to clinch up but Rebel circles away and keeps his distance.
Rebel shoots in looking for a takedown but Kerr manages to keep the fight standing, pushing Rebel's face into the canvas for good measure before circling away.
Rebel tries to score a power double leg takedown but Kerr sees that one coming and sprawls well. That will dishearten Rebel somewhat.
That's three failed takedown attempts in the round for Solo Rebel. That's going to take a lot out of him.
Rebel changes levels and looks for a double leg takedown. Kerr tries to avoid it but Rebel manages to keep hold of a leg and drag Kerr to the ground. Kerr escapes though and pops straight back up to his feet.
Kerr throws a counter combo.
Twee Kerr is looking to throw some combinations by the looks of things.
Rebel shoots in with a takedown attempt and he has Kerr pinned against the cage. Kerr gets the underhooks and manages to circle away.
Kerr wants to clinch up but Rebel keeps it at a distance.
We've had a slow start to the round here - hopefully the action picks up.
Rebel shoots in looking for a takedown. Kerr tries to sprawl out of it but Rebel keeps driving through. The fighters are pinned against the cage. Kerr manages to get underhooks and after a bit of a struggle, circles away and we're back to standing.
Kerr throws a counter combo.
Rebel stuffs a takedown. It's all about dictating where the fight takes place and Rebel wants it to stay on the feet.
Horrible takedown attempt by Rebel or perhaps it was just good defense by Kerr, which made it look bad.
Kerr is definitely looking for the counter takedowns here.
That's one minute gone in the round.
Rebel shoots in for a takedown but doesn't get it.
Rebel fails with a takedown attempt from distance.
Kerr shoots in and drives through. Rebel sprawls well.
Rebel misses with a takedown attempt. He shot from a bit too far out.
Kerr throws a sloppy head kick and Rebel moves out of range easily.
Rebel shoots in but Kerr avoids the takedown attempt easily.
Rebel changes levels and looks for a double leg takedown. Kerr tries to avoid it but Rebel manages to keep hold of a leg and drag Kerr to the ground. Kerr escapes though and pops straight back up to his feet.
Kerr defends well against a solid takedown attempt from Rebel.
Kerr has been working on his striking defense in training and it's paying off as Rebel is landing a low percentage of strikes.
Both fighters are absolutely exhausted here.
Rebel fails miserably with a takedown attempt.
Kerr lands a vicious shot with the stealth of a sniper and the strength of a viper. Are vipers that strong? I can think of lots of things that are stronger than a viper - not many rhyme with sniper though.
That's two minutes gone in the round.
Rebel drives through with a really nice takedown into side control.
Kerr tries to improve position but can't.
Rebel knows he needs to get back to his feet asap. He's simply no match for Kerr on the ground.
Kerr takes an elbow right on the bridge of the nose and winces in pain.
Wooooo! Give it up for these two warriors! They are putting on a show!
Kerr is moving his hips around well on the bottom and has managed to get back to half guard.
Kerr works his way to full guard. Good work.
Kerr is looking for a guillotine. You can't force these things though and Rebel defends well.
Rebel makes a bit of distance and scores with some ground and pound, still in guard.
Rebel trying to move into half guard but instead Kerr has managed to sweep!
Rebel had isolated an arm as going for a kimura. Kerr defends it easily.
Kerr trying to pass the guard but can't manage it just yet.
Rebel looking for submissions off his back, moving his hips, looking for an opening.
Kerr works a leg free and moves into half guard.
Solo Rebel overall seems to be getting the better of the ground position in the fight so far.
That's three minutes gone in the round.
Rebel works his way to full guard. Good work.
The ref warns both fighters not to hold the cage as they work up against the meshing.
There's a bit of a scramble here and now Rebel is on top in guard.
There's a bit of a scramble here and now Kerr is on top in guard.
Kerr passes into half guard.
Kerr not throwing his punches with enough precision this time.
Rebel tries to get to full guard but Kerr has control of the leg.
Rebel is looking to sinch up a guillotine here but Kerr pulls his head out easily.
Kerr is looking to take a break and control but Rebel is keeping him honest, looking to work from the bottom.
Kerr is sneakily working for an arm triangle but Rebel sees it coming and defends easily.
Kerr wants to take a breather but Rebel is having none of it.
That's four minutes gone in the round.
Kerr thows a wild elbow that connects with the canvas.
Rebel makes his way to full guard. A much better position for Rebel.
Rebel wants to sweep but no luck.
Rebel working from the bottom, still in full guard. He's managed to get a loose triangle. Kerr doesn't seem to be doing much to defend here, obviously he feels comfortable in the position. Kerr manages to throw the legs off his shoulder and he's back into guard - no problem.
There's a bit of a scramble here and now Rebel is on top in guard.
Rebel postures up and scores with a shot to the body and a follow up elbow to the head.
Rebel scoring with some ground and pound.
Rebel stands up and looks to throw the legs aside to pass to side control. Kerr swivels though and keeps the full guard.
Kerr is working from a closed guard but he's struggling to control his opponent.
Rebel avoids a guillotine attempt easily.
The crowd are loving this. Great action here.
Rebel stands up over Kerr, holding his feet. He dives back in and lands a decent shot to the head.
And thats the end of the round the fighters go back to their corners.
Twee Kerr showed his class in that round. I'd imagine he'll take it on all the scorecards.
That's the end of the interval. I'm sure that seemed a lot quicker than a minute for our two fighters! Back to the action. This is the final round!

Rebel shoots in but no luck this time.
Kerr is definitely looking for the counter takedowns here.
Rebel is looking for a takedown here. He's shot in and has managed to get it, finishing up in Kerr's half guard.
Rebel trying to pass the guard but Kerr defending well.
Kerr is looking to escape.
Rebel scoring with strikes to the body and head.
Rebel is scoring with some nice ground and pound from the dominant position.
Rebel is nestled in close to Kerr, controlling him well. He's worked in a nice elbow to the side of the head as well, for good measure.
Kerr trying to control but Rebel postures up.
Rebel winds up and cracks Kerr with a swinging punch to the side of the head.
We've had a slow start to the round here - hopefully the action picks up.
Kerr gets back to full guard.
Rebel stopping the sweep attempt from Kerr.
Rebel won't allow Kerr to get back to his feet.
That's one minute gone in the round.
Rebel stands and throws Kerr's legs to the side, diving into side control.
Kerr takes a big intake of breath there - he's definitely tired.
Kerr tries to get back to half guard but can't.
Rebel cracks Kerr with a big elbow.
Kerr is not in a great position here, taking some shots.
You can see the frustration on Kerr's face, being in this tough position on the bottom.
Rebel grinds an elbow into Kerr's temple.
Kerr is trying to get back to half guard.
Rebel works a knee to the body and follows up with a nice elbow to the head.
Rebel connects with a decent looking elbow from side control that caused Kerr some visible discomfort.
Rebel scoring with punches from side control.
Kerr tries to work a leg under to get back to half guard but Rebel wriggles his own leg back out and remains in side control.
That's two minutes gone in the round.
Kerr on the wrong end of some ground and pound.

Kerr is rocked!
Rebel cracks Kerr with a big right hand but Kerr just smiles back at him and invites him to have another go.
Kerr is still in real trouble! Can Rebel finish him?
Rebel cracks Kerr with a big elbow.
We've seen a great period of action over the last minute or so - credit to both fighters for going all out!
Rebel landing strikes.
Rebel cracks Kerr with a big elbow.
Rebel lands a strong strike to the head of Kerr. That's dazed him! Rebel looking to finish here. Kerr is waving his arms around trying to block but he's hurt badly - Rebel lands more strikes and the referee steps in to end the fight!
Ladies and gentlemen, after 2:36 of round 3, we have a winner by way of TKO (Strikes). Solo Rebel!
A very excited looking Solo Rebel made sure he remembered to thank all the fans both in the arena and on the internet. He said all the coolest people spend all day on MMA websites, which got a big reaction.
|
|
|
|
|
|
|
|
|
|
|
|
|
|
|
|
|
|
|
|
|
|
|
| S |
C
A |
G |
S |
C
B |
G |
|
S |
C |
G |
|
energy
A | B |
|
hype
A | B |
|
pop
A | B |
|
mgr
A | B |
|
FIGHT
RATING
54% |
|
|
|
|
|
|

