|
|
PBP Commentary |
Coming up we have a light heavyweight MMA rules bout between Joe Montana (ranked 5468 p4p, 3789 weight class) and Michael Burnside (ranked 0 p4p, 0 weight class). Burnside comes into a darkened arena with his song building. gangnam style kicks in, the lights come on and the crowd goes wild! What a showman! This should be a great matchup!
 |
|
 |
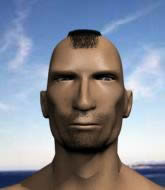
| 183 cm
18
215
0 - 0 - 0 |
|
185 cm
23
205
0 - 1 - 0 |
BJJ White Belt
Brawler
Very strong |
|
BJJ Purple Belt
Brawler
Determined |
|
| |
|
Ladies and gentlemen. This fight is 3 rounds, in the light heavyweight division.
Introducing the fighter to my left, fighting out of the red corner.
With a record of 0 - 0 - 0, fighting out of Amsterdam, Joe Montana!
And introducing the fighter to my right, fighting out of the blue corner.
With a record of 0 - 1 - 0, fighting out of London, Michael Burnside!
The judges for this bout are Donald Grub, James Atkins and Sam Margolis.

The bell rings for round one and we are underway!
Burnside looks for the body kick but Montana saw that one coming.
Michael Burnside seems to be the more aggressive standup fighter in this bout.
Burnside takes a step back and watches a body kick go sailing past his mid section.
Burnside throws a body kick but he wasn't in range.
Burnside looking to land some kicks to the body here.

Montana moves into the clinch.
Burnside tried to land a shot to the body but connects with Montana's elbow.
Burnside being controlled against the cage.
Burnside doesn't land with the attempted body shot.
Montana prevents a body shot from Burnside.
Nice body punch from Montana.
Burnside tries to throw a body punch but Montana avoids it by throwing Burnside back against the cage.
Burnside tries a body shot but Montana blocks it.
We've had a slow start to the round here - hopefully the action picks up.
Burnside misses with a shot to the kidneys.
Burnside goes for a body shot but it's blocked.

Montana pulls Burnside into guard.
Burnside is looking to stand up but Montana won't let him.
Montana is pulling down on Burnside's head to control his posture.

That's one minute gone in the round.
Burnside wants to stand but Montana has a closed guard, so he can't escape.

Montana isolates an arm and boxes in a triangle. Burnside stacks Montana on his neck as he steps over and passes to the side. He's now in a much more dominant position where he can look to do some serious damage. Nice move by Burnside!
Montana tries to buck Burnside off but Burnside is having none of it.
Montana tries to wriggle free to get back to his feet but he's given up his back! Oops.

That's two minutes gone in the round.
Neither fighter has done anything of merit for a good minute or two here and the crowd are not happy about it.
Montana tries to roll but Burnside sticks to his back.
Montana is trying to get back to his feet but Burnside has full control of the position and if anything, Montana has just worked his way into a worse spot.
Montana tries to escape the position.
Montana keeps the fight on the ground as Burnside tries to escape.
I really don't envy Montana right now.

That's three minutes gone in the round.
Burnside is trying to stand.
I really don't envy Montana right now.
Montana is working hard here to advance position.
The ref warns both fighters not to hold the cage as they work up against the meshing.
Montana wants to get back to his feet.
Burnside not allowing Montana to control his hands.
Burnside wants to stand back up.

That's four minutes gone in the round.
A few boos can be heard. I'm sure they will multiply if the fighters don't pick up the pace.
Montana holding both Burnside 's hands and preventing any damage.
Montana tries to break free.
Burnside is not going to allow Montana to sit and survive in this position.
Montana is trying to stand back up.
Boooooooooooooooooooo!!! God, this has been a terrible round. Come on you two, sort yourselves out!
Montana keeps the fight on the ground as Burnside tries to escape.
And that is the end of the round. The fighters go back to their corners.
Michael Burnside dominated that round.
OK. That's time! The bell goes and we're back to the action.

The fighters are starting to get sweaty, which will make takedowns a bit more tricky.
Burnside gets tackled into the cage by Montana. Montana maintains the clinch.

Montana breaks the clinch.
Montana fakes high and shoots in for a takedown but Burnside avoids it really well and circles away.
Montana shoots in for a double leg but Burnside sprawls well. That's going to sap some energy.
Burnside throws a body kick but he wasn't in range.
Montana shoots in looking for a takedown but Burnside manages to keep the fight standing, pushing Montana's face into the canvas for good measure before circling away.
That's three failed takedown attempts in the round for Joe Montana. That's going to take a lot out of him.
Montana shoots in for a takedown! He's got it and he's managed to land in side control! That's better than Montana was expecting from the takedown attempt, I'm sure!
Burnside pushes Montana away and creates a bit of space to escape. He's almost out here... but no, Montana gets a good hold of his legs and remains firmly in side control.
The fighters are pressed up against the cage, both looking to find a bit of space to work.
We've had a slow start to the round here - hopefully the action picks up.

Montana stands up and beckons Burnside to his feet.
Burnside throws a body kick but he wasn't in range.
Montana moves into the clinch.
Montana is working for takedown but Burnside is calmly controlling the position for now.
Burnside tries to work over Montana's body with a swooping hook but it only glances the target.
Burnside doesn't land with the attempted body shot.
That's one minute gone in the round.
Burnside misses with a hook to the ribs.
Burnside tries a body shot but Montana blocks it.
Montana dictating the pace here, as the fighters clinch against the cage.
Montana jumps guard but Burnside stands there with Montana around his waist. Montana gives up and drops back to his feet. We remain in the clinch.
Burnside can't find room to land a body shot as Montana controls the action.
Burnside misses with a shot to the kidneys.
Burnside tries to work over Montana's body with a swooping hook but it only glances the target.
Montana is trying to drag Burnside to the mat but Burnside just about manages to keep his footing. He used the cage to his advantage there.
Montana prevents a body shot from Burnside.
Montana digs a right hand into Burnside's ribs. Those have got to be taking their toll on Burnside's gas tank.
Burnside can't find room to land a body shot as Montana controls the action.
Burnside tried to land a shot to the body but connects with Montana's elbow.
Montana lands a hook to the side of the head.
That's two minutes gone in the round.
Montana breaks the clinch and we're back to striking at distance.
Montana looking to shoot here. He's gone for it and he's landed a takedown into side control! Oh, that's bad for Burnside!
Montana controls the position.
Burnside wants to get back to his feet.
Burnside is breathing heavily.
Montana sitting in side control, looking to soften his opponent up with elbows and hammerfists but Burnside is avoiding damage well and looking to escape the position.
Montana is moving around in side control but his primary objective seems to be to maintain the position.
Burnside wants to get back to his feet but Montana drags him back down.
That's three minutes gone in the round.
Montana remains in side control and seems content to stay there. It's a versatile position from which he can work both strikes and submissions, whilst maintaining that control, so maybe he'll sit here for a while.
Montana looking for an arm triangle but it's way too loose to do anything.
Montana stands up.
Montana misses with a body kick.
Montana moves out of range as Burnside throws a body kick.
Burnside tries to land a front kick but Montana steps back. That was a bit too telegraphed.
Montana has managed to clinch.
Montana tries to take the fight to the ground by pulling guard but can't manage it.
Montana jumps guard.

Montana is working an open guard so Burnside takes the opportunity to get back to his feet.
That's four minutes gone in the round.
Burnside misses with a body kick.
Montana fakes high and shoots in for a takedown but Burnside avoids it really well and circles away.
Burnside counters with a body kick.
Michael Burnside is looking to keep the fight on the feet at all costs.
Burnside takes a jab on the nose. He smiles like he loves it and keeps coming.

It looks like Michael Burnside has been cut.
Burnside goes for a spinning back kick but it misses.
Montana takes a step back and watches a body kick go sailing past his mid section.
Burnside tries to keep at a distance but Montana has taken the fight into the clinch.
Montana fails to pull the fight into his guard.
Burnside goes for a body shot but it's blocked.
Montana manages to pull guard. Let's see whether he can land a sub off his back.
We've seen a great period of action over the last minute or so - credit to both fighters for going all out!
Montana throws his legs up looking for a submission but Burnside uses it to pass to side control.
And that is the end of the round. The fighters go back to their corners.
Joe Montana dominated that second round.
The cut man is working on Michael Burnside's cut.
That's the end of the interval. I'm sure that seemed a lot quicker than a minute for our two fighters! Back to the action. This is the final round!

Burnside looks for the body kick but Montana saw that one coming.
A momentary lapse in concentration from Burnside enables Montana to shoot in and score with a neat double leg. Burnside manages to secure a closed guard as the fighters hit the mat.
Burnside wants to stand and escape but Montana is having none of it.
Montana pressing down on his opponent's thigh, looking to pass guard. Burnside is keeping the position for now.
Montana stops Burnside from standing up.
Montana trying to control but Burnside is working from the bottom.
We've had a slow start to the round here - hopefully the action picks up.
Montana trying to land body shots but he keeps hitting the mat.
Montana seems content to control from guard here. He's going to have to remain active though if he doesn't want to get stood back up.
The referee must be thinking about standing these guys back up.
Montana has to be careful here, sitting in the guard of a superior BJJ player.

The ref stands the fighters back up due to a lack of activity.
That's one minute gone in the round.
Montana tries a head kick but it misses.
Burnside pivots as if he's going to throw a leg kick but stops half way.
Burnside goes for a spinning back kick but it misses.
Montana throws a big counter combination but Burnside scrambles out of danger and avoids any damage.
Burnside throws a wild body kick that Montana sees coming a mile off.
Montana moves into the clinch.
Burnside misses with a punch to the body.
Montana drops down looking for an ankle pick but Burnside pulls his leg out and moves away.
Montana thuds a left hand into Burnside's body.
Burnside takes a big intake of breath there - he's definitely tired.
Montana has managed to clinch.
Burnside tries to throw a body punch but Montana avoids it by throwing Burnside back against the cage.
Montana pulls guard.
Montana is pulling down on Burnside's head to control his posture.
That's two minutes gone in the round.
Montana's ground tactics aren't going to win him many fans. Let's hope he's got fireworks for us if he gets back to his feet because he's not doing much on the ground.
Montana wants to hit a sweep here but Burnside passes into full mount! Oh no, disaster for Montana there!
Montana controls the position.
That's three minutes gone in the round.
Montana working to try and regain half guard.
Montana reaches up and holds on to Burnside to control the position.
Montana is desperately trying to improve his position but Burnside has a good base and remains in mount.
That's four minutes gone in the round.
Neither fighter has done anything of merit for a good minute or two here and the crowd are not happy about it.
Montana wants to hold on but Burnside pushes him away.
Joe Montana overall seems to be getting the better of the ground position in the fight so far.
Boooooooooooooooooooo!!! God, this has been a terrible round. Come on you two, sort yourselves out!
Montana tries to reverse the position but Burnside maintains control.
And that's the end of the fight!
That was a close round. You could make an argument for either fighter but I would give it to Joe Montana.
I think Montana has won this one but let's see what the judges have to say. Over to the ring announcer for the scorecards.
Ladies and gentlemen, after 3 rounds of action, we go to the scorecards for a decision.
Judge Donald Grub scores the fight 29:28
Judge James Atkins scores the fight 29:28
Judge Sam Margolis scores the fight 29:28
In favor of your winner, by unanimous decision... Joe Montana!
Michael Burnside was interviewed post fight and said 'He's a better fighter than me ngl xoxo'.
|
|
|
|
|
|
|
|
|
|
|
|
|
|
|
|
|
|
|
|
|
|
|
| S |
C
A |
G |
S |
C
B |
G |
|
S |
C |
G |
|
energy
A | B |
|
hype
A | B |
|
pop
A | B |
|
mgr
A | B |
|
FIGHT
RATING
30% |
|
|
|
|
|
|
