|
|
PBP Commentary |
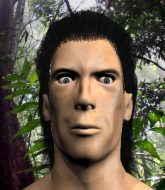
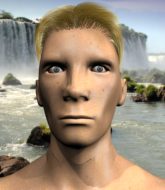
Coming up we have a middleweight MMA rules bout between Kazuki Takeda (ranked 2408 p4p, 4366 weight class) and Bobby Drake (ranked 369 p4p, 594 weight class). Both these guys have really solid chins. Will we see a standup war or will they both decide that a knockout is unlikely and try to win the fight elsewhere?
 |
|
 |
| 185 cm
20
188
4 - 1 - 0 |
|
188 cm
21
188
3 - 4 - 0 |
Abu Dhabi Champ
Solid boxing
Very quick |
|
Good wrestler
Excellent boxer
Granite chin |
|
| |
|
Ladies and gentlemen. This fight is 3 rounds, in the middleweight division.
Introducing the fighter to my left, fighting out of the red corner.
With a record of 4 - 1 - 0, fighting out of Tokyo, Kazuki Takeda!
And introducing the fighter to my right, fighting out of the blue corner.
With a record of 3 - 4 - 0, fighting out of Montreal, Bobby Drake!
The judges for this bout are Dillan Fox, Alec Ball and Trevor Gratis.

The bell rings for round one and we are underway!

Drake gets tackled into the cage by Takeda. Takeda maintains the clinch.
Takeda lands a hook to the body. It's hard to tell if that hurt Drake or not.
Takeda goes for a body shot but it's blocked.

Takeda gets a trip takedown into half guard.

Takeda seems to be working for a kimura but Drake defends the submission attempt.
The fighters are pressed up against the cage, both looking to find a bit of space to work.
Takeda is trying to work for a kimura. This could be trouble! No, Drake has managed to free his arm - good work.
Takeda is looking for an arm triangle, whilst trying to pass to side control. Drake doesn't seem that keen to cooperate though. No luck this time Takeda.
Takeda lands with a punch from half guard.
We've had a slow start to the round here - hopefully the action picks up.
Takeda thows a wild elbow that connects with the canvas.

That's one minute gone in the round.
Drake is trying to get back to full guard.
Drake is pressing down on Takeda's left leg trying to get back to full guard. He's managed it.
We get told so often about how wrestlers don't like to be on their backs. Let's see if Drake can do anything to dispel that myth.
Takeda lands a couple of decent looking shots.
Drake wants to control the position but Takeda says "no thanks buddy" and passes to half guard.
Drake is trying to maintain the position but Takeda is very close to passing his half guard.
The ref warns both fighters not to hold the cage as they work up against the meshing.
Drake tries to roll over but Takeda keeps him under control.
Drake gets full guard.
Takeda throwing elbows and punches but not connecting, as Drake works some decent striking defense from the bottom.
Takeda scores with a decent looking elbow strike.

It looks like Bobby Drake has been cut.
Drake looking to control.
Takeda drops back for a leg! It's a sloppy attempt though and Takeda jumps back into guard quickly, to retain the dominant position.
Takeda has been looking to land a fair amount of strikes on the ground. He might be looking to soften his opponent up in order to work for a submission.
Takeda is in close to Drake's body, working some short punches and elbows.
Drake really doesn't want to stay on the ground with Takeda. If he can't get it back to his feet, it's only a matter of time before he'll be tapping out.

That's two minutes gone in the round.
Takeda chips away with some ground and pound.
Drake is trying to keep Takeda in close.
Takeda pressing down on his opponent's thigh, looking to pass guard. Drake is keeping the position for now.
Takeda postures up and scores with a shot to the body and a follow up elbow to the head.
The fighters are starting to perspire pretty heavily.
Drake avoiding any damage from the ground and pound.
Takeda throws a big right hand that misses.
Takeda working some ground and pound from guard but it's not doing any damage.
Drake is trying to keep Takeda in close.
Takeda throwing strikes from guard but Drake blocks nicely.

That's three minutes gone in the round.
Takeda missing there with some ground and pound from the guard.
Takeda stands up over Drake, holding his feet. He dives back in and lands a decent shot to the head.
Takeda keeps in close for a moment and lands a decent shot to the side of Drake's head.
Takeda landing with the ground and pound.
Takeda is sitting in guard, working some ground and pound.
Takeda lands a nice shot whilst sitting in his opponent's guard.
Drake is pulling down on Takeda's head. It's preventing any offense from Takeda, at least for the moment.
Drake wants to hit a sweep here but Takeda passes into full mount! Oh no, disaster for Drake there!
Takeda putting on the heat here with some good ground and pound!

That's four minutes gone in the round.
Drake tries to hold on but Takeda postures up.
Drake is looking to improve his position but Takeda isn't that keen on the idea.
Takeda is in full mount, looking to secure a guillotine but Drake is surviving well by controlling Takeda's body position as best he can.
Takeda looking to secure an arm triangle but Drake defends it well.
Drake wants to hold on but Takeda pushes him away.
Takeda working for a submission but Drake is keeping him at bay.
This is a great period of action - very entertaining stuff!
Takeda is thinking about an arm triangle here, looking to tighten it up before moving to side control. Drake can see it coming though and defends well with a couple of strikes to the head and some good arm positioning.
And that is the end of the round. The fighters go back to their corners.
Kazuki Takeda dominated that round.
The cut man is working on Bobby Drake's cut.
The referee calls time. The cornermen exit stage left and we're back to business.

Takeda walks into a straight right hand from Drake.
Drake takes a swing at Takeda's ribcage but misses.
Drake throws a body punch but Takeda moves out of range.
As Drake tries to get set, Takeda tries to push him back and clinch up but Drake manages to avoid the attempt.
Drake digs a good body shot into Takeda's ribs.
Drake throws a combination. Takeda tries to block but a couple of punches get through.
Takeda on the wrong end of a vicious looking body shot.
Drake throws a body punch but Takeda moves out of range.
Drake lands a beauty of a right hand that gets the crowd cheering.
Takeda tries to close the distance and clinch but Drake swats him to one side with an open hand palm strike and circles away.
Takeda tries to clinch but Drake moves out of range.
Takeda ducks under an overhand right and circles away with a smile on his face.
Takeda keeping a good distance there, avoiding the body shot.
Takeda closes the distance and clinches.
That's one minute gone in the round.

Drake's corner calls for him to break the clinch, which he does.
Drake has been working on his striking defense in training and it's paying off as Takeda is landing a low percentage of strikes.
Takeda throws a looping left and ducks down for a takedown. He's got his arms around Drake's waist but Drake gets an underhook and avoids the takedown by throwing Takeda off to one side.
Takeda is really dominating this fight. Is there anything that Drake can do to turn this around?
Drake ducks down and throws a hook to the body but Takeda moves away.
Drake looks to land a right hand but Takeda moved out of range.
Takeda has his head slapped from side to side by a 3 punch combination. That must have hurt him.
Drake thuds a left hand into Takeda's body.
Drake tries to bum rush Takeda with a series of wild strikes but Takeda uses good footwork to avoid the assault.
Bobby Drake is looking to keep the fight on the feet at all costs.
Drake fails to land with the punch combination there - jab, cross, hook, miss, miss, miss.
Takeda is trying to close the distance and clinch up, after that failed offence from Drake.
No joy there for Takeda, who threw a few shots but didn't land.
A little jabbing left from Drake on the counter but it doesn't find it's target.
Drake avoids the body shot from Takeda.
Drake misses with a wild body shot.
Drake scores with a punch to the head.
Bobby Drake seems to be getting the better of the standup.
Drake swings away but doesn't land with a series of punches.
That's two minutes gone in the round.
We've seen a great period of action over the last minute or so - credit to both fighters for going all out!
Takeda wants to clinch.
Takeda looks to clinch
and Drake counters with a left and a right that stings Takeda.
Bobby Drake is looking to throw some combinations by the looks of things.
Drake throws a left and a right that both miss
and Takeda decides to take the opportunity to score a takedown. He's landed in Drake's guard.
Takeda slips effortlessly into side control - very nice.
Drake is looking to reverse the position.
Takeda landing a few strikes.
Takeda cracks Drake with an elbow. That is naaassty.
Drake tries to work a leg under to get back to half guard but Takeda wriggles his own leg back out and remains in side control.
Kazuki Takeda overall seems to be getting the better of the ground position in the fight so far.
Takeda grinds an elbow into Drake's temple.
That's three minutes gone in the round.
Takeda has worked his way into a potential kimura here. Drake is trying to get out of the position but his squirming has just got him deeper into trouble. Takeda yanks on the arm and Drake is forced to tap due to a very painful looking submission! Nice work by Takeda.
Ladies and gentlemen, after 3:22 of round 2, we have a winner by way of Submission (Kimura). Kazuki Takeda!
Kazuki Takeda thanked the fans post fight for their support.
|
|
|
|
|
|
|
|
|
|
|
|
|
|
|
|
|
|
|
|
|
|
|
| S |
C
A |
G |
S |
C
B |
G |
|
S |
C |
G |
|
energy
A | B |
|
hype
A | B |
|
pop
A | B |
|
mgr
A | B |
|
FIGHT
RATING
51% |
|
|
|
|
|
|
