|
|
PBP Commentary |
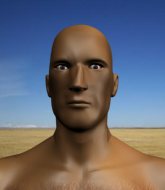
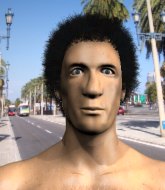
Coming up we have a lightweight MMA rules bout between Johnny Hammer (ranked 6776 p4p, 24646 weight class) and Mark Taylor (ranked 603 p4p, 638 weight class). Over to our ring announcer for the fighter introductions!
 |
|
 |
| 180 cm
23
165
4 - 6 - 0 |
|
178 cm
26
145
2 - 6 - 0 |
BJJ Blue Belt
Brawler
KO power |
|
BJJ White Belt
Excellent MT
Granite chin |
|
| |
|
Ladies and gentlemen. This fight is 3 rounds, in the lightweight division.
Introducing the fighter to my left, fighting out of the red corner.
With a record of 4 - 6 - 0, fighting out of New York, Johnny Hammer!
And introducing the fighter to my right, fighting out of the blue corner.
With a record of 2 - 6 - 0, fighting out of London, Mark Taylor!
The judges for this bout are Franklyn Lucas, John Roberts and Jorge Garcia.

The bell rings for round one and we are underway!
Hammer looking to throw a kick but he's pulled out of it.

Taylor clinches.
Taylor wants a takedown.

Taylor's corner calls for him to break the clinch, which he does.
Hammer moves his head to the side to avoid a jab but walks straight into a cross.

Taylor gets the takedown into side control.

Hammer throws Taylor to one side and escapes!
The fans in attendance giving it up for the two fighters, who have really let it all hang out in the last minute or so!
Well, he's not going to score with shots like that. A lazy body kick attempt from Hammer.
Hammer tries to land a body kick
and Taylor counters with a good right hand that lands right on the jaw.
Nice body kick from Hammer.
Taylor wants to clinch.
Hammer looks for the body kick but Taylor saw that one coming.
Hammer throws a push kick but Taylor slaps the foot to one side.
Hammer throws a push kick but Taylor slaps the foot to one side.
Nice body kick there by Hammer.
Hammer throws a body kick, spinning off balance
and Taylor counters with a single leg into guard. Hammer didn't expect that.
Hammer kicks Taylor off and gets to his feet.

That's one minute gone in the round.
Taylor has closed the distance and engaged Hammer in a clinch.
Hammer tries to break the clinch but Taylor is controlling the position.
Taylor's corner calls for him to break the clinch, which he does.
Taylor moves out of range of the body kick.
Taylor shoots in for a takedown. "Ole!" shouts Hammer as he jumps to the side.
Hammer goes for a spinning back kick but it misses.
Taylor tries a counter takedown but it's more of a dummy move, and he uses it to push himself away.
Taylor blocks the body kick.
Taylor blocks the body kick.
Taylor avoids a kick to the body.
Taylor lands a nice shot to the body.
We've been told by Hammer's head coaches at Cozad MMA New York that he's been working on his takedown defense in preparation for this fight.
Johnny Hammer seems to be the more aggressive standup fighter in this bout.
Taylor blocks the body kick.
Hammer misses with a kick to the body
and Taylor decides to take the opportunity to score a takedown. He's landed in Hammer's guard.
Hammer manages to escape and get back to his feet.
The crowd are loving this. Great action here.
Taylor pulls out of a head kick attempt.
Hammer throws a body kick but he wasn't in range.
Taylor drops down looking to force a counter takedown but Hammer defends it well.
Hammer throws a lazy body kick
and Taylor counters with a takedown into side control! That could mean trouble for Hammer!
Hammer bucks up and manages to escape back to his feet!

That's two minutes gone in the round.
Taylor throws a head kick that misses and slips in the process. He scrambles back to his feet and the fighters circle.
Hammer throws a body kick despite being completely out of range
and Taylor counters with a left and a right that stings Hammer.
Hammer goes for a spinning back kick but it misses.
Taylor shoots for a takedown but Hammer saw that one coming a mile off and avoided it easily.
Johnny Hammer has stuffed three takedown attempts in the round now. That's going to take a lot out of Mark Taylor.
Hammer pivots as if he's going to throw a leg kick but stops half way.
Taylor is looking to clinch but Hammer is avoiding it.
Hammer swats away the attempt to clinch by Taylor.
Taylor takes a step back and watches a body kick go sailing past his mid section.
Taylor feints the counter takedown.
Taylor wants to clinch up but Hammer keeps it at a distance.
Hammer throws a body kick that misses
and Taylor counters with a shoot takedown. Hammer fights it but they end up in guard.
The fighters are working up against the cage. Hammer manages to wriggle his way back to his feet, so the fighters are now clinched against the cage.
Hammer wants to break free but Taylor has control.
Taylor prevents Hammer from breaking the clinch.
Hammer wants to strike at distance but he can't break free of the clinch.

That's three minutes gone in the round.
Taylor's corner calls for him to break the clinch, which he does.
Hammer blocks the body kick.
Taylor clinches.
Taylor keeps control of Hammer as he tries to wriggle out of the double underhooks.
Hammer can't break the clinch.
Taylor keeps the fight in the clinch, despite Hammer's efforts to push away.
Hammer tries to break free but Taylor pushes him back against the cage.
Taylor pushes off and circles away, back to the middle of the mat.
Well, he's not going to score with shots like that. A lazy body kick attempt from Hammer.
Hammer throws a push kick but Taylor slaps the foot to one side.
Taylor moves out of range of the body kick.
Taylor is definitely looking for the counter takedowns here.
Johnny Hammer is looking to keep the fight on the feet at all costs.
Taylor shoots in for a takedown - he's clinched up with Hammer but Hammer pushes him off and we're back to square one.
Hammer looks to throw a body kick
and Taylor counters with a nice double leg into side control. Hammer won't be happy with that.
Hammer sneaks out the side door and pushes Taylor away - he's back to his feet. The crowd show their appreciation for the escape.
Wooooo! Give it up for these two warriors! They are putting on a show!
Hammer pivots as if he's going to throw a leg kick but stops half way.

That's four minutes gone in the round.
Taylor shoots in for a takedown - he's clinched up with Hammer but Hammer pushes him off and we're back to square one.
Hammer throws the kick towards the body but Taylor avoids it.
Hammer gets caught on his heels momentarily as he allows Taylor to score an easy takedown into full guard.
Hammer pushes Taylor off and gets back to his feet.
Taylor fails with a rather predictable takedown attempt.
Hammer looking to land some kicks to the body here.
Taylor shoots in for a takedown and gets it.
Hammer manages to create a bit of space in order to work his way back to his feet. Taylor keeps hold of his opponent and drives him back against the cage.
The crowd are going absolutely nuts as the round comes to an end - what a fantastic round of action!

Hammer breaks the clinch and we return to the middle of the mat.
Hammer throws a body kick, spinning off balance
and Taylor counters nicely by changing levels and landing a hook to the body.
Taylor moves out of range as Hammer throws a body kick.
And that is the end of the round. The fighters go back to their corners.
Johnny Hammer dominated that round.
The referee calls time. The cornermen exit stage left and we're back to business.

Taylor shoots in for a takedown - he's clinched up with Hammer but Hammer pushes him off and we're back to square one.
Hammer is really dominating this fight. Is there anything that Taylor can do to turn this around?
Hammer misses with a body kick.
Taylor lets it all go there with a big combo counter but none of the punches connected.
Taylor misses with a half-hearted attempt at a head kick.
Taylor tries to close the distance and clinch up but Hammer swats him away and circles back towards the center.
Taylor avoids a kick to the body.
Hammer throws a push kick but Taylor slaps the foot to one side.
Taylor connects with a slap. Keep your fist closed son.
Johnny Hammer is winning the standup battle so far.
Hammer looking to throw a kick but he's pulled out of it.
Taylor moves out of range as Hammer throws a body kick.
Taylor tries a counter takedown but it's more of a dummy move, and he uses it to push himself away.
Hammer looking to land some kicks to the body here.
Hammer throws a half hearted mid kick.
We've had a slow start to the round here - hopefully the action picks up.
Hammer throws a half hearted mid kick.
Hammer throws a body kick that misses.
Taylor avoids a kick to the body.
Taylor moves out of range of the body kick from Hammer.
Hammer throws a body kick but he was well out of range there.
That's one minute gone in the round.
Taylor shoots in with a takedown attempt and he has Hammer pinned against the cage. Hammer gets the underhooks and manages to circle away.
Well, he's not going to score with shots like that. A lazy body kick attempt from Hammer.
Despite the aggression on Taylor's face he doesn't fully commit to the counter.
Taylor clinches with his opponent.
Hammer working hard to break the clinch.
Hammer wants to break free but Taylor has control.
Taylor breaks from the clinch.
Hammer misses with an attempted mid kick.
Taylor drops down looking to force a counter takedown but Hammer defends it well.
Taylor tries to clinch but is not successful on this occasion.
Hammer misses with a body kick.
Hammer throws a push kick but Taylor slaps the foot to one side.
Hammer looking to land some kicks to the body here.
As Hammer backs off Taylor throws a huge counter combo but Hammer manages to avoid it all.
Taylor darts in and clinches Hammer up against the cage.
Hammer looks like he'd prefer to be striking at range right now.
Taylor is clearly stalling here... Pick up the pace son.
A frustrated look appears on Hammer's face as he tries to break the clinch.
That's two minutes gone in the round.
Hammer has had enough of the clinch but Taylor keeps him there for the moment.
Hammer looks like he'd prefer to be striking at range right now.
Hammer tries to circle away but Taylor has him pinned against the cage.
Hammer looks like he'd prefer to be striking at range right now.
Hammer wants to push off and get back to the center of the mat but Taylor has him pressed against the cage.
Hammer has had enough of the clinch and is looking to separate.
Taylor goes for a takedown attempt but Hammer pushes him away and we're back to fighting at a distance.
Johnny Hammer has stuffed three takedown attempts in the round now. That's going to take a lot out of Mark Taylor.
Hammer throws a push kick but Taylor slaps the foot to one side.
Taylor clinches.
Taylor pulls Hammer into guard.
Hammer preventing the sweep.
The fighters are pressed up against the cage, both looking to find a bit of space to work.
Taylor working a defensive guard here.

Hammer gets to his feet and steps away from his opponent.
Taylor misses with a half-hearted attempt at a head kick.
That's three minutes gone in the round.
Taylor tries to shoot in for a takedown. He's got hold of a leg but Hammer swivels and escapes.
Hammer throws a body kick but he was well out of range there.
Taylor moves out of range of the body kick.
Hammer looks for the body kick but Taylor saw that one coming.
Hammer misses with a body kick.
Hammer throws a push kick but Taylor slaps the foot to one side.
Taylor dives in for a single leg takedown but Hammer sprawls and the fighters end up clinched against the cage.
Hammer lands a front kick.
Taylor is breathing heavily.
Taylor misses with a low kick.
Hammer went nuts there looking for a big combo counter but none of the flurry connected.
Taylor tries to score a power double leg takedown but Hammer sees that one coming and sprawls well. That will dishearten Taylor somewhat.
Hammer scores with a kick to the body.
Crunch! Hammer slams his shin into Taylor's torso.
That's four minutes gone in the round.
Hammer misses with an attempted mid kick.
Taylor moves out of range as Hammer throws a body kick.
Taylor dives in for a single leg takedown but Hammer sprawls and the fighters end up clinched against the cage.
Taylor closes this distance looking for a takedown but Hammer circles away.
Well, he's not going to score with shots like that. A lazy body kick attempt from Hammer.
And Taylor tries to counter it with a takedown but Hammer pushes his down on his head and steps out.
Taylor blocks the body kick.
Taylor takes a kick to the body and keeps moving.
This is a great period of action - very entertaining stuff!
Hammer misses with a body kick.
Hammer misses with a body kick.
Taylor is looking to clinch.
As Taylor looks to move away, Hammer throws a big counter combo but Taylor just gets out of the way.
Taylor closes the distance and pushes Hammer back into the cage.
Taylor has developed a nice purple lump on his ribcage, as a result of some heavy body kicks from Hammer.
Taylor prevents Hammer from breaking the clinch.
Taylor wants to stall.
Hammer wants to get back to striking at distance but Taylor won't allow it.
Hammer tries to break the clinch but Taylor is controlling the position.
And that is the end of the round. The fighters go back to their corners.
Johnny Hammer dominated that second round.
The referee calls time. The cornermen exit stage left and we're back to business. This is the final round!

Taylor tries to close the distance and clinch up but Hammer swats him away and circles back towards the center.
Taylor blocks the body kick.
Taylor blocks the body kick.
Hammer gets tackled into the cage by Taylor. Taylor maintains the clinch.
Hammer is trying to push Taylor away but Taylor has him pressed against the cage, so he's going nowhere.
Hammer wants to break the clinch but can't.
Hammer wants to push off and get back to the center of the mat but Taylor has him pressed against the cage.
Taylor tries to take the fight to the ground by pulling guard but can't manage it.
A frustrated look appears on Hammer's face as he tries to break the clinch.
Hammer tries to circle away but Taylor has him pinned against the cage.
A short left from Taylor.
We've had a slow start to the round here - hopefully the action picks up.
Hammer breaks the clinch and we return to the middle of the mat.
Taylor misses with an attempted mid kick.
Hammer throws a wild body kick that Taylor sees coming a mile off.
Hammer misses with a body kick.
Hammer looks for the body kick but Taylor saw that one coming.
Hammer has his head slapped from side to side by a 3 punch combination. That must have hurt him.
That's one minute gone in the round.
Taylor misses with a takedown attempt - Hammer sprawls well and throws a nice strike on the way out which just misses.
Hammer misses with an attempted mid kick.
Taylor drops down looking to force a counter takedown but Hammer defends it well.
Taylor moves out of range as Hammer throws a body kick.
Taylor lands a jab followed by a nice looking cross.
Johnny Hammer is looking to throw some combinations by the looks of things.
Hammer pivots as if he's going to throw a leg kick but stops half way.
A little jabbing left from Taylor on the counter but it doesn't find it's target.
Hammer is looking to land body kicks.
No luck for Taylor with that takedown attempt.
Johnny Hammer has stuffed three takedown attempts in the round now. That's going to take a lot out of Mark Taylor.
Taylor takes a big intake of breath there - he's definitely tired.
Hammer slaps away a takedown attempt from Taylor, before circling back to the center of the mat.
Hammer gets off balance looking for a body kick
and Taylor decides to take the opportunity to score a takedown. He's landed in Hammer's guard.
Hammer is edging up against the cage. He's using the cage to get back to his feet. Nice work there - the fighters are clinched.
The crowd are loving this. Great action here.
Hammer breaks from the clinch.
Hammer misses with a kick to the body
and Taylor counters with a takedown into side control.
Hammer throws his opponent off and manages to get back to his feet! Nicely done!
That's two minutes gone in the round.
Hammer circles away from the clinch attempt.
Hammer goes for a spinning back kick but it misses.
Taylor fails with an attempt to clinch.
Taylor moves out of range as Hammer throws a body kick.
Hammer throws a wild body kick that Taylor sees coming a mile off.
Taylor takes the fight into the clinch.
Taylor escapes the clinch and we're back to striking.
Hammer tries to land a front kick but Taylor steps back. That was a bit too telegraphed.
Hammer misses with a body kick.
Taylor with the counter takedown but Hammer avoids it easily.
Taylor gets to the clinch - let's see what his plan is here.
Hammer has had enough of the clinch but Taylor keeps him there for the moment.
Hammer wants to strike at distance but he can't break free of the clinch.
Hammer is trying to break the clinch but Taylor has him pressed against the cage.
That's three minutes gone in the round.
Hammer stops a takedown attempt from Taylor.
Hammer's head jolts backwards as he takes an uppercut right on the button!
Hammer is trying to force a seperation but Taylor has the dominant position.
Hammer is trying to force a seperation but Taylor has the dominant position.
Hammer can't break the clinch.
Hammer gets double underhooks to prevent a takedown attempt from Taylor.
Hammer wants to get back to striking at distance but Taylor won't allow it.
Taylor has Hammer pressed against the cage, preventing Hammer from circling away and getting back to striking at range.
Hammer breaks the clinch.
Taylor misses with a body kick.
Hammer throws a body kick that misses.
Hammer throws a wild body kick that Taylor sees coming a mile off.
Taylor blocks the body kick.
And an attempted straight right on the counter from Taylor! But no joy.
That's four minutes gone in the round.
Nice sprawl there from Hammer as Taylor shoots in.
Hammer misses with the body kick
and Taylor counters with a nice shoot takedown that brings the fighters to the ground.
The fighters are working up against the cage. Hammer manages to wriggle his way back to his feet, so the fighters are now clinched against the cage.
The crowd are loving this. Great action here.
Taylor fails to pull guard.
Hammer has had enough of the clinch but Taylor keeps him there for the moment.
Taylor taking a breather.
Hammer is trying to push Taylor away but Taylor has him pressed against the cage, so he's going nowhere.
Hammer has had enough of the clinch and is looking to separate.
Hammer is looking to break free of the clinch but Taylor has double underhooks.
Hammer escapes the clinch and we're back to striking.
Taylor shoots in but Hammer avoids the takedown attempt easily.
Hammer seem to be loading up, looking for a big counter.
Hammer looking to land some kicks to the body here.
Taylor blocks the body kick.
Mark Taylor has stepped it up - he knows he needs a finish here!
Johnny Hammer is fighting for a decision here - he's started to take the cautious approach.
Taylor throws a front kick aimed at Hammer's knee but Hammer avoids it well.
Hammer appears to be looking for a big counter.
Hammer looks for the body kick but Taylor saw that one coming.
Taylor drops down looking to force a counter takedown but Hammer defends it well.
And that's the end of the fight!
Johnny Hammer showed his dominance in that final round.
Well I reckon that's a shut out for Hammer, winning every round. Will the judges agree? They are the ones who matter, even if they are often depressingly incompetent. Over to the ring announcer for the scorecards.
Ladies and gentlemen, after 3 rounds of action, we go to the scorecards for a decision.
Judge Franklyn Lucas scores the fight 30:27
Judge John Roberts scores the fight 30:27
Judge Jorge Garcia scores the fight 30:27
In favor of your winner, by unanimous decision... Johnny Hammer!
Johnny Hammer spent the whole post fight interview bigging himself up. It didn't go down that well with the fans after a while as they thought it was a bit arrogant.
|
|
|
|
|
|
|
|
|
|
|
|
|
|
|
|
|
|
|
|
|
|
|
| S |
C
A |
G |
S |
C
B |
G |
|
S |
C |
G |
|
energy
A | B |
|
hype
A | B |
|
pop
A | B |
|
mgr
A | B |
|
FIGHT
RATING
77% |
|
|
|
|
|
|
