|
|
PBP Commentary |
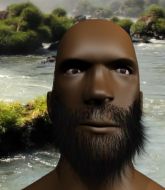
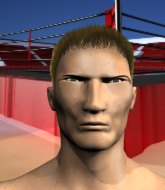
Coming up we have a light heavyweight MMA rules bout between Jerome Carter (ranked 0 p4p, 0 weight class) and Dave Hawkins (ranked 0 p4p, 0 weight class). We have two fighters making their debuts here, so let's see who comes out of this one with their first professional victory.
 |
|
 |
| 189 cm
22
205 lbs
0 - 0 - 0 |
|
193 cm
22
217 lbs
0 - 0 - 0 |
BJJ White Belt
Basic striking
Cuts easily |
|
BJJ White Belt
Brawler
Prefers standup |
|
| |
|
Ladies and gentlemen. This fight is 3 rounds, in the light heavyweight division.
Introducing the fighter to my left, fighting out of the red corner.
With a record of
0 - 0 - 0, fighting out of Montreal, Jerome Carter!
And introducing the fighter to my right, fighting out of the blue corner.
With a record of
0 - 0 - 0, fighting out of Montreal, Dave Hawkins!
The judges for this bout are Steve Smith, Trevor Gratis and Gregory Folan.

The bell rings for round one and we are underway!
Hawkins wants to clinch up but Carter keeps it at a distance.
Carter throws a series of punches but Hawkins avoids them all with ease.
Carter tries to clinch but is not successful on this occasion.
No joy there for Carter, who threw a few shots but didn't land.
Carter fails with an attempt to clinch.
Carter keeps the fight on the outside.

Excellent takedown into side control there by Carter.

Carter is trying to land an Americana. He has the arm isolated but Hawkins is keeping cool and he's avoided the danger for now.
Hawkins wants to escape from the position here - easier said than done!
Hawkins stops Carter from passing to mount.
Hawkins is not content to let Carter control the position.

That's one minute gone in the round.
Hawkins pushes Carter away and creates a bit of space to escape. He's almost out here... but no, Carter gets a good hold of his legs and remains firmly in side control.

Carter decides to stand up, so the ref orders Hawkins to his feet.
Hawkins fails to land with a series of punches.
Carter tries to clinch but Hawkins moves away

and Hawkins holds on and brings the fighters into a clinch.
Carter wants a takedown but no success here.
Carter scores with a shot to the side of Hawkins's head.
Carter lands a shoulder strike that jolts his opponent's head backwards.
Hawkins lands on the inside with an uppercut.
Hawkins lands a body punch in the clinch.
The pace slowing considerably in the clinch, as Hawkins takes a break from that fighting nonsense to think about the finer things in life.
Carter connects with a knee to the head.
Hawkins will no doubt start fighting again in a minute but for now he's just having a little rest, leaning Carter up against the cage.
Carter tries to land a shot to the body but it's blocked.
Hawkins lands with a right to the head.
A bit of stalling here from Hawkins.
Hawkins throws a punch but it's blocked by Carter.
Hawkins prevents a body shot from Carter.
Nice body punch from Hawkins - that landed with a thud.
Hawkins prevents a body shot from Carter.

That's two minutes gone in the round.
Carter works for underhooks and lands a body shot in the process.
Carter is trying to work for a single leg takedown but Hawkins pulls him back up using the underhooks.
Carter is breathing heavily.
Hawkins taking a break, stalling in the clinch.
Carter can't get the takedown.
That's three failed takedown attempts in the round for Jerome Carter. That's going to take a lot out of him.
Hawkins is leaning against Carter and scores with a nice uppercut to the body.
A right hook to the body lands for Hawkins.
Hawkins stalling in the clinch.
Carter is trying to break free.
Carter misses with a hook from the clinch.
Hawkins lands with a light punch inside.
Carter wants a takedown.
Hawkins scores with a nice hook to the head.
Hawkins lands a body shot.
Hawkins working some nice short punches in the clinch.
Hawkins holding his opponent close, against the cage.
A nice right hand lands inside from Hawkins.
Carter tries to land a shot to the body but it's blocked.
Hawkins content to slow the pace in the clinch.
Hawkins lands a short shot on the inside that snaps the head of Carter backwards.
We've seen a great period of action over the last minute or so - credit to both fighters for leaving it all in the cage!
Hawkins working some nice short punches in the clinch.
Hawkins scores with an uppercut up the middle.
Hawkins throws a blind hook that connects with the side of Carters head.
Hawkins lands a right hand.
Hawkins working on landing some head shots here - that one got through nicely.
Hawkins scores with a nice hook to the head.
Carter throws a head punch that misses.
Hawkins scores with a shot to the side of Carter's head.
Carter misses with a hook to the ribs.
A short right from Hawkins on the inside.
Hawkins lands with a short shot to the head.
Carter misses with a shot to the kidneys.
A quick uppercut on the inside from Hawkins.
Carter wants to break the clinch but can't.

That's three minutes gone in the round.
A head punch on the inside from Carter fails to land.
Hawkins lands with a light punch inside.
Hawkins makes some space for himself and lands an uppercut.
Hawkins lands with a light punch inside.
An uppercut to the body lands inside from Hawkins.
Hawkins lands a right hand.
Carter is trying to work for a single leg takedown but Hawkins pulls him back up using the underhooks.
Hawkins lands a body punch.

Carter escapes the clinch and we're back to striking.
Carter has managed to clinch.
Carter has picked Hawkins up - he's going for a ride! Carter dumps his opponent to the mat with a thud and settles into half guard.
Carter thumps the canvas. Not on purpose obviously - he just missed Hawkins's head.
Carter thows a wild elbow that connects with the canvas.
Carter missing with some ground and pound from the half guard.
Hawkins is refusing to be controlled, as Carter sits in half guard.
Carter stops Hawkins from getting back to his feet.
Carter thows a wild elbow that connects with the canvas.
Carter thows a wild elbow that connects with the canvas.

That's four minutes gone in the round.
Hawkins has hold of Carter's hands but Carter slips his arm to the side and lands an elbow.
Hawkins keeping his head moving to avoid the ground and pound.
Carter thows a huge punch but Hawkins dodges it nicely.
Hawkins avoiding damage under a succession of punches from Carter.
Carter sitting in half guard, looking to land shots. Hawkins defending well though.
Carter throwing shots but they're hitting the canvas more than the man.
Hawkins blocking the ground and pound attempt from Carter.
Carter lands with a punch from half guard.
We get told so often about how wrestlers don't like to be on their backs. Let's see if Hawkins can do anything to dispel that myth.
Carter is thinking about going for an arm triangle but he can't free his leg.
The crowd applaud the fighters efforts here as the round comes to an end.

The referee has ruled that neither fighter is active enough on the ground and has stood them back up.
A lazy left from Hawkins finds it's target.
Hawkins circles away from the clinch attempt.
Hawkins rushes forward with a series of wild hooks but Carter moves out of range and avoids them all easily.
Hawkins swats away the attempt to clinch by Carter.
And thats the end of the round the fighters go back to their corners.
Dave Hawkins dominated that round.
The fighters' corners scream their final instructions, as the referee calls time. Here we go, back to the action!

Hawkins throws a hard body shot but it just misses.
Hawkins throws an overhand right that lands on Carter's shoulder, as Carter tries to avoid the shot.
Carter takes a shot to the body in his stride.
Hawkins cracks Carter with a big right hand that sends him to the floor! Carter looks wobbly but he's sprung back up to his feet straight away
can Hawkins finish him?

Carter is rocked!

It looks like Jerome Carter has been cut.
Carter tries to clinch there but Hawkins circles away.
Oh Carter is still all over the place! His legs are completely gone! Will he be able to recover?!!
Carter clinches.
Carter seems to have got his legs back now.
Carter goes for a body shot but it's blocked.
A body shot lands from Carter.
A short uppercut from Hawkins.
Hawkins lands a short shot on the inside that snaps the head of Carter backwards.
Carter breaks the clinch and we return to the middle of the mat.
Carter tries to clinch up
and Hawkins counters into the clinch. Nicely done.
Hawkins throws a blind hook that connects with the side of Carters head.
The fans in attendance giving it up for the two fighters, who have really let it all hang out in the last minute or so!
Carter misses with a hook to the ribs.
A head punch blocked on the inside by Hawkins.
Hawkins lands a short shot on the inside that snaps the head of Carter backwards.
Both fighters are absolutely exhausted here.
Hawkins lands with a short punch from the clinch.
Carter tries to break the clinch but Hawkins is controlling the position.
Hawkins lands a hook to the side of the head.
Hawkins works for underhooks and lands a body shot in the process.
A right hook to the body lands for Hawkins.
Carter stalling in the clinch but Hawkins improves position.
Still in the clinch, Carter scores with a nice short uppercut.
Carter makes some space for himself and lands an uppercut.
Hawkins prevents the takedown attempt.
That's one minute gone in the round.
Carter tries to stall but Hawkins uses the opportunity to gain a better position.
Dave Hawkins seems to be working more effectively in the clinch in the fight so far.
Carter tries a body shot but Hawkins blocks it.
Hawkins stops a takedown attempt from Carter.
Hawkins tries a shoulder strike but it doesn't do any damage.
Carter tries to land a shot to the body but it's blocked.
Carter has a body lock and is looking for a takedown. Hawkins is bouncing around trying to prevent the takedown and somehow he has indeed managed to stay on his feet.
That's three failed takedown attempts in the round for Jerome Carter. That's going to take a lot out of him.
Carter tries for a takedown. No joy.
Hawkins doesn't land with the attempted body shot.
Carter looking to slow down the pace here.
Carter throws a head punch that misses.
Hawkins looking to slow down the pace here.
Hawkins gets through Carter's defenses to land a nice punch to the side of the head.
Hawkins is stalling here. The referee will be looking to step in if he doesn't pick up the pace.
Hawkins is leaning against Carter and scores with a nice uppercut to the body.
Carter breaks the clinch and we're back to striking at distance.
Hawkins tries to clinch up but Carter circles away and keeps his distance.
Carter moves away from the strike by Hawkins.
Carter closes the distance looking to clinch
and Hawkins counters by moving into the clinch. Good anticipation by Hawkins.
Hawkins lands with a good tight uppercut to the head.
Carter breaks the clinch and we're back to striking at distance.
Carter wants to clinch
and Hawkins counters with a series of strikes. Carter will be more careful next time no doubt.
Carter lands a jab, followed by a cross and another cross, as Hawkins backs up against the cage.
Carter throws a shot to the body.
Carter looks to clinch
and Hawkins counters into the clinch. Nicely done.
That's two minutes gone in the round.
Carter can't find room to land a body shot as Hawkins controls the action.
Carter stalling in the clinch but Hawkins improves position.
Carter working aggressively here.
Hawkins lands with a short shot to the head.
Hawkins blocks a body shot from Carter.
Hawkins just leaning against Carter, taking a breather.
Hawkins lands a right uppercut that snaps the head of Carter backwards.
An uppercut on the inside fails to land for Hawkins.
A short uppercut from Hawkins.
Carter is looking for a takedown up against the cage. Hawkins gets underhooks though and prevents the takedown attempt.
Hawkins lands a hook to the side of the head.
Hawkins stalling in the clinch.
Hawkins swings away with an uppercut that misses.
Carter misses with a shot to the kidneys.
Carter misses with a knee strike.
Carter tries to score a body lock takedown but Hawkins shows good agility there to stay on his feet.
Hawkins is trying to slow down the pace in the clinch, to catch his breath.
Carter tries a body shot but Hawkins blocks it.
Carter lands a hook to the body. It's hard to tell if that hurt Hawkins or not.
Hawkins prevents a takedown attempt there.
Carter lands a left hand that snaps the head of Hawkins backwards.
Carter fails to land with a short punch on the inside.
Carter is looking for a takedown up against the cage. Hawkins gets underhooks though and prevents the takedown attempt.
Carter throws a punch but it's blocked by Hawkins.
Carter lands a right uppercut that snaps the head of Hawkins backwards.
Carter lands with a good tight uppercut to the head.
The crowd are loving this. Great action here.
Carter lands a left hand that snaps the head of Hawkins backwards.
Carter pushes Hawkins back against the cage and lands a hook to the side of the head.
Carter fails to land with a short punch on the inside.
Carter tries a shoulder strike but it doesn't do any damage.
That's three minutes gone in the round.
Hawkins stalling here - the referee won't stand for too much of that.
A shot in the inside from Hawkins.
Hawkins is trying to stall.
Still in the clinch, Hawkins scores with a nice short uppercut.
Carter manages to break the clinch.
The fighters circle momentarily. Carter darts into range and connects with a nice straight punch.
Hawkins clinches with his opponent.
A nice left hand lands by Hawkins.
Carter tries to land knees in the clinch but Hawkins avoids the damage to the body.
Hawkins working some nice short punches in the clinch.
Carter lands a right hand.
Hawkins avoiding damage as Carter throws knees to the body.
An uppercut to the body lands inside from Hawkins.
Hawkins lands a right uppercut that snaps the head of Carter backwards.
Carter has Hawkins pressed up against the cage and is working for takedown. Hawkins manages to improve position though and keeps the fight standing.
Carter breaks from the clinch.
Hawkins swats away the attempt to clinch by Carter.
Hawkins connects with a single shot there.
Hawkins fails with an attempt to clinch.
Hawkins is looking to clinch.
Jerome Carter is looking to throw some combinations by the looks of things.
Carter tries to clinch but Hawkins moves away
and Hawkins counters by moving into the clinch. Good anticipation by Hawkins.
A head punch on the inside from Carter fails to land.
Carter can't break the clinch.
Hawkins lands a hook to the body. It's hard to tell if that hurt Carter or not.
Hawkins stalling.
A right hand to the body from Hawkins.
The crowd cheering loudly, showing their appreciation for the quality fight we're seeing here.
A right hook to the body lands for Hawkins.
That's four minutes gone in the round.
Hawkins blocks a punch to the side of the head.
Carter struggles to land a body shot inside as Hawkins controls his hands.
Carter working some nice short punches in the clinch.
Carter has Hawkins pressed up against the cage and is working for takedown. Hawkins manages to improve position though and keeps the fight standing.
Carter has Hawkins pressed up against the cage and is working for takedown. Hawkins manages to improve position though and keeps the fight standing.
Carter lands a hook to the body. It's hard to tell if that hurt Hawkins or not.
Carter can't find room to land a body shot as Hawkins controls the action.
Carter fails to pull the fight into his guard.
Carter tries a knee to the head but he's missed.
Carter is trying to stall.
A shot in the inside from Hawkins.
Carter jumps into guard, dragging Hawkins to the mat.
Carter wants to sweep but no luck.
Carter wants to hit a switch here but Hawkins passes into full mount! Oh no, disaster for Carter there!
Carter keeping his composure momentarily, calmly looking to get back to half guard.
The crowd are going absolutely nuts as the round comes to an end - what a fantastic round of action!
Hawkins takes Carter's back, avoiding a couple of desperation strikes from the bottom.
Carter is being controlled on the ground here - he must escape this position otherwise surely the end is near.
And thats the end of the round the fighters go back to their corners.
Dave Hawkins showed his class in that round. I'd imagine he'll take it on all the scorecards.
The cut man is working on Jerome Carter's cut.
Well, the break between rounds is over. Let's get back to the scrappin! This is the final round!

Carter falls off balance throwing a combination
and Hawkins counters with a body kick that brings a smile to the face of both fighters.
Carter avoids the clinch attempt nicely.
Hawkins circles away from the clinch attempt.
Hawkins rushes Carter and pushes him back against the cage in a clinch.
Hawkins has Carter pressed against the cage.
Carter wants to break free. God knows he wants to breaaaak freeee.
Hawkins blocks a body shot from Carter.
Carter can't find room to land a body shot as Hawkins controls the action.
Carter changes levels and goes for a takedown here. Hawkins fights it off and pushes away nicely.
Carter swats away the attempt to clinch by Hawkins.
Carter throws a nice looking combination but Hawkins bobs and weaves to avoid any damage.
Carter throws a combination but comes up with nothing but fresh air.
Carter tries to grapple but his opponent circles
and Hawkins counters with a straight punch to the midsection.
Both fighters are breathing heavily.
Hawkins darts in and clinches Carter up against the cage.
Carter drops down looking for an ankle pick but Hawkins pulls his leg out and moves away.
Hawkins circles away from the clinch attempt
and Hawkins holds on and brings the fighters into a clinch.
Hawkins misses with some punches.
That's one minute gone in the round.
A short right from Carter.
Carter lands an uppercut.
Carter lands a takedown into guard.
Carter stands up and looks to throw the legs aside to pass to side control. Hawkins swivels though and keeps the full guard.
Carter with a flurry of punches that miss.
A big thud reverberates around the arena there as Carter accidentally thumps the mat. Hopefully he's not broken his hand.
Carter throwing shots from guard but he's hitting more mat than opponent.
Hawkins has a closed guard, preventing Carter from standing up.
Carter throwing strikes but missing.
Carter throwing strikes from guard but Hawkins blocks nicely.
Carter lands a couple of decent looking shots.
That's two minutes gone in the round.
Carter stands up from Hawkins's guard - Carter perhaps looking for a knockout.
Hawkins throws out a token jab with nothing on it.
Carter darts in and lands a nice takedown into half guard.
Carter is tying to control. Hawkins wants to improve his position but can't escape this time.
Carter prevents Hawkins from standing back up.
Carter frees up his trapped foot and advances to mount.
Hawkins is trying to stand.
Carter throws a strike there. Hawkins manages to avoid it well and slips a leg under to get to half guard.
That's three minutes gone in the round.
Hawkins blocking the ground and pound attempt from Carter.
Hawkins pushes Carter off looking to stand but Carter dives back in and keeps control.
The fighters are pressed up against the cage, both looking to find a bit of space to work.
Carter looks to land a strike but Hawkins avoids it nicely and regains full guard.
Carter throwing strikes from guard but Hawkins blocks nicely.
The ref warns both fighters not to hold the cage as they work up against the meshing.
Carter stands up and looks to throw the legs aside to pass to side control. Hawkins swivels though and keeps the full guard.
Jerome Carter has stepped it up - he knows he needs a finish here!
Well, the referee has seen enough. Neither fighter is active enough on the ground so he's stood them back up.
Carter fails in his attempt to clinch.
Carter moves away from the strike by Hawkins.
Carter smiles there as he lands a nice right hand right on the button.
Carter tries to clinch
and Hawkins counters with a left and a right that stings Carter.
That's four minutes gone in the round.
Hawkins misses with a body shot. Nice footwork from Carter.
Hawkins fails with an attempt to clinch.
Carter misses with a jab, cross combination.
Hawkins avoids the clinch attempt nicely.
Hawkins tries to clinch but Carter moves out of range.
Carter fakes the leg kick and cracks Hawkins in the body.
Carter clinches up against the cage.
A nice right hand lands inside from Carter.
Carter fails to land with a short punch on the inside.
Hawkins prevents the takedown attempt.
That's three failed takedown attempts in the round for Jerome Carter. That's going to take a lot out of him.
Carter lands a nice trip takedown into half guard.
Carter throwing shots but Hawkins is blocking nicely.
Carter thows a huge punch but Hawkins dodges it nicely.
Carter missing with some ground and pound from the half guard.
Carter thows a huge punch but Hawkins dodges it nicely.
The crowd applaud the fighters efforts here as the round comes to an end.
Hawkins makes some distance and scrambles quickly back to his feet. Nice work!
Hawkins fails to land with a series of punches.
Hawkins closes the distance and clinches.
Carter escapes the clinch and we're back to striking.
Carter clinches up with Hawkins and pushes him back against the cage.
Carter misses with a hook from the clinch.
And that's the end of the fight!
That was a close round. You could make an argument for either fighter but I would give it to Jerome Carter.
I think Hawkins has won this one but let's see whether the judges agree with me. Over to the ring announcer for the scorecards.
Ladies and gentlemen, after 3 rounds of action, we go to the scorecards for a decision.
Judge Steve Smith scores the fight 28:29
Judge Trevor Gratis scores the fight 28:29
Judge Gregory Folan scores the fight 28:29
In favor of your winner, by unanimous decision... Dave Hawkins!
|
|
|
|
|
|
|
|
|
|
|
|
|
|
|
|
|
|
|
|
|
|
|
| S |
C
A |
G |
S |
C
B |
G |
|
S |
C |
G |
|
energy
A | B |
|
hype
A | B |
|
pop
A | B |
|
mgr
A | B |
|
FIGHT
RATING
100% |
|
|
|
|
|
|
