|
|
PBP Commentary |
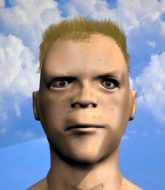
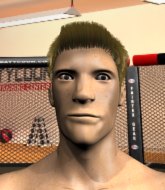
Coming up we have a light heavyweight MMA rules bout between Baek Do San (ranked 0 p4p, 0 weight class) and Tim Riggins (ranked 0 p4p, 0 weight class). Baek Do San has the better chin. Will he look to stand and bang today?
 |
|
 |
| 180 cm
22
198 lbs
3 - 6 - 0 |
|
190 cm
20
210 lbs
0 - 0 - 0 |
BJJ White Belt
Solid Muay Thai
Good chin |
|
BJJ Blue Belt
Decent boxing
Very confident |
|
| |
|
Ladies and gentlemen. This fight is 3 rounds, in the light heavyweight division.
Introducing the fighter to my left, fighting out of the red corner.
With a record of
3 - 6 - 0, fighting out of Rio de Janeiro, Baek Do San!
And introducing the fighter to my right, fighting out of the blue corner.
With a record of
0 - 0 - 0, fighting out of Rio de Janeiro, Tim Riggins!
The judges for this bout are Matheus Silva, Emerson Jorge and Felipe Paraventi.

The bell rings for round one and we are underway!
Do San tries to clinch there but Riggins circles away.
Do San stuffs the takedown.
Riggins tries for a takedown but Do San sees it coming a mile off and avoids it easily.

Riggins gets the takedown into side control.
Riggins landing a few strikes.
Do San manages to land a sweep and he's now on top! Lovely Jiu Jitsu!
Riggins slips a foot under and gets full guard. Nice work.

Do San gets to his feet and steps away from his opponent.
Do San stuffs the takedown attempt from Riggins. Riggins gets slowly back to his feet.
Baek Do San has stuffed three takedown attempts in the round now. That's going to take a lot out of Tim Riggins.
Riggins shoots in for a takedown. "I don't think so" says Do San as he avoids it easily.
Nice sprawl there from Do San as Riggins shoots in.
Riggins looks gassed!
Riggins shoots in for a takedown but doesn't get it.
Riggins looks for a takedown but Do San sprawls well.

Do San has Riggins up against the cage in a clinch.
Riggins can't get the takedown.

That's one minute gone in the round.
Do San lands a nice knee to the body.
Riggins works for the underhooks and manages to get a trip takedown into guard.
Riggins tries to free his leg and advance position but Do San is retaining full guard.
Riggins postures up.
Riggins looking to pass the guard.
Do San has a closed guard, preventing Riggins from standing up.
Riggins trying to pass the guard but can't manage it just yet.
Riggins trying to control the position from guard on top but Do San is wriggling around, looking for whatever he can.
Do San utilising some decent striking defenses from the guard, preventing the ground and pound.
The ref warns both fighters not to hold the cage as they work up against the meshing.

Well, the referee has seen enough. Neither fighter is active enough on the ground so he's stood them back up.
Riggins fails miserably with a takedown attempt.

That's two minutes gone in the round.
Do San tries to clinch there but Riggins circles away.
Do San tries to bum rush Riggins with a series of wild strikes but Riggins uses good footwork to avoid the assault.
Do San fails in his attempt to clinch.
Do San changes levels and drives through with a really nice takedown into side control. Riggins looks really pissed at himself for not defending that better.
Riggins is looking to reverse the position.
Riggins throws an elbow to the body but it doesn't land.
Do San decides to stand back up.
Riggins has his takedown stuffed
and Do San counters into the clinch. Nicely done.
Riggins tries to jump guard but he falls flat on his backside. Do San smiles and moves away.
Riggins shoots and misses
and Do San counters with a nice jab to the body that keeps Riggins thinking.
Do San fakes with an overhand right and moves in to clinch with Riggins, pushing him back against the cage.
Riggins tries for a takedown but Do San manages to get underhooks.
Riggins fails to pull guard.
Do San with the Thai clinch. He's looking to land a big knee but he's not managed it this time.
Riggins tries for a takedown. No joy.
A right hand to the body from Riggins.
Riggins drops down for a takedown but doesn't get it.

That's three minutes gone in the round.
Do San misses the knee to the body. Nice hip positioning from Riggins.
Do San gets underhooks to prevent Riggins's takedown attempt.

Do San breaks the clinch and we're back to striking at distance.
Riggins doesn't succeed with the takedown
and Do San counters with a nice low kick that buckles Riggins's knee momentarily.
Riggins misses with a takedown
and Do San counters by clinching up.
Riggins avoiding damage as Do San throws knees to the body.
Riggins tries for a takedown. No joy.
Riggins manages to pull guard.

Riggins is looking for a triangle here but Do San uses the submission attempt to pass into side control.
Riggins struggling a bit here.
Riggins is trying to get back to half guard. He's pushing on Do San's leg. He's managed it. Nice work.

That's four minutes gone in the round.
The fighters are going at a pretty good pace and they're both starting to sweat now.
Riggins looking for submissions off his back.
Do San controlling the action here.
The fighters are pressed up against the cage, both looking to find a bit of space to work.
Riggins actively working from the bottom here.
Do San prevents Riggins from improving his position.
Riggins regains full guard. Nicely done.
The crowd applaud the fighters efforts here as the round comes to an end.
Riggins wants to stand up but Do San is controlling him.
Riggins has an active guard here but Do San has managed to pass into half guard.
And thats the end of the round the fighters go back to their corners.
Baek Do San dominated that round.
Well, the break between rounds is over. Let's get back to the scrappin!

Riggins gets his takedown attempt stuffed easily
and Do San counters with a shoot takedown. Riggins fights it but they end up in guard.
Riggins lands a good elbow from the bottom.
Riggins looking for submissions off his back, moving his hips, looking for an opening.
Riggins lands a beautiful switch and he's in full mount! That could spell trouble for Do San!
Riggins working for a guillotine from mount but Do San is in no mood to give up.
Riggins mounts Do San! Really nice guard pass there!
Do San in a bad spot here, taking shots to the head.
Both fighters are absolutely exhausted here.
Riggins postures up and cracks his opponent a couple of times before moving back into close ground control. Do San looks a forlorn figure.
That's one minute gone in the round.
Riggins looking for an armbar but decides to keep the dominant position instead.
Riggins has his opponent pinned against the cage, landing some nasty ground and pound that is really making a bit of a mess out of Do San's face.
Do San takes a big shot to the head but keeps on trying to improve his position.
Riggins with good strikes from the mount here!
Riggins working for a guillotine from mount but Do San is in no mood to give up.
Riggins scoring with some good ground and pound from mount here. Will he manage to finish Do San?
Riggins is in full mount, looking to secure a guillotine but Do San is surviving well by controlling Riggins's body position as best he can.
Do San is looking to improve his position but Riggins isn't that keen on the idea.
That's two minutes gone in the round.
Riggins is landing with some decent strikes but Do San is trying to advance his position so the referee is letting the fight continue.
Do San really trying hard to get back to half guard here.
Do San's corner are shouting for him to stand up but that's bad cornering - how is he meant to stand up when he's mounted? He should be looking to improve his position on the ground before trying to stand back up.
Do San is working to get back to half guard.
Riggins stands up from mount. Strange move.
Do San ducks down and throws a hook to the body.
Riggins shoots and misses
and Do San counters into the clinch. Nicely done.
Knees to the body from Do San.
Riggins tries for a takedown. No joy.
Baek Do San has stuffed three takedown attempts in the round now. That's going to take a lot out of Tim Riggins.
Knees in the clinch landing for Do San.
Riggins lands a nice trip takedown into half guard.
Riggins drops an elbow to the side of Do San's head.
The crowd are loving this. Great action here.
Riggins is keeping good posture, landing some ground and pound.
That's three minutes gone in the round.
Riggins sitting in half guard, looking to land shots. Do San defending well though.
Riggins seems to be taking a bit of a break to think of his next move. He lands a short punch in the meantime.
Riggins takes advantage of the dominant position to land a couple of big hammer fists.
Riggins is trying to advance to mount but he's lost his balance and Do San reverses the position - he's now on top in Riggins's guard.
Tim Riggins has got the better of the ground game so far.
Riggins looking to sweep using the butterfly guard but Do San puts pay to that idea as he passes nicely into half guard.
Riggins missing with punches from the bottom.
Do San wants to stand but Riggins has hold of a leg and an arm, so he's trapped for now.
Riggins moves his hips nicely and gets into full guard.
Riggins keeping busy on the bottom but Do San has passed one foot through into half guard.
That's four minutes gone in the round.
Riggins tries to get to full guard but Do San has control of the leg.
Do San sitting and controlling from the half guard.
Do San thows a wild elbow that connects with the canvas.
Riggins is trying to get back to full guard.
The crowd applaud the fighters efforts here as the round comes to an end.
Riggins missing with punches from the bottom.
And thats the end of the round the fighters go back to their corners.
Tim Riggins showed his class in that round. I'd imagine he'll take it on all the scorecards.
The fighters' corners scream their final instructions, as the referee calls time. Here we go, back to the action! This is the final round!

Riggins misses with a takedown
and Do San counters with a low kick, right behind Riggins 's knee.
Riggins gets his takedown attempt stuffed easily
and Do San holds on and brings the fighters into a clinch.
Do San scores a nice knee to the body.
Do San lands an elbow that stopped Riggins in his tracks for a moment.
Riggins wants a takedown but no success here.
Baek Do San has stuffed three takedown attempts in the round now. That's going to take a lot out of Tim Riggins.
Riggins tries for a takedown. No joy.
Riggins drops down looking for an ankle pick but Do San pulls his leg out and moves away.
Baek Do San is looking to throw some combinations by the looks of things.
The fight moves into the clinch position.
Riggins lands a nice trip takedown into half guard.
Riggins is looking to take a break and control but Do San is keeping him honest, looking to work from the bottom.
Riggins is trying to advance to mount but he's lost his balance and Do San reverses the position - he's now on top in Riggins's guard.
Do San not doing a lot at the moment. He'll have to show some more aggression or the fight will get stood up.
Both fighters are breathing heavily.
That's one minute gone in the round.
Riggins working from the bottom, still in full guard. He's managed to get a loose triangle. Do San doesn't seem to be doing much to defend here, obviously he feels comfortable in the position. Do San manages to throw the legs off his shoulder and he's back into guard - no problem.
Do San has decided he wants to stand but the closed guard of Riggins is proving hard to escape from.
Do San throws a big right hand that misses.
Riggins looking to hit a scissor sweep but Do San is one step ahead there.
Riggins is active off his back here, looking for submissions.
Do San avoids a guillotine attempt easily.
That's two minutes gone in the round.
Well. There's a bit of a lull in the action here and the crowd are starting to get restless.
Do San avoids a guillotine attempt easily.
Do San stands up from Riggins's guard - Do San perhaps looking for a knockout.
Do San clinches up with Riggins and pushes him back against the cage.
Do San prevents a takedown attempt there.
Do San drops to a knee looking for a takedown but Riggins gets the underhooks and prevents it.
Riggins tries for a takedown but Do San manages to get underhooks.
Do San is fighting off a takedown attempt but Riggins is just too persistent for him and manages to trip Do San to the mat. Do San regains guard as soon as the fighters hit the mat.
Riggins working some strikes from top position.
Riggins has the superior BJJ but he's also working some ground strikes into his gameplan.
That's three minutes gone in the round.
Riggins pressing down on his opponent's thigh, looking to pass guard. Do San is keeping the position for now.
Do San working the defensive guard well to avoid strikes from Riggins.
Do San is trying to control the position but Riggins postures up.
Riggins trying to control the position from guard on top but Do San is wriggling around, looking for whatever he can.
Riggins postures up and lands a big shot to Do San's brow.
Riggins forces his way into half guard.
Do San keeping his head moving to avoid the ground and pound.
Do San keeping hold of Riggins's head, controlling as best he can.
Do San gets full guard.
That's four minutes gone in the round.
The crowd are getting on the fighters' backs, as the pace has dropped off in the last minute or so.
Do San manages to land a sweep and now he's in mount on top!
Do San controlling the pace for now.
Do San has controlled the position for a good 20 seconds, which will no doubt be starting to frustrate his opponent.
Riggins tries to get back to half guard but can't.
And that's the end of the fight!
That was a close round. You could make an argument for either fighter but I would give it to Baek Do San.
I think Do San has won this one but let's see what the judges have to say. Over to the ring announcer for the scorecards.
Ladies and gentlemen, after 3 rounds of action, we go to the scorecards for a decision.
Judge Matheus Silva scores the fight 29:28
Judge Emerson Jorge scores the fight 29:28
Judge Felipe Paraventi scores the fight 28:29
In favor of your winner, by split decision... Baek Do San!
|
|
|
|
|
|
|
|
|
|
|
|
|
|
|
|
|
|
|
|
|
|
|
| S |
C
A |
G |
S |
C
B |
G |
|
S |
C |
G |
|
energy
A | B |
|
hype
A | B |
|
pop
A | B |
|
mgr
A | B |
|
FIGHT
RATING
68% |
|
|
|
|
|
|
