|
|
PBP Commentary |
Coming up we have a light heavyweight MMA rules bout between Sadsy Lafarge (ranked 0 p4p, 0 weight class) and Carl Carter (ranked 0 p4p, 0 weight class). Carl Carter will no doubt be trying to keep this one on the feet, where he has a distinct advantage.
 |
|
 |
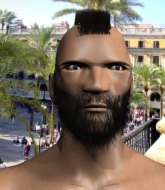
| 193 cm
22
217 lbs
1 - 0 - 0 |
|
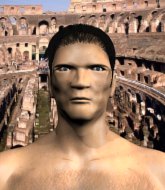
190 cm
22
200 lbs
2 - 0 - 0 |
BJJ White Belt
Brawler
Cuts easily |
|
BJJ Blue Belt
Excellent boxer
Intelligent |
|
| |
|
Ladies and gentlemen. This fight is 3 rounds, in the light heavyweight division.
Introducing the fighter to my left, fighting out of the red corner.
With a record of
1 - 0 - 0, fighting out of Los Angeles, Sadsy Lafarge!
And introducing the fighter to my right, fighting out of the blue corner.
With a record of
2 - 0 - 0, fighting out of Los Angeles, Carl Carter!
The judges for this bout are Timothy Bukovac, and .

The bell rings for round one and we are underway!

Lafarge closes the distance and looks for a trip takedown... aaaand he's got it - Lafarge lands in his opponent's guard.
Lafarge tries to free his leg and advance position but Carter is retaining full guard.
Lafarge thows a big elbow that misses.
Lafarge stopping the sweep attempt from Carter.
Carter is persisting with the attempt to improve his position.
Lafarge is working the ground and pound from guard. He might want to try advancing position though to get more of an impact.
The fighters are pressed up against the cage, both looking to find a bit of space to work.
Lafarge throwing strikes from guard but Carter blocks nicely.
Lafarge wants to stand but Carter has a closed guard, so he can't escape.
Carter is working an open guard here, looking to improve his position. No doubt that will leave him open to counters but at least he's being more offensive.

It looks like we're going to have a standup here. Neither fighter is doing enough on the ground.
Carter blocks the body kick.
Sadsy Lafarge seems to be the more aggressive standup fighter in this bout.
Lafarge avoids a punch combination nicely.

That's one minute gone in the round.
Lafarge keeping a good distance there, avoiding the body shot.
Lafarge tries to clinch but Carter moves out of range.
A combination from Lafarge does no damage.
Lafarge shoots in with a takedown attempt and he has Carter pinned against the cage. Carter gets the underhooks and manages to circle away.
Carter throws a hook to the body but it doesn't connect.
Carter takes a swing at Lafarge's ribcage but misses.
Lafarge will have to do better than that with his takedown attempts.
Carter looks to score with a combo but nothing lands.
Lafarge closes the distance and clinches up, looking for a takedown. He shifts his weight and gets a nice trip into half guard.
Carter tries to roll over but Lafarge keeps him under control.
Lafarge throwing shots but they're hitting the canvas more than the man.

Carter looking for submissions off his back.
Carter wants to get back to full guard.

That's two minutes gone in the round.
Lafarge is scoring with some nice ground and pound from the dominant position.
Carter makes his way to full guard. A much better position for Carter.
Lafarge lands a nice shot whilst sitting in his opponent's guard.
Lafarge wants to control from the top but Carter keeps moving.
Carter looking to sweep here. No luck so far.
Carter preventing the ground and pound from doing any damage.
Lafarge wanted to stand there but Carter had control of the position.
The ref warns both fighters not to hold the cage as they work up against the meshing.
Lafarge is breathing heavily.
Carter avoiding any damage from the ground and pound.

That's three minutes gone in the round.
Lafarge preventing the sweep.
There's a bit of a scramble here and now Carter is on top in guard.
Lafarge can't keep his opponent in guard - Carter advances to half guard, no doubt looking to mount.
Carter works his foot free and advances to mount.
Carter fails to take his opponent's back.
Lafarge is trying to reverse the position but instead Carter has taken his back - oops!
Lafarge rolls, trying to escape but Carter keeps control of the position.

That's four minutes gone in the round.
Lafarge defends a rear naked choke attempt by controlling one of Carter's arms.
Lafarge is defending well here and trying to improve his position.
Carter working for a choke but Lafarge is defending well.
Carter is trying to stick to Lafarge's back but Lafarge is turning into Carter. He's managed to reverse the position - now he's in Carter's guard. Polite applause from the crowd in appreciation of some nice Jiu Jitsu by Lafarge.
Lafarge knows he needs to get back to his feet asap. He's simply no match for Carter on the ground.
The fans in attendance giving it up for the two fighters, who have really let it all hang out in the last minute or so!
Lafarge avoids a guillotine attempt easily.
Lafarge working from the guard for now, landing some ground and pound.
And thats the end of the round the fighters go back to their corners.
Carl Carter dominated that round.
The corners get their ten second warning. Both fighters stand from their stools and stare eachother down, ready to get back to the action.

Lafarge shoots in for a takedown but doesn't get it.
Lafarge fails miserably with a takedown attempt.
A cross from Carter lands.

Lafarge has Carter up against the cage in a clinch.
Carter tries to break the clinch but Lafarge is controlling the position.

Lafarge escapes the clinch and we're back to striking.
Carter scores with a nice strike.

It looks like Sadsy Lafarge has been cut.
Lafarge has a takedown stuffed.
That's three failed takedown attempts in the round for Sadsy Lafarge. That's going to take a lot out of him.
Carter fakes high and swings low for a body shot but Lafarge manages to avoid it.
Nice jab there from Carter.
Both fighters are absolutely exhausted here.
Carter tries to bum rush Lafarge with a series of wild strikes but Lafarge uses good footwork to avoid the assault.
Carter stuffs the takedown attempt from Lafarge. Lafarge gets slowly back to his feet.
Carter dips to his left and cracks Lafarge with an uppercut!
Lafarge throws a looping left and ducks down for a takedown. He's got his arms around Carter's waist but Carter gets an underhook and avoids the takedown by throwing Lafarge off to one side.
That's one minute gone in the round.
Lafarge defending well as Carter loads up on a big left hand.
Lafarge looks frustrated there after his takedown attempt is stuffed easily.
Carter swings and misses with a hook to the body.
A nice combination there by Carter.
Carter throws a series of punches but Lafarge avoids them all with ease.
Carter throws a right and a left that both miss.
Carter keeps the fight standing with a nice sprawl.
Carter misses with a jab, cross combination.
Carter throws a wild combination but nothing lands.
Lafarge fails with the takedown.
Carter ducks down and throws a hook to the body but Lafarge moves away.
A really sloppy takedown attempt there from Lafarge.
That's two minutes gone in the round.
A combination from Carter does no damage.
Lafarge shoots in looking for a takedown. Carter tries to sprawl out of it but Lafarge keeps driving through. The fighters are pinned against the cage. Carter manages to get underhooks and after a bit of a struggle, circles away and we're back to standing.
Nice jab there from Carter.
Carter lands a jab to Lafarge's midsection.
Carter digs a good hook to Lafarge's body.
Lafarge shoots for a takedown but Carter saw that one coming a mile off and avoided it easily.
Carter lands a straight punch to the body, keeping Lafarge at a distance.
Carter is throwing a lot of body shots here, looking to wear down Lafarge rather than just go for the knockout.
Carter throws a wild combination but nothing lands.
Lafarge avoids a punch combination nicely.
Lafarge shoots for a takedown but Carter saw that one coming a mile off and avoided it easily.
Sadsy Lafarge is looking to throw some combinations by the looks of things.
Lafarge tries to clinch but Carter moves out of range.
Carter misses with a wild body shot.
That's three minutes gone in the round.
Lafarge is looking to take this fight into the clinch.
Lafarge changes levels and looks for a double leg takedown. Carter tries to avoid it but Lafarge manages to keep hold of a leg and drag Carter to the ground. Carter escapes though and pops straight back up to his feet.
Carter throws a hook to the body but it doesn't connect.
Lafarge fails with a takedown attempt from distance.
Carter cracks Lafarge with a right hand to the side of the head.
Carter throws a two punch combo that lands nicely.
Jab, cross, leg kick. Nice combination by Carter!
Lafarge decides to change it up a bit and drives through with a nice takedown into half guard.
Lafarge wants to lay and pray for a moment but Carter keeps working.
Carter wants to get back to full guard.
Carter moves into full guard.
Carter keeping moving, preventing Lafarge from controlling successfully.
That's four minutes gone in the round.
Carter is working an open guard here, looking to improve his position. No doubt that will leave him open to counters but at least he's being more offensive.
Carter looking to control.

Lafarge stands and steps away. Carter gets to his feet too and we're back to the striking game.
Carter takes a swing at Lafarge's ribcage but misses.
Lafarge wants to clinch.
Carter lands a powerful looking uppercut that connected with his opponent's jaw.
The crowd applaud the fighters efforts here as the round comes to an end.
Lafarge swings wildly with a couple of big hooks
and Carter counters with a left and a right that stings Lafarge.
Lafarge misses with a takedown attempt
and Lafarge takes a counter punch right on the button for his troubles.
And thats the end of the round the fighters go back to their corners.
Carl Carter showed his class in that round. I'd imagine he'll take it on all the scorecards.
The cut man is working on Sadsy Lafarge's cut.
The referee calls time. The cornermen exit stage left and we're back to business. The crowd applaud as we get ready to start the final round!

Lafarge uses some good footwork to avoid the body shot by Carter.
Lafarge tries to grapple but his opponent circles
and Carter counters with a straight punch to the midsection.
Carter misses with a body shot. Nice footwork from Lafarge.
Lafarge gets the takedown into side control.
Carter gets one leg under and gets the fight to half guard.
Carter gets full guard.
Lafarge throws a strike but Carter rolls with it and manages to sweep. Now he's in guard on top.
Carter passes Lafarge's right leg, so he's now in half guard.
Carter looking to pass the half guard. Not this time.
That's one minute gone in the round.
Lafarge is looking to regain full guard. Not this time though.
Both fighters are breathing heavily.
Carter frees up his trapped foot and advances to mount.
Carter stands up from the dominant position. He obviously fancies his chances standing.
Lafarge fails with the takedown
and Carter counters with a straight punch to the midsection.
Carter takes a swing at Lafarge's ribcage but misses.
Lafarge gets his takedown attempt stuffed easily
and Carter counters with a quick right hand to the jaw.
Lafarge bobs and weaves into range and then changes levels and scores with a nice takedown into side control.
Carter manages to work his way to half guard, despite Lafarge's best efforts.
That's two minutes gone in the round.
Lafarge working Carter over with strikes.
Carter tries to get to full guard but Lafarge has control of the leg.
Lafarge not throwing his punches with enough precision this time.
Lafarge not throwing his punches with enough precision this time.
Lafarge is trying to control. Carter wants to improve his position but can't escape this time.
Lafarge is really struggling to control Carter but he's trying to hold on to the position.
Lafarge seems to have lost interest with the ground game and is thinking about standing back up.
It looks like we're going to have a standup here. Neither fighter is doing enough on the ground.
Carter misses with a wild combination.
Lafarge walks into a jab.
Carter throws a nice looking combination but Lafarge bobs and weaves to avoid any damage.
That's three minutes gone in the round.
Lafarge closes the distance and clinches.
Lafarge has Carter pressed up against the cage and is working for takedown. Carter manages to improve position though and keeps the fight standing.
That's three failed takedown attempts in the round for Sadsy Lafarge. That's going to take a lot out of him.
Carter can't break the clinch.
Carter wants to push off and get back to the center of the mat but Lafarge has him pressed against the cage.
Carter has had enough of the clinch but Lafarge keeps him there for the moment.
Lafarge tries to stall but Carter uses the opportunity to gain a better position.
Carter wants to push off and get back to the center of the mat but Lafarge has him pressed against the cage.
Lafarge keeps control of Carter as he tries to wriggle out of the double underhooks.
Lafarge breaks from the clinch.
Carter looks to score with a jab to the body but Lafarge is just out of range.
Carter throws a series of punches but Lafarge moves out of range.
Carter just misses with a punch to the body.
Carter takes a swing at Lafarge's ribcage but misses.
Carter throws a combination but it was largely blocked by Lafarge.
Lafarge has closed the distance and engaged Carter in a clinch.
Carter is looking to break free of the clinch but Lafarge has double underhooks.
Lafarge lands with a left to the head.
Lafarge tries for a takedown. No joy.
Lafarge tries to pull guard but can't drag his opponent to the mat. Carter just stands there and leans against the cage.
That's four minutes gone in the round.
Lafarge jumps guard but his hands slip and he falls flat on his back. Well, he's made himself look a right mug there, as Carter walks away with a smile on his face. Lafarge gets slowly back to his feet and shakes his head.
Carter lunges in with swinging rights and lefts but Lafarge circles away quickly and effectively.
Lafarge shoots in looking for a takedown. Carter tries to sprawl out of it but Lafarge keeps driving through. The fighters are pinned against the cage. Carter manages to get underhooks and after a bit of a struggle, circles away and we're back to standing.
Carl Carter seems to be getting the better of the standup.
Lafarge shoots in but Carter avoids the takedown attempt easily.
Carl Carter is fighting for a decision here - he's started to take the cautious approach.
Lafarge tries to clinch up but Carter circles away and keeps his distance.
A punch combination from Carter misses.
Lafarge looks for a takedown but Carter sprawls well.
Lafarge has a takedown stuffed.
Carter ducks low and lands a nice hook to the body of his opponent.
Sadsy Lafarge has stepped it up - he knows he needs a finish here!
Carter scores with a three punch combo!
And that's the end of the fight!
Carl Carter comfortably won the final round on my scorecard.
I've got Carter winning every round here. Surely the decision will go his way and he'll pick up a well deserved decision victory. Over to the ring announcer for the scorecards.
Ladies and gentlemen, after 3 rounds of action, we go to the scorecards for a decision.
Judge Timothy Bukovac scores the fight 27:30
Judge Suge Night scores the fight 27:30
Judge Percy O'Donnell scores the fight 27:30
In favor of your winner, by unanimous decision... Carl Carter!
|
|
|
|
|
|
|
|
|
|
|
|
|
|
|
|
|
|
|
|
|
|
|
| S |
C
A |
G |
S |
C
B |
G |
|
S |
C |
G |
|
energy
A | B |
|
hype
A | B |
|
pop
A | B |
|
mgr
A | B |
|
FIGHT
RATING
68% |
|
|
|
|
|
|
