|
|
PBP Commentary |
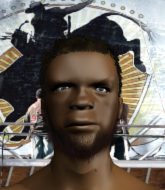
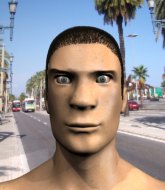
Coming up we have a featherweight MMA rules bout between Anti Happy (ranked 4171 p4p, 4359 weight class) and Takumi Sagaki (ranked 384 p4p, 395 weight class). Happy comes to the cage accompanied by Bvana iz lagune & Mikri Maus - AntiHepi. Sagaki is bouncing up and down as he enters the arena, backed by One Piece - AMV - We Are! (Full Song). Anti Happy has the better chin. Will he look to stand and bang today?
 |
|
 |
| 172 cm
30
158
10 - 19 - 0 |
|
172 cm
38
147
25 - 13 - 0 |
Great wrestler
World class boxer
Cardio machine |
|
Excellent grappler
Excellent boxer
Good gas tank |
|
| |
|
Ladies and gentlemen. This fight is 3 rounds, in the featherweight division.
Introducing the fighter to my left, fighting out of the red corner.
With a record of 10 - 19 - 0, fighting out of Los Angeles, Anti Happy!
And introducing the fighter to my right, fighting out of the blue corner.
With a record of 25 - 13 - 0, fighting out of Helsinki, Takumi Sagaki!
The judges for this bout are Ben Hemmingworth, Damien Edna and Chris Dean.

The bell rings for round one and we are underway!
Horrible takedown attempt by Sagaki or perhaps it was just good defense by Happy, which made it look bad.
Nice takedown defense from Happy. No joy for Sagaki on that attempt.

Happy shoots in with a lovely double leg takedown. Sagaki manages to land in full guard to minimise the damage.
Happy trying to control but Sagaki is working from the bottom.
Happy postures up in Sagaki's guard and throws a big left but Sagaki blocks it.
Sagaki managing to control the position.
Happy cracks Sagaki with a solid left hand.
We've had a slow start to the round here - hopefully the action picks up.
Sagaki is working from a closed guard but he's struggling to control his opponent.
Happy is fighting to break Sagaki's control of his arms but Sagaki is doing a good job of controlling the position at the moment.

That's one minute gone in the round.
Happy sitting in guard here, content to control.
Sagaki managing to control the position.
Happy slips nicely into half guard.
Happy throwing shots but they're hitting the canvas more than the man.
Sagaki trying to control from the bottom.
Sagaki regains full guard. Nicely done.
We've been hearing that Happy has been drilling a lot of ground and pound in training, so let's see if he get the finish.
Happy trying to control but Sagaki is working from the bottom.
Happy lands a nice shot whilst sitting in his opponent's guard.

That's two minutes gone in the round.
Sagaki keeping moving, preventing Happy from controlling successfully.
Happy loading up with the ground and pound but he's missing more than he's landing in this flurry.
Happy chips away with some ground and pound.
Happy's corner is telling him to maintain position.
Happy throwing strikes but missing.
Happy trying to control but Sagaki is working from the bottom.
Happy throwing shots from guard but he's hitting more mat than opponent.
Happy trying to land body shots but he keeps hitting the mat.
Sagaki pulls Happy in to control the position.

That's three minutes gone in the round.
Happy with a flurry of punches that miss.
Happy trying to land body shots but he keeps hitting the mat.
Sagaki keeping moving, preventing Happy from controlling successfully.

The referee has decided to stand the fighters back up, so we'll restart on the feet.
Happy drives through with a takedown into Sagaki's guard. Let's see what he can do from the top position.

Sagaki manages to wriggle out and sneak his way back up to his feet, so the fighters are now clinched up against the cage.
A short uppercut from Happy.

Happy manages to break the clinch.
Happy leaves Sagaki with his face pressed against the mat as he sprawls beautifully, defending against a solid takedown attempt.
Anti Happy has stuffed three takedown attempts in the round now. That's going to take a lot out of Takumi Sagaki.
Happy misses with a takedown attempt - Sagaki sprawls well and throws a nice strike on the way out which just misses.
Sagaki shoots in but Happy avoids the takedown attempt easily.
Sagaki throws a looping left and ducks down for a takedown. He's got his arms around Happy's waist but Happy gets an underhook and avoids the takedown by throwing Sagaki off to one side.
Happy tries to counter by moving into the clinch but Sagaki manages to circle out of the way.
Wooooo! Give it up for these two warriors! They are putting on a show!
Happy looks for a takedown but Sagaki sprawls well.

That's four minutes gone in the round.
Sagaki keeping at a good range here, avoiding a leg kick.
Sagaki gets his takedown attempt stuffed easily
enabling Happy to counter with a crisp jab.
Sagaki will have to do better than that with his takedown attempts.
Sagaki changes levels and looks for a double leg takedown. Happy tries to avoid it but Sagaki manages to keep hold of a leg and drag Happy to the ground. Happy escapes though and pops straight back up to his feet.

Sagaki gets tackled into the cage by Happy. Happy maintains the clinch.
Happy tries to pull guard but Sagaki holds him up against the cage and eventually Happy drops back down to his feet.
Happy breaks the clinch and we're back to striking at distance.
Sagaki shoots in for a takedown. "Ole!" shouts Happy as he jumps to the side.
Sagaki will have to do better than that with his takedown attempts.
Happy will need to tighten up his combinations if he doesn't want to gas himself out, swinging at thin air.
No luck for Sagaki with that takedown attempt.
And that is the end of the round. The fighters go back to their corners.
Anti Happy dominated that round.
The minute break is over - no more time for sponges and pep talks - back to the action!

Sagaki darts in looking for a takedown but Happy gets double underhooks and turns Sagaki into the cage.
Happy is really dominating this fight. Is there anything that Sagaki can do to turn this around?
Sagaki tries to shoot in for a takedown. He's got hold of a leg but Happy swivels and escapes.
Sagaki darts in looking for a takedown but Happy gets double underhooks and turns Sagaki into the cage.
Happy swung with a counter punch to the body but it didn't connect.
Anti Happy has stuffed three takedown attempts in the round now. That's going to take a lot out of Takumi Sagaki.
Sagaki shoots in looking for a takedown. Happy tries to sprawl out of it but Sagaki keeps driving through. The fighters are pinned against the cage. Happy manages to get underhooks and after a bit of a struggle, circles away and we're back to standing.
A thudding body kick lands there by Happy!
Happy closes the distance and clinches up, looking for a takedown. He shifts his weight and gets a nice trip into half guard.
Sagaki has managed to escape just enough to sneak back to his feet but Happy is on him like a limpet, forcing Sagaki back against the cage.
Sagaki is trying to break free.
Happy lands a right hand.
Fantastic stuff here - a very entertaining period of action, which has drawn cheers from the crowd.

Sagaki escapes the clinch and we're back to striking.

Sagaki scores with a takedown into Happy's guard.

Happy pushes Sagaki off for just long enough to get back to his feet. Very athletic spring there.
That's one minute gone in the round.
Happy misses with a wild combination.
Happy has a takedown stuffed.
Sagaki misses with a takedown attempt
and Sagaki takes a counter punch right on the button for his troubles.
Happy misses with a jab, cross combination.
Happy misses with a leg kick.
Happy shoots in and gets a takedown into Sagaki's guard.
Sagaki pushes Happy off and scrambles back to his feet.
The crowd cheering loudly, showing their appreciation for the quality fight we're seeing here.
Sagaki has his takedown stuffed
and Happy counters with a good low kick that Sagaki was not able to check.
A cross from Happy lands.
Happy keeps the fight standing with a nice sprawl.
Sagaki shoots in looking for a single leg takedown. Happy is trying to defend but Sagaki finishes it well and ends up in half guard. Let's see if he can advance position further.
My spies in HELLsinki inform me that Sagaki has been getting involved in the gym's BJJ sparring sessions. Let's see whether that pays dividends!
The ref warns both fighters not to hold the cage as they work up against the meshing.
Sagaki is breathing heavily.
That's two minutes gone in the round.

Happy actively working from the bottom here.
Happy wants to control but Sagaki is keeping busy and won't allow it.
Sagaki moves into side control, avoiding a weak kimura attempt from Happy.

Sagaki goes for an armbar! This could be all over! Wait, no, Happy rolls with the submission and now he's on top in Sagaki's guard! Nice work there by Happy!
Sagaki preventing the ground and pound from doing any damage.
Sagaki utilising some decent striking defenses from the guard, preventing the ground and pound.
Happy would like to get this fight back to the feet but can't get free from the closed guard.
That's three minutes gone in the round.
Happy wants to pass the guard but Sagaki is keeping the position.
Sagaki pulls Happy in close to his closed guard and prevents Happy from doing any damage or advancing position.
Happy throws a strike but Sagaki rolls with it and manages to sweep. Now he's in guard on top.

Sagaki drops back for a leg but he's not going to get it - he lets go and Happy dives on top into guard.

Happy wants to control from the top but Sagaki keeps moving.
Happy sitting in guard, not really doing much.
Sagaki trying to keep a closed guard but Happy is proving a slippery customer.
The fighters are pressed up against the cage, both looking to find a bit of space to work.
That's four minutes gone in the round.
Sagaki managing to control the position.
Happy scoring with punches to the head and body.
Happy wants to control from the top but Sagaki keeps moving.
Happy with a flurry of punches that miss.
Sagaki is working the butterfly guard. He manages to land a nice scissor sweep and is now in half guard on the top. Nice move.
Happy tries to get to full guard but Sagaki has control of the leg.
Happy moves into full guard.
And that is the end of the round. The fighters go back to their corners.
Anti Happy dominated that second round.
The fighters' corners scream their final instructions, as the referee calls time. Here we go, back to the action! This is the final round!

Excellent takedown into side control there by Sagaki.
Sagaki is looking for a kimura. He might have it! No, Happy has escaped the position, nice work there.
Happy is trying to get back to half guard.
Sagaki working hard here to secure a kimura but he's not really in the right position for it.
Happy is trying to control Sagaki's posture but Sagaki avoids it.
We've had a slow start to the round here - hopefully the action picks up.
Happy is looking to work his way out of this bad position but Sagaki is controlling him well.
That's one minute gone in the round.
Sagaki wants to work for a kimura but he's foiled early by Happy, who protects the arm well.
Sagaki swings around for an armbar but Happy sees it coming a mile off and turns beautifully into Sagaki's guard.
Happy trying to pass the guard but can't manage it just yet.
Anti Happy overall seems to be getting the better of the ground position in the fight so far.
Happy trying to control but Sagaki is working from the bottom.

Happy stands up from guard. Let's bang!
Jab, cross, leg kick. Nice combination by Happy!
Happy has a takedown stuffed.
Sagaki tries to shoot in for a takedown. He's got hold of a leg but Happy swivels and escapes.
Happy works the jab nicely.
Sagaki shoots in and drives through. Happy sprawls well.
Sagaki takes a big intake of breath there - he's definitely tired.
Happy misses with a jab and misses with a cross straight after too.
Sagaki is looking for the big counter here.
That's two minutes gone in the round.
No luck for Sagaki with that takedown attempt.
Anti Happy has stuffed three takedown attempts in the round now. That's going to take a lot out of Takumi Sagaki.
Sagaki showing good head movement there, avoiding the strikes from Happy.
This has been an exciting period of action!
Sagaki closes this distance looking for a takedown but Happy circles away.
No luck for Sagaki with that takedown attempt.
Sagaki goes for a double leg but Happy avoids the attempt and the two fighters end up clinched against the cage as Happy continues to drive forward.
Sagaki tries to score a power double leg takedown but Happy sees that one coming and sprawls well. That will dishearten Sagaki somewhat.
Takumi Sagaki seems to be the more aggressive standup fighter in this bout.
Happy lands a jab. Then a cross. Then finally a nice hook to the body. Good work there by Happy.
A punch combination from Happy misses.
That's three minutes gone in the round.
Sagaki shoots in but no luck this time.
As Sagaki looks to move away, Happy throws a big counter combo but Sagaki just gets out of the way.
Sagaki tries to sprawl but Happy drives through with a takedown into half guard.
Sagaki kicks Happy off and gets back to his feet.
Happy closes the distance, clinches up and gets a nice trip takedown into side control. Very smooth.
This is a great period of action - very entertaining stuff!
The ground and pound from Happy seems to be hitting the mat more than his opponent.
Sagaki managing to avoid any damage from the strikes thrown by Happy.
Happy in side control, trying to ground and pound but not landing this time.
Happy lands a few punches from side control.
Happy misses with a strike but at least he's keeping busy, looking to cause some damage - that will still help him when it comes to the judges scorecards.
Happy is trying to land an Americana. He has the arm isolated but Sagaki is keeping cool and he's avoided the danger for now.
Sagaki regains half guard there - taking advantage of Happy's attempt to lay and pray for a moment.
That's four minutes gone in the round.
Sagaki keeping control of the position.
Anti Happy is fighting for a decision here - he's started to take the cautious approach.
Happy looking for a kimura but he'll have to free his other leg if he wants to finish that. Perhaps he's just using it as a distraction technique.
The fighters are battling for position here. Sagaki manages to regain full guard. Nice work.
And that's the end of the fight!
Anti Happy showed his dominance in that final round.
Well Happy has outscored his opponent in every aspect of the fight today. Only a scarily incompetent judge or two will keep him from a well deserved win... Over to the ring announcer for the scorecards.
Ladies and gentlemen, after 3 rounds of action, we go to the scorecards for a decision.
Judge Ben Hemmingworth scores the fight 30:27
Judge Damien Edna scores the fight 30:27
Judge Chris Dean scores the fight 30:27
In favor of your winner, by unanimous decision... Anti Happy!
A relieved looking Anti Happy thanked the fans for their support and gave the usual line about them being amazing. They seemed to believe that he actually meant it.
|
|
|
|
|
|
|
|
|
|
|
|
|
|
|
|
|
|
|
|
|
|
|
| S |
C
A |
G |
S |
C
B |
G |
|
S |
C |
G |
|
energy
A | B |
|
hype
A | B |
|
pop
A | B |
|
mgr
A | B |
|
FIGHT
RATING
52% |
|
|
|
|
|
|
