|
|
PBP Commentary |
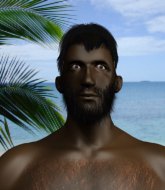
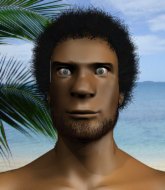
Coming up we have a light heavyweight MMA rules bout between Nick Saber (ranked 3306 p4p, 5812 weight class) and Edgar Shark (ranked 401 p4p, 555 weight class). Saber comes to the cage accompanied by Sky Walker. Buckle up people - heeeeeeeeeere we go!
 |
|
 |
| 175 cm
25
200
2 - 2 - 0 |
|
210 cm
19
205
0 - 1 - 0 |
BJJ White Belt
Solid Muay Thai
Intelligent |
|
BJJ White Belt
Good low kicks
Powerful |
|
| |
|
Ladies and gentlemen. This fight is 3 rounds, in the light heavyweight division.
Introducing the fighter to my left, fighting out of the red corner.
With a record of 2 - 2 - 0, fighting out of Tokyo, Nick Saber!
And introducing the fighter to my right, fighting out of the blue corner.
With a record of 0 - 1 - 0, fighting out of New York, Edgar Shark!
The judges for this bout are Trevor Gratis, Ian Loll and Yves DeLean.

The bell rings for round one and we are underway!

Shark pushes Saber up against the cage in a clinch.
Shark drops down looking for an ankle pick but Saber pulls his leg out and moves away.
Shark tries to close the distance and clinch up against the cage but Saber paws at him with a jab and circles away.
Saber attempts a low kick but it misses it's target.
Shark takes the fight into the clinch.
Shark drops down for a takedown but doesn't get it.
Saber taking a breather.
Shark fails to pull the fight into his guard.
Nick Saber has stuffed three takedown attempts in the round now. That's going to take a lot out of Edgar Shark.
Shark tries for a takedown. No joy.
Shark has dropped down and is looking to force the takedown but it's defended by Saber after a bit of a struggle.
Shark is a painfully thin specimen of a man. You do wonder whether a good body kick would snap him clean in two.
Saber wants to break free but Shark has control.

Saber escapes the clinch and we're back to striking.
We've had a slow start to the round here - hopefully the action picks up.
Saber swats away the attempt to clinch by Shark.
Saber lands a head kick. Shark smiles back at him and beckons him forward.
Shark's coach down at Iron Sharpens Iron was telling us pre-fight that they have been working on Shark's balance. Obviously they view that as a key factor in the outcome of this fight.
Saber throws a two punch combo that lands nicely.

That's one minute gone in the round.
Saber misses with a few strikes there.
Saber fails with an attempt to clinch.
Shark moves in looking to clinch but Saber pushes him off.
Shark instigates a clinch.
Saber breaks the clinch and we're back to striking at distance.
Shark avoids the head kick by Saber.
Shark is looking to clinch.
As Shark looks to move away, Saber throws a big counter combo but Shark just gets out of the way.
Saber throws a body kick that misses.

Saber fakes with an overhand right and moves in to clinch with Shark, pushing him back against the cage.
Shark tries to jump guard but he falls flat on his backside. Saber smiles and moves away.
Saber swings and misses with a hook to the body.
Saber throws a head kick that misses.
Shark changes levels for a counter takedown but doesn't follow through with his attempt.
Shark tries to close the distance and clinch up but Saber swats him away and circles back towards the center.
Shark tries to close the distance and clinch but Saber swats him to one side with an open hand palm strike and circles away.
Saber pushing out the jab but it's not landing.
Shark doesn't manage to clinch there - Saber circles away.

That's two minutes gone in the round.
Shark darts in and clinches Saber up against the cage.
Saber breaks from the clinch.
Saber throws a head kick that misses and slips in the process. He scrambles back to his feet and the fighters circle.
Saber throws a poor cross that misses
and Shark counters with a nice uppercut.
The fans in attendance giving it up for the two fighters, who have really let it all hang out in the last minute or so!
Saber missing with a left hand there. Shark was out of range so wasted energy throwing that one.
Saber misses with an attempted mid kick.
Shark tries a counter takedown but it's more of a dummy move, and he uses it to push himself away.
Shark drives through and clinches with Saber against the cage.
Saber is defending well against a takedown attempt.
Saber tries to break free but Shark pushes him back against the cage.
Saber's corner calls for him to break the clinch, which he does.
Shark misses with a takedown
and Saber counters with a three punch combination, finished off with a leg kick. Nice work.
Nick Saber is looking to keep the fight on the feet at all costs.
Shark wants to clinch.
Saber lunges in with swinging rights and lefts but Shark circles away quickly and effectively.

That's three minutes gone in the round.
Shark tries to clinch but Saber moves out of range.
Saber misses with a half-hearted attempt at a head kick.
Saber moves in looking to clinch but Shark pushes him off.
Shark circles away from the clinch attempt.
Shark wants to clinch.
Saber swung with a counter punch to the body but it didn't connect.
Saber misses with an attempted mid kick.
Shark wants to clinch.
Shark doesn't manage to clinch there - Saber circles away.
Saber throws a body kick but he wasn't in range.

Excellent takedown into side control there by Shark.
Saber is not content to let Shark control the position.

That's four minutes gone in the round.
Shark taking a breather here.
The fighters are pressed up against the cage, both looking to find a bit of space to work.
Shark is looking to take a break and control but Saber is keeping him honest, looking to work from the bottom.
Shark slows the pace down.

Shark tries for a kimura. Not really close to a finish though.
And that is the end of the round. The fighters go back to their corners.
Nick Saber dominated that round.
Well, the break between rounds is over. Let's get back to the scrappin!

Saber misses with a wild combination.
Saber is really dominating this fight. Is there anything that Shark can do to turn this around?
The fight stays on the outside here - Shark looks like he's thinking about clinching though.
Shark moves in looking to clinch but Saber pushes him off.
Shark moves into the clinch.
Shark drops to a knee looking for a takedown but Saber gets the underhooks and prevents it.
Shark has Saber pressed up against the cage and is working for takedown. Saber manages to improve position though and keeps the fight standing.
Saber wants to push off and get back to the center of the mat but Shark has him pressed against the cage.
Saber is looking to break free of the clinch but Shark has double underhooks.
We've had a slow start to the round here - hopefully the action picks up.
Saber using the Thai plumb to throw knees but Shark has his back arched nicely, preventing the strike.
Shark tries to pull guard but Saber forces him back to his feet, against the cage.
Nick Saber has stuffed three takedown attempts in the round now. That's going to take a lot out of Edgar Shark.
Shark is working on a leg, looking for a takedown but Saber is defending well.
Saber breaks the clinch and we're back to striking at distance.
Shark tries to close the distance and clinch up against the cage but Saber paws at him with a jab and circles away.
Shark tries to close the distance and clinch up against the cage but Saber paws at him with a jab and circles away.
Saber could do with losing a few pounds - he looks very soft around the mid section, to put it politely.
That's one minute gone in the round.
Saber wants to clinch.
Shark tries to clinch but is not successful on this occasion.
Shark tries to clinch but Saber moves out of range.
Shark tries to clinch there but Saber circles away.
Shark wants to clinch up but Saber keeps it at a distance.
Shark tries to clinch but fails miserably
enabling Saber to counter with a crisp jab.
Shark takes the fight into the clinch.
Shark is looking for a takedown up against the cage. Saber gets underhooks though and prevents the takedown attempt.
Shark wants a takedown.
Shark tries for a takedown. No joy.
Saber tries to break free but Shark pushes him back against the cage.
Saber gets underhooks to prevent Shark's takedown attempt.
Saber breaks the clinch and we return to the middle of the mat.
That's two minutes gone in the round.
Saber has managed to clinch.
Saber lands an elbow inside.
Saber is defending well against a takedown attempt.
Shark is working for takedown but Saber is calmly controlling the position for now.
Saber lands with a short shot to the head.
Saber lands an uppercut.
Saber is trying to break free.
Shark wants a takedown but no success here.
Shark changes levels and goes for a takedown here. Saber fights it off and pushes away nicely.
Shark is looking to clinch.
Nick Saber is looking to throw some combinations by the looks of things.
The fans in attendance giving it up for the two fighters, who have really let it all hang out in the last minute or so!
Saber tries to close the distance and clinch up but Shark swats him away and circles back towards the center.
Shark tries to clinch but is not successful on this occasion.
Shark tries to clinch but Saber moves out of range.
Saber throws a big counter combination but Shark scrambles out of danger and avoids any damage.
Shark is looking to clinch but Saber is avoiding it.
Saber drives through and clinches with Shark against the cage.
Shark goes for a takedown in the clinch but Saber prevents it.
Saber is trying to stall.
That's three minutes gone in the round.
Shark drops down for a takedown but doesn't get it.
Saber prevents the takedown attempt.
A bit of stalling here from Saber.
Saber breaks the clinch.
Shark darts in and clinches Saber up against the cage.
Shark has Saber pressed against the cage, preventing Saber from circling away and getting back to striking at range.
Saber stops a takedown attempt from Shark.
Shark blocks an elbow strike.
Saber tries a knee to the head but he's missed.
Shark drops down for a takedown but doesn't get it.
Saber misses the knee to the body. Nice hip positioning from Shark.
Shark wants a takedown but no success here.
That's four minutes gone in the round.
Saber's corner calls for him to break the clinch, which he does.
Saber gets to the clinch - let's see what his plan is here.
Saber is looking to break free of the clinch but Shark has double underhooks.
Saber is pressed up against the cage. Shark has hold of a leg and is looking to drag Saber down to the mat. Saber avoids the attempt though and has circled away. We're back to striking at a distance.
Nick Saber is winning the standup battle so far.
Saber fakes a jab and scores with a low kick.
Saber stuffs the takedown attempt from Shark. Shark gets slowly back to his feet.
A slapping leg kick lands for Saber.
The fight stays on the outside here - Shark looks like he's thinking about clinching though.
The crowd thankful this round is nearly over.
The fight stays on the outside here - Saber looks like he's thinking about clinching though.
Shark misses with a takedown attempt. He shot from a bit too far out.
And that is the end of the round. The fighters go back to their corners.
Nick Saber dominated that second round.
The fighters get back to their feet, the hooter sounds and we're back to the action! Let's get this one finished - here comes the final round!

Shark is looking to clinch.
Saber is looking to counter with a shot to the body.
Saber misses with a series of wild punches.
A good leg kick by Saber.
Shark takes a step back and watches a body kick go sailing past his mid section.
A head kick misses from Saber.
Shark is looking to take this fight into the clinch.
Saber has managed to clinch.
We've had a slow start to the round here - hopefully the action picks up.
Saber has had enough of the clinch and is looking to separate.
Saber is looking to break free of the clinch but Shark has double underhooks.
Saber lands a body punch - he's looking to wear down Shark.
Shark is trying to drag Saber to the mat but Saber just about manages to keep his footing. He used the cage to his advantage there.
Saber gets through Shark's defenses to land a nice punch to the side of the head.
Nick Saber has scored more points in the clinch so far.
That's one minute gone in the round.
Saber is looking to break free of the clinch but Shark has double underhooks.
Saber is struggling to control the position.
Saber manages to break the clinch.
Saber wants to clinch up but Shark keeps it at a distance.
Shark circles away from the clinch attempt.
Shark tries to clinch up.
Saber throws a big counter combination but Shark scrambles out of danger and avoids any damage.
Shark tries to clinch up.
Saber half committed to a counter leg kick.
Saber tries to close the distance and clinch but Shark swats him to one side with an open hand palm strike and circles away.
Shark steps in looking to clinch after the strikes miss from Saber.
Saber thuds a mid kick into his opponent's body. That will wear on Shark if he has to take too many more of those.
Saber clinches with his opponent.
Shark has hold of a leg and is looking for a trip takedown. Saber avoids it nicely though and we remain in the clinch.
Saber connects with a nasty looking knee right to Shark's face.
Shark prevents Saber from breaking the clinch.
Edgar Shark has stepped it up - he knows he needs a finish here!
That's two minutes gone in the round.
Saber misses with a knee to the head.
Shark prevents Saber from breaking the clinch.
Shark wants a takedown but no success here.
Nick Saber has stuffed three takedown attempts in the round now. That's going to take a lot out of Edgar Shark.
Shark drops to a knee looking for a takedown but Saber gets the underhooks and prevents it.
Shark wants to take the fight to the mat but Saber manages to get underhooks and keep the fight in the clinch.
Saber pushes off and circles away, back to the middle of the mat.
Saber misses with a double jab
and Shark counters with a good right hand that lands right on the jaw.
Shark showing good head movement there, avoiding the strikes from Saber.
Both fighters are breathing heavily.

A head kick lands from Shark that sends Saber to the canvas. Saber tries to scramble back to his feet but Shark brings him back down into side control.

Saber is rocked!
The fans in attendance giving it up for the two fighters, who have really let it all hang out in the last minute or so!
Shark scores with a big shot from side control... and another... and another! Oh Saber is done here - save him referee! More strikes land and eventually the ref does step in and Shark can finally stop beating on his defenseless opponent!
Ladies and gentlemen, after 3:58 of round 3, we have a winner by way of TKO (Strikes). Edgar Shark!
Edgar Shark decided to go for the less than humble approach in his post fight interview, telling everyone how he is going to conquer the world. The crowd seemed to like it when really that sort of approach could have gone either way.
|
|
|
|
|
|
|
|
|
|
|
|
|
|
|
|
|
|
|
|
|
|
|
| S |
C
A |
G |
S |
C
B |
G |
|
S |
C |
G |
|
energy
A | B |
|
hype
A | B |
|
pop
A | B |
|
mgr
A | B |
|
FIGHT
RATING
57% |
|
|
|
|
|
|
