|
|
PBP Commentary |
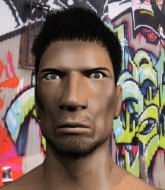
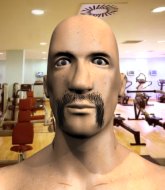
Coming up we have a heavyweight MMA rules bout between Tim Hard (ranked 0 p4p, 0 weight class) and Blake Wheeler (ranked 0 p4p, 0 weight class). Hard comes to the cage accompanied by Crazy Bitch. Blake Wheeler will no doubt be looking to use his reach advantage to good effect.
 |
|
 |
| 187 cm
19
227 lbs
0 - 12 - 0 |
|
200 cm
20
270 lbs
0 - 1 - 0 |
Dangerous GnP
Brawler
Good chin |
|
BJJ White Belt
Excellent MT
Solid chin |
|
| |
|
Ladies and gentlemen. This fight is 3 rounds, in the heavyweight division.
Introducing the fighter to my left, fighting out of the red corner.
With a record of
0 - 12 - 0, fighting out of Montreal, Tim Hard!
And introducing the fighter to my right, fighting out of the blue corner.
With a record of
0 - 1 - 0, fighting out of Montreal, Blake Wheeler!
The judges for this bout are Robert Douchet, Trevor Gratis and Dillan Fox.

The bell rings for round one and we are underway!
Horrible takedown by Hard or perhaps it was just good defense by Wheeler which made him look bad.

Hard shoots in for a takedown and gets it.
Wheeler is trying to get back to full guard.
Hard lands with an elbow from half guard - that looked like it hurt.
Hard slips a nice elbow through Wheeler's hands, connecting with Wheeler's forehead.
Wheeler is looking to control Hard's leg but it's slowly edging free. Can Wheeler avoid being mounted?
Hard working the head and body with strikes.
Wheeler really doesn't want to stay on the ground with Hard. If he can't get it back to his feet, it's only a matter of time before he'll be tapping out.
Wheeler makes his way to full guard. A much better position for Wheeler.
Hard lands a couple of elbows.
Hard working some ground and pound from guard but it's not doing any damage.
Hard lands a couple of decent looking shots.

That's one minute gone in the round.
Hard keeps in close for a moment and lands a decent shot to the side of Wheeler's head.
Hard might be looking to lock onto one of his opponent's long limbs for a submission, whilst we're on the ground.
Hard throwing strikes but missing.
Wheeler striking off his back but it's not causing Hard any problems.
Wheeler preventing the ground and pound from doing any damage.
Hard postures up to throw the ground and pound strikes but they don't connect.
Wheeler trying to keep a closed guard but Hard is proving a slippery customer.
Wheeler wants to sweep here but Hard controlling him for the moment.
Hard lands a couple of decent looking shots.
Wheeler looking to control.
Hard chips away with some ground and pound.
Hard lands a couple of decent looking shots.
Hard won't allow Wheeler to get back to his feet.

That's two minutes gone in the round.
Wheeler is trying to control the position but Hard postures up.
The fighters are starting to perspire pretty heavily.
Wheeler lands a beautiful switch and he's in full mount! That could spell trouble for Hard!
Hard throwing hammer fists to the chest of Wheeler. What's that going to do exactly?
Wheeler trying to control but he's not successful this time.
Hard is wriggling around trying to escape.
Hard is breathing heavily.
Hard swinging wildly from the bottom but he's not landing.
Hard throwing hammer fists to the chest of Wheeler. What's that going to do exactly?
Hard tries to reverse the position but Wheeler maintains control.
Hard throws some wild strikes from the bottom.
Hard keeping his composure momentarily, calmly looking to get back to half guard.
Wheeler trying to control but Hard is having none of it.

That's three minutes gone in the round.
Hard working to try and regain half guard.
Wheeler blocks Hard's feeble attempts to strike from the bottom.
Hard flailing away with punches but nothing is landing.
Wheeler can't quite control the action as he would like just now, as Hard is looking to escape.
Hard gets back to half guard.
Wheeler seems very keen to just sit and control from half guard but Hard does not like that idea so much and is remaining active off his back.
Hard flails away from the bottom but he's not doing any damage.

That's four minutes gone in the round.
A lull in the action here being met with boos from the crowd.
Hard avoiding damage under a succession of punches from Wheeler.
Hard keeping his head moving to avoid the ground and pound.
Hard works his way to full guard. Good work.
Hard has a butterfly guard looking to sweep but Wheeler has passed into side control.
Wheeler misses with a strike but at least he's keeping busy, looking to cause some damage - that will still help him when it comes to the judges scorecards.
Hard misses with a strike from the bottom.
Wheeler blocks the strikes from Hard.
Hard throwing some weak shots from the bottom that do no damage.
Wheeler trying to control the action but Hard is working from the bottom.
The ref warns both fighters not to hold the cage as they work up against the meshing.
Wheeler avoids the strikes from the bottom by Hard.
Hard throws an elbow to the body but it doesn't land.
And thats the end of the round the fighters go back to their corners.
Tim Hard dominated that round.
The fighters get back to their feet, the hooter sounds and we're back to the action!

Wheeler fails with a takedown attempt.
Hard tries for a takedown but Wheeler sees it coming a mile off and avoids it easily.
Hard fails with a rather predictable takedown attempt.
No luck for Wheeler with that takedown attempt.

Wheeler closes the distance and pushes Hard back into the cage.
Hard has hold of a leg and is looking for a trip takedown. Wheeler avoids it nicely though and we remain in the clinch.
That's three failed takedown attempts in the round for Tim Hard. That's going to take a lot out of him.
Hard has Wheeler pressed up against the cage and is working for takedown. Wheeler manages to improve position though and keeps the fight standing.
Wheeler wants a takedown.

Wheeler's corner calls for him to break the clinch, which he does.
Wheeler lands a two punch combo.
Wheeler looks for a takedown but Hard sprawls well.
Both fighters are absolutely exhausted here.
Wheeler lands with an uppercut that bounces Hard off the cage and back into rage.
Hard keeps the fight on the outside.
Wheeler fails to land the takedown.
That's one minute gone in the round.
Wheeler stuffs the takedown.
Wheeler looks for a takedown but Hard sprawls well.
Wheeler tries to clinch but Hard moves out of range.
Tim Hard seems to be the more aggressive standup fighter in this bout.
Hard changes levels and looks for a double leg takedown. Wheeler tries to avoid it but Hard manages to keep hold of a leg and drag Wheeler to the ground. Wheeler escapes though and pops straight back up to his feet.
Wheeler fails with a rather predictable takedown attempt.
A really sloppy takedown attempt there from Hard.
Wheeler throws a quick head kick that skims the top of Hard's head.
Hard fails with the takedown.
Wheeler's corner calls for a 1,2 combination and Wheeler duly obliges.
Hard misses with a takedown attempt - Wheeler sprawls well and throws a nice strike on the way out which just misses.
Hard shoots in for a takedown. "Ole!" shouts Wheeler as he jumps to the side.
That's two minutes gone in the round.
Wheeler will have to do better than that with his takedown attempts.
Hard fakes an overhand right and shoots for a takedown. Wheeler sprawls well initially but Hard persists and gets the takedown into half guard.
Wheeler is trying to control but can't.
Wheeler has hold of Hard's hands but Hard slips his arm to the side and lands an elbow.
The fighters are battling for position here. Wheeler manages to regain full guard. Nice work.
Hard scoring with punches to the head and body.
Hard connects with a couple of short punches.
Hard postures up.

Wheeler is working actively off his back, looking to secure an arm or perhaps work for a triangle.
Wheeler throwing some rather feeble looking strikes off his back.
It really doesn't seem like the step up in weight is hurting Hard here at all. He's more than holding his own against the bigger man.
That's three minutes gone in the round.
Hard works over Wheeler with some ground and pound from guard.
Hard with a nice head shot there.
Hard throwing shots from guard but he's hitting more mat than opponent.

The referee decides to stand the fighters back up.
Wheeler throws a head kick that Hard semi-blocks.
Hard shoots in and gets a takedown into half guard. Hard showed some decent athleticism there.
Wheeler on the receiving end of some nice ground and pound.
Nice strikes from Hard there.
Wheeler trying to hold on to Hard's head to control him but Hard postures up.
Hard is scoring with some nice ground and pound from the dominant position.
That's four minutes gone in the round.
Wheeler has no desire to be mounted, so is trying to control. Hard is working away from the top position though.
Wheeler gets full guard.
Hard postures up and lands some nice ground and pound.
Hard postures up and lands a big shot to Wheeler's brow.
Wheeler controls Hard momentarily but Hard frees himself.
Wheeler looking for a sweep. Not yet Wheeler, not yet.
Hard stands up over Wheeler, holding his feet. He dives back in and lands a decent shot to the head.
Wheeler looking to sweep here. No luck so far.
Wheeler is trying to stand up but he's not managed so far.
Hard in full guard, throwing the ground and pound. No damage this time.
And thats the end of the round the fighters go back to their corners.
Tim Hard dominated that second round.
OK. That's time! The bell goes and we're back to the action. This is the final round!

Wheeler throws a two punch combo that lands nicely.
Wheeler shoots for a double leg takedown but Hard sprawls well. He's pushed Wheeler's face into the mat and manages to get back to his feet relatively easily.
Wheeler misses with a jab and misses with a cross straight after too.
Hard looks for a takedown but Wheeler sprawls well.
Wheeler tries to clinch up but Hard circles away and keeps his distance.
Hard closes the distance, clinches up and gets a nice trip takedown into side control. Very smooth.
Hard is working Wheeler over with some ground and pound from side control.
Hard cracks Wheeler with a big elbow.
Tim Hard overall seems to be getting the better of the ground position in the fight so far.
Wheeler is trying to control Hard's posture but Hard avoids it.
Wheeler takes an elbow right on the bridge of the nose and winces in pain.
Both fighters are breathing heavily.
You can see the frustration on Wheeler's face, being in this tough position on the bottom.
Hard lands a decent elbow from side control.
That's one minute gone in the round.
Wheeler struggling a bit here.
Wheeler takes a big shot right to the temple there but he's taken it well.
Wheeler is trying to get back to half guard.
Hard lands an elbow.
Wheeler wants to control but Hard postures up.
Wheeler gets one leg under and gets the fight to half guard.
Hard takes advantage of the dominant position to land a couple of big hammer fists.
Hard scoring with strikes to the body and head.
Hard throwing punches and elbows but they're not doing any damage.
That's two minutes gone in the round.
Well. There's a bit of a lull in the action here and the crowd are starting to get restless.
Hard throwing shots but Wheeler is blocking nicely.
Wheeler wants to control but Hard is keeping busy.
Hard working some ground and pound from close in. He's looking to maintain this position and strike for a while by the looks of things... although he'll probably advance to full mount in a minute now I've said that.
Hard working the head and body with strikes.
Wheeler has no desire to be mounted, so is trying to control. Hard is working away from the top position though.
Neither fighter is doing enough for the referee's liking and he's decided to stand them back up.
Horrible takedown by Hard or perhaps it was just good defense by Wheeler which made him look bad.
Wheeler looks for a takedown here. Will he get it? Hard is fending him off so far but Wheeler persists. Nope, Hard circles away and we're back to standing.
Hard misses with a takedown
and Wheeler counters with a right hand to the body.
That's three failed takedown attempts in the round for Tim Hard. That's going to take a lot out of him.
Hard tries to shoot in for a takedown. He's got hold of a leg but Wheeler swivels and escapes.
An inside leg kick lands from Wheeler.
Hard shoots in looking for a takedown. Wheeler tries to sprawl out of it but Hard keeps driving through. The fighters are pinned against the cage. Wheeler manages to get underhooks and after a bit of a struggle, circles away and we're back to standing.
That's three minutes gone in the round.
Hard takes a head kick and shrugs it off.
Hard throws a looping left and ducks down for a takedown. He's got his arms around Wheeler's waist but Wheeler gets an underhook and avoids the takedown by throwing Hard off to one side.
Hard is on the wrong end of a nice combination from Wheeler.
Hard circles away from the clinch attempt.
Wheeler lands a head kick. Hard smiles back at him and beckons him forward.
Wheeler tries to clinch up but Hard circles away and keeps his distance.
Hard keeps the fight on the outside.
Hard looks for a takedown here. Will he get it? Wheeler is fending him off so far but Hard persists. Nope, Wheeler circles away and we're back to standing.
Hard doesn't succeed with the takedown
and Wheeler makes him pay by landing a nice hook to the body before moving out of range.
Wheeler doesn't manage to clinch there - Hard circles away.
Hard looks for a takedown here. Will he get it? Wheeler is fending him off so far but Hard persists. Nope, Wheeler circles away and we're back to standing.
Wheeler shoots in and drives through. Hard sprawls well.
Blake Wheeler is looking to throw some combinations by the looks of things.
The fight stays on the outside here - Wheeler looks like he's thinking about clinching though.
Wheeler lands a jab-cross combination.
That's four minutes gone in the round.
Hard shoots in for a takedown but Wheeler shows good takedown defense.
Hard fakes an overhand right and shoots for a takedown. Wheeler sprawls well initially but Hard persists and gets the takedown into half guard.
Hard looks towards his corner to check for any instructions. The corner give him nothing to work with, so he cracks Wheeler with a short hammerfist. I guess that's as good as any advice he could get in this position.
Hard passes the guard and advances to mount!
Hard working the ground and pound effectively.
Wheeler tries to reverse the position but Hard maintains control.
Hard blocks Wheeler's feeble attempts to strike from the bottom.
Hard landing strikes from the mount and Wheeler is in trouble!
Wheeler taking shots to the head.
Blake Wheeler has stepped it up - he knows he needs a finish here!
Wheeler is bucking up trying to escape but Hard cracks him with another couple of good strikes.
And that's the end of the fight!
Tim Hard showed his dominance in that final round.
Well I reckon that's a shut out for Hard, winning every round. Will the judges agree? They are the ones who matter, even if they are often depressingly incompetent. Over to the ring announcer for the scorecards.
Ladies and gentlemen, after 3 rounds of action, we go to the scorecards for a decision.
Judge Robert Douchet scores the fight 29:27
Judge Trevor Gratis scores the fight 30:27
Judge Dillan Fox scores the fight 30:27
In favor of your winner, by unanimous decision... Tim Hard!
|
|
|
|
|
|
|
|
|
|
|
|
|
|
|
|
|
|
|
|
|
|
|
| S |
C
A |
G |
S |
C
B |
G |
|
S |
C |
G |
|
energy
A | B |
|
hype
A | B |
|
pop
A | B |
|
mgr
A | B |
|
FIGHT
RATING
58% |
|
|
|
|
|
|
