|
|
PBP Commentary |
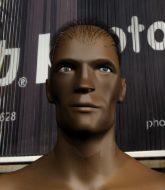
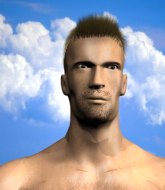
Coming up we have a welterweight MMA rules bout between Brad Blixhaven (ranked 0 p4p, 0 weight class) and Matt Murdock (ranked 0 p4p, 0 weight class). Over to our ring announcer for the fighter introductions!
 |
|
 |
| 188 cm
19
170 lbs
2 - 0 - 0 |
|
188 cm
22
183 lbs
1 - 0 - 0 |
BJJ Blue Belt
Counter striker
Granite chin |
|
BJJ White Belt
Good kicks
Determined |
|
| |
|
Ladies and gentlemen. This fight is 3 rounds, in the welterweight division.
Introducing the fighter to my left, fighting out of the red corner.
With a record of
2 - 0 - 0, fighting out of Montreal, Brad Blixhaven!
And introducing the fighter to my right, fighting out of the blue corner.
With a record of
1 - 0 - 0, fighting out of Montreal, Matt Murdock!
The judges for this bout are Gregory Folan, Trevor Gratis and Elvis Blanc.

The bell rings for round one and we are underway!
Murdock misses with a series of wild punches.
Blixhaven takes a step back and watches a body kick go sailing past his mid section.
Blixhaven dives in and grabs Murdock's left leg, looking for a takedown. Murdock pushes down on Blixhaven's head and hops out.
Left hook, right uppercut from Murdock.
Murdock throws a push kick but Blixhaven slaps the foot to one side.
Blixhaven shoots in and drives through. Murdock sprawls well.
Matt Murdock seems to be the more aggressive standup fighter in this bout.
Murdock pulls out of a head kick attempt.
Murdock throws a head kick that misses and slips in the process. He scrambles back to his feet and the fighters circle.
Murdock looking to land some kicks to the body here.

Blixhaven shoots in and scores a nice double leg takedown into half guard.
Blixhaven is pressing down on Murdock's thigh, looking to free his foot. Murdock is holding on for now.
The ref warns both fighters not to hold the cage as they work up against the meshing.

Blixhaven seems to be working for a kimura but Murdock defends the submission attempt.
Murdock is trying to stand up here but Blixhaven is controlling him well.
Murdock is defending against the submission attempts here by Blixhaven.

That's one minute gone in the round.
Blixhaven is looking for a kimura but he's never going to get it from there.
Blixhaven is breathing heavily.
Blixhaven stops Murdock from getting back to his feet.
Both fighters really going for it on the ground here!
Blixhaven seems to be looking for submissions.

Neither fighter is doing enough for the referee's liking and he's decided to stand them back up.
Murdock throws a head kick but Blixhaven moves out of range.
Blixhaven uses decent footwork to sidestep a right hand from Murdock.
Murdock misses with a half-hearted attempt at a head kick.
Murdock throws a head kick that Blixhaven semi-blocks.
Murdock tries a switch kick but it misses it's target.
Murdock throws a head kick but Blixhaven moves out of range.
Murdock jabbing away but nothing is landing.

That's two minutes gone in the round.
Blixhaven shoots in and drives through. Murdock sprawls well.
That's three failed takedown attempts in the round for Brad Blixhaven. That's going to take a lot out of him.
Murdock misses with a body kick.
Blixhaven fails with a takedown attempt.
Murdock rushes forward with a series of wild hooks but Blixhaven moves out of range and avoids them all easily.
Murdock tries a switch kick but it misses it's target.
Murdock lands with a kick to the temple. Blixhaven shrugs as if to say "is that all you've got?"
Murdock throws a right and a left that Blixhaven avoids nicely.
Blixhaven fails with a takedown attempt.
Murdock throws a head kick that misses.
Blixhaven fails with a takedown attempt from distance.

That's three minutes gone in the round.
Murdock with a jab.
Blixhaven avoids the head kick by Murdock.
Murdock misses with a head kick.
Blixhaven takes a body kick right on the floating rib. Ouchie.
Murdock throws a wild body kick that Blixhaven sees coming a mile off.
Blixhaven fakes high and shoots in for a takedown but Murdock avoids it really well and circles away.
Murdock pulls out of a head kick attempt.
Blixhaven walks into a stiff left hand from Murdock.
Murdock stuffs the takedown.
Murdock throws a sloppy head kick and Blixhaven moves out of range easily.
Murdock displaying good standup as he scores with a three punch combination.
Blixhaven shoots in with a takedown attempt and he has Murdock pinned against the cage. Murdock gets the underhooks and manages to circle away.

That's four minutes gone in the round.
Murdock tries to bum rush Blixhaven with a series of wild strikes but Blixhaven uses good footwork to avoid the assault.
Murdock misses with a few strikes there.
Blixhaven shoots in for a takedown and gets it.
Blixhaven is working for a kimura but Murdock is defending it quite comfortably.
Murdock looks like he's trying to stand up.
Murdock is in trouble now - Blixhaven has advanced to mount!
Blixhaven working for a submission but Murdock is keeping him at bay.
And thats the end of the round the fighters go back to their corners.
Matt Murdock dominated that round.
That's time! Back to the action!

Murdock lands with a cross.
Murdock throws a head kick but Blixhaven moves out of range.
Murdock fakes low and throws an overhand right that catches Blixhaven on the side of the head.
Murdock misses with a series of wild punches.
Murdock misses with a body kick.
Murdock misses the jab.
Murdock throws a sloppy head kick and Blixhaven moves out of range easily.
We've had a slow start to the round here - hopefully the action picks up.
Blixhaven fails with a takedown attempt.
Murdock misses with a series of wild punches.
Murdock misses with a few strikes there.
Murdock is breathing heavily.
That's one minute gone in the round.
Murdock throws a looping overhand right but Blixhaven ducks down to avoid it.
Murdock swinging wilding here.
Murdock misses with a half-hearted attempt at a head kick.
Blixhaven drops down and drives through with a powerful takedown into guard.
Blixhaven advances to half guard.
We get told so often about how wrestlers don't like to be on their backs. Let's see if Murdock can do anything to dispel that myth.
Blixhaven has freed up his trapped foot and advances to mount.
Blixhaven working to secure an arm triangle but it's not happening for him just yet.
Blixhaven working for a guillotine from mount but Murdock is in no mood to give up.
Blixhaven is in full mount, looking to secure a guillotine but Murdock is surviving well by controlling Blixhaven's body position as best he can.
That's two minutes gone in the round.
Murdock's corner are shouting for him to stand up but that's bad cornering - how is he meant to stand up when he's mounted? He should be looking to improve his position on the ground before trying to stand back up.
Blixhaven is working on an americana here. Ooh, that looks pretty nasty! Nope, Murdock has managed to escape the submission attempt.

Murdock bucks up and throws Blixhaven to the side - he's got back to his feet. Great escape!
Murdock thows a body kick. Blixhaven tries to catch it but that hurt him.
Murdock misses with a head kick.
Blixhaven shoots in for a takedown and gets it. Oh and he's advanced to full mount straight away.
Blixhaven looking to secure an arm triangle but Murdock defends it well.
Murdock's corner are shouting for him to stand up but that's bad cornering - how is he meant to stand up when he's mounted? He should be looking to improve his position on the ground before trying to stand back up.
Blixhaven looking for an armbar but decides to keep the dominant position instead.
Blixhaven is going olschool here, as he tries to force Murdock to tap using a forearm choke. This isn't 1993 though, so Murdock shrugs it off.
That's three minutes gone in the round.
Blixhaven is working for a guillotine from mount but Murdock frees his head quite easily.
Blixhaven working for a submission but Murdock is keeping him at bay.
Blixhaven wants to take Murdock's back here but Murdock is holding on to an arm, himself looking to escape.
Murdock is really trying hard to get back to his feet.
Blixhaven with some aggressive grappling here. He's looking for submissions here, rather than waiting for the opportunity to counter.
Murdock wants to use the cage to get back to his feet here.
That's four minutes gone in the round.
A few boos can be heard. I'm sure they will multiply if the fighters don't pick up the pace.
The fighters are pressed up against the cage, both looking to find a bit of space to work.
Blixhaven is in full mount, looking to secure a guillotine but Murdock is surviving well by controlling Blixhaven's body position as best he can.
Blixhaven is thinking about an arm triangle here, looking to tighten it up before moving to side control. Murdock can see it coming though and defends well with a couple of strikes to the head and some good arm positioning.
Murdock defends a decent attempt at a guillotine from Blixhaven.
Blixhaven is going olschool here, as he tries to force Murdock to tap using a forearm choke. This isn't 1993 though, so Murdock shrugs it off.
Murdock is trying to escape but when you're mounted that's not too easy.
Blixhaven looking to secure an arm triangle but Murdock defends it well.
And thats the end of the round the fighters go back to their corners.
Brad Blixhaven dominated that second round.
The fighters get back to their feet, the hooter sounds and we're back to the action! This is the final round!

A punch combination from Murdock misses.
Murdock bobbing and weaving, closes the distance and lands a hook to the side of Blixhaven's head.
Murdock tries a head kick but it misses.
Blixhaven dives in and grabs Murdock's left leg, looking for a takedown. Murdock pushes down on Blixhaven's head and hops out.
Blixhaven misses with a takedown attempt. He shot from a bit too far out.
Murdock tries a head kick but it misses.
Blixhaven tries to clinch up but Murdock circles away and keeps his distance.
We've had a slow start to the round here - hopefully the action picks up.
Murdock lands with a head kick! That's gotta hurt.
A head kick misses from Murdock.
Blixhaven avoids the head kick by Murdock.
Both fighters are breathing heavily.
A telegraphed takedown attempt from Blixhaven is defended easily by Murdock.
That's three failed takedown attempts in the round for Brad Blixhaven. That's going to take a lot out of him.
That's one minute gone in the round.
Murdock plants his feet and lands a nice head kick!
Murdock misses with a jab, cross combination.
Murdock stuffs the takedown.
Blixhaven blocks the body kick.
Murdock misses with a series of wild punches.
Blixhaven has a takedown stuffed.
Blixhaven shoots in looking for a double leg takedown. Murdock defends it nicely.
No luck with that takedown attempt from Blixhaven.
That's two minutes gone in the round.
The crowd are starting to boo a lack of action.
Murdock tries a head kick but it misses.
Blixhaven slips under a jab.
Murdock misses with a head kick.
Blixhaven is looking for a takedown here. He's shot in and has managed to get it, finishing up in Murdock's half guard.
Blixhaven is looking for an arm triangle, whilst trying to pass to side control. Murdock doesn't seem that keen to cooperate though. No luck this time Blixhaven.
Murdock is trying to stand.
Blixhaven is looking for an arm triangle, whilst trying to pass to side control. Murdock doesn't seem that keen to cooperate though. No luck this time Blixhaven.
Blixhaven is working for a submission of some sort.
That's three minutes gone in the round.
Blixhaven wants to work for an arm triangle but Murdock is really keeping half guard well and defending the submission attempt.
Murdock wants to get back to his feet.
Blixhaven is trying for a guillotine from the top but the pressure isn't in the right place so Murdock is just riding it out for now. Blixhaven eventually gives up the hold.
Murdock looks like he's trying to stand up.
The referee decides to stand the fighters back up.
Blixhaven shoots in for a takedown but Murdock shows good takedown defense there and keeps this one on the feet.
That's four minutes gone in the round.
Well. There's a bit of a lull in the action here and the crowd are starting to get restless.
Murdock throws a head kick but Blixhaven moves out of range.
Murdock misses with a half-hearted attempt at a head kick.
Murdock throws a body kick but he wasn't in range.
Murdock fails to land with a series of punches.
Blixhaven drives through with a really nice takedown into side control.
Murdock really doesn't want to stay on the ground with Blixhaven. If he can't get it back to his feet, it's only a matter of time before he'll be tapping out.
Murdock is pushing Blixhaven's head away, looking to escape. Blixhaven manages to hold on to the position though.
Blixhaven tries for an arm triangle. That looks pretty tight to me. Is this one over!?! Possibly, maybe, no Blixhaven has let go of the choke. Obviously it wasn't as tight as we thought!
Murdock tries to escape but Blixhaven is in control.
The crowd thankful this round is nearly over.
Blixhaven tries for a kimura. Not really close to a finish though.
And that's the end of the fight!
That was a close round. You could make an argument for either fighter but I would give it to Brad Blixhaven.
I think Blixhaven has won this one but let's see what the judges have to say. Over to the ring announcer for the scorecards.
Ladies and gentlemen, after 3 rounds of action, we go to the scorecards for a decision.
Judge Gregory Folan scores the fight 29:28
Judge Trevor Gratis scores the fight 29:28
Judge Elvis Blanc scores the fight 29:28
In favor of your winner, by unanimous decision... Brad Blixhaven!
|
|
|
|
|
|
|
|
|
|
|
|
|
|
|
|
|
|
|
|
|
|
|
| S |
C
A |
G |
S |
C
B |
G |
|
S |
C |
G |
|
energy
A | B |
|
hype
A | B |
|
pop
A | B |
|
mgr
A | B |
|
FIGHT
RATING
44% |
|
|
|
|
|
|
