|
|
PBP Commentary |
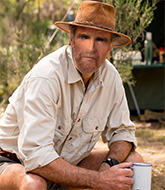
Coming up we have a middleweight MMA rules bout between Macca Outback (ranked 65 p4p, 190 weight class) and Salomon Mukunzi (ranked 10 p4p, 26 weight class). Mukunzi has chosen Champion (ft. D Smoke) - Fireboy DML as his entrance music, which hasn't gone down very well with the crowd. This should be a great matchup!
 |
|
 |
| 188 cm
28
193
19 - 4 - 0 |
|
178 cm
28
197
12 - 6 - 0 |
Good wrestling
World class boxer
Insanely flexible |
|
Good wrestler
World class MT
Granite chin |
|
| |
|
Ladies and gentlemen. This fight is 5 rounds, for the middleweight championship of the world!
Introducing the champion to my left, fighting out of the red corner.
With a record of 19 - 4 - 0, fighting out of Montreal, Macca Outback!
And introducing the challenger to my right, fighting out of the blue corner.
With a record of 12 - 6 - 0, fighting out of Las Vegas, Salomon Mukunzi!
The judges for this bout are Hugh Johnson, Eliza Hachem and Ben Watson.

The bell rings for round one and we are underway!
Mukunzi throws a wild combination but nothing lands.
Mukunzi throws a looping overhand right but Outback ducks down to avoid it.
An attempted straight right counter from Outback misses the target.
Mukunzi has done a lot of speed work in the buildup to this fight.
Outback misses the shot to the body.
Outback throws a good cross that connects.
A slapping leg kick lands for Outback.
Outback ducks down and throws a hook to the body.
Nice defenses there by Mukunzi.
Mukunzi throws a body shot but no joy.
Outback throws a push kick but Mukunzi slaps the foot to one side.
Outback works the jab nicely.
We've had a slow start to the round here - hopefully the action picks up.
Outback throws a head kick that misses and slips in the process. He scrambles back to his feet and the fighters circle.
Outback throws a monster uppercut resembling something out of street fighter but it doesn't land.
Outback looks to land a right hand but Mukunzi moved out of range.
Macca Outback seems to be the more aggressive standup fighter in this bout.
Mukunzi takes a solid shot to the body. That one hurt him but he's trying not to show it.

That's one minute gone in the round.
Mukunzi throws a leg kick
and Outback counters with a straight punch to the midsection.
Mukunzi is the aggressor but that punch slipped nicely by Outback.
Outback misses with a straight right.
Outback tries to score with a leg kick but it misses it's target.
Mukunzi throws a body kick but he was well out of range there.
Outback swings for the body but Mukunzi moves out of range.
Mukunzi chopped to the floor by a nice leg kick but he springs right back up before Outback can pounce on him.
Mukunzi avoids a lazy jab quite easily.
A lazy body kick from Outback
and Outback takes a counter punch right on the button for his troubles.
Outback swings for the body but Mukunzi moves out of range.
Mukunzi swings for the body but Outback moves out of range.
Outback fakes a head shot and lands one to the body.
Outback tries to close the distance and clinch but Mukunzi swats him to one side with an open hand palm strike and circles away.
Mukunzi throws out a counter right but Outback avoids it with no problem.

That's two minutes gone in the round.
Mukunzi misses with a body shot. Nice footwork from Outback.
Mukunzi throws a shot from downtown. Outback moves away and avoids it.
Outback lands a leg kick and bounces back out of range.
Outback throws a decent looking leg kick but it doesn't land clean.
Outback keeping a good distance there, avoiding the body shot.
Outback misses with a wild body shot.
A clash of legs there as Mukunzi blocks the low kick.
Mukunzi is clearly trying to counter these attacks from Outback with a body shot.
We've seen a great period of action over the last minute or so - credit to both fighters for going all out!
Outback throws a body shot but no joy.
A chopping leg kick lands by Outback.
A solid leg kick lands there for Mukunzi.
Outback punishes Mukunzi's body with a nice straight punch.
Outback throws a lazy body kick
and Mukunzi counters with a good right hand that lands right on the jaw.
Outback looks for the body kick but Mukunzi saw that one coming.

That's three minutes gone in the round.
Outback throws a body kick but he wasn't in range.
Outback rushes in with a sloppy looking punch
and Mukunzi counters with a good right hand that lands right on the jaw.
Mukunzi takes a kick to the side of the head.
Mukunzi swings widly with a right hand
and Outback counters with a left to the body.
Outback throws a leg kick
and Mukunzi counters nicely by changing levels and landing a hook to the body.
Outback rushes in with a sloppy looking punch
and Mukunzi counters with a nice body shot.
Mukunzi motions for Outback to come forward. Mukunzi throws a leg kick but it misses it's target.
Outback tries to clinch up.
Mukunzi throws out a counter right but Outback avoids it with no problem.
Outback lands a leg kick that knocks Mukunzi off balance momentarily.
Mukunzi misses with a body kick.
Outback connects with a leg kick.
Mukunzi throws a hook to the side of Outback's head but Outback sees it coming and ducks under it beautifully.

That's four minutes gone in the round.
Outback keeps his opponent at a distance with a nice jab.
Fantastic stuff here - a very entertaining period of action, which has drawn cheers from the crowd.
Mukunzi throws a body punch but Outback moves out of range.
Mukunzi checks a leg kick nicely.
Mukunzi lands a really nice looking cross but Outback seems unphased.
Outback throws a body kick but he wasn't in range.
Outback connects with a looping right hand.
Outback throws a half hearted mid kick.
Mukunzi swings away with a counter right hand but no contact made.
Outback moves out of range as Mukunzi throws a body kick.
Outback moves out of range as Mukunzi strikes.
Outback scores with a nice right hand.
Outback throws a body kick that misses.
Mukunzi throws out a counter right but Outback avoids it with no problem.
A looping hook to the body misses from Mukunzi. Outback does a little dance to reset his feet.
Outback throws a monster uppercut resembling something out of street fighter but it doesn't land.
And that is the end of the round. The fighters go back to their corners.
Macca Outback dominated that round.
The corners get their ten second warning. Both fighters stand from their stools and stare each other down, ready to get back to the action.

Outback avoids a lazy jab quite easily.
Outback scores with a spinning back kick!
Outback bobbing and weaving, closes the distance and lands a hook to the side of Mukunzi's head.
Outback blocks a jab.
Outback misses with a low kick.
Outback tries to land a front kick but Mukunzi steps back. That was a bit too telegraphed.
Outback misses with a lunging right hand
and Mukunzi counters nicely by changing levels and landing a hook to the body.
Outback takes a body kick right on the floating rib. Ouchie.
Outback swings widly with a right hand
and Mukunzi counters with a quick right hand to the jaw.
We've had a slow start to the round here - hopefully the action picks up.
Outback missing with a left hand there. Mukunzi was out of range so wasted energy throwing that one.
Mukunzi thows a left - swing and a miss!
Mukunzi just misses with a punch to the body.
Outback fakes a jab and throws a low kick but Mukunzi checks it well.
That's one minute gone in the round.
Outback uses good head movement to avoid the hook from Mukunzi.
A looping hook to the body misses from Mukunzi. Outback does a little dance to reset his feet.
Outback digs a good hook to Mukunzi's body.
Outback doesn't react quick enough there as he takes a shot to the body.

Outback has taken the fight to the clinch.
Mukunzi is working Outback over against the cage.
Outback throws a punch but it's blocked by Mukunzi.

Mukunzi pushes off and circles away, back to the middle of the mat.
Macca Outback is winning the standup battle so far.
Outback throws a jab to the body, straight down the pipe. Boom. That sent Mukunzi stumbling backwards but he manages to regain his composure quickly.
Mukunzi blocks a jab.
A low kick from Outback misses
and Mukunzi counters with a nice low kick that buckles Outback's knee momentarily.
Mukunzi connects with a solid leg kick.
Outback lands a nice looking kick to the body. Mukunzi takes a step back to recover.
That's two minutes gone in the round.
Outback looks for the body kick but Mukunzi saw that one coming.
A jab from Outback finds it's way through Mukunzi's defenses.
This is a great period of action - very entertaining stuff!
Outback feints and then cracks Mukunzi's leading leg with a nice low kick. He's obviously looking to slow Mukunzi down.
Outback shapes like he's going to throw a leg kick but settles back down.
A jab from Mukunzi misses.
A punch combination from Mukunzi misses.
Mukunzi on the wrong end of a vicious looking body shot.
Mukunzi throws a leg kick but Outback sees it coming and checks it nicely.
Mukunzi misses with a body shot. Nice footwork from Outback.
Outback tries a low kick but Mukunzi avoids it.
Mukunzi looked like he wanted to counter with a punch but didn't throw it.
Mukunzi swings away with a leg kick that misses.
Outback is looking to counter punch.
Outback misses with an uppercut. Mukunzi saw that one coming.
Outback ducks down and throws a hook to the body but Mukunzi moves away.
That's three minutes gone in the round.
Outback misses with a body shot. Nice footwork from Mukunzi.
A low kick from Outback is predictable there
and Mukunzi counters with a straight right hand.
Outback throws a body kick despite being completely out of range
and Mukunzi counters with a series of strikes. Outback will be more careful next time no doubt.
Outback lands a really nice looking cross but Mukunzi seems unphased.
Mukunzi cracks a nice hook into Outback's ribs.
Mukunzi scores with a crisp jab that stopped Outback in his tracks.
Mukunzi misses with a body punch
and Outback counters with a crisp hook to the side of the head.
Outback takes a shot right to the liver - Bas would have been proud of that punch.
Outback throws a solid leg kick but Mukunzi takes the impact on his shin and smiles at Outback.
Mukunzi looks like he wants to counter punch here.
Outback moves in looking to clinch but Mukunzi pushes him off.
Outback scores with a jab. Mukunzi acknowledges it with a nod of the head.
That's four minutes gone in the round.
This is a great period of action - very entertaining stuff!
Outback scores with a shot to the body.
Mukunzi will need to tighten up his combinations if he doesn't want to gas himself out, swinging at thin air.
Mukunzi waving his hands out in front of him, looking to distract Outback.
Outback lands with a thumping leg kick.
A swing and a miss from Mukunzi.
Some bone on bone action there as Mukunzi checks a low kick. Luckily it wasn't a particularly hard one.
Mukunzi tries a quick counter leg kick but Outback is wise to it.
Outback throws a body kick that misses.
Mukunzi looks shocked there as he takes a right hand to the temple.
Outback pivots, looking for a leg kick but Mukunzi is out of range and Outback settles back down.
Mukunzi will need to close the distance a bit before he attacks - that leg kick was thrown from too far away.
Mukunzi takes a jab right on the kisser.
And that is the end of the round. The fighters go back to their corners.
That was a close second round but I would say that Macca Outback will probably get the nod.
The fighters get back to their feet, the hooter sounds and we're back to the action!

Outback misses the jab.
Mukunzi swings away with a counter right hand but no contact made.
Mukunzi throws a chopping leg kick but Outback manages to avoid taking any serious damage.
Outback misses with a looping left.
Mukunzi lands a nice shot to the body.
Outback is looking to take this fight into the clinch.
A chopping leg kick lands by Outback.
Outback misses with a wild body shot.
We've had a slow start to the round here - hopefully the action picks up.
Outback tries a low kick but Mukunzi avoids it.
Outback closes the distance and clinches.
Mukunzi prevents a body shot from Outback.
Mukunzi blocks a body shot from Outback.
That's one minute gone in the round.
Outback softening up his opponent with strikes, against the cage.
Mukunzi prevents a body shot from Outback.
Mukunzi lands a left hand.
Mukunzi tries to throw a body punch but Outback avoids it by throwing Mukunzi back against the cage.
Outback lands punches inside but they're not really causing much damage.
Mukunzi tries to break the clinch but Outback is controlling the position.
Mukunzi is looking to break free of the clinch but Outback has double underhooks.
Outback blocks a body shot from Mukunzi.

Outback's corner calls for him to break the clinch, which he does.
Nice defenses there by Outback.
Outback fakes a jab and throws a low kick but Mukunzi checks it well.
Outback ducks down and throws a hook to the body but Mukunzi moves away.
Mukunzi misses with an uppercut.
Outback slips a straight right by Mukunzi.
A looping hook to the body misses from Outback. Mukunzi does a little dance to reset his feet.
Outback does a little shimmy and throws a leg kick. The leg kick missed by a considerable margin though, making him look a little bit silly for doing the shimmy.
That's two minutes gone in the round.
Outback misses with a series of wild punches.
Outback waving his hands out in front of him, looking to distract Mukunzi.
Outback lands a jab to Mukunzi's midsection.
Mukunzi walks forward and throws out a flicking leg kick. Outback checks it nicely though, as he moves to the side.
A low kick from Outback misses
and Mukunzi counters with a quick right hand to the jaw.
Fantastic stuff here - a very entertaining period of action, which has drawn cheers from the crowd.
Mukunzi pivots, looking for a leg kick but Outback is out of range and Mukunzi settles back down.
Outback ducks down and throws a hook to the body but Mukunzi moves away.
Outback is really dominating this fight. Is there anything that Mukunzi can do to turn this around?
Outback slips a jab from Mukunzi.
A jab from Outback misses.
Outback wants to land a leg kick but Mukunzi is out of range.
Mukunzi uses some good footwork to avoid the body shot by Outback.
That's three minutes gone in the round.
Mukunzi misses with a body shot.
Outback rushes in with a sloppy looking punch
enabling Mukunzi to counter with a crisp jab.
Outback scores with a jab to the jaw of his opponent.
Outback throws a monster uppercut resembling something out of street fighter but it doesn't land.
Mukunzi thinks about the counter body kick.
Mukunzi fakes a head punch and goes low to the body. Nicely done.
Outback takes a step back and watches a body kick go sailing past his mid section.
Mukunzi ducks under a wild hook from Outback.
Mukunzi's leg has a nasty welt from taking a succession of leg kicks. That must be slowing him down.
Outback goes for a spinning back kick but it misses.
Mukunzi appears to be waiting to throw a counter punch to the body.
Outback tries to clinch but is not successful on this occasion.
Outback gets a clinch.
Outback blocks a punch to the side of the head.
A quick uppercut on the inside from Mukunzi.
That's four minutes gone in the round.
A left hand lands to the body for Mukunzi.
A head punch on the inside from Mukunzi fails to land.
Mukunzi presses Outback against the cage and delivers a mid-strength body shot.
Both fighters are breathing heavily.
An uppercut on the inside fails to land for Mukunzi.
A quick uppercut on the inside from Mukunzi.
This has been an exciting period of action!
Outback pushes off and circles away, back to the middle of the mat.
Outback displays some good footwork, moving neatly out of range as Mukunzi throws out the jab.
Thud! ouch! good body kick from Outback - that will leave a mark!
Mukunzi tests Outback's chin there with a solid looking shot.
Outback closes the distance but Mukunzi moves to the side
and Mukunzi makes the exchange count by landing a cracking kick to the body. Outback really felt that one!
Mukunzi throws a body kick but he was well out of range there.
Mukunzi tries to land a front kick but Outback steps back. That was a bit too telegraphed.
Outback swings and misses with a hook to the body.
A little jabbing left from Mukunzi on the counter but it doesn't find it's target.
And that is the end of the round. The fighters go back to their corners.
A close third round but Salomon Mukunzi just about did enough to take it.
The fighters' corners scream their final instructions, as the referee calls time. Here we go, back to the action!

Mukunzi tries to score with a low kick but Outback moves his leg out of the way.
Outback steps to the side to avoid the strikes from Mukunzi.
Outback turns his hip over beautifully as he lands a nice leg kick.
A shot to the liver by Outback. Beautiful body shot.
Outback tries to clinch up.
Mukunzi is the aggressor but that punch slipped nicely by Outback.
Outback with a nice calf kick.
Outback tries to land a front kick but Mukunzi steps back. That was a bit too telegraphed.
We've had a slow start to the round here - hopefully the action picks up.
Mukunzi stuns Outback with a nice body shot, before stepping back out of range.
Mukunzi's hands are dropping dangerously low here and Outback connects clean with a right hook that sends him down to one knee! Mukunzi scrambles back to his feet.
Mukunzi ducks under an overhand right and circles away with a smile on his face.
Outback backing away here, and Mukunzi unleashes a leg kick that just misses.
Mukunzi checks a low kick from Outback.
Mukunzi flicks out a counter leg kick but Outback steps away.
That's one minute gone in the round.
Outback looks to throw the jab but Mukunzi is out of range.
Outback misses with a shot to the body
letting Mukunzi counter with a right hand.
Mukunzi dips to his left and cracks Outback with an uppercut!
Outback jabs at Mukunzi's body.
Outback dips down and scores with a jab to the body.
Outback takes a shot right to the liver - Bas would have been proud of that punch.
Outback works his jab well there, keeping his opponent at a distance.
Mukunzi throws a body kick, spinning off balance
and Outback counters with a good low kick that Mukunzi was not able to check.
Mukunzi pushing out the jab but it's not landing.
Mukunzi lands a body shot.
Mukunzi moves into range and lands a nice body kick.
Outback scores with a shot to the body.
That's two minutes gone in the round.
The crowd are loving this. Great action here.
Mukunzi misses with a jab to the body
letting Outback counter with a right hand.
Mukunzi takes a swing at Outback's ribcage but misses.
Mukunzi missing with a left hand there. Outback was out of range so wasted energy throwing that one.
Outback shakes his hands off, looking to compose himself, but takes a jab to the jaw whilst he does it.
Mukunzi misses with a wild body shot.
Outback misses the shot to the body.
Outback's Muay Thai looks sharper than normal. He has obviously been working on it in the gym.
Outback misses with a body shot. Nice footwork from Mukunzi.
Mukunzi throws a body kick that misses
and Outback counters with a nice body shot.
Mukunzi throws a lazy body kick
and Outback counters with a quick right hand to the jaw.
Outback misses with a low kick.
Outback looking to throw a kick but he's pulled out of it.
That's three minutes gone in the round.
Outback throws a big shot that misses.
Mukunzi only half commits to the counter leg kick.
Outback with a hook.
Outback defending well as Mukunzi loads up on a big left hand.
Mukunzi throws a half hearted mid kick.
Outback lands a pitter patter jab to the forehead of his opponent.
Mukunzi stuns Outback with a nice body shot, before stepping back out of range.
Outback throws a jab to the body, straight down the pipe. Boom. That sent Mukunzi stumbling backwards but he manages to regain his composure quickly.
Outback pulls out of a head kick attempt.
Mukunzi appears to be waiting to throw a counter punch to the body.
Outback looks to land a left hand but Mukunzi moved out of range nicely.
A solid body kick from Outback.
Outback throws a looping overhand right but Mukunzi ducks down to avoid it.
And an attempted straight right on the counter from Mukunzi! But no joy.
That's four minutes gone in the round.
Outback misses with an uppercut. Mukunzi saw that one coming.
Mukunzi is looking for the big counter here.
Mukunzi throws a hard body shot but it just misses.
Outback takes a swing at Mukunzi's ribcage but misses.
Mukunzi is loading up here, looking for a big counter of his own.
Outback takes a kick to the body and keeps moving.
Mukunzi blocks the body kick.
Mukunzi throws a leg kick which misses Outback's front leg but catches the back leg as Outback tries to avoid it.
We've seen a great period of action over the last minute or so - credit to both fighters for going all out!
Mukunzi throws a jab when Outback was well out of range.
Outback throws a nice hook to the body that draws an oooh from the crowd.
Outback connects with a looping left hand that seems like it dazed Mukunzi momentarily.
Mukunzi showing good head movement there, avoiding the strikes from Outback.
Mukunzi is clearly trying to counter these attacks from Outback with a body shot.
And that is the end of the round. The fighters go back to their corners.
Macca Outback had his way with Salomon Mukunzi in that round.
The fighters' corners scream their final instructions, as the referee calls time. Here we go, back to the action! The crowd applaud as we get ready to start the final round!

Outback moves out of range of the strikes.
Outback takes a swing at Mukunzi's ribcage but misses.
Outback moves into range and clinches up with Mukunzi.
Mukunzi has a couple of punches blocked by Outback.
Outback scores with an uppercut up the middle.
Outback lands punches inside but they're not really causing much damage.
Mukunzi lands a body shot.
Mukunzi working some nice short punches in the clinch.
A hook to the body from Mukunzi.
Outback misses with a body punch.
Outback has had enough of the clinch and is looking to separate.
We've had a slow start to the round here - hopefully the action picks up.
Mukunzi tries to throw a body punch but Outback avoids it by throwing Mukunzi back against the cage.
Mukunzi lands a body shot.
Both of our modern day gladiators look out of it here - a gruelling 5 rounds of action taking it's toll on them, no doubt.
Mukunzi lands a right hand that snaps the head of Outback backwards.
Outback tried to land a shot to the body but connects with Mukunzi's elbow.
Mukunzi lands a shoulder strike that jolts his opponent's head backwards.
Mukunzi lands a body punch.
That's one minute gone in the round.
Mukunzi doesn't land with the attempted body shot.
A nice left hand lands by Mukunzi.
Mukunzi lands a shot to the body.
Mukunzi tried to land a shot to the body but connects with Outback's elbow.
Mukunzi working aggressively here.
Mukunzi breaks the clinch and we're back to striking at distance.
Outback throws a poor cross that misses
and Mukunzi counters with a low kick, right behind Outback 's knee.
Mukunzi takes a body punch but keeps moving.
Outback throws a body kick that misses.
Mukunzi throws a hook to the side of Outback's head but Outback sees it coming and ducks under it beautifully.
A punch lands to the side of Outback 's head but he takes it in his stride.
Decent striking displayed by Mukunzi there.
Mukunzi misses with a body shot.
Salomon Mukunzi has stepped it up - he knows he needs a finish here!
That's two minutes gone in the round.
Outback misses with a leg kick
and Outback takes a counter punch right on the button for his troubles.
Outback lands with a nice body kick.
Outback misses with a looping right.
Mukunzi uses some good footwork to avoid the body shot by Outback.
The crowd are loving this. Great action here.
Outback misses with a leg kick
letting Mukunzi counter with a right hand.
Outback misses with a body punch
enabling Mukunzi to counter with a crisp jab.
Mukunzi moves out of range of the strikes.
And an attempted straight right on the counter from Mukunzi! But no joy.
Outback throws a right hand that misses
and Mukunzi counters with a stiff right hand.
Mukunzi swings away with a body shot that misses
and Outback counters with a straight punch to the midsection.
Donk. Mukunzi catches Outback right on the button with a cross.
Outback shapes like he's going to throw a leg kick but settles back down.
That's three minutes gone in the round.
Outback scores with a jab to the body.
Mukunzi shakes his hands off, looking to compose himself, but takes a jab to the jaw whilst he does it.
Mukunzi misses the jab.
An inside leg kick lands from Outback.
Outback misses with a body shot.
Macca Outback is fighting for a decision here - he's started to take the cautious approach.
Outback uses good head movement to avoid the hook from Mukunzi.
Mukunzi avoids the body shot from Outback.
Crunch! Outback slams his shin into Mukunzi's torso.
Outback connects with a leg kick. He turned his hip over nicely there.
Outback ducks under a wild hook from Mukunzi.
Outback swings wildly with a hook that is half blocked by Mukunzi.
That's four minutes gone in the round.
Outback fakes a head shot and lands one to the body.
Outback closes the distance and presses his opponent up against the cage.
Outback escapes the clinch and we're back to striking.
Outback stooping low to avoid any incoming strikes and then lunges in with an uppercut come cross that lands flush.
This is a great period of action - very entertaining stuff!
Mukunzi has his head snapped back a nice jab. A little nod from Mukunzi there as he acknowledges the shot.
Mukunzi ducks under a wild hook from Outback.
Mukunzi appears to be waiting to throw a counter punch to the body.
Outback slips in close and lands a nice hook before moving back out of range.
Outback scores with a slapping inside leg kick.
Outback wants to clinch.
Outback moves in looking to clinch but Mukunzi pushes him off.
And that's the end of the fight!
That was a close round. You could make an argument for either fighter but I would give it to Macca Outback.
I think Outback has won this one but let's see what the judges have to say. Over to the ring announcer for the scorecards.
Ladies and gentlemen, after 5 rounds of action, we go to the scorecards for a decision.
Judge Hugh Johnson scores the fight 50:46
Judge Eliza Hachem scores the fight 49:46
Judge Ben Watson scores the fight 47:48
In favor of your winner, by split decision... Macca Outback!
Macca Outback retains his middleweight title!
Macca Outback was full of energy after the big win and talked about how he thinks he can do big things in this sport. The crowd were appreciative of his determination to succeed.
|
|
|
|
|
|
|
|
|
|
|
|
|
|
|
|
|
|
|
|
|
|
|
| S |
C
A |
G |
S |
C
B |
G |
|
S |
C |
G |
|
energy
A | B |
|
hype
A | B |
|
pop
A | B |
|
mgr
A | B |
|
FIGHT
RATING
61% |
|
|
|
|
|
|

