|
|
PBP Commentary |
Coming up we have a welterweight MMA rules bout between Max Mayhem (ranked 0 p4p, 0 weight class) and Jack Ham (ranked 0 p4p, 0 weight class). Over to our ring announcer for the fighter introductions!
 |
|
 |
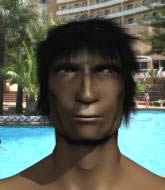
| 180 cm
19
175 lbs
2 - 5 - 0 |
|
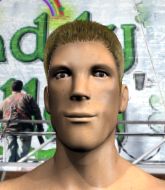
178 cm
22
168 lbs
3 - 4 - 0 |
BJJ White Belt
Brawler
Good chin |
|
BJJ Blue Belt
Brawler
Granite chin |
|
| |
|
Ladies and gentlemen. This fight is 3 rounds, in the welterweight division.
Introducing the fighter to my left, fighting out of the red corner.
With a record of
2 - 5 - 0, fighting out of Helsinki, Max Mayhem!
And introducing the fighter to my right, fighting out of the blue corner.
With a record of
3 - 4 - 0, fighting out of Helsinki, Jack Ham!
The judges for this bout are Tarja Halkonen, Johanna Lukiainen and Ben Zyskovitsi.

The bell rings for round one and we are underway!

Mayhem rushes Ham and pushes him back against the cage in a clinch.
Ham can't get the takedown.
Ham looking for a takedown.
Mayhem is trying to slow down the pace of the fight but Ham is keeping busy.
Mayhem misses with a knee to the head.
Ham takes an elbow to the temple.
Mayhem tries to land a knee to the head but misses.
Ham drops down for a takedown but doesn't get it.
Max Mayhem has stuffed three takedown attempts in the round now. That's going to take a lot out of Jack Ham.
Mayhem prevents a takedown attempt there.
Mayhem lands an elbow inside.
With the two fighters working up against the cage, Mayhem just misses with a elbow thrown towards Ham's brow.
Ham drops to a knee looking for a takedown but Mayhem gets the underhooks and prevents it.
Ham looking for a takedown.
Ham wants to push off and get back to the center of the mat but Mayhem has him pressed against the cage.
Mayhem gets underhooks to prevent Ham's takedown attempt.
With the two fighters working up against the cage, Mayhem just misses with a elbow thrown towards Ham's brow.
Mayhem misses with a knee to the head.
Mayhem scores with a knee to the head.
With the fighters up against the cage, Mayhem throws an elbow but misses.
Ham blocks an elbow strike from Mayhem.
Mayhem comes over the top with an elbow. That landed flush.
Knees to the body from Mayhem.
Ham looks gassed!
Mayhem with an attempt at a knee that misses.
Mayhem throws an elbow but it's blocked.

That's one minute gone in the round.
Ham blocks an elbow strike.
Mayhem scores a nice knee to the body.
Mayhem gets an overhook and lands an elbow to the side of the head.
A knee to the head by Mayhem.
Mayhem lands a nice elbow.
Mayhem stalling.
Mayhem lands a damaging elbow.
Mayhem comes over the top with an elbow. That landed flush.
Mayhem tries to land a knee to the head but Ham blocks with his arms.
Mayhem throws a knee to the head but misses.
With the fighters up against the cage, Mayhem throws an elbow but misses.
Mayhem throws a vicious knee straight up the middle but Ham blocks it with crossed arms.
Mayhem with a knee to the head.
Ham takes an elbow to the temple.
Mayhem connects with a knee to the head.
Mayhem slowing the pace effectively.

Ham has hold of one of Mayhem's legs. Mayhem is fighting the takedown attempt but Ham gets the trip and lands the takedown into guard.
Ham is standing up over Mayhem. Mayhem looks to escape but Ham dives into side control.

Ham looking for an arm triangle but it's way too loose to do anything.

That's two minutes gone in the round.

Ham has had enough of the ground for now and decides to stand.
Ham throws a wild body kick that Mayhem sees coming a mile off.
Ham circles away from the clinch attempt.
Mayhem wants to clinch.
Mayhem wants to clinch.
Mayhem wants to clinch.
Mayhem fails with an attempt to clinch.

That's three minutes gone in the round.
Mayhem wants to clinch.
A head kick misses from Ham.
Mayhem tries to close the distance and clinch up against the cage but Ham paws at him with a jab and circles away.
Mayhem avoids the head kick by Ham.
Ham keeps the fight on the outside.
Mayhem clinches up against the cage.
With the fighters up against the cage, Mayhem throws an elbow but misses.
A nice glancing elbow lands by Mayhem.
Mayhem holding his opponent close, against the cage.
Ham is looking to break free of the clinch but Mayhem has double underhooks.
Mayhem throws a vicious knee straight up the middle but Ham blocks it with crossed arms.
Mayhem misses with a knee strike.
Mayhem throws an elbow but it misses.
Ham blocks an elbow strike.
Ham blocks the elbow strike.
Mayhem is struggling to control the position.
Mayhem is working hard here but doesn't seem to be able to control effectively, up against the cage.

That's four minutes gone in the round.
The crowd are showing their displeasure at the lack of action as loud boos ring out around the arena.
Ham managing to block the knees to the body from Mayhem.

Ham escapes the clinch and we're back to striking.
Mayhem fails in his attempt to clinch.
Ham takes the fight into the clinch.
Mayhem prevents the takedown attempt.
Mayhem pushes off an throws an elbow but Ham leans to the side and avoids it. We're back to clinching against the cage.
Mayhem pushes off and fires off an elbow that misses, before clinching up again, against the cage.
Ham drops to a knee looking for a takedown but Mayhem gets the underhooks and prevents it.
Mayhem misses with an elbow strike.
Ham takes a knee right on the jaw!
Mayhem pushes off and fires off an elbow that misses, before clinching up again, against the cage.
Mayhem is pressed up against the cage. Ham has hold of a leg and is looking to drag Mayhem down to the mat. Mayhem avoids the attempt though and has circled away. We're back to striking at a distance.
Mayhem tries to clinch up
and Ham counters with a low kick, right behind Mayhem 's knee.
Mayhem wants to clinch but Ham slips to the side
and Ham counters with a left and a right that stings Mayhem.
And thats the end of the round the fighters go back to their corners.
Max Mayhem dominated that round.
The minute break is over - no more time for sponges and pep talks - back to the action!

Mayhem tries to clinch
enabling Ham to counter with a crisp jab.
Ham goes to the watering hole and comes back with a big thumbs up from the judges as he scores a three punch combo.
Mayhem tries to clinch up.
Mayhem fails with an attempt to clinch.
Mayhem wants to clinch.
Mayhem tries to grapple but his opponent circles
and Ham counters with an outside leg kick.
Ham tries to clinch up but Mayhem circles away and keeps his distance.
Mayhem tries to grapple but his opponent circles
and Ham counters with a left to the body.
Jack Ham is looking to throw some combinations by the looks of things.
Mayhem takes a shot to the eye socket. That's gotta hurt.
Ham tries to keep at a distance but Mayhem has taken the fight into the clinch.
Mayhem scores with a knee to the head.
Both fighters are absolutely exhausted here.
With the fighters up against the cage, Mayhem throws an elbow but misses.
Ham pulls guard successfully.
Mayhem gets to his feet and steps away from his opponent.
That's one minute gone in the round.
Ham lands a jab followed by a nice looking cross.
Mayhem looks to clinch
and Ham counters with a nice single leg takedown and he's in Mayhem's guard now.
Ham wants to control from the top but Mayhem keeps moving.
Ham prevents Mayhem from getting back to his feet.
Ham thinks about going for a leg but decides against it, in order to maintain the position.
Mayhem on his back here. We all know that wrestlers don't like being on their back so let's see if Mayhem tries to get out of the position.
Ham prevents Mayhem from getting back to his feet.
That's two minutes gone in the round.
Mayhem pushes Ham off and gets back to his feet.
Ham looks to land a combination but Mayhem avoids it well.
Horrible takedown by Ham or perhaps it was just good defense by Mayhem which made him look bad.
Mayhem tries to grapple but his opponent circles
letting Ham counter with a right hand.
Mayhem closes the distance but Ham moves to the side
and Ham counters with a good right hand that lands right on the jaw.
Mayhem fails in his attempt to clinch.
Mayhem takes the fight into the clinch.
Mayhem throws an elbow but it's blocked.
Mayhem tries a knee to the head but he's missed.
Ham successfully pulls guard.
Ham controls Mayhem momentarily but Mayhem frees himself.
That's three minutes gone in the round.
Ham looking to sweep here. No luck so far.
The ref warns both fighters not to hold the cage as they work up against the meshing.
Ham throwing his legs up looking for a triangle.
Mayhem trying to stand up but can't free himself from Ham's guard.
Ham controlling Mayhem's posture.
Mayhem is looking to stand up but Ham won't let him.
That's four minutes gone in the round.
A few boos can be heard. I'm sure they will multiply if the fighters don't pick up the pace.
Ham is working actively off his back, looking to secure an arm or perhaps work for a triangle.
Mayhem would like to get this fight back to the feet but can't get free from the closed guard.
And thats the end of the round the fighters go back to their corners.
Jack Ham showed his class in that round. I'd imagine he'll take it on all the scorecards.
That's time! Back to the action! This is the final round!

Ham listening to his corner there, landing a nice uppercut.
Ham throws a push kick but Mayhem slaps the foot to one side.
Ham misses with a half-hearted attempt at a head kick.
Mayhem tries to clinch but fails miserably
and Ham makes him pay by landing a nice hook to the body before moving out of range.
Mayhem closes the distance looking to clinch
and Ham moves into the clinch.
Mayhem throws a vicious knee straight up the middle but Ham blocks it with crossed arms.
Ham drops to a knee looking for a takedown but Mayhem gets the underhooks and prevents it.
Mayhem with a knee to the head.
Ham avoids a wild elbow strike from Mayhem.
Mayhem's corner are urging him to control the action in the clinch for a moment, rather than mount any serious offense. I'm sure the crowd appreciate those instructions... not.
Mayhem scores with a knee to the head.
Mayhem has Ham pressed against the cage.
Mayhem prevents the takedown attempt.
Both fighters are breathing heavily.
Mayhem with the Thai clinch. He's looking to land a big knee but he's not managed it this time.
Mayhem looks to throw an elbow but misses.
That's one minute gone in the round.
Mayhem with the Thai clinch. He's looking to land a big knee but he's not managed it this time.
Mayhem tries a knee to the head but he's missed.
Mayhem is stalling here. The referee will be looking to step in if he doesn't pick up the pace.
Mayhem prevents the takedown attempt.
Max Mayhem has stuffed three takedown attempts in the round now. That's going to take a lot out of Jack Ham.
Mayhem looks to throw an elbow but misses.
Mayhem creates a bit of distance and throws an elbow that only just misses.
Mayhem lands an elbow inside that Ham shrugs off.
Ham tries to pull guard but can't drag his opponent to the mat. Mayhem just stands there and leans against the cage.
Ham takes an elbow to the forehead.
Mayhem lands an elbow inside.
Mayhem looks to throw an elbow but misses.
Mayhem tries to land a knee to the head but misses.
Ham dodges an elbow strike from Mayhem.
Mayhem connects with a knee to the head.
Mayhem creates a bit of distance and throws an elbow that only just misses.
Mayhem with the Thai clinch, lands a knee to the head.
Ham changes levels and goes for a takedown here. Mayhem fights it off and pushes away nicely.
Ham shoots in but no luck this time.
That's two minutes gone in the round.
There's not a lot going on here and the crowd are letting the fighters know they're not willing to tolerate a lack of action.
Ham fails to land with a series of punches.
Mayhem clinches but Ham breaks the clinch
and Ham counters with a lovely straight right hand!
Mayhem tries to clinch but Ham moves away
and Mayhem takes a counter punch right on the button for his troubles.
Mayhem wants to clinch but Ham slips to the side
and Ham counters with a quick right hand to the jaw.
Mayhem closes the distance and takes a jab right on the nose as he does so.
Mayhem wants to clinch but Ham slips to the side
and Ham counters with a takedown into side control.
Ham has knee on belly and now moves to full mount! Trouble for Mayhem!
You get the feeling that Mayhem really doesn't like being in this position too much.
Ham looking to secure an arm triangle but Mayhem defends it well.
Ham quickly switches position and commits to an armbar! It's a big risk for Ham but it's paid off an Mayhem is forced to tap! Nice work by Ham.
Ladies and gentlemen, after 3:04 of round 3, we have a winner by way of Submission (Armbar). Jack Ham!
|
|
|
|
|
|
|
|
|
|
|
|
|
|
|
|
|
|
|
|
|
|
|
| S |
C
A |
G |
S |
C
B |
G |
|
S |
C |
G |
|
energy
A | B |
|
hype
A | B |
|
pop
A | B |
|
mgr
A | B |
|
FIGHT
RATING
82% |
|
|
|
|
|
|

