|
|
PBP Commentary |
Coming up we have a middleweight MMA rules bout between Tom Hardy (ranked 4434 p4p, 4459 weight class) and Johnny Anfield (ranked 0 p4p, 0 weight class). We have two fighters making their debuts here, so let's see who comes out of this one with their first professional victory.
 |
|
 |
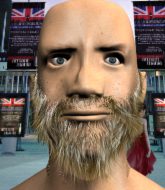
| 184 cm
23
185
0 - 0 - 0 |
|
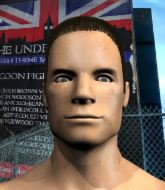
187 cm
18
192
0 - 0 - 0 |
BJJ Purple Belt
Brawler
KO power |
|
Good wrestler
Brawler
Determined |
|
| |
|
Ladies and gentlemen. This fight is 3 rounds, in the middleweight division.
Introducing the fighter to my left, fighting out of the red corner.
With a record of 0 - 0 - 0, fighting out of London, Tom Hardy!
And introducing the fighter to my right, fighting out of the blue corner.
With a record of 0 - 0 - 0, fighting out of Tokyo, Johnny Anfield!
The judges for this bout are James Ackerman, Sam Margolis and Richard Clark.

The bell rings for round one and we are underway!
Hardy displays some good footwork, moving neatly out of range as Anfield throws out the jab.
A looping hook to the body misses from Anfield. Hardy does a little dance to reset his feet.

Hardy takes the fight into the clinch.
Hardy pressing his opponent against the cage.
Anfield is trying to break the clinch but Hardy is controlling him.
Hardy lands a short shot on the inside that snaps the head of Anfield backwards.
Anfield wants to push off and get back to the center of the mat but Hardy has him pressed against the cage.
We've had a slow start to the round here - hopefully the action picks up.

Hardy pulls guard effortlessly.

Hardy throwing his legs up looking for a triangle.
Hardy looking to control.

That's one minute gone in the round.
Anfield got a little sloppy there for a moment and Hardy has worked his way into a loose triangle - can he finish it?! No, Anfield has managed to get both his arms back between Hardy's legs - danger averted.
Anfield trying to land body shots but he keeps hitting the mat.
Hardy is looking to stand up but Anfield isn't so interested in that idea.
Hardy keeping moving, preventing Anfield from controlling successfully.
Hardy is working actively off his back, looking to secure an arm or perhaps work for a triangle.

Hardy pushes Anfield off and scrambles back to his feet.

That's two minutes gone in the round.
Hardy clinches with his opponent.
Hardy stays in close to his opponent and throws a right hand to the body.
Nice body punch from Hardy.
Anfield can't break the clinch.
Hardy tightens his grip and picks Anfield up, before dumping him to the ground. Anfield manages to land in guard.
The fans in attendance giving it up for the two fighters, who have really let it all hang out in the last minute or so!
Hardy trying to control but Anfield is working from the bottom.
Anfield wants to sweep here but Hardy controlling him for the moment.

That's three minutes gone in the round.

Hardy gets to his feet. Anfield looking to butt scoot but the ref puts an end to that. On your feet son!
Hardy digs a good body shot into Anfield's ribs.
Hardy defending well as Anfield loads up on a big left hand.
Anfield waving his hands out in front of him, looking to distract Hardy.
Nice uppercut there from Anfield.
Hardy tries to close the distance and clinch up against the cage but Anfield paws at him with a jab and circles away.
Anfield unleashes a big counter combination but Hardy bobs and weaves and avoids any damage.
Hardy scores with a spinning back kick!
Hardy shoots in for a takedown but doesn't get it.
Hardy has taken the fight to the clinch.
Hardy drops down looking for an ankle pick but Anfield pulls his leg out and moves away.

That's four minutes gone in the round.
Hardy instigates a clinch.
Hardy wants a takedown.
That's three failed takedown attempts in the round for Tom Hardy. That's going to take a lot out of him.
Hardy stalls.
Anfield working hard to break the clinch.
Anfield wants to push off and get back to the center of the mat but Hardy has him pressed against the cage.
Anfield tries to break the clinch but Hardy is controlling the position.
Hardy manages to pull guard. Let's see whether he can land a sub off his back.
Anfield wants to control from the top but Hardy keeps moving.
Hardy utilising some decent striking defenses from the guard, preventing the ground and pound.
And that is the end of the round. The fighters go back to their corners.
Tom Hardy dominated that round.
The fighters get back to their feet, the hooter sounds and we're back to the action!

Hardy bobs and weaves well there to avoid the strikes.
Anfield throws out a loose jab but Hardy uses good head movement to avoid it.
It looked like Hardy was looking amped, ready to throw a big counter but didn't commit.
Anfield stuffs the takedown attempt from Hardy. Hardy gets slowly back to his feet.
Anfield looks to land a right hand but Hardy moved out of range.
Anfield misses with a straight left.
Some wild striking there from Anfield.
Anfield lands an overhand right.
We've had a slow start to the round here - hopefully the action picks up.
Anfield throws a jab but it's blocked by Hardy.
Hardy showing good head movement there, avoiding the strikes from Anfield.
Hardy tries to clinch but Anfield is having none of it.
Anfield looks like he wants to counter punch here.
That's one minute gone in the round.
Hardy shoots in looking for a takedown but Anfield manages to keep the fight standing, pushing Hardy's face into the canvas for good measure before circling away.
Hardy scores a trip takedown into side control. Nice.
Anfield struggling a bit here.
Hardy is looking for a kimura. He might have it! No, Anfield has escaped the position, nice work there.
Anfield is not content to let Hardy control the position.
Hardy looking to punish the body of his opponent here but Anfield is avoiding damage well.
Hardy is really dominating this fight. Is there anything that Anfield can do to turn this around?
That's two minutes gone in the round.
Anfield tries to get back to his feet but has found himself mounted instead. Damn, that's gotta suck.
Hardy is working for a guillotine from mount but Anfield frees his head quite easily.
Anfield tries to reverse the position but Hardy maintains control.
That's three minutes gone in the round.
Hardy has his opponent pinned against the cage, landing some nasty ground and pound that is really making a bit of a mess out of Anfield's face.
Hardy content just to control the position here.
Anfield is working to get back to half guard.
Hardy can't quite control the action as he would like just now, as Anfield is looking to escape.
That's four minutes gone in the round.
Hardy working for a guillotine from mount but Anfield is in no mood to give up.
Hardy lands a couple of nice shots there from mount.
Hardy can't quite control the action as he would like just now, as Anfield is looking to escape.
Anfield is writhing around trying to get back to his feet.
And that is the end of the round. The fighters go back to their corners.
Tom Hardy dominated that second round.
Well, the break between rounds is over. Let's get back to the scrappin! Let's hear some noise people - this is the final round!

A lazy left from Anfield finds it's target.
Hardy clinches up with Anfield and pushes him back against the cage.
The referee calls for Hardy to work.
Anfield wants to get back to striking at distance but Hardy won't allow it.
Anfield is trying to work out of this bad position, with his back against the cage.
Anfield stalling in the clinch but Hardy improves position.
Anfield has had enough of the clinch but Hardy keeps him there for the moment.

Hardy breaks the clinch and we return to the middle of the mat.
We've had a slow start to the round here - hopefully the action picks up.
Hardy uses good head movement to avoid the hook from Anfield.
Hardy swings away but doesn't land with a series of punches.
Anfield swings and misses with a hook to the body.

Hardy lands a left and a right that send Anfield crashing to the mat, dazed. Hardy thinks about following him to the mat but decides to wave him back up to his feet!

It looks like Johnny Anfield has been cut.
That's one minute gone in the round.
Hardy misses with a takedown attempt - Anfield sprawls well and throws a nice strike on the way out which just misses.
Anfield misses with a jab and misses with a cross straight after too.
Anfield throws the left hand but Hardy avoids the punch easily.
Hardy keeping a good distance there, avoiding the body shot.
Nice shot lands for Anfield.
Anfield tries to land with a swinging hook to the body but Hardy was well out of range. Poor timing from Anfield.
Hardy gets his head snapped back by a nice shot there.
Hardy drops his hands momentarily and Anfield takes advantage with a crisp shot to the head.
Hardy moves into the clinch.
Anfield is trying to push Hardy away but Hardy has him pressed against the cage, so he's going nowhere.
Anfield tries to work over Hardy's body with a swooping hook but it only glances the target.
That's two minutes gone in the round.
Anfield working hard to break the clinch.
Hardy wants a takedown.
Hardy manages to break the clinch.
Anfield throws a combination but it was largely blocked by Hardy.
Anfield throws a sloppy body shot
and Hardy counters with a crisp one two that drops Anfield! Hardy thinks about following him to the mat for a moment but instead steps back and waves Anfield to his feet! Anfield is in big trouble!

Anfield is rocked!
This is a great period of action - very entertaining stuff!
Hardy closes the distance looking for a takedown. Hardy picks Anfield up and slams him brutally to the floor. Anfield is out! He's out cold! Wow, you don't see a finish like that every day!
Ladies and gentlemen, after 2:34 of round 3, we have a winner by way of KO (Slam). Tom Hardy!
|
|
|
|
|
|
|
|
|
|
|
|
|
|
|
|
|
|
|
|
|
|
|
| S |
C
A |
G |
S |
C
B |
G |
|
S |
C |
G |
|
energy
A | B |
|
hype
A | B |
|
pop
A | B |
|
mgr
A | B |
|
FIGHT
RATING
49% |
|
|
|
|
|
|

