|
|
PBP Commentary |
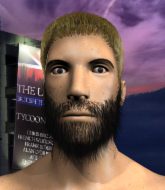
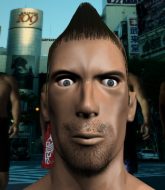
Coming up we have a lightweight MMA rules bout between Max Mad (ranked 0 p4p, 0 weight class) and Mac Paining (ranked 0 p4p, 0 weight class). Mad's entrance music is Move aside and let the man go through. A fine choice. This should be fireworks!
 |
|
 |
| 180 cm
24
164 lbs
10 - 7 - 0 |
|
179 cm
24
152 lbs
7 - 4 - 0 |
BJJ Purple Belt
Solid boxing
Experienced |
|
Good wrestler
Counter striker
Solid chin |
|
| |
|
Ladies and gentlemen. This fight is 3 rounds, in the lightweight division.
Introducing the fighter to my left, fighting out of the red corner.
With a record of
10 - 7 - 0, fighting out of Rio de Janeiro, Max Mad!
And introducing the fighter to my right, fighting out of the blue corner.
With a record of
7 - 4 - 0, fighting out of Rio de Janeiro, Mac Paining!
The judges for this bout are Alexandre Firmino, Seu Braga and Mauricio Rocha.

The bell rings for round one and we are underway!
Mad is looking to take this fight into the clinch.
Mad throws a head kick but Paining moves out of range.
Mad is looking to clinch.
Mad looks to land a combination but Paining avoids it well.
Paining uses good head movement to avoid the hook from Mad.
Mad looks to score with a combo but nothing lands.
Paining has his hands up protecting his head but a hook from Mad finds it's way round the side to connect with Paining's head.
Paining avoids a lazy jab quite easily.
Mad throws a combination but it was largely blocked by Paining.
Paining fakes high and swings low for a body shot but Mad manages to avoid it.
Some wild striking there from Mad.
We've had a slow start to the round here - hopefully the action picks up.
Mad lunges in with swinging rights and lefts but Paining circles away quickly and effectively.
Mad throws a right and a left that Paining avoids nicely.
Paining thows a body shot but no joy.
Mad shoots in but no luck this time.
Mad misses with the combination.

That's one minute gone in the round.
Mad tries to clinch but Paining is having none of it.
Some wild striking there from Mad.
Mad fails with an attempt to clinch.
Paining avoids a punch combination nicely.
Mad just misses with a punch to the body.
Paining slips a jab and a cross from Mad.
Mad throws a sloppy head kick and Paining moves out of range easily.
Mad is breathing heavily.
Mad is looking to clinch but Paining is avoiding it.
Paining misses with a body shot.
Paining throws a hook to the body but it doesn't connect.
Paining ducks down and throws a hook to the body but Mad moves away.
Mad shoots in for a takedown but Paining shows good takedown defense there and keeps this one on the feet.
Mad throws a combination but it was largely blocked by Paining.

That's two minutes gone in the round.
A few boos can be heard. I'm sure they will multiply if the fighters don't pick up the pace.
Some wild striking there from Mad.
Mad is looking to take this fight into the clinch.
Mad misses with a few strikes there.
Mad closes this distance looking for a takedown but Paining circles away.
That's three failed takedown attempts in the round for Max Mad. That's going to take a lot out of him.
Mad goes for a spinning back kick but it misses.
Mac Paining is looking to keep the fight on the feet at all costs.
Mad throws a hook but Paining blocks it.
Mad closes this distance looking for a takedown but Paining circles away.
Mad keeping a good distance there, avoiding the body shot.
Paining takes a swing at Mad's ribcage but misses.
Mad misses with a hook.
Paining fakes high and swings low for a body shot but Mad manages to avoid it.
Mad keeping a good distance there, avoiding the body shot.
Paining throws a hook to the body but it doesn't connect.
Mad shoots in for a takedown but Paining shows good takedown defense.

That's three minutes gone in the round.
Mad uses some good footwork to avoid the body shot by Paining.
Paining is throwing a lot of body shots here, looking to wear down Mad rather than just go for the knockout.
Paining just misses with a punch to the body.
Mad misses with a hook. Paining ducked under it nicely.
A big left from Paining misses.
Paining throws a hook to the body but it doesn't connect.
Paining throws an overhand right that lands on Mad's shoulder, as Mad tries to avoid the shot.
Paining dodges the punch combination from Mad.
Mad pulls out of a head kick attempt.
Mad looks to land a right hand but Paining moved out of range.
Mad avoids the body shot from Paining.
Paining looks to land a right hand but Mad moved out of range.
Mad shoots in for a takedown - he's clinched up with Paining but Paining pushes him off and we're back to square one.
A punch combination from Mad misses.

That's four minutes gone in the round.
Well. There's a bit of a lull in the action here and the crowd are starting to get restless.
Paining misses with a body shot. Nice footwork from Mad.
Mad shoots in with a takedown attempt and he has Paining pinned against the cage. Paining gets the underhooks and manages to circle away.
Mad keeping a good distance there, avoiding the body shot.
A punch combination from Mad misses.
Mad will need to tighten up his combinations if he doesn't want to gas himself out, swinging at thin air.
Mad shoots in for a takedown but Paining shows good takedown defense there and keeps this one on the feet.
Mad keeping a good distance there, avoiding the body shot.
Mad stalks Paining and leaps in with a furious combination of punches. Uppercuts and crosses smash into Paining's face. Paining staggers backwards, shaken.
Paining throws a front kick aimed at Mad's knee but Mad avoids it well.
Boooooooooooooooooooo!!! God, this has been a terrible round. Come on you two, sort yourselves out!
Mad throws a series of punches but Paining avoids them all with ease.
Mad uses some good footwork to avoid the body shot by Paining.
Paining ducks down and throws a hook to the body but Mad moves away.
Paining keeps the fight standing with a nice sprawl.
And thats the end of the round the fighters go back to their corners.
Mac Paining dominated that round.
That's the end of the interval. I'm sure that seemed a lot quicker than a minute for our two fighters! Back to the action.

Mad on the wrong end of a vicious looking body shot.
Paining leaves Mad with his face pressed against the mat as he sprawls beautifully, defending against a solid takedown attempt.
Paining dodges the punch combination from Mad.
Paining throws a hook to the body but it doesn't connect.
Mad tries to clinch there but Paining circles away.
Paining misses with a body shot.
Paining avoids the clinch attempt nicely.
Paining misses with a wild body shot.
We've had a slow start to the round here - hopefully the action picks up.

Paining gets caught on his heels momentarily as he allows Mad to score an easy takedown into full guard.

Paining is edging up against the cage. He's using the cage to get back to his feet. Nice work there - the fighters are clinched.
Both fighters are absolutely exhausted here.
That's one minute gone in the round.
Mad has had enough of the clinch and is looking to separate.
Mad tries to break the clinch but Paining is controlling the position.
Mad tries for a takedown but Paining manages to get underhooks.
Paining is trying to force a seperation but Mad has the dominant position.
Mad has dropped down and is working for a takedown. Paining is trying to keep an underhook but Mad manages to get the takedown into half guard.
Mad prevents Paining from standing back up.
Mad with the ground and pound but Paining uses the opportunity to regain guard.
Mad won't allow Paining to get back to his feet.
Mad stands up and looks to throw the legs aside to pass to side control. Paining swivels though and keeps the full guard.
Mad won't allow Paining to get back to his feet.
That's two minutes gone in the round.
Paining keeping full guard, as Mad tries to pass.
Paining is looking to stand back up... there's a bit of a scramble and Mad dives into side control.
Paining is trying to escape and get back to his feet.

It looks like we're going to have a standup here. Neither fighter is doing enough on the ground.
Mad lands with a nice combination. Paining backs away looking to recover.
Mad swings away but doesn't land with a series of punches.
Mad throws a leg kick but Paining checks it.
Paining showing good head movement there, avoiding the strikes from Mad.
Paining swats away the attempt to clinch by Mad.
That's three minutes gone in the round.
Mad throws a nice looking combination but Paining bobs and weaves to avoid any damage.
Some wild striking there from Mad.
Mad tries for a takedown but Paining sees it coming a mile off and avoids it easily.
That's three failed takedown attempts in the round for Max Mad. That's going to take a lot out of him.
Mad misses with a takedown attempt. He shot from a bit too far out.
Paining moves away from the strike by Mad.
Mad keeping a good distance there, avoiding the body shot.
Paining slaps away a takedown attempt from Mad, before circling back to the center of the mat.
Mad fails with the takedown.
Max Mad is looking to throw some combinations by the looks of things.
That's four minutes gone in the round.
A few boos can be heard. I'm sure they will multiply if the fighters don't pick up the pace.
Mad uses some good footwork to avoid the body shot by Paining.
Mad closes this distance looking for a takedown but Paining circles away.
Paining stuffs the takedown.
Paining misses with a straight left.
Mad avoids the body shot from Paining.
Mad keeping a good distance there, avoiding the body shot.
Mad fails to land with the punch combination there - jab, cross, hook, miss, miss, miss.
Paining throws a hard body shot but it just misses.
Mad throws a combination but comes up with nothing but fresh air.
Mad looks for a takedown here. Will he get it? Paining is fending him off so far but Mad persists. Nope, Paining circles away and we're back to standing.
Mad avoids the body shot from Paining.
Paining misses the shot to the body.
And thats the end of the round the fighters go back to their corners.
Max Mad dominated that second round.
Well, the break between rounds is over. Let's get back to the scrappin! This is the final round!

Mad attempts a leg kick but it's missed by a good margin.
Mad looks frustrated there after his takedown attempt is stuffed easily.
Paining swings for the body but Mad moves out of range.
Paining avoids a punch combination nicely.
Mad misses with a half-hearted attempt at a head kick.
Max Mad seems to be the more aggressive standup fighter in this bout.
Paining throws an uppercut from half a mile away. Mad sees it coming and avoids it easily.
Mad throws an overhand right that lands on Paining's shoulder, as Paining tries to avoid the shot.
Mad shoots in but no luck this time.
We've had a slow start to the round here - hopefully the action picks up.
Mad uses some good footwork to avoid the body shot by Paining.
Both fighters are breathing heavily.
Paining loads up on a big right hand but Mad slips the punch.
A punch combination from Mad misses.
Mad fails miserably with a takedown attempt.
That's three failed takedown attempts in the round for Max Mad. That's going to take a lot out of him.
That's one minute gone in the round.
Paining swings for the body but Mad moves out of range.
Paining looks to score with a jab to the body but Mad is just out of range.
Mad avoids the body shot from Paining.
Paining swats away the attempt to clinch by Mad.
Mad is looking to take this fight into the clinch.
Mad misses with a few strikes there.
Mad shoots in for a takedown. He's persisting with it as Paining sprawls well. Paining wins this battle and keeps the fight standing. Mad gets slowly back to his feet.
Paining tries to land with a swinging hook to the body but Mad was well out of range. Poor timing from Paining.
Paining misses with a body shot. Nice footwork from Mad.
That's two minutes gone in the round.
There's not a lot going on here and the crowd are letting the fighters know they're not willing to tolerate a lack of action.
Paining misses with a body shot. Nice footwork from Mad.
Paining circles away from the clinch attempt.
A head kick misses from Mad.
Paining throws a body punch but Mad moves out of range.
Mad lands with a hook. Paining tried to avoid it but it clipped the top of his head.
Paining ducks down and throws a hook to the body but Mad moves away.
Paining ducks down and throws a hook to the body but Mad moves away.
Paining slips under a jab.
A punch combination from Mad misses.
Paining walks into a left hand.
Mad throws a right and a left that both miss.
Paining fakes high and swings low for a body shot but Mad manages to avoid it.
Mad throws a right and a left that both miss.
Mad throws a right hand that Paining ducks under and follows up with a left that Paining also avoids with ease.
That's three minutes gone in the round.
Mad lunges in with swinging rights and lefts but Paining circles away quickly and effectively.
Paining thows a body shot but no joy.
Paining misses with a wild body shot.
Mad throws a right and a left that Paining avoids nicely.
Some wild striking there from Mad.
Mad tries to clinch but Paining moves out of range.
Paining swings for the body but Mad moves out of range.
Paining swings and misses with a hook to the body.
Mad misses with a double jab.
Mad swings away but doesn't land with a series of punches.
Mad swinging wilding here.
Mad shoots in looking for a takedown. Paining tries to sprawl out of it but Mad keeps driving through. The fighters are pinned against the cage. Paining manages to get underhooks and after a bit of a struggle, circles away and we're back to standing.
That's four minutes gone in the round.
A lull in the action here being met with boos from the crowd.
Paining throws a hard body shot but it just misses.
Paining fakes high and swings low for a body shot but Mad manages to avoid it.
Paining swings for the body but Mad moves out of range.
Mad is moving around nicely and scores here with a single head shot.
Mad throws a looping left and ducks down for a takedown. He's got his arms around Paining's waist but Paining gets an underhook and avoids the takedown by throwing Mad off to one side.
Paining throws a body punch but Mad moves out of range.
No luck with that takedown attempt from Mad.
Paining misses with a body shot.
Boooooooooooooooooooo!!! God, this has been a terrible round. Come on you two, sort yourselves out!
Mad looks to score with a combo but nothing lands.
Paining waving his hands out infront of him, looking to distract Mad.
Mad tries to score a power double leg takedown but Paining sees that one coming and sprawls well. That will dishearten Mad somewhat.
And that's the end of the fight!
I would just about give that final round to Mac Paining.
I think Paining has won this one but let's see whether the judges agree with me. Over to the ring announcer for the scorecards.
Ladies and gentlemen, after 3 rounds of action, we go to the scorecards for a decision.
Judge Alexandre Firmino scores the fight 28:29
Judge Seu Braga scores the fight 28:29
Judge Mauricio Rocha scores the fight 28:29
In favor of your winner, by unanimous decision... Mac Paining!
|
|
|
|
|
|
|
|
|
|
|
|
|
|
|
|
|
|
|
|
|
|
|
| S |
C
A |
G |
S |
C
B |
G |
|
S |
C |
G |
|
energy
A | B |
|
hype
A | B |
|
pop
A | B |
|
mgr
A | B |
|
FIGHT
RATING
18% |
|
|
|
|
|
|
