|
|
CWC 360 PBP Commentary |
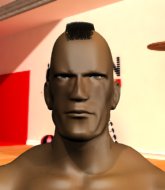
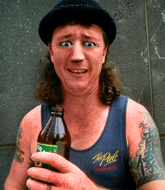
This TWGC bout is 1 fifteen minute round in the super heavyweight division. Introducing today's competitors. In the red corner, competing out of Las Vegas, with a TWGC record of 2 wins and 0 losses; Rio Rolla! And in the blue corner, fighting out of Montreal, with a TWGC record of 25 wins and 23 losses; Arthur Kincaid!
The judges for this bout are Yves DeLean, Gregory Folan and Dillan Fox.
The fighters bow as they face eachother in the middle of the mat and we are under way.
Rolla fails with the takedown

and Kincaid counters by moving into the clinch. Good anticipation by Kincaid.
Rolla goes for a takedown in the clinch but Kincaid prevents it.

Kincaid lands a takedown into guard.
Score +2 for takedown into guard / half guard: Rolla (0) vs (2) Kincaid

Rolla looking for submissions from the bottom here. Moving his hips around, possibly looking for an armbar.
Kincaid wants to pass the guard but Rolla is keeping the position.
Rolla seems to have improved his submission grappling technique since last time we saw him. Let's see if he can pull off a submission.
Rolla manages to sweep nicely, so he's now on top. Kincaid manages to get himself to full guard.
Score +2 for sweep to guard / half guard: Rolla (2) vs (2) Kincaid
Kincaid trying to keep a closed guard but Rolla is proving a slippery customer.
We've had a slow start to the round here - hopefully the action picks up.
Rolla drops back, looking for a kneebar! Kincaid looks panicked! The fighters roll across the mat, one looking to finish, one looking to escape. Kincaid looks to have wriggled free... Yes, he's got his leg free and he's dived into side control! Good work there from Kincaid! Score +4 for clean sweep to past guard: Rolla (2) vs (6) Kincaid
Kincaid tries to move into full mount but can't pass Rolla's legs.

That's one minute gone in the round.
Rolla is looking for a sweep.

Kincaid is looking for a kimura. He might have it! No, Rolla has escaped the position, nice work there.
Kincaid advances nicely into full mount. Score +2 for reaching mount: Rolla (2) vs (8) Kincaid
Kincaid is looking to work his way around to Rolla's back. He needs to be careful though, as he's in danger of losing this dominant position.
Rolla bucks up and manages to get a nice reversal! He's in guard on the top - nicely done! Score +2 for sweep to guard / half guard: Rolla (4) vs (8) Kincaid
Kincaid keeping full guard, as Rolla tries to pass.
Kincaid throwing his legs up looking for a triangle.

That's two minutes gone in the round.
Rolla tries to free his leg and advance position but Kincaid is retaining full guard.
Rolla avoids a guillotine attempt easily.
Rolla slips nicely into half guard.
Rolla passes the guard and advances to mount! Score +3 for passing guard: Rolla (7) vs (8) Kincaid
Rolla prevents Kincaid from getting the reversal.
Rolla wants to take his opponent's back but Kincaid doesn't allow it.
Kincaid tries to reverse the position but Rolla maintains control.

That's three minutes gone in the round.
Rolla looking to secure an arm triangle but Kincaid defends it well.
Kincaid prevents Rolla from taking his back.
Rolla working for a guillotine from mount but Kincaid is in no mood to give up.
Kincaid can't escape the position.
Rolla wants to take his opponent's back but Kincaid doesn't allow it.
Kincaid keeping his composure momentarily, calmly looking to get back to half guard.
Rolla pushing the pace here, looking to move to his opponents back and work for a finish.
Kincaid is trying desperately to improve position.

That's four minutes gone in the round.
Rolla jumps to side control looking for an arm triangle but Kincaid manages to avoid the submission attempt.
Rolla tries to move to mount but Kincaid blocks the move with his legs.
The fighters are pressed up against the cage, both looking to find a bit of space to work.
Rolla advances nicely into full mount. Score +2 for reaching mount: Rolla (9) vs (8) Kincaid
Rolla wants to take his opponent's back but Kincaid doesn't allow it.
Kincaid keeping his composure momentarily, calmly looking to get back to half guard.
Rolla looks like he's working for a submission but he's not found anything just yet.
Kincaid is working to get back to half guard.

That's five minutes gone in the round.
Kincaid is still trying to improve position.
The ref warns both fighters not to hold the cage as they work up against the meshing.
Kincaid has given up his back. Will we see Rolla going for some submissions?
Score +3 for taking back: Rolla (12) vs (8) Kincaid
Rolla doesn't have the hooks in and Kincaid manages to turn into his guard.
Score +2 for sweep to guard / half guard: Rolla (12) vs (10) Kincaid
Rolla is looking for a triangle but Kincaid pushes his legs off easily.
Rolla is looking for a guillotine. You can't force these things though and Kincaid defends well.
Kincaid tries to free his leg and advance position but Rolla is retaining full guard.
Rolla wants to sweep but no luck.

That's six minutes gone in the round.
Rolla manages to sweep nicely, so he's now on top. Kincaid manages to get himself to full guard.
Score +2 for sweep to guard / half guard: Rolla (14) vs (10) Kincaid
Rolla got a little sloppy there for a moment and Kincaid has worked his way into a loose triangle - can he finish it?! No, Rolla has managed to get both his arms back between Kincaid's legs - danger averted.
Rolla trying to pass the guard but can't manage it just yet.
Kincaid looking to control.
Kincaid can't keep his opponent in guard - Rolla advances to half guard, no doubt looking to mount.
Kincaid gets back to full guard.
Kincaid looking to sweep here. No luck so far.
Rolla pressing down on his opponent's thigh, looking to pass guard. Kincaid is keeping the position for now.
Kincaid wants to sweep but no luck.
Kincaid lands a beautiful sweep and he's now moved into his opponent's guard. Score +2 for sweep to guard / half guard: Rolla (14) vs (12) Kincaid

That's seven minutes gone in the round.
Rolla tries to land a sweep but no joy.
Kincaid got a little sloppy there for a moment and Rolla has worked his way into a loose triangle - can he finish it?! No, Kincaid has managed to get both his arms back between Rolla's legs - danger averted.
Rolla is looking for a guillotine. You can't force these things though and Kincaid defends well.
Kincaid stopping the sweep attempt from Rolla.
Kincaid is looking to advance position but Rolla has hit a scissor sweep - now he's on top in mount! Score +4 for clean sweep to past guard: Rolla (18) vs (12) Kincaid
Kincaid is desperately trying to improve his position but Rolla has a good base and remains in mount.
Rolla pushing the pace here, looking to move to his opponents back and work for a finish.

That's eight minutes gone in the round.
Rolla has control of Kincaid's right arm, working for a kimura. It's a bit of a token attempt though and Kincaid regains control of the situation pretty easily.
Kincaid sneaks a leg back under and regains half guard and is working straight away to try and get back to guard. He hasn't managed just yet though.
Kincaid is looking to improve his position.
Kincaid has found himself in a tricky position here. He's been working his transitions in training so let's see if he can work his way out of it.
Rolla wants to pass the guard but Kincaid is defending well.
Kincaid with the active half guard here but Rolla passes nicely into side control. Score +3 for passing guard: Rolla (21) vs (12) Kincaid
Rolla tries for a kimura but Kincaid is defending well.

That's nine minutes gone in the round.
Kincaid is trying to improve his position.
Rolla is looking to finish here, going for an Americana. Kincaid knows the correct defense though, so he's OK.
Kincaid is looking to regain half guard here but Rolla keeps moving and retains side control.
Rolla wants to work for a kimura but he's foiled early by Kincaid, who protects the arm well.
Kincaid tries to buck Rolla off but Rolla is having none of it.

That's ten minutes gone in the round.
Rolla tries for a kimura but Kincaid is defending well.
Kincaid tries to bench press Rolla off him but Rolla keeps the position.
Kincaid prevents Rolla from moving into mount.
Rolla advances to full mount. Score +2 for reaching mount: Rolla (23) vs (12) Kincaid
Kincaid has given up his back.
Score +3 for taking back: Rolla (26) vs (12) Kincaid
Kincaid is in bad spot here.

That's eleven minutes gone in the round.
Kincaid is persisting with the attempt to improve his position.
Kincaid defending nicely against the rear naked choke attempt.
Kincaid showing good submission defense here.
Rolla working for the choke.
Rolla is working for the rear naked choke. He has one arm under the chin but Kincaid has hold of the other arm. A bit of a stalemate here.
Rolla is remaining active here, looking for the choke. The more discerning members of the crowd will appreciate his efforts.

That's twelve minutes gone in the round.
Kincaid rolls, trying to escape but Rolla keeps control of the position.
Kincaid manages to reverse the position and now he's in Rolla's guard. Nice work there by Kincaid.
Score +2 for sweep to guard / half guard: Rolla (26) vs (14) Kincaid
Rolla escapes his hips to the side and looks to be working for an armbar. Kincaid gives him a little smile and shakes his head. No chance.
Kincaid drops back, looking for a kneebar! Rolla looks panicked! The fighters roll across the mat, one looking to finish, one looking to escape. Rolla looks to have wriggled free... Yes, he's got his leg free and he's dived into side control! Good work there from Rolla! Score +4 for clean sweep to past guard: Rolla (30) vs (14) Kincaid
Kincaid struggling a bit here.

That's thirteen minutes gone in the round.
Rolla tries to cartwheel into mount but he doesn't manage it.
Rolla is trying to get an arm triangle but Kincaid is defending well.
Kincaid tries to get back to half guard but can't.
Rolla advances to mount. Score +2 for reaching mount: Rolla (32) vs (14) Kincaid
Kincaid is desperately trying to get back to half guard.
Rolla seems to be looking to move to his opponent's back but Kincaid is holding on tight.

That's fourteen minutes gone in the round.
Kincaid tries to get back to half guard but can't.
Rolla moves into side control, trying to work for a kimura. That looks painful! Will he finish!!?? No, Kincaid has worked his arm free - good work by Kincaid!
Rolla tries to advance position but instead Kincaid slips a leg back in to half guard.
Rolla is looking for a kimura but Kincaid is holding onto that half guard position, so it's hard for Rolla to get the leverage.
Kincaid is in trouble now - Rolla has advanced to mount! Score +3 for passing guard: Rolla (35) vs (14) Kincaid
Kincaid tries to reverse the position but Rolla maintains control.
Boooooooooooooooooooo!!! God, this has been a terrible round. Come on you two, sort yourselves out!
Kincaid stops Rolla from taking his back. Still, being mounted isn't any better.
Rolla jumps to the side looking to secure the arm triangle
. Ooooh, that looks tight
Kincaid is gargling but he's managed to escape! Nice work there by Kincaid and Rolla has given up the dominant position trying to land that submission.
And that's the end of the fight!
Rolla takes the fight on points by 35 to 14. |
|
|
|
|
|