|
|
PBP Commentary |
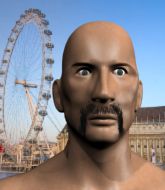
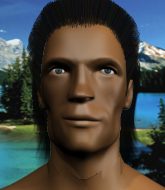
Coming up we have a welterweight MMA rules bout between Lui Mora (ranked 3137 p4p, 6363 weight class) and Isoa Tawake (ranked 391 p4p, 604 weight class). Lui Mora had a look across the cage there at his opponent. He definitely means business
 |
|
 |
| 177 cm
25
175
3 - 0 - 0 |
|
193 cm
18
185
1 - 2 - 0 |
Good wrestling
Basic striking
Hates pizza |
|
BJJ Blue Belt
Excellent MT
Determined |
|
| |
|
Ladies and gentlemen. This fight is 3 rounds, in the welterweight division.
Introducing the fighter to my left, fighting out of the red corner.
With a record of 3 - 0 - 0, fighting out of New York, Lui Mora!
And introducing the fighter to my right, fighting out of the blue corner.
With a record of 1 - 2 - 0, fighting out of Amsterdam, Isoa Tawake!
The judges for this bout are Radbod Blank, Aafke Stam and Albert Achterberg.

The bell rings for round one and we are underway!
Tawake swings wildly with a right hand that was never going to find it's target.
Tawake throws a nice outside leg kick.
Mora looks to land a left hand but Tawake moved out of range nicely.
Lui Mora seems to be the more aggressive standup fighter in this bout.
Mora misses with a lunging right hand
enabling Tawake to counter with a crisp jab.
Mora misses with a jab to the body
letting Tawake counter with a right hand.
Tawake misses with a hook

and Mora counters with a nice double leg into side control. Tawake won't be happy with that.
Mora taking a breather here.
Tawake tries to work a leg under to get back to half guard but Mora wriggles his own leg back out and remains in side control.
Tawake tries to control but end up mounted... ooooh, that's bad.
Mora sitting in mount, just looking to control for the moment.
Tawake really doesn't want to stay on the ground with Mora. If he can't get it back to his feet, it's only a matter of time before he'll be tapping out.
This has been an exciting period of action!
Tawake taking shots to the head.

That's one minute gone in the round.
Mora punishing his opponent with strikes.
Mora is still in mount, landing shots to his trapped opponent. Tawake can't stay in a position like this for much longer.
Tawake is wriggling around trying to escape.
Mora has his opponent pinned against the cage, landing some nasty ground and pound that is really making a bit of a mess out of Tawake's face.
Mora prevents Tawake from getting the reversal.
Mora tucks in and makes sure he doesn't lose the dominant position.
The fighters are pressed up against the cage, both looking to find a bit of space to work.
Mora lands a nice shot to the head.
The ref warns both fighters not to hold the cage as they work up against the meshing.
Mora tucks in and makes sure he doesn't lose the dominant position.
Mora has been looking to land a fair amount of strikes on the ground. He might be looking to soften his opponent up in order to work for a submission.
Tawake is hanging on here. He's in a desperate position.

That's two minutes gone in the round.
The referee warns Tawake that he has to improve his position here as he takes two more clean shots to the head.
Tawake is working to get back to half guard.
Mora scoring with strikes but Tawake is staying in there.
Tawake felt the need to train up his defensive grappling in the buildup to the fight. Presumably he was expecting to be in a difficult position like this, so let's see if he can get out of it.
The fans in attendance giving it up for the two fighters, who have really let it all hang out in the last minute or so!
Tawake is looking to get to half guard.
Mora controlling from mount.
The fighters are starting to get a bit slippery now, which will make submissions a bit more difficult.
Mora seems to have a rather negative gameplan on the ground. He seems keen to just score the takedown and hold down Tawake for as long as he can get away with.

That's three minutes gone in the round.
Tawake manages to regain half guard. Good work.
Tawake is not content to let Mora control the position.
Tawake slips a foot under and gets full guard. Nice work.
Mora wants to control from the top but Tawake keeps moving.
Tawake looking to sweep here. No luck so far.
Mora stays in close to Tawake's body and controls the position.
Tawake tries to land a sweep but no joy.

That's four minutes gone in the round.
Neither fighter has done anything of merit for a good minute or two here and the crowd are not happy about it.
Tawake trying to punch from his back but it's not doing any damage.
Tawake wants to sweep here but Mora controlling him for the moment.
Mora might be looking to lock onto one of his opponent's long limbs for a submission, whilst we're on the ground.
Mora with a nice head shot there.
Tawake tries to land a sweep but no joy.
Mora content to strike from guard, landing some decent shots.
Mora passes into half guard.
Mora has freed up his trapped foot and advances to mount.
Mora can't quite control the action as he would like just now, as Tawake is looking to escape.
Mora dominating with strikes here.
Tawake is trying desperately to improve position.
And that is the end of the round. The fighters go back to their corners.
Lui Mora dominated that round.
That's time! Back to the action!

Nice jab there from Tawake.
Tawake ducks down and throws a hook to the body.
Mora closes the distance but Tawake moves to the side
and Mora takes a counter punch right on the button for his troubles.
Mora shoots in for a double leg but Tawake sprawls well. That's going to sap some energy.
Mora looks to have improved his striking defense since last time we saw him fight.
A telegraphed takedown attempt from Mora is defended easily by Tawake.
We've had a slow start to the round here - hopefully the action picks up.
Tawake looks to score with a jab to the body but Mora is just out of range.
Mora shoots in but doesn't get the takedown
and Tawake counters with a straight right hand.
That's three failed takedown attempts in the round for Lui Mora. That's going to take a lot out of him.
That's one minute gone in the round.
Tawake lands an overhand right.
Mora throws a body punch but Tawake moves out of range.
Tawake bobs and weaves well there to avoid the strikes.
Mora misses with a body shot.
Mora shakes his hands off, looking to compose himself, but takes a jab to the jaw whilst he does it.
Nice takedown defense from Tawake. No joy for Mora on that attempt.
Nice uppercut there from Tawake.

Mora is rocked!
Mora misses with a takedown
and Tawake counters with a big left hand that crumples Mora! He was out before he hit the floor! Brutal knockout!
Ladies and gentlemen, after 1:46 of round 2, we have a winner by way of KO (Punch). Isoa Tawake!
Isoa Tawake thanked the fans post fight for their support.
|
|
|
|
|
|
|
|
|
|
|
|
|
|
|
|
|
|
|
|
|
|
|
| S |
C
A |
G |
S |
C
B |
G |
|
S |
C |
G |
|
energy
A | B |
|
hype
A | B |
|
pop
A | B |
|
mgr
A | B |
|
FIGHT
RATING
43% |
|
|
|
|
|
|

