|
|
PBP Commentary |
Coming up we have a middleweight MMA rules bout between Jung Hoi (ranked 0 p4p, 0 weight class) and Apollo Need (ranked 0 p4p, 0 weight class). Over to our ring announcer for the fighter introductions!
 |
|
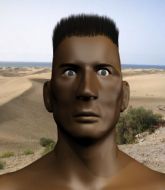 |
| 179 cm
23
186 lbs
3 - 2 - 0 |
|
185 cm
24
195 lbs
3 - 3 - 0 |
BJJ Brown Belt
Brawler
Self confident |
|
Powerful takedowns
Decent boxing
Powerful |
|
| |
|
Ladies and gentlemen. This fight is 3 rounds, in the middleweight division.
Introducing the fighter to my left, fighting out of the red corner.
With a record of
3 - 2 - 0, fighting out of Rio de Janeiro, Jung Hoi!
And introducing the fighter to my right, fighting out of the blue corner.
With a record of
3 - 3 - 0, fighting out of Rio de Janeiro, Apollo Need!
The judges for this bout are Emerson Jorge, Matheus Silva and Alexandre Firmino.

The bell rings for round one and we are underway!
Hoi throws a combination but it was largely blocked by Need.
Need looks for a takedown but Hoi sprawls well.
Need is trying hard to land a takedown here. Hoi sprawls well and keeps this one on the feet.

Need drives through with a takedown into guard.
The fighters are pressed up against the cage, both looking to find a bit of space to work.
Hoi wants to sweep but no luck.
Need is taking a break and basically stalling. The referee will not allow him to do that for long.

Hoi working from the bottom, still in full guard. He's managed to get a loose triangle. Need doesn't seem to be doing much to defend here, obviously he feels comfortable in the position. Need manages to throw the legs off his shoulder and he's back into guard - no problem.
Need scores with a decent looking elbow strike.

Need gets to his feet. Hoi looking to butt scoot but the ref puts an end to that. On your feet son!
Need scores with a nice takedown into half guard. Let's see what he's got on the ground.
Hoi is looking to regain full guard. Not this time though.
Need tries to stand but his arm is trapped.

That's one minute gone in the round.
Need trying to control from half guard but Hoi is working away.
Need thows a wild elbow that connects with the canvas.
Hoi looking for submissions off his back.
Need passes into side control, despite Hoi's attempt to control the position.
Need working away.

The referee decides to stand the fighters back up.
Hoi stuffs the takedown attempt from Need. Need gets slowly back to his feet.
Jung Hoi has stuffed three takedown attempts in the round now. That's going to take a lot out of Apollo Need.
Hoi rushes forward with a series of wild hooks but Need moves out of range and avoids them all easily.

That's two minutes gone in the round.
My god... these two guys really need to pick up the pace or everyone will leave to go get a beer.
Need closes the distance and scores a nice trip takedown into half guard. Hoi did well to prevent Need getting side control.
Hoi is looking to improve his position.
Hoi looking to work for a kimura from the bottom.
Hoi is breathing heavily.
Need trying to mount his opponent but Hoi defends it.
Hoi tries to get to full guard but Need has control of the leg.
Need with a momentary lay and pray from half guard.
Need is looking for the mount but instead finds himself back in full guard.

That's three minutes gone in the round.
Hoi is looking for a guillotine. You can't force these things though and Need defends well.
Need stays in close to Hoi's body and controls the position.
Hoi wants to hit a switch here but Need passes into full mount! Oh no, disaster for Hoi there!
Need takes a little breather and maintains the position. The referee will be looking for him to stay active from such a dominant position though.
Need scoring with strikes but Hoi is staying in there.

That's four minutes gone in the round.
Hoi tries to reverse the position but Need maintains control.
Hoi is in a horrible position here, under a barrage of strikes, he's managing to avoid any damage.
Hoi tries to reverse the position but Need maintains control.
Need controlling his opponent.
Need dominating with strikes here.
Hoi wants to control but Need is having none of it.
Need controlling his opponent.
And thats the end of the round the fighters go back to their corners.
Apollo Need dominated that round.
The minute break is over - no more time for sponges and pep talks - back to the action!

Need shoots in but Hoi avoids the takedown attempt easily.
Hoi tries to close the distance and clinch up but Need swats him away and circles back towards the center.
Need misses with a few strikes there.
Hoi fails to land with a series of punches.
Need stuffs the takedown attempt from Hoi. Hoi gets slowly back to his feet.
Hoi tries to bum rush Need with a series of wild strikes but Need uses good footwork to avoid the assault.
Hoi misses with a series of wild punches.
We've had a slow start to the round here - hopefully the action picks up.
Hoi swings wildly with a couple of big hooks
and Need connects with a straight left hand counter down the middle.
Need swings wildly with a couple of big hooks
and Hoi connects with a straight left hand counter down the middle.
Need shoots in and bounces Hoi off the cage to secure the takedown into guard.
Hoi can't do much from the bottom at the moment, as Need controls the pace.
Both fighters are absolutely exhausted here.
That's one minute gone in the round.
Need got a little sloppy there for a moment and Hoi has worked his way into a loose triangle - can he finish it?! No, Need has managed to get both his arms back between Hoi's legs - danger averted.
A big thud reverberates around the arena there as Need accidentally thumps the mat. Hopefully he's not broken his hand.
Need seems content to control from guard here. He's going to have to remain active though if he doesn't want to get stood back up.
Need stands up and looks to throw the legs aside to pass to side control. Hoi swivels though and keeps the full guard.
Hoi can't do much from the bottom at the moment, as Need controls the pace.
Need passes Hoi's right leg, so he's now in half guard.
Hoi trying to control here.
That's two minutes gone in the round.
There's not a lot going on here and the crowd are letting the fighters know they're not willing to tolerate a lack of action.
Need perhaps working for something from half guard, or maybe not. It looks like he's just sitting there.
Need has freed up his trapped foot and advances to mount.
Need controlling the pace for now.
That's three minutes gone in the round.
Hoi can't escape the position.
Need controlling from mount.
Despite being in the dominant position, Apollo Need just isn't active enough and the referee decides to stand the fighters back up.
Need closes the distance and scores a nice trip takedown into half guard. Hoi did well to prevent Need getting side control.
The ref warns both fighters not to hold the cage as they work up against the meshing.
Hoi wants to control but Need is keeping busy and won't allow it.
Hoi looking for submissions off his back.
Hoi is trying to control but Need passes into side control!
That's four minutes gone in the round.
Need decides to stand back up. Need steps back and let's Hoi get back to his feet.
Need dives in and grabs Hoi's left leg, looking for a takedown. Hoi pushes down on Need's head and hops out.
Hoi closes the distance but Need moves to the side
and Need counters with a one-two to the body.
Need shoots in looking for a single leg takedown. Hoi is trying to defend but Need finishes it well and ends up in half guard. Let's see if he can advance position further.
Hoi looking for submissions off his back.
Need performing his best blanket impression for a moment.
Need moves nicely into side control.
And thats the end of the round the fighters go back to their corners.
Apollo Need showed his class in that round. I'd imagine he'll take it on all the scorecards.
That's the end of the interval. I'm sure that seemed a lot quicker than a minute for our two fighters! Back to the action. This is the final round!

Need throws a right and a left that both miss.
Need cracks Hoi with a good jab.
Need defending well as Hoi loads up on a big left hand.
Hoi stuffs the takedown attempt from Need. Need gets slowly back to his feet.
Need tries to score a power double leg takedown but Hoi sees that one coming and sprawls well. That will dishearten Need somewhat.
Need will need to tighten up his combinations if he doesn't want to gas himself out, swinging at thin air.
Hoi looks to score with a combo but nothing lands.
We've had a slow start to the round here - hopefully the action picks up.
Hoi misses with a double jab
and Need counters with a quick right hand to the jaw.
Need ducks down and throws a hook to the body.
Both fighters are breathing heavily.
Need misses with a jab, cross combination.
That's one minute gone in the round.
Need changes levels and looks for a double leg takedown. Hoi tries to avoid it but Need manages to keep hold of a leg and drag Hoi to the ground. Hoi escapes though and pops straight back up to his feet.
Jung Hoi has stuffed three takedown attempts in the round now. That's going to take a lot out of Apollo Need.
Need looking to shoot here. He's gone for it and he's landed a takedown into mount! Oh, that's bad for Hoi!
Need controlling from mount.
Hoi working to try and regain half guard.
Hoi wriggling around on the bottom manages to avoid the strikes thrown by Need.
Need controlling from the full mount.
That's two minutes gone in the round.
Hoi tries to control the position but Need now has his back.
Need scores with punches to the body.
Watch the back of the head! Comes the shout from the referee towards Need.
Need gets his hands free as Hoi looks to control.
Hoi is trying to break free.
Hoi looks to control his opponent's hands but he's not mananging it at the moment.
Hoi is being controlled on the ground here - he must escape this position otherwise surely the end is near.
That's three minutes gone in the round.
Hoi takes a big shot to the side of the head.
Need is hanging on to Hoi's back as he tries to escape.
So, who will make the next big move? In this position it could be crucial.
Hoi is really stuck here.
That's four minutes gone in the round.
Well. There's a bit of a lull in the action here and the crowd are starting to get restless.
Hoi trying to control the hands but Need breaks the grip.
Hoi tries to escape but Need has the hooks in and won't let him break free.
Need thows a huge left but connects with the canvas and not his opponent.
Hoi is defending well here and trying to improve his position.
I would not like to be Hoi right now.
Need is not going to allow Hoi to sit and survive in this position.
Need controlling from the back.
Hoi tries to escape the position.
Need controls the position.
And that's the end of the fight!
Apollo Need comfortably won the final round on my scorecard.
Well Need has outworked and out performed his opponent in all aspects of the game today. He was simply too good and the decision should be no more than a formality. Over to the ring announcer for the scorecards.
Ladies and gentlemen, after 3 rounds of action, we go to the scorecards for a decision.
Judge Emerson Jorge scores the fight 27:30
Judge Matheus Silva scores the fight 27:30
Judge Alexandre Firmino scores the fight 27:30
In favor of your winner, by unanimous decision... Apollo Need!
|
|
|
|
|
|
|
|
|
|
|
|
|
|
|
|
|
|
|
|
|
|
|
| S |
C
A |
G |
S |
C
B |
G |
|
S |
C |
G |
|
energy
A | B |
|
hype
A | B |
|
pop
A | B |
|
mgr
A | B |
|
FIGHT
RATING
46% |
|
|
|
|
|
|

