|
|
PBP Commentary |
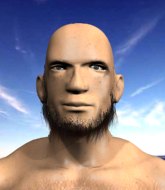
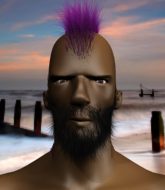
Coming up we have a lightweight MMA rules bout between Svalbard Haudegen (ranked 413 p4p, 701 weight class) and Klaus Chugman (ranked 64 p4p, 102 weight class). Both fighter's entrance songs getting the crowd jumping here.
 |
|
 |
| 180 cm
31
161
14 - 2 - 0 |
|
150 cm
44
130
42 - 38 - 0 |
Abu Dhabi Champ
World class boxer
Granite chin |
|
Olympic wrestler
Excellent MT
Fast |
|
| |
|
Ladies and gentlemen. This fight is 3 rounds, in the lightweight division.
Introducing the fighter to my left, fighting out of the red corner.
With a record of 14 - 2 - 0, fighting out of Los Angeles, Svalbard Haudegen!
And introducing the fighter to my right, fighting out of the blue corner.
With a record of 42 - 38 - 0, fighting out of Los Angeles, Klaus Chugman!
The judges for this bout are Francis DeMontford, Winston Howard and Damien Edna.

The bell rings for round one and we are underway!
Chugman fails in his attempt to clinch.
Haudegen looks to land a right hand but Chugman moved out of range.

Chugman gets to the clinch - let's see what his plan is here.
Haudegen wants to stall.
Chugman wants to take the fight to the mat but Haudegen manages to get underhooks and keep the fight in the clinch.
We've been hearing reports that Haudegen has been drilling takedowns in recent sessions so let's see if that has an impact on the result of this fight.
Haudegen lands a right hand that snaps the head of Chugman backwards.
Chugman struggles to land a body shot inside as Haudegen controls his hands.
Chugman tries to throw a body punch but Haudegen avoids it by throwing Chugman back against the cage.
Haudegen gets underhooks to prevent Chugman's takedown attempt.
Haudegen misses with the head strike.
Haudegen scores with a shot to the side of Chugman's head.
Chugman is looking to control Haudegen's arms but Haudegen gets an underhook and turns him. Now Chugman has his back to the cage.
Haudegen lands with a left to the head.
We've had a slow start to the round here - hopefully the action picks up.
Haudegen can't find room to land a body shot as Chugman controls the action.
Chugman is pressed up against the cage. Haudegen has hold of a leg and is looking to drag Chugman down to the mat. Chugman avoids the attempt though and has circled away. We're back to striking at a distance.
Chugman swings for the body but Haudegen moves out of range.
Chugman gets cracked there but stands up to it.
Haudegen thuds a left hand into Chugman's body.
Haudegen misses with a looping left.

That's one minute gone in the round.
Haudegen misses with an uppercut. Chugman saw that one coming.
Chugman looks to score with a jab to the body but Haudegen is just out of range.

Chugman gets caught on his heels momentarily as he allows Haudegen to score an easy takedown into full guard.

Chugman is looking for a guillotine. You can't force these things though and Haudegen defends well.
Chugman seems keen to control rather than go for a submission, at least for now.
Chugman looking for submissions from the bottom but instead Haudegen passes into side control.
Chugman prevents Haudegen from improving position.

That's two minutes gone in the round.

Haudegen tries for an arm triangle. That looks pretty tight to me. Is this one over!?! Possibly, maybe, no Haudegen has let go of the choke. Obviously it wasn't as tight as we thought!
Haudegen swings around for an armbar but Chugman sees it coming a mile off and turns beautifully into Haudegen's guard.
Haudegen preventing the ground and pound from doing any damage.
Hammerfist, elbow! yells Chugman's corner. There ya go! There ya go!
Chugman throws a big elbow that misses.
Chugman wants to control from the top but Haudegen keeps moving.

That's three minutes gone in the round.
Haudegen had isolated an arm as going for a kimura. Chugman defends it easily.
The fighters are starting to get a bit slippery now, which will make submissions a bit more difficult.
Haudegen escapes his hips to the side and looks to be working for an armbar. Chugman gives him a little smile and shakes his head. No chance.
Chugman postures up in Haudegen's guard and throws a big left but Haudegen blocks it.
Chugman postures up in Haudegen's guard and throws a big left but Haudegen blocks it.
Chugman trying to control but Haudegen is working from the bottom.

That's four minutes gone in the round.
Neither fighter has done anything of merit for a good minute or two here and the crowd are not happy about it.
Haudegen working away from the bottom but not quite defensive enough there because Chugman has passed into half guard!
Chugman prevents Haudegen from improving his position.
Haudegen is working hard here to advance position.
Chugman is controlling the pace.
My spies in Crapollas Gym inform me that Chugman has been getting involved in the gym's BJJ sparring sessions. Let's see whether that pays dividends!
The crowd thankful this round is nearly over.
Haudegen tries to get to full guard but Chugman has control of the leg.
The referee is pacing around the two fighters, thinking about a standup.
And that is the end of the round. The fighters go back to their corners.
Svalbard Haudegen dominated that round.
The referee calls time. The cornermen exit stage left and we're back to business.

Haudegen avoids a punch combination nicely.
Horrible takedown attempt by Chugman or perhaps it was just good defense by Haudegen, which made it look bad.
Haudegen leaves Chugman with his face pressed against the mat as he sprawls beautifully, defending against a solid takedown attempt.
Haudegen tries to counter with a takedown but Chugman is quick to defend against it.
A jab from Chugman misses.
Haudegen scores with a punch to the gut of his opponent.
Haudegen is really dominating this fight. Is there anything that Chugman can do to turn this around?
Chugman takes a swing at Haudegen's ribcage but misses.
Haudegen lands a beauty of a right hand that gets the crowd cheering.
Haudegen throws a body punch but Chugman moves out of range.
Chugman tries a counter takedown but it's more of a dummy move, and he uses it to push himself away.
We've had a slow start to the round here - hopefully the action picks up.
Chugman gets his head snapped back by a nice shot there.
Haudegen throws a big shot that misses.
Chugman tries to close the distance and clinch up against the cage but Haudegen paws at him with a jab and circles away.

The fight moves into the clinch position.

Chugman's corner calls for him to break the clinch, which he does.
That's one minute gone in the round.
Haudegen goes to the watering hole and comes back with a big thumbs up from the judges as he scores a three punch combo.
Haudegen looks to land a left hand but Chugman moved out of range nicely.
Haudegen scores with a jab.
Haudegen takes a swing at Chugman's ribcage but misses.
The fight stays on the outside here - Chugman looks like he's thinking about clinching though.
Chugman rushes Haudegen and presses him up against the cage.
Chugman jumps guard but Haudegen stands there with Chugman around his waist. Chugman gives up and drops back to his feet. We remain in the clinch.
Svalbard Haudegen has stuffed three takedown attempts in the round now. That's going to take a lot out of Klaus Chugman.
Chugman is trying to drag Haudegen to the mat but Haudegen just about manages to keep his footing. He used the cage to his advantage there.
Chugman tries a shoulder strike but it doesn't do any damage.
Chugman can't find room to land a body shot as Haudegen controls the action.
Chugman misses with a punch on the inside.
Chugman doesn't land with the attempted body shot.
That's two minutes gone in the round.
Chugman controlling the action here for a moment.
Chugman blocks a couple of punches on the inside.
A head punch on the inside from Haudegen fails to land.
Chugman lands with a light punch inside.
Haudegen is trying to drag Chugman to the mat but Chugman just about manages to keep his footing. He used the cage to his advantage there.
Chugman is trying to pull guard but Haudegen turns him against the cage and we stay in the clinch.
Haudegen blocks a body shot from Chugman.
Haudegen prevents a body shot from Chugman.
Haudegen lands with a light punch inside.
The fans in attendance giving it up for the two fighters, who have really let it all hang out in the last minute or so!
Haudegen swings wildly with an uppercut but Chugman uses good head movement to avoid it.
Chugman takes a shot to the head.
A real battle for position is taking place between these two warriors.
Haudegen lands punches inside but they're not really causing much damage.
Chugman misses with a shot to the kidneys.
Haudegen blocks a couple of punches on the inside.
That's three minutes gone in the round.

Haudegen is fighting off a takedown attempt but Chugman is just too persistent for him and manages to trip Haudegen to the mat. Haudegen regains guard as soon as the fighters hit the mat.
Haudegen is looking for a triangle but Chugman pushes his legs off easily.
Haudegen looking for submissions off his back, moving his hips, looking for an opening.
Haudegen trying to keep a closed guard but Chugman is proving a slippery customer.
Haudegen has his foot on Chugman's thigh. He's trying to push off and get in position for a triangle, I think. Chugman works his way back into a safe position though.
The ref warns both fighters not to hold the cage as they work up against the meshing.
Chugman got a little sloppy there for a moment and Haudegen has worked his way into a loose triangle - can he finish it?! No, Chugman has managed to get both his arms back between Haudegen's legs - danger averted.
Haudegen working from the bottom, still in full guard. He's managed to get a loose triangle. Chugman doesn't seem to be doing much to defend here, obviously he feels comfortable in the position. Chugman manages to throw the legs off his shoulder and he's back into guard - no problem.
That's four minutes gone in the round.
Chugman advances to half guard.
Chugman has freed up his trapped foot and advances to mount.
Chugman moves into side control, trying to work for a kimura. That looks painful! Will he finish!!?? No, Haudegen has worked his arm free - good work by Haudegen!
Chugman advances to mount.
And that is the end of the round. The fighters go back to their corners.
Svalbard Haudegen dominated that second round.
That's time! Back to the action! This is the final round!

Haudegen throws a hook to the side of Chugman's head but Chugman sees it coming and ducks under it beautifully.
Chugman gets to the clinch - let's see what his plan is here.
Chugman tries to land a shot to the body but it's blocked.
A head punch blocked on the inside by Chugman.
Chugman pushes off and circles away, back to the middle of the mat.
Chugman ducks down and throws a hook to the body but Haudegen moves away.
Haudegen defending well as Chugman loads up on a big left hand.
Haudegen works his jab well there, keeping his opponent at a distance.
Svalbard Haudegen is winning the standup battle so far.
Chugman fails with a takedown attempt.
We've had a slow start to the round here - hopefully the action picks up.
Haudegen changes levels and scores with a jab to the body.
Chugman is looking to clinch.
Chugman keeping a good distance there, avoiding the body shot.
That's one minute gone in the round.
Chugman throws a hard body shot but it just misses.
Haudegen appears to be looking for a counter takedown.
Svalbard Haudegen seems to be the more aggressive standup fighter in this bout.
Haudegen misses with a looping right.
Haudegen steps to the side to avoid the strikes from Chugman.
Haudegen connects with a body shot.
Chugman moves away from the strike by Haudegen.
Chugman needs to keep his hands up - Haudegen had a free shot at his head there.
Haudegen throws a monster uppercut resembling something out of street fighter but it doesn't land.
Chugman changes levels for a counter takedown but doesn't follow through with his attempt.
Chugman is looking to clinch but Haudegen is avoiding it.
Chugman misses with a hook.
Haudegen misses with a body shot.
Good shot there by Haudegen.
Haudegen cracks a nice hook into Chugman's ribs.
Chugman is throwing a lot of body shots here, looking to wear down Haudegen rather than just go for the knockout.
Haudegen swings wildly with a right hand that was never going to find it's target.
Chugman lands with a good body shot.
Chugman uses some good footwork to avoid the body shot by Haudegen.
Klaus Chugman has stepped it up - he knows he needs a finish here!
Svalbard Haudegen is fighting for a decision here - he's started to take the cautious approach.
That's two minutes gone in the round.
Chugman wants to clinch up but Haudegen keeps it at a distance.
Chugman wants to clinch up but Haudegen keeps it at a distance.
Chugman tries to clinch there but Haudegen circles away.
Haudegen attempts a counter takedown but Chugman avoids it well and moves away.
Chugman wants to clinch.
Haudegen throws an ugly left hook that misses
and Chugman counters with a driving takedown into guard. Nice work there by Chugman.
This is a great period of action - very entertaining stuff!
Chugman trying to control the position from guard on top but Haudegen is wriggling around, looking for whatever he can.
Haudegen utilising some decent striking defenses from the guard, preventing the ground and pound.
That's three minutes gone in the round.
Chugman trying to control but Haudegen is working from the bottom.
Chugman trying to pass the guard but can't manage it just yet.
The fighters are pressed up against the cage, both looking to find a bit of space to work.

The referee has motioned to the fighters to stand back up.
Chugman walks straight into a jab right on the nose. That one stung - he's blinking and trying to clear his head.
Haudegen scores with a punch to the head.
Haudegen throws a body shot but no joy.
And Chugman tries to counter it with a takedown but Haudegen pushes his down on his head and steps out.
This fight brought to you by 5M nutrition - it's mmmmm tasty. Nice jab by Haudegen.
Chugman swings for the body but Haudegen moves out of range.
Haudegen half commits to a counter takedown before pushing away, out of range.
That's four minutes gone in the round.
Chugman gets a clinch.
Chugman misses with a hook from the clinch.
Haudegen misses with a hook from the clinch.
Haudegen prevents the takedown attempt.
Chugman misses with a short punch on the inside.
Haudegen misses with the head strike.
Haudegen prevents a takedown attempt there.
Svalbard Haudegen has stuffed three takedown attempts in the round now. That's going to take a lot out of Klaus Chugman.
Chugman blocks a couple of punches on the inside.
Good anti-grappling being displayed by Haudegen as Chugman tries to tie him up.
Haudegen prevents a takedown attempt there.
Haudegen scores with a nice hook to the head.
Haudegen is defending well against a takedown attempt.
Chugman misses with the head strike.
And that's the end of the fight!
Svalbard Haudegen showed his dominance in that final round.
Well I reckon that's a shut out for Haudegen, winning every round. Will the judges agree? They are the ones who matter, even if they are often depressingly incompetent. Over to the ring announcer for the scorecards.
Ladies and gentlemen, after 3 rounds of action, we go to the scorecards for a decision.
Judge Francis DeMontford scores the fight 30:27
Judge Winston Howard scores the fight 30:27
Judge Damien Edna scores the fight 30:27
In favor of your winner, by unanimous decision... Svalbard Haudegen!
A victorious Svalbard Haudegen thanked his army of followers in his post fight interview, telling people to make sure they follow him on Twitter.
|
|
|
|
|
|
|
|
|
|
|
|
|
|
|
|
|
|
|
|
|
|
|
| S |
C
A |
G |
S |
C
B |
G |
|
S |
C |
G |
|
energy
A | B |
|
hype
A | B |
|
pop
A | B |
|
mgr
A | B |
|
FIGHT
RATING
40% |
|
|
|
|
|
|

