|
|
PBP Commentary |
Coming up we have a light heavyweight MMA rules bout between Finnegan Brewzer (ranked 0 p4p, 0 weight class) and Shane Leonard (ranked 0 p4p, 0 weight class). Brewzer's ring entrance music is that housewives' favourite, The Way I Feel. Leonard has chosen Step into a world as his entrance music, which hasn't gone down very well with the crowd. Shane Leonard is the more experienced fighter, so let's see if that makes a difference tonight.
 |
|
 |
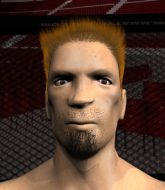
| 188 cm
18
210 lbs
1 - 0 - 0 |
|
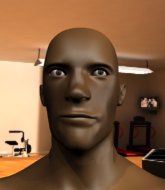
185 cm
18
215 lbs
1 - 0 - 0 |
BJJ Blue Belt
Counter striker
Very strong |
|
BJJ White Belt
Decent boxing
Good gas tank |
|
| |
|
Ladies and gentlemen. This fight is 3 rounds, in the light heavyweight division.
Introducing the fighter to my left, fighting out of the red corner.
With a record of
1 - 0 - 0, fighting out of Montreal, Finnegan Brewzer!
And introducing the fighter to my right, fighting out of the blue corner.
With a record of
1 - 0 - 0, fighting out of Montreal, Shane Leonard!
The judges for this bout are Elvis Blanc, Gregory Folan and Yves DeLean.

The bell rings for round one and we are underway!
Leonard misses with a jab and misses with a cross straight after too.
Leonard lunges in with swinging rights and lefts but Brewzer circles away quickly and effectively.
Leonard throws a series of punches but Brewzer moves out of range.
Leonard misses with a two punch combination.
Leonard swinging wilding here.
Leonard looks to land a combination but Brewzer avoids it well.
Brewzer ducks under a wild hook from Leonard.

Brewzer closes the distance and clinches up, looking for a takedown. He shifts his weight and gets a nice trip into half guard.
Brewzer seems very keen to just sit and control from half guard but Leonard does not like that idea so much and is remaining active off his back.

Brewzer is looking for a kimura but Leonard is holding onto that half guard position, so it's hard for Brewzer to get the leverage.
Brewzer missing with the ground and pound from half guard.
Leonard really doesn't want to stay on the ground with Brewzer. If he can't get it back to his feet, it's only a matter of time before he'll be tapping out.
Brewzer stops Leonard from getting back to his feet.
Leonard is defending against the submission attempts here by Brewzer.
Brewzer seems to be looking for submissions.

That's one minute gone in the round.
Brewzer not landing any meaningful shots this time.
Brewzer is thinking about going for an arm triangle but he can't free his leg.
Leonard tries to kick Brewzer off but Brewzer keeps his base steady and stays in half guard.
Brewzer is looking for a kimura here.
Leonard looks like he's trying to stand up.
Leonard is trying to escape back to his feet but Brewzer uses the scramble to pass into side control.
Brewzer is looking for a kimura. He might have it! No, Leonard has escaped the position, nice work there.

That's two minutes gone in the round.
The crowd are getting on the fighters' backs, as the pace has dropped off in the last minute or so.
Leonard is trying to get back to his feet.
Check out the look on Brewzer's face as he threw that strike - that's one determined fighter!
Brewzer looking for an arm triangle but it's way too loose to do anything.
Brewzer working hard here to secure a kimura but he's not really in the right position for it.

The fighters are going at a pretty good pace and they're both starting to sweat now.
Leonard throws his opponent off and manages to get back to his feet! Nicely done!
Jab by Leonard.
Leonard misses with a two punch combination.

That's three minutes gone in the round.

Brewzer gets a clinch.
Brewzer creates a bit of space for himself and sneaks an elbow through Leonard's defenses.

Brewzer breaks the clinch and we return to the middle of the mat.
Leonard throws a combination. Brewzer tries to block but a couple of punches get through.
Brewzer avoids the body shot from Leonard.
Leonard will need to tighten up his combinations if he doesn't want to gas himself out, swinging at thin air.
Brewzer tries to clinch but Leonard is having none of it.
Brewzer showing good head movement there, avoiding the strikes from Leonard.
Leonard throws a combination but it was largely blocked by Brewzer.
A combination from Leonard does no damage.
Shane Leonard seems to be the more aggressive standup fighter in this bout.
Leonard misses with a double jab.
Brewzer has taken the fight to the clinch.
Leonard wants to break the clinch but can't.
Brewzer gets a trip takedown into half guard.
Brewzer is looking for a kimura. It's going to be difficult to finish that from half guard though and Leonard defends it well.

That's four minutes gone in the round.
Leonard has one foot on Brewzer's thigh - he pushes off and manages to get back to his feet.
Danga de danga de dang - Leonard scores with a four punch combination!
We've seen a great period of action over the last minute or so - credit to both fighters for going all out!
Brewzer avoids a punch combination nicely.
Leonard swings away but doesn't land with a series of punches.
Brewzer has managed to clinch.
Brewzer jumps guard and drags Leonard to the mat. He's obviously going to be looking for submissions off his back.
Brewzer is trying to control the position but Leonard postures up.
Brewzer has his hands on Leonard's head, controlling the position.
The crowd applaud the fighters efforts here as the round comes to an end.
Brewzer looking for a guillotine here but Leonard defends easily.
And thats the end of the round the fighters go back to their corners.
A close round but Shane Leonard will probably get the nod.
OK. That's time! The bell goes and we're back to the action.

Brewzer looks for a takedown but Leonard sprawls well.
Leonard misses with a double jab.
Brewzer slips a jab and a cross from Leonard.
Brewzer misses with a series of wild punches.
Leonard lunges in with swinging rights and lefts but Brewzer circles away quickly and effectively.
Brewzer moves into the clinch.
We've had a slow start to the round here - hopefully the action picks up.
Leonard is trying to break the clinch but Brewzer is controlling him.
Leonard gets underhooks to prevent Brewzer's takedown attempt.
Brewzer controlling the action here for a moment.
Leonard tries to break free but Brewzer pushes him back against the cage.
Leonard prevents a takedown attempt there.
That's three failed takedown attempts in the round for Finnegan Brewzer. That's going to take a lot out of him.
That's one minute gone in the round.
Brewzer tries for a takedown. No joy.
Leonard tries to circle away but Brewzer has him pinned against the cage.
Brewzer turns his back and goes for a hip toss. It's a bit messy but it gets the job done and Brewzer manages to end up in side control.
Brewzer prevents Leonard from escaping the position.
Brewzer wants to control but Leonard is keeping him busy.
Leonard wants to get back to his feet but Brewzer drags him back down.
Brewzer looking for an arm triangle but it's way too loose to do anything.
Both fighters are absolutely exhausted here.
Leonard is trying to stand back up. He's worked his way up against the cage but Brewzer has just dragged him back down to the mat.
That's two minutes gone in the round.

It looks like we're going to have a standup here. Neither fighter is doing enough on the ground.
Leonard misses with a wild combination.
Brewzer tries to score a power double leg takedown but Leonard sees that one coming and sprawls well. That will dishearten Brewzer somewhat.
Brewzer moves out of range as Leonard strikes.
Leonard swinging wilding here.
Brewzer fakes with an overhand right and moves in to clinch with Leonard, pushing him back against the cage.
Brewzer creates a bit of distance and throws an elbow that only just misses.
Brewzer decides to pull guard.
Leonard tries to stand but Brewzer is controlling from the bottom.
That's three minutes gone in the round.
Brewzer working a defensive guard here.
Brewzer throwing his legs up looking for a triangle.
Brewzer manages to sweep nicely, so he's now on top. Leonard manages to get himself to full guard.
Leonard is trying to stand up but he's not managed so far.
Brewzer is pushing down on Leonard's leg trying to pass to half guard. Leonard is fighting to maintain full guard but Brewzer has managed to sneak the leg through.
Leonard tries to kick Brewzer off but Brewzer keeps his base steady and stays in half guard.
Brewzer keeping composed on the top, looking to control the action.
That's four minutes gone in the round.
Leonard blocking the ground and pound attempt from Brewzer.
Brewzer passes to side control.
Leonard is trying to buck Brewzer off.
The fighters are pressed up against the cage, both looking to find a bit of space to work.
Brewzer thinks about going for a far side armbar but bails out and retains the dominant position instead.
The ref warns both fighters not to hold the cage as they work up against the meshing.
Leonard is pushing Brewzer's head away, looking to escape. Brewzer manages to hold on to the position though.
Brewzer is looking to take a break and control but Leonard is keeping him honest, looking to work from the bottom.
Leonard is looking to work his way out of this bad position but Brewzer is controlling him well.
And thats the end of the round the fighters go back to their corners.
Finnegan Brewzer dominated that second round.
That's time! Back to the action! This is the final round!

Leonard is the aggressor but that punch slipped nicely by Brewzer.
Leonard displaying good standup as he scores with a three punch combination.
Leonard throws a series of strikes that have Brewzer backpedaling.
Leonard misses with a combination
and Brewzer counters with a three punch combo that has Leonard backing up. Leonard nods at Brewzer to acknowledge the strikes.
Brewzer slips a jab and a cross from Leonard.
Leonard tries to bum rush Brewzer with a series of wild strikes but Brewzer uses good footwork to avoid the assault.
Leonard fails to land with the punch combination there - jab, cross, hook, miss, miss, miss.
Leonard ducks down and throws a hook to the body but Brewzer moves away.
No joy there for Leonard, who threw a few shots but didn't land.
Leonard misses the jab.
Brewzer shoots in for a takedown! He's got it and he's managed to land in full mount! That's better than Brewzer was expecting from the takedown attempt, I'm sure!
Leonard takes a big intake of breath there - he's definitely tired.
Brewzer tries to control but Leonard wriggling away.
Brewzer raining down shots from the mount!
We get told so often about how wrestlers don't like to be on their backs. Let's see if Leonard can do anything to dispel that myth.
That's one minute gone in the round.
Leonard is trying to stand up.
Brewzer stands up from the dominant position, so we're back on the feet.
Leonard falls off balance throwing a combination
and Brewzer counters with a takedown into side control.
Finnegan Brewzer overall seems to be getting the better of the ground position in the fight so far.
Brewzer moves into full mount!
Brewzer is controlling this nicely and is looking to make no mistakes. Leonard is trying to wiggle out of this horrible position. Leonard flips to his side and attempts to get a leg in for half guard. Brewzer anticipates the leg and manages to get behind Leonard and secures both hooks! This could be bad! Brewzer slips an arm under Leonard chin and tries to position for a rear naked choke. Brewzer has worked the choke in now and it looks tight. Brewzer is squeezing on Leonard like an anaconda would it's prey. Leonard fails to tap and has fallen unconscious! We've got ourselves a winner by way of a rear naked choke!
Ladies and gentlemen, after 1:52 of round 3, we have a winner by way of Submission (RNC). Finnegan Brewzer!
|
|
|
|
|
|
|
|
|
|
|
|
|
|
|
|
|
|
|
|
|
|
|
| S |
C
A |
G |
S |
C
B |
G |
|
S |
C |
G |
|
energy
A | B |
|
hype
A | B |
|
pop
A | B |
|
mgr
A | B |
|
FIGHT
RATING
100% |
|
|
|
|
|
|
