|
|
PBP Commentary |
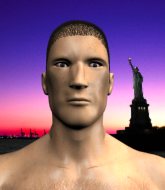
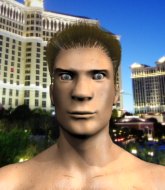
Coming up we have a super heavyweight MMA rules bout between Roy Hayden (ranked 4137 p4p, 25182 weight class) and Dominic Mowrey (ranked 0 p4p, 0 weight class). Dominic Mowrey is the more experienced fighter, so let's see if that makes a difference tonight.
 |
|
 |
| 210 cm
18
282
0 - 0 - 0 |
|
156 cm
18
286
0 - 2 - 0 |
Decent wrestler
Brawler
Cuts easily |
|
BJJ Blue Belt
Brawler
Determined |
|
| |
|
Ladies and gentlemen. This fight is 3 rounds, in the super heavyweight division.
Introducing the fighter to my left, fighting out of the red corner.
With a record of 0 - 0 - 0, fighting out of Los Angeles, Roy Hayden!
And introducing the fighter to my right, fighting out of the blue corner.
With a record of 0 - 2 - 0, fighting out of Las Vegas, Dominic Mowrey!
The judges for this bout are Timothy Bukovac, Percy O'Donnell and Frank Antenori.

The bell rings for round one and we are underway!
Mowrey shoots in for a takedown - he's clinched up with Hayden but Hayden pushes him off and we're back to square one.
As Mowrey tries to get set, Hayden tries to push him back and clinch up but Mowrey manages to avoid the attempt.
We're hearing some news coming in from back stage. It's official - Mowrey has eaten all the pies!
Mowrey shoots in for a takedown but Hayden shows good takedown defense there and keeps this one on the feet.
Hayden appears to be looking for a big counter.
Hayden tries to clinch
and Mowrey counters with a one-two to the body.

Hayden feints and as Mowrey raises his hands in defense, Hayden changes levels and drives through with a takedown into guard.

Mowrey throwing his legs up looking for a triangle.
Hayden trying to control the position from guard on top but Mowrey is wriggling around, looking for whatever he can.
Hayden connects with a couple of short punches.
The ref warns both fighters not to hold the cage as they work up against the meshing.
We've had a slow start to the round here - hopefully the action picks up.
Hayden wants to pass the guard but Mowrey is keeping the position.
Hayden trying to control but Mowrey is working from the bottom.
Mowrey working a defensive guard here.

That's one minute gone in the round.
Hayden tries to free his leg and advance position but Mowrey is retaining full guard.
Hayden postures up to throw the ground and pound strikes but they don't connect.
Mowrey working a defensive guard here.

Hayden stands up from guard. Let's bang!
Hayden tries to clinch there but Mowrey circles away.
Mowrey shoots in but no luck this time.
Roy Hayden has stuffed three takedown attempts in the round now. That's going to take a lot out of Dominic Mowrey.
Hayden shoots in and bounces Mowrey off the cage to secure the takedown into guard.

Mowrey kicks Hayden off and gets to his feet.

That's two minutes gone in the round.
Mowrey tries to drive through with a takedown attempt but Hayden defends well and Mowrey ends up having to push Hayden into the cage where they will battle it out in the clinch.
Mowrey looks winded!
Hayden decides to change it up a bit and drives through with a nice takedown into half guard.
Wooooo! Give it up for these two warriors! They are putting on a show!
Hayden landing with strikes to the body and head, softening up his opponent.
Mowrey is trying to maintain the position but Hayden is very close to passing his half guard.
Mowrey is refusing to be controlled, as Hayden sits in half guard.
Hayden tries to pass to full mount but Mowrey defends it.
Hayden missing with some ground and pound from the half guard.

That's three minutes gone in the round.
Mowrey trying to control but Hayden postures up.
Hayden will need to keep those long limbs tucked in whilst he's on the ground, to prevent any submissions.
Hayden throwing shots but they're hitting the canvas more than the man.
Mowrey wants to get back to full guard.
Hayden throwing shots but they're hitting the canvas more than the man.
Hayden is taking a breather. Mowrey says something to him but it's hard to make out. Perhaps he's telling him to get on with it and actually do something.
Hayden looks towards his corner to check for any instructions. The corner give him nothing to work with, so he cracks Mowrey with a short hammerfist. I guess that's as good as any advice he could get in this position.

Hayden is working for submissions here but there's nothing on.
Hayden is scoring with some nice ground and pound from the dominant position.
Hayden knows he needs to get back to his feet asap. He's simply no match for Mowrey on the ground.

That's four minutes gone in the round.
Mowrey avoiding damage under a succession of punches from Hayden.
Hayden is looking for a kimura but Mowrey is holding onto that half guard position, so it's hard for Hayden to get the leverage.
Mowrey trying to control but Hayden postures up.
Hayden seems very keen to just sit and control from half guard but Mowrey does not like that idea so much and is remaining active off his back.
Mowrey makes his way to full guard. A much better position for Mowrey.
Hayden throws a big right hand that misses.
Hayden is looking to stand up but Mowrey won't let him.

The ref stands the fighters back up due to a lack of activity.
Hayden closes the distance and looks for a trip takedown... aaaand he's got it - Hayden lands in his opponent's guard.
Mowrey is scooting his butt against the cage and has managed to get back to his feet. Hayden presses him back against the cage, presumably looking to take the fight back to the mat.
And that is the end of the round. The fighters go back to their corners.
Roy Hayden dominated that round.
That's the end of the round. The referee orders the cornermen out of the cage so we can get back down to business.

Mowrey shoots in and drives through. Hayden sprawls well.

Mowrey rushes Hayden and presses him up against the cage.
Mowrey can't break the clinch.
Hayden is working on a leg, looking for a takedown but Mowrey is defending well.
Mowrey has Hayden pressed against the cage, preventing Hayden from circling away and getting back to striking at range.
Mowrey is trying to pull guard but Hayden turns him against the cage and we stay in the clinch.
Hayden is trying to pull guard but Mowrey turns him against the cage and we stay in the clinch.
Mowrey tries to pull guard but Hayden holds him up against the cage and eventually Mowrey drops back down to his feet.
Roy Hayden has stuffed three takedown attempts in the round now. That's going to take a lot out of Dominic Mowrey.
Hayden jumps guard but Mowrey turns him against the cage and keeps the fight standing.
We've had a slow start to the round here - hopefully the action picks up.
Mowrey stalling here - the referee won't stand for too much of that.
Hayden is trying to pull guard but being pressed up against the cage enables Mowrey to keep the fight standing.
That's one minute gone in the round.
The referee calls for Mowrey to work.
Mowrey has Hayden pressed up against the cage and is working for takedown. Hayden manages to improve position though and keeps the fight standing.
Mowrey is trying to stall.
Mowrey stalling here - the referee won't stand for too much of that.
Mowrey is breathing heavily.
Mowrey tries to take the fight to the ground by pulling guard but can't manage it.
Hayden wants to break free. God knows he wants to breaaaak freeee.
Hayden is trying to work out of this bad position, with his back against the cage.
Hayden decides to pull guard.
Hayden has an active guard here but Mowrey has managed to pass into half guard.
That's two minutes gone in the round.
Hayden misses with some strikes from the bottom.
Mowrey is looking for a kimura. It's going to be difficult to finish that from half guard though and Hayden defends it well.

Hayden has managed to escape just enough to sneak back to his feet but Mowrey is on him like a limpet, forcing Hayden back against the cage.

Hayden pushes off and circles away, back to the middle of the mat.
Mowrey darts in looking for a takedown but Hayden gets double underhooks and turns Mowrey into the cage.
Hayden tries to clinch there but Mowrey circles away.
Mowrey moves out of range as Hayden throws a body kick.

Hayden moves into the clinch.
Mowrey fails to pull guard.
That's three minutes gone in the round.
Hayden stalling in the clinch but Mowrey improves position.
Hayden is trying to work for a single leg takedown but Mowrey pulls him back up using the underhooks.
Mowrey landing knees to the body.

Mowrey jumps into guard, dragging Hayden to the mat.
Mowrey preventing the ground and pound from doing any damage.
Hayden throws an elbow that misses. Mowrey uses the momentum to reverse the position. He's now in Hayden's guard. Nice move by Mowrey!

Mowrey stops Hayden from standing up.
Mowrey tries to free his leg and advance position but Hayden is retaining full guard.
Hayden throws a couple of weedy looking strikes off his back.
That's four minutes gone in the round.
Mowrey postures up.
Hayden on his back here. We all know that wrestlers don't like being on their back so let's see if Hayden tries to get out of the position.

Mowrey gets to his feet and steps away from his opponent.
Mowrey lands a jab-cross combination.
Hayden tries to land with a swinging hook to the body but Mowrey was well out of range. Poor timing from Hayden.
Hayden scores with a nice takedown into half guard. Let's see what he's got on the ground.
Mowrey pushes Hayden off and gets back to his feet.
We've seen a great period of action over the last minute or so - credit to both fighters for going all out!
Hayden fails with an attempt to clinch.
Mowrey checks a leg kick.
Mowrey shoots in for a takedown but Hayden shows good takedown defense there and keeps this one on the feet.
Hayden closes the distance, clinches up and gets a nice trip takedown into side control. Very smooth.
Mowrey can't do much from the bottom here.
And that is the end of the round. The fighters go back to their corners.
Dominic Mowrey showed his class in that round. I'd imagine he'll take it on all the scorecards.
That's the end of the round. The referee orders the cornermen out of the cage so we can get back down to business. And we move into the final round!

Hayden shoots in for a takedown but doesn't get it.
Hayden throws a body kick that misses.
Mowrey feints the counter takedown.
Hayden drives through with a takedown into Mowrey's guard. Let's see what he can do from the top position.
Hayden missing there with some ground and pound from the guard.
Mowrey tries to land a sweep but no joy.
Hayden trying to stand up but can't free himself from Mowrey's guard.
Hayden works a leg free and moves into half guard.
We've had a slow start to the round here - hopefully the action picks up.
Mowrey is trying to control but can't.
Both fighters are breathing heavily.
Hayden looks towards his corner to check for any instructions. The corner give him nothing to work with, so he cracks Mowrey with a short hammerfist. I guess that's as good as any advice he could get in this position.
That's one minute gone in the round.
Mowrey blocking the ground and pound attempt from Hayden.
Hayden is sneakily working for an arm triangle but Mowrey sees it coming and defends easily.
Hayden stands up and beckons Mowrey to join him on the feet.
Mowrey closes the distance and presses his opponent up against the cage.
Mowrey has Hayden pressed up against the cage and is working for takedown. Hayden manages to improve position though and keeps the fight standing.
Mowrey manages to pull guard.
Hayden slips nicely into half guard.
Hayden seems to be taking a bit of a break to think of his next move. He lands a short punch in the meantime.
The fighters are pressed up against the cage, both looking to find a bit of space to work.
That's two minutes gone in the round.
Mowrey is defending against the submission attempts here by Hayden.
Hayden moves into full mount! Mowrey won't be happy about that!
Hayden connects with a couple of good shots from mount.
Roy Hayden overall seems to be getting the better of the ground position in the fight so far.
Hayden postures up and cracks his opponent a couple of times before moving back into close ground control. Mowrey looks a forlorn figure.
Hayden controlling from mount.
That's three minutes gone in the round.
Hayden goes for an armbar but Mowrey turns quickly into his guard - lovely anticipation from Mowrey.
Hayden controls Mowrey momentarily but Mowrey frees himself.
Hayden controlling Mowrey's posture.
Mowrey trying to control but Hayden is working from the bottom.
Mowrey trying to stand up but can't free himself from Hayden's guard.
That's four minutes gone in the round.
The crowd are hurling abuse towards the fighters... You can hardly blame them though because there isn't a lot going on in the fight.
Hayden is trying to control the position but Mowrey postures up.
Mowrey prevents Hayden from getting back to his feet.
Mowrey forces his way into half guard.
Mowrey is trying to work for a kimura. This could be trouble! No, Hayden has managed to free his arm - good work.
Hayden is not content to let Mowrey control the position.
Boooooooooooooooooooo!!! God, this has been a terrible round. Come on you two, sort yourselves out!
Hayden slips a foot under and gets full guard. Nice work.
And that's the end of the fight!
Roy Hayden showed his dominance in that final round.
I think Hayden has won this one but let's see what the judges have to say. Over to the ring announcer for the scorecards.
Ladies and gentlemen, after 3 rounds of action, we go to the scorecards for a decision.
Judge Timothy Bukovac scores the fight 29:28
Judge Percy O'Donnell scores the fight 29:28
Judge Frank Antenori scores the fight 29:28
In favor of your winner, by unanimous decision... Roy Hayden!
|
|
|
|
|
|
|
|
|
|
|
|
|
|
|
|
|
|
|
|
|
|
|
| S |
C
A |
G |
S |
C
B |
G |
|
S |
C |
G |
|
energy
A | B |
|
hype
A | B |
|
pop
A | B |
|
mgr
A | B |
|
FIGHT
RATING
39% |
|
|
|
|
|
|
