|
|
PBP Commentary |
Coming up we have a welterweight MMA rules bout between Nakagome Kakuzo (ranked 282 p4p, 1016 weight class) and Jesse Thomas Babcock (ranked 38 p4p, 148 weight class). Babcock comes into a darkened arena with his song building. 70 kicks in, the lights come on and the crowd goes wild! What a showman! Over to our ring announcer for the fighter introductions!
 |
|
 |
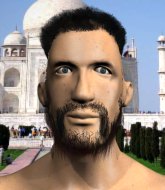
| 185 cm
25
180
15 - 9 - 0 |
|
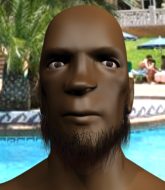
177 cm
32
183
17 - 6 - 0 |
Powerful takedowns
Solid boxing
Cardio machine |
|
Good wrestler
Decent boxing
Good gas tank |
|
| |
|
Ladies and gentlemen. This fight is 5 rounds, for the welterweight championship of the world!
Introducing the champion to my left, fighting out of the red corner.
With a record of 15 - 9 - 0, fighting out of Tokyo, Nakagome Kakuzo!
And introducing the challenger to my right, fighting out of the blue corner.
With a record of 17 - 6 - 0, fighting out of Amsterdam, Jesse Thomas Babcock!
The judges for this bout are Dean Styles, Chad Campbell and Russell Pearce.

The bell rings for round one and we are underway!
Kakuzo misses with a body shot.

Kakuzo closes the distance and looks for a trip takedown... aaaand he's got it - Kakuzo lands in his opponent's guard.
Kakuzo throwing elbows and punches but not connecting, as Babcock works some decent striking defense from the bottom.
Babcock is doing well to control the posture of his opponent and prevent any damage.
Babcock looks more muscular than last time we saw him. He must have been on the weights.
Kakuzo wants to pass the guard but Babcock is keeping the position.
The ref warns both fighters not to hold the cage as they work up against the meshing.
We've had a slow start to the round here - hopefully the action picks up.
Babcock lands a beautiful sweep and he's now moved into his opponent's guard.


Kakuzo is working actively off his back, looking to secure an arm or perhaps work for a triangle.
Kakuzo is working actively off his back, looking to secure an arm or perhaps work for a triangle.

That's one minute gone in the round.
Kakuzo wants to improve his position but instead Babcock has moved into half guard.
Babcock lands with a punch from half guard.
Kakuzo is looking to sinch up a guillotine here but Babcock pulls his head out easily.
Kakuzo wants to get back to full guard.
Ground and pound from Babcock.
Babcock seems very keen to just sit and control from half guard but Kakuzo does not like that idea so much and is remaining active off his back.
Babcock tries to pass the half guard into mount. Kakuzo knows what he's doing though and prevents the attempt.
Babcock working some ground and pound from close in. He's looking to maintain this position and strike for a while by the looks of things... although he'll probably advance to full mount in a minute now I've said that.
Babcock trying to mount his opponent but Kakuzo defends it.

That's two minutes gone in the round.
The fighters are going at a pretty good pace and they're both starting to sweat now.
Kakuzo is trying to get back to full guard.
Kakuzo has a hand on Babcock's thigh, trying to get back to full guard. Babcock takes advantage of the position though and mounts him!
Babcock lands a nice shot to the head.
Babcock trying to control but he's not successful this time.
Kakuzo is trying desperately to improve position.
Babcock lands a big elbow.
The fighters are pressed up against the cage, both looking to find a bit of space to work.
Kakuzo is writhing around trying to get back to his feet.
BOOM! Babcock connects with a massive shot to the dome!
Kakuzo keeping his composure momentarily, calmly looking to get back to half guard.
Babcock lands with some strikes.

That's three minutes gone in the round.
Kakuzo manages to regain half guard. Good work.
Babcock lands a big shot. The thud that echoes around the arena is like music to the fans' ears.
Kakuzo actively working from the bottom here.
Babcock working Kakuzo over with strikes.
Kakuzo looking for submissions from an awkward position here.
Kakuzo on the receiving end of some nice ground and pound.
Kakuzo regains full guard. Nicely done.
Babcock forces his way into half guard.
Babcock trying to control the action but Kakuzo is working from the bottom.
Babcock wants to pass to mount but Kakuzo is defending the position.
Kakuzo looking for submissions from an awkward position here.

That's four minutes gone in the round.
Babcock wants to take a breather but Kakuzo is having none of it.
Kakuzo is trying to defend against the ground and pound but Babcock scores with a couple of nice shots.
Babcock is looking to advance position but Kakuzo won't allow it.
Kakuzo actively working from the bottom here.
Babcock is looking to advance position but Kakuzo won't allow it.
Babcock passes the half guard and he's now in mount! Big trouble for Kakuzo!
Babcock breaks from Kakuzo's wrist control and lands an elbow.
Kakuzo is desperately trying to get back to half guard.
And that is the end of the round. The fighters go back to their corners.
Jesse Thomas Babcock dominated that round.
The referee calls time. The cornermen exit stage left and we're back to business.

Babcock throws a hook but Kakuzo blocks it.
As Babcock backs away, Kakuzo returns fire with a leg kick that just misses.
Babcock throws out a loose jab but Kakuzo uses good head movement to avoid it.
Kakuzo throws a hook to the body but it doesn't connect.
A bone on bone clash there as Babcock blocks the leg kick.
Kakuzo tries to score a power double leg takedown but Babcock sees that one coming and sprawls well. That will dishearten Kakuzo somewhat.
An inside leg kick from Kakuzo misses.
Kakuzo is looking to take this fight into the clinch.
A jab from Babcock misses.
Nakagome Kakuzo seems to be the more aggressive standup fighter in this bout.
We've had a slow start to the round here - hopefully the action picks up.
Kakuzo has his head snapped back a nice jab. A little nod from Kakuzo there as he acknowledges the shot.
Kakuzo connects with a hook to the side of his opponent's head.
Kakuzo buckles his opponent's knee momentarily with a nice leg kick.
Babcock connects with a looping right hand.
Kakuzo is looking to clinch but Babcock is avoiding it.
That's one minute gone in the round.
Kakuzo lands an overhand left. A wild punch that just about connected.
Kakuzo throws a hook but Babcock blocks it.
Babcock appears to be waiting to throw a counter punch to the body.
Kakuzo just misses with a punch to the body.
Babcock swings for the body but Kakuzo moves out of range.
Kakuzo missing with a left hand there. Babcock was out of range so wasted energy throwing that one.
Babcock throws out a counter right but Kakuzo avoids it with no problem.
Kakuzo ducks under an overhand right and circles away with a smile on his face.
Good standup being displayed there by Kakuzo as he connects with a hook.
Babcock avoids the clinch attempt nicely.
Kakuzo misses with a hook.
Good shot there by Kakuzo.
Babcock connects with a jab.
Kakuzo cracks Babcock with a hook to the jaw. Both fighters smile at eachother and high-five before getting back down to business.
Babcock has been the more effective fighter overall so far.
Babcock loads up on a big right hand but Kakuzo slips the punch.
Babcock uses some good footwork to avoid the body shot by Kakuzo.
Kakuzo misses with a looping left.
It seemed like Babcock was going to counter with the hook but didn't fully commit to it.
That's two minutes gone in the round.
Babcock uses good head movement to avoid the hook from Kakuzo.
It seemed like Babcock was going to counter with the hook but didn't fully commit to it.
Babcock pushing out the jab but it's not landing.
Kakuzo looks to land a combination but Babcock avoids it well.
The fans in attendance giving it up for the two fighters, who have really let it all hang out in the last minute or so!
Kakuzo throws a hard body shot but it just misses.
Kakuzo defending well as Babcock loads up on a big left hand.
Kakuzo misses with a double jab.
Kakuzo moves in looking to clinch but Babcock pushes him off.
Kakuzo misses with an uppercut. Babcock saw that one coming.
Kakuzo looking to throw a kick but he's pulled out of it.
A little jabbing left from Babcock on the counter but it doesn't find it's target.
Babcock looks to score with a jab to the body but Kakuzo is just out of range.
Nakagome Kakuzo is winning the standup battle so far.
Babcock looks to throw the jab but Kakuzo is out of range.
Kakuzo tries to counter by moving into the clinch but Babcock manages to circle out of the way.
Kakuzo staying out of range there.
Babcock misses with a few strikes there.
Kakuzo throws a hard body shot but it just misses.
That's three minutes gone in the round.
Babcock ducks under a wild hook from Kakuzo.
Kakuzo scores with a leg kick.
Kakuzo throws a hook but Babcock blocks it.
Babcock looks to land a combination but Kakuzo avoids it well.
Babcock swings wildly with a right hand that was never going to find it's target.
Babcock throws a hook to the body but it doesn't connect.
Kakuzo fakes a jab and then connects with a hook.
An inside leg kick from Kakuzo misses.
Kakuzo tests Babcock's chin there with a solid looking shot.
Babcock throws a jab to the body, straight down the pipe. Boom. That sent Kakuzo stumbling backwards but he manages to regain his composure quickly.
A good leg kick by Kakuzo.
A nice leg kick from Kakuzo, right into the meat of the thigh.
Kakuzo lands a head shot.
Kakuzo throws a lazy right hand but Babcock sees it coming a mile off and sidesteps it easily.
Babcock appears to be waiting to throw a counter punch to the body.
That's four minutes gone in the round.
Babcock looks to score with a jab to the body but Kakuzo is just out of range.
Kakuzo throws a jab when Babcock was well out of range.
This has been an exciting period of action!
Babcock just misses with a punch to the body.
Kakuzo lands with a nice low kick. That'll leave a bruise.
Kakuzo lands a nice hook to Babcock's body. Babcock takes it in his stride and looks to land his own strikes.
Babcock lands a nice hook to Kakuzo's body. Kakuzo takes it in his stride and looks to land his own strikes.
Babcock throws a hook to the body but it doesn't connect.
Kakuzo tries to close the distance and clinch but Babcock swats him to one side with an open hand palm strike and circles away.
Kakuzo is looking to land body kicks.
Kakuzo loads up on a big right hand but Babcock slips the punch.
Kakuzo fakes a couple of low kicks, before throwing one on the third attempt. It connects and Babcock has to reset his feet before getting ready to engage.
Babcock misses with a straight left.
Babcock fakes high and swings low for a body shot but Kakuzo manages to avoid it.
Kakuzo scores with a jab.
And that is the end of the round. The fighters go back to their corners.
Nakagome Kakuzo dominated that second round.
The fighters get back to their feet, the hooter sounds and we're back to the action!

A really sloppy takedown attempt there from Kakuzo.
Kakuzo scores with a nice takedown into half guard. Let's see what he's got on the ground.
Babcock preventing any damage for now, controlling his opponent's head.
Kakuzo is looking for a kimura here.
Kakuzo is trying to control the action in half guard but Babcock is working away on the bottom, looking perhaps to get back to full guard.
We've had a slow start to the round here - hopefully the action picks up.
Kakuzo throwing shots but they're hitting the canvas more than the man.
Kakuzo thows a wild elbow that connects with the canvas.
That's one minute gone in the round.
Babcock is doing well to avoid being mounted. He's controlling the position at the moment.
Kakuzo is nestled in close to Babcock, controlling him well. He's worked in a nice elbow to the side of the head as well, for good measure.
Jesse Thomas Babcock has got the better of the ground game so far.
Babcock regains full guard, whilst avoiding punches from Kakuzo.
Kakuzo working some ground and pound from guard but it's not doing any damage.
Kakuzo won't allow Babcock to sweep him here.
Kakuzo trying to control the position from guard on top but Babcock is wriggling around, looking for whatever he can.
Babcock wants to sweep here but Kakuzo controlling him for the moment.
Babcock keeping moving, preventing Kakuzo from controlling successfully.
That's two minutes gone in the round.
The crowd are getting on the fighters' backs, as the pace has dropped off in the last minute or so.
Babcock manages to sweep nicely, so he's now on top. Kakuzo manages to get himself to full guard.
Babcock works over Kakuzo with some ground and pound from guard.
Babcock makes a bit of distance and scores with some ground and pound, still in guard.
Kakuzo has momentary wrist control but Babcock slips an elbow through the middle.
Babcock got a little sloppy there for a moment and Kakuzo has worked his way into a loose triangle - can he finish it?! No, Babcock has managed to get both his arms back between Kakuzo's legs - danger averted.
Babcock stands up and looks to throw the legs aside to pass to side control. Kakuzo swivels though and keeps the full guard.
Kakuzo is looking for a guillotine. You can't force these things though and Babcock defends well.
Babcock pressing down on his opponent's thigh, looking to pass guard. Kakuzo is keeping the position for now.
That's three minutes gone in the round.
Babcock working from the guard for now, landing some ground and pound.
Babcock lands a couple of decent looking shots.
Babcock wants to pass the guard but Kakuzo is keeping the position.
Kakuzo is striking but Babcock is not phased and passes to half guard.
Kakuzo wants to control the action here but instead Babcock manages to pass to full mount!
Babcock landing shots from mount.
Kakuzo manages to regain half guard. Good work.
Babcock is just sitting in half guard, waiting for something to happen.
Babcock looks towards his corner to check for any instructions. The corner give him nothing to work with, so he cracks Kakuzo with a short hammerfist. I guess that's as good as any advice he could get in this position.
That's four minutes gone in the round.
Kakuzo is looking to sinch up a guillotine here but Babcock pulls his head out easily.
Babcock lands with an elbow from half guard - that looked like it hurt.
Babcock controlling the action here.
Babcock is pressing down on Kakuzo's thigh, looking to free his foot. Kakuzo is holding on for now.
Boooooooooooooooooooo!!! God, this has been a terrible round. Come on you two, sort yourselves out!
Kakuzo looking for submissions from an awkward position here.
Kakuzo gets back to full guard.
And that is the end of the round. The fighters go back to their corners.
A close third round but Jesse Thomas Babcock just about did enough to take it.
That's time! Back to the action!

Kakuzo tries for a takedown but Babcock sees it coming a mile off and avoids it easily.
Babcock lets it all go there with a big combo counter but none of the punches connected.
Kakuzo shoots in for a takedown - he's clinched up with Babcock but Babcock pushes him off and we're back to square one.
Excellent takedown into side control there by Kakuzo.
Babcock keeps Kakuzo under control for a moment.
Kakuzo is looking to finish here, going for an Americana. Babcock knows the correct defense though, so he's OK.
We've had a slow start to the round here - hopefully the action picks up.
Kakuzo is looking to take a break and control but Babcock is keeping him honest, looking to work from the bottom.
Kakuzo throws a strike aimed at the side of Babcock's head but Babcock avoids it well.
That's one minute gone in the round.
You can see the frustration on Babcock's face, being in this tough position on the bottom.
Babcock manages to get one leg in to regain half guard.
Kakuzo throws a big elbow that misses, also allowing Babcock to regain full guard.
Babcock avoiding any damage from the ground and pound.
Kakuzo passes Babcock's left leg - he's now in half guard.
The fighters are battling for position here. Babcock manages to regain full guard. Nice work.
Babcock wants to control here, rather than go for any submissions from the bottom. At least for now.
Kakuzo with a flurry of punches that miss.
That's two minutes gone in the round.
Kakuzo throws a strike but Babcock rolls with it and manages to sweep. Now he's in guard on top.
Babcock postures up and lands some nice ground and pound.
Babcock works a leg free and moves into half guard.
Babcock scores with a couple of good hammerfists.
Babcock looks towards his corner to check for any instructions. The corner give him nothing to work with, so he cracks Kakuzo with a short hammerfist. I guess that's as good as any advice he could get in this position.
Kakuzo looking for submissions from an awkward position here.
Kakuzo looking for submissions from an awkward position here.
It's got to the stage where if one of these guys blows hard enough, the other might fall over.
Babcock looks towards his corner to check for any instructions. The corner give him nothing to work with, so he cracks Kakuzo with a short hammerfist. I guess that's as good as any advice he could get in this position.
Nice strikes from Babcock there.
Babcock seems to be taking a bit of a break to think of his next move. He lands a short punch in the meantime.

Kakuzo is rocked!
That's three minutes gone in the round.
Babcock scores with a couple of good hammerfists.
Oh Kakuzo is still in real trouble! Will he be able to recover?!!
Kakuzo on the receiving end of some nice ground and pound.
Nice strikes from Babcock there.
Kakuzo tries to roll over but Babcock keeps him under control.
Babcock tries to pass to full mount but Kakuzo defends it.
Babcock not doing much here.
Kakuzo is refusing to be controlled, as Babcock sits in half guard.
Kakuzo seems to have got his legs back now.
Kakuzo gets back to full guard.
That's four minutes gone in the round.
Kakuzo is active off his back here, looking for submissions.
Kakuzo has momentary wrist control but Babcock slips an elbow through the middle.
Kakuzo trying to control the position.
Babcock trying to pass the guard but can't manage it just yet.
Babcock content to stall in guard here.
Kakuzo isolates an arm and boxes in a triangle. Babcock stacks Kakuzo on his neck as he steps over and passes to the side. He's now in a much more dominant position where he can look to do some serious damage. Nice move by Babcock!
Boooooooooooooooooooo!!! God, this has been a terrible round. Come on you two, sort yourselves out!
Babcock works to advance to full mount. Kakuzo defends for a few seconds but eventually he succumbs.
And that is the end of the round. The fighters go back to their corners.
Jesse Thomas Babcock dominated that fourth round.
That's time! Back to the action! This is the final round!

Babcock throws an overhand right that lands on Kakuzo's shoulder, as Kakuzo tries to avoid the shot.
Babcock misses with a body shot.
Babcock takes a solid shot to the body. That one hurt him but he's trying not to show it.
Babcock is really struggling to land any decent head shots against his taller opponent.
Kakuzo throws a leg kick which misses Babcock's front leg but catches the back leg as Babcock tries to avoid it.
Kakuzo missing with a left hand there. Babcock was out of range so wasted energy throwing that one.
Babcock throws a body punch but Kakuzo moves out of range.
Kakuzo misses with an uppercut.
Babcock blocks a low kick nicely.
A little jabbing left from Babcock on the counter but it doesn't find it's target.
Kakuzo tries to clinch up.
Babcock circles away from the clinch attempt.
We've had a slow start to the round here - hopefully the action picks up.
Kakuzo connects with the punch.
Kakuzo misses with a takedown attempt - Babcock sprawls well and throws a nice strike on the way out which just misses.
Babcock tries to clinch there but Kakuzo circles away.
That's one minute gone in the round.
Jab by Babcock.
Kakuzo is looking to clinch but Babcock is avoiding it.
Babcock throws a couple of head shots and lands with the final one - a decent hook, which struck Kakuzo on the side of the head.
Kakuzo throws out a token jab with nothing on it.
Kakuzo shoots in looking for a takedown. Babcock tries to sprawl out of it but Kakuzo keeps driving through. The fighters are pinned against the cage. Babcock manages to get underhooks and after a bit of a struggle, circles away and we're back to standing.
A jab from Babcock misses.
Kakuzo uses some good footwork to avoid the body shot by Babcock.
Babcock lands the left hand.
Kakuzo connects with a good right hand that stumbles Babcock. Babcock circles away out of range and recomposes himself.
Excellent takedown into side control there by Kakuzo.
Wooooo! Give it up for these two warriors! They are putting on a show!
Kakuzo tries for a kimura. Not really close to a finish though.
That's two minutes gone in the round.
Kakuzo wants to lay and pray for a moment but Babcock keeps working.
Kakuzo working hard here to secure a kimura but he's not really in the right position for it.
Babcock struggling a bit here.
Sloppy strikes there by Kakuzo.
That's three minutes gone in the round.
Kakuzo misses with an attempted head punch from side control.
Babcock can't do much from the bottom here.
Babcock avoids any damage from the ground and pound of Kakuzo.
Babcock tries to bench press Kakuzo off him but Kakuzo keeps the position.
Babcock wants to control but Kakuzo postures up.
Kakuzo goes for an armbar! This could be all over! Wait, no, Babcock rolls with the submission and now he's on top in Kakuzo's guard! Nice work there by Babcock!
Kakuzo can't keep his opponent in guard - Babcock advances to half guard, no doubt looking to mount.
Kakuzo looking for submissions off his back.
That's four minutes gone in the round.
Babcock wants to control but Kakuzo is keeping him busy.
Babcock blocks the strikes from Kakuzo.
Kakuzo looking for submissions from an awkward position here.
Kakuzo on the receiving end of some nice ground and pound.
Babcock working some ground and pound from close in. He's looking to maintain this position and strike for a while by the looks of things... although he'll probably advance to full mount in a minute now I've said that.
Kakuzo tries to roll over but Babcock keeps him under control.
The crowd thankful this round is nearly over.
Babcock lands a big shot. The thud that echoes around the arena is like music to the fans' ears.
Nakagome Kakuzo has stepped it up - he knows he needs a finish here!
Kakuzo is looking to sinch up a guillotine here but Babcock pulls his head out easily.
And that's the end of the fight!
That was a close round. You could make an argument for either fighter but I would give it to Nakagome Kakuzo.
I think Babcock has won this one but let's see whether the judges agree with me. Over to the ring announcer for the scorecards.
Ladies and gentlemen, after 5 rounds of action, we go to the scorecards for a decision.
Judge Dean Styles scores the fight 47:48
Judge Chad Campbell scores the fight 47:48
Judge Russell Pearce scores the fight 47:48
In favor of your winner, by unanimous decision... Jesse Thomas Babcock!
Jesse Thomas Babcock is the new welterweight champion!
After winning the bout, Jesse Thomas Babcock thanked all his fans and promised he'd do even better in his next fight. The crowd seemed to love his humility.
|
|
|
|
|
|
|
|
|
|
|
|
|
|
|
|
|
|
|
|
|
|
|
| S |
C
A |
G |
S |
C
B |
G |
|
S |
C |
G |
|
energy
A | B |
|
hype
A | B |
|
pop
A | B |
|
mgr
A | B |
|
FIGHT
RATING
41% |
|
|
|
|
|
|
