|
|
PBP Commentary |
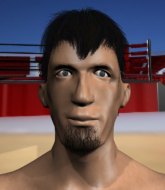
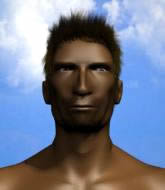
Coming up we have a light heavyweight MMA rules bout between Sammy Cohen (ranked 4304 p4p, 2983 weight class) and Reed Jack (ranked 493 p4p, 392 weight class). We have two fighters making their debuts here, so let's see who comes out of this one with their first professional victory.
 |
|
 |
| 185 cm
18
215
0 - 0 - 0 |
|
190 cm
25
215
0 - 0 - 0 |
BJJ Brown Belt
Brawler
Granite chin |
|
Good takedowns
Brawler
Enjoys gardening |
|
| |
|
Ladies and gentlemen. This fight is 5 rounds, for the light heavyweight championship of the world!
Introducing the champion to my left, fighting out of the red corner.
With a record of 0 - 0 - 0, fighting out of Montreal, Sammy Cohen!
And introducing the challenger to my right, fighting out of the blue corner.
With a record of 0 - 0 - 0, fighting out of Montreal, Reed Jack!
The judges for this bout are Robert Douchet, Elvis Blanc and Yves DeLean.

The bell rings for round one and we are underway!

Jack throws the overhand right but ducks down into a quick takedown attempt. Cohen was covering up waiting for the punch and Jack finishes the takedown easily into guard.
Jack engaging in some classic timewasting tactics.
Jack's corner are shouting for him to control the position and he seems happy to oblige.
We've had a slow start to the round here - hopefully the action picks up.
Cohen controls Jack momentarily but Jack frees himself.

That's one minute gone in the round.
Cohen working the defensive guard well to avoid strikes from Jack.
Cohen will have to put a bit more behind his punches if he's going to do any damage from this position.
The referee is asking the fighters to pick up the pace.
The fighters are pressed up against the cage, both looking to find a bit of space to work.
Jack stands and throws Cohen's legs to the side, diving into side control.
Jack tries to advance to mount but can't.

Jack stands up.
Jack throws a push kick but Cohen slaps the foot to one side.
Jack misses with a head kick.
Cohen avoids a lazy jab quite easily.
Cohen fails with a rather predictable takedown attempt.
Jack looks like he wants to counter punch here.

That's two minutes gone in the round.
Cohen tries a switch kick but it misses it's target.
Jack blocks a head kick by Cohen.

Jack has taken the fight to the clinch.
Jack pulls guard.
Jack throws a couple of shots from the bottom but they don't land.

Jack is throwing his legs up, looking for submissions. Cohen is aware though and is defending well.
Jack keeping moving, preventing Cohen from controlling successfully.
Jack controlling the position.
Cohen trying to control but Jack is working from the bottom.
Jack striking off his back but it's not causing Cohen any problems.

That's three minutes gone in the round.
Jack keeping moving, preventing Cohen from controlling successfully.
Cohen wants to pass the guard but Jack is keeping the position.

Jack has his feet on Cohen's hips. He pushes off and gets to his feet. Nice work.
Jack closes the distance and clinches.
Cohen misses with a knee strike.
A short body shot lands from Cohen as the two fighters clinch.
Cohen lands a hook that snaps the head of Jack backwards.

That's four minutes gone in the round.
Cohen tries to score a body lock takedown but Jack shows good agility there to stay on his feet.
Jack throws a punch but it's blocked by Cohen.

Jack's corner calls for him to break the clinch, which he does.
Jack displays good takedown defense there as he swats away a double leg from Cohen.
That's three failed takedown attempts in the round for Sammy Cohen. That's going to take a lot out of him.
Jack feints and then dives in with a takedown. That was a long way out but the feint bought him enough time to close the distance and complete the takedown. Now we'll play guard for a bit and see who can get the better of that position.
Cohen wants to get back to his feet but Jack passes into half guard.

The crowd cheering loudly, showing their appreciation for the quality fight we're seeing here.
Jack prevents Cohen from improving his position.
The crowd thankful this round is nearly over.
Jack is figuring out what he wants to do next.
And that is the end of the round. The fighters go back to their corners.
Reed Jack dominated that round.
Well, the break between rounds is over. Let's get back to the scrappin!

Cohen shoots in for a takedown - he's clinched up with Jack but Jack pushes him off and we're back to square one.
No luck for Cohen with that takedown attempt.
The fight stays on the outside here - Cohen looks like he's thinking about clinching though.
Cohen tries to clinch but fails miserably
and Jack counters with a takedown into side control! That could mean trouble for Cohen!
Jack has been the more effective fighter overall so far.
Jack passes to full mount! That's big trouble for Cohen!
Reed Jack has got the better of the ground game so far.
Cohen is in a horrible position here, under a barrage of strikes, he's managing to avoid any damage.
We've had a slow start to the round here - hopefully the action picks up.
Jack tucks in and makes sure he doesn't lose the dominant position.
Jack lands with some vicious ground and pound - can Cohen hang on?
Jack content just to control the position here.
That's one minute gone in the round.
Cohen tries to hold on but Jack pushes him away.
Jack throws some wild stikes that Cohen manages to avoid easily.
Jack lands a big elbow.
Jack sitting in mount, just looking to control for the moment.
Cohen has given up his back here.
That's two minutes gone in the round.
Cohen is very frustrated here, being controlled quite effectively by Jack.
Jack thows a huge left but connects with the canvas and not his opponent.
Jack misses with a punch to the head.
Jack has his hand under the chin of his opponent looking for the choke. He's nearly got it! This one could be all over! But no, Cohen has freed his hand and lives to survive another
well, another couple of seconds at least!
Jack looking for the choke but no joy.
Jack controls the position.
That's three minutes gone in the round.
Cohen tries to roll but Jack sticks to his back.
Jack controls the position.
Cohen is defending well here and trying to improve his position.
Jack controls the action.
Jack is throwing strikes from the back here. Oh that last one was to the back of the head. Jack gets a warning from the referee. He throws another strike to the back of the head straight away though and the referee has seen enough. He breaks up the two fighters and stands them back up. Jack gets a real talking to here and is lucky not to get a point deducted. Jack apologises and we restart here on the feet.
Cohen gets caught napping as Jack dives in and scores a takedown. Cohen manages to retain guard.
Cohen is looking to stand back up... there's a bit of a scramble and Jack dives into side control.
That's four minutes gone in the round.
Cohen tries to slip a leg under to move to half guard but Jack presses down on the leg and jumps into full mount!
Cohen wriggling around on the bottom manages to avoid the strikes thrown by Jack.
Jack controlling his opponent.
Jack working to secure an arm triangle but it's not happening for him just yet.
Cohen holding onto his opponent's waist for dear life, as Jack tries to land some strikes to get him to release his grip.
And that is the end of the round. The fighters go back to their corners.
Reed Jack showed his class in that round. I'd imagine he'll take it on all the scorecards.
The fighters' corners scream their final instructions, as the referee calls time. Here we go, back to the action!

Cohen connects with a jab.
Sammy Cohen is looking to throw some combinations by the looks of things.
Cohen tries to close the distance and clinch up against the cage but Jack paws at him with a jab and circles away.
Cohen tries to clinch but Jack is having none of it.
Cohen is looking to clinch.
Jack drops down looking to force a counter takedown but Cohen defends it well.
Cohen moves in looking to clinch but Jack pushes him off.
Jack unleashes a big counter combination but Cohen bobs and weaves and avoids any damage.
Cohen fails with a takedown attempt from distance.
Jack looks for a takedown. He's got it. We're now in half guard.
Cohen is trying to stand back up but Jack is controlling him
We've had a slow start to the round here - hopefully the action picks up.
Jack is pressing down on Cohen's thigh, looking to free his foot. Cohen is holding on for now.
The ref warns both fighters not to hold the cage as they work up against the meshing.

Cohen looking to work for a kimura from the bottom.
That's one minute gone in the round.
Cohen is kicking away at Jack from the bottom - trying to push off and stand up. Jack grabs hold of a leg and drops back for a heel hook! The two fighters roll across the mat, with Cohen trying to push Jack off... Cohen taps! He's tapped! This one is all over! A throwback to the old Pancrase there with an infrequently seen submission hold! Nice work.
Ladies and gentlemen, after 1:24 of round 3, we have a winner by way of Submission (Heel Hook). Reed Jack!
Reed Jack is the new light heavyweight champion!
|
|
|
|
|
|
|
|
|
|
|
|
|
|
|
|
|
|
|
|
|
|
|
| S |
C
A |
G |
S |
C
B |
G |
|
S |
C |
G |
|
energy
A | B |
|
hype
A | B |
|
pop
A | B |
|
mgr
A | B |
|
FIGHT
RATING
36% |
|
|
|
|
|
|
