|
|
PBP Commentary |
Coming up we have a bantamweight MMA rules bout between Antonio Bellavia (ranked 1824 p4p, 3657 weight class) and Sam Holt (ranked 135 p4p, 259 weight class). Both fighters look fresh as a daisy as they make their way towards the cage.
 |
|
 |
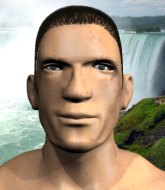
| 170 cm
29
134
10 - 3 - 0 |
|
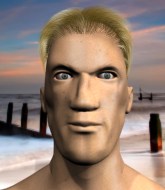
165 cm
27
135
3 - 3 - 0 |
Powerful takedowns
Excellent boxer
Granite chin |
|
Good wrestler
Excellent boxer
Powerful |
|
| |
|
Ladies and gentlemen. This fight is 3 rounds, in the bantamweight division.
Introducing the fighter to my left, fighting out of the red corner.
With a record of 10 - 3 - 0, fighting out of Rio de Janeiro, Antonio Bellavia!
And introducing the fighter to my right, fighting out of the blue corner.
With a record of 3 - 3 - 0, fighting out of Montreal, Sam Holt!
The judges for this bout are Russell Pearce, Chad Campbell and John Roberts.

The bell rings for round one and we are underway!
A looping hook to the body misses from Bellavia. Holt does a little dance to reset his feet.
Holt doesn't fully commit to the body shot counter.
Holt throws a monster uppercut resembling something out of street fighter but it doesn't land.
Bellavia swings and misses with a hook to the body.
We've been hearing reports that Bellavia has been drilling takedowns in recent sessions so let's see if that has an impact on the result of this fight.
Holt looks to score with a combo but nothing lands.
Holt misses with a two punch combination.
We can't be sure of the tactics at this early stage but we have heard that Holt has been working on his takedowns a lot in the buildup to the fight and we can only assume he's going to look to take this to the mat.
Bellavia shoots in for a takedown but doesn't get it.
Holt looked like he wanted to counter with a punch but didn't throw it.

Bellavia gets the takedown into side control.
Holt tries to work a leg under to get back to half guard but Bellavia wriggles his own leg back out and remains in side control.
Bellavia lands a knee to the body and follows it up with some ground and pound to the head. That will wear Holt down.

Bellavia looking for an arm triangle but it's way too loose to do anything.
Bellavia tries to advance to mount but Holt denies him.
Bellavia scores with punches from side control.
The crowd are loving this. Great action here.
Holt is trying to get back to half guard. He's pushing on Bellavia's leg. He's managed it. Nice work.
The fighters are pressed up against the cage, both looking to find a bit of space to work.

That's one minute gone in the round.
Bellavia thows a wild elbow that connects with the canvas.
Bellavia landing with strikes to the body and head, softening up his opponent.
Holt is looking to get full guard. It looks like he might be successful but at the last minute Bellavia jumps into side control!
Holt takes a couple of big shots there - the referee warns him that he has to defend himself better.
The ref warns both fighters not to hold the cage as they work up against the meshing.
Bellavia scoring with punches from side control.
Holt gets one leg under and gets the fight to half guard.
Bellavia is working for submissions here but there's nothing on.
Bellavia is trying for a guillotine from the top but the pressure isn't in the right place so Holt is just riding it out for now. Bellavia eventually gives up the hold.
Holt trying to hold on to Bellavia's head to control him but Bellavia postures up.

That's two minutes gone in the round.
Holt keeping his head moving to avoid the ground and pound.
Holt is looking to improve his position.
Holt moves into full guard.
Holt looking to control but Bellavia passes into half guard.
Holt is looking to regain full guard. Not this time though.
Bellavia landing with strikes to the body and head, softening up his opponent.

That's three minutes gone in the round.
Bellavia is looking for a kimura but Holt is holding onto that half guard position, so it's hard for Bellavia to get the leverage.
Holt moves into full guard.
Hammerfist, elbow! yells Bellavia's corner. There ya go! There ya go!
Bellavia passes Holt's left leg - he's now in half guard.
Bellavia is thwarting Holt's attempts to control the position.
Bellavia is working for a submission of some sort.
Bellavia is looking to pass Holt's guard but actually Holt recovers to full guard.

That's four minutes gone in the round.
Bellavia missing there with some ground and pound from the guard.
Bellavia lands a couple of digs.
Bellavia passes easily into side control. Nice work.
Bellavia is working Holt over with some ground and pound from side control.
Bellavia tries for a kimura but Holt is defending well.
Bellavia in side control, trying to ground and pound but not landing this time.
Bellavia has been looking to land a fair amount of strikes on the ground. He might be looking to soften his opponent up in order to work for a submission.
Bellavia lands a few punches from side control.
Bellavia has knee on belly and now moves to full mount! Trouble for Holt!
Holt tries to hold on but Bellavia pushes him away.
And that is the end of the round. The fighters go back to their corners.
Antonio Bellavia dominated that round.
That's time! Back to the action!

Bellavia swings for the body but Holt moves out of range.
Bellavia misses with a takedown
and Holt counters with a three punch combination, finished off with a leg kick. Nice work.
Bellavia defending well as Holt loads up on a big left hand.
Bellavia seemed to be looking to counter by closing the distance.
Holt lands a glancing blow to the side of Bellavia's head.
Holt rushes in with a sloppy looking punch
letting Bellavia counter with a right hand.
Holt takes a shot right to the bread basket.
Holt swings for the body but Bellavia moves out of range.
Bellavia fakes high and swings low for a body shot but Holt manages to avoid it.
Bellavia digs a good hook to Holt's body.
Holt misses with an uppercut. Bellavia saw that one coming.
Holt connects with a right hand. Bellavia shakes it off.
Bellavia takes a jab right on the nose. That must have hurt but he shrugs his shoulders and looks to return the favor.
The crowd are loving this. Great action here.
Holt slaps away a takedown attempt from Bellavia, before circling back to the center of the mat.
Holt lunges in with swinging rights and lefts but Bellavia circles away quickly and effectively.
Bellavia shoots for a takedown but Holt saw that one coming a mile off and avoided it easily.
That's three failed takedown attempts in the round for Antonio Bellavia. That's going to take a lot out of him.
That's one minute gone in the round.
Bellavia shoots in for a takedown but doesn't get it.
Bellavia closes this distance looking for a takedown but Holt circles away.
No joy there for Holt, who threw a few shots but didn't land.
Bellavia tries to counter by moving into the clinch but Holt manages to circle out of the way.
Antonio Bellavia seems to be the more aggressive standup fighter in this bout.
Bellavia tries to shoot in for a takedown. He's got hold of a leg but Holt swivels and escapes.
Bellavia shoots in with a takedown attempt and he has Holt pinned against the cage. Holt gets the underhooks and manages to circle away.
Bellavia avoids the body shot from Holt.
Bellavia drops his hands momentarily and Holt takes advantage with a crisp shot to the head.
A big left from Holt misses.
Bellavia was looking to counter that last move with a shot to the body but he didn't commit.
Bellavia shoots in with a takedown attempt and he has Holt pinned against the cage. Holt gets the underhooks and manages to circle away.
Bellavia shoots in looking for a takedown. Holt tries to sprawl out of it but Bellavia keeps driving through. The fighters are pinned against the cage. Holt manages to get underhooks and after a bit of a struggle, circles away and we're back to standing.
Sam Holt seems to be getting the better of the standup.
That's two minutes gone in the round.
Holt misses with an uppercut.
Bellavia is looking to wear down Holt with body shots, infact he's throwing more body shots than head shots at the moment.
Bellavia slips a jab and a cross from Holt.
Bellavia will have to do better than that with his takedown attempts.
Holt swings and misses with a hook to the body.
Bellavia is trying to close the distance and clinch up, after that failed offence from Holt.
Bellavia walks straight into a jab right on the nose. That one stung - he's blinking and trying to clear his head.
Holt tries to land with a swinging hook to the body but Bellavia was well out of range. Poor timing from Holt.
Bellavia walks straight into an uppercut. Luckily it didn't land flush.
Fantastic stuff here - a very entertaining period of action, which has drawn cheers from the crowd.
Bellavia misses the jab.
Bellavia keeping his hands up high there, blocking the jab from Holt.
Holt lands with a nice body punch.
Bellavia shoots in looking for a takedown but Holt manages to keep the fight standing, pushing Bellavia's face into the canvas for good measure before circling away.
Holt appears to be waiting to throw a counter punch to the body.
Bellavia shoots for a takedown but Holt saw that one coming a mile off and avoided it easily.
Holt stuffs the takedown.
Holt works his jab well there, keeping his opponent at a distance.
Bellavia shoots in looking for a double leg takedown. Holt defends it nicely.
That's three minutes gone in the round.
Bellavia slips a jab from Holt.
Holt fails to land with a series of punches.
Bellavia dips down and scores with a jab to the body.
Bellavia tries to shoot in for a takedown. He's got hold of a leg but Holt swivels and escapes.
Holt is loading up here, looking for a big counter of his own.
Holt pushes forward with a 1-2 combination that forces Bellavia back to the cage. Holt follows up with a solid lead hook to the liver.
Holt scores to the head and body with a nice combination!
Bellavia fakes high and swings low for a body shot but Holt manages to avoid it.
Bellavia drives through with a really nice takedown into side control.
We've seen a great period of action over the last minute or so - credit to both fighters for going all out!
Holt struggling a bit here.
Holt stops Bellavia from passing to mount.
That's four minutes gone in the round.
Holt struggling a bit here.
Holt is looking for a sweep.
Holt manages to get back to half guard.
Bellavia works his way into side control.
Bellavia grinds an elbow into Holt's temple.
Holt is trying to get back to half guard. He's pushing on Bellavia's leg. He's managed it. Nice work.
Holt is looking to improve his position.
And that is the end of the round. The fighters go back to their corners.
Sam Holt showed his class in that round. I'd imagine he'll take it on all the scorecards.
The fighters get back to their feet, the hooter sounds and we're back to the action! This is the final round!

Bellavia fails with a takedown attempt from distance.
Bellavia tries to score a power double leg takedown but Holt sees that one coming and sprawls well. That will dishearten Bellavia somewhat.
Holt is loading up here, looking for a big counter of his own.
Bellavia with a lazy takedown attempt
and Holt counters with a left to the body.
That's three failed takedown attempts in the round for Antonio Bellavia. That's going to take a lot out of him.
Bellavia shoots in for a takedown. He's persisting with it as Holt sprawls well. Holt wins this battle and keeps the fight standing. Bellavia gets slowly back to his feet.
Holt is loading up here, looking for a big counter of his own.
No joy there for Holt, who threw a few shots but didn't land.
Bellavia misses with a body shot.
Bellavia looks for a takedown here. Will he get it? Holt is fending him off so far but Bellavia persists. Nope, Holt circles away and we're back to standing.
We've had a slow start to the round here - hopefully the action picks up.
Holt uses some good footwork to avoid the body shot by Bellavia.
Holt avoids the body shot from Bellavia.
Bellavia lands with a right hand.
A nice combination there by Holt.
A jab from Holt misses.
That's one minute gone in the round.
Holt throws a looping overhand right but Bellavia ducks down to avoid it.
Bellavia fails with a takedown attempt.
Sam Holt is looking to keep the fight on the feet at all costs.
Bellavia closes the distance and clinches up with Holt, looking for a takedown. Bellavia pushes Holt against the cage but Holt circles to the side and manages to break the clinch.
Bellavia showing good head movement there, avoiding the strikes from Holt.
Bellavia looks to land a right hand but Holt moved out of range.
Sam Holt is looking to throw some combinations by the looks of things.
A big left from Holt misses.
Holt throws a right and a left that both miss.
Holt lands with a cross to side of his opponent's head.
Bellavia shoots in looking for a takedown. Holt tries to sprawl out of it but Bellavia keeps driving through. The fighters are pinned against the cage. Holt manages to get underhooks and after a bit of a struggle, circles away and we're back to standing.
Holt looked like he wanted to counter with a punch but didn't throw it.
Bellavia shoots in for a double leg but Holt sprawls well. That's going to sap some energy.
That's two minutes gone in the round.
Holt throws a combination. Bellavia tries to block but a couple of punches get through.
Holt slips a straight right by Bellavia.
It seemed like Holt was going to counter with the hook but didn't fully commit to it.
Bellavia throws a jab to the body, straight down the pipe. Boom. That sent Holt stumbling backwards but he manages to regain his composure quickly.
Jab, cross, leg kick. Nice combination by Holt!
This has been an exciting period of action!
Bellavia with a lazy takedown attempt
and Holt counters with a straight punch to the midsection.
Holt stuffs the takedown attempt from Bellavia. Bellavia gets slowly back to his feet.
Holt lets it all go there with a big combo counter but none of the punches connected.
Both fighters are breathing heavily.
Holt lands with a good body shot.
Holt lands with a two punch combination before moving back out of range.
Holt defends well against a solid takedown attempt from Bellavia.
Holt digs a good body shot into Bellavia's ribs.
Holt tries to land with a swinging hook to the body but Bellavia was well out of range. Poor timing from Holt.
Bellavia looks for a takedown here. Will he get it? Holt is fending him off so far but Bellavia persists. Nope, Holt circles away and we're back to standing.
Bellavia takes an uppercut right on the button but keeps his composure.
That's three minutes gone in the round.
Bellavia moves out of range as Holt strikes.
Holt has been the more effective fighter overall so far.
Holt looks to land a left hand but Bellavia moved out of range nicely.
Holt on the wrong end of a vicious looking body shot.
Holt throws out a powerful jab.
Bellavia fakes and then throws a beautiful body shot. Holt looks a bit winded and takes a step backwards to take a breath.
Bellavia is trying hard to land a takedown here. Holt sprawls well and keeps this one on the feet.
Holt misses with a two punch combination.
Nice straight punches there by Holt. You know Roy Jones Jr respects the hands of Holt.
Some wild striking there from Holt.
A telegraphed takedown attempt from Bellavia is defended easily by Holt.
Bellavia connects with a body shot that sends Holt's belly button to the back.
That's four minutes gone in the round.
Nice takedown defense from Holt. No joy for Bellavia on that attempt.
Holt jabs at Bellavia's body.
Bellavia walks into a left hand.
We've seen a great period of action over the last minute or so - credit to both fighters for going all out!
Donk. Holt catches Bellavia right on the button with a cross.
Holt misses with a looping left.
Bellavia shoots in for a takedown but Holt shows good takedown defense.
Jab, jab by Holt - just one landing.
Holt defends well against a solid takedown attempt from Bellavia.
Bellavia moves away from the strike by Holt.
Holt jabbing away but nothing is landing.
Bellavia closes this distance looking for a takedown but Holt circles away.
A countering left hand to the body from Holt misses.
Bellavia keeping a good distance there, avoiding the body shot.
A jab from Holt misses.
And that's the end of the fight!
Sam Holt comfortably won the final round on my scorecard.
I think Holt has won this one but let's see whether the judges agree with me. Over to the ring announcer for the scorecards.
Ladies and gentlemen, after 3 rounds of action, we go to the scorecards for a decision.
Judge Russell Pearce scores the fight 28:29
Judge Chad Campbell scores the fight 28:29
Judge John Roberts scores the fight 28:29
In favor of your winner, by unanimous decision... Sam Holt!
|
|
|
|
|
|
|
|
|
|
|
|
|
|
|
|
|
|
|
|
|
|
|
| S |
C
A |
G |
S |
C
B |
G |
|
S |
C |
G |
|
energy
A | B |
|
hype
A | B |
|
pop
A | B |
|
mgr
A | B |
|
FIGHT
RATING
56% |
|
|
|
|
|
|
